My 1979 280zx


Big Poppa
Joined: Jan 2005
Posts: 4,499
From: Mission, British Columbia
are you bondoing the crack between the headlight bucket and the fender? i cant tell in that last pic. if youre going to, you may want to use some fiberglass and resin to hold them together as just bondo will crack. ask me how i know
Registered User
Joined: Oct 2010
Posts: 109
From: Modesto, Ca
Sounds good man. Good progress is slow right. Dont wana just slap it together. Got some pics of ur brazing on the roof/windshield line?? Ive got a few holes to fill in there myself would mind seeing how the bondo wrks on the z lines either. I havent started that on mine yet. wana get the s30 on the road and then start in on the rest of the body wrk on the zx. Looks good bro keep up the good work!! and are those semi leds for ur tail lights??
Thread Starter
Primer Grey FTW!
Joined: Jul 2010
Posts: 587
From: hawthorne, nv
I thought about doing the bondo between the bucket and fender but decided not to, thanks for the advise. I don't know what it is called but they make something that is basically tub and tile caulk for you car, that would work too.
I haven't brazed it yet, I'm going to put metal behind the holes so the braze will have something to adhere to. I'll definitely take pics when I do it. Those are semi LED's I'm going to change it a little, I'll have to red ones on each side, still figuring out what to do for a reverse light.
Thanks for the comments guys.
Registered User
Joined: Oct 2010
Posts: 109
From: Modesto, Ca
Thats a cool Idea man. I'd Like to see what they look like running at night on the zx. I belive they make clear caps (for the semis) for the lights that run on the roof of the cabin aswell as the ones that sit on the top of the fenders as turn signals. I know the roof line lights are a tear drop shape not sure on the fender turn sigs tho. Just an Idea for ya, maybe theyd fit inbetween the two break lights 
Last edited by ZguyECV; Dec 15, 2010 at 11:15 AM.
Thread Starter
Primer Grey FTW!
Joined: Jul 2010
Posts: 587
From: hawthorne, nv
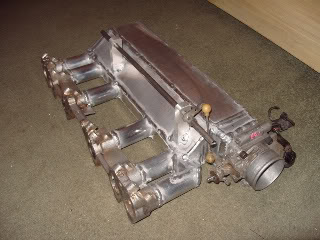
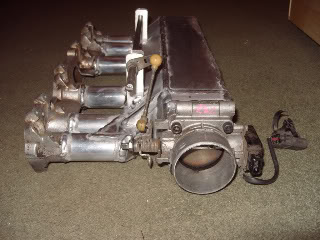
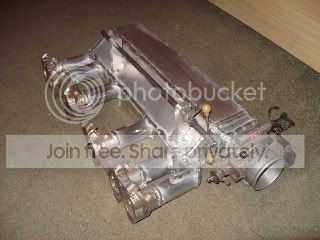
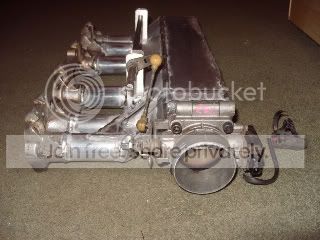
hey Wildman, I'm not going to make an exhaust manifold until I get my engine rebuilt and a turbo on it. But I made my intake manifold, I hope to put it on tomorrow.
[IMG]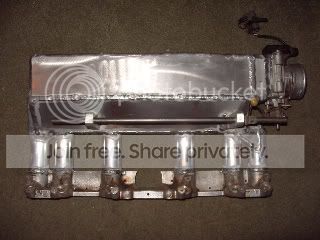 [/IMG]
What do you think?
[IMG]
[/IMG]What do you think?

More Than Meets The Eye
Joined: Feb 2005
Posts: 5,120
From: Mesa, Az
Thread Starter
Primer Grey FTW!
Joined: Jul 2010
Posts: 587
From: hawthorne, nv
Thanks I appreciate it. I don't have CAD anymore, but I drew out several ideas. TIG is my favorite type of welding slow and steady pace. Today I got the air reg, cold start, and the vacuum line nipples put on it. Tomorrow I'll get the EGR on the exhaust plugged and the intake installed.
Thread Starter
Primer Grey FTW!
Joined: Jul 2010
Posts: 587
From: hawthorne, nv
T-tops!!!
I cut the top off from Pick-N-Pull and spliced it on my Z. WooHoo!!
[IMG] [/IMG]
Here's what the splices look like.
[IMG]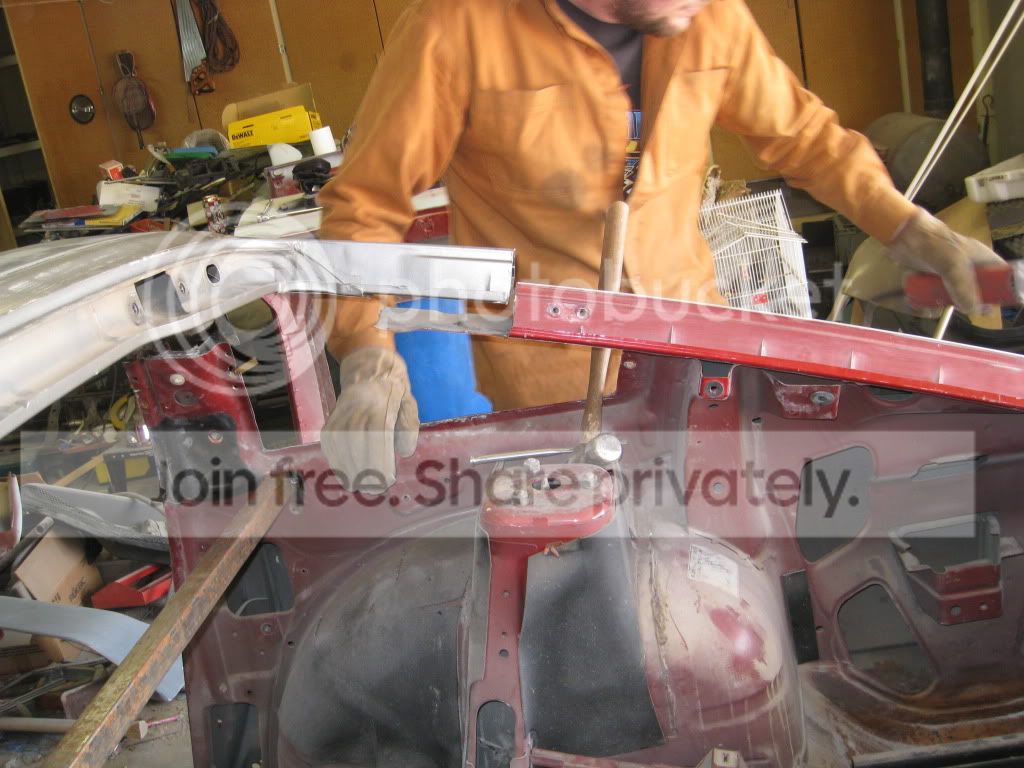 [/IMG]
here's the fit on the C-pillar before I welded it.
[IMG]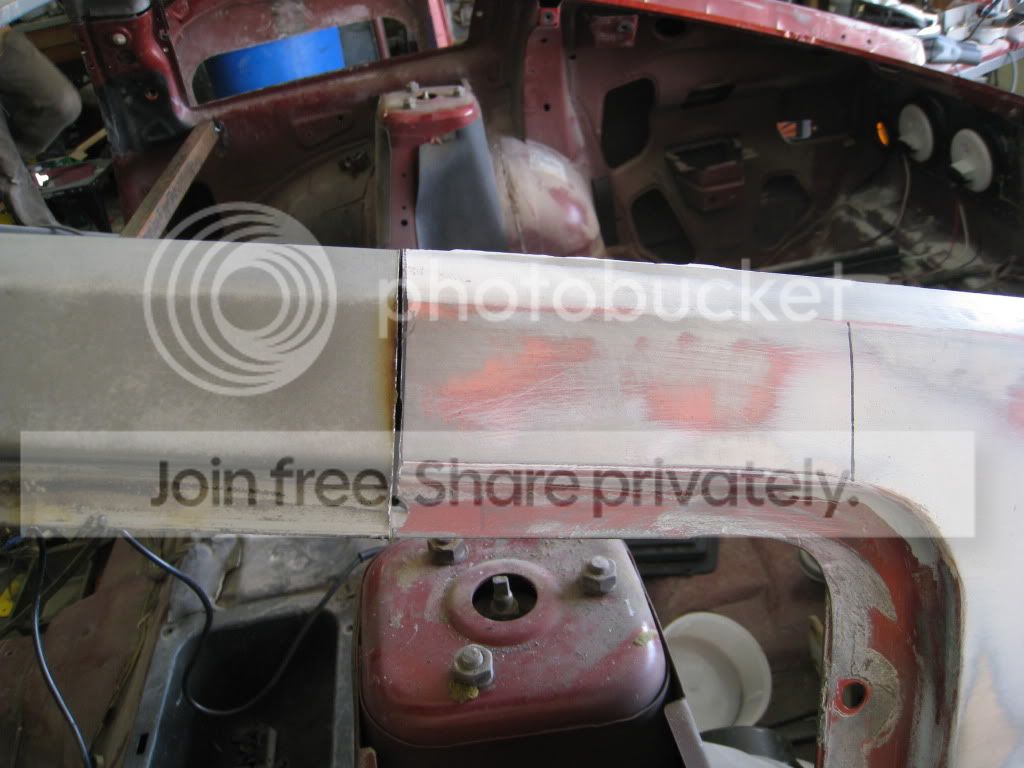 [/IMG]
I've have to finish welding it out tomorrow and I should be able to paint it next weekend!
[IMG]
[/IMG]Here's what the splices look like.
[IMG]
[/IMG]here's the fit on the C-pillar before I welded it.
[IMG]
[/IMG]I've have to finish welding it out tomorrow and I should be able to paint it next weekend!
Big Poppa
Joined: Jan 2005
Posts: 4,499
From: Mission, British Columbia
for the intake manifold did you open up the runner size at the head?? this seems to be a big restriction. i was thinking about doing something simmilar using the stock flange and injector mounts. but cutting the bottom off and only keeping the flange and injector mounts. that way i could get a larger intake size. something like 1.5" id. can i has the sides of your old roof. im taking a t-top off and want the drip rails and pinch welds
Big Poppa
Joined: Jan 2005
Posts: 4,499
From: Mission, British Columbia
i just need the part along each side (drip rail) and about an inch of roof. pretty much the door opening. im filling in the t-top cause i need it to be a coupe. i as going to mmake the part myself, but this just saves the effort. i dont like cutting up other cars incase someone needs it for a project like you did.

The Good Twin
Joined: Aug 2005
Posts: 20,639
From: Wild Wild West, UTAH!
Frankenstein! 
I did a t-top conversion too, but I wasn't allowed to chop and weld the pillars like that. Technically that's illegal. Each pillar has layers, and when you chop and weld in the middle of a pillar, you won't be able to weld the inside layers, making for a weak roof support. Not a problem if you don't mind the roof "creaking" around corners or uneven surfaces, or if you get in a wreck.
If you haven't welded it in yet, make sure you use slip in sleeves for the new roof to slide over.
I did a t-top conversion too, but I wasn't allowed to chop and weld the pillars like that. Technically that's illegal.
Each pillar has layers, and when you chop and weld in the middle of a pillar, you won't be able to weld the inside layers, making for a weak roof support. Not a problem if you don't mind the roof "creaking" around corners or uneven surfaces, or if you get in a wreck.If you haven't welded it in yet, make sure you use slip in sleeves for the new roof to slide over.
Thread Starter
Primer Grey FTW!
Joined: Jul 2010
Posts: 587
From: hawthorne, nv
Thanks, on the B-pillars is the extra metal you're talking about I undid the spot welds and left it sticking up. Then made an 1/8" gap all the way around, so I can weld the inside to the outside and put more in there and weld it all the way around. Then fish plate the B and C-pillars. The A-pillars are really thick. Thanks for the advice, I really appreciate it!
More Than Meets The Eye
Joined: Feb 2005
Posts: 5,120
From: Mesa, Az
Good work on the roof conversion. But considering slicktops are more scarce. I would have kept it a slicktop. I found out down here that T-tops are prone to leaking because of the hot and cold weather. My '82 leaks like a sieve, and all my weatherstripping is destroyed. lol
Just preparing you for what's ahead. The weather will wreck havoc on your T-top's seals. All in all, if that is what you want, that's all that matters.
Just preparing you for what's ahead. The weather will wreck havoc on your T-top's seals. All in all, if that is what you want, that's all that matters.
Thread Starter
Primer Grey FTW!
Joined: Jul 2010
Posts: 587
From: hawthorne, nv
A friend of mine has a set of Eibach springs for a 240z, he says they will fit a 280zx, but I don't think they will. I searched trying to find out, but couldn't find anything.Can someone tell me if they will or won't fit.
 [/IMG]
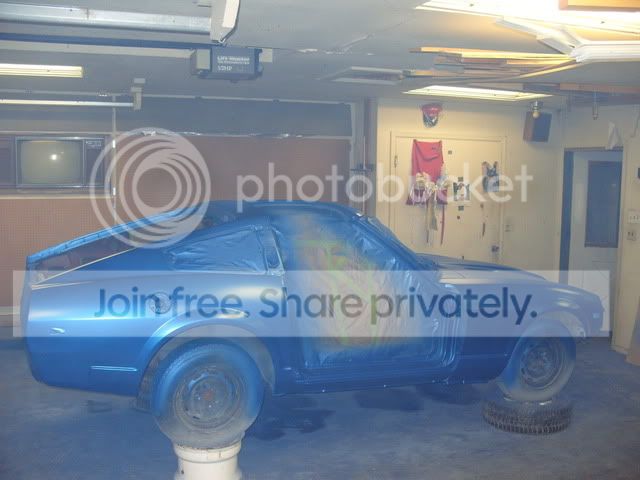 [/IMG]
 [/IMG]
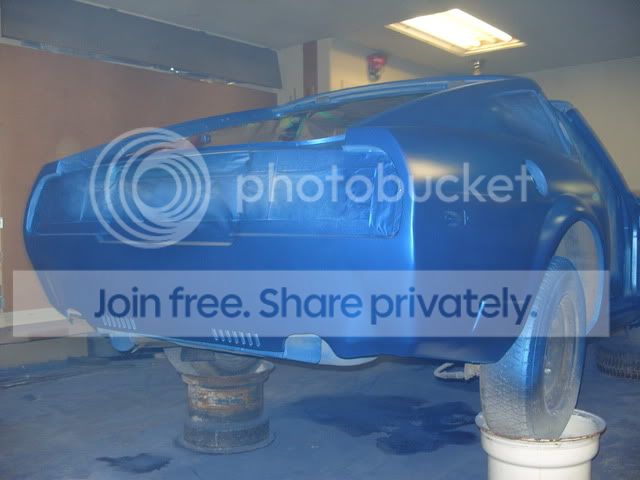 [/IMG]