
280ZT In Progress

Registered User
Joined: Apr 2011
Posts: 1,032
From: A Shady Tree in Boise
keep up the good work
Nice to see you are making progress, sometimes life gets in the way of our projects, I'm in the middle of a couple myself, arg. Post some pics of your car when you get a chance.

Thread Starter
NisTuner
Joined: Sep 2005
Posts: 2,800
From: Cleveland, Ohio
Hmm I didn't think about the half shafts. I guess that's possible too. I'll find out once I put in that diff mount, which really the way I'll be installing it is more of a diff bushing/damper. I don't remember having that strap in place when putting the diff back in though. So either way it should help. I'll try to grab some pics if the car leaves the garage this weekend.
Thread Starter
NisTuner
Joined: Sep 2005
Posts: 2,800
From: Cleveland, Ohio
Well this weekend was interesting. It was really productive Saturday. I was impressed that the rears came apart so easy. The drums came right off and everything came apart quite nicely. I found out my driver's side wheel cylinder was leaking which is probably why the brake light on the dash never went out. Cutting the backing plates for the rear drums took longer than expected, but worked out. Sunday was a mess. I spent probably an hour fighting with the caliper on one side to get it to go together when finally I realized I was trying to match the L pad retainer with the R caliper. Finally got that together and figured I'd go work on the R side. Turns out the second rotor I had ordered was incorrect. Ordered them a year ago so I think I'm stuck. Ordered a new brembo rotor through amazon. Also have a proportioning valve on the way. Maybe this weekend my Z's brakes will be finished. I was going to get under and work on putting that R/T diff mount in, but by this point I was exhausted and frustrated. Also for anyone dealing with brake lines I've found that
is a good tool for making pretty decent flares. Much better than the standard bar/clamp style flaring tool. Also after reading through various threads, I've opted to remove the stock proportioning valve from the firewall and put in a Wilwood one on just the rear line. Although I suppose I could just gut the existing one like so many people have done.
Last edited by duowing; Apr 29, 2013 at 08:22 AM.
Thread Starter
NisTuner
Joined: Sep 2005
Posts: 2,800
From: Cleveland, Ohio
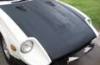
Well weekend 3 of sitting on jack stands has passed and the car still sits on jack stands, but I think it will be coming back down this coming weekend. Having only Saturday/Sunday to work on it makes for slow progress. Anyway here's what it looked like when it went up:
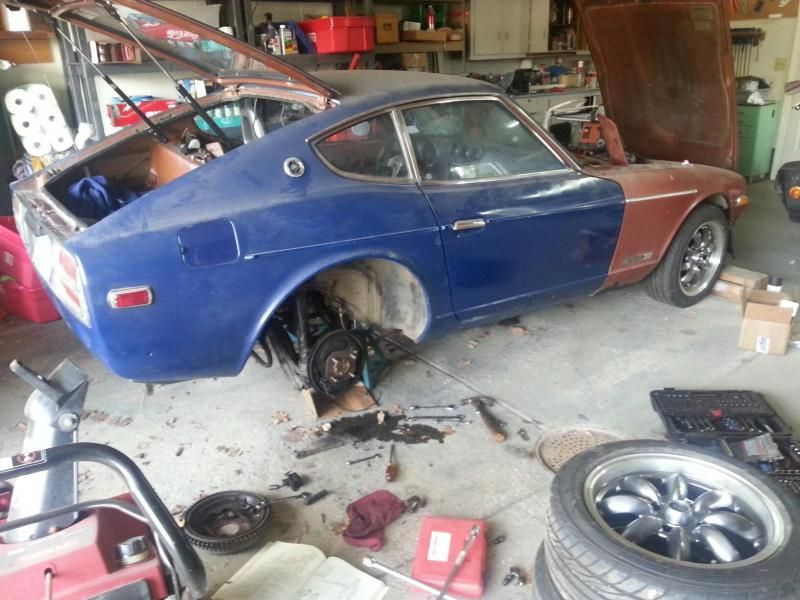
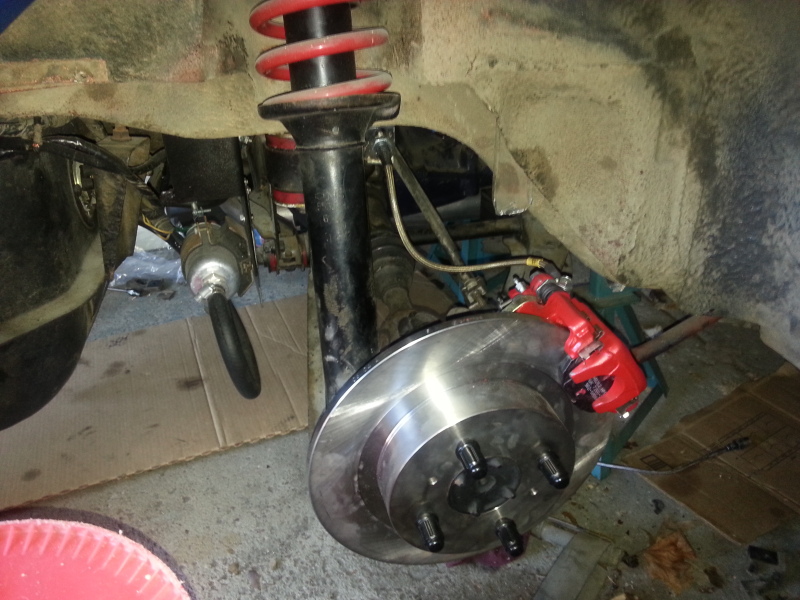
It still looks pretty much the same except it now has red 240sx calipers and rotors in the rear. Everything with the brakes on this has turned into more than just a swap. I installed the 1" Wilwood which turned into a headache as for some reason it took me making 3 different brake lines for the rear circuit before I finally got one that didn't leak. Then I opted to remove the stock proportioning valve and throw in a Wilwood adjustable and just run a union for the front lines which required making a new line for that. I just put a bunch of spacers so there would be enough room for the union to sit nicely behind the valve.
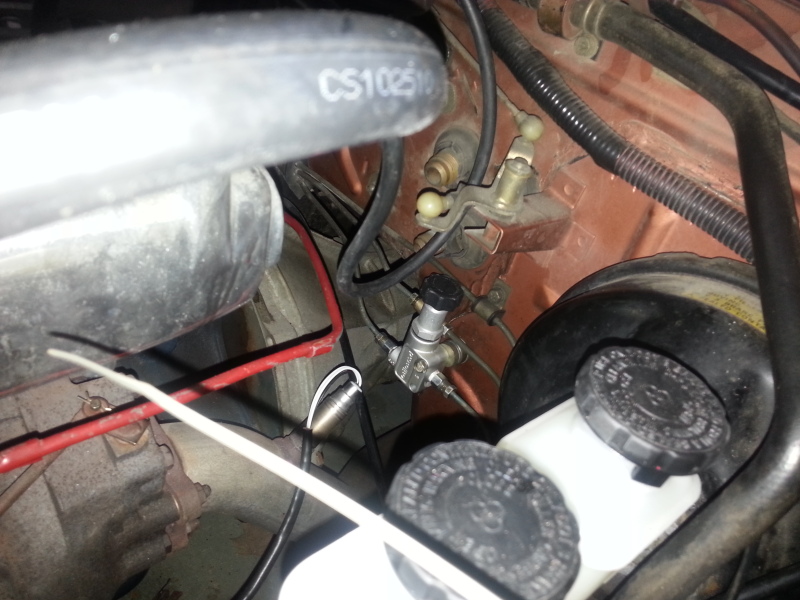
In the rear I ended up getting under the car and removing the hardlines to the left and right sides from the factory tee and running new lines. The one line comes out right at the wheel well and then into the stainless braided line that runs to the caliper. This way I could remove the hardline and the old mount because of clearance issues and not leave the hardline just dangling there without a mount.
I did a similar thing for the driver's side, but instead of running all the way to the wheel well I just took a piece of pre-flared 3/16" line 20" long and just bent it to match up to the original as far as I could, then just ran a 10mm Female to -3AN male union to connect the hardline to the stainless braided line and ran it to the caliper. I just used an insulated clamp to mount the hard line to the underside. I'll grab pics of this later.
Also yesterday I managed to get under the car and remove the old diff strap and put in my Technoversions R/T mount. I guess it's wrong to call it the mount as I'm still running the stock diff crossmember, but I put this above the diff with a rubber bumper type thing so it's compressed right against the diff keeping it held down. I may trim it later to allow for slight play if there ends up being vibration/extra noise.
Finally I found I'm for some reason leaking a little from my return line at the fuel tank, so I'm going to throw a new piece of fuel line and clamp on there, and check it out, but this weekend I should be able to throw the wheels back on, lower the car, then put new pads up front and bleed the fronts and give the car a test drive with the new brakes and new diff hold down.
It still looks pretty much the same except it now has red 240sx calipers and rotors in the rear. Everything with the brakes on this has turned into more than just a swap. I installed the 1" Wilwood which turned into a headache as for some reason it took me making 3 different brake lines for the rear circuit before I finally got one that didn't leak. Then I opted to remove the stock proportioning valve and throw in a Wilwood adjustable and just run a union for the front lines which required making a new line for that. I just put a bunch of spacers so there would be enough room for the union to sit nicely behind the valve.
In the rear I ended up getting under the car and removing the hardlines to the left and right sides from the factory tee and running new lines. The one line comes out right at the wheel well and then into the stainless braided line that runs to the caliper. This way I could remove the hardline and the old mount because of clearance issues and not leave the hardline just dangling there without a mount.
I did a similar thing for the driver's side, but instead of running all the way to the wheel well I just took a piece of pre-flared 3/16" line 20" long and just bent it to match up to the original as far as I could, then just ran a 10mm Female to -3AN male union to connect the hardline to the stainless braided line and ran it to the caliper. I just used an insulated clamp to mount the hard line to the underside. I'll grab pics of this later.
Also yesterday I managed to get under the car and remove the old diff strap and put in my Technoversions R/T mount. I guess it's wrong to call it the mount as I'm still running the stock diff crossmember, but I put this above the diff with a rubber bumper type thing so it's compressed right against the diff keeping it held down. I may trim it later to allow for slight play if there ends up being vibration/extra noise.
Finally I found I'm for some reason leaking a little from my return line at the fuel tank, so I'm going to throw a new piece of fuel line and clamp on there, and check it out, but this weekend I should be able to throw the wheels back on, lower the car, then put new pads up front and bleed the fronts and give the car a test drive with the new brakes and new diff hold down.
Thread Starter
NisTuner
Joined: Sep 2005
Posts: 2,800
From: Cleveland, Ohio
Well car seems to run good, it took a little while for the brake pedal to come up. I drove it around and wore in the pads as you're supposed to. Not seeing any leaks. Finally after letting it cool down and going for another drive the brake pedal feels pretty solid so that's good. I was driving it at night and everything seems to be alright, but I did come to a light and when another car pulled up behind me it looked like I was smoking a bit. I don't know if it's just because it's been sitting since December that I still have crap burning off, or if the new brake pads will kinda smoke, maybe the excess red disc brake quiet burning off, I really don't know. My temp gauge and oil pressure are fine. I checked the oil today, I think it looks fine. Kinda dark/light colored, but the oil isn't that old so it's hard to say. Radiator is full and the coolant looks nice and green. Also this car does not want me to have a proper working fuel system. I turned the key to on and it started spraying fuel everywhere. Turns out I had a leak at the fuel filter, from the hard line to the filter. Replaced the piece of rubber line and used proper clamps that fixed that. My return line right at the tank has a leak. I don't know what it is and why it keeps leaking. It's driving me nuts. I changed out the line for a new piece of 5/16" line, put the proper sized clamp on and it still seems to be leaking. I drove it and checked it, thought it was ok. Checked it this morning and there's more fuel just hanging out on the bottom of the tank. My idle seems a little lumpy. I don't know if that's from running the Z31 ECU/MAF with no idle controls, if there's maybe still a vacuum leak or not, but running the thing runs really good. Really gets up and goes.
Thread Starter
NisTuner
Joined: Sep 2005
Posts: 2,800
From: Cleveland, Ohio
Well I haven't done much. Found that the passenger half shaft has some play in the outer U-joint. So took it apart, and am waiting for some new u-joints to put in. Also changed out my brake booster for a rebuilt. I didn't realize how easy it was to throw a 280ZX booster in. I wish I had just purchased a rebuilt 10" ZX booster now. Maybe somewhere down the road. Other than that not much. Although I think my old booster was leaking as the car seems to start up quicker and idle a little better now.
Thread Starter
NisTuner
Joined: Sep 2005
Posts: 2,800
From: Cleveland, Ohio
Well I haven't really been home lately to work on the car. Got the new u-joints in. Installed the half shafts, and then noticed some leakage on the brake lines in places. I really don't understand why I'm having so much trouble with sealing these brake lines. Is there something I'm doing wrong or some trick to brake lines? I think I'll just have to loosen them and retighten. From things I've seen on the web people sometimes claim they have the same issue as me and they just have to mess around with loosening and tightening because they're just not getting the flare to sit exactly right.

Thread Starter
NisTuner
Joined: Sep 2005
Posts: 2,800
From: Cleveland, Ohio
Well it's been a while as usual. I think I FINALLY FINALLY got rid of all the fuel leaks. The brake lines are good and don't seem to be leaking anywhere now. Went to drive it one day and the clutch master took a crap. Replaced it and everything seems to be good. Despite de-pinning my old S130 harness ECU connectors and swapping them all into the Z31 ECU connectors I'm still encountering wiring issues. I can still get the car to stumble or nearly die by shaking the harness. So now I need to figure that out, I'm still thinking it's the ground wires nismo has mentioned. So this weekend I'm going to pull those back apart and try to redo all that a little nicer as well as run a third wire from the ECU harness out to a star ground setup I've been slowly making. Other than that the car seems to run really good. Never starts up immediately, but I blame that on my Fuel Pressure Regulator which doesn't seem to hold pressure in the system once the key is off. Also I fixed my brake light on the dash always being on.

The Good Twin
Joined: Aug 2005
Posts: 20,639
From: Wild Wild West, UTAH!
Wait... so you just pulled the pins out and put them in the empty Z31 plugs? That didn't solve the problem if so. You are supposed to cut the stock ecu plugs off at the wires and solder in the Z31 ecu plugs. I have a picture here somewhere of my Z31 plug install, and the lower grounding wires in question (I'd find it for you, but I'm at work).
Thread Starter
NisTuner
Joined: Sep 2005
Posts: 2,800
From: Cleveland, Ohio
Yeah I put the pins in there, I mean the pins looked exactly the same. I know one person over on HybridZ mentioned he did it that way and that fixed his problem. I put them into the connectors, but they also have that extra piece of plastic and one not to help hold the pins from moving. I see that it could just simply be a problem with the pins themselves. I saved all the pins that I pulled from the Z31 connectors so I guess I could technically redo it. I know the picture you're talking about. I've seen that before. I just really didn't want to splice and solder 40 some pins. Although if it comes to it, I may just go that route.
 Just get another set of Z31 ecu plugs if you do it. It fixed all my erratic running / idle problems.
Thread Starter
NisTuner
Joined: Sep 2005
Posts: 2,800
From: Cleveland, Ohio
Once I figured it out it was really easy to quickly de-pin the 280ZX connectors and swap over to the de-pinned Z31 connectors. I'll keep an eye out in junkyards for more Z31s though and I'll probably go that route if I eventually can't fix this issue. Anyway I don't even have enough time to play with the car, but I messed with the wiring a little today and started on fixing that ground again. Last time I did it I tried to solder the big Aluminum wire which I'm assuming is a shielding wire to the other 4 smaller ground wires. It seemed to work and was still held, but I don't know if over time the solder was maybe developing connection issues? Supposedly solder, copper, and aluminum don't work well together, or so I've been told. Anyway I got some of those nicer insulated butt connectors. I ran the two grounds and the aluminum one from the harness side into the one end of the butt connector. On the ECU plug side I ran the two small ECU wires into a single 16 gauge wire. I then ran that 16 gauge wire and a 12 gauge wire into the other end of the butt connector. I ran the other end of that 12 gauge wire out to the firewall. I got some Zinc 6x1.0mm bolts from home depot with some brass washers. So the 12 gauge wire runs from the ECU wires to the driver's side firewall under that inspection lid. From there I have a 10 gauge wire which runs to the passenger side firewall. It runs to a little junction that then ties back into the battery with a 10 gauge wire. I'm going to run the driver's side junction out further along the driver's engine bay and try to tie in the main harness grounds along with the coil, maf, etc grounds. I'm trying to give everything as low a resistance and as many paths back to ground as possible. Hopefully this will help my issue. If not it's off to the junkyard, although I think I'm going to maintain this whole star ground idea.
Do you by chance remember how the grounds were wired up in the Z31 harness? Was it still similar to the S130? With the two ECU plug wires running into a crush connector with that goofy aluminum wire, or did you have to do anything special for splicing that all in?
Do you by chance remember how the grounds were wired up in the Z31 harness? Was it still similar to the S130? With the two ECU plug wires running into a crush connector with that goofy aluminum wire, or did you have to do anything special for splicing that all in?
The Good Twin
Joined: Aug 2005
Posts: 20,639
From: Wild Wild West, UTAH!
https://www.zdriver.com/forums/280zx...40/#post320895
Thread Starter
NisTuner
Joined: Sep 2005
Posts: 2,800
From: Cleveland, Ohio
That's not a bad idea using the two eye connectors and just running a bolt through them to make a nice little grounding junction. Pretty similar to me using the crimp connector. Unfortunately I didn't get to mess with the car this weekend. Ended up spending the weekend working on other cars when I was home. Although I did at least pull out the old 76' Clock and I'm in the process of fitting my sport comp boost gauge into it.
Thread Starter
NisTuner
Joined: Sep 2005
Posts: 2,800
From: Cleveland, Ohio
Unfortunately I really haven't driven the car all that much. It's a long long process of doing something, testing it, and then for some reason finding some new issue. As I mentioned I thought the brakes were done, then I found the lines still leaking. Finally got that fixed, and then the master cylinder for the clutch took a crap. I've had more fuel issues than I care to recount and I really can't understand why. Vacuum leaks, wiring issues, etc, but it slowly makes progress. Just like anything I get in modes where I do a lot, then other times it just sits for a good while.
Thread Starter
NisTuner
Joined: Sep 2005
Posts: 2,800
From: Cleveland, Ohio
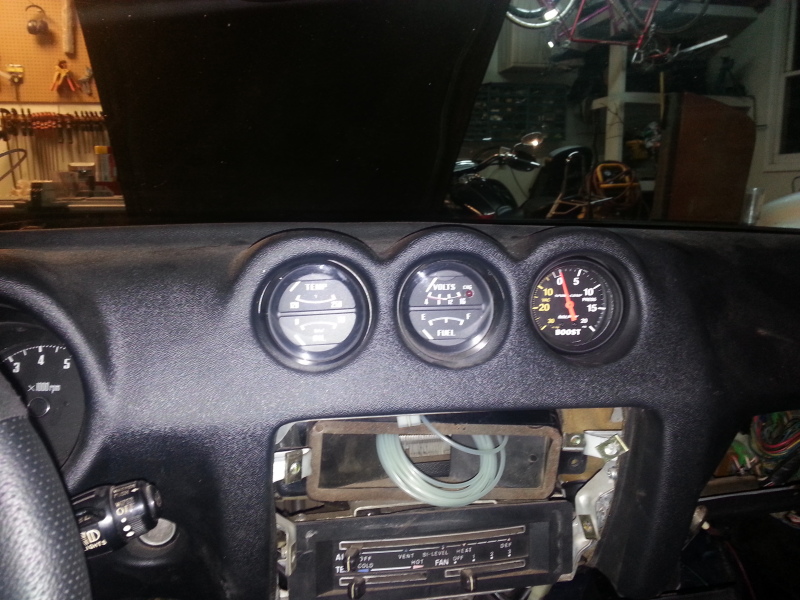
Well I just about finished with my boost gauge install. I saw the other threads with people just getting them in there in a really quick manner, but I wasn't thrilled with the way it looked. I wanted to get it to sit in there as close to stock as possible. This turned out to be a lot more work every step of the way, but it should look good.
I threw it in there to see how it looked, then I finished the wiring for the bulb and it should be ready to go.
Now I have a new issue. I've done the parking light/interior lighting relay upgrade, the only problem is for some reason now I keep blowing the fuse whenever I try to turn on my parking/interior lights. My headlights work just fine, and so do my turn signals, brake lights, and hazards. I haven't really had an issue with the interior lights before, so I'm assuming it has something to do with me having removed the clock, but who knows... I'm not sure the best way to go about finding the short? Just pull bulbs and see which one seems to cause the issue?
Thread Starter
NisTuner
Joined: Sep 2005
Posts: 2,800
From: Cleveland, Ohio
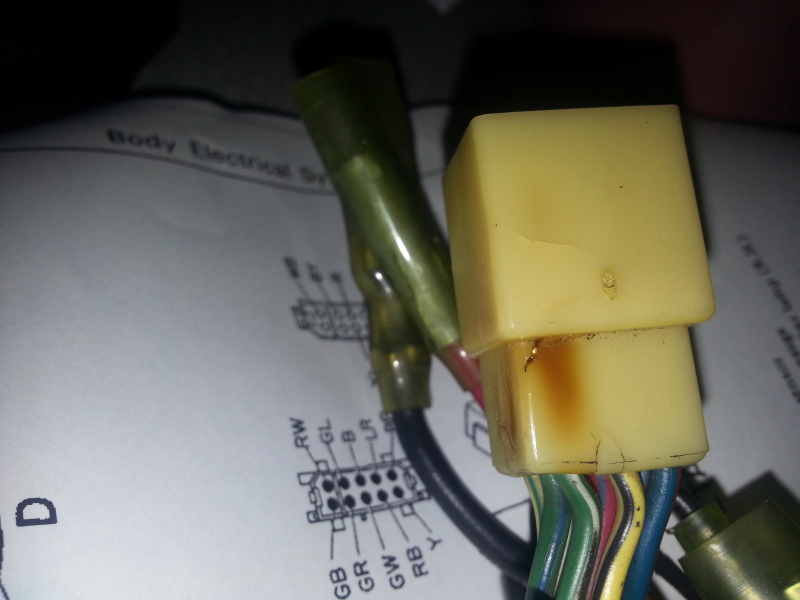
Well I'm in the process of trying to track down why my interior/parking lights don't work. Basically everything that seems to be connected to the Green/White wire. I pulled my headlight combo switch and followed the guide to pulling that apart, cleaning it up, and "rebuilding" it. Seems to work pretty nicely. Not sure how bad it was before, but it's one thing eliminated. You can see that there must have been some issues in the past with this as the one connector looks burnt/melted around the wire in question that comes out of the switch.
Registered User
Joined: Oct 2012
Posts: 29
From: Central Florida
I have struggled with this same issue. My connector looked the same, slightly melted. I lost all my dash lights. I have done everything you are trying and I could not get them to come back on. My next attempt is to re-ground all the tail lights. I even took the multi switch apart like you are and still no help. In the middle of all this I lost my wipers as well.
Everything worked on my car. Only thing I did was remove the glove box to work on taking out the clock. I ended up not taking the clock out and put the glove box back in and poof, lost the dash lights.


Good luck, if I make any headway I will let you know.
Everything worked on my car. Only thing I did was remove the glove box to work on taking out the clock. I ended up not taking the clock out and put the glove box back in and poof, lost the dash lights.
Good luck, if I make any headway I will let you know.
Thread Starter
NisTuner
Joined: Sep 2005
Posts: 2,800
From: Cleveland, Ohio
Oddly enough this is exactly when my problem seems to have begun. Took out the glovebox to remove clock and install boost gauge and interior lights no longer work. You may want to look into your glovebox light/switch. It's possible that when removing you may have pinched it or pulled something loose causing a short. I'm hoping to have the short or the problem area identified in the next day or so, but we'll see
Thread Starter
NisTuner
Joined: Sep 2005
Posts: 2,800
From: Cleveland, Ohio
Well I have disconnected every single bulb along the path of the green/white wire. Exterior and interior. I've found no shorts. Really frustrating as I can't find a change or anything. Then I started thinking over the whole glovebox removal and what could have changed and it occurred to me. The glovebox light. The whole body of it is metal, and the wires are just soldered to the top of it, the light just works by the rod on the inside connecting the grounded side of the body to the powered side of the body. When I removed the glovebox and messed with getting the clock out, the light would have just been hanging there. There's plenty of metal framing all around the dash and glove box area. So I'm guessing it was touching metal enough to short and blow the fuse. This theory also would run with why my lights started working when I stuck another fuse in there after moving everything around to test mount my boost gauge. Then I pulled everything back out and the next day the fuse blew again when I tried it once more. This is the best theory I can come up with. Once I'm done cleaning up the back of the tach as it's a little rusty where the turn signal bulbs ground, and make sure my speedo/cable work. I'll put everything back and see if I'm still blowing fuses. As for Tooquick260, this could have been a similar problem for you. Have you actually pulled your fuses out and tested them? I know when I switched out the fuses on my 280, I pulled fuses out that looked completely fine, but once I pulled them out the just completely fell apart.
Registered User
Joined: Oct 2012
Posts: 29
From: Central Florida
From reading your issues and others I remembered the steps and process of when and why the lighting quit and fuses blowing.
I looked at the glove box again, did not see anything obvious. I will dive into that again and see if that is the literal smoking gun.
I am still chasing ecu issues. I got a second ecu after I burned up the first one. The second ecu floods with fuel as soon as you plug it in. Even without key on. Now I have a burnt inj driver ecu, toasted ecu that runs wide open and a stock ecu that will not run with the 500cc injectors.
Thread Starter
NisTuner
Joined: Sep 2005
Posts: 2,800
From: Cleveland, Ohio
As my productivity goes in bursts I at least pulled everything out of the dash. Cleaned up the back of the tach, and found out why my one turn signal bulb is kind of iffy. One of the tabs on the bulb holder is broken which is why it doesn't stay in the back of the tach that well. Cleaned it up though. I also pulled out my Speedo and tested it with the old speedometer cable and found out that it does in fact work. Being able to get my hand right behind the speedo through the tach hole in the dash was nice, because I was able to make sure the cable connected into the square hole in the back properly. So my speedo should work now. Also I'm in the process of re-wiring my Fuel Pump Relay again. Doing some google searches, I saw the 70amp relays that they use for Cooling fans and decided that those take up a lot less room, so I can use that and then easily mount it with one bolt under the passenger side, rather than having to make a custom mount for what I'm currently using. Also this way I've wired the power wire for the air regulator to tap into the Black/White wire that gets powered by the EFI relay, this way completely separating my Fuel Pump Relay and wiring from everything else. The relay is still triggered by the ECU, but the Pump now has it's own maxi fuse block coming off the battery, with a 10 gauge wire to 70 amp relay, and then 10 gauge wire straight back to pump positive. The 70 amp relay should stay a bit cooler than the 50amp one I'm currently using and should also eliminate a slight bit more voltage loss to the pump.
Thread Starter
NisTuner
Joined: Sep 2005
Posts: 2,800
From: Cleveland, Ohio
Well everything is back to a running state. I put all my gauges back in the dash and hooked up my boost gauge. I've left the glovebox light out of the dash for now since I haven't put the glovebox back. No blowing the fuse for interior lights. Also doing the "rebuild" on the combo switch, and tightening everything up seems to have made my switch work a bit nicer. Haven't gotten a chance to drive it again yet, but when I had it running for a bit(I didn't play with the harness to check) it felt smoother than before. So I'm hoping adding in that extra ground into the ECU harness has really helped. It also looked like from my boost gauge that at least while the air regulator was opened, my vacuum looked pretty steady and pretty darn close to what it should be at warm/idle. Which is really nice to see. Hopefully I'll get a chance to get out and give it a test drive or two soon. Also to see how well it's boosting at stock/and see if I have any boost leaks. Then it's time to put my boost controller back in and start playing around. Also speaking of grounding, with all the reading I've been doing on HybridZ about grounding I've decided to start adding in extra grounding straps. I figure I'll get a couple of those braided ground straps and run one from the head to the block, one from the block to alternator, replace the main ground from alternator to frame rail with a bigger ground strap, and finally tie in one from the block to the starter terminal. This then would kind of begin to link every ground together. This should at least help out with everything in general.
Last edited by duowing; Oct 2, 2013 at 07:59 AM.


