
VG33ET Build!

Thread Starter
Registered User
Joined: Sep 2010
Posts: 303
From: Portland, OR
VG33ET Build!
Hey all! If anybody has noticed, ive been gathering parts to build my vg33et. Its been a much longer process then expected but i finally have all the parts and everything back from the machine shop ready to start assembly. I will posting up my progress here every weekend with pics and perhaps putting up a write up together since there is not very many vg33et write ups out there(i only know of one). If you guys have any questions or would like to offer some tips, id be more then glad to answer them. Day one starts tomorrow!


Ruff Ryder
Joined: Sep 2005
Posts: 6,140
From: palm desert
Thread Starter
Registered User
Joined: Sep 2010
Posts: 303
From: Portland, OR
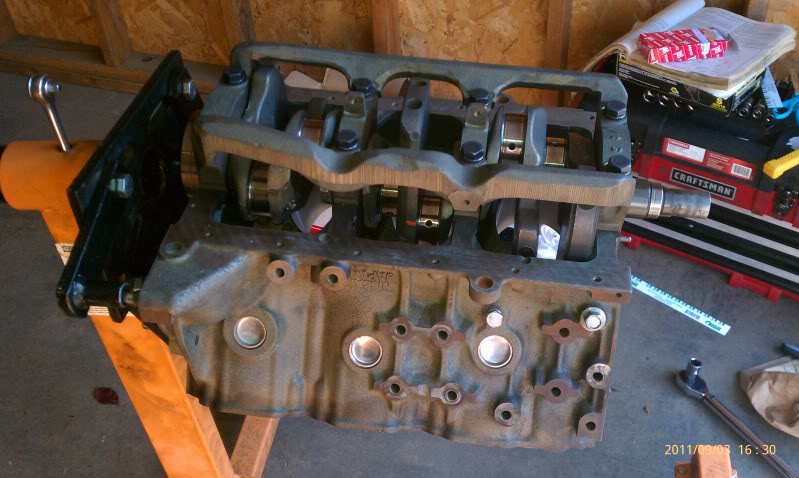
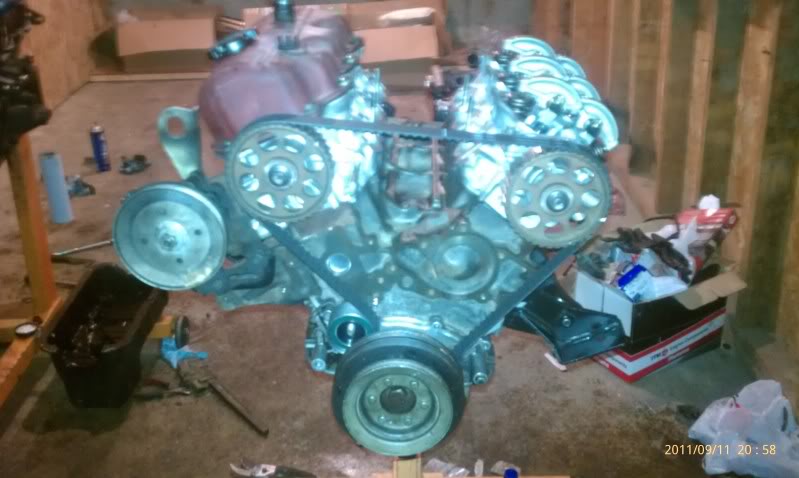
Day one of assembly: Crankshaft installed!
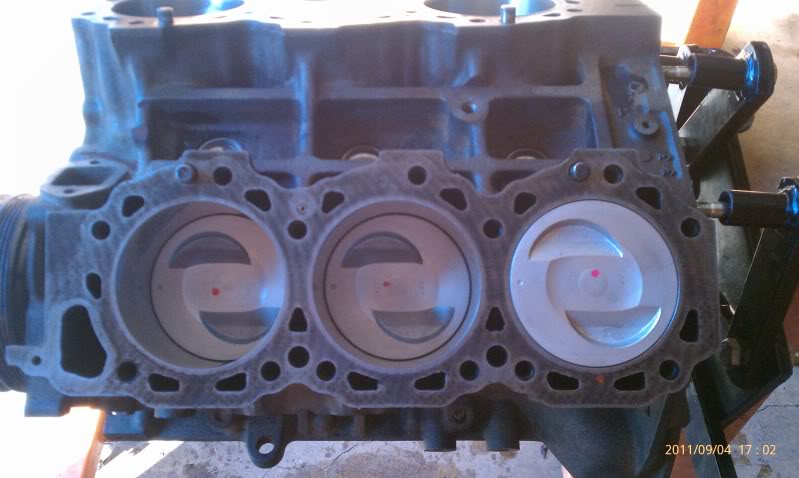
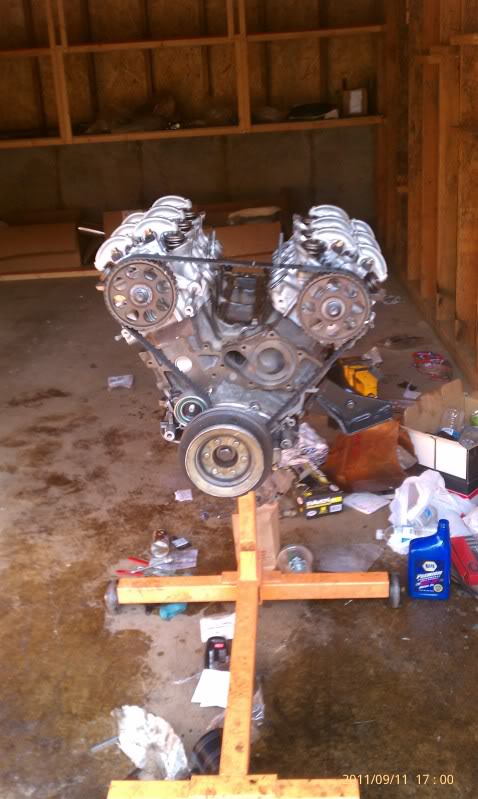
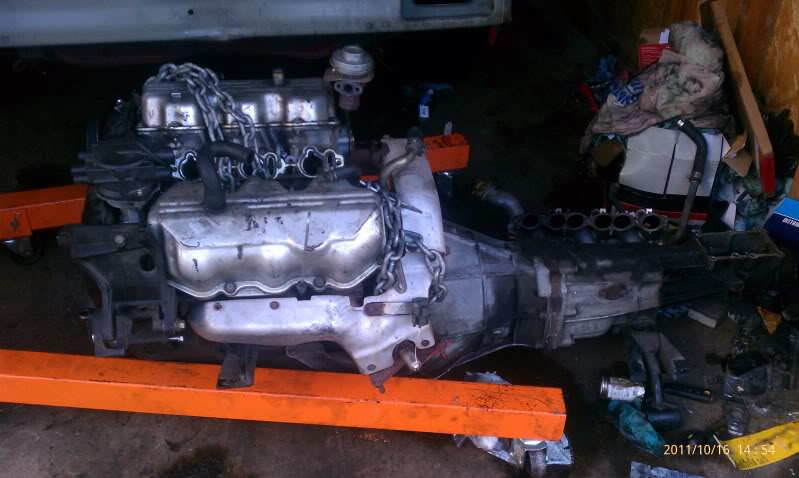
Day two of assembly: Complete short block!

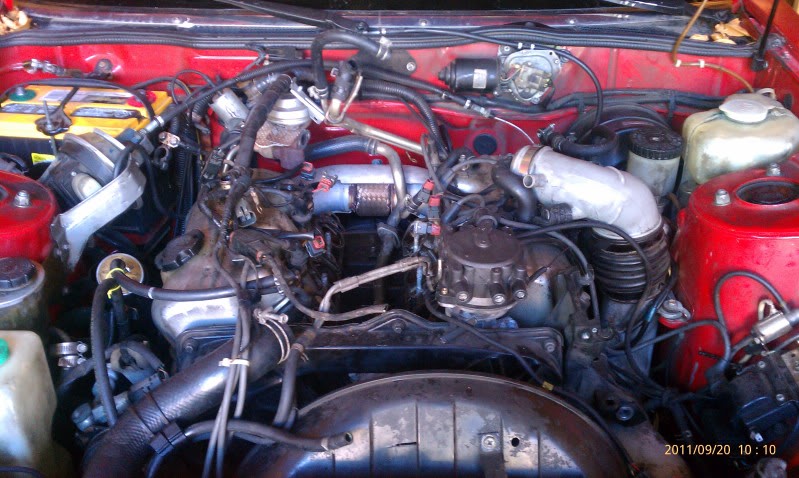
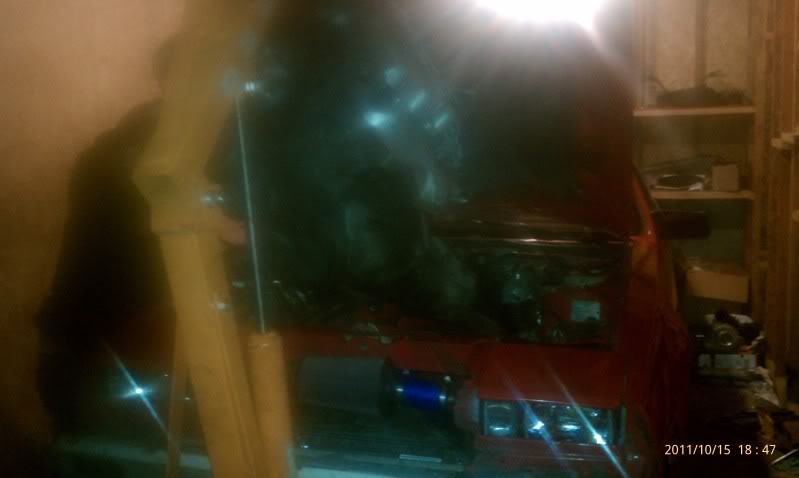
Here's a pic of the garage and new turbo!
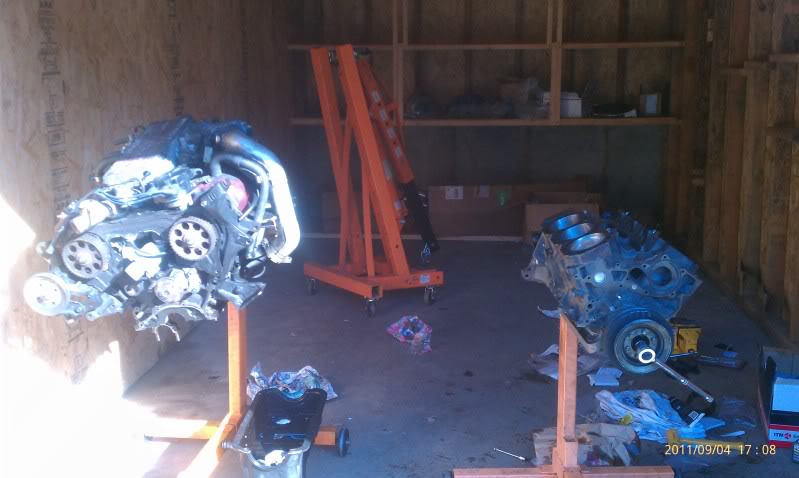
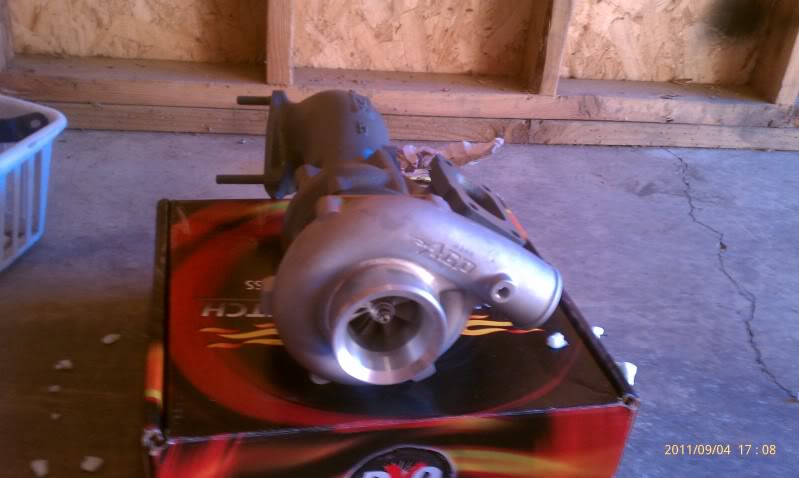
Everything seems to be going really smoothly. No problems at all. I only wish i had more time to work on it. Ill be working on it next weekend and will hopefully have a almost complete vg33et. Tune in next week!
Day two of assembly: Complete short block!
Here's a pic of the garage and new turbo!
Everything seems to be going really smoothly. No problems at all. I only wish i had more time to work on it. Ill be working on it next weekend and will hopefully have a almost complete vg33et. Tune in next week!
Thread Starter
Registered User
Joined: Sep 2010
Posts: 303
From: Portland, OR
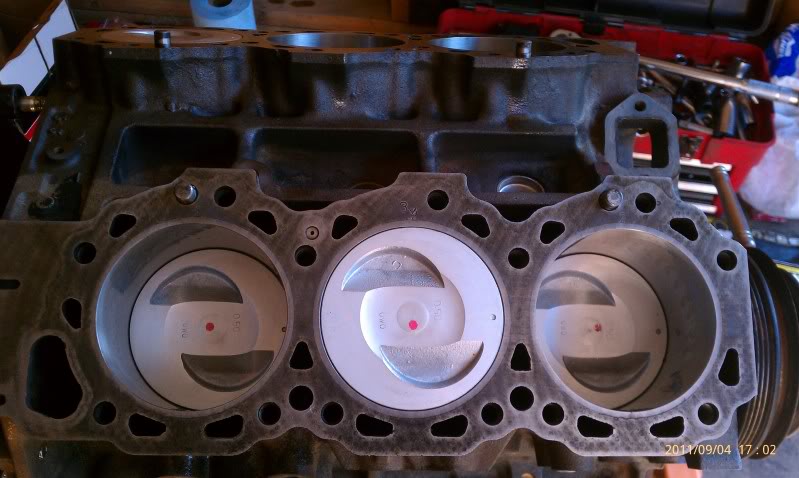
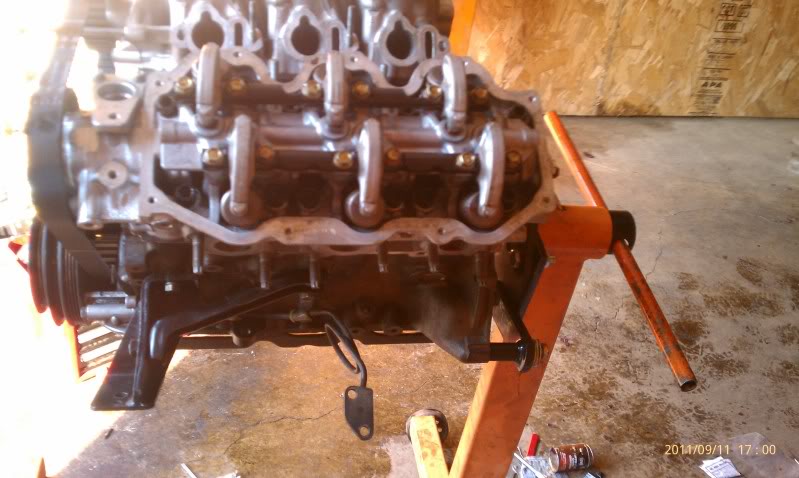
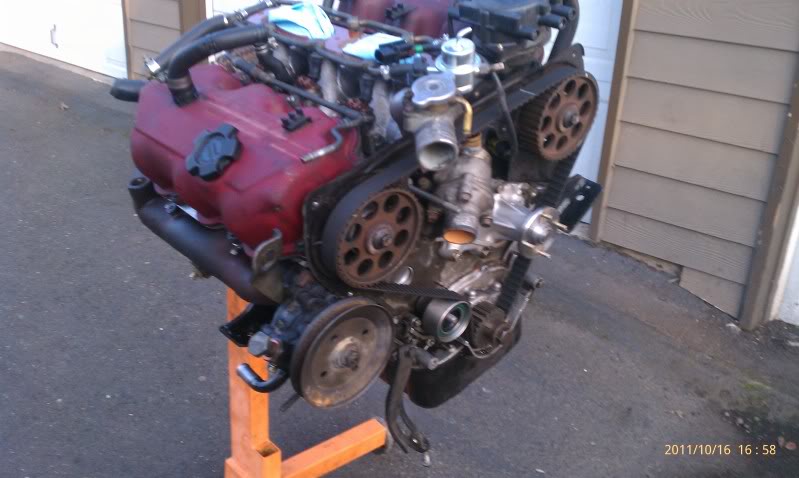
Day three of assembly: Complete long block!
Day four of assembly: Swapping parts over!
I had tons of trouble today trying to swap over the exhaust manifolds. Had a lot of bolts break on me and had one bolt from heat shield strip on me as well. Super annoying! When i finally removed the heat shield from the turbo manifold. I realized there there is a crack going down the middle. I was like EFF!!! So if anyone has an extra one, please send me an PM.
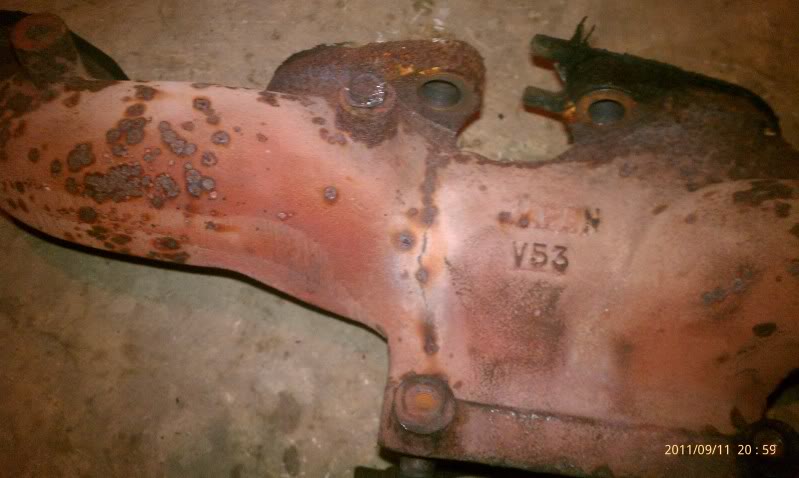
I guess i will be using the exhaust manifolds from my n/a since they seem to be in better shape and head to the hardware store and get some more bolts. Fortunately, everything seems to be coming along fine. I feel that i could have accomplished more today if i had the right L-wrench for the plenum. Oh well. Next week i should have the engine ready to drop in. Most likely another 2 weekends til im done. Til next week my fellow Zdrivers!
Day four of assembly: Swapping parts over!
I had tons of trouble today trying to swap over the exhaust manifolds. Had a lot of bolts break on me and had one bolt from heat shield strip on me as well. Super annoying!
When i finally removed the heat shield from the turbo manifold. I realized there there is a crack going down the middle. I was like EFF!!! So if anyone has an extra one, please send me an PM. I guess i will be using the exhaust manifolds from my n/a since they seem to be in better shape and head to the hardware store and get some more bolts. Fortunately, everything seems to be coming along fine. I feel that i could have accomplished more today if i had the right L-wrench for the plenum. Oh well. Next week i should have the engine ready to drop in. Most likely another 2 weekends til im done. Til next week my fellow Zdrivers!

Thread Starter
Registered User
Joined: Sep 2010
Posts: 303
From: Portland, OR
Day five of assembly: Still swapping crap over!
Its now getting tricky. There are head bolts the are breaking, ordering parts from nissan(oil thread thing), and just parts breaking on me as well lol. When i was taking the plenum off my turbo parts engine. One of the bolt's head was completely stripped. It was the one at the very end back of the engine. And this is one of those that you have to take out using a L-wrench. So finding no other alternative, i had forcefully pull the plenum off. Luckily, on day 6, i still had the one from my n/a engine which one of the bolt heads that holds down the injectors broke off..... So i think im just going to pick one up locally here from someone who is parting out their car and use that one.........
Day six of assembly: Time to take the engine out of my n/a!
Put my car in the garage finally.
Taking out the intake manifold which was a success til i need to take out the injectors....
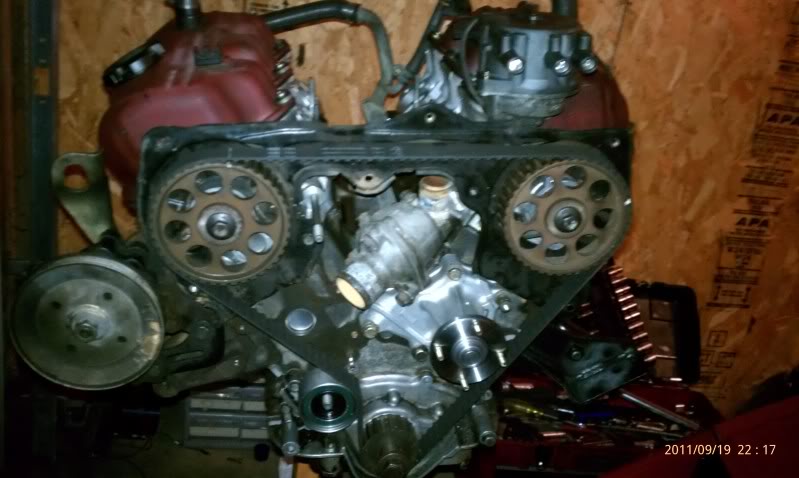
I also redid my timing belt a few days ago just to make sure everything was lined up. I drivers side gear seems to be off somehow... It seems to be off by like half a notch. If i put it one notch back it seems off as well. Here are some pics and tell me what you guys think please.
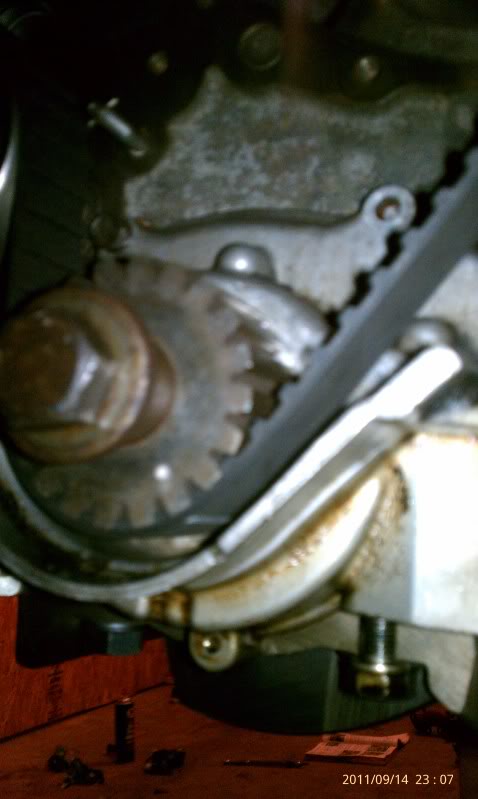
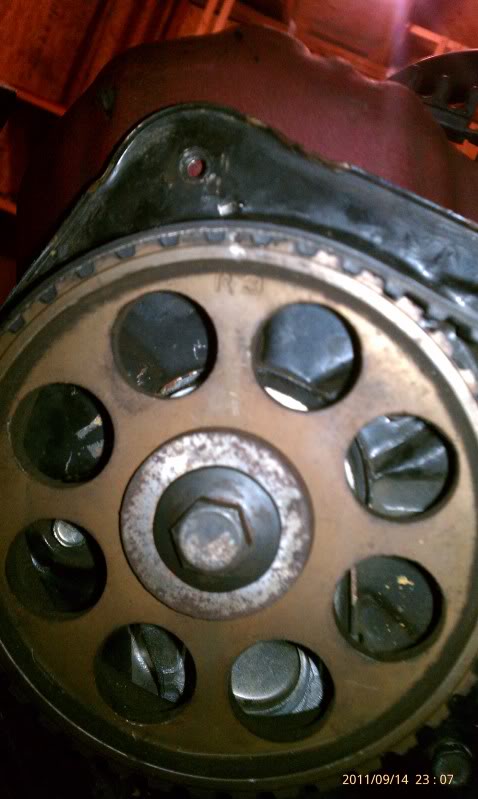
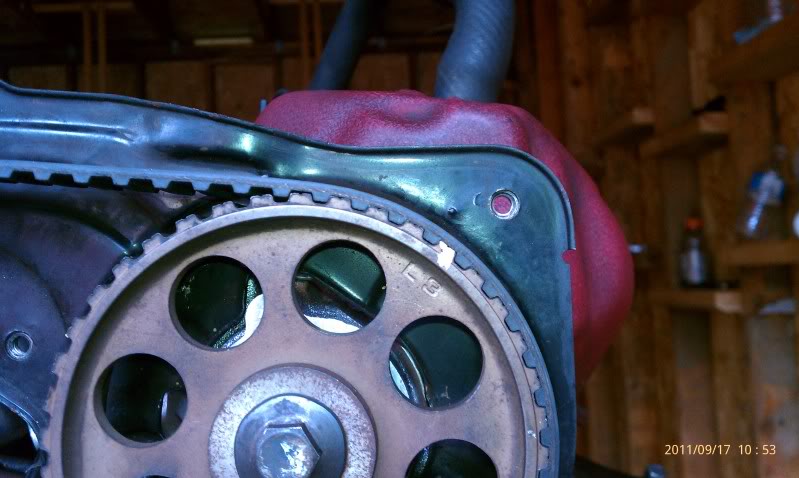
Seems a lil off but everything else is right. I think its right. The valves are not hitting any of the pistons and there is very litle resistance when turning. Til next week!
Its now getting tricky. There are head bolts the are breaking, ordering parts from nissan(oil thread thing), and just parts breaking on me as well lol. When i was taking the plenum off my turbo parts engine. One of the bolt's head was completely stripped. It was the one at the very end back of the engine. And this is one of those that you have to take out using a L-wrench. So finding no other alternative, i had forcefully pull the plenum off. Luckily, on day 6, i still had the one from my n/a engine which one of the bolt heads that holds down the injectors broke off..... So i think im just going to pick one up locally here from someone who is parting out their car and use that one.........
Day six of assembly: Time to take the engine out of my n/a!
Put my car in the garage finally.
Taking out the intake manifold which was a success til i need to take out the injectors....
I also redid my timing belt a few days ago just to make sure everything was lined up. I drivers side gear seems to be off somehow... It seems to be off by like half a notch. If i put it one notch back it seems off as well. Here are some pics and tell me what you guys think please.
Seems a lil off but everything else is right. I think its right. The valves are not hitting any of the pistons and there is very litle resistance when turning. Til next week!
Thread Starter
Registered User
Joined: Sep 2010
Posts: 303
From: Portland, OR
Day seven/eight: Engine ready to drop in pretty much and getting ready to pull n/a engine:
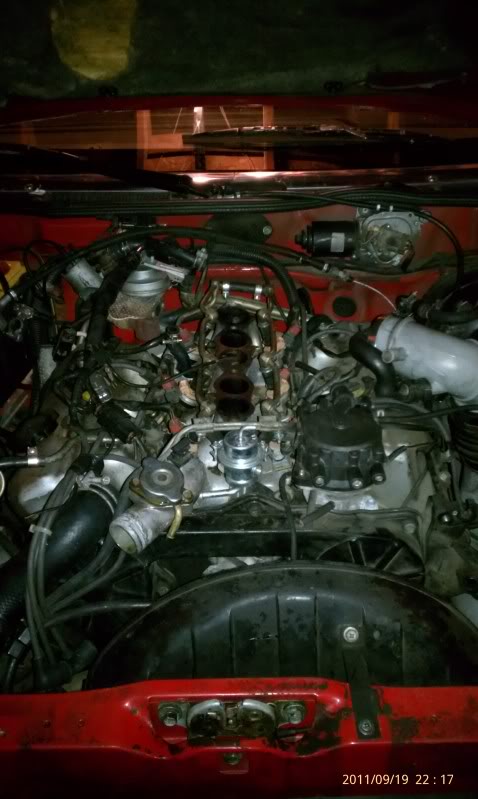
Finally got everything together except the exhaust manifolds and turbo. Othere then thats its pretty much ready. The plenum is not bolted down. I will be dropping the engine without it. Much easier to connect everything back together that way.
Finally got the intake manifold off(obviously from first pic)and managed to make it work. Its really easier to remove all the wires and such out of the way with the intake manifold off. Only took a handful of minuets to clear it up.
Got the car on stands also. Just need to remove a few things and unbolt the engine from the transmission. Im going to need to remove the front fascia in order to get the cheery picker in place.
Had some trouble switching stuff between the stock plenum and the gutted plenum. I had to drill out a few screws in order to put stock components on it. It also didnt have those two threads or screws or whatever youd like to call them for the egr. I think im just going to block it off.
Plan for next week: Take out n/a engine and drop turbo engine! Still need the exhaust manifolds and oil pan which i have. I just cant find the strainer.... Still debating to take out the engine with the transmission or not. Id really leave the transmission in there but i dont want to go through more work then i need to. I still need help on the timing belt. Please reply with some advice or suggestions on it. Thanks and hopefully start up video next week!

The Good Twin
Joined: Aug 2005
Posts: 20,639
From: Wild Wild West, UTAH!
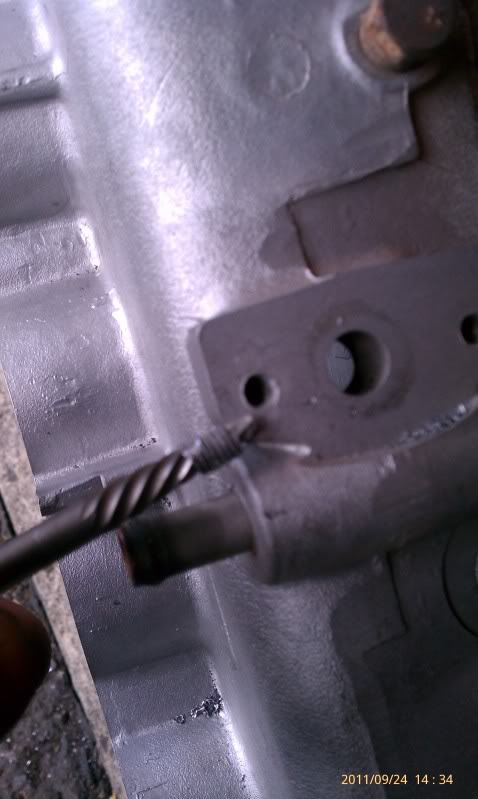
#1: You are using stock head bolts for this build? Why are you not using ARP head studs?
#2: PLEASE PLEASE PLEASE throw away those helical extractors. I am surprised you were able to remove any bolts. They should be outlawed because they are tapered and reverse threaded... as you try to unscrew it, it expands more and more, making it harder and harder to get out, until it snaps off, and you are in a worse position than before.
I have mentioned this many times... only use the 4-edge square tapered extractors:
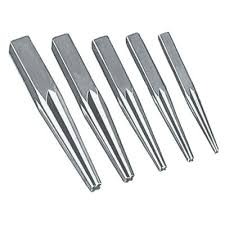
Thread Starter
Registered User
Joined: Sep 2010
Posts: 303
From: Portland, OR
I am using stock head bolts. They will get the job done for what i want. Im not going to able to pull out more then 300hp right off the bat due to the stock fuel system. I will be nistuning it though once i brake in the engine with new injectors, fuel pump, etc. My goal is just around 300-325whp. Thanks the tip on the extractors. Do you think my timing belt is correct by the way?
Thread Starter
Registered User
Joined: Sep 2010
Posts: 303
From: Portland, OR
Days 9-12: So I havent really been updating a lot. Been kinda slow waiting for parts and such. Really slowing things down.
Blurry as eff picture of the engine getting pulled out of the car. Took two of my buddies and I about 30mins to pull it out once everything was disconnected.
Engine and transmission the next day. The engine and transmission came apart really easy. When I did it on my parts car a few months ago, I remember it taking some effort.
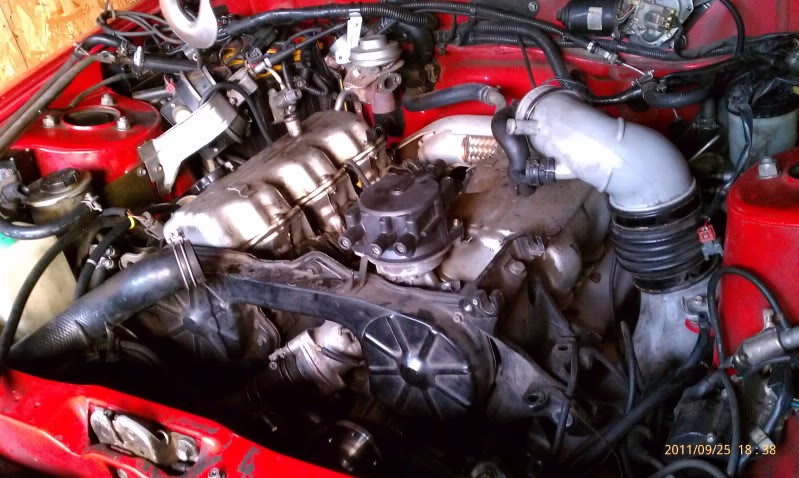
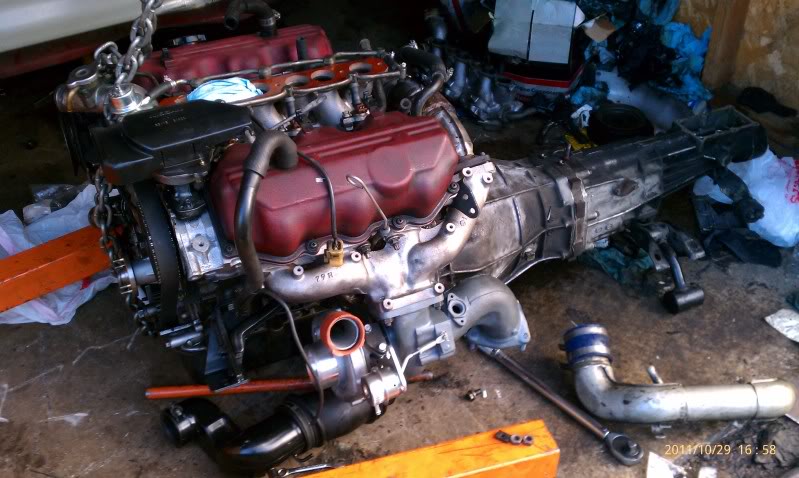
Finally putting the exhaust manifolds on along with the turbo. I had to use the center piece from my n/a engine since the one from the parts engine had studs in it. Took the intakes manifold off to better work with it also.
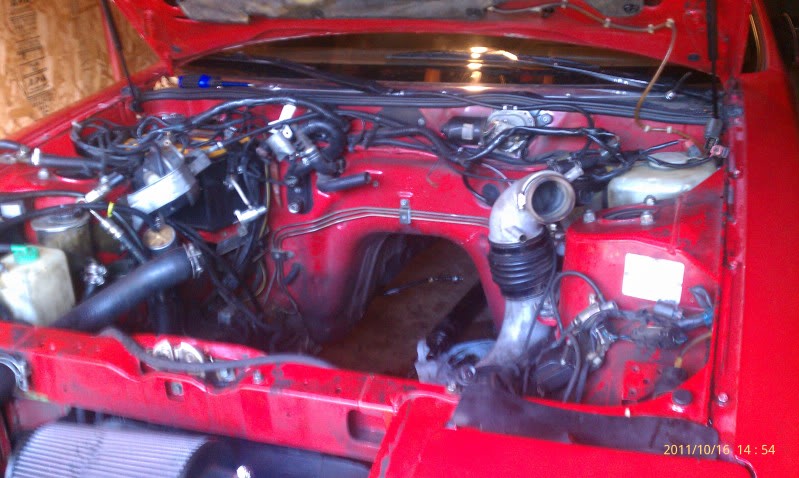
Empty engine bay!
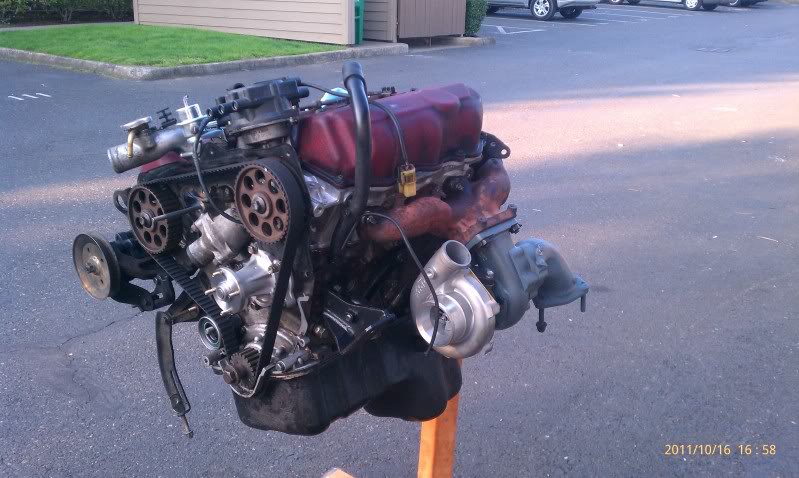
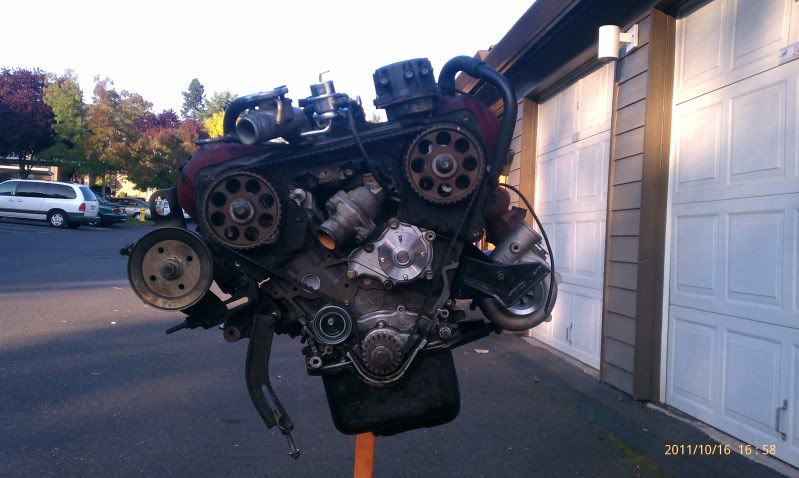
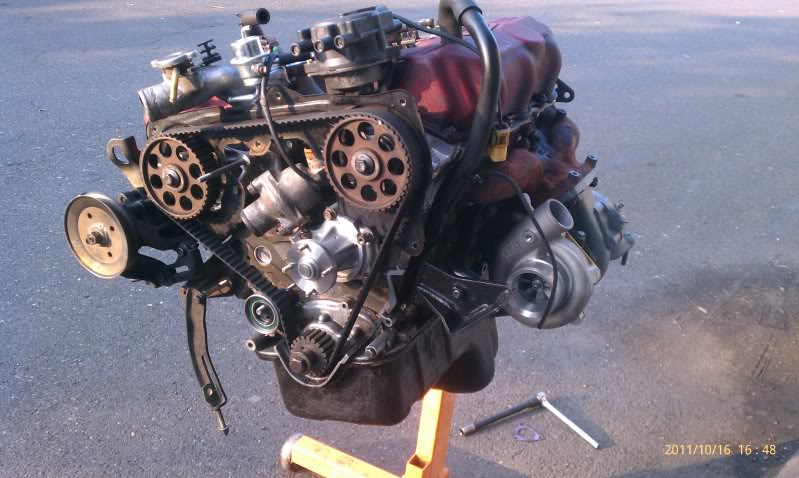
Exhaust manifolds w/turbo!!!
I should hopefully have this done in two more weekends. Ill have the engine in the car this weekend but ill still be missing some parts here and there and im sure there will be some troubleshooting perhaps. Please comment on my build guys! Thanks
Blurry as eff picture of the engine getting pulled out of the car. Took two of my buddies and I about 30mins to pull it out once everything was disconnected.
Engine and transmission the next day. The engine and transmission came apart really easy. When I did it on my parts car a few months ago, I remember it taking some effort.
Finally putting the exhaust manifolds on along with the turbo. I had to use the center piece from my n/a engine since the one from the parts engine had studs in it. Took the intakes manifold off to better work with it also.
Empty engine bay!
Exhaust manifolds w/turbo!!!
I should hopefully have this done in two more weekends. Ill have the engine in the car this weekend but ill still be missing some parts here and there and im sure there will be some troubleshooting perhaps. Please comment on my build guys! Thanks
Thread Starter
Registered User
Joined: Sep 2010
Posts: 303
From: Portland, OR
Day 13-14: Back to waiting for parts and changing the crossmember and front bushings to ploy. I dont have alot of pics since not alot of done. Cluth and flywheel were installed and i need to put in the new throw out bearing in the tranny so i can bolt them together and drop them. =)
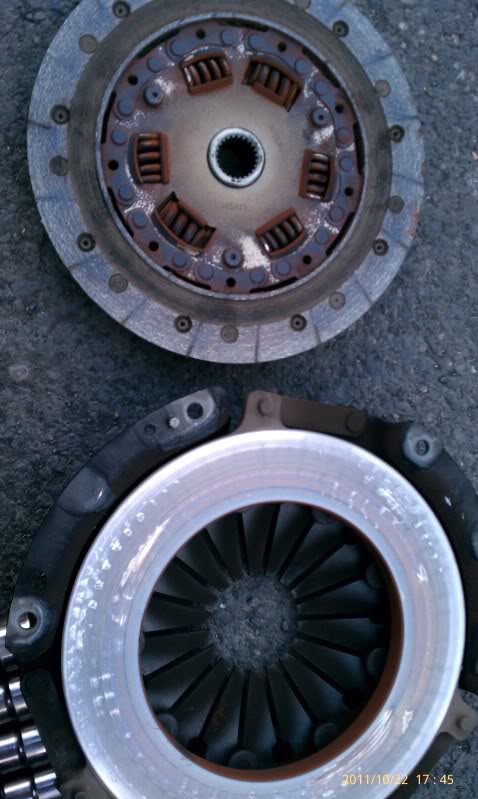
Original 26 year old clutch and pressure plate. The clutch looks like it got messed up real bad somehow towards the center of the outer ring. It was starting to slip really bad as well.
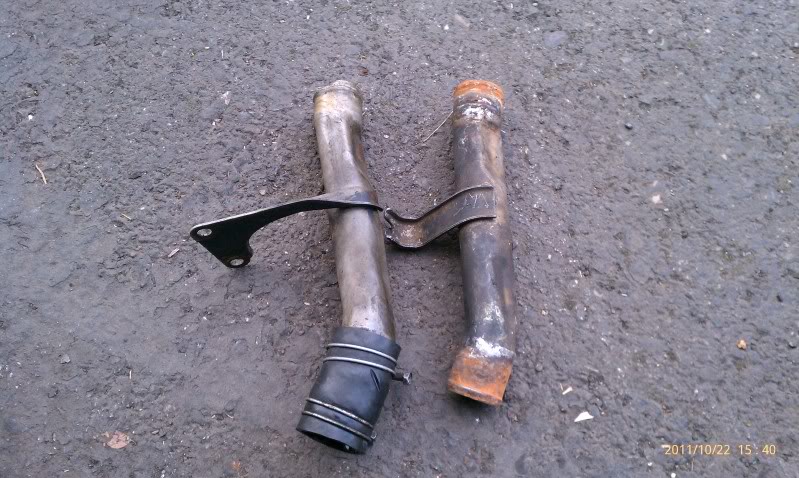
Here are the differences between the the n/a(left) and turbo(right) metal water pipes. The n/a one wont mount up properly so i had to use the turbo one. Just throwing it out there for who ever is doing a n/a to turbo swap.
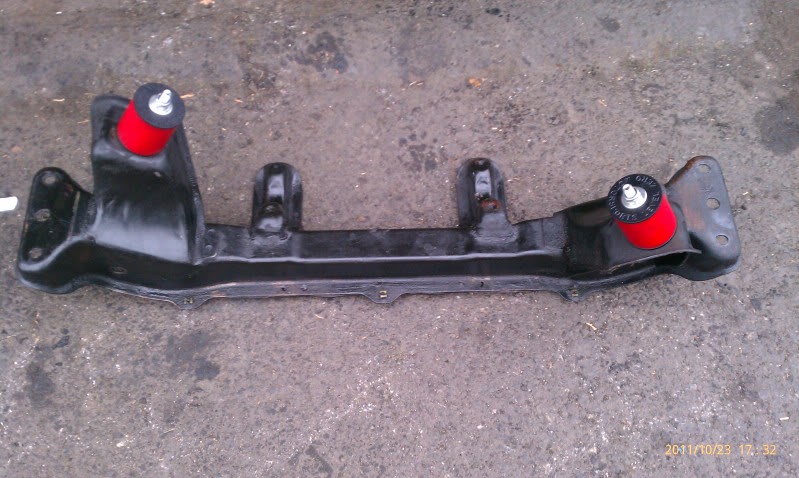
Crossmember with new engine mounts! Looks dope!
So im currently to the point where the engine is ready to drop in once the crossmember is swapped and bushings changed. Few more hours of work. Most likely first start up will be sometime sunday or late saturday. I also purchased another drivers side exhaust manifold and wastegate with mounting bracket. If its dropped in by this week ill surely be posting a vid. Tune in for next weeks update!
Original 26 year old clutch and pressure plate. The clutch looks like it got messed up real bad somehow towards the center of the outer ring. It was starting to slip really bad as well.
Here are the differences between the the n/a(left) and turbo(right) metal water pipes. The n/a one wont mount up properly so i had to use the turbo one. Just throwing it out there for who ever is doing a n/a to turbo swap.
Crossmember with new engine mounts! Looks dope!
So im currently to the point where the engine is ready to drop in once the crossmember is swapped and bushings changed. Few more hours of work. Most likely first start up will be sometime sunday or late saturday. I also purchased another drivers side exhaust manifold and wastegate with mounting bracket. If its dropped in by this week ill surely be posting a vid. Tune in for next weeks update!

Thread Starter
Registered User
Joined: Sep 2010
Posts: 303
From: Portland, OR
Day 15-17: Took monday off to work on my car hoping i was going to be able to drive it today. Nope..... Soo close tho....
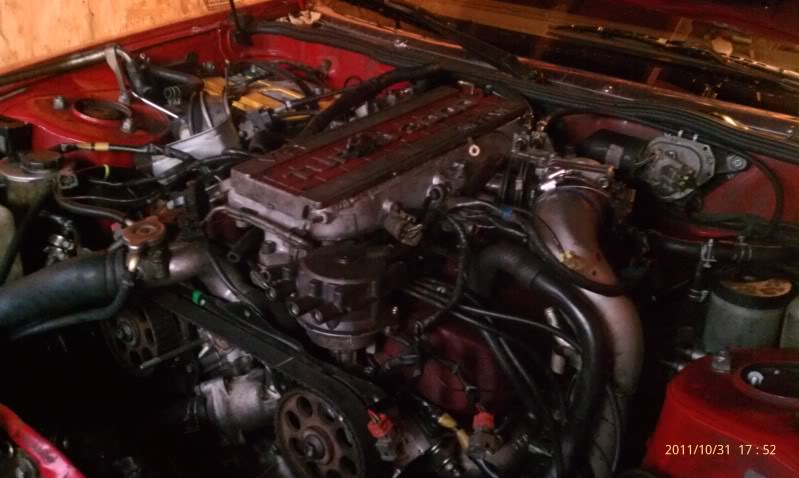
I got the engine and transmission together on saturday and put on a newer/nicer turbo exhaust manifold. I was also able to mount my new after market wastegate. Finding a way to mount it was horrible. Almost half assed it and left it hanging. I was able to find a bunch of washers and a longer screw to push out the mount further.

Hey, its mounted....
Got the engine in sunday night! Took about an hour with the help of my dad and uncle to get it in and mounted. The aftermarket poly engine mount screws would keep falling out if the nut was screwed in which was not going to work since the engine need to mount on them. My dad came up with the idea of cutting the finger part of a rubber glove and put it over the screw like a condom, then into the mount. It all held in place surprisingly well.
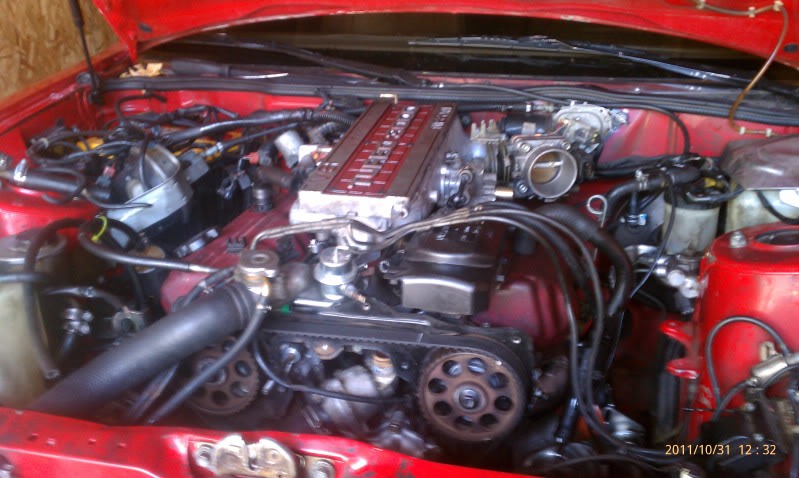
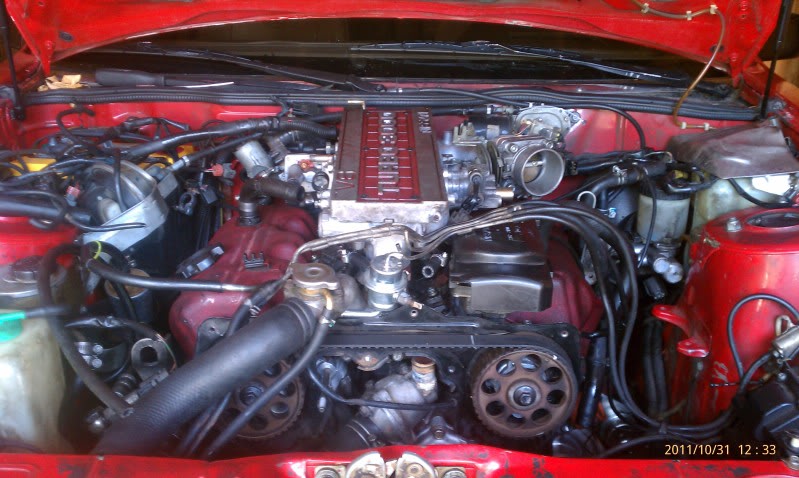
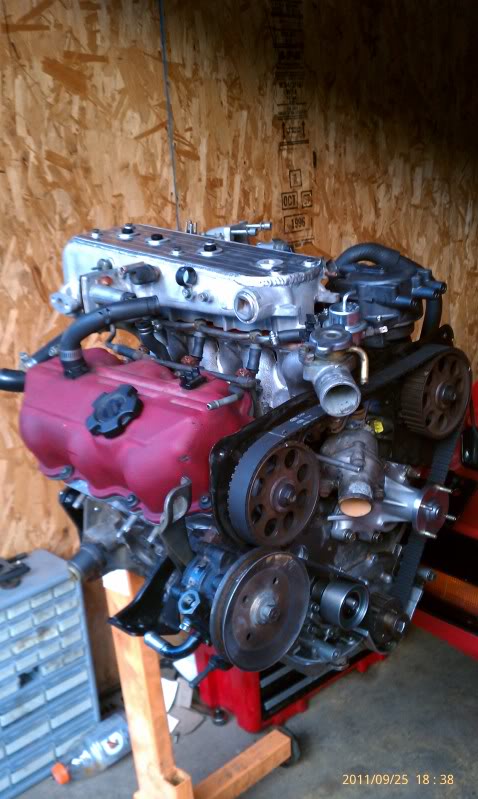
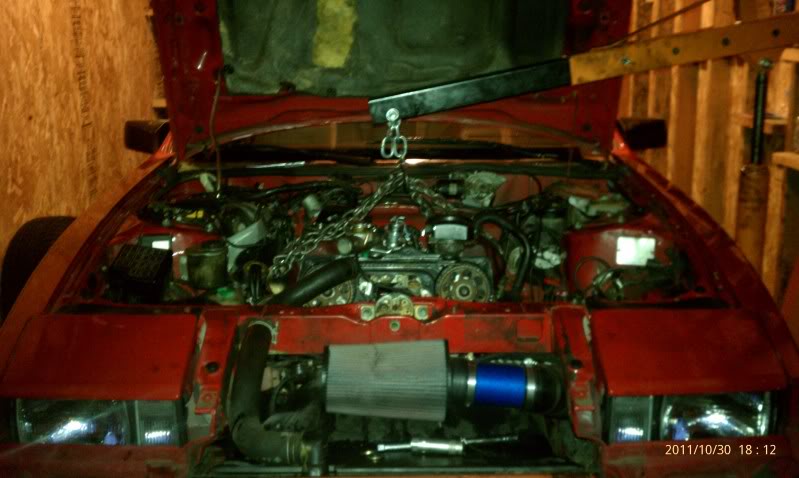
Today:Engine after putting the plenum on. Looks bad ***!
Thanks to nismopu and zachary .ard, I got most of the hooking up done today. I used up a lot of my time today getting little parts here and there and finding reducers for the turbo since i forgot it was larger and the stock s-pipe and intake dont fit anymore. Doh! I still have hopefully just 4 to 6 hours left before i can actually start it. I still have to install my new CM 3inch exhaust, boost gauge, alternator wiring, belts, some water hoses and a hand full of other things. Im also having trouble with which pigtail goes on which injector. I can promise thing time that i will have it up and running later this week or for sure the weekend! Next week start up vid!
I got the engine and transmission together on saturday and put on a newer/nicer turbo exhaust manifold. I was also able to mount my new after market wastegate. Finding a way to mount it was horrible. Almost half assed it and left it hanging. I was able to find a bunch of washers and a longer screw to push out the mount further.
Hey, its mounted....
Got the engine in sunday night! Took about an hour with the help of my dad and uncle to get it in and mounted. The aftermarket poly engine mount screws would keep falling out if the nut was screwed in which was not going to work since the engine need to mount on them. My dad came up with the idea of cutting the finger part of a rubber glove and put it over the screw like a condom, then into the mount. It all held in place surprisingly well.
Today:Engine after putting the plenum on. Looks bad ***!
Thanks to nismopu and zachary .ard, I got most of the hooking up done today. I used up a lot of my time today getting little parts here and there and finding reducers for the turbo since i forgot it was larger and the stock s-pipe and intake dont fit anymore. Doh! I still have hopefully just 4 to 6 hours left before i can actually start it. I still have to install my new CM 3inch exhaust, boost gauge, alternator wiring, belts, some water hoses and a hand full of other things. Im also having trouble with which pigtail goes on which injector. I can promise thing time that i will have it up and running later this week or for sure the weekend! Next week start up vid!
Last edited by Flacster; Nov 16, 2011 at 10:29 PM.


Thread Starter
Registered User
Joined: Sep 2010
Posts: 303
From: Portland, OR
Turns out not to be an exhaust leak. Just oil burning off.... Seems now that the car is overheating. Steam seems to develop inside and is building a lot of pressure. no idea what it is at this point. ive already put in plenty or coolent and checked the water lines.... guess i still wont be able to move it lol.

Registered User
Joined: Jul 2011
Posts: 68
Turns out not to be an exhaust leak. Just oil burning off.... Seems now that the car is overheating. Steam seems to develop inside and is building a lot of pressure. no idea what it is at this point. ive already put in plenty or coolent and checked the water lines.... guess i still wont be able to move it lol.
Thread Starter
Registered User
Joined: Sep 2010
Posts: 303
From: Portland, OR
So it is still overheating but not very much anymore. I think there is still a little bit of air left. I was about to drive it though so i can seat the piston rings. The car is extremely slow and dies if i press in the clutch when its above 2000rpm. For example, if i have it around 2500 rpm and im about to stop, I press in the clutch and go to neutral. The engines rpm would normally go back to 700-900rpm but instead dies and makes this weird sound. Sound almost sounds like gargling. Not sure if its because its new and maybe too stress full for the engine. Help please? Thanks
Registered User
Joined: Jul 2011
Posts: 68
So it is still overheating but not very much anymore. I think there is still a little bit of air left. I was about to drive it though so i can seat the piston rings. The car is extremely slow and dies if i press in the clutch when its above 2000rpm. For example, if i have it around 2500 rpm and im about to stop, I press in the clutch and go to neutral. The engines rpm would normally go back to 700-900rpm but instead dies and makes this weird sound. Sound almost sounds like gargling. Not sure if its because its new and maybe too stress full for the engine. Help please? Thanks
How does the car idle normally?
Thread Starter
Registered User
Joined: Sep 2010
Posts: 303
From: Portland, OR
it idles at 500-600rpm. i have the idle control and n/a wiring harness. I tried adjusting it but the screws on the idle control wont turn....
Last edited by Flacster; Nov 20, 2011 at 02:43 PM.
Registered User
Joined: Jul 2011
Posts: 68
Hmmm. Well turbo Nissans seem to be notorious for stalling when coming to astop. When my Sentra was boosted, if I didn't blip the gas when stopping it would stall every time. Even my Z31 I have to blip most the time. Try that and see if it works. Are you running a BOV by any chance?


