
Hey! Can I Get A Re-Do On That?


Thread Starter
Distinquished Guest
Joined: Aug 2003
Posts: 413
From: Old North State
Hey! Can I Get A Re-Do On That?
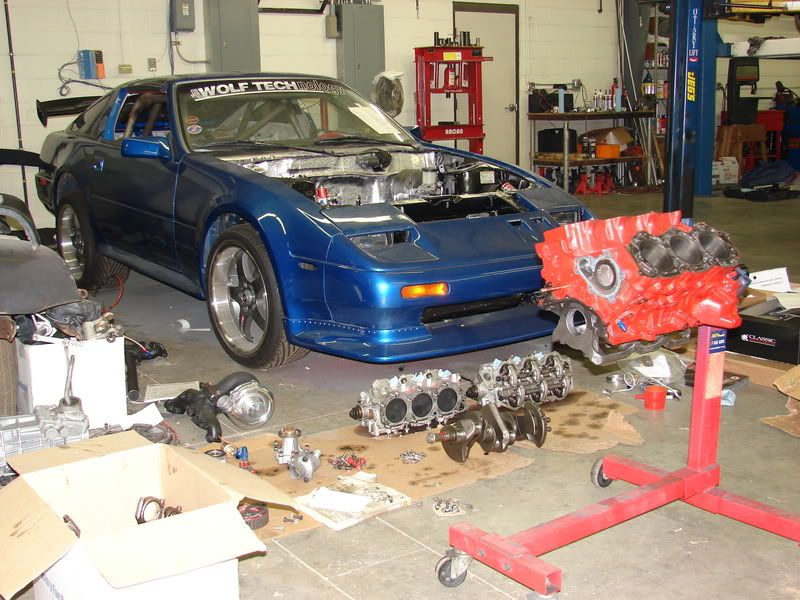
Some of you may recall, I built a neat little vg30. It ran decent (never dyno'd) making more power than a Borg-Warner T-5, or the rear tires could handle. However, there was a problem. I could never get the JWT setup to go stoic in the low rpm range. It was running so rich it would foul plugs in a minute, and wasn't very drivable. W.O.T. was fine. Anything less and gallons of unused fuel was being pumped into the cylinders. Bad! It was so bad the oil became contaminated with fuel which meant a lot of the fuel was getting past the rings. That's not good because the rings need some oil for lubrication and the gas was washing it away. I thought (correctly) I had discovered this issue prior to any real damage being done to the engine.
I had the engine out of the bay doing some other work to the car. When the work was done I decided to spruce up the engine a little before sitting it back in. I was removing the UR crank pulley to do some machine work to it and when I pulled on it I heard a nice little "clunk". My crank would move back and forth enough to make this noise. I measured the end play and found about .025 of movement. Now, I'm worried. Tolerance is suppose to be about half of that. It would seem a thrust washer may have failed.
I didn't build the short block, so, I hauled it back to the machine shop that did. I left it with them to "check and advise". A day later they called and told me the engine is fine, and that they built it to spec. Okay?? When I picked it up the end play had mysteriously disappeared. They said, �no charge, thank you, and, come again.� Odd. Maybe they�re covering their azz.
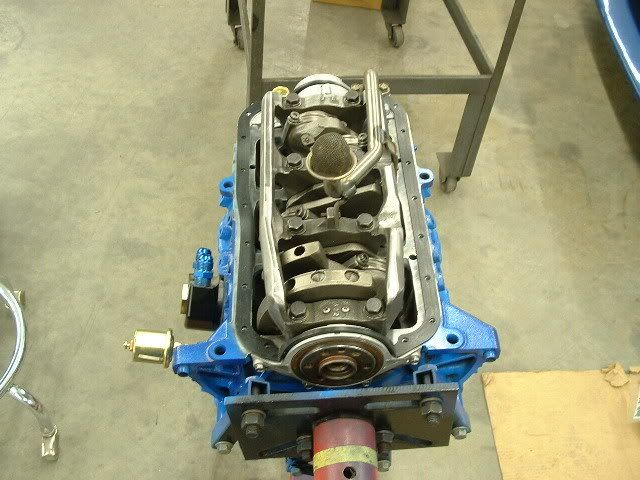
Well, I've come this far, so I decide to go ahead and freshen up the short block, just in case the gas had washed the oil off of something important and friction had done some damage. When I tore into it, everything looked good. It should have with only about 1200 miles on the last rebuild. None the less, I'm putting new rings and bearings in to be sure, and, I'm doing it myself. No more trusting machine shops for me, at least not with assembly task.
Here are a few pics of the progress, so far. This is fun.
Scattered: Where did I lay that bolt?
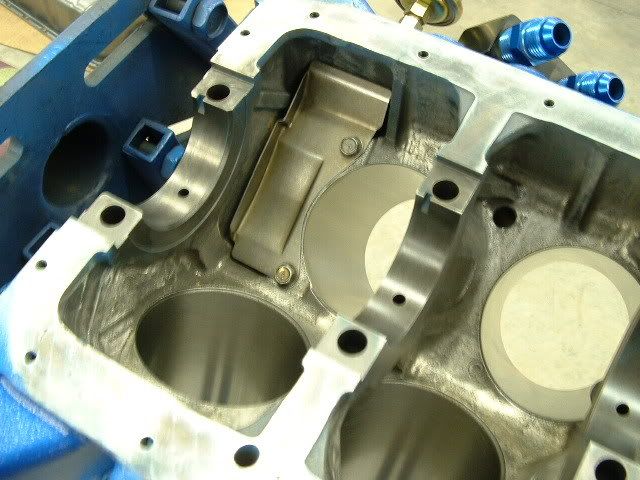
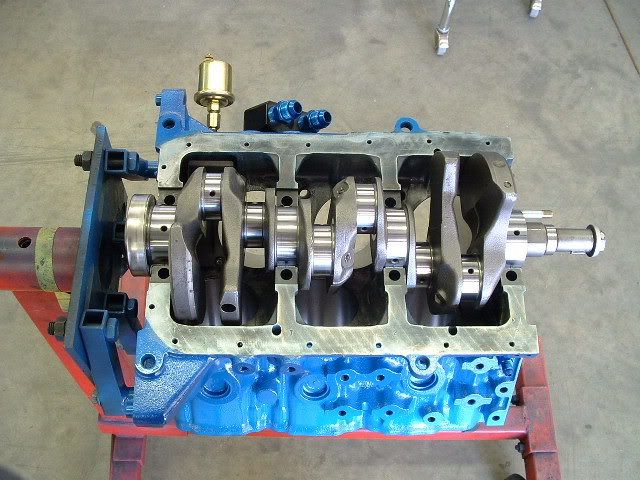
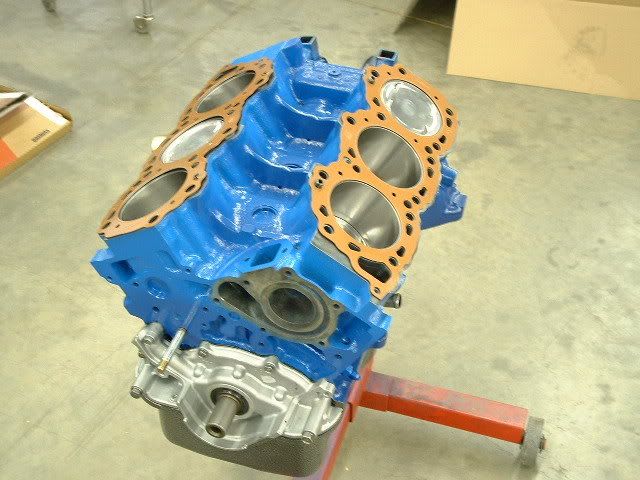
A Fresh Start: Nice and clean. I only needed to hone the cylinders.

Sanitary: It can't be too clean.
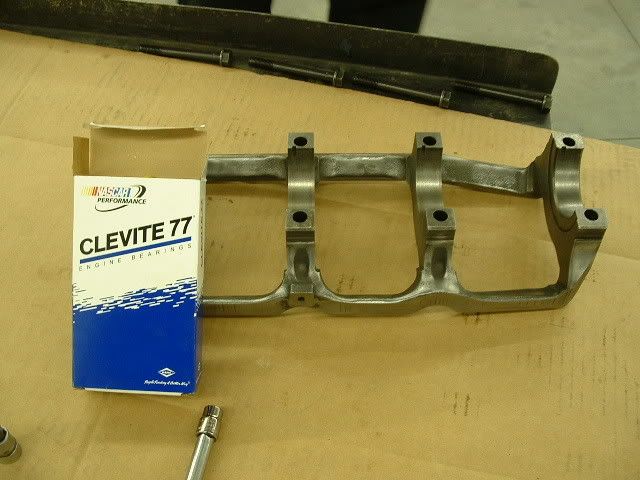
Nothing But The Good Stuff: By the way, did you know the Ford and Chevy folks have to go aftermarket to get a girdle like this for their engines? Another example of great Nissan engineering.
A Front Main Bearing: For those who haven't had the pleasure.
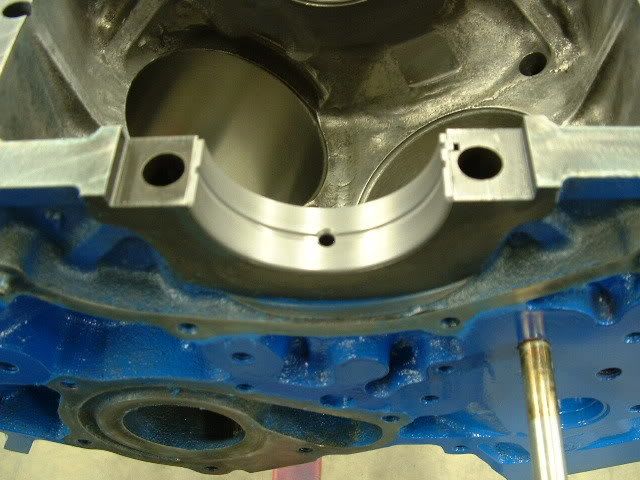
Crank in Place: Considered knife edging, but, then considered how else I might use $1,500. No Thanks.
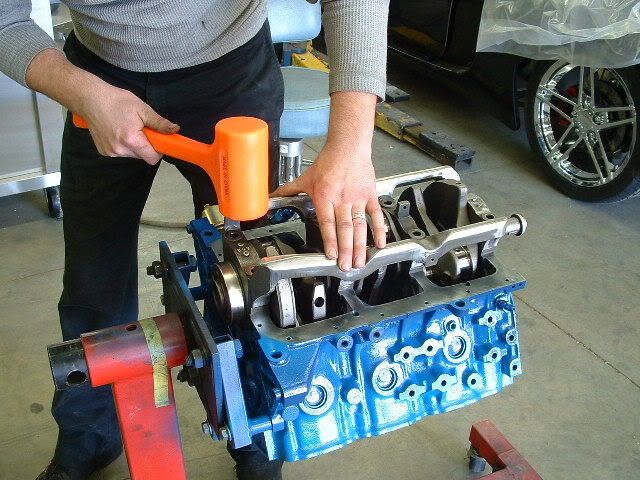
Main Bearing Caps / Girdle Going In Place: If it don't fit, use a big ol' hammer.
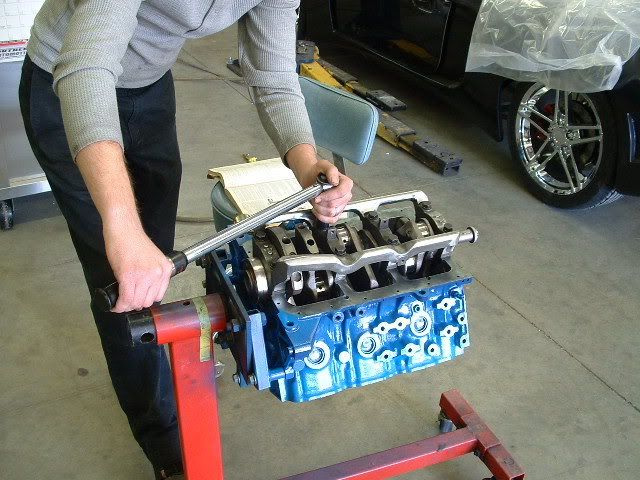
Click: That took more torque than a Honduh makes.
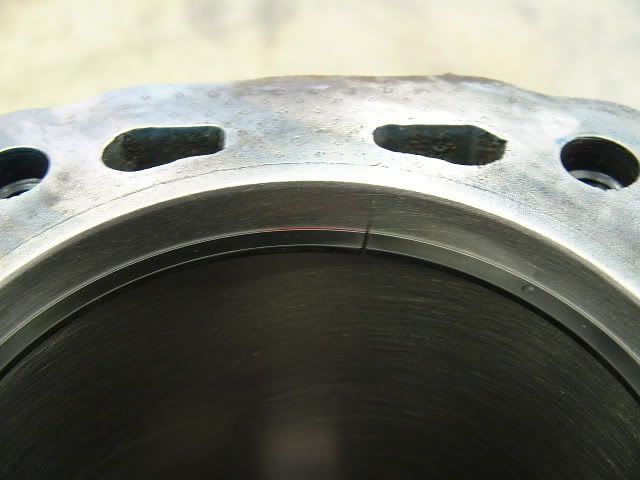
Perfect End Gap .017, no more, no less.
I'll post more later. There is some rule about only ten pics per post. Stay tuned.
I had the engine out of the bay doing some other work to the car. When the work was done I decided to spruce up the engine a little before sitting it back in. I was removing the UR crank pulley to do some machine work to it and when I pulled on it I heard a nice little "clunk". My crank would move back and forth enough to make this noise. I measured the end play and found about .025 of movement. Now, I'm worried. Tolerance is suppose to be about half of that. It would seem a thrust washer may have failed.
I didn't build the short block, so, I hauled it back to the machine shop that did. I left it with them to "check and advise". A day later they called and told me the engine is fine, and that they built it to spec. Okay?? When I picked it up the end play had mysteriously disappeared. They said, �no charge, thank you, and, come again.� Odd. Maybe they�re covering their azz.
Well, I've come this far, so I decide to go ahead and freshen up the short block, just in case the gas had washed the oil off of something important and friction had done some damage. When I tore into it, everything looked good. It should have with only about 1200 miles on the last rebuild. None the less, I'm putting new rings and bearings in to be sure, and, I'm doing it myself. No more trusting machine shops for me, at least not with assembly task.
Here are a few pics of the progress, so far. This is fun.
Scattered: Where did I lay that bolt?
A Fresh Start: Nice and clean. I only needed to hone the cylinders.
Sanitary: It can't be too clean.
Nothing But The Good Stuff: By the way, did you know the Ford and Chevy folks have to go aftermarket to get a girdle like this for their engines? Another example of great Nissan engineering.
A Front Main Bearing: For those who haven't had the pleasure.
Crank in Place: Considered knife edging, but, then considered how else I might use $1,500. No Thanks.
Main Bearing Caps / Girdle Going In Place: If it don't fit, use a big ol' hammer.
Click: That took more torque than a Honduh makes.
Perfect End Gap .017, no more, no less.
I'll post more later. There is some rule about only ten pics per post. Stay tuned.

Thread Starter
Distinquished Guest
Joined: Aug 2003
Posts: 413
From: Old North State
Work continues. I�m having so much fun it�s hard to think of it as work. It is beginning to look like the real deal now.
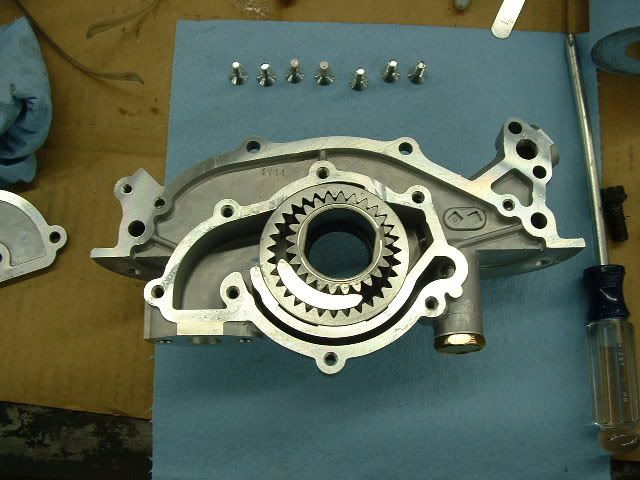
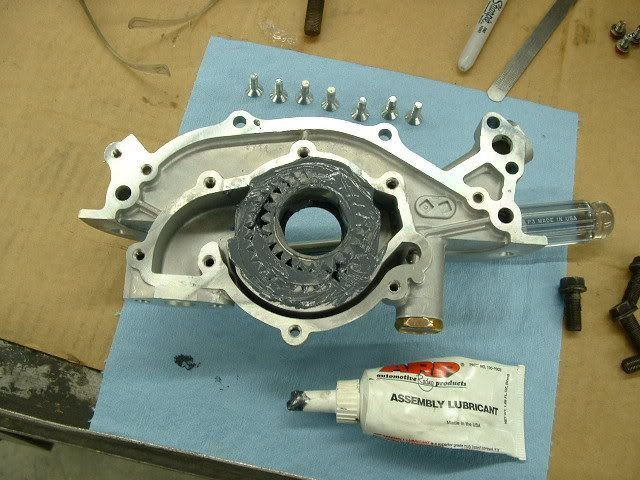
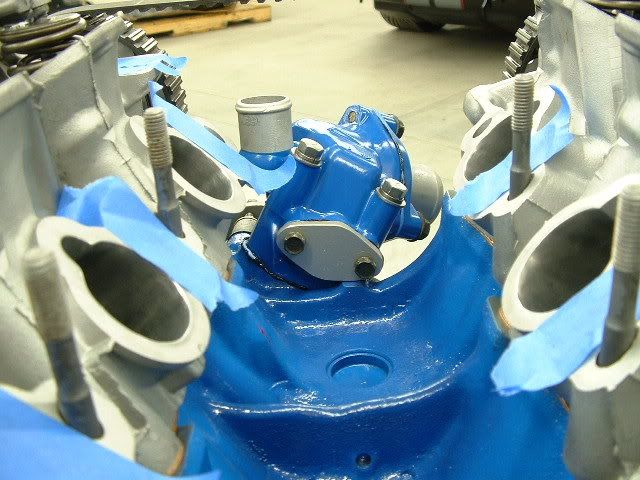
A New Melling Oil Pump I swear they ground "Nissan" off of the front of the housing. Using a pump for a turbo automatic because I recall reading somewhere they pumped a little stronger.
Packed With Assembly Lube: They are dry out of the box.
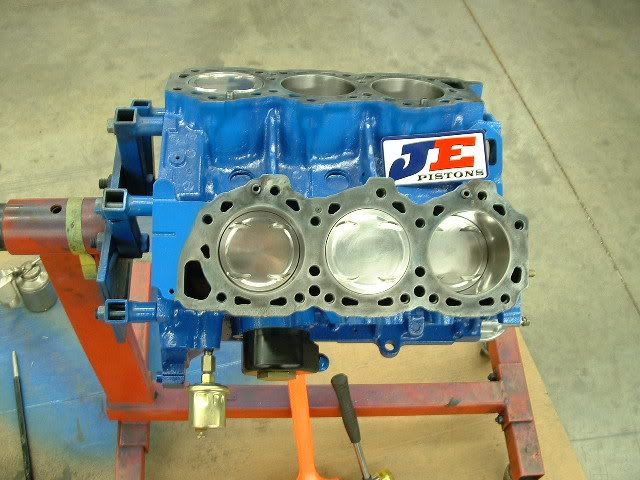
J&E Pistons and Rings: My old pistons, new rings.
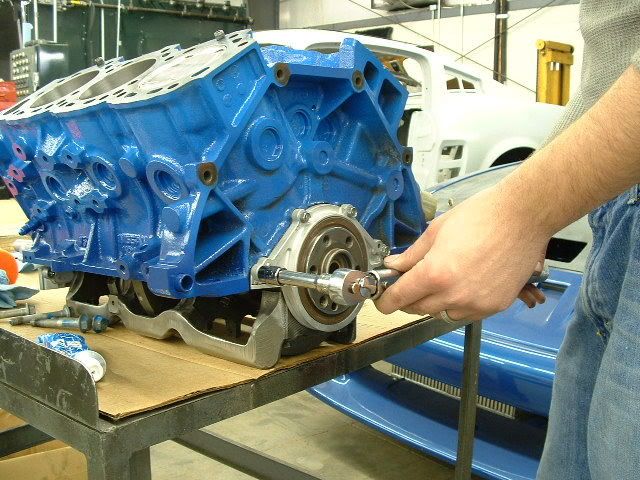
Rear Main Seal: Had to transfer from the engine stand to the operating table for that procedure.
Back To The Engine Stand: Time to install the oil pick-up.
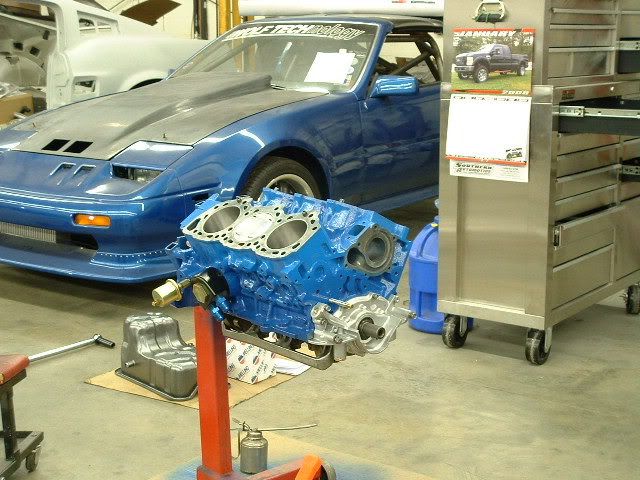
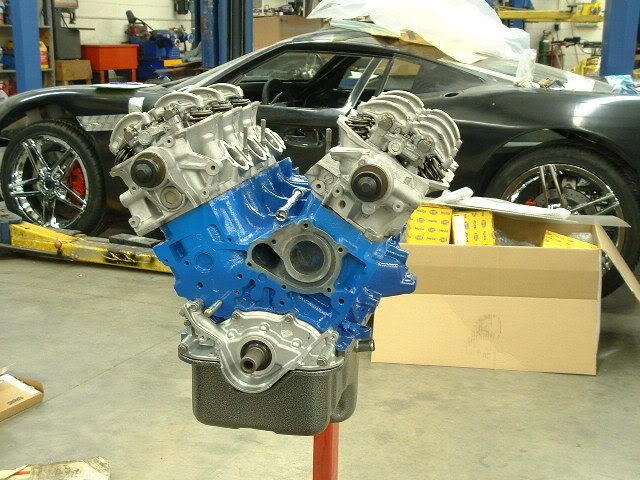
Beginning To Resemble An Engine, Again:
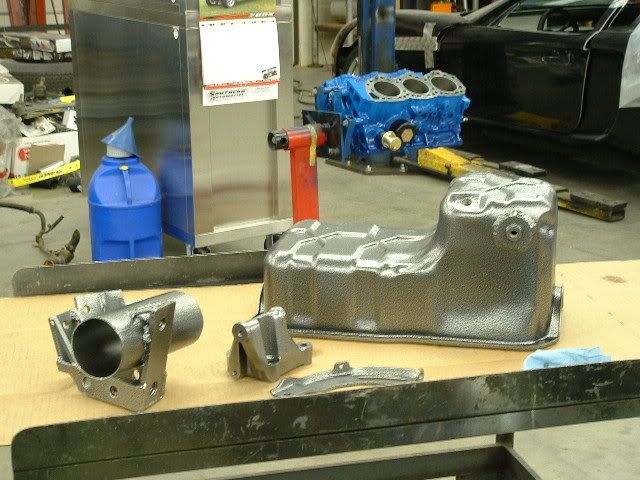
Some Parts I Powder-coated "Nickle Vein": Anybody wanna' guess what that thing is on the left side of the table?
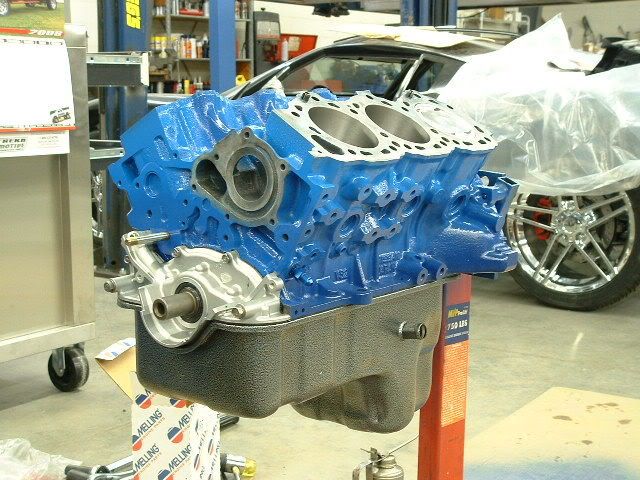
Oil pan On Pretty.
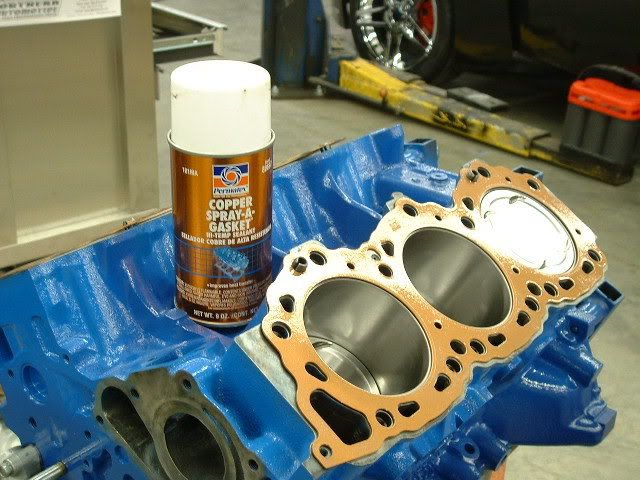
Copper Head Gaskets? Not.
Copper Coated: Yes. Good stuff.
I've bumped that ten photo limit again. Stay tuned for more.
A New Melling Oil Pump I swear they ground "Nissan" off of the front of the housing. Using a pump for a turbo automatic because I recall reading somewhere they pumped a little stronger.
Packed With Assembly Lube: They are dry out of the box.
J&E Pistons and Rings: My old pistons, new rings.
Rear Main Seal: Had to transfer from the engine stand to the operating table for that procedure.
Back To The Engine Stand: Time to install the oil pick-up.
Beginning To Resemble An Engine, Again:
Some Parts I Powder-coated "Nickle Vein": Anybody wanna' guess what that thing is on the left side of the table?
Oil pan On Pretty.
Copper Head Gaskets? Not.
Copper Coated: Yes. Good stuff.
I've bumped that ten photo limit again. Stay tuned for more.
Thread Starter
Distinquished Guest
Joined: Aug 2003
Posts: 413
From: Old North State
Originally Posted by AZ-ZBum
solid pass through motor mount.
Damn that looks nice John. Very cool.
Damn that looks nice John. Very cool.
Tell Ken he has great ideas.
Last edited by johnZboy; Jan 15, 2008 at 06:57 PM.

Thread Starter
Distinquished Guest
Joined: Aug 2003
Posts: 413
From: Old North State
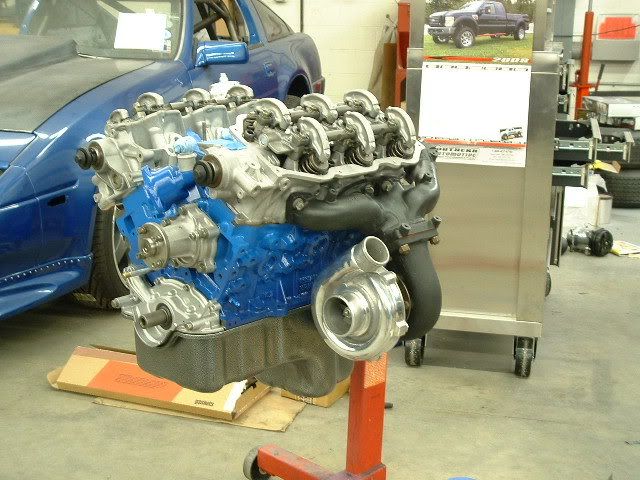
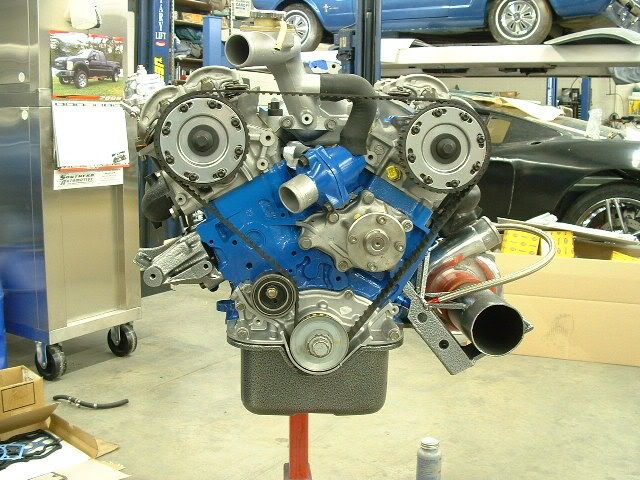
I bolted on the heads, the exhaust manifolds, and installed the timing belt tonight. Hot-Rods kill a bunch of time, and even more money, but, yippee-ky-yeah they are what makes me happy.
A Little Bling: The casting is by Nissan. The rest is from Schneider.
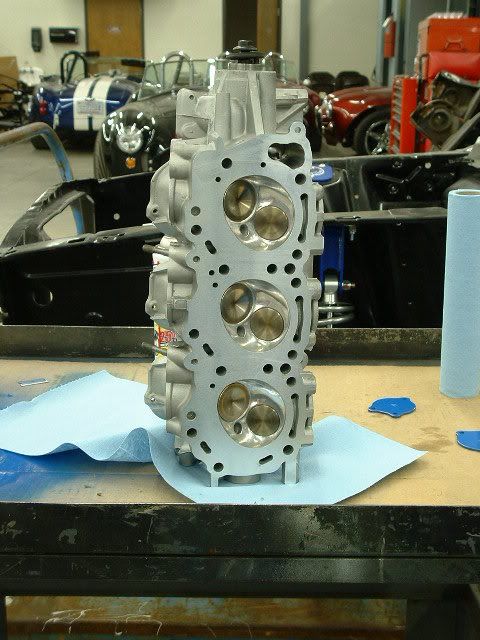
These Little Engine Have An Awesome Profile: Big heads
A Little More Bling: Garrett T3 TO4E 60 trim.
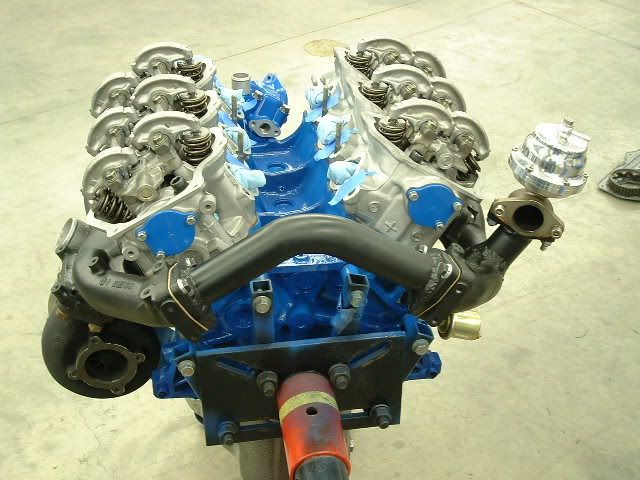
EGR Valve: Well, it is. Not what CARB would like to see, though.

I made This: Nothing real special, but it weighs 25% of what the OEM crossover does, and should flow a lot better. The manifolds, crossover, and turbine are treated with HPC Extreme Coating and is suppose to withstand 2,200*F. We'll see.
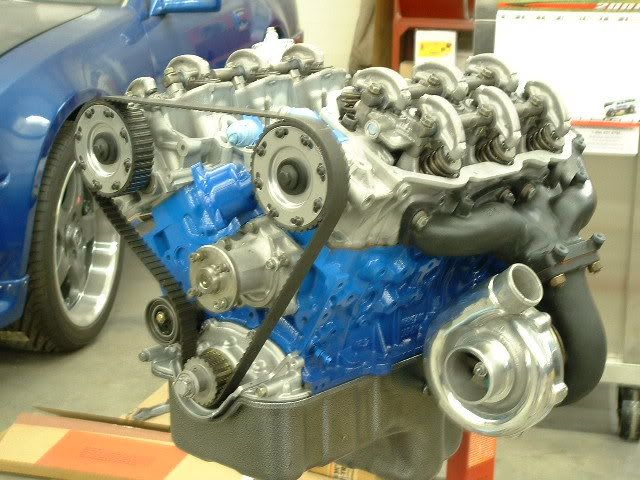
Adjustable Timing Gears: Thank you Russ.
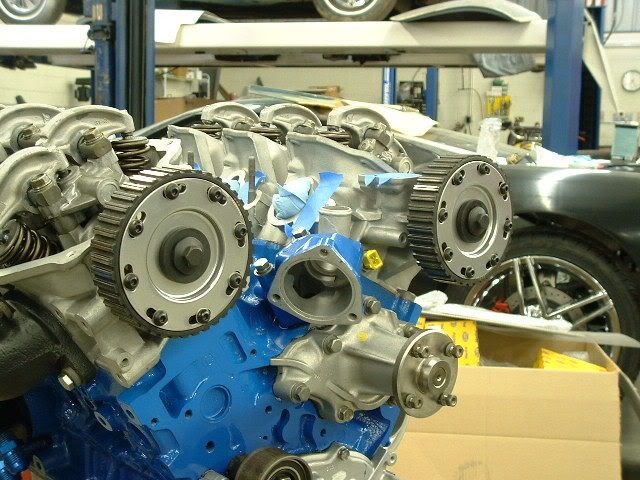
Timing Belt Installed: No cover or back plate on this engine. I know better than to stick my fingers in there.
A Drop In Back Plate: Put it in place to obtain the cam timing marks, then lift it out when you're done.

Will post more later. Stay tuned. Good night.
A Little Bling: The casting is by Nissan. The rest is from Schneider.
These Little Engine Have An Awesome Profile: Big heads
A Little More Bling: Garrett T3 TO4E 60 trim.
EGR Valve: Well, it is. Not what CARB would like to see, though.
I made This: Nothing real special, but it weighs 25% of what the OEM crossover does, and should flow a lot better. The manifolds, crossover, and turbine are treated with HPC Extreme Coating and is suppose to withstand 2,200*F. We'll see.
Adjustable Timing Gears: Thank you Russ.
Timing Belt Installed: No cover or back plate on this engine. I know better than to stick my fingers in there.
A Drop In Back Plate: Put it in place to obtain the cam timing marks, then lift it out when you're done.
Will post more later. Stay tuned. Good night.
Last edited by johnZboy; Jan 16, 2008 at 05:04 AM.

Stupid Hurricanes...
Joined: Jun 2007
Posts: 1,481
From: louisiana
Man i love it...been thinking really hard between another l28 build or a vg build. i love everything about the vg and you just got me more fired up about it. MUST HAVE MORE PICS...what management system you going to run?

Registered User
Joined: Jan 2005
Posts: 1,396
From: Phoenix, Arizona
Originally Posted by johnZboy
Lucky guess?
Tell Ken he has great ideas.
Tell Ken he has great ideas.

And I'll tell him next time I see him. But after a few other people saw and tried (and usually succeeded), I think he knows.
Thread Starter
Distinquished Guest
Joined: Aug 2003
Posts: 413
From: Old North State
Originally Posted by 260zturbo
Man i love it...been thinking really hard between another l28 build or a vg build. i love everything about the vg and you just got me more fired up about it. MUST HAVE MORE PICS...what management system you going to run?

The Good Twin
Joined: Aug 2005
Posts: 20,639
From: Wild Wild West, UTAH!
Originally Posted by johnZboy
After my experience with the Jim Wolf Technology "Sport 450" Package I could not recommend it to anyone.
Thread Starter
Distinquished Guest
Joined: Aug 2003
Posts: 413
From: Old North State
This will be the last of the pics I post in this thread. It is taking a long time to load and my ISP connection is pretty fast. I should have some mercy on the dial ups and DSL users.
Flow-Thru Engine Mount: A dude named Ken in Arizona thought this one up a few years ago. Mine is probably the eleventeenth version of the concept. If it can stand the pressure I'll have a nice Cobra-Head for sale.
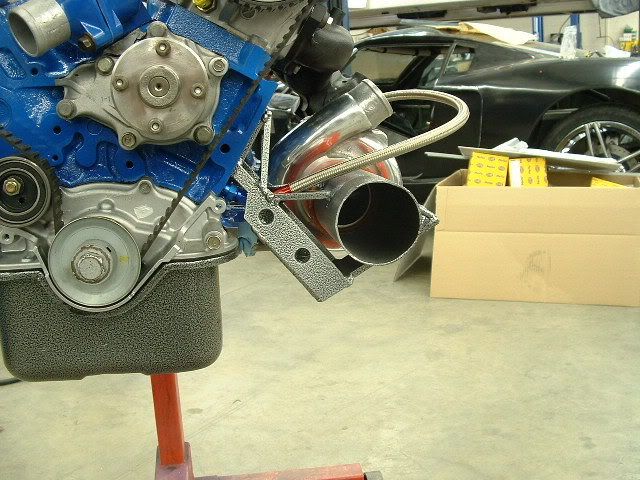
The Geometry Is Dead On: It will bolt in. I hope it will stay in.

If This Works, I'm Going Into Bridge Building: I probably overkilled on the supports and gussets.
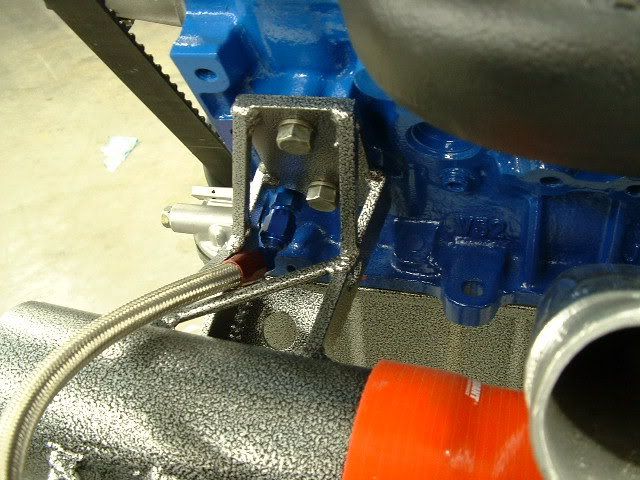
No Heater: No need for a hot water pipe. Gate closed.
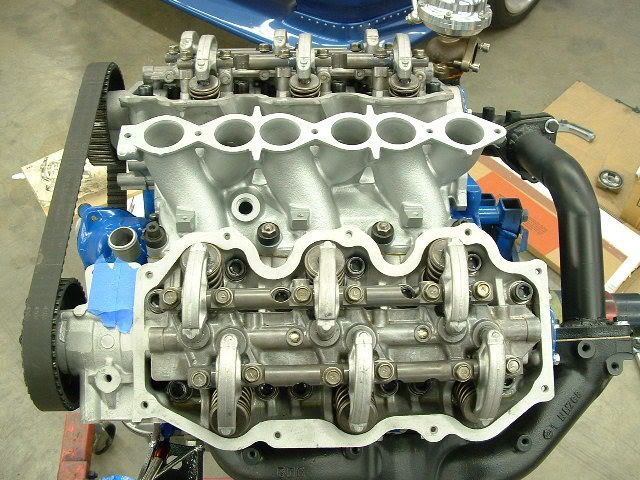
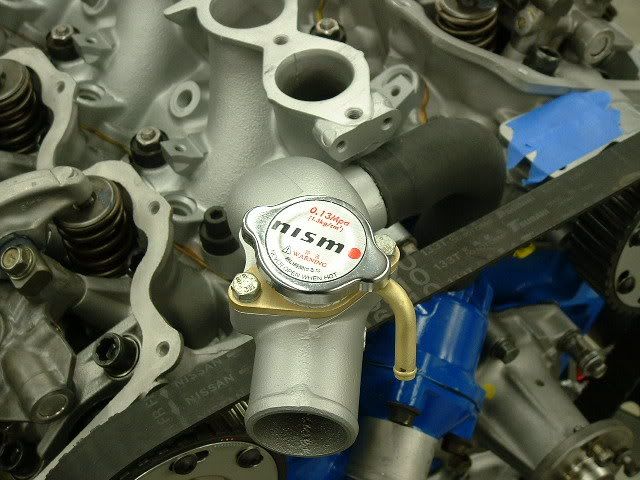
Lower Intake Installed: Nothing special except the enlarged and re-tapped water temperature sensor bung. My aftermarket gauge sensor wouldn't fit in the Nissan's hole.
A Little Bling: This also increases the RWHP in direct proportion to the gullibility of the viewer.
This Is All For Now: I have a few loose ends, like the rocker covers and upper intake, to finish and I can hoist it into the car. Watch for a new thread.
Flow-Thru Engine Mount: A dude named Ken in Arizona thought this one up a few years ago. Mine is probably the eleventeenth version of the concept. If it can stand the pressure I'll have a nice Cobra-Head for sale.
The Geometry Is Dead On: It will bolt in. I hope it will stay in.
If This Works, I'm Going Into Bridge Building: I probably overkilled on the supports and gussets.
No Heater: No need for a hot water pipe. Gate closed.
Lower Intake Installed: Nothing special except the enlarged and re-tapped water temperature sensor bung. My aftermarket gauge sensor wouldn't fit in the Nissan's hole.
A Little Bling: This also increases the RWHP in direct proportion to the gullibility of the viewer.
This Is All For Now: I have a few loose ends, like the rocker covers and upper intake, to finish and I can hoist it into the car. Watch for a new thread.
Thread Starter
Distinquished Guest
Joined: Aug 2003
Posts: 413
From: Old North State
Originally Posted by snwbrderphat540
hey whats that car in the background???? i dont know WHY i cant figure out what it is but i just cant....
It is the GTM, which is a kit car sold by FactoryFiveRacing. Have fun learning about it.

�ber User
Joined: Sep 2005
Posts: 9,532
From: lemont, Illinois
ahhh, at least i know im not going crazy and cant identify cars. ive actually seen this car factoryfive is pretty amazing, i saw it on some sort of streetfire or sema episode of some sort, pretty damn cool.

Registered User
Joined: Jan 2008
Posts: 2
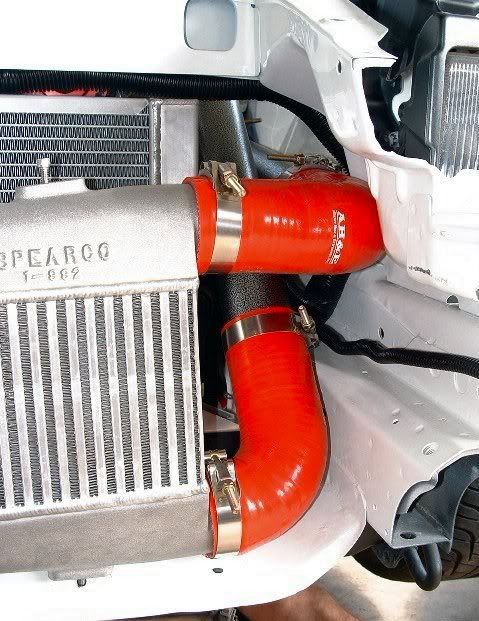
I noticed your FMIC pop up in one of the later pics: http://img.photobucket.com/albums/v3...y/DSCF0030.jpg
Can you tell me how you routed the piping? Do the in/out both exit the same side out the end of the tanks, or the backside? Did you have problems getting around the bumper support?
I'm also using a 26"x12" vertical core, and briefly looked at how I was going to route the piping, but seemed to be a PITA.
Thread Starter
Distinquished Guest
Joined: Aug 2003
Posts: 413
From: Old North State
Originally Posted by Evil Z31
I noticed your FMIC pop up in one of the later pics: http://img.photobucket.com/albums/v3...y/DSCF0030.jpg
Can you tell me how you routed the piping? Do the in/out both exit the same side out the end of the tanks, or the backside? Did you have problems getting around the bumper support?
I'm also using a 26"x12" vertical core, and briefly looked at how I was going to route the piping, but seemed to be a PITA.
Can you tell me how you routed the piping? Do the in/out both exit the same side out the end of the tanks, or the backside? Did you have problems getting around the bumper support?
I'm also using a 26"x12" vertical core, and briefly looked at how I was going to route the piping, but seemed to be a PITA.
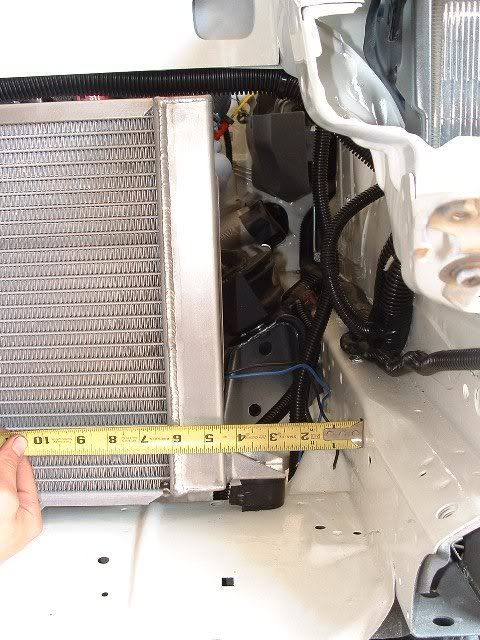
That left enough room to have lots of IC piping options.
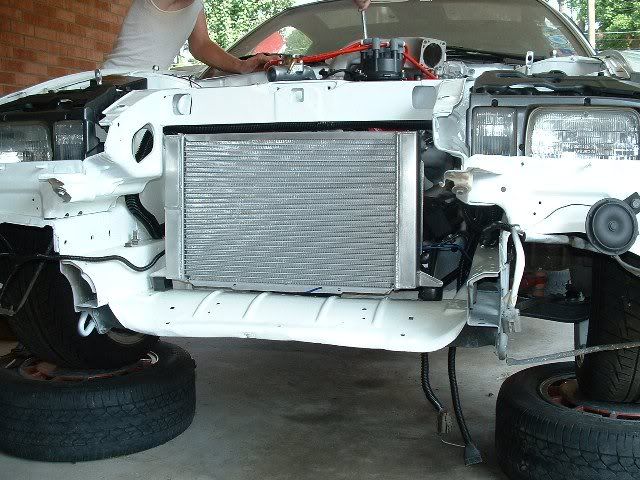
And, it worked out quite nicely.
I'm re-doing the entire car, but, some of the concepts remains the same.
Registered User
Joined: Jan 2008
Posts: 2
Ack! You cheater!
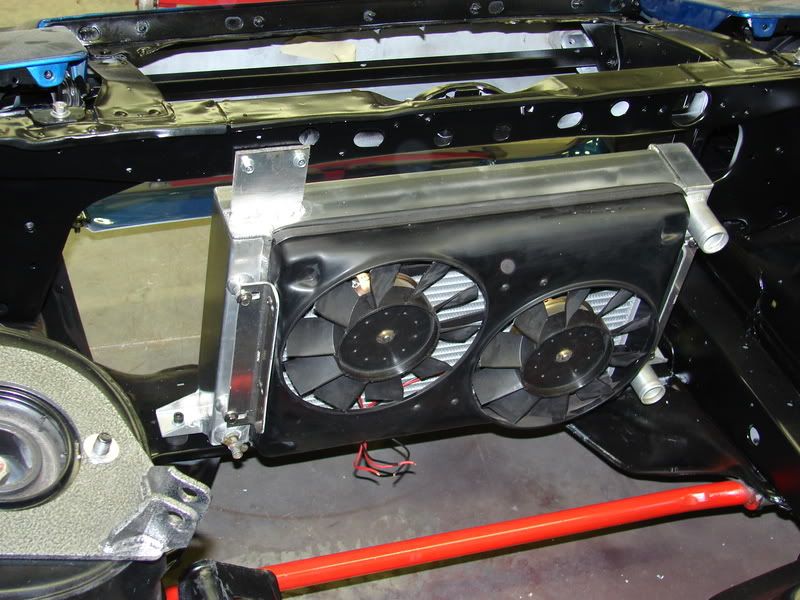
Unfortunately, I really didn't feel the need to upgrade the radiator since I have the Flex-a-lite dual fans that fit perfectly, and probably won't have cooling problems. I guess I need to find another way around then.
Unfortunately, I really didn't feel the need to upgrade the radiator since I have the Flex-a-lite dual fans that fit perfectly, and probably won't have cooling problems. I guess I need to find another way around then.


Registered User
Joined: Mar 2006
Posts: 88
From: Virgina Beach VA... From Gettysburg Pa org.
Wow you have an amazing set up going on there. I wish that I had the money or the space to do something like that. I love the idea of the flow through engine mount, and I like the way that radiator sits in there.
I was looking for an electric fan for mine but would you say switch out the radiator like that instead. Just so that when I put the FMIC on I have enough room to run the piping?
Great Job keep up the good work!
I was looking for an electric fan for mine but would you say switch out the radiator like that instead. Just so that when I put the FMIC on I have enough room to run the piping?
Great Job keep up the good work!

More Than Meets The Eye
Joined: Feb 2005
Posts: 5,120
From: Mesa, Az
Wow man, I have enjoyed reading, and looking at your pics in this thread. Good stuff dude, and you have my 2 favorite colors also. Blue and silver..  Looking forward to seeing more pics, and the completion of this sweet project. Major props bro'
Looking forward to seeing more pics, and the completion of this sweet project. Major props bro'


