
Default Completely Humbled (WoW!) 280ZX Rear Control Arm Bushing Removal - Pics!


Thread Starter
Registered User
Joined: Jan 2012
Posts: 26
From: Houston
Default Completely Humbled (WoW!) 280ZX Rear Control Arm Bushing Removal - Pics!
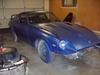
Well gang, back working on my ZXT after a very long hiatus and I guess the punishment for neglecting the old girl was received this weekend. For the most working on this car has been a delight and well within my abilities but this weekend I got my royal a $ $ handed to me . I dropped the entire rear sub frame, diff, axles, brakes and control arms to freshen everything up and install a Z31 LSD. Dropping the rear sub frame with everything connected was cake compared to removing the inner control arm metal sleeves in preparation to install a set of Poly Urethane bushings.
i am writing this thread to serve as a guideline to anyone who will be attempting this major ordeal.
Firstly you have to remove these sleeves to install the new Poly Urethane bushings, otherwise the new schmancy bushings will not fit. The metal sleeves are pressed into the control arms and after 30 years of harmony in the car have assumed a matrimonial union with the control arm.
Secondly you CANNOT use a hydraulic press to remove these sleeves, the hydraulic press will actually bend the control arm and distort them and completely screw up your car.
Thirdly you cannot use a puller or socket and a BF hammer either.
The *ONLY* way to remove these PITA things is to carefully and surgically cut them out in pieces.
You will need these basic tools:
1) A Sawzall with a good metal blade
2) Two chisels
3) 5 -7 lb sledge MC Hammer
4) MAP gas
5) Some PB Blaster
6) 23mm socket
7) Dremel with a cutting wheel
Here is the hell hath no fury metal sleeve that you have to dance with, in the picture below I have started making one longitudinal slice with my Sawzall

Then I made four longitudinal slices with my Sawzall, being ULTRA careful to not cut the control arm!

Afterwards using a Dremel I made one careful circumferential inner cut perpendicular to the Sawzall cuts:

Afterwards brute force with a Chisel and Sledge being careful to not damage the inner side of the control arm and remove the inner sleeve in pieces:

First inner piece removed below:

Four inner pieces removed below (this took almost 30 minutes to get to this point!)

Do the same on the opposing side and after remove the other side in four pieces, then spray PB Blaster and let it soak down behind the remaining section of inner sleeve which will be in the middle of the control arm and then heat the crap out of it with the MAP gas, after that you can take a 23mm socket and your handiest of dandiest Sledge MC Hammer and whack away until this mid section of sleeve pops out. It took me about 8-10 hours to remove just these sleeves!!! And very frustrating....so hope this helps y'all.

Grrr...I hate these:

Ready to be powder coated and then new Urethane bushings pressed in:

Like so:

My weekend:

All disassembled ready for new bushings, powder coat and new LSD!

Cheers - Yasin
i am writing this thread to serve as a guideline to anyone who will be attempting this major ordeal.
Firstly you have to remove these sleeves to install the new Poly Urethane bushings, otherwise the new schmancy bushings will not fit. The metal sleeves are pressed into the control arms and after 30 years of harmony in the car have assumed a matrimonial union with the control arm.
Secondly you CANNOT use a hydraulic press to remove these sleeves, the hydraulic press will actually bend the control arm and distort them and completely screw up your car.
Thirdly you cannot use a puller or socket and a BF hammer either.
The *ONLY* way to remove these PITA things is to carefully and surgically cut them out in pieces.
You will need these basic tools:
1) A Sawzall with a good metal blade
2) Two chisels
3) 5 -7 lb sledge MC Hammer
4) MAP gas
5) Some PB Blaster
6) 23mm socket
7) Dremel with a cutting wheel
Here is the hell hath no fury metal sleeve that you have to dance with, in the picture below I have started making one longitudinal slice with my Sawzall
Then I made four longitudinal slices with my Sawzall, being ULTRA careful to not cut the control arm!
Afterwards using a Dremel I made one careful circumferential inner cut perpendicular to the Sawzall cuts:
Afterwards brute force with a Chisel and Sledge being careful to not damage the inner side of the control arm and remove the inner sleeve in pieces:
First inner piece removed below:
Four inner pieces removed below (this took almost 30 minutes to get to this point!)
Do the same on the opposing side and after remove the other side in four pieces, then spray PB Blaster and let it soak down behind the remaining section of inner sleeve which will be in the middle of the control arm and then heat the crap out of it with the MAP gas, after that you can take a 23mm socket and your handiest of dandiest Sledge MC Hammer and whack away until this mid section of sleeve pops out. It took me about 8-10 hours to remove just these sleeves!!! And very frustrating....so hope this helps y'all.
Grrr...I hate these:
Ready to be powder coated and then new Urethane bushings pressed in:
Like so:
My weekend:
All disassembled ready for new bushings, powder coat and new LSD!
Cheers - Yasin


Big Poppa
Joined: Jan 2005
Posts: 4,499
From: Mission, British Columbia
there is a much easier way that i use all the time in the shop and at work when doing bushings. take the rubber out via force or just leave it. grab the air chisel with a punch type bit. you can just contact the metal edge of that bushing. then squeeze the trigger and watch as in seconds the whole bushing slides out and bends. little to no effort and you need a vise, bench, compressor and air chisel. its the way that its done because as you stated the control arm with bend like a pretzel if you try and press it out. sometimes i use a press or ball joint removal tool to get the rubber bushing out.
Thread Starter
Registered User
Joined: Jan 2012
Posts: 26
From: Houston
there is a much easier way that i use all the time in the shop and at work when doing bushings. take the rubber out via force or just leave it. grab the air chisel with a punch type bit. you can just contact the metal edge of that bushing. then squeeze the trigger and watch as in seconds the whole bushing slides out and bends. little to no effort and you need a vise, bench, compressor and air chisel. its the way that its done because as you stated the control arm with bend like a pretzel if you try and press it out. sometimes i use a press or ball joint removal tool to get the rubber bushing out.
Big Poppa
Joined: Jan 2005
Posts: 4,499
From: Mission, British Columbia
ill see what i can get out of the loft one day and do a how to write up. i have a selection of control arms incase i bend one and need one quick. the big thing is having the right tools like a powerful air chisel. a good one can even shear bolts with the correct tip on it.

Thread Starter
Registered User
Joined: Jan 2012
Posts: 26
From: Houston


Thread
Thread Starter
Forum
Replies
Last Post
Philbert
280ZX Brakes, Wheels, Suspension and Chassis
12
Oct 30, 2013 08:36 AM
NASHVILLEPHOTOG
240Z, 260Z, 280Z Brakes, Wheels, Suspension and Chassis
3
Dec 29, 2006 07:22 PM
BigEkak1941
280ZX Brakes, Wheels, Suspension and Chassis
3
Feb 18, 2005 03:07 PM
1artworkz
300ZX (Z31) Brakes, Wheels, Suspension and Chassis
1
Dec 15, 2004 05:45 PM
Bookmarks


