
280ZXT - wasn't going to be a project...


Thread Starter
Mr Z++ Wiki
Joined: Sep 2009
Posts: 2,195
From: Victoria, BC
280ZXT - wasn't going to be a project...
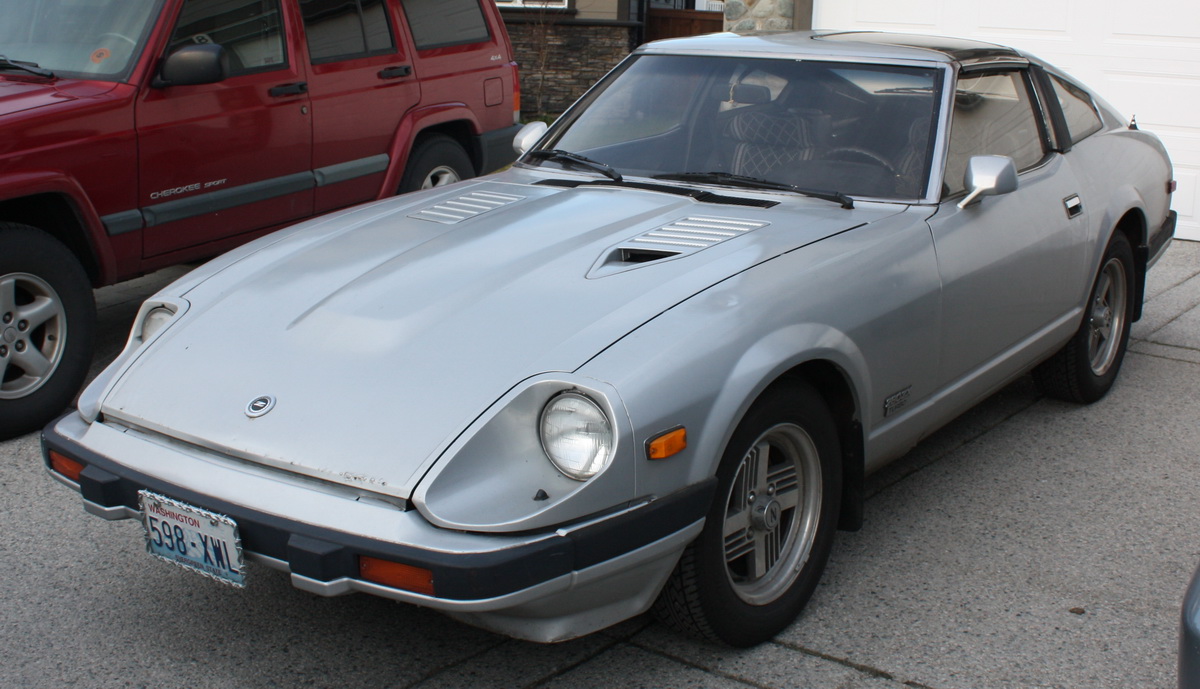
Finally found a 280ZXT 5 speed. I've wanted one for about 18 years now. She's a little rough but not too bad. I was going to use her as a test mule for my NA to Turbo swap on my NA S130 and that's still the plan but I got a little carried away on not fixing her up.
Here she is when I first picked her up.
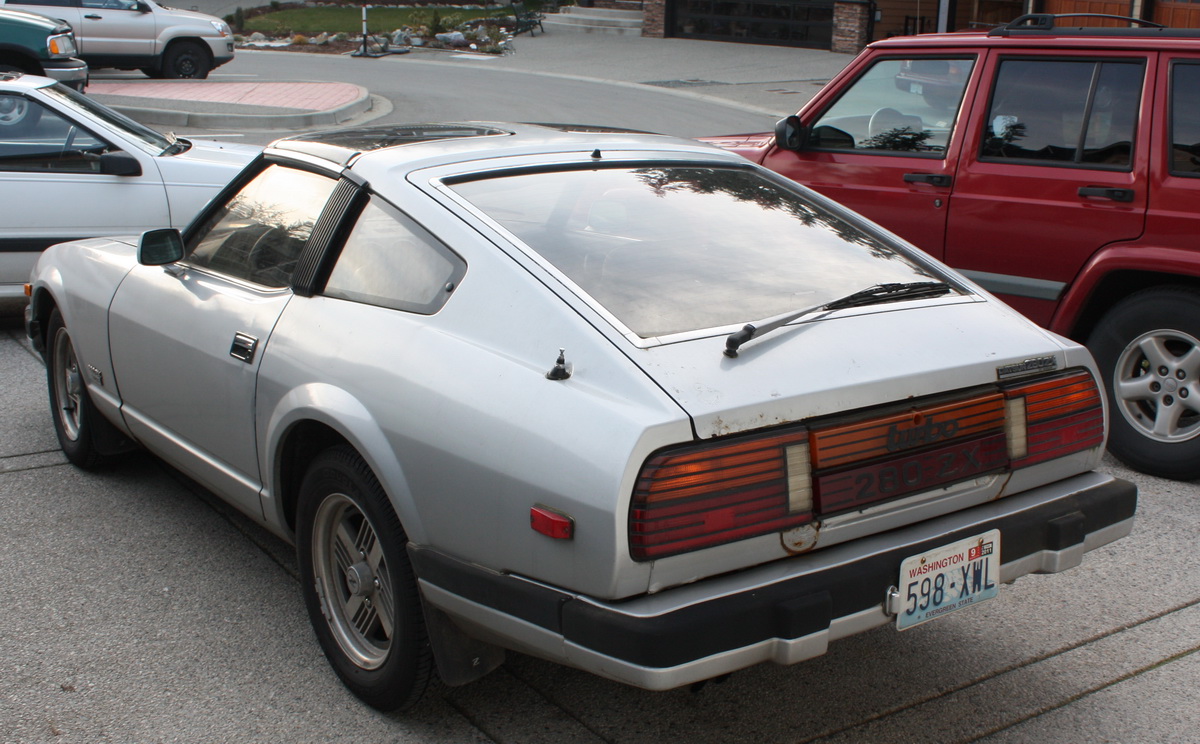
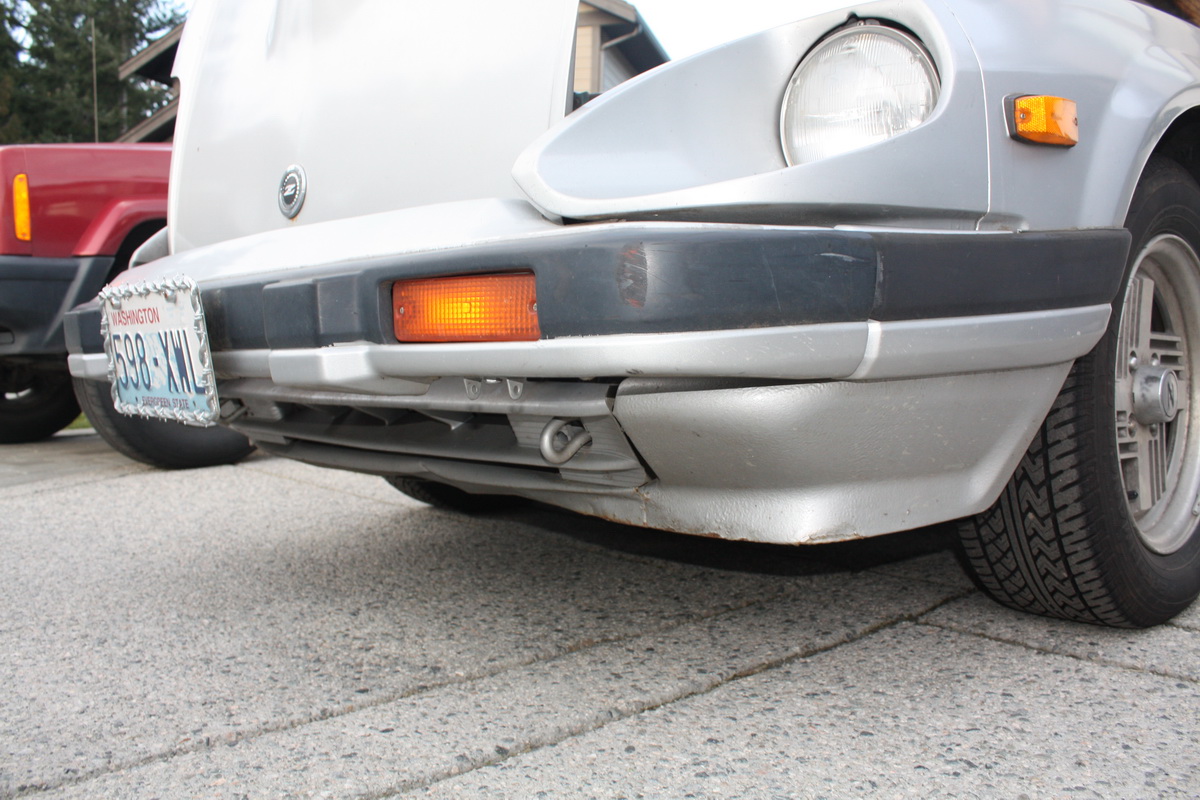
Rusty in the strangest spots - below the rear tail lights but solid in the spare tire well. The bottom of the hatch is really rusty but not a big deal - hatches are easy to find and a simple replacement.

Here she is when I first picked her up.
Rusty in the strangest spots - below the rear tail lights but solid in the spare tire well. The bottom of the hatch is really rusty but not a big deal - hatches are easy to find and a simple replacement.
Last edited by FricFrac; Jul 30, 2011 at 01:30 AM.

Registered User
Joined: May 2011
Posts: 44
From: Lincoln, NE
Dude looks just like mine cept i got a 3 tone silver going but same color you got basically, and i dont have the center lights in the middle of the rear area. but same wheels, and year. haha funny  SHE BEAUTIFUL
SHE BEAUTIFUL
Thread Starter
Mr Z++ Wiki
Joined: Sep 2009
Posts: 2,195
From: Victoria, BC
Lol my NA is in amazing condition so she's the keeper. She'll get the turbo engine I'm building but this one I'll use to test all the parts for the NA to Turbo swap including the MegaSquirt III setup, etc. I'd like to see how the shaved rear end looks and I've got some ideas for rear tail lights I think will look good. I've got the rear body panel I sawzalled off a rotten 280ZX that was solid so I can weld in the rear panel unless I decide to do something funky with the rear to mold in the new tail lights. I'll also change the rear end on the NA to the CV setup from the turbos.
I was just going to rip the carpets out of the 280ZXT since the interior was in shambles. Unfortunatley I didn't get a lot of great pictures before I ripped everything out. You can't really see the grey household carpet they used inside the car or the grey household carpet glued to the back panels, etc. The seats were grotesque under the covers. It was pretty musty too and there was a lot of green stuff growing on the outside of the car. I think she sat for a while. Anyhow ripping the carpets out lead to taking the underlay out. Then the sound dampening material. Then all the body panels.... then the well I guess I should post some pictures so you can see how I got a little side tracked with the interior....
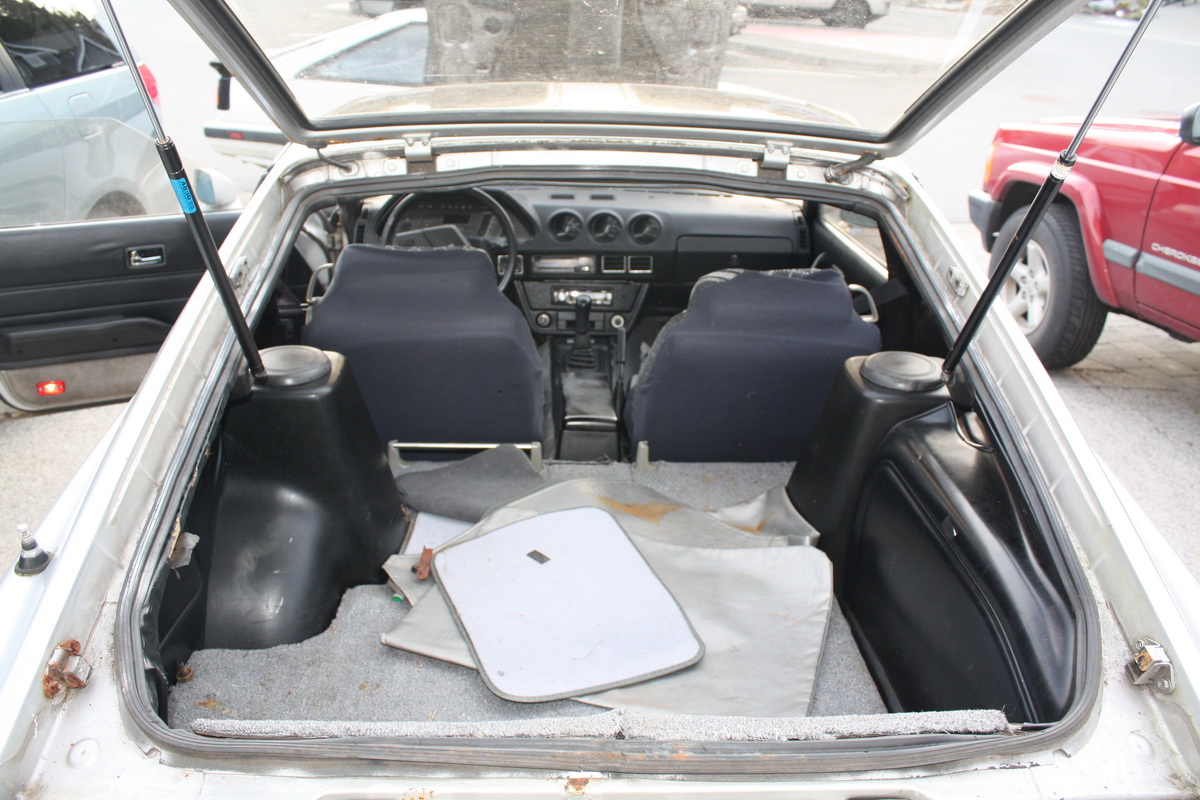
I was just going to rip the carpets out of the 280ZXT since the interior was in shambles. Unfortunatley I didn't get a lot of great pictures before I ripped everything out. You can't really see the grey household carpet they used inside the car or the grey household carpet glued to the back panels, etc. The seats were grotesque under the covers. It was pretty musty too and there was a lot of green stuff growing on the outside of the car. I think she sat for a while. Anyhow ripping the carpets out lead to taking the underlay out. Then the sound dampening material. Then all the body panels.... then the well I guess I should post some pictures so you can see how I got a little side tracked with the interior....
Thread Starter
Mr Z++ Wiki
Joined: Sep 2009
Posts: 2,195
From: Victoria, BC
If you really want the barbed wire LP frame reverse psychology isn't going to get it for you. Maybe we can work out a deal and then we'll discuss the "Z" mud flaps ;P

The Emblem Thief y0!
Joined: Aug 2009
Posts: 948
From: Tulsa, Ok


Thread Starter
Mr Z++ Wiki
Joined: Sep 2009
Posts: 2,195
From: Victoria, BC
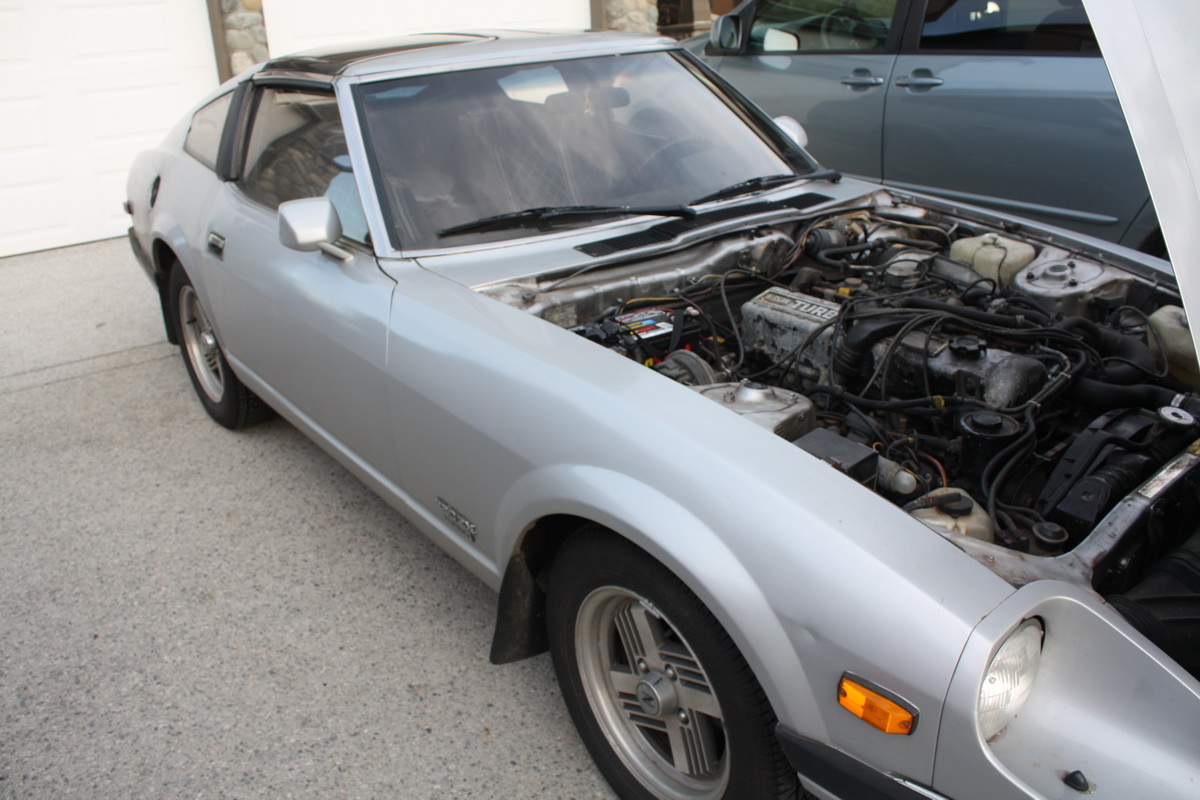
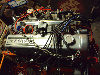
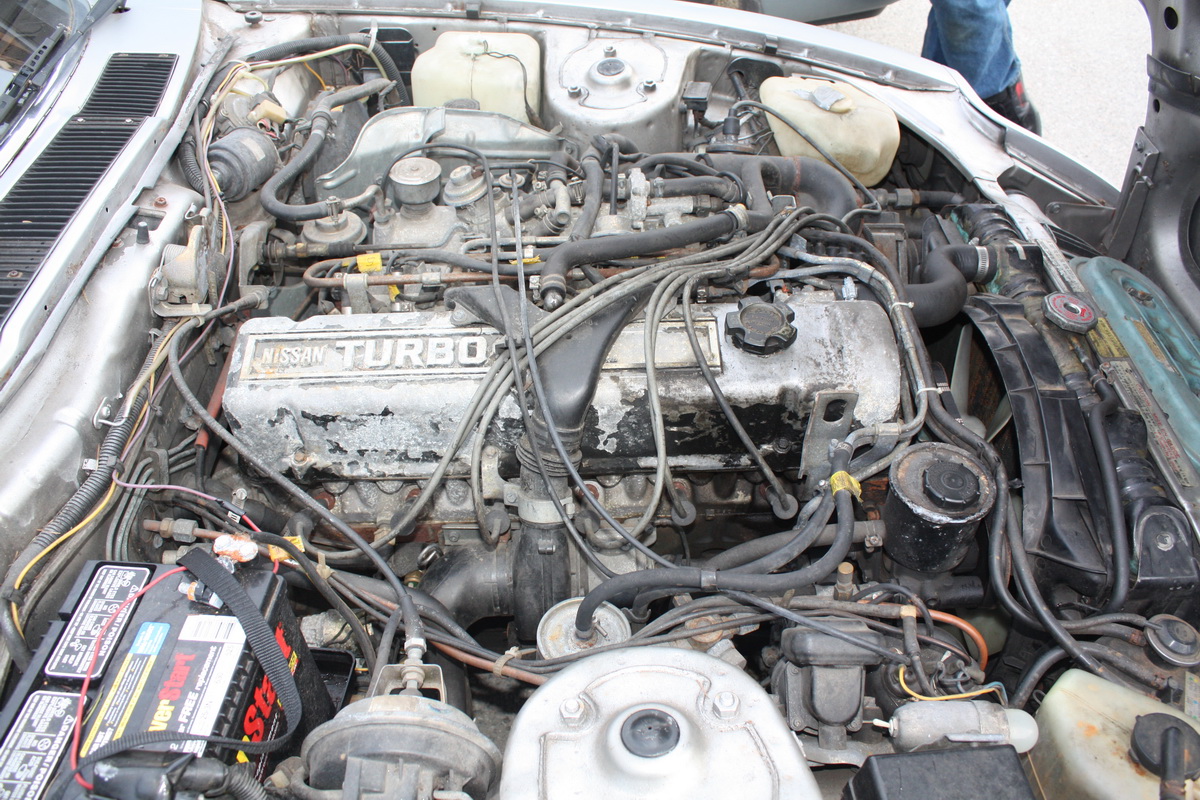
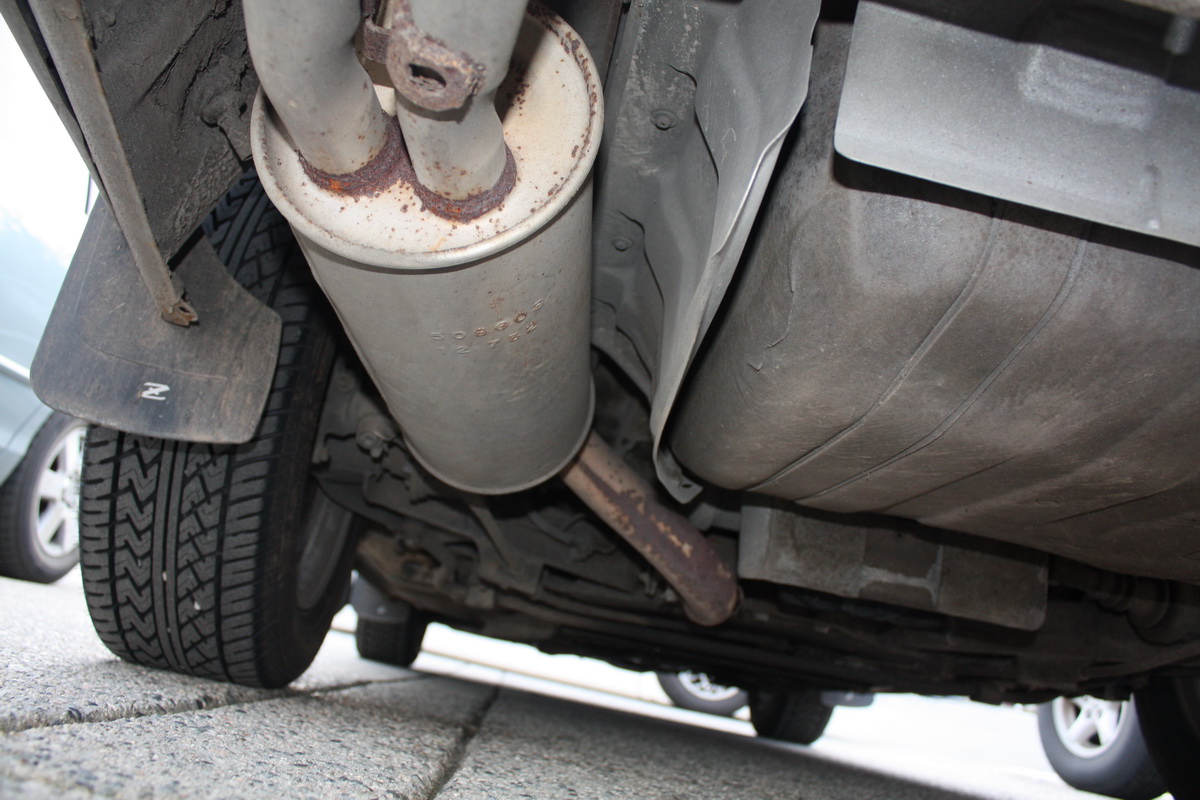
A little crusty in the engine bay. Now she has new plugs (rust free!), wires, cap, rotor, PVC valve, MSD coil, refurbished J-Pipe with DMS BOV until I get the intercooler setup installed. The "security" starter switch which was wired to the solenoid on the starter is a safety issue so that needed to be fixed (you can see the wires going from the battery through the firewall to a switch below the steering column). Turns out they were trying to bypass the broken ignition switch. New ignition switch installed. The reverse lights weren't working but the NC portion of the tranny switch was working so I hooked a relay up so the reverse lights work for the safety inspection.
Last edited by FricFrac; Jul 31, 2011 at 07:28 PM.
Thread Starter
Mr Z++ Wiki
Joined: Sep 2009
Posts: 2,195
From: Victoria, BC
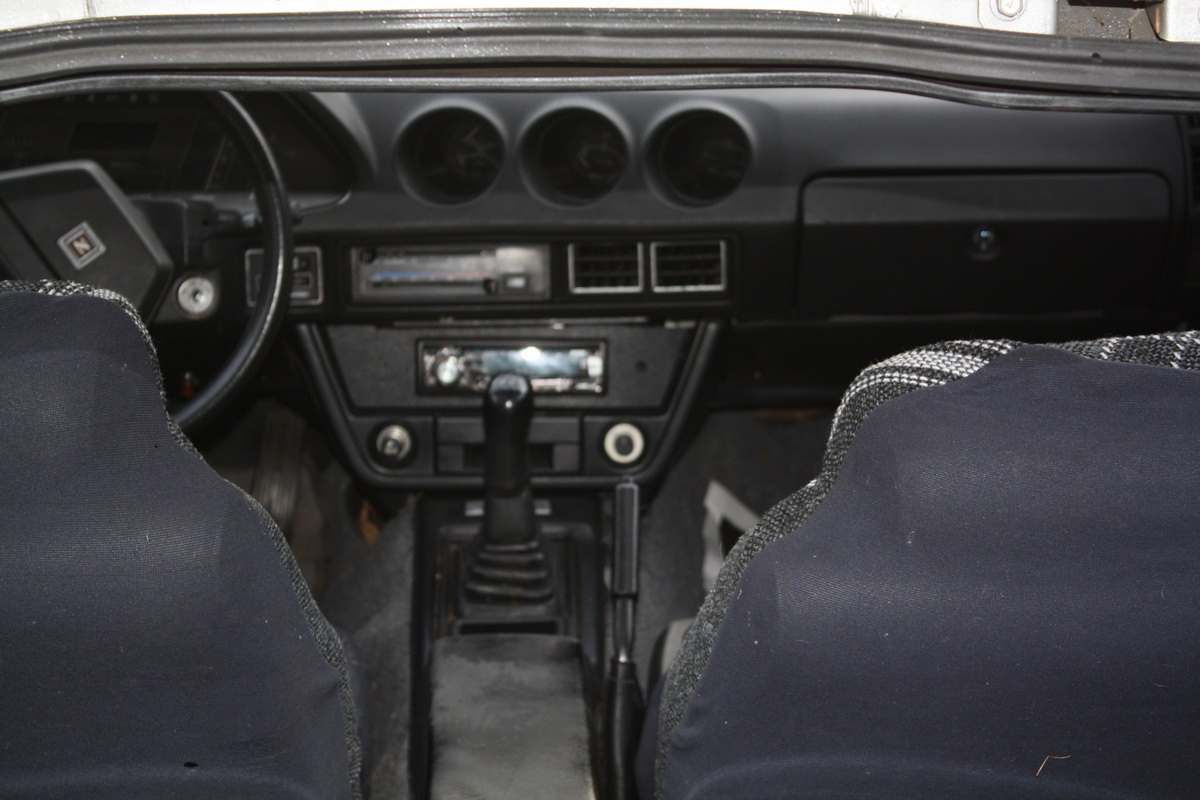
I haven't gotten that far yet. The defrost wasn't working properly though so I ended up pulling the dash and spent about eight hours completely rebuilding the climate control unit. Reuel gave me a spare one when I was down in Portland so I used that as my guinea pig. Its hard to see but the vaccum lines are colour coded depending on what "circuit" they are on (sorry electronics guy's view of a pneumatic system). There is a "schematic" in the FSM that shows you how the whole thing works. I figured a quick little trick is to cut about 1/4 inch of the end of the vacuum line where it gets all hard and push it back onto the fitting for a nice tight fit and no more leaks. I used a lot of open cell foam to get a better seal between units and piping now it blows like a hurricane! I was showing my brother how all the vacuum relays work with the dash still off and he was standing a few feet from the back bumper with the hatch opened and the wind was still quite strong all the way back there. I cleaned the evaporator up inside the car and vacuumed the pine needles, etc out. Took a while to get the greasy fuzz out as well but she blows good. Not sure about the other side of the AC yet though. I think the belt is missing IIRC... We'll take a look once the interior is done and we get 'er up on the hoist.
Thread Starter
Mr Z++ Wiki
Joined: Sep 2009
Posts: 2,195
From: Victoria, BC
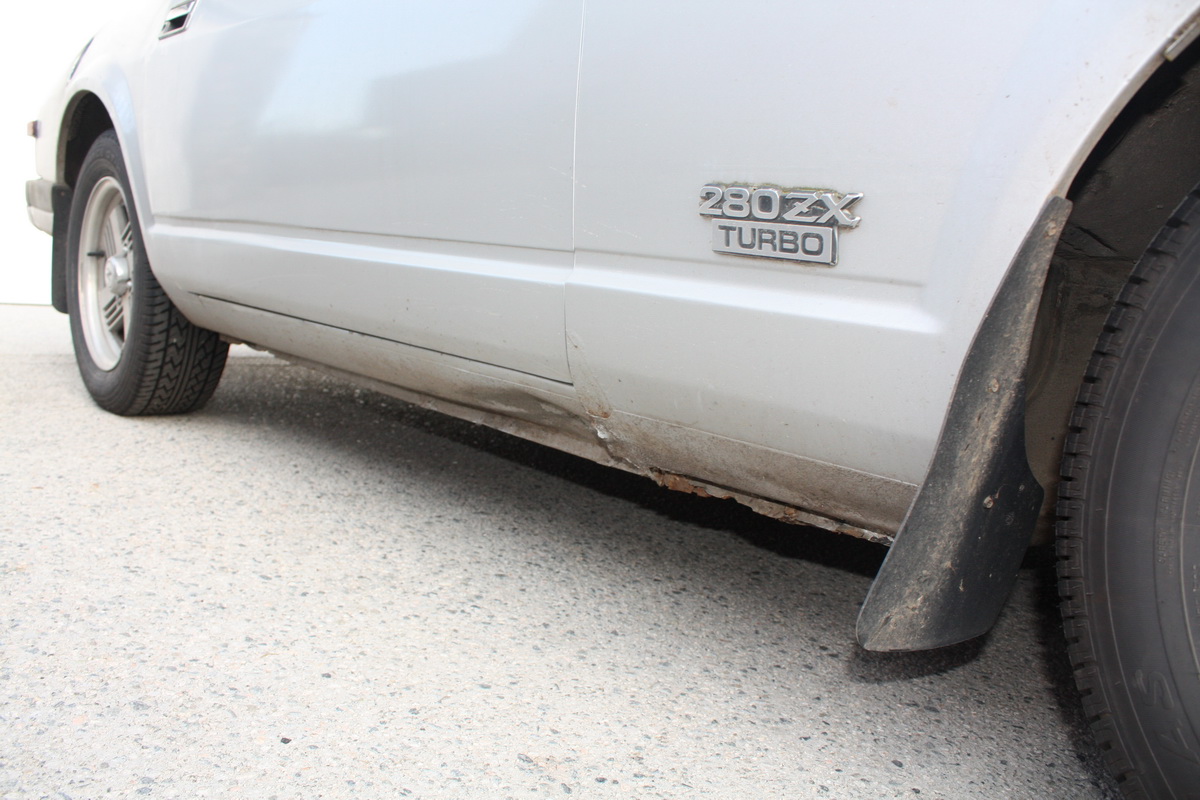
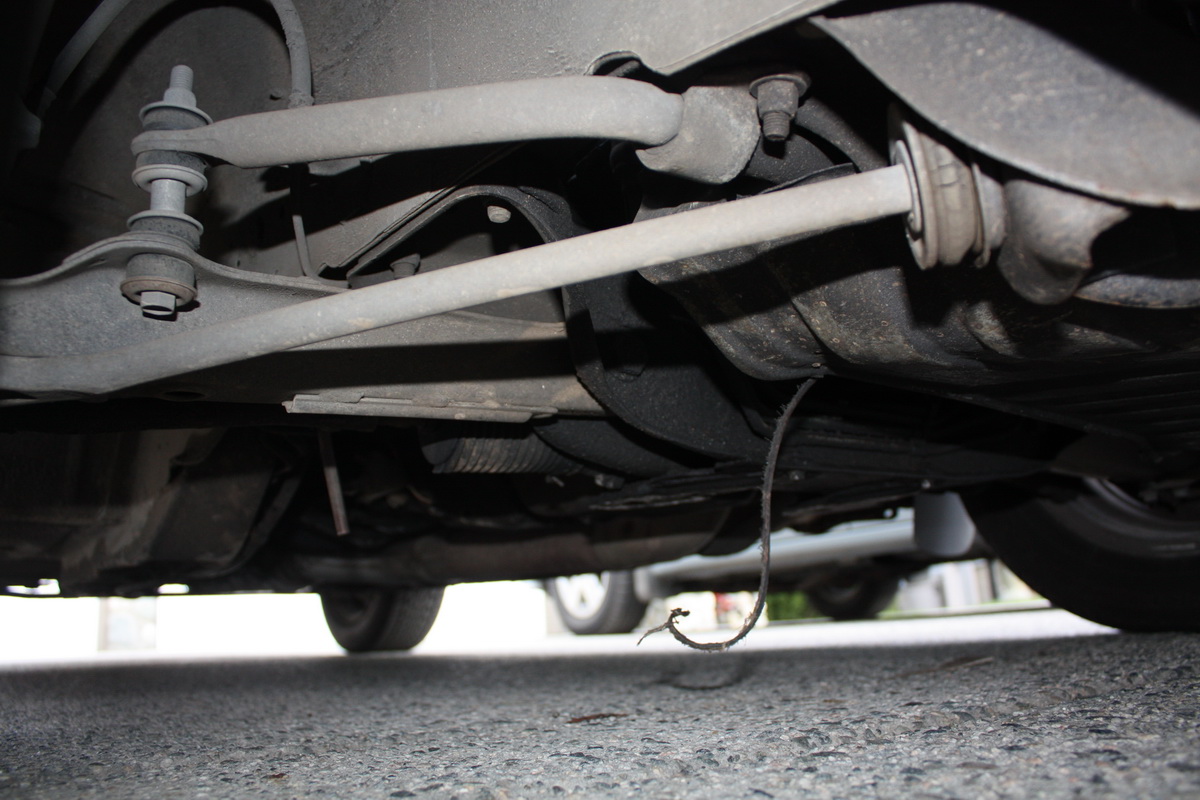
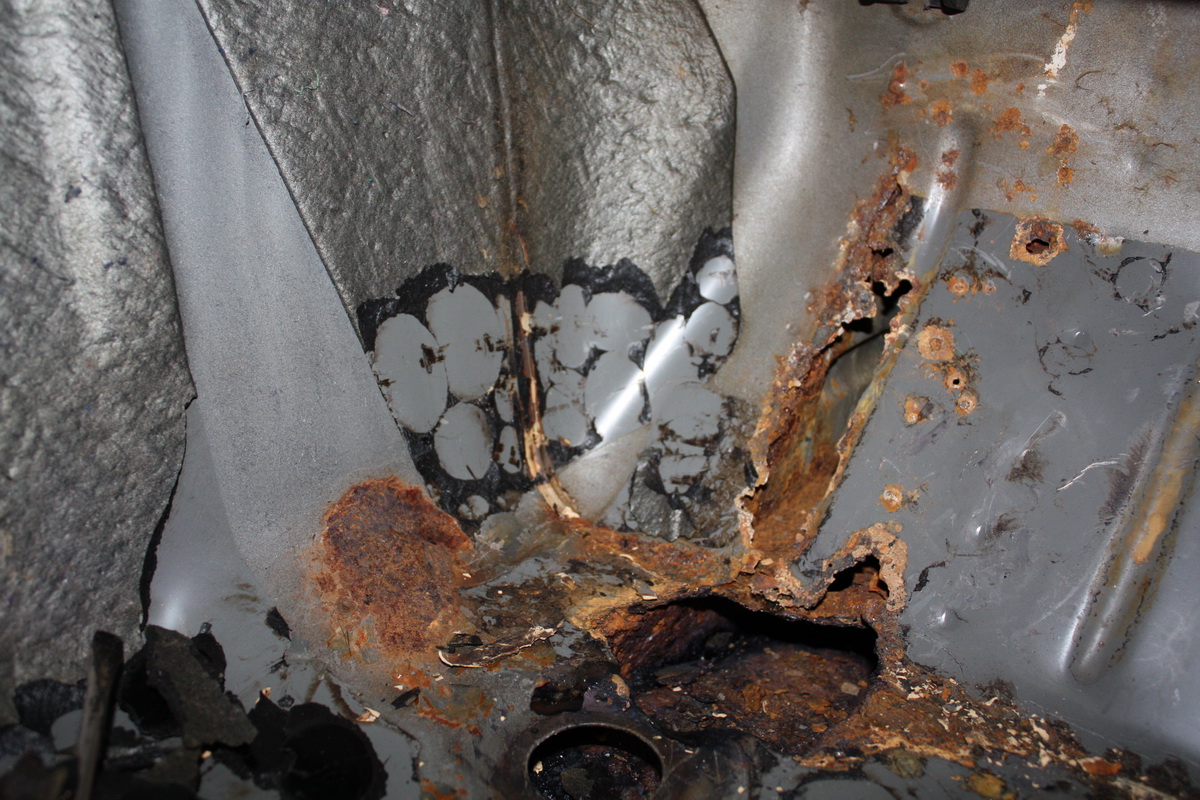
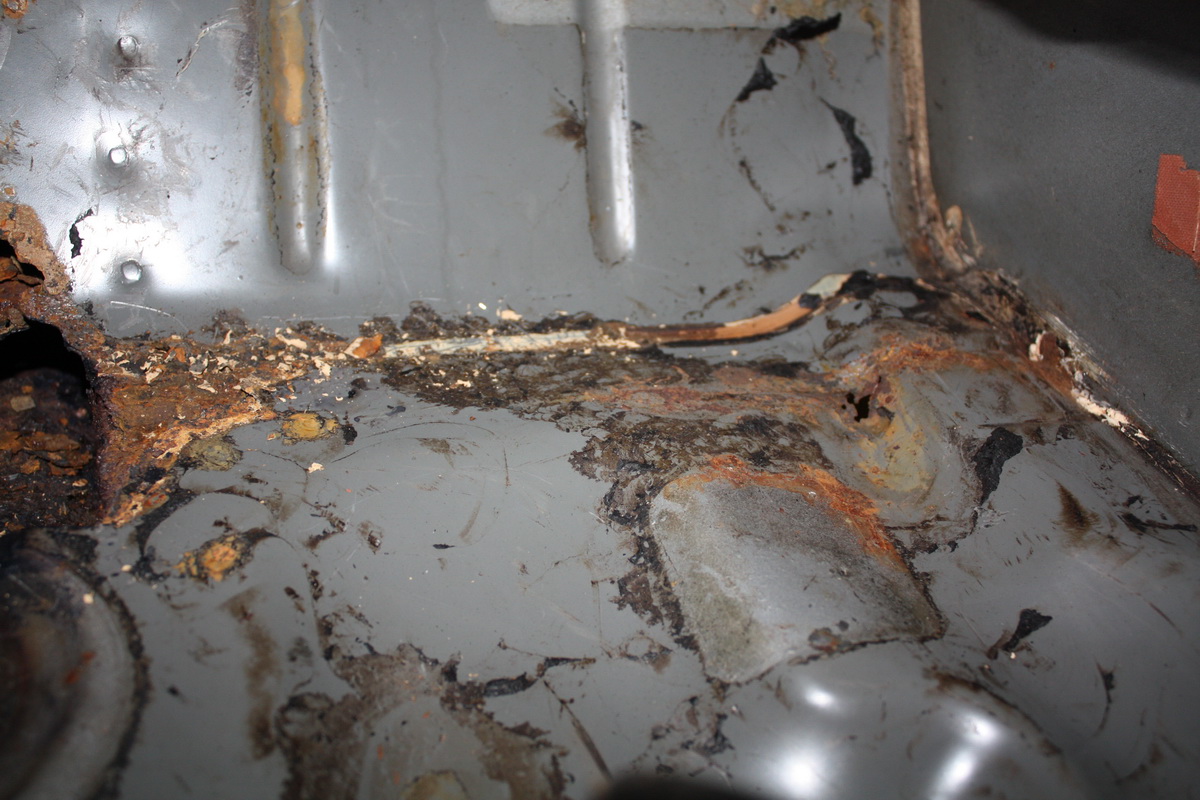
The worst of the rust. The frame rail was dented and instead of rusting the actual rail it ended up steaming the floor and rusting a small hole through. Conquest, Rust Killer primer, enamel paint and temporary patch. Mostly surface rust and the odd bubble. Also I cleaned everything with vinegar to kill any mold so any bare metal would turn to rust almost instantly. The biggest killer on the S130 was the seam sealer ironically enough. It's poreous and absorbs water once the paint cracks. Water follows the seams and they rot out. Simple fix is to remove the seam sealer BEFORE it all rots away and put in a modern urethane based seam sealer.

Thread Starter
Mr Z++ Wiki
Joined: Sep 2009
Posts: 2,195
From: Victoria, BC
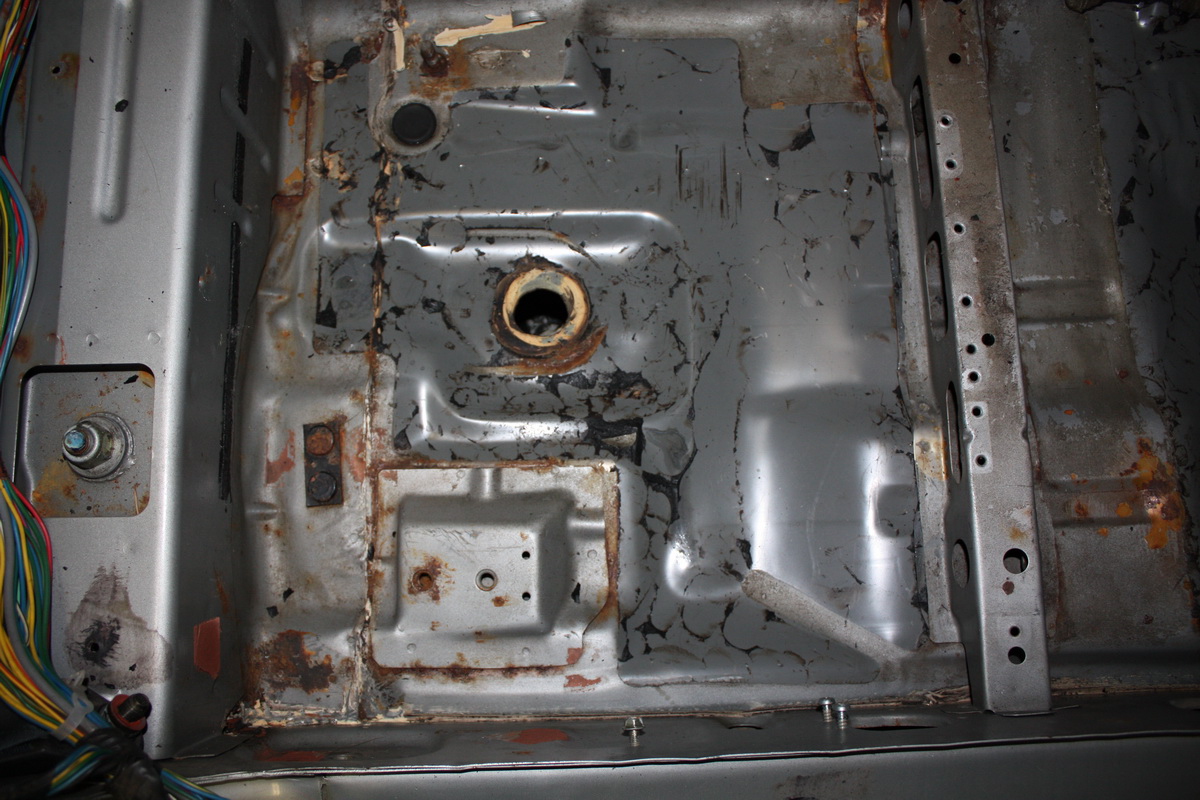
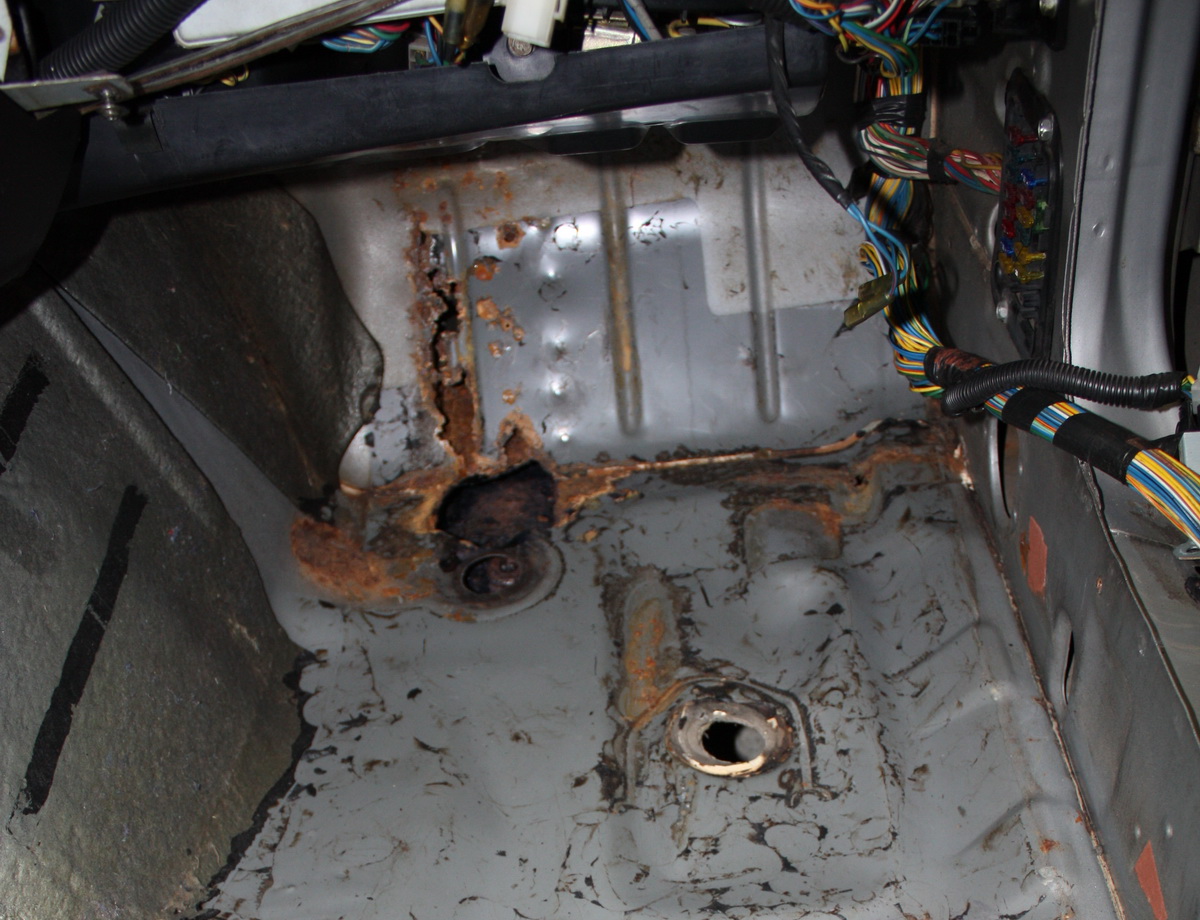
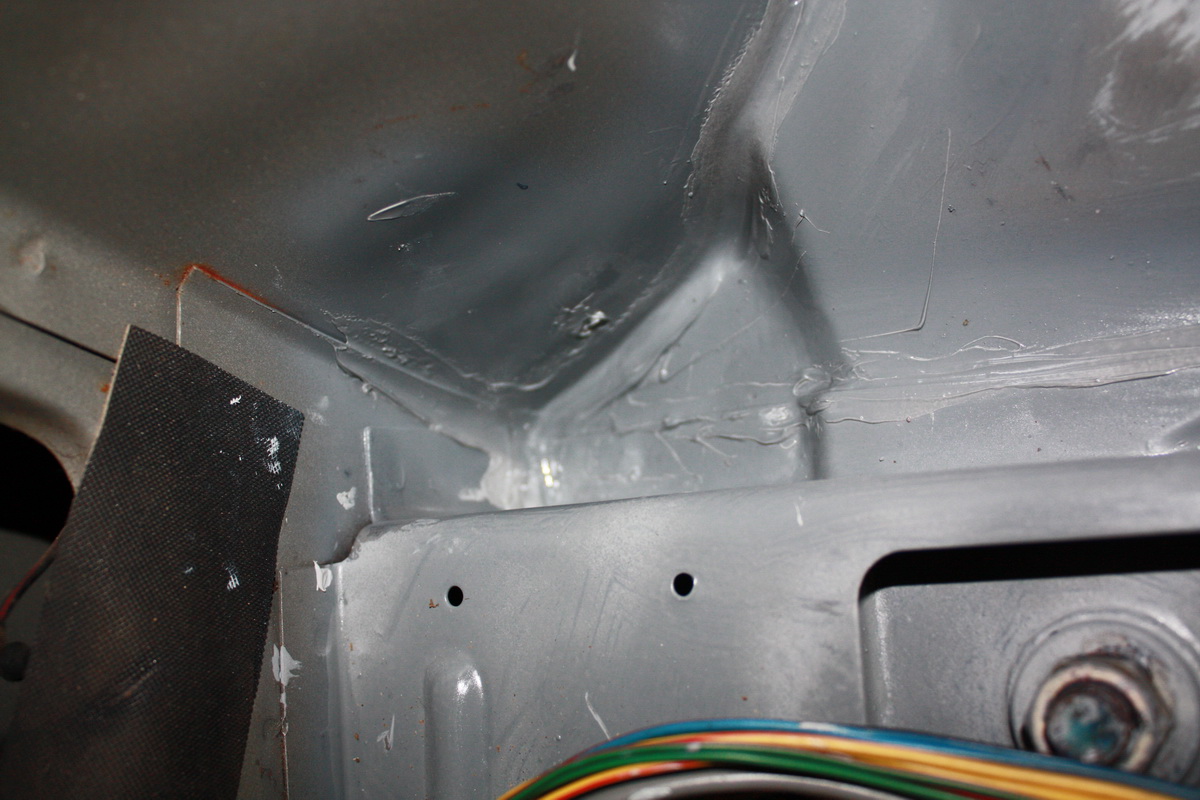
If you don't know about the seam sealer on the S130 then it's something you need to do if you are planing on keeping your car. As you may or may not know the seam sealer is poreous and absorbs water. It esentially does exactly the opposite of what you want it to do which is seal the seam and keep the water out. It's fine until the seam flexes and the factory paint cracks allowing water into the seam sealer. Once the water gets in it stays there and follows the seam bringing rusty destruction along with it.
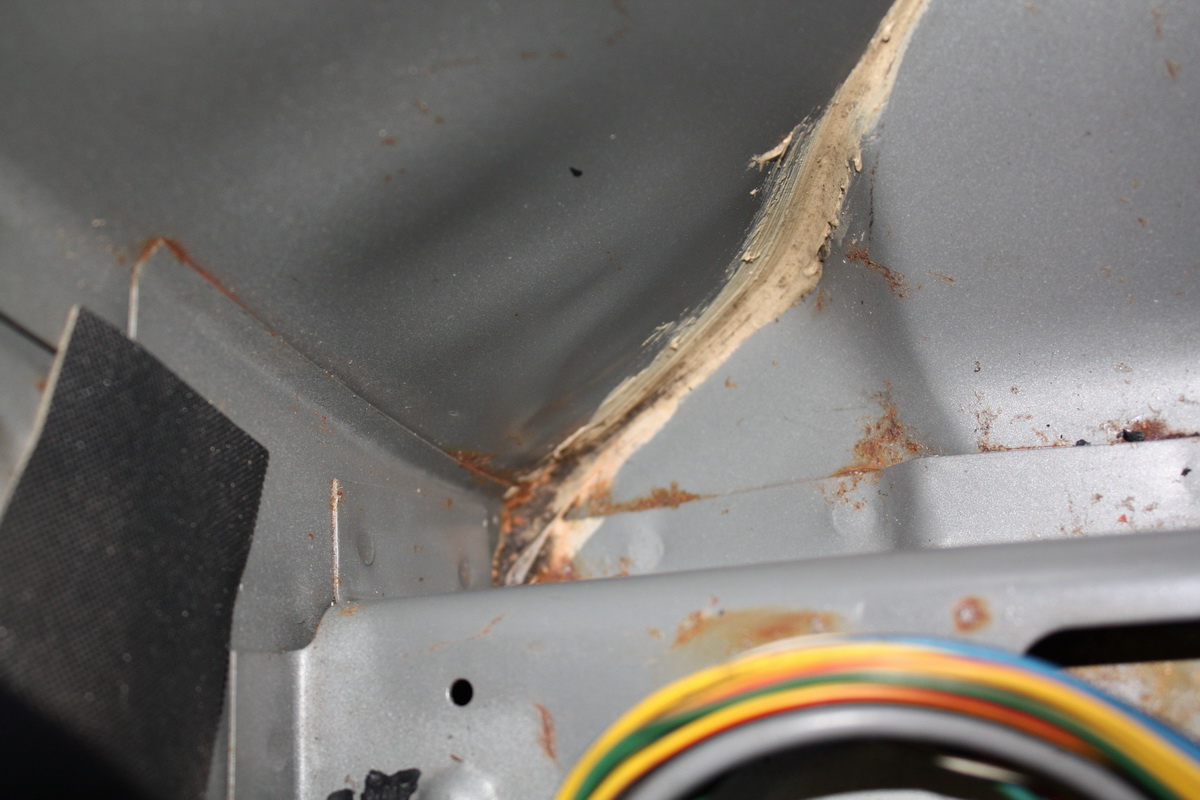
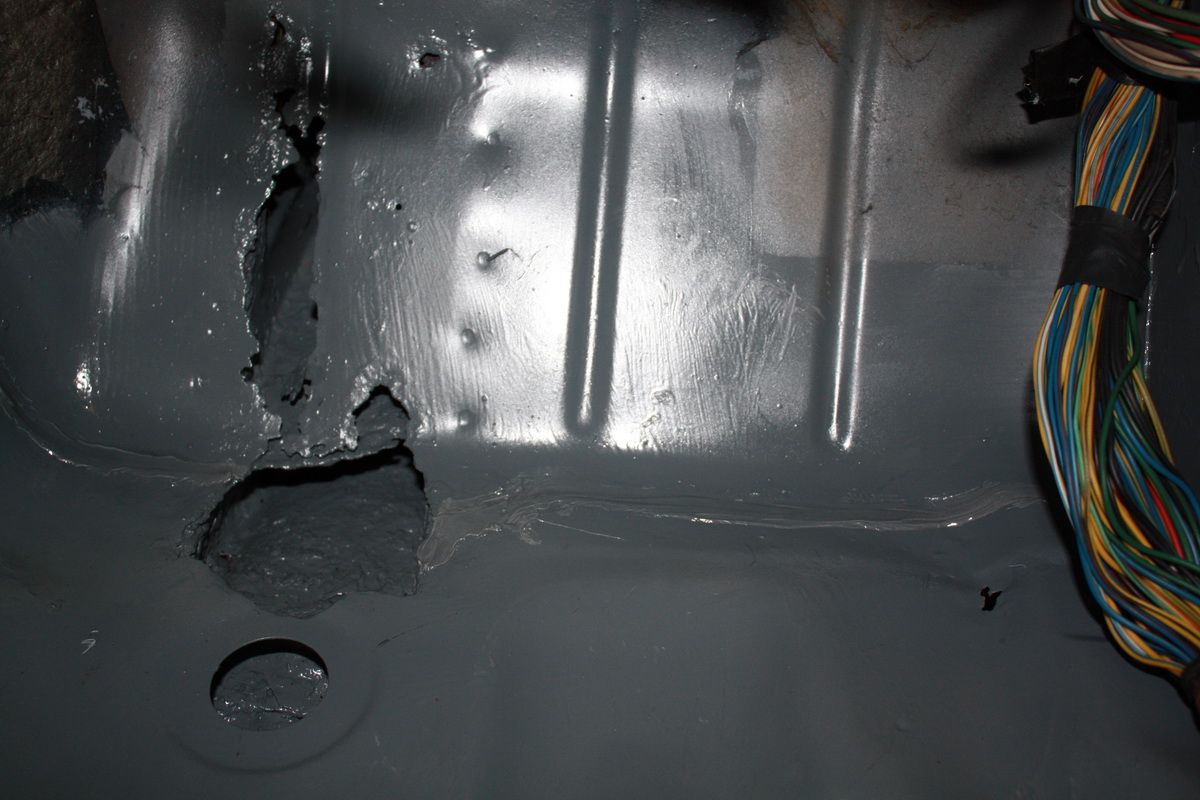
Sorry not the greatest pictures but you can see there is a little bit of surface rust under the seam sealer. This area is one of the major problem areas on the ZX located behind the seat just past the mounting points for the rear subframe. Water collects down here under the panel for the speakers and the interior body panels. I use a flat tipped knife that i've ground an edge on (like a narrow scraper) to cut the majority of the seam sealer out. Then the rest I simply dig out with a dental pick (awesome tool if you can get a used one from your dentist. Made from surgical stainless and they are super tough). Once the seam sealer is removed and cleaned out any rust scale is removed. I use Conquest to convert the rust so you want to remove the scale but not quite down to the bare metal. After 24 hours I seal it up with Rust Killer primer. Once the primer is dried I use an enamel paint to seal it up. I use the Pro Form PF211 urethane seam sealer then paint a last time over the sealer (not required).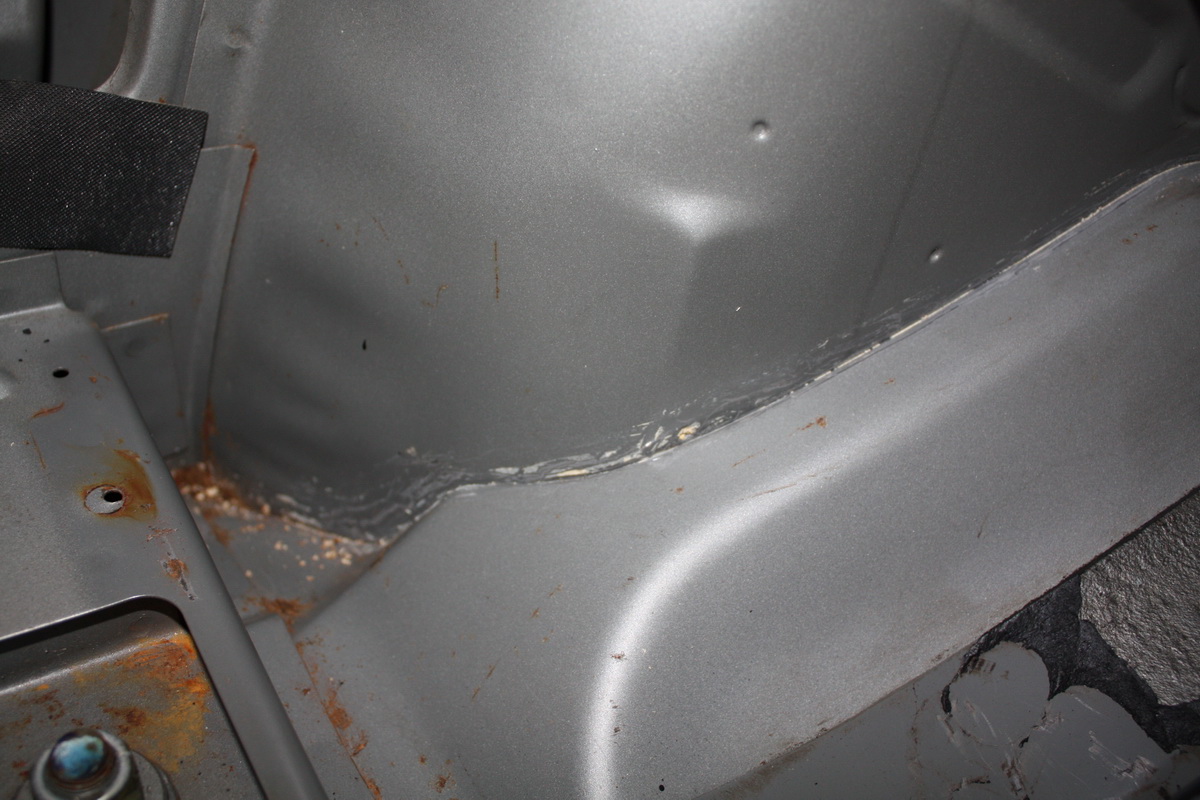
Once that's done your car is sealed the way it was suppose to be done from the factory. Of course this is from the top side of the seam. I'll get to the bottom later. The bottom is usually better protected with the undercoat.
Last edited by FricFrac; Aug 1, 2011 at 10:11 PM.

Thread Starter
Mr Z++ Wiki
Joined: Sep 2009
Posts: 2,195
From: Victoria, BC
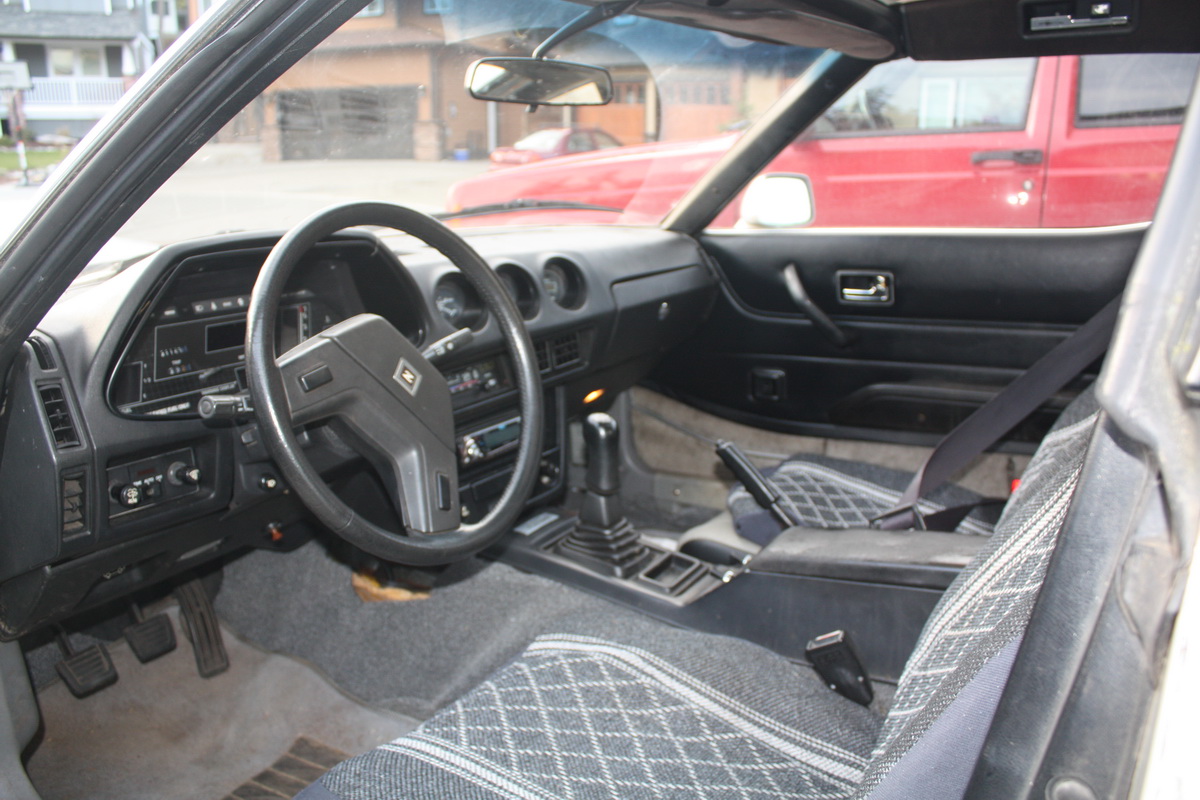
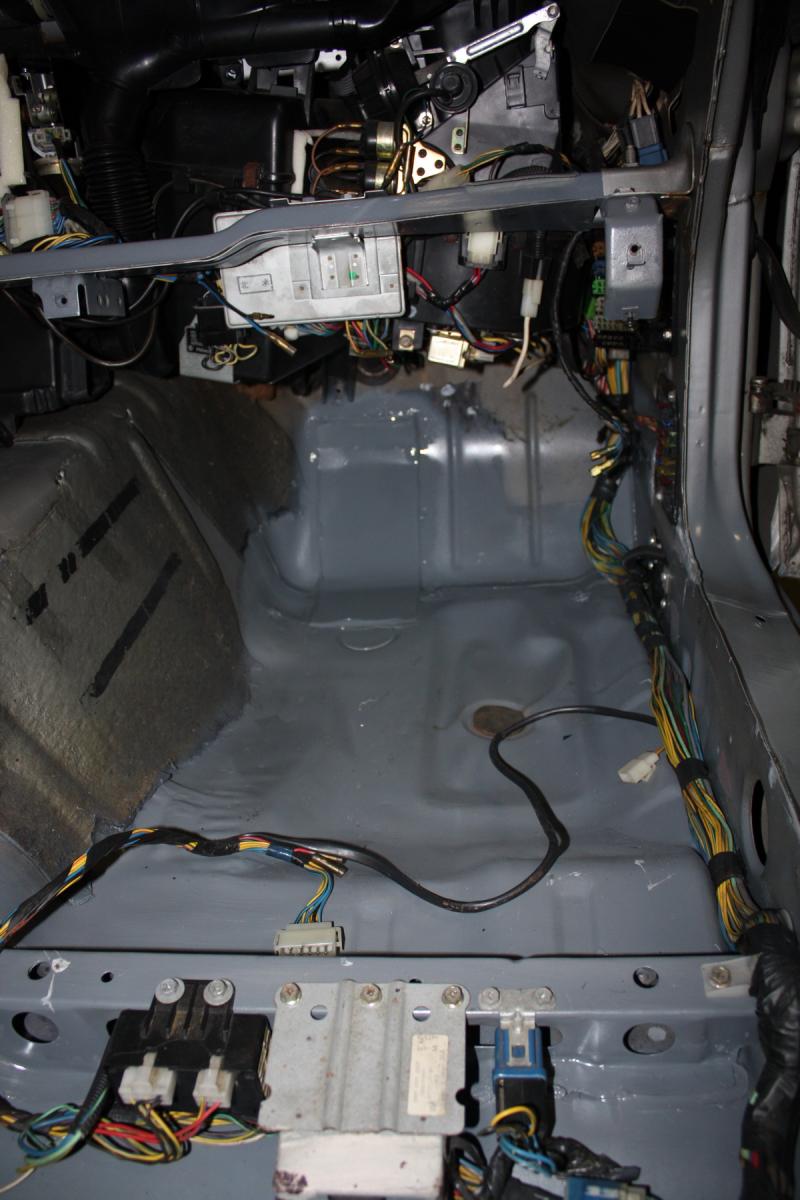
Dash is pretty good. Just cleaning all the ducting and adding open cell foam strips to make it air tight for better air flow as well as converting from digital to analog gagues. I had to rewire the pig tail so I could keep the stock turbo gauges in the tri cluster (which will probably be changed out anyhow... sigh. Oh well good practice...). I'm just in the process of converting it to red LEDs instead of the stock orange bulbs.
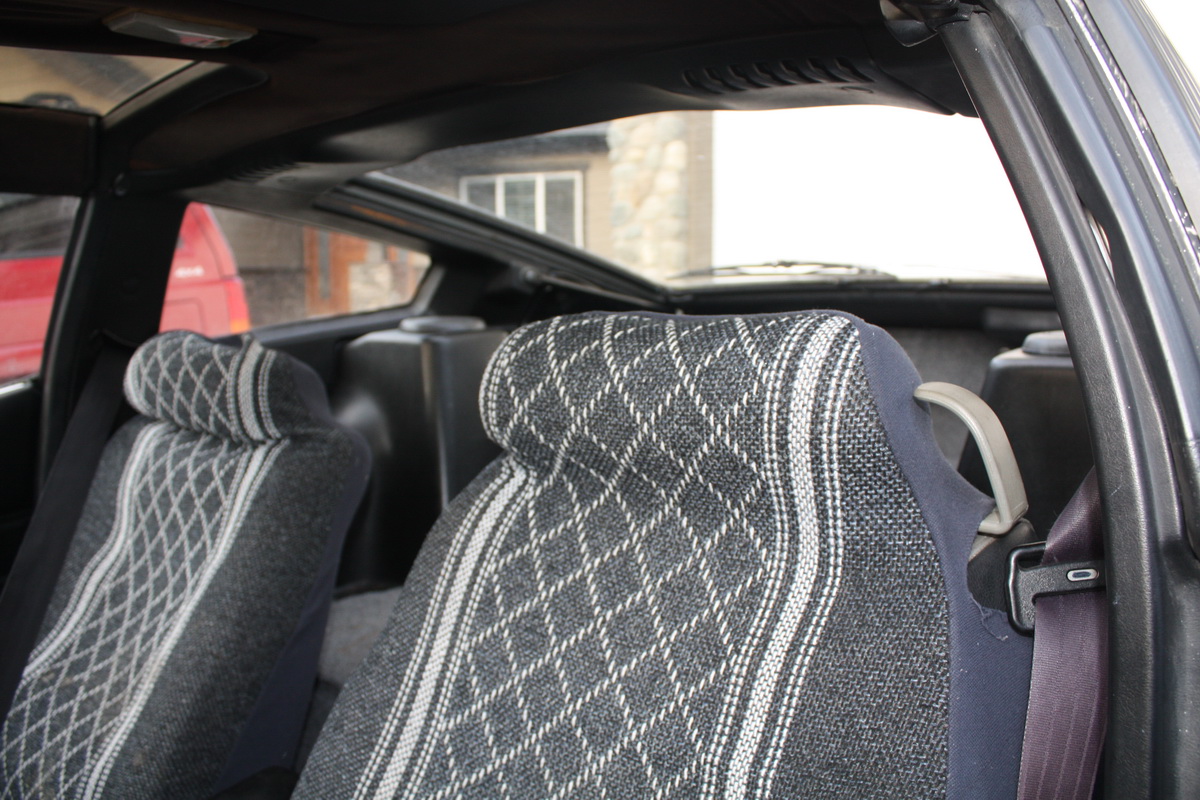
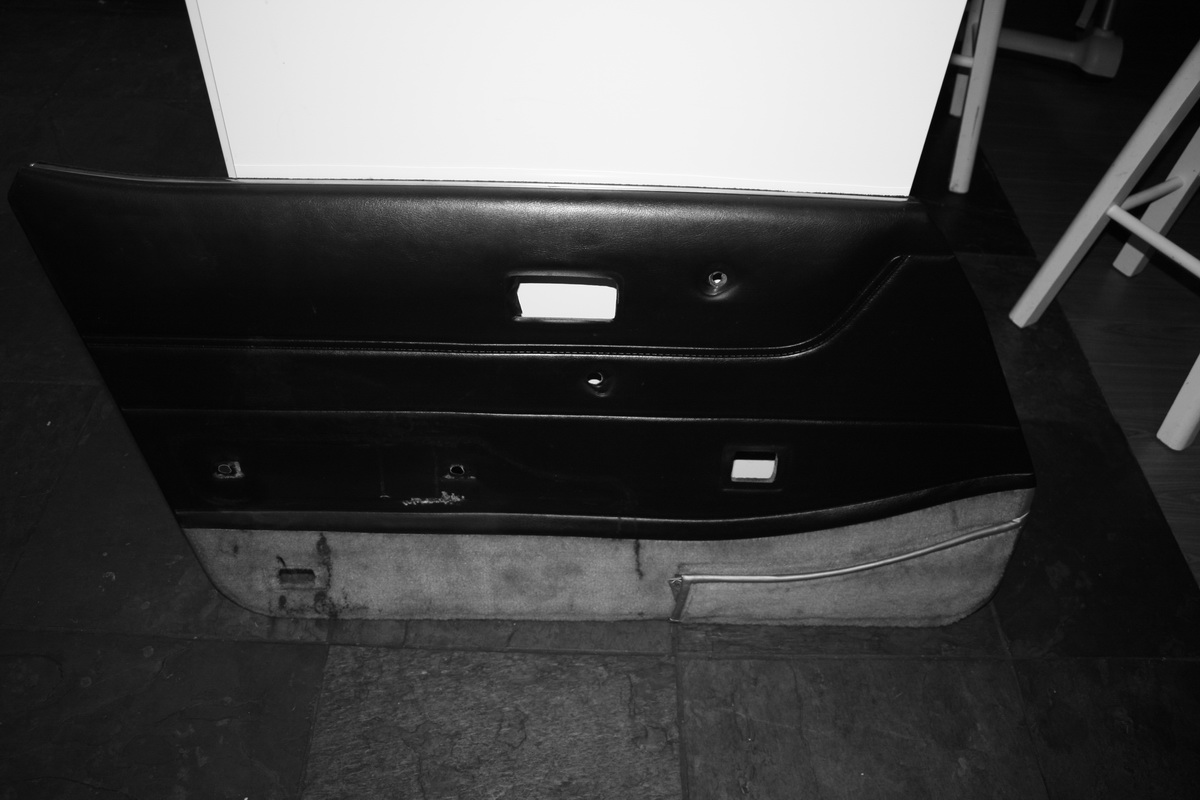
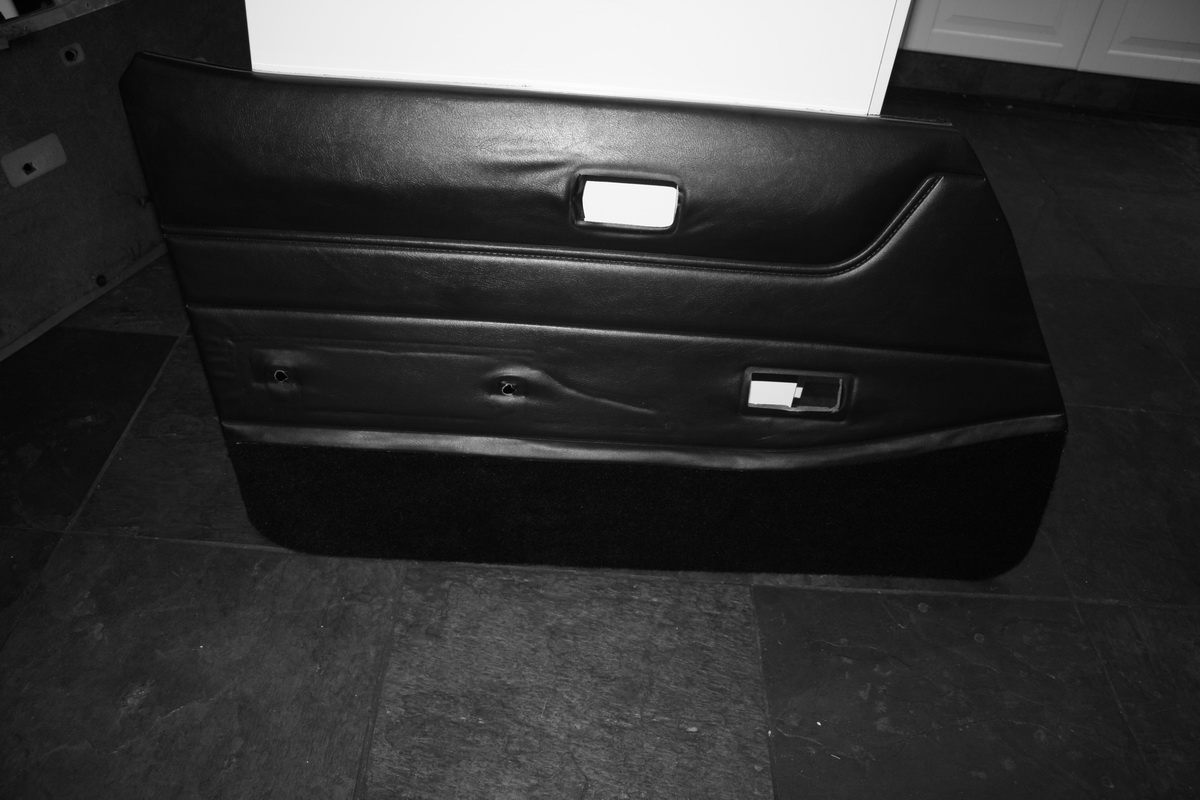
The interior was CRAP. It's starting to look good now though. Hopefully get the carpets shaped and installed tonight but who knows The rear interior is refurbished and reinstalled. New vinyl on the two rear pieces instead of household carpet badly glued to the back. Finished the door panels last night with new carpets on the door. First time I've recarpeted a door panel and it turned out good.
The interior was CRAP. It's starting to look good now though. Hopefully get the carpets shaped and installed tonight but who knows
The rear interior is refurbished and reinstalled. New vinyl on the two rear pieces instead of household carpet badly glued to the back. Finished the door panels last night with new carpets on the door. First time I've recarpeted a door panel and it turned out good.

The Good Twin
Joined: Aug 2005
Posts: 20,639
From: Wild Wild West, UTAH!

Thread Starter
Mr Z++ Wiki
Joined: Sep 2009
Posts: 2,195
From: Victoria, BC
I just grabed some LEDs from my friend's stash at work. They are all super bright (whatever that means now...) except for the green ones which are insane bright. I made two led per bulb insert but I went to singles for the green (could have changed the resistor value as well...) I'm trying to decide if I want to go part bulbs part LED because you won't be able to adjust the brightness without a PWM driving the LEDs...

Big Poppa
Joined: Jan 2005
Posts: 4,499
From: Mission, British Columbia
next time im up in the plane with the brother in law im gonna come stop by. or at least toilet paper your house. from 500 feet up hahahahah. you should jujst start a z shop and restore these for people.


