

How to remove 280ZX dashboard


Thread Starter
Registered User
Joined: Sep 2007
Posts: 14
From: Fort Collins, CO
How to remove 280ZX dashboard
Just for grins, I'll summarize the process of removing the dash in case it helps anyone else, having done this around six times on my 1983 280ZX: (and edited it today, 8/12/11, because I just pulled it to fix the fan blower switch and replace old vacuum lines)
1) Remove left and right foot well trim panels under dash (2 screws each)
2) Remove radio console (one screw holds the triangular trim piece on each side, then 4 bolts on each side; you may not have to remove wire harnesses if there's enough slack to sit the panel on the passenger floorboards)
3) Disconnect various-colored wiring harnesses on passenger side firewall.
4) Remove two large factory cable ties next to wiring harnesses; these retain the harnesses to the dash frame (these are re-usable; release the ties by pressing on the small tab on the upper side between the tail end and the metal frame, then push the tail end back out of the tie)
4) Remove the steering wheel shroud, remove steering wheel (with a punch, lightly mark the steering wheel relative to the steering shaft so you can center the wheel on re-assembly).
5) Loosen one screw on the right side of the turn signal assy to release the clamp holding the turn signal assy on the steering column. Disconnect wiring harnesses and slide turn signal assy forward off the shaft - it can dangle.
6) Reach under dash on the right/passenger side of the steering column and disconnect speedometer cable near the firewall (this is easy to forget)
7) Remove cosmetic plugs over four screws on top of dash - try to preserve them, they're hard to find.
8) Remove 8 main dashboard screws/bolts: four screws across top of dash, four bolts on bottom side of dash (two of the bottom bolts are hidden by the radio console until you remove it)
9) Remove five screws holding the center dash vent trim in place; remove center trim panel, now remove two screws holding the heat/AC control box to the dash frame. (This is really easy to miss.)
You may now remove the dash. Try not to scrape it on the A-pillar trim too much. I find it easier to pull the passenger side forward first; keep it low so it won't jam the dash in place.
The dash weighs about 40 pounds when free - take it out the passenger side door.
Re-assembly is the reverse of removal. NOTE: make SURE when setting the dash in place to re-locate he speedometer cable properly. if you get it on the wrong side of the steering wheel brace, you will need to pull the dash again and move it so it will connect.
The only specialized tool required is a standard steering wheel puller. Most of it is done with a #2 and #3 screwdriver. You may need a small flat-blade screwdriver to carefully pry off the bolt covers on top of the dashboard.
Last edited by Pilgrim; Aug 13, 2011 at 02:33 PM.

The Good Twin
Joined: Aug 2005
Posts: 20,639
From: Wild Wild West, UTAH!

Thread Starter
Registered User
Joined: Sep 2007
Posts: 14
From: Fort Collins, CO

Registered User
Joined: Jan 2009
Posts: 95
From: Pleasanton, CA
The write up on xenons130's site is great too - very similar.
So I'm running into an issue after refinishing/painting my dash.
In the process of taking it apart (after removal), the liners for the 3 gauges in the middle snapped each of their two mounting tabs that keep them in place.
Now I�m putting it back together and having the darnedest time lining up the liners with the dash and the 3-gauge pod module � since they are staggered and at an angle and all, it�s juggling a lot and I�m coming up short.
Any of you guys who have messed with an S130 dash have any ideas on how to better patch this up? I really want to finish this project � been at it for 3 months in my spare time and the garage needs the Z out! I briefly thought about just installing without, and then retrofitting some kind of liner from the outside of the dash, but I really have no idea how I would do that�maybe with small pieces of Velcro?

Registered User
Joined: Jan 2009
Posts: 95
From: Pleasanton, CA
Problem is, I'm not sure what angle to use.
I'm assuming they are all 3 the exact same, but could be wrong, as it appears the gauges are not all at the same angle (the farthest one from the driver is angled more than the nearest one). So I don't really want to glue them on and be wrong. I've responded to several "parting out" threads today looking for these pieces.
I think I'm going to try cutting and affixing small pieces of velcro, and just try to set them up with trial and error. If I get a bite on my posts in the next couple days, then I'll get some new ones...

Registered User
Joined: Jul 2006
Posts: 6
Each of the 3 are different. They must go back in the holes they came from or they will not go back correctly. I had the same problem "NIGHTMARE" until I took another dash a part. Then it was still a little bit of a problem. The tabs must be EXACTLY where they came from also. I have one gauge that is 1/8" off but only I know it.....
 Thanks anyway!
Registered User
Joined: Jan 2009
Posts: 95
From: Pleasanton, CA
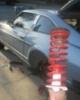
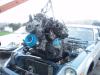
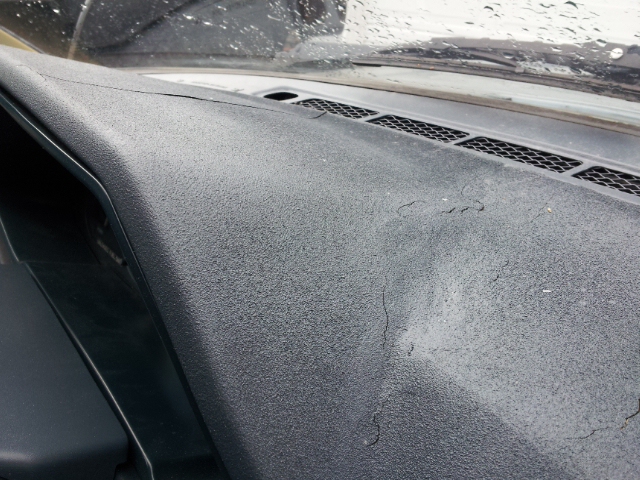
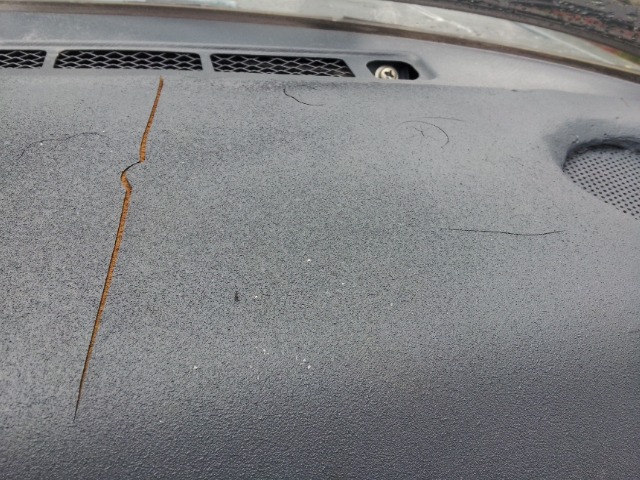
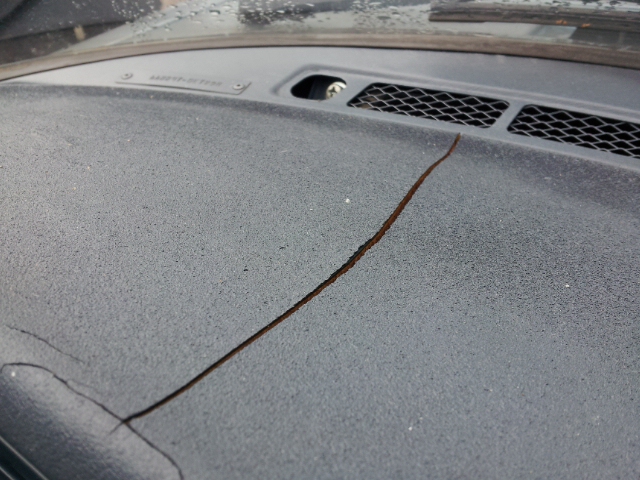
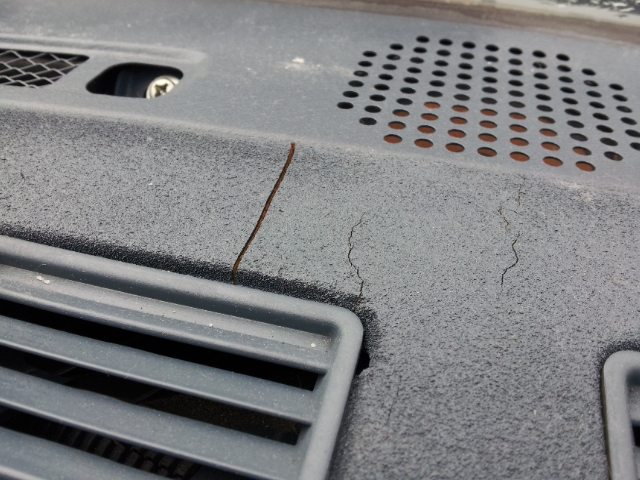
That's exactly what I did with this project  Got the dash out, chipped away at the old cracks, filled with bumper filler, smoothed, sanded, textured, painted. Looked like a million bucks for a couple weeks, then the same cracks reappeared - not sure what I could have done differently.
Here's my thread with photos:
https://www.zdriver.com/forums/280zx...-photos-34182/
Before:

After:

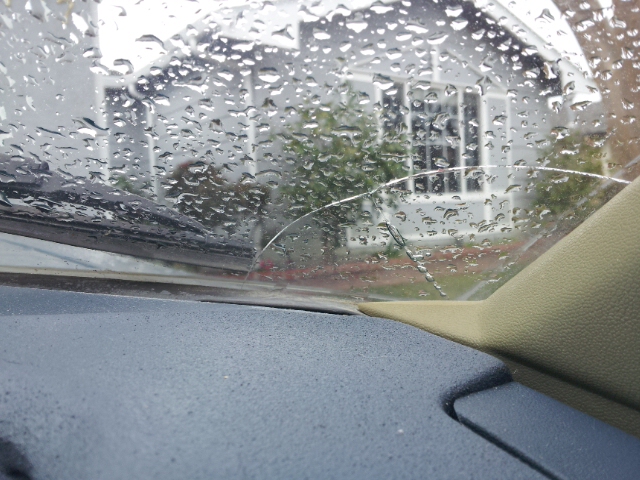
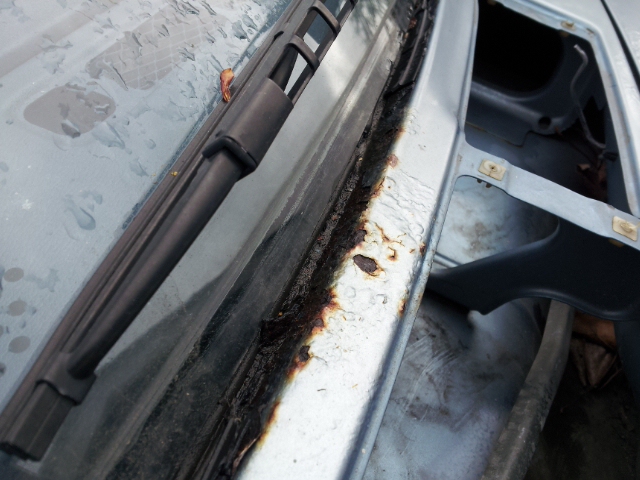
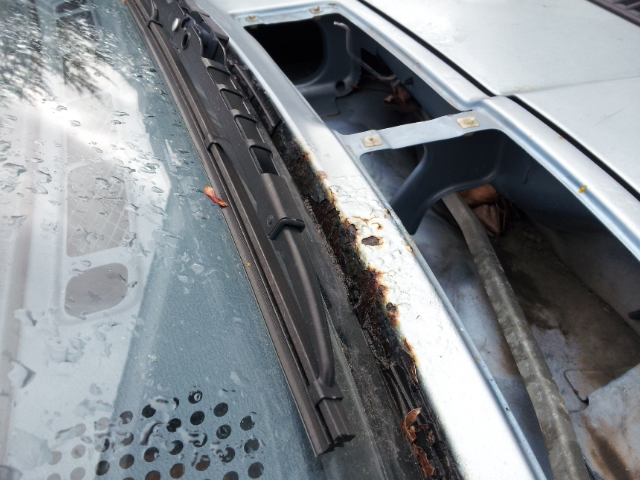
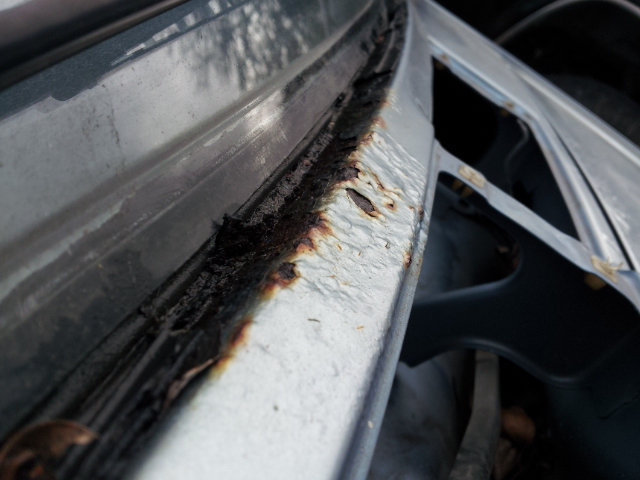
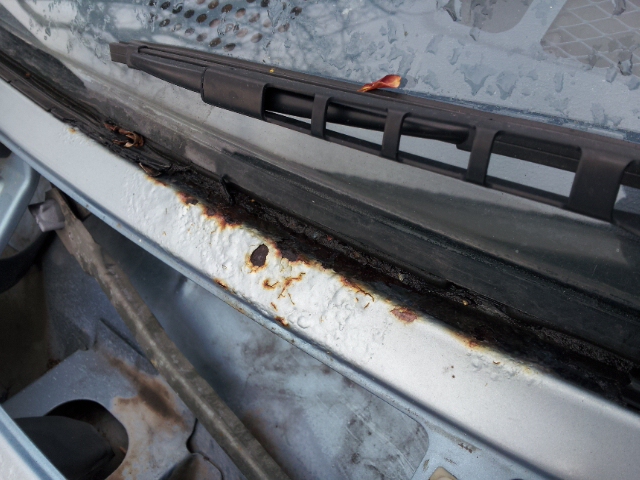
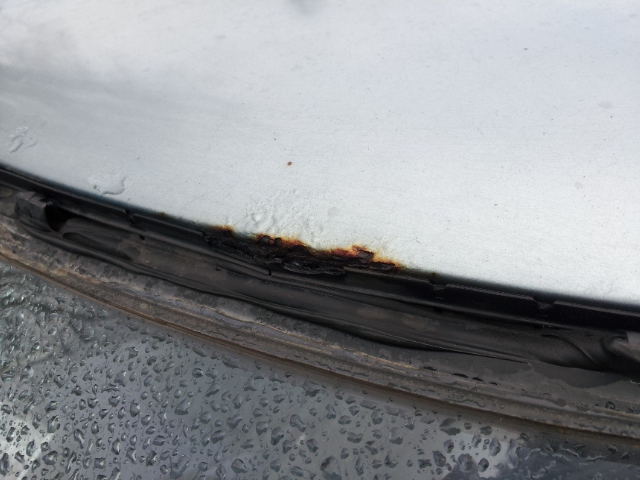
I'm going to be replacing the window this year since it's cracked, and will attack the rust at the base of the bottom trim (bought new trim clips from dealer already).....if anyone has tips for window removal and treating that rust/priming/painting it, let me know.
Phil
Got the dash out, chipped away at the old cracks, filled with bumper filler, smoothed, sanded, textured, painted. Looked like a million bucks for a couple weeks, then the same cracks reappeared - not sure what I could have done differently.Here's my thread with photos:
https://www.zdriver.com/forums/280zx...-photos-34182/
Before:
After:
I'm going to be replacing the window this year since it's cracked, and will attack the rust at the base of the bottom trim (bought new trim clips from dealer already).....if anyone has tips for window removal and treating that rust/priming/painting it, let me know.
Phil
Registered User
Joined: Jul 2011
Posts: 548
From: Foresthill, California
That's exactly what I did with this project Got the dash out, chipped away at the old cracks, filled with bumper filler, smoothed, sanded, textured, painted. Looked like a million bucks for a couple weeks, then the same cracks reappeared - not sure what I could have done differently.
Got the dash out, chipped away at the old cracks, filled with bumper filler, smoothed, sanded, textured, painted. Looked like a million bucks for a couple weeks, then the same cracks reappeared - not sure what I could have done differently.
Registered User
Joined: Jan 2009
Posts: 95
From: Pleasanton, CA


Registered User
Joined: Jul 2011
Posts: 548
From: Foresthill, California
That really is too bad about the dash. I remember reading through your post and thought you did a fantastic job.
Also, yikes! I sure am glad my windshield rust is nowhere near that bad. Good luck on getting all of that fixed up and take some pictures
Also, yikes! I sure am glad my windshield rust is nowhere near that bad. Good luck on getting all of that fixed up and take some pictures

Registered User
Joined: Feb 2010
Posts: 179
From: Lacey, WA
Wow...rain...in Cali? Huh...whoda thought...anyways, cracks can likely be due to heat. I refinished my dash (after seeing the origional diy, as well as your dash) and its still doing fine, though I didn't texture it. Still need to knock down the shine, I get some crazy glare in the sun. Be happy that is all the rust you have! You should come up to WA and take a look at mine!


Registered User
Joined: Jan 2009
Posts: 95
From: Pleasanton, CA
I had a dash cap on my 87 BMW and it never fit right - plus I knew what lay beneath...
Just like we like doing our own work on these cars and owning the maintenance and modifications, I wanted to do my best to bring this dash back to life as one piece.
I've thought about going after it again with fiberglas, but I have no experience with that and am a little skittish.
Hope to get around to pulling the window out, sanding down the rust and priming/painting - maybe I'll attack the dash again then....
Registered User
Joined: Feb 2010
Posts: 179
From: Lacey, WA
Glassing it shoupdnt be too difficult if you get the mat, rather than the strands. Hardest part will be getting it all smooth, but a random orbital would help greatly, along with a little Bondi. Then texture, knock down, and paint like before. Heck if you wanted to go all river you could mold in some gauge pods! Lmao

More Than Meets The Eye
Joined: Feb 2005
Posts: 5,120
From: Mesa, Az
They are not that great, and do not fit right. I ended up taking mine off, because for one did not match the glovebox, and stuck out from it. And because my dash is so warped and cracked. The dashcap can't lay on there straight. So I just put on a dash mat, and be done with it for now.

Thread
Thread Starter
Forum
Replies
Last Post
Bookmarks


