

Diahatsu seats

Thread Starter
No Club Love
Joined: May 2006
Posts: 1,518
From: Mo Valley, So Cali
Diahatsu seats
Ok, to install some comfortable, nonexpensive seats, that don't take much work to install, pick up some diahatsu seats, (from a little geo metro looking car) i got mine from a friend for less than $20. The total project took 6 hrs. but that included, removal, disassembly, figuring out where every thing needed to go and what parts that were needed to be retained, and repainting the seat bottom parts(i could do another set an in hour per seat minus the paint). Advantages of this swap include, the weight, i lost at least 10 pounds, per seat, and retained all componants unsept the lumbar support. They are also very comfortable and cheap, also they raise the seat a little for better view of the road and the rear view mirrors.(i don't know why but i couldn't see much behind me, must be the little mirrors)
The parts retained from the original seats are:The seat recliner lever, seat brackets, Seat bottom(inside the upholstered seat bottom).
Tools required are:10,12,14mm sockets, rachet wrench,extensions, hammer, sawsall(if your impatient like me), welder(just to do a couple of minor tacks, didn't picture this cause im embarrased), wire clipers, knife, a some things i may of forgot, ill list later.
First thing is to unbolt and remove your original seats.(4 bolts, 14mm)
Second remove the seat tracks (4 bolts, 12mm), seat recliner lever (4 bolts, 12mm), unbolt opposite side castle nut(14mm).
Now the seats are in two pieces, bottom and top. Your done with the top of the seat after you remove the seat lever recliner,(2 bolts, you'll have to cut the upholstery to get to the top bolt)
To get the seat bottom(inside the seat), you pull all the cushion/upholstery, off the bottom.
Next after its striped of the cushion, remove the springs, there no longer needed. This is were i lost my patience, and broght out the big guns, the sawsall. Its easier to use the hammer(which i learned on the second seat) then just bend back the springs so they don't go back into the holes.
Next start removing the seat brackets, from the new diahatsu seats, you won't need any of these pieces so chuck them. To remove the top of the seat recliner lever cut a small hole so your able to unbolt and rebolt the new seat lever.
Place the original seat bottom on the new seat cushion and weld it on, or you can drill holes, and use bolts, much harder. And time consuming
Now start building the new seat up, using both new and old seat parts.I first finger tightened, the bottom of the seat lever, you'll need a little space for the spring on the lever, so just bend the seat bottom, made out of thin metal so just hit it with the hammer a little, then slide the new top seat on and finger tighten the top bolts.
Then i bent the opposite side seat bracket(had a castle nut on it) till it was straight, and the seat bracket would stretch over(confusing but you'll understand if you look at any seat.)Put back on the castle nut and tighten the 4 bolts on the seat recliner lever.
Next reinstall the original seat tracks and tighten all four bolts. Then your done you have a new more comfortable seats, just reinstall the seats and be happy!
Thread Starter
No Club Love
Joined: May 2006
Posts: 1,518
From: Mo Valley, So Cali
Pix 1 is original seat bottom(you can see the seat springs inside the cushion), pix 2 is new seat, pix 3 is retained seat lever, pix 4 is retained seat tracks. Pix five is the original seat bottom, its was within the bottom seat cushion, still has springs.
Pixs at the bottom of this page are, pix1 the seat bottom with removed springs, pix2 is new seat with original seat bottoms, pix3 is welded up seat with original seat tracks bolted up, pix 4 is the seat bracket, bent straight, with the castle nut installed. Pix 5 is the new seat with original brackets, lever and tracks.
Pixs at the bottom of this page are, pix1 the seat bottom with removed springs, pix2 is new seat with original seat bottoms, pix3 is welded up seat with original seat tracks bolted up, pix 4 is the seat bracket, bent straight, with the castle nut installed. Pix 5 is the new seat with original brackets, lever and tracks.
Last edited by wreckedj30; Sep 24, 2006 at 05:36 PM.
Thread Starter
No Club Love
Joined: May 2006
Posts: 1,518
From: Mo Valley, So Cali
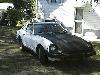
Pix 1 the new seat retains the original plastic coverings, since they have the same bottoms. Pix2 is the speaker box i built, has two tens and room for another but i didn't have one so for now it has two, my amp is just chilling on the floor till i get around to building the triangle. Pix 3 is my car, im doing a 10th anniversity replica, later the final color will be black/ charcoal for now its primer black/white. Pix4 is my radio installed in the climate control position, the original position was removed, and blocked with 1/8th inch wood. Later im going to install gauges, and after that some zdriver may make the whole center piece out of carbon fiber...
Last edited by wreckedj30; Sep 24, 2006 at 05:57 PM.

Thread
Thread Starter
Forum
Replies
Last Post
petrol
240Z, 260Z, 280Z Appearance Exterior, Interior
2
Jan 13, 2006 08:20 PM
Bookmarks


