
How to do your intake/exhaust gasket


Thread Starter
Big Poppa
Joined: Jan 2005
Posts: 4,499
From: Mission, British Columbia
Admin, please sticky this for others referance. These are the steps and procedures that i have used to complete the intake gasket in the easiest and fastest method. Feel free to pm more suggestions and editing finds so that it may be fixed for an easier read for other.
Disclaimer: I do not accect any responsiblity for anything that goes wrong or missed procedure on your job, use common sense and a good manual if you have never completed this before, pictures may not represent your vehicles exact intake or setup. for referance only.
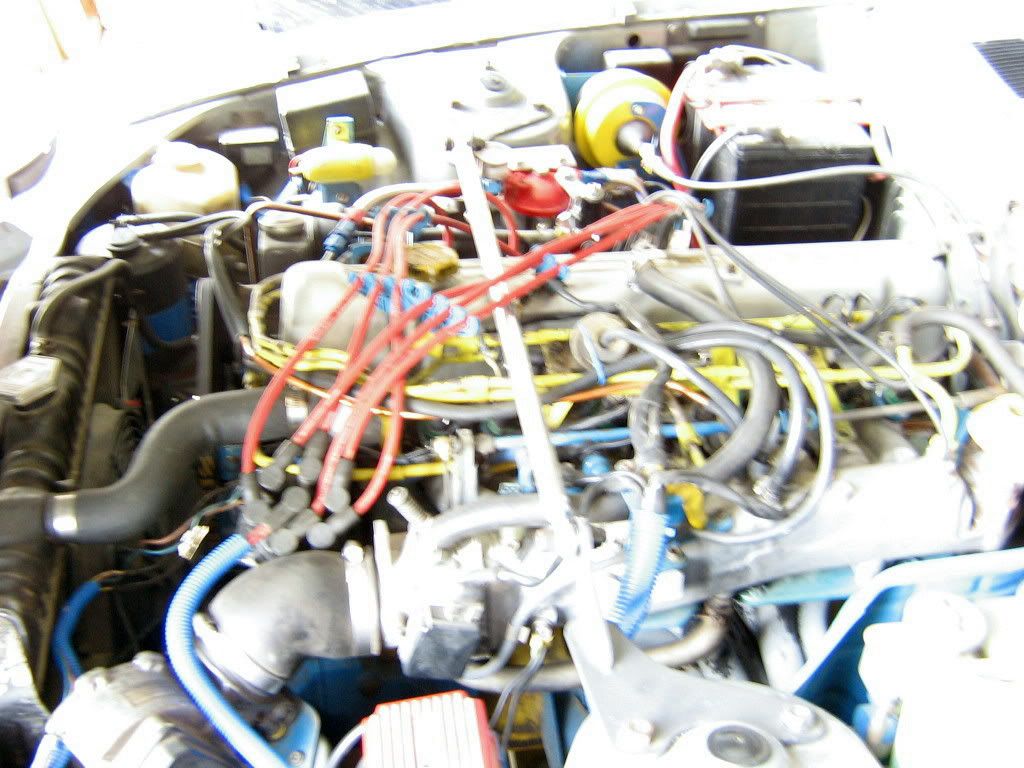
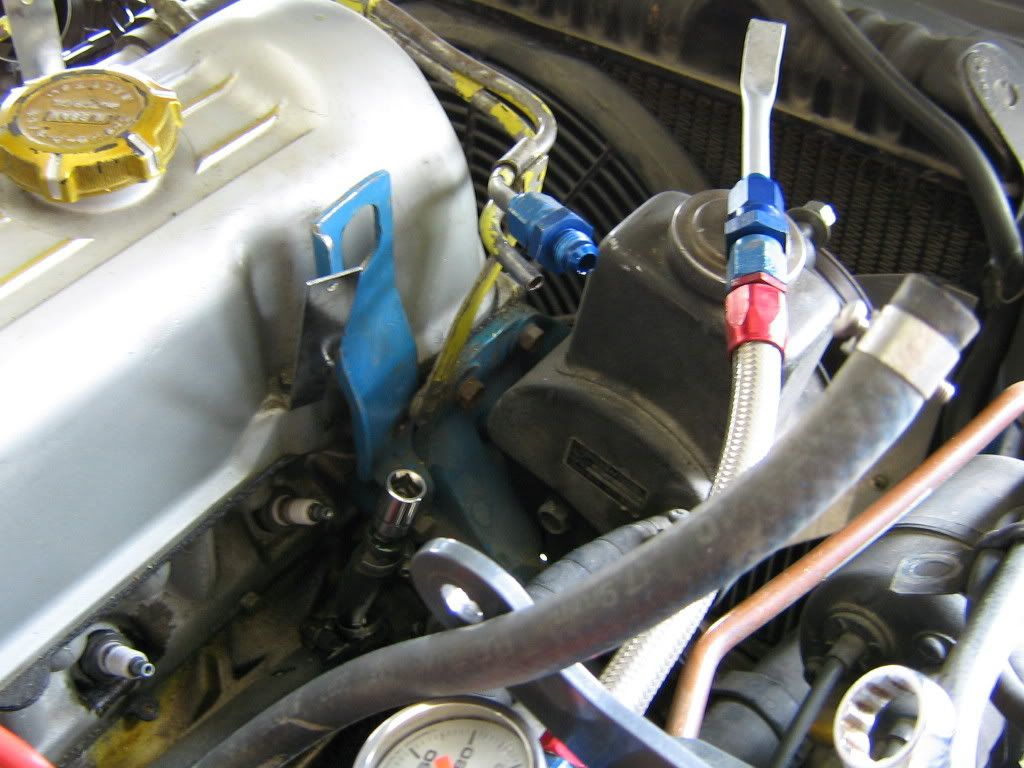
The first few steps are simple and can be overlooked, so make sure you check everything before pulling or unbolting the intake to avoid a large headache. This first pic is of the intake before dissassembly.
1. Undo ground cable
2. Remove cap from distributer c/w wires attached to make room to work
3. Remove intake hose between tb and afm
4. Undo wiring harness clamp, and remove all intake wiring, be carefull to not break any of the brittle delecate clips.
5. Remove all vaccum hoses and from surrounding parts. ei brake booster, cruise, intake breather, pcv valve.
6. Drain coolant, about an icecream buckets worth
7. Remove air bypass valve and hoses, and egr control
8. Remove throttle rod, remove hair pin and arm will slide out
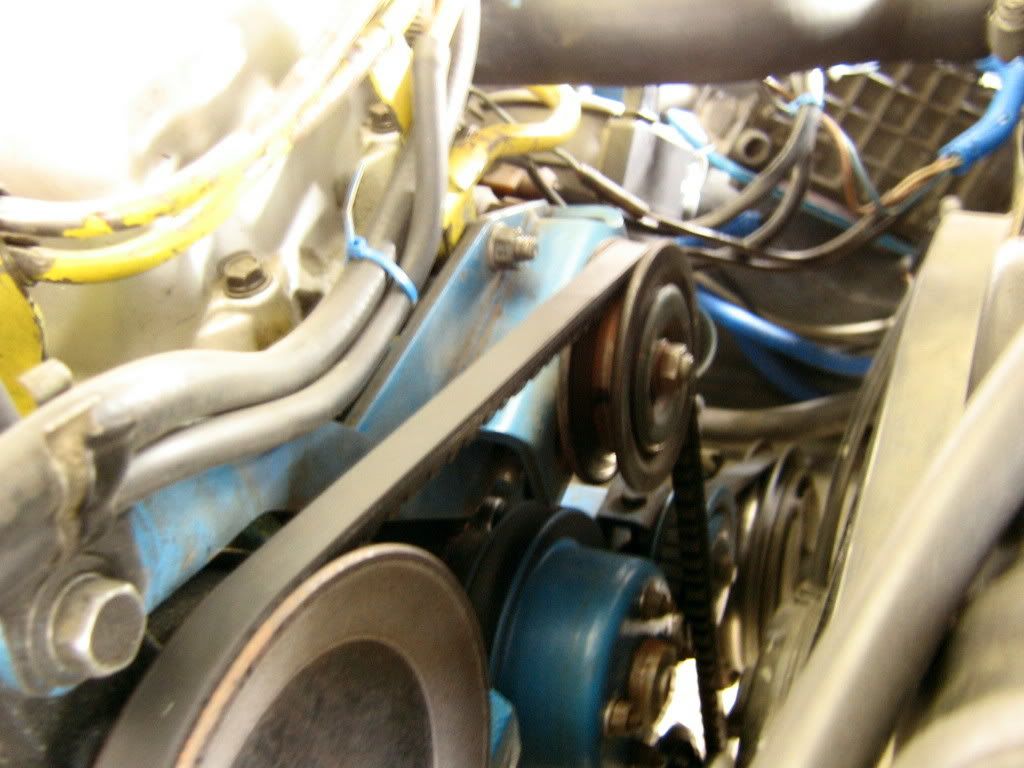
9. Remove pulley from front of engine, power steering belt must be loosened first, no need to remove mechanical fan. Pic before
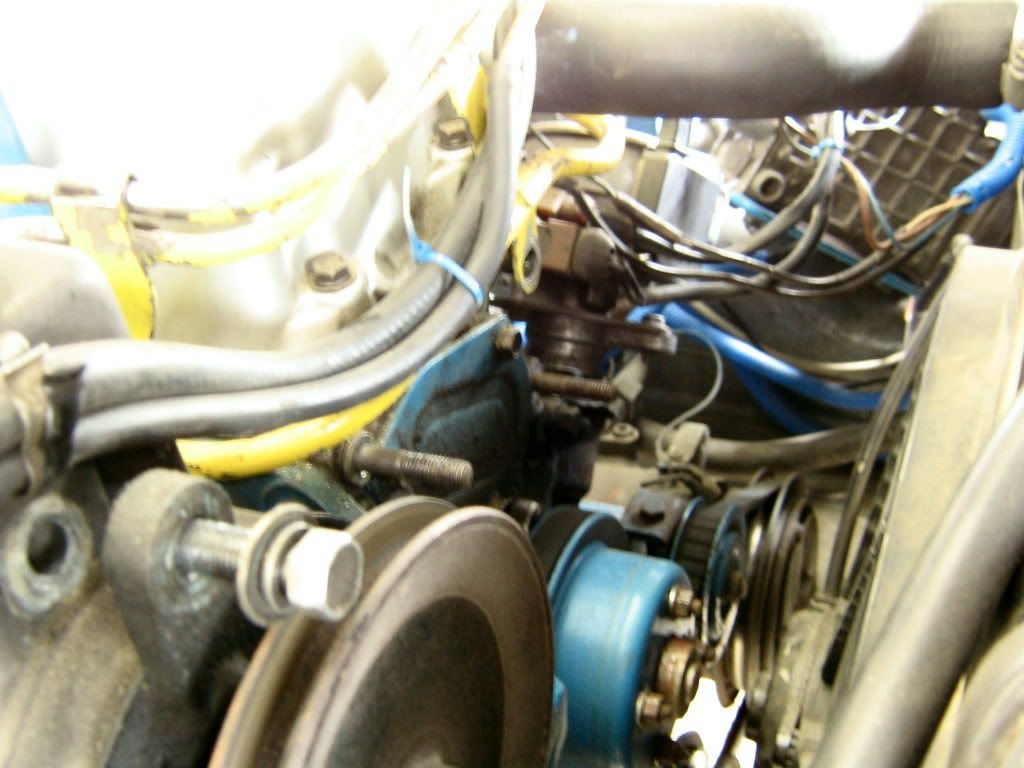
Pic after. Also double nut top stud, and remove stud
10. Remove coolant line running to egr control from above lower rad hose.
11. Disconnect fuel lines, to relieve pressure, touch power + ground to cold start valve, as per factory manual
12. Disconnect egr tube from intake side because its usually not seized like the manifold side.
13. Disconnect exhaust from header pipe, or at manifold flange, or catalitic, whichever is easier and not going to break, use pb blaster or aerocroil.
14. Remove egr valve (if equipt) then heatsheild 12mm bolts
15. Remove access plate on top of intake, to reveal top exhaust bolt
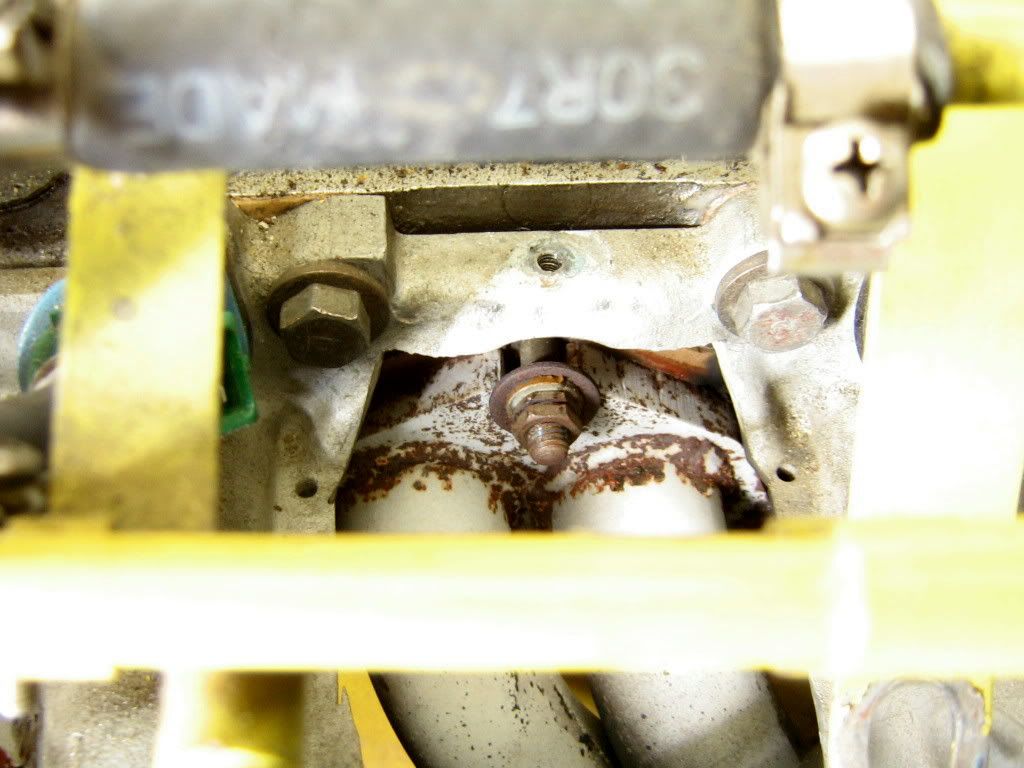
16. Start to undo all 12mm bolts off of exhaust under to intake, do not undo the 2 end bolts on the ends of exhaust or the 3 center bolts, they do not need to be removed to remove intake. for this step use a wrench, long extension, mirror, flashlight, whatever it takes to get these nuts off.
17. use very long extension with swivel and 14mm and remove all 4 bolts from intake and remove
18. Remove final 5 bolts and remove header
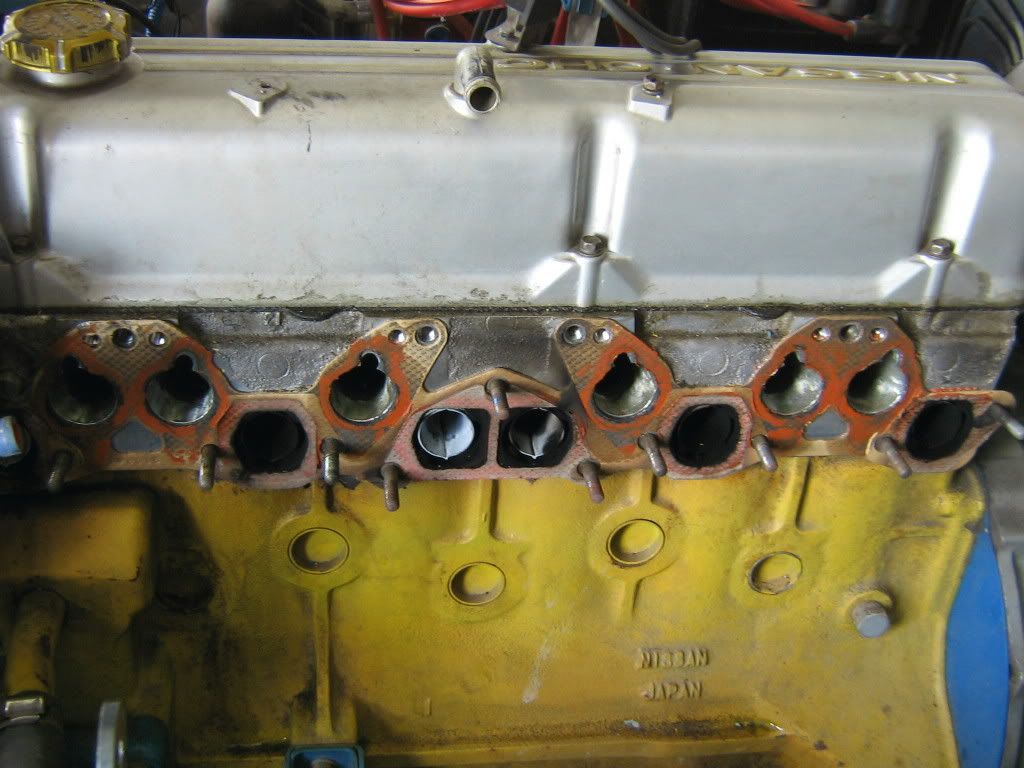
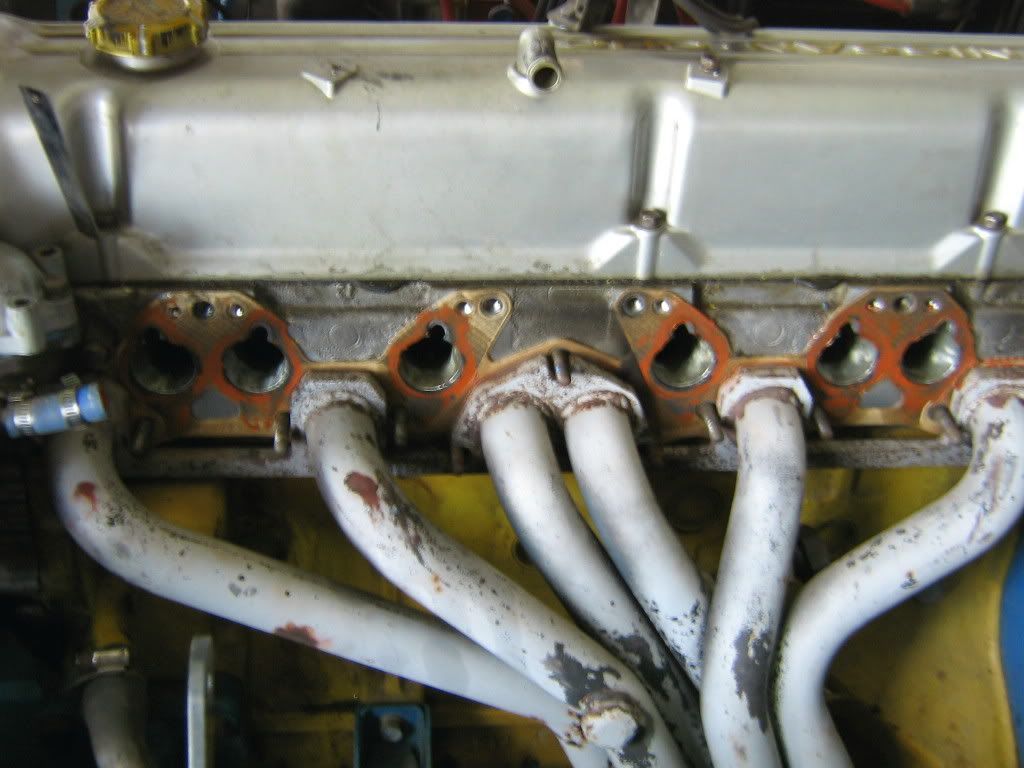
19. Clean all surfaces with scraper, if using a power disk, do not make any inperfections in surfaces, this could cause future leakage.
20. installation is revese of removal. to install intake easier, intsall all nuts and washers loosely on sections where intake and exhuast share so you dont have to try and get your hand in there. Tighten all 5 nuts on the exhuast that were previously left untill last.
Have fun and take your time, if its been done before it may only take 2 hours or so, if its your first time allow some time if you break bolts or need other repairs, when putting everything back together use some never seize, it will make next time way easier, esspecially if its you.
i will update this and proof read this later, so please excuse any dumb overlooked errors
Disclaimer: I do not accect any responsiblity for anything that goes wrong or missed procedure on your job, use common sense and a good manual if you have never completed this before, pictures may not represent your vehicles exact intake or setup. for referance only.
The first few steps are simple and can be overlooked, so make sure you check everything before pulling or unbolting the intake to avoid a large headache. This first pic is of the intake before dissassembly.
1. Undo ground cable
2. Remove cap from distributer c/w wires attached to make room to work
3. Remove intake hose between tb and afm
4. Undo wiring harness clamp, and remove all intake wiring, be carefull to not break any of the brittle delecate clips.
5. Remove all vaccum hoses and from surrounding parts. ei brake booster, cruise, intake breather, pcv valve.
6. Drain coolant, about an icecream buckets worth
7. Remove air bypass valve and hoses, and egr control
8. Remove throttle rod, remove hair pin and arm will slide out
9. Remove pulley from front of engine, power steering belt must be loosened first, no need to remove mechanical fan. Pic before
Pic after. Also double nut top stud, and remove stud
10. Remove coolant line running to egr control from above lower rad hose.
11. Disconnect fuel lines, to relieve pressure, touch power + ground to cold start valve, as per factory manual
12. Disconnect egr tube from intake side because its usually not seized like the manifold side.
13. Disconnect exhaust from header pipe, or at manifold flange, or catalitic, whichever is easier and not going to break, use pb blaster or aerocroil.
14. Remove egr valve (if equipt) then heatsheild 12mm bolts
15. Remove access plate on top of intake, to reveal top exhaust bolt
16. Start to undo all 12mm bolts off of exhaust under to intake, do not undo the 2 end bolts on the ends of exhaust or the 3 center bolts, they do not need to be removed to remove intake. for this step use a wrench, long extension, mirror, flashlight, whatever it takes to get these nuts off.
17. use very long extension with swivel and 14mm and remove all 4 bolts from intake and remove
18. Remove final 5 bolts and remove header
19. Clean all surfaces with scraper, if using a power disk, do not make any inperfections in surfaces, this could cause future leakage.
20. installation is revese of removal. to install intake easier, intsall all nuts and washers loosely on sections where intake and exhuast share so you dont have to try and get your hand in there. Tighten all 5 nuts on the exhuast that were previously left untill last.
Have fun and take your time, if its been done before it may only take 2 hours or so, if its your first time allow some time if you break bolts or need other repairs, when putting everything back together use some never seize, it will make next time way easier, esspecially if its you.
i will update this and proof read this later, so please excuse any dumb overlooked errors

Registered User
Joined: Apr 2006
Posts: 2,827
From: Concord, NC
Word! Hey that looks like a "cardboard" gasket...is it? Doesn't look like there are any major leaks. Did you let that Silicone "set-up" before you put the exhaust and intake on, cause it looks like it spread out during the tightening of the bolts.
Last edited by thxone; Jun 5, 2006 at 03:27 PM.
Thread Starter
Big Poppa
Joined: Jan 2005
Posts: 4,499
From: Mission, British Columbia
i just put it on real thin, then just put on the manifolds, the silicon is really meant for extreme heat applications and has real copper in it as well. oh, that gasket is felpro gasket and is the cardboard type of stuff, i just got the victor reinze gasket like you did thxone, and like it better


Registered User
Joined: Apr 2005
Posts: 5,485
From: Temecula, CA
as far as the turbo question goes: It's no more difficult. You have a little less elbow room for getting to a bolt or two directly across from where the turbo sits. But it's really no big deal. I've done both and I dont consider one harder then the other. The only part I did find harder about doing the turbo manifold is the extra weight of that turbo hanging off of there 


Registered User
Joined: Apr 2006
Posts: 26
One thing that made a big difference in my case was to use 1/4" size for the 12mm intake nuts. the heat shield is the worst part of the job from my experience's. This job is a pain the first time around, but SHADY280 sheds some light for first time wrenches... Good luck time frame first time, the week end.


Thread
Thread Starter
Forum
Replies
Last Post
280zx2by2
280ZX Performance / Technical
13
Apr 7, 2009 11:10 PM
Bookmarks


