1969 Datsun 510 2Dr Z22 turbo EFI build


Thread Starter
Mr Z++ Wiki
Joined: Sep 2009
Posts: 2,195
From: Victoria, BC
1969 Datsun 510 2Dr Z22 turbo EFI build
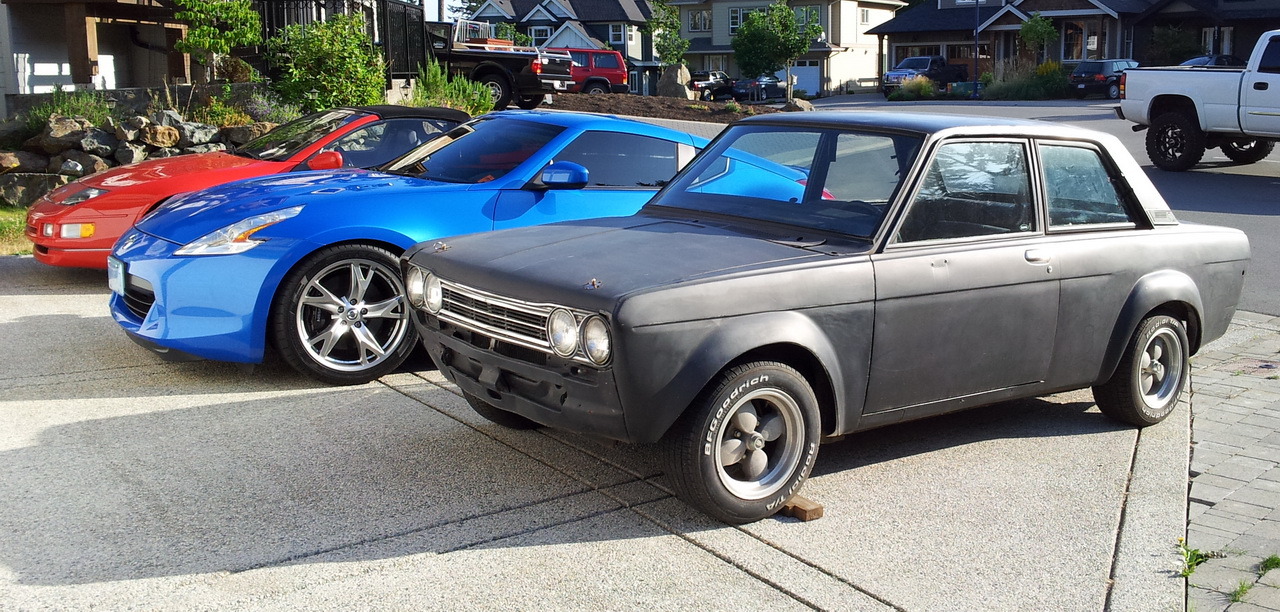
Well I guess I should start a build thread. Like everyone and their dog here long time 510 fan always wanted one but being a Z car guy first and foremost the 510 kinda went to the back burner. Kept an eye out and missed a few but most of the stuff around here is rotten and goes for a fortune. Long story short a guy I knew had one about three years ago. It was a project he picked up from a kid. Put the car back together, added bubble flairs and painted it flat black. Found a rebuilt L16 and dropped it in. Shortly thereafter he found his dream car - '60's Impala which he proceeded to dump huge piles of cash into to build his dream car. I told him if he was ever going to sell the 510 to let me know. Three years later I get a message on my phone from our local classified adds which pops up any time anything Datsun is listed. 95% of the time it's either wheels that fit a Datsun, books with Datsun in a picture on the 59th page or some rotten piece of junk. Anyhow this time it turns out to be this 510 and it sure looked like the guy's car that I talked to years ago so I call the number right away. He answers the phone and I ask him if this is so and so and it turns out it's the guy. He says he just posted the ad less than five minutes ago. Anyhow I ended up buying it and so it begins....
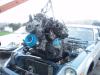
After she arrives at home with some of her stable mates:
Missing the rear cover so I covered her shame with a piece of sheet metal till I can get around to fitting something properly.

After she arrives at home with some of her stable mates:
Missing the rear cover so I covered her shame with a piece of sheet metal till I can get around to fitting something properly.
Last edited by FricFrac; Oct 12, 2012 at 10:40 PM.
Thread Starter
Mr Z++ Wiki
Joined: Sep 2009
Posts: 2,195
From: Victoria, BC
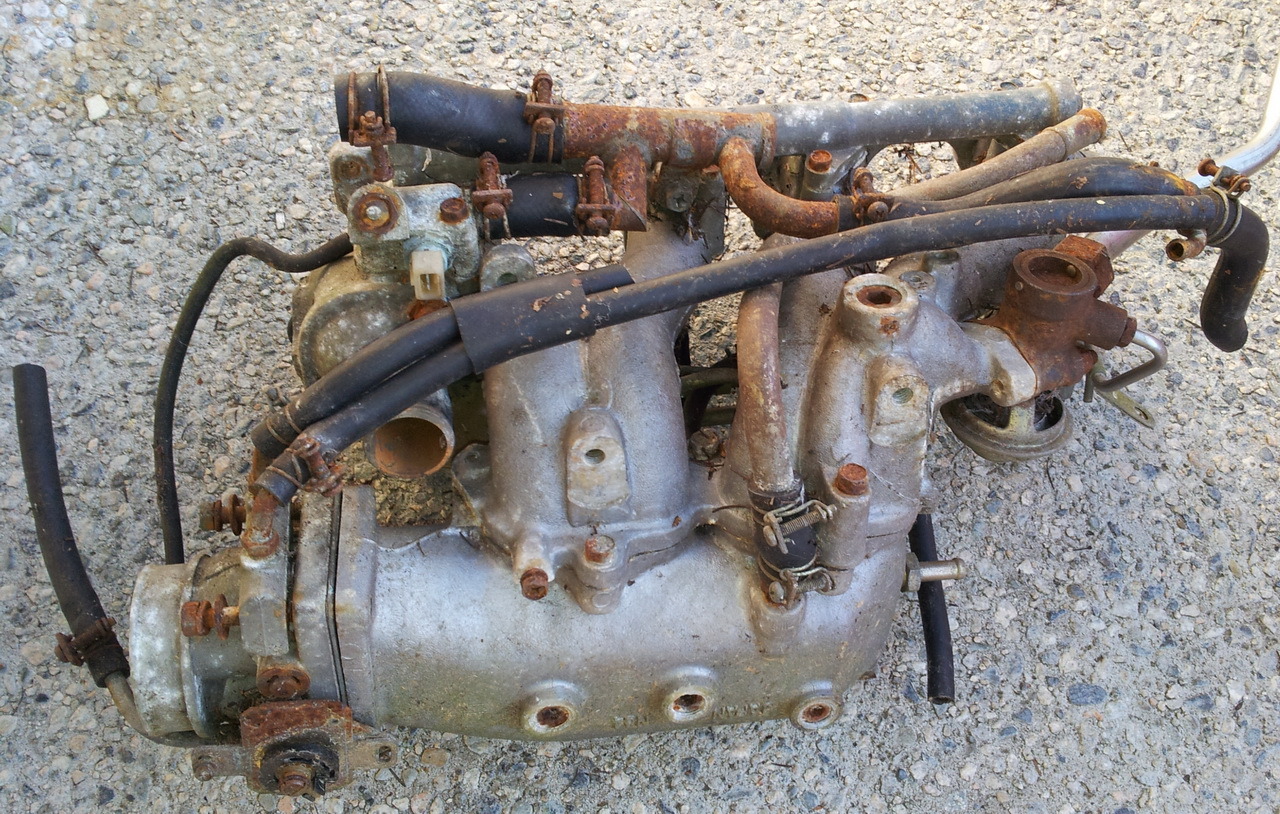
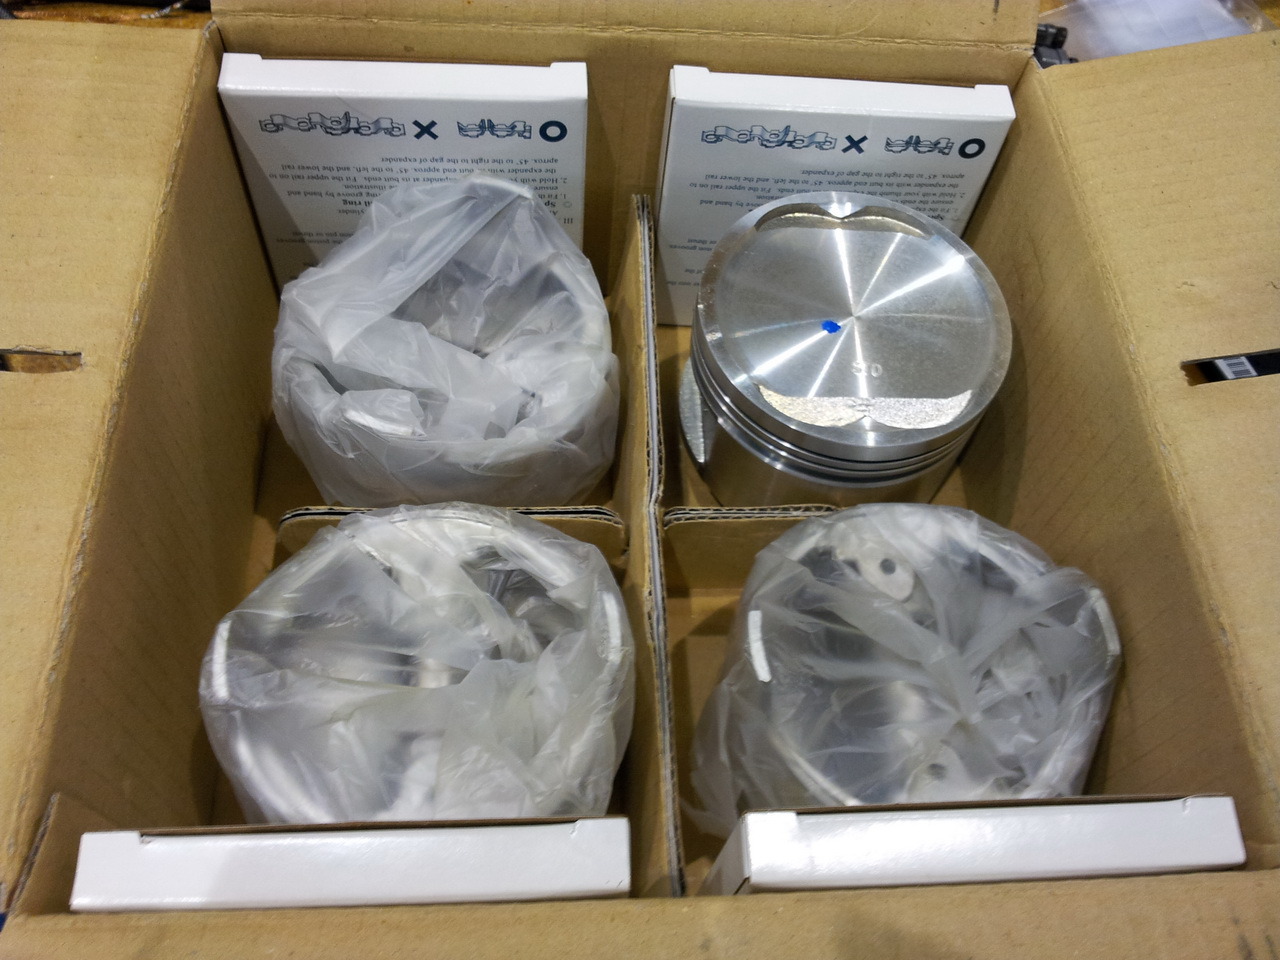
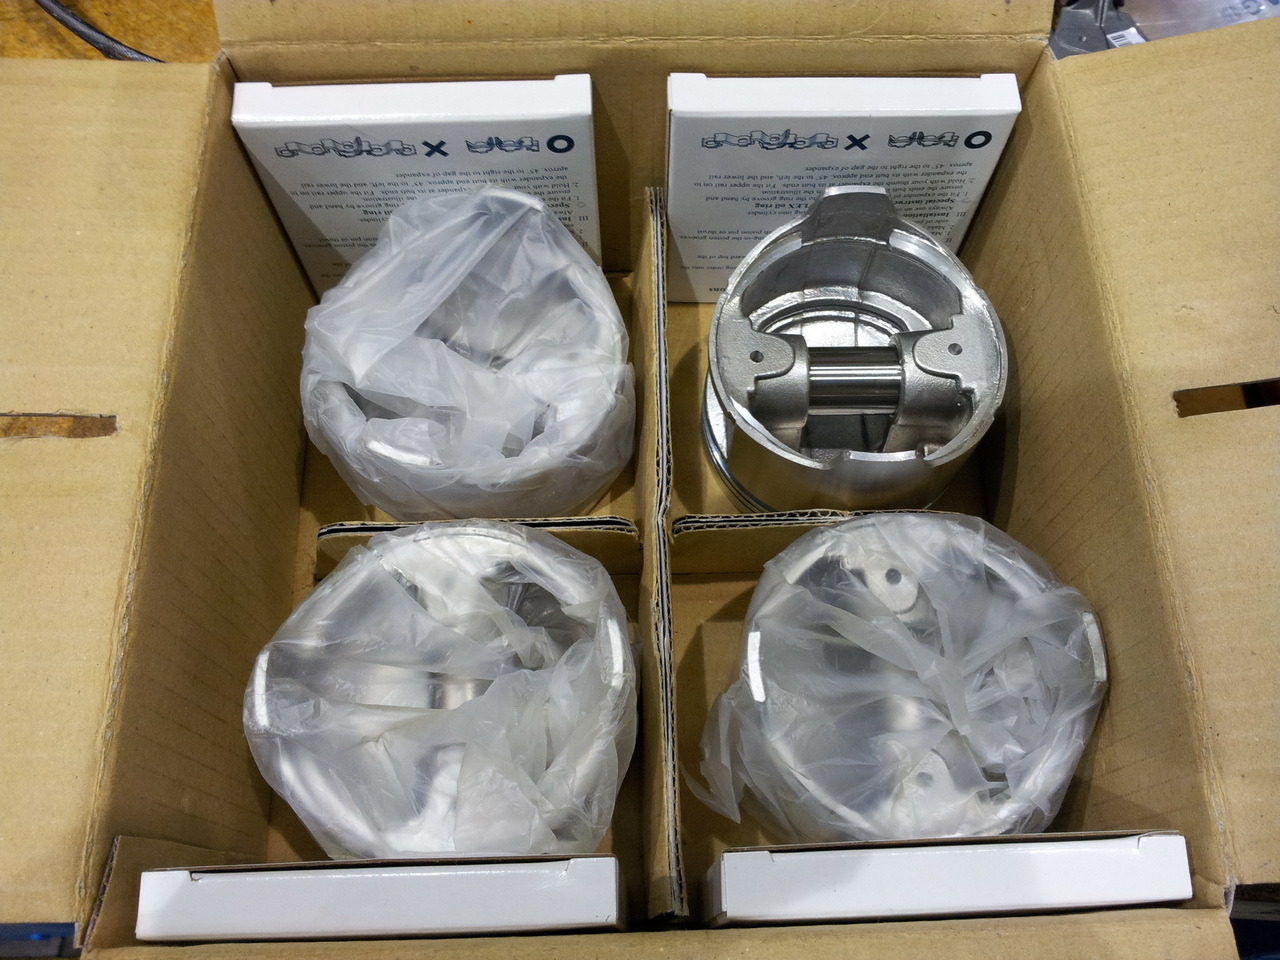
Of course I haven't even had her towed home and I'm researching engine swaps. You know the usual KA24, SR20, VG30E and ET, etc... I'm trying to get 'er running in the drive way and I'm not having a lot of luck. I rebuilt the carb not knowing what kind of shape it's in. Getting better. Find a bunch of vacuum leaks. Replace the weak coil. I'm an Electronics Eng so I pull the stock harness out of the engine bay and give 'er a rebuild. I've got all the connectors for the 240Z, etc so I was already good to go there - add some new ground wires, etc. The whole time I'm fighting with this I'm thinking how much easier it would be if I was running Mega Squirt like I just built for the 280ZXT. That's when I start thinking about building an L16 turbo with EFI (MS3). I start researching about how to make this happen. I think it would be a fun little engine and I don't need an insane build - I've got other cars that make lots of power and the L16 turbo is kinda unique as most people don't bother. I start researching EFI manifolds and figure I'm going to have to build my own. Then I start trying to figure out how I'm going to trigger the EFI. Looking into an L28ET dizzy, etc and I find out that the Z24i has an optical dizzy. It also has a hemi head with a good quench area - hmmm that's perfect for a turbo build. A friend of mine tells me he has a Z22 so I do some horse trading (thanks Greg!) and now I'm going down the Z22 EFI turbo road. She burns oil so now's the time for a rebuild. The tentative plans are a full gasket set, ITM hyperutectic pistons and rings (only $50 more than rings alone - seems like a no brainer), ARP head and rod bolts (good for a boosted engine and the NAPSZ seems to have an issue with the head bolts getting loose after time), and Cleavite crank and rod bearings. Once we get her cracked open we'll see if anything else needs doing but I'm trying to keep this fairly low cost. I picked up an extra oil pan (thanks Peter!) and oil pickup (thanks Hayden!) so I don't need to rip the L16 apart to build this thing.
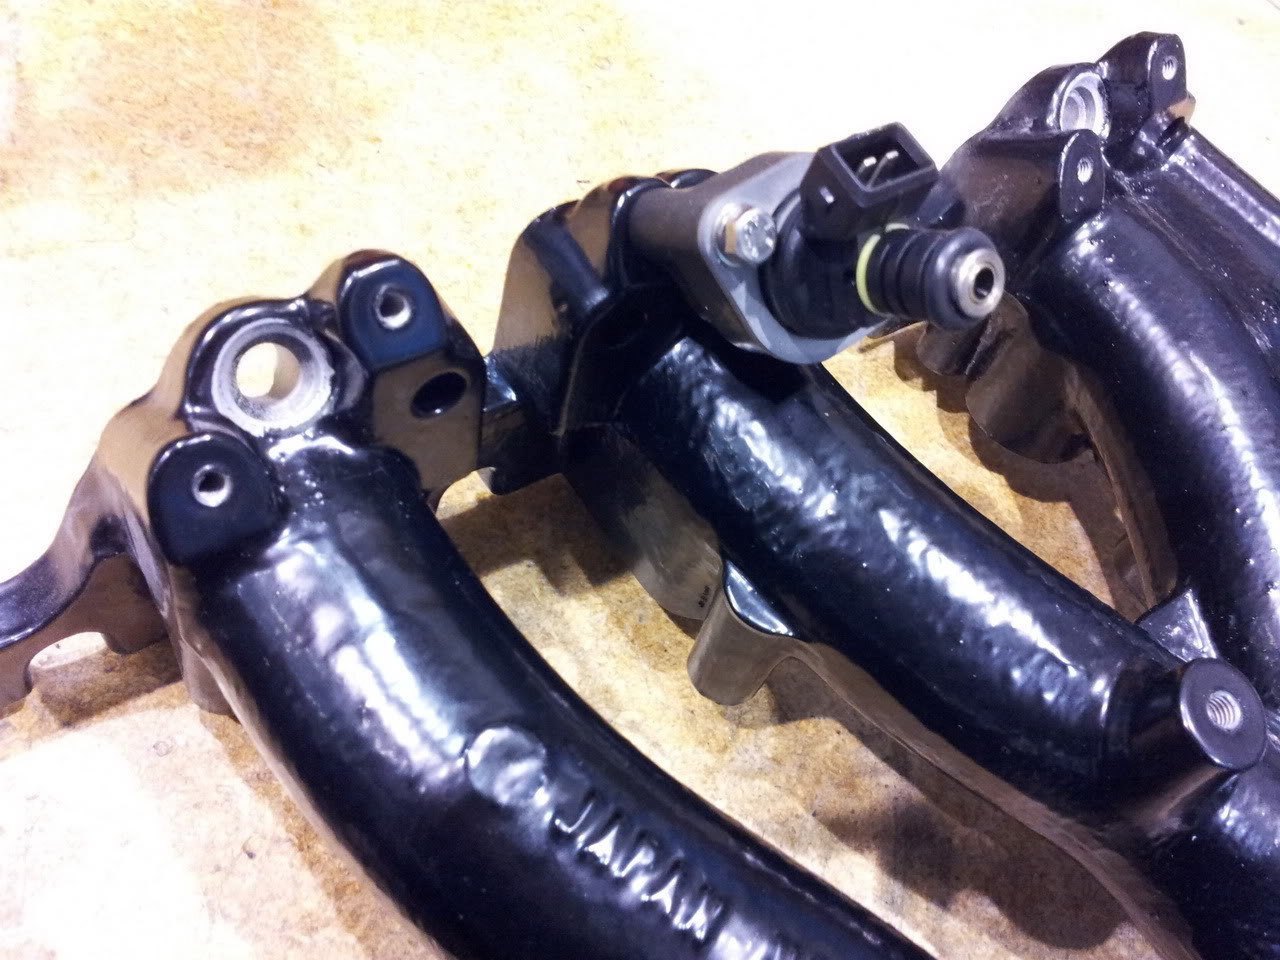
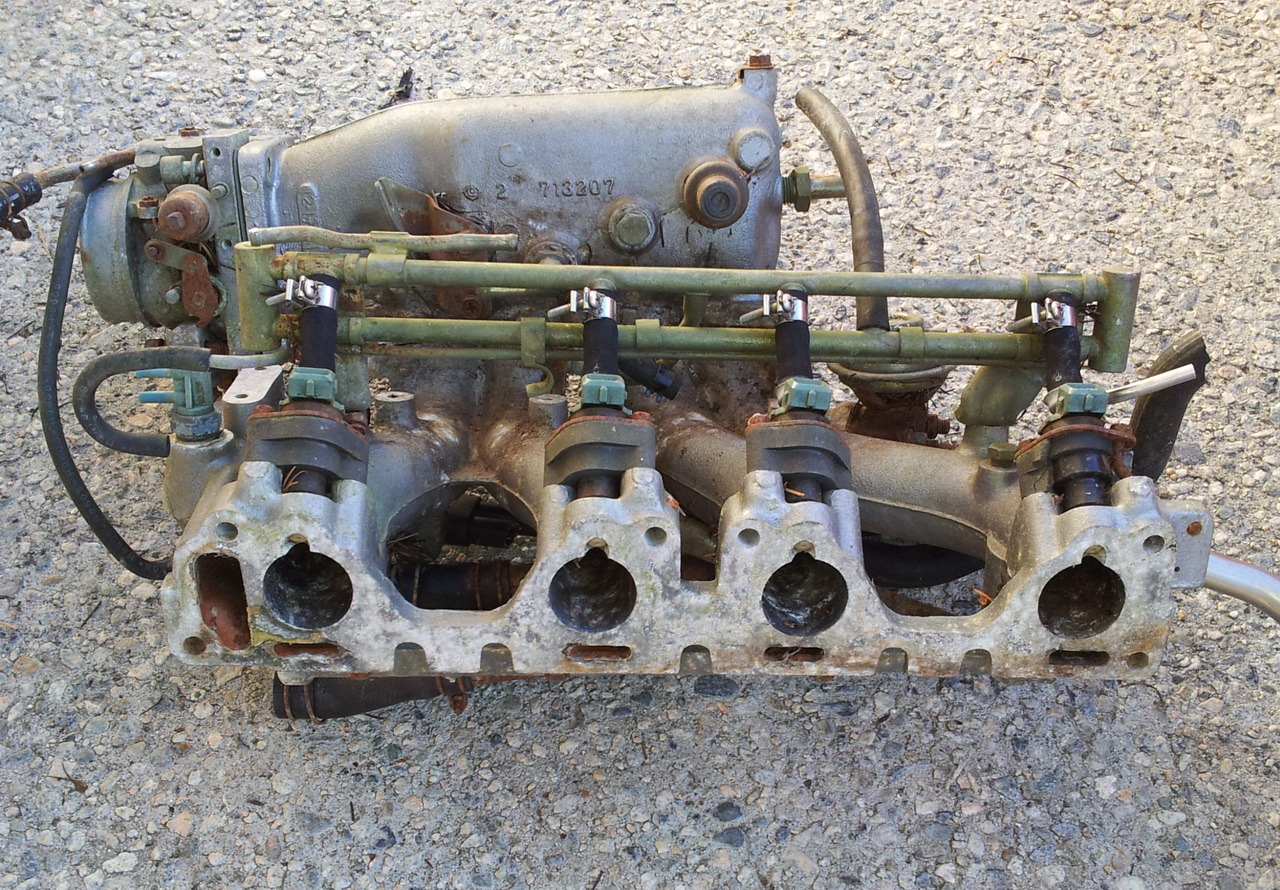
So the challenge of this beast is to get it into EFI land. I'm already part way there researching for the L16 EFI conversion. I need an EFI manifold from an early 200SX (Z20) and an optical dizzy from the later Z24i Hardbody. DatsunMike as always has been a pile of help. Posted tons of picks and pointed me in the right direction. Found a dizzy from a Z24i (thanks Sealick!) and while I was looking at a 280ZX for a good friend of mine I look down in the dirt literally and there lies a 200SX intake plenum and runners - the last piece of the puzzle (thanks Robert!)
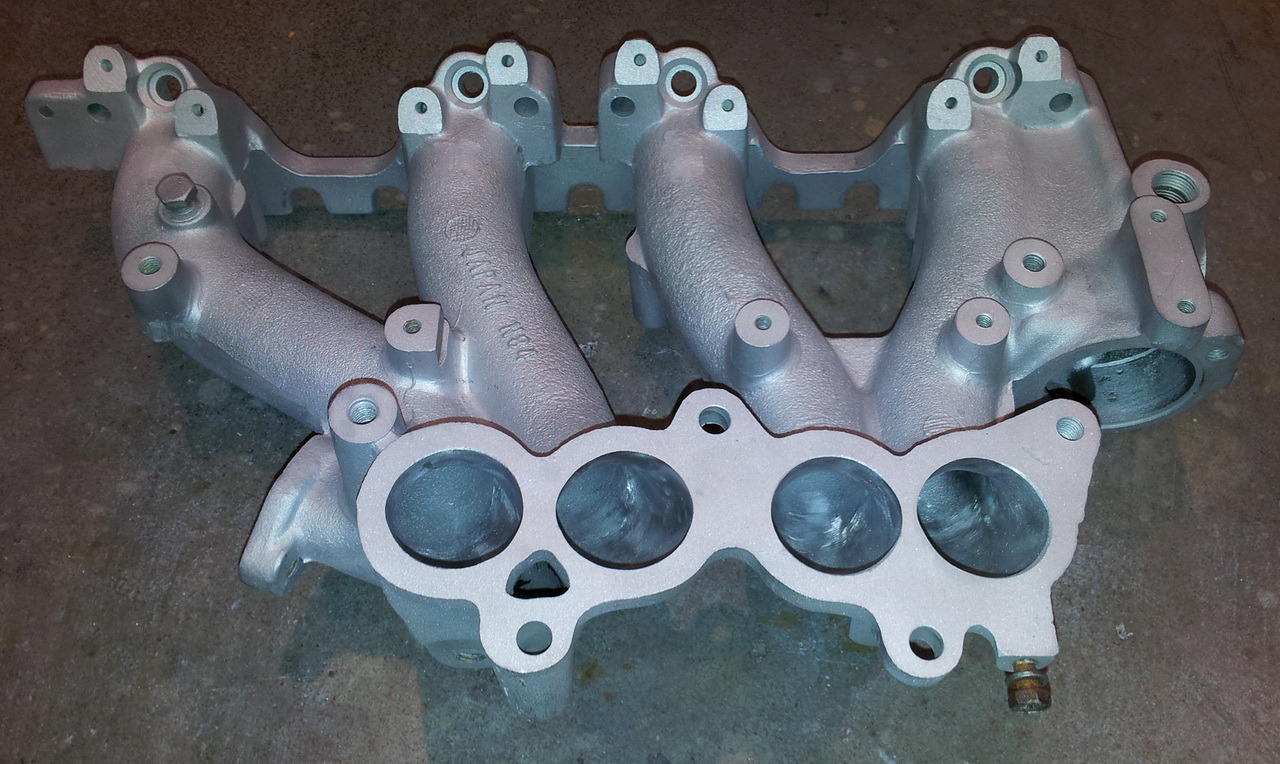
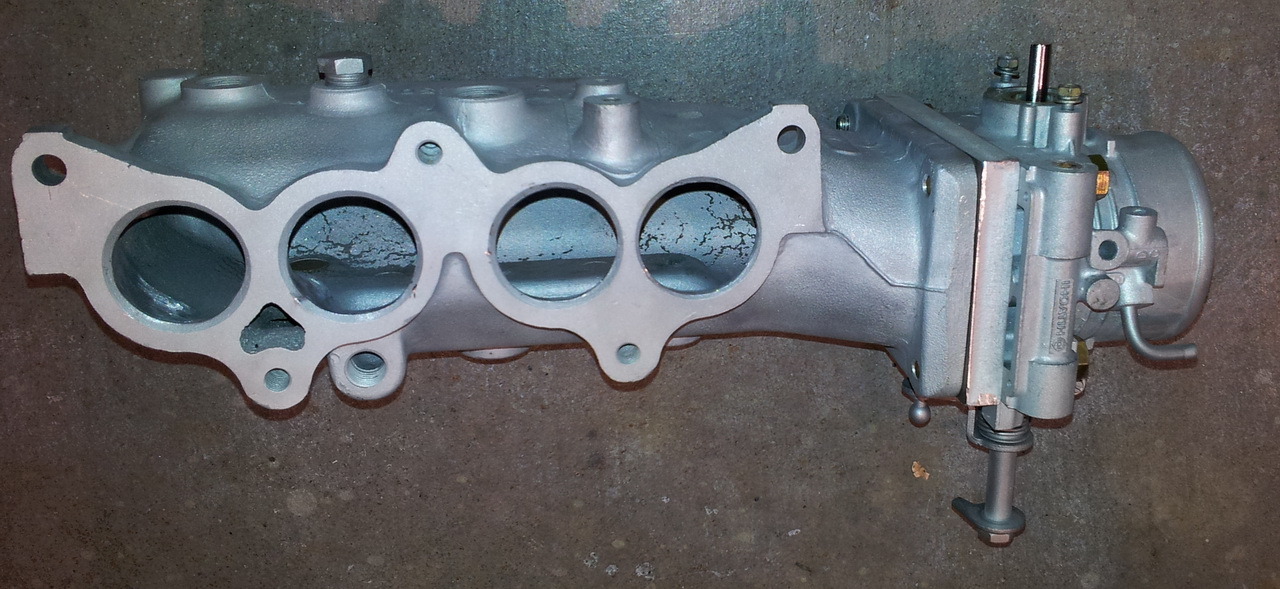
So here's the plenum and runners before the masaging begins (minus 12lbs of pine needles)
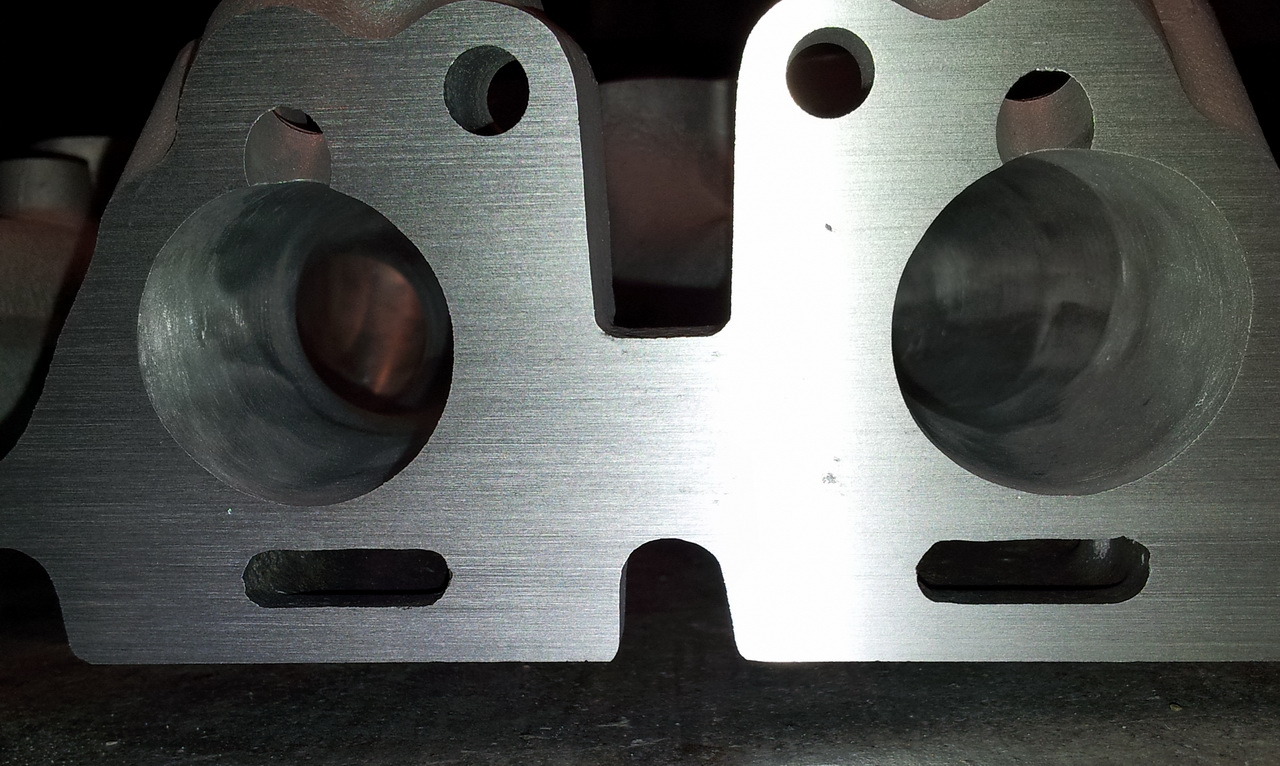
Intake runners bead blasted, ported and polished
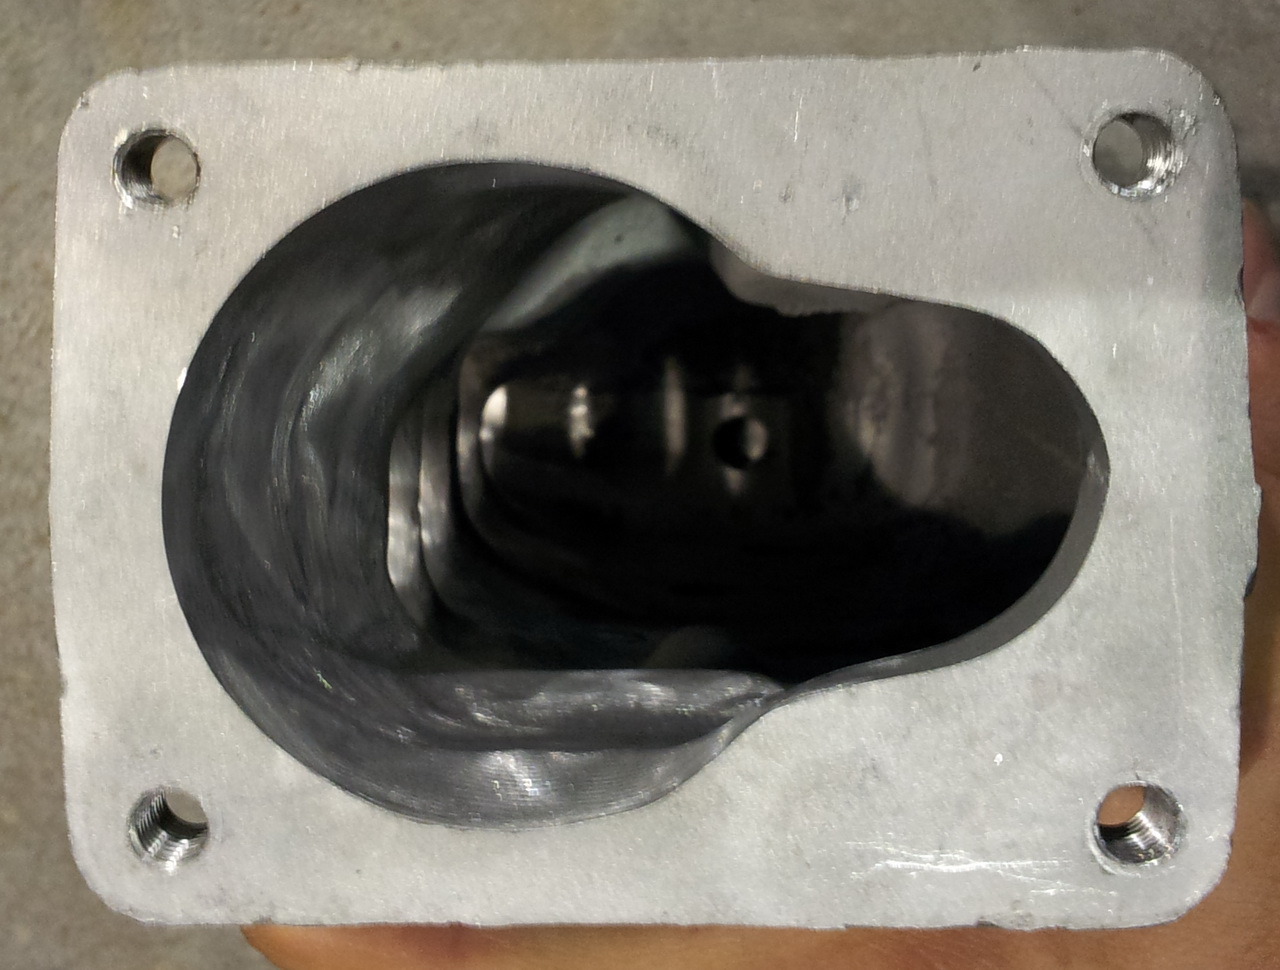
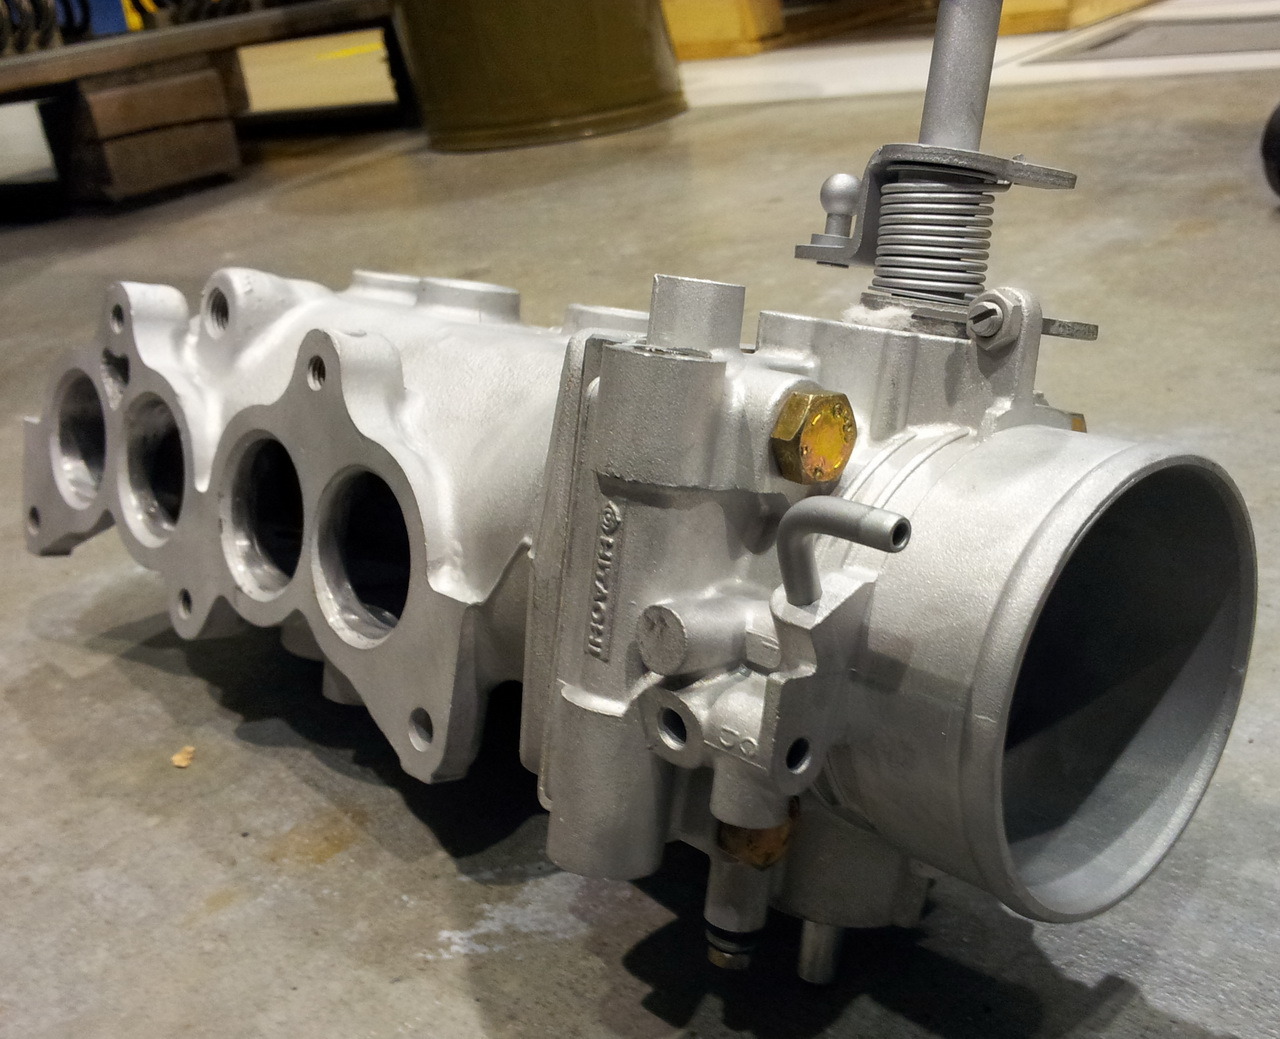
Intake plenum ported to accept a 240SX 60mm throttle body. Might be a little overkill so I may have to go to a 280ZX 48mm TB for better throttle response. We'll have to see how it works out.
Intake plenum with 240SX TB and an adapter plate made of 1/2" aluminum. Two screw holes are tapped into the plate to mount the TB and the other two line up with the stock mounts. Third set of holes mounts to the stock location below the TB. Cut the water inlet/outlet off the TB to reduce plumbing.
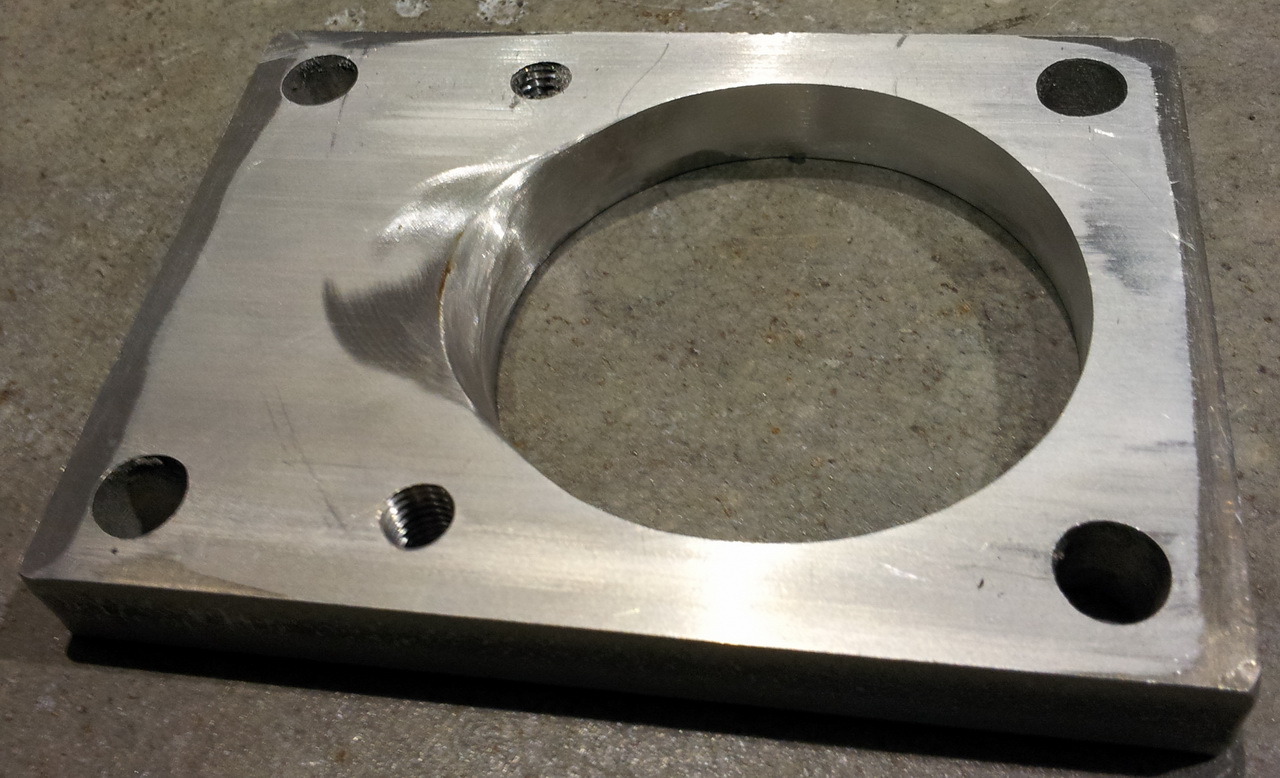
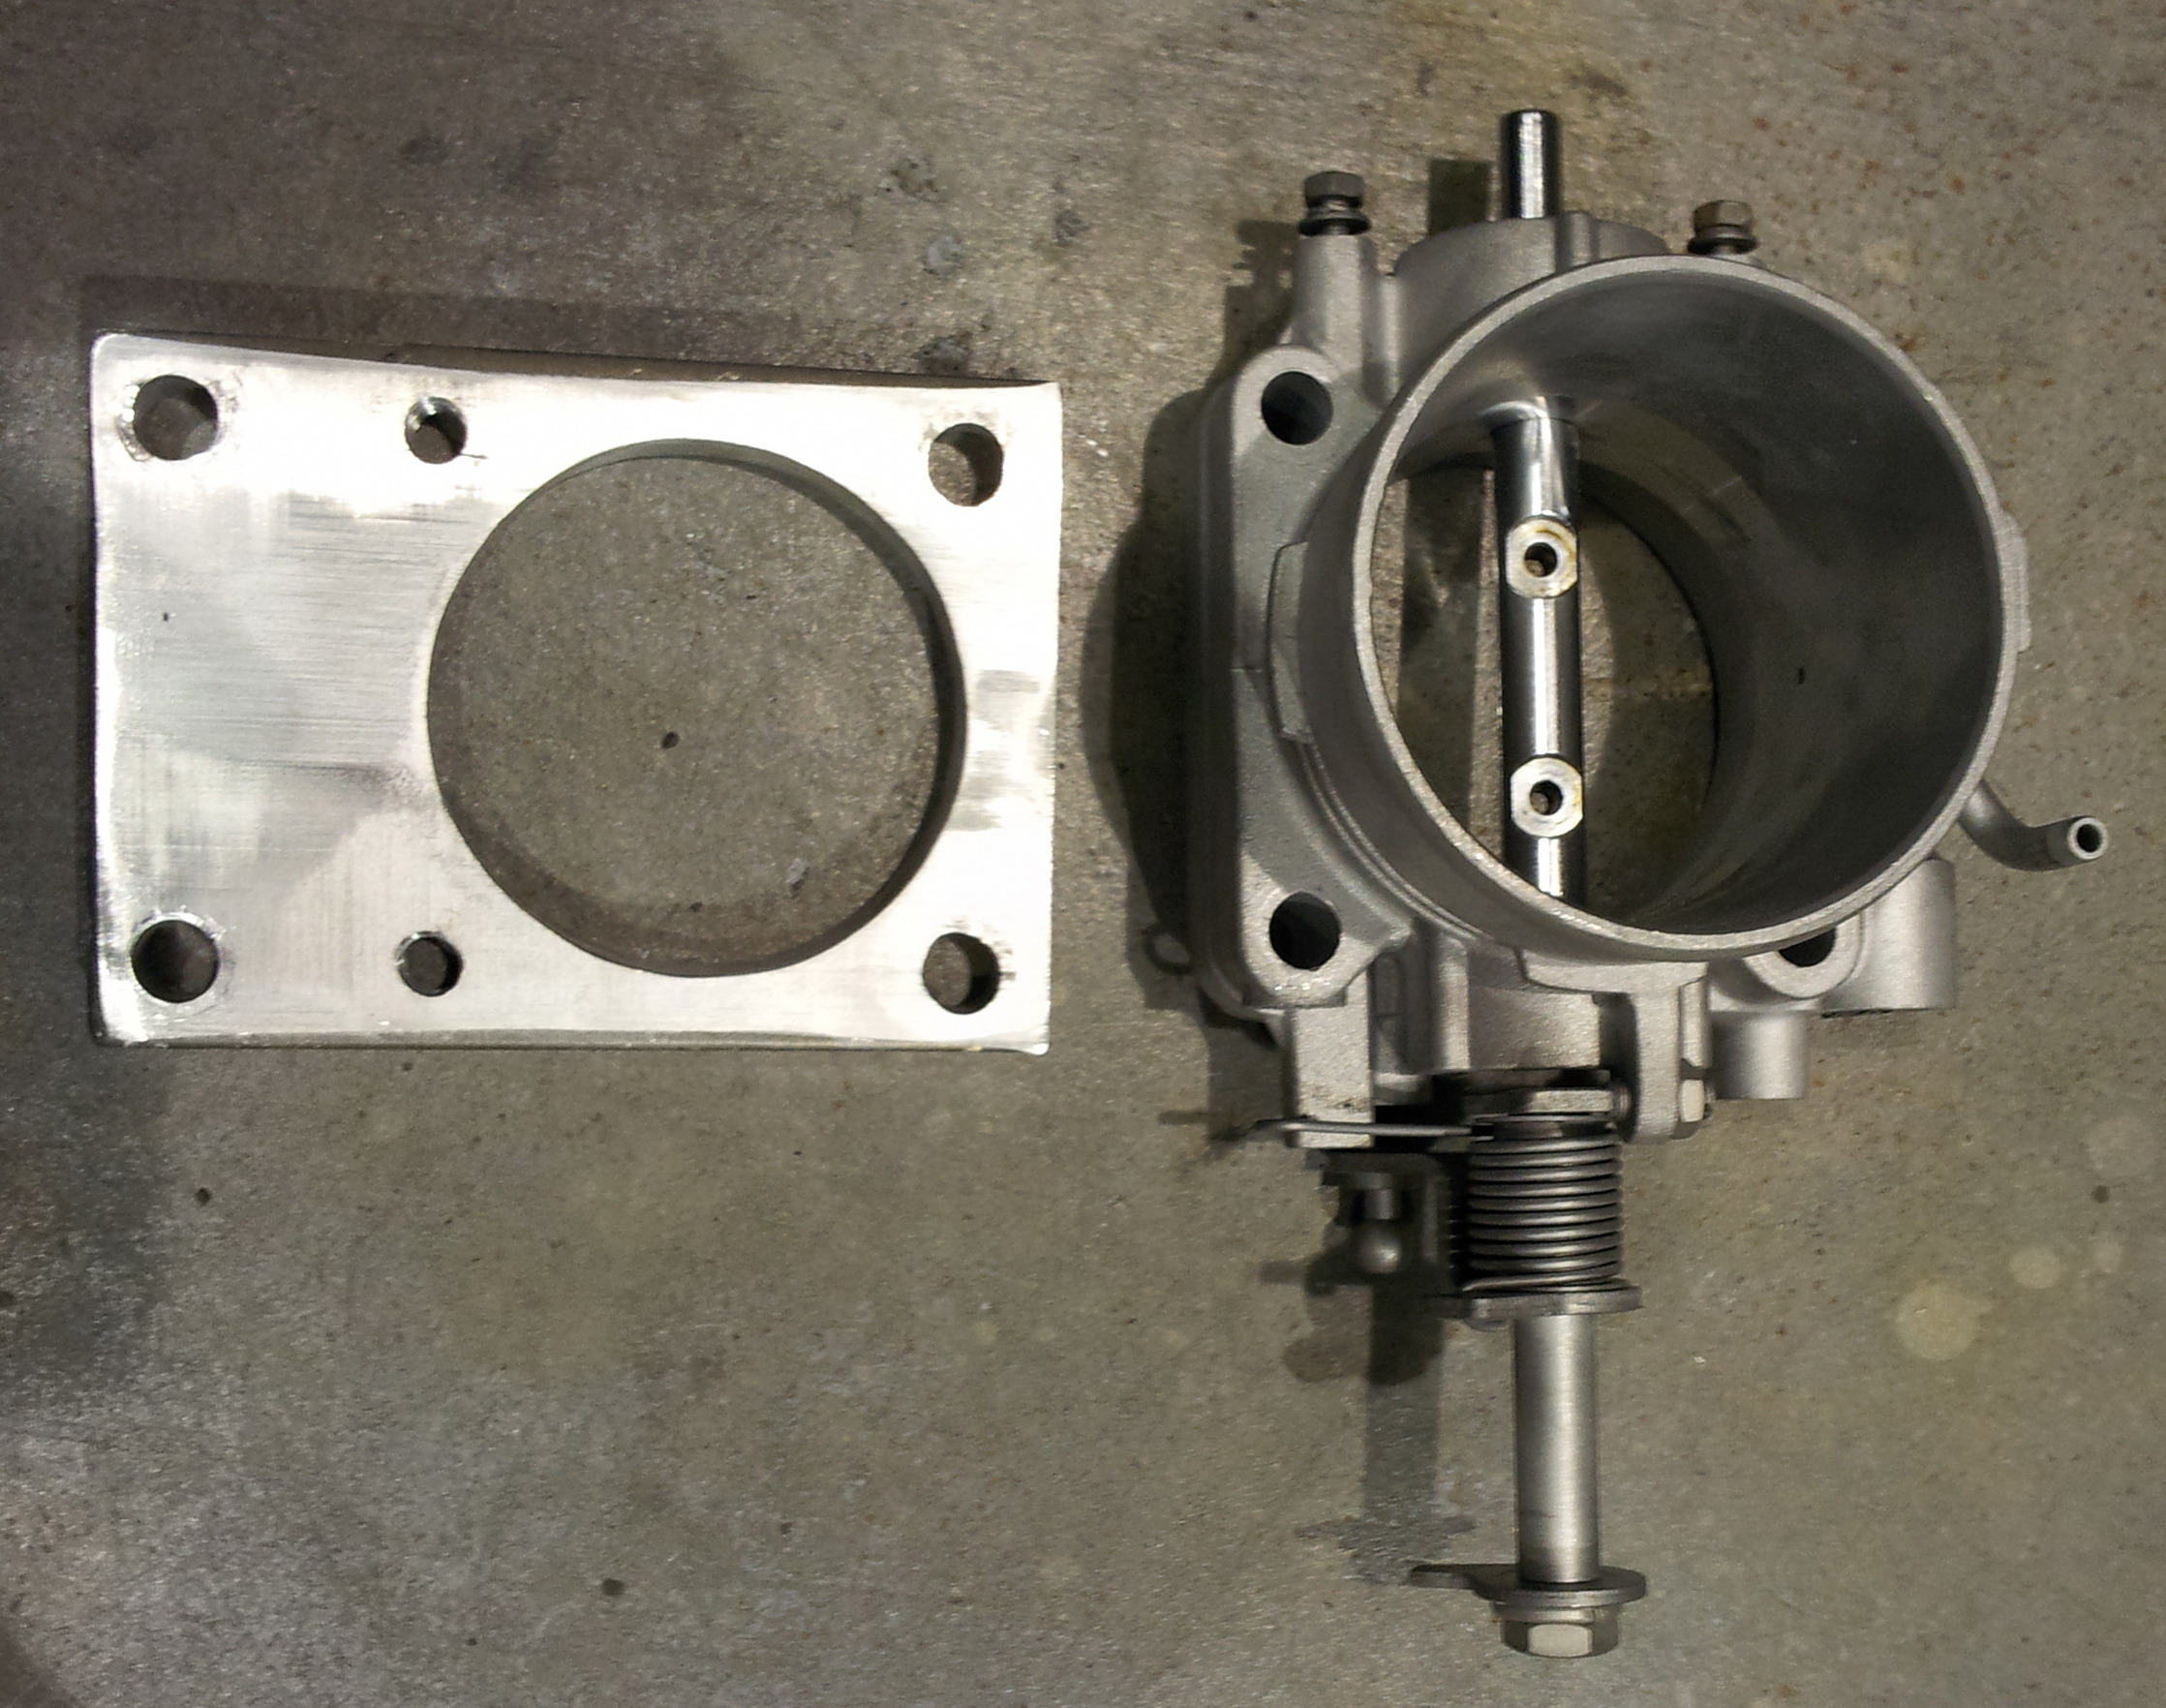
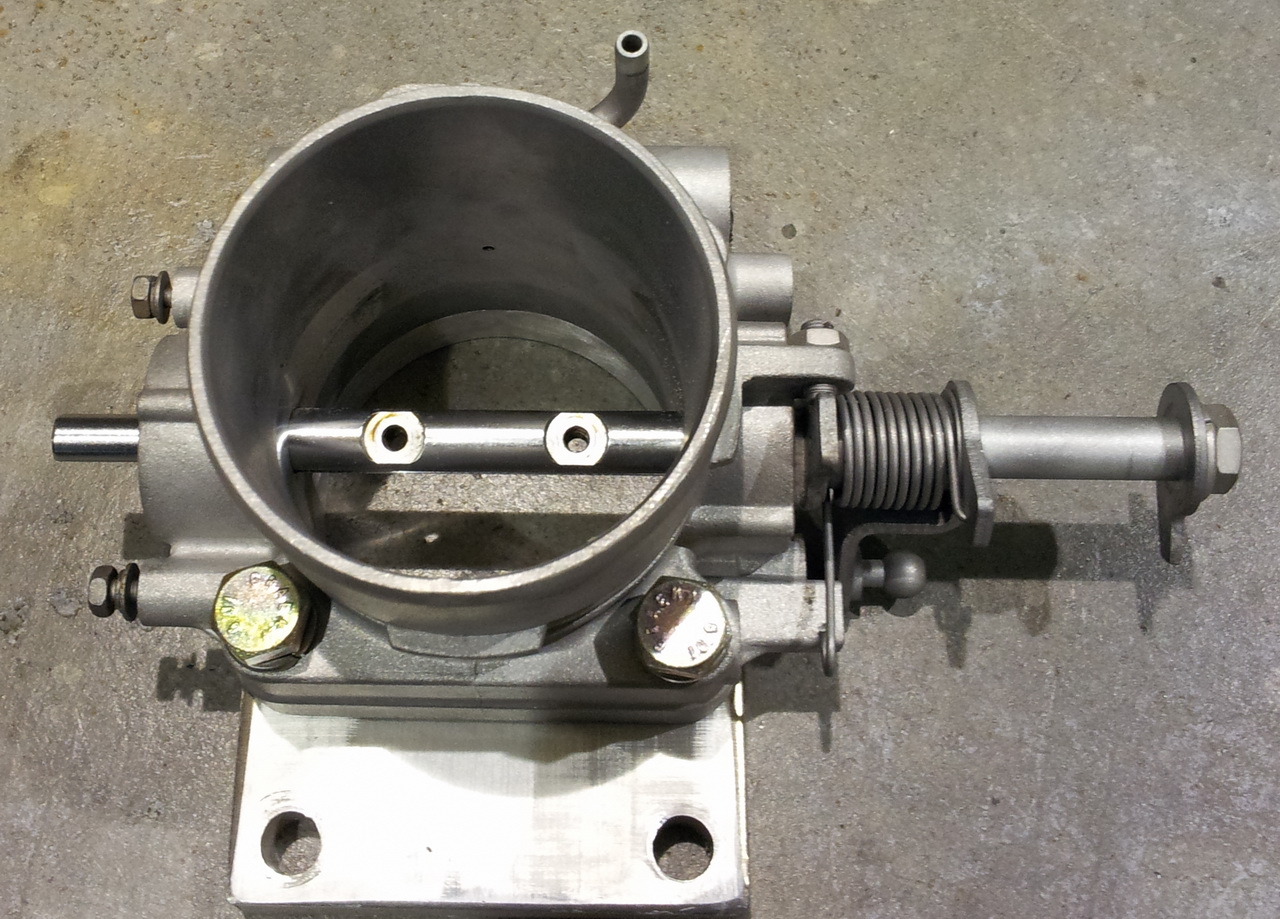
Plenum and TB test fitted. TB adapter is port matched to the plenum
So the challenge of this beast is to get it into EFI land. I'm already part way there researching for the L16 EFI conversion. I need an EFI manifold from an early 200SX (Z20) and an optical dizzy from the later Z24i Hardbody. DatsunMike as always has been a pile of help. Posted tons of picks and pointed me in the right direction. Found a dizzy from a Z24i (thanks Sealick!) and while I was looking at a 280ZX for a good friend of mine I look down in the dirt literally and there lies a 200SX intake plenum and runners - the last piece of the puzzle (thanks Robert!)
So here's the plenum and runners before the masaging begins (minus 12lbs of pine needles)
Intake runners bead blasted, ported and polished
Intake plenum ported to accept a 240SX 60mm throttle body. Might be a little overkill so I may have to go to a 280ZX 48mm TB for better throttle response. We'll have to see how it works out.
Intake plenum with 240SX TB and an adapter plate made of 1/2" aluminum. Two screw holes are tapped into the plate to mount the TB and the other two line up with the stock mounts. Third set of holes mounts to the stock location below the TB. Cut the water inlet/outlet off the TB to reduce plumbing.
Plenum and TB test fitted. TB adapter is port matched to the plenum
Thread Starter
Mr Z++ Wiki
Joined: Sep 2009
Posts: 2,195
From: Victoria, BC
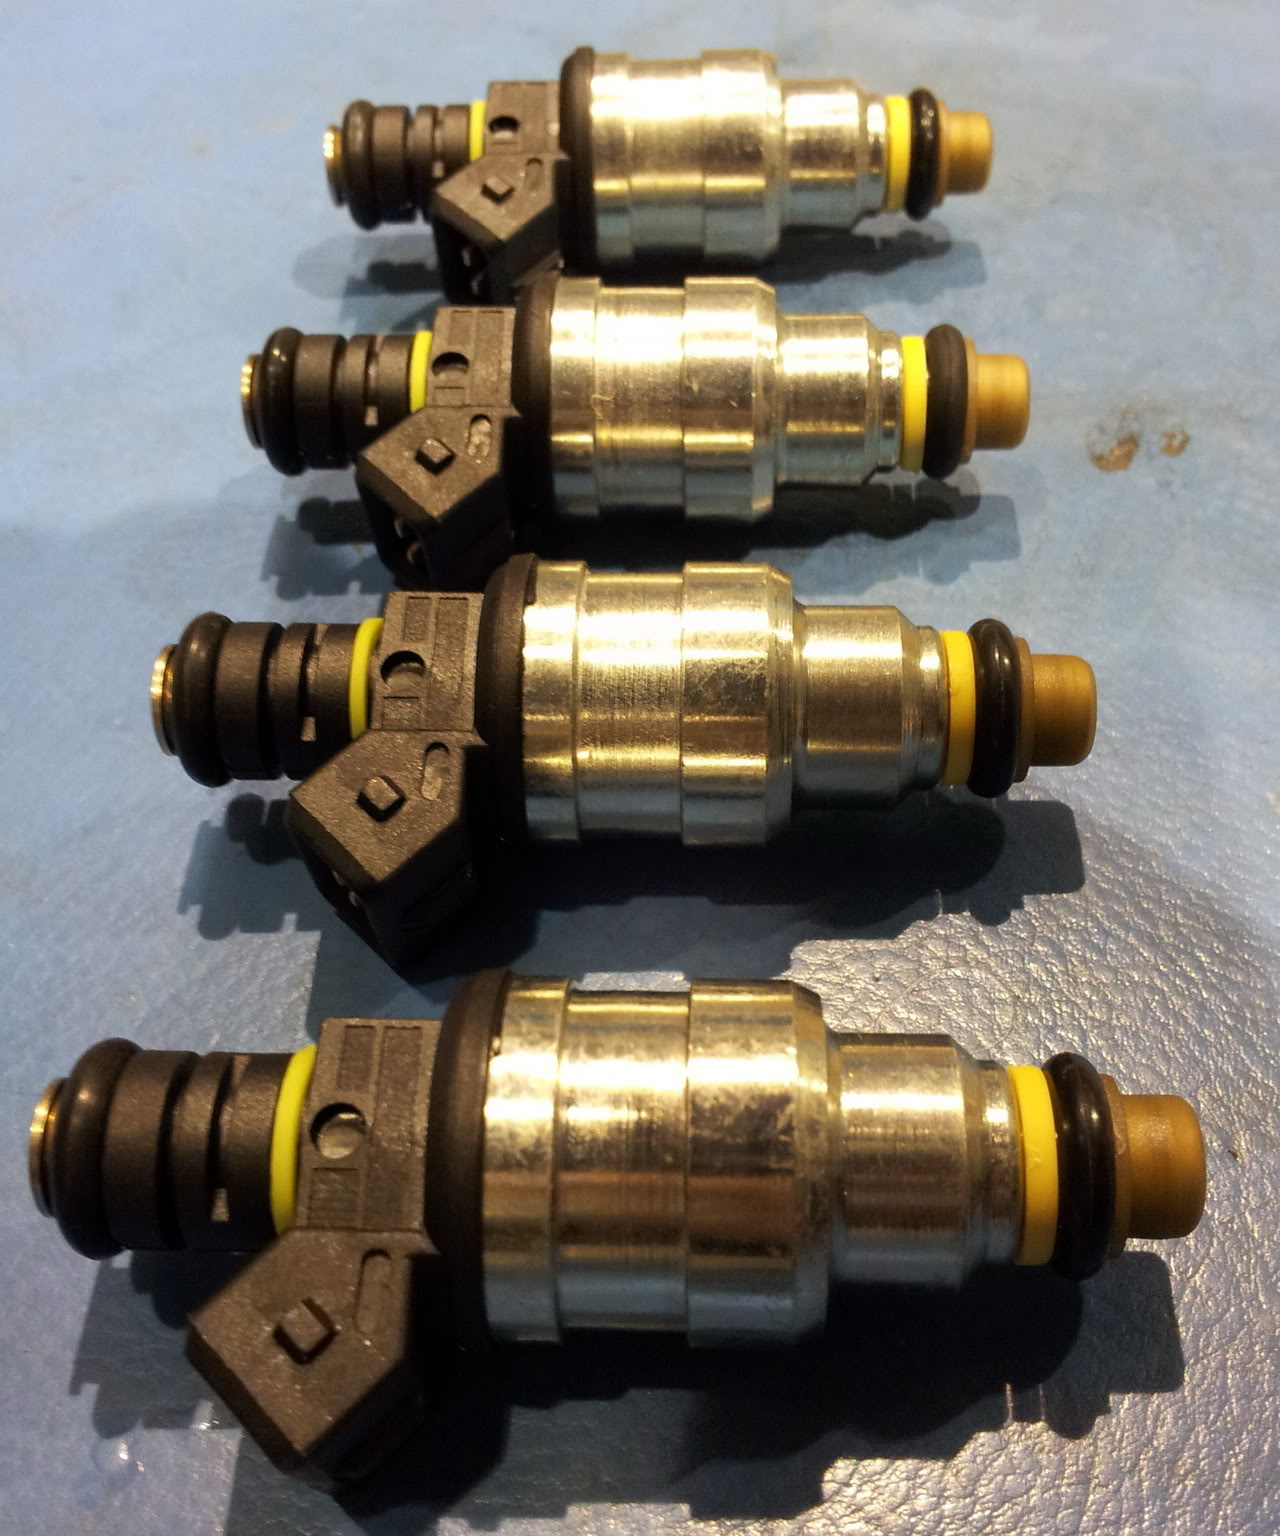
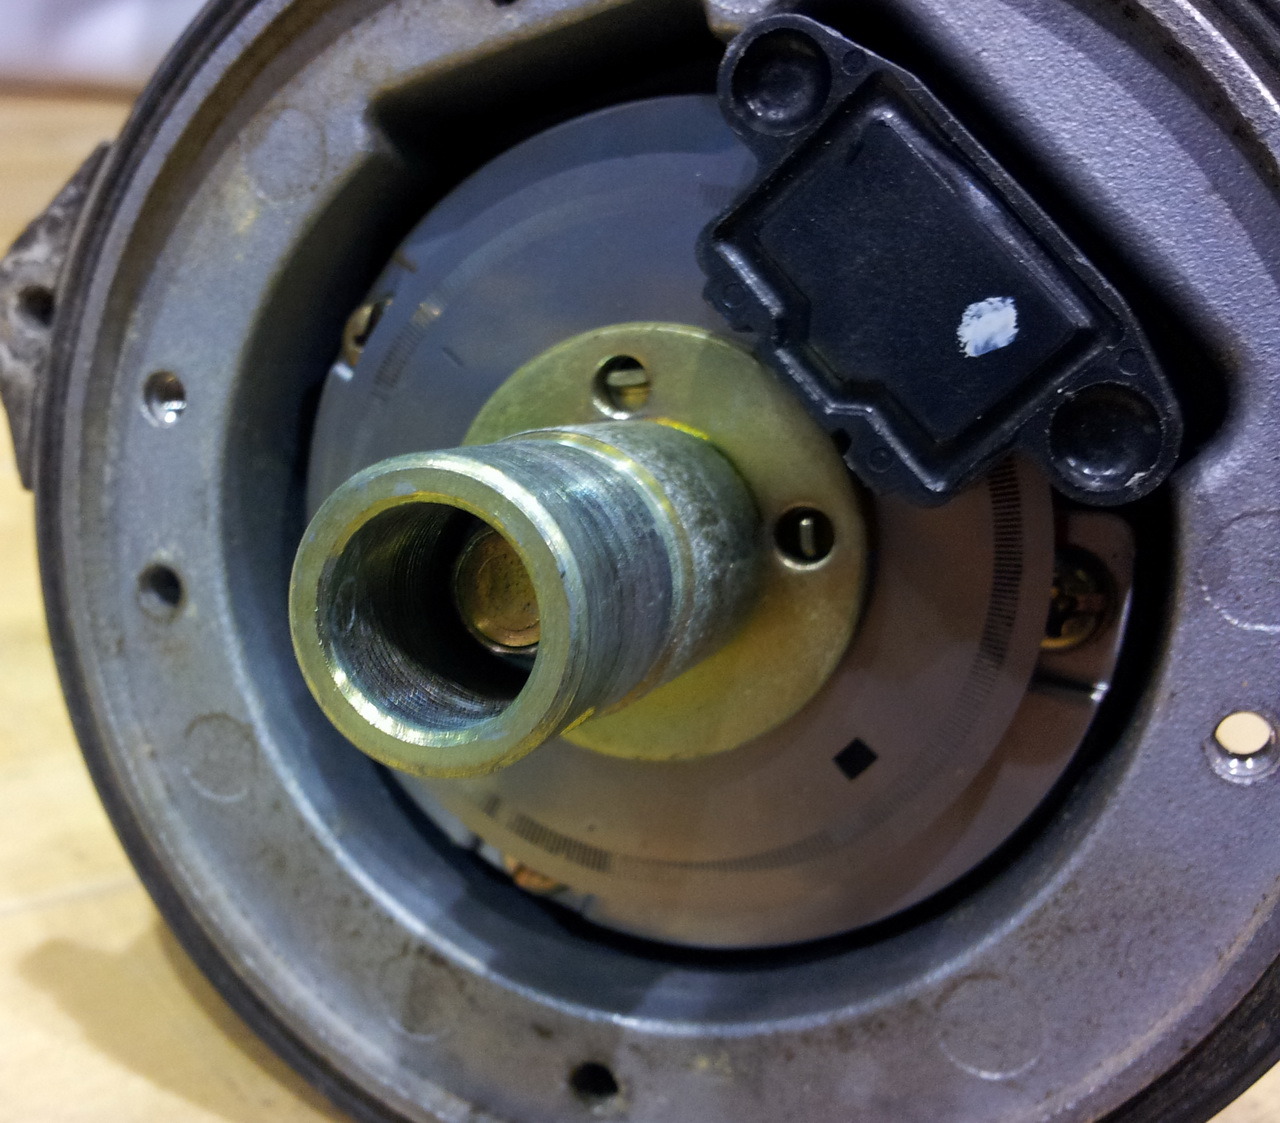
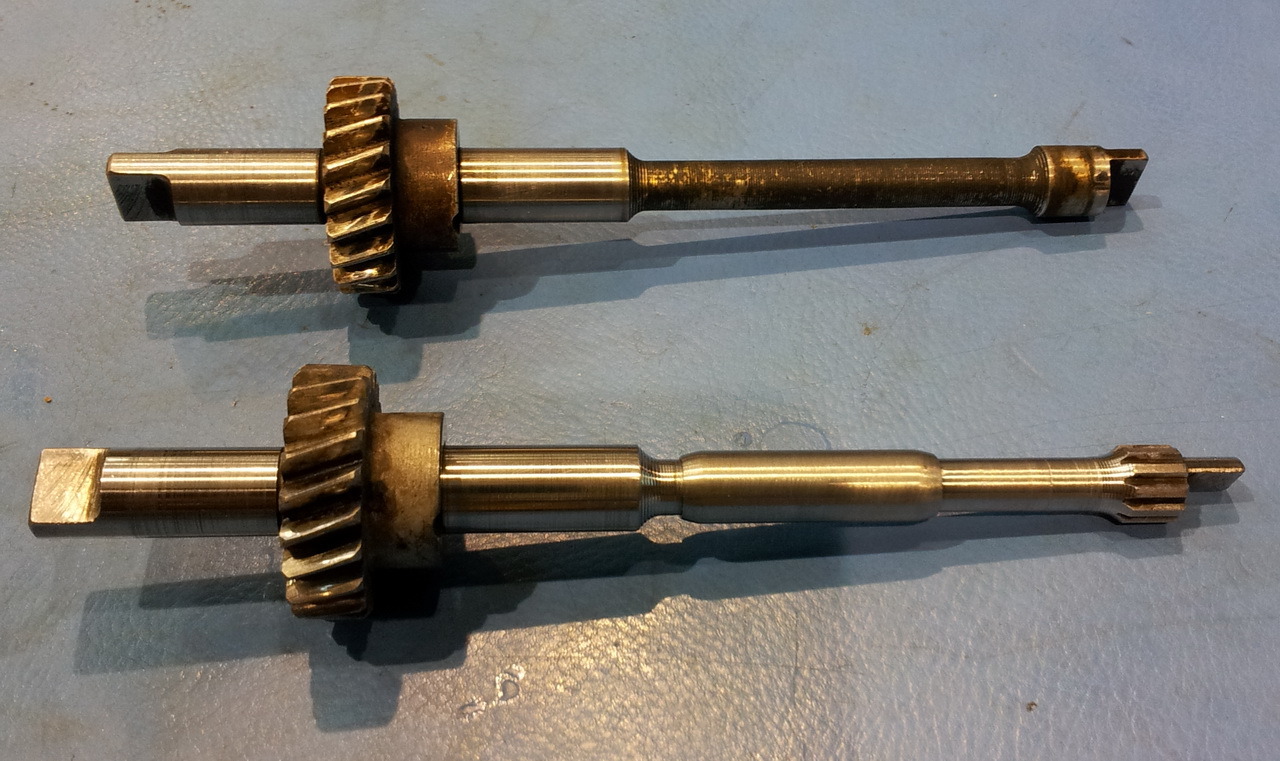
And here's my dizzy from a Z24i with the optical encoder wheel. I might be able to use the wheel as is since it has a larger slot for TDC. MS3 firmware 1.1.2 supports the Nissan CAS so we'll see if that works. If not I've got a 24-1-1 50mm optical encoder wheel we cut on the water jet that should work instead. I cut it for the L28ET but it's the same size conveniently 
Has the same 10 spline count as the L28ET oil pump shaft which should work in the Z22
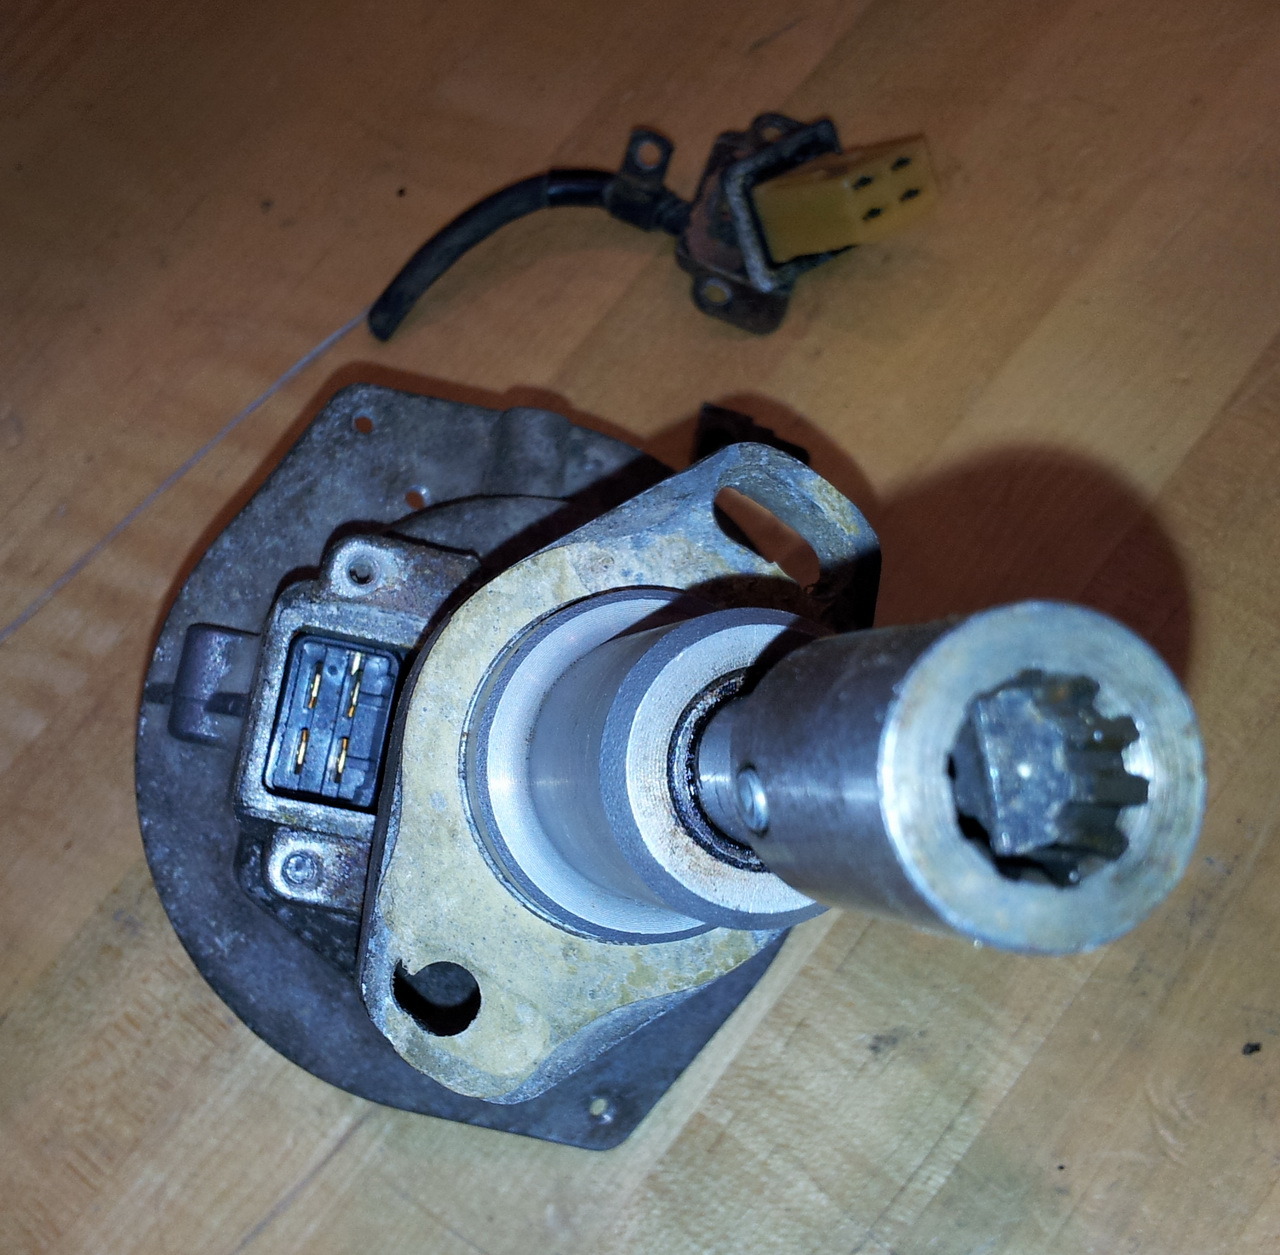
Stock 50mm optical encoder wheel. Same size as the L28ET and VG30E dizzy. Different in that it has a larger slot for TDC whereas the L28ET are all equal size (and six instead of four slots on the second ring)
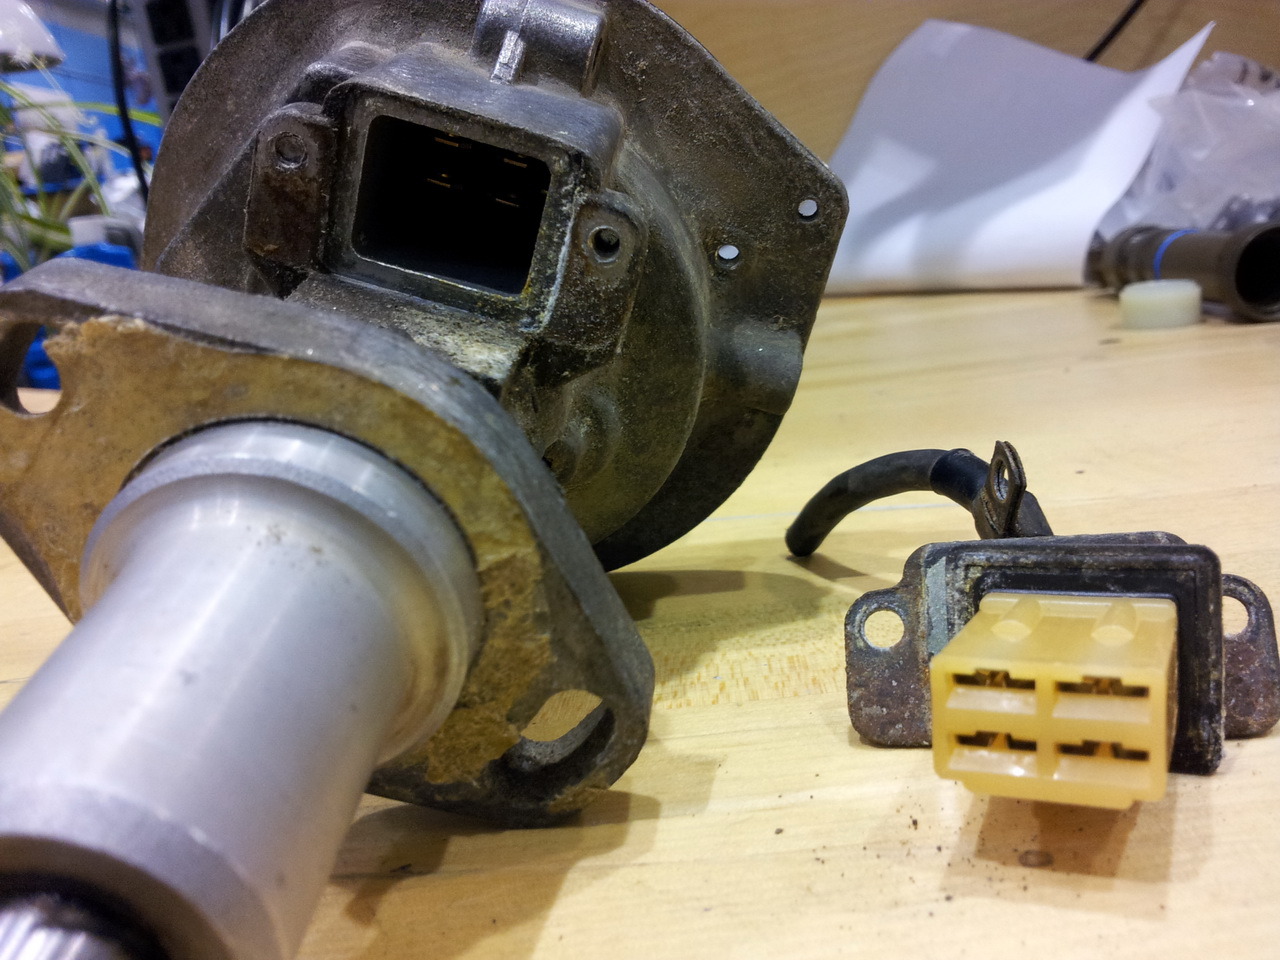
The pigtail looks like it goes right into the dizzy but it's just a cover plate that holds the more common rectangular four pin connector - same as the L28ET dizzy. Nice as this makes it easier to interface to
Has the same 10 spline count as the L28ET oil pump shaft which should work in the Z22
Stock 50mm optical encoder wheel. Same size as the L28ET and VG30E dizzy. Different in that it has a larger slot for TDC whereas the L28ET are all equal size (and six instead of four slots on the second ring)
The pigtail looks like it goes right into the dizzy but it's just a cover plate that holds the more common rectangular four pin connector - same as the L28ET dizzy. Nice as this makes it easier to interface to
Registered User
Joined: Jul 2011
Posts: 548
From: Foresthill, California
Looking good so far! I am excited to see how this turns out because I am a big 510 fan also. There are so many of them in my area for cheap I am very tempted to pick one up... but I have to refrain!
Good luck with the build FricFrac! I'll be following it closely
Good luck with the build FricFrac! I'll be following it closely


The Good Twin
Joined: Aug 2005
Posts: 20,639
From: Wild Wild West, UTAH!
w0w! You have too much free time on your hands.
I lolol'd at this local 510 ad:
$1k for a smokin wild / popular 510? er nope... just compiling all the cool pics on the intrawebs... this 510 is trashed.
I lolol'd at this local 510 ad:
$1k for a smokin wild / popular 510? er nope... just compiling all the cool pics on the intrawebs... this 510 is trashed.
Thread Starter
Mr Z++ Wiki
Joined: Sep 2009
Posts: 2,195
From: Victoria, BC
w0w! You have too much free time on your hands.
I lolol'd at this local 510 ad:
$1k for a smokin wild / popular 510? er nope... just compiling all the cool pics on the intrawebs... this 510 is trashed.
I lolol'd at this local 510 ad:
$1k for a smokin wild / popular 510? er nope... just compiling all the cool pics on the intrawebs... this 510 is trashed.
Last edited by FricFrac; Oct 19, 2012 at 08:50 PM.
Thread Starter
Mr Z++ Wiki
Joined: Sep 2009
Posts: 2,195
From: Victoria, BC
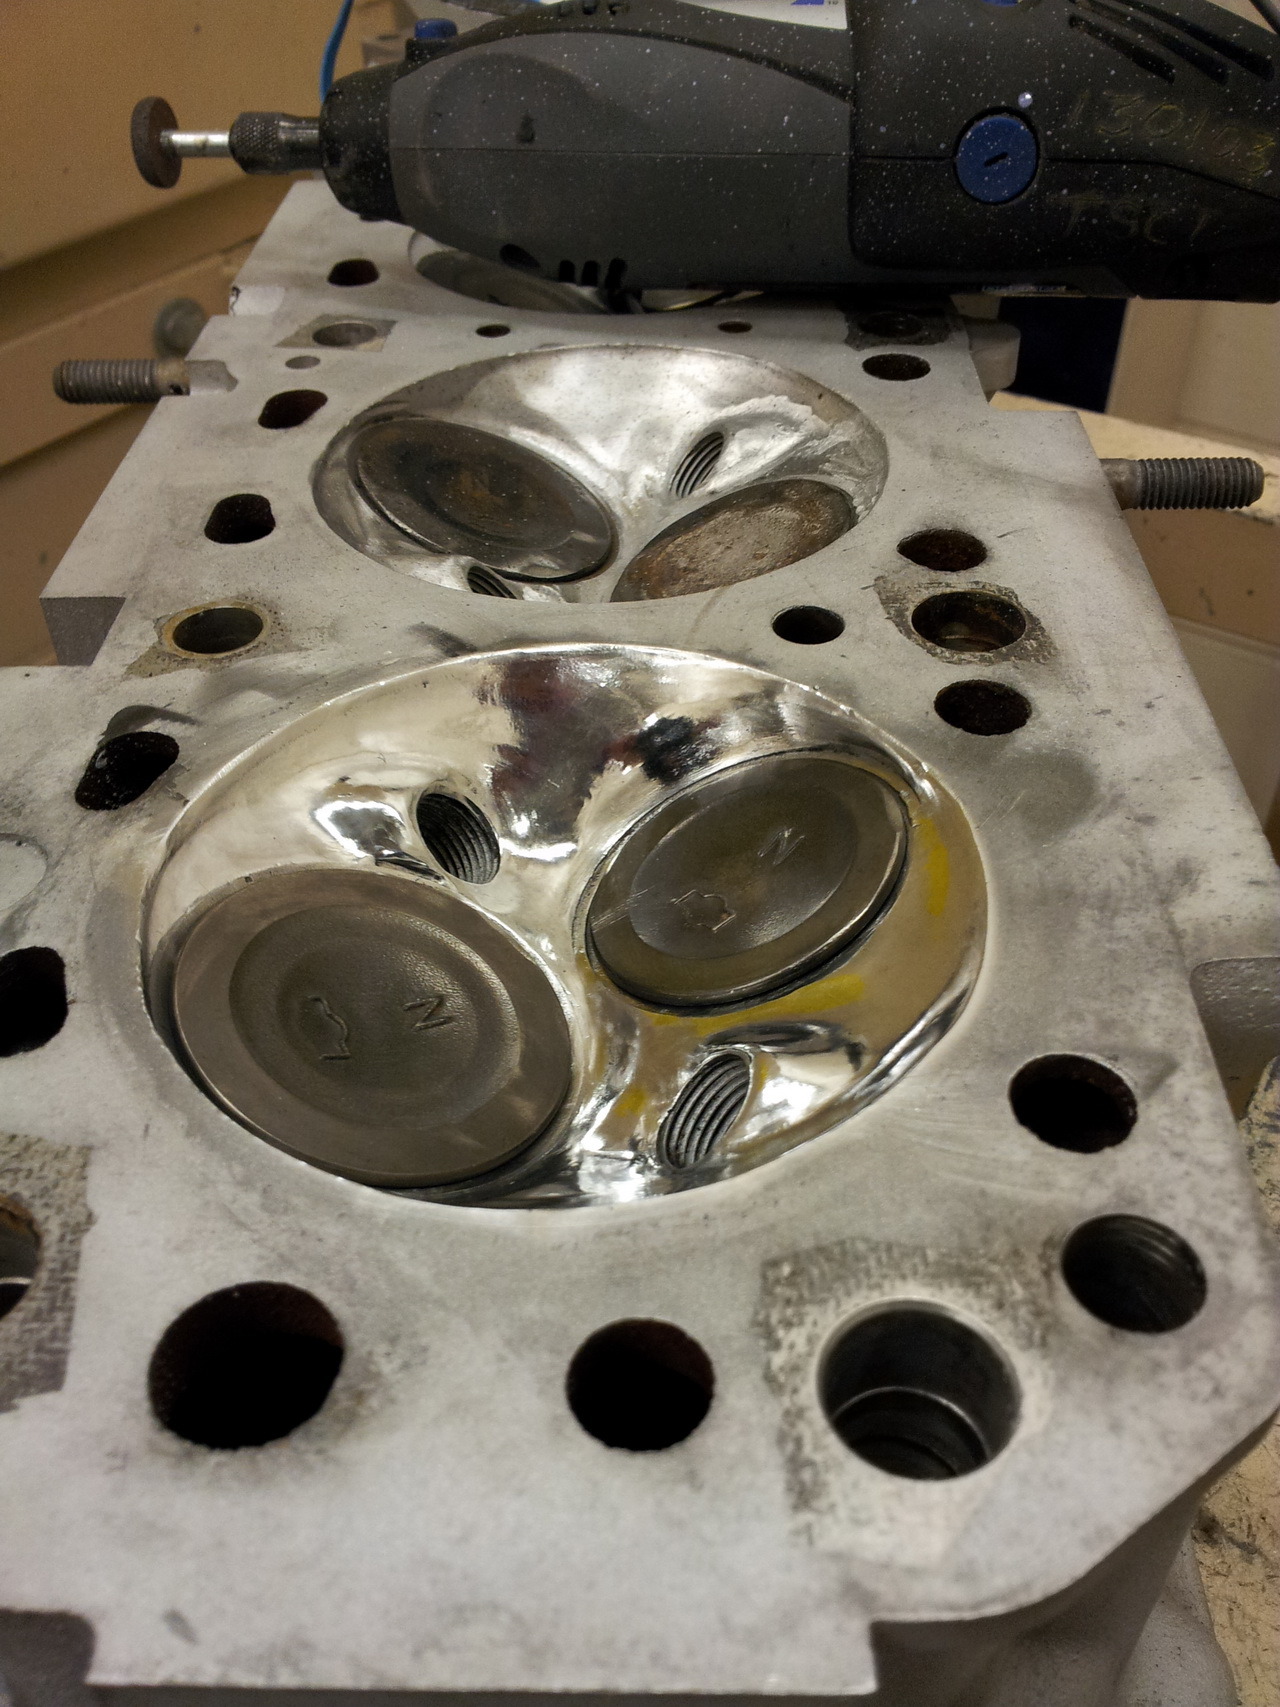
Took the engine apart so it's all sitting in bits on my buddy's garage on the bench. Took the head apart and started to give 'er some loving:
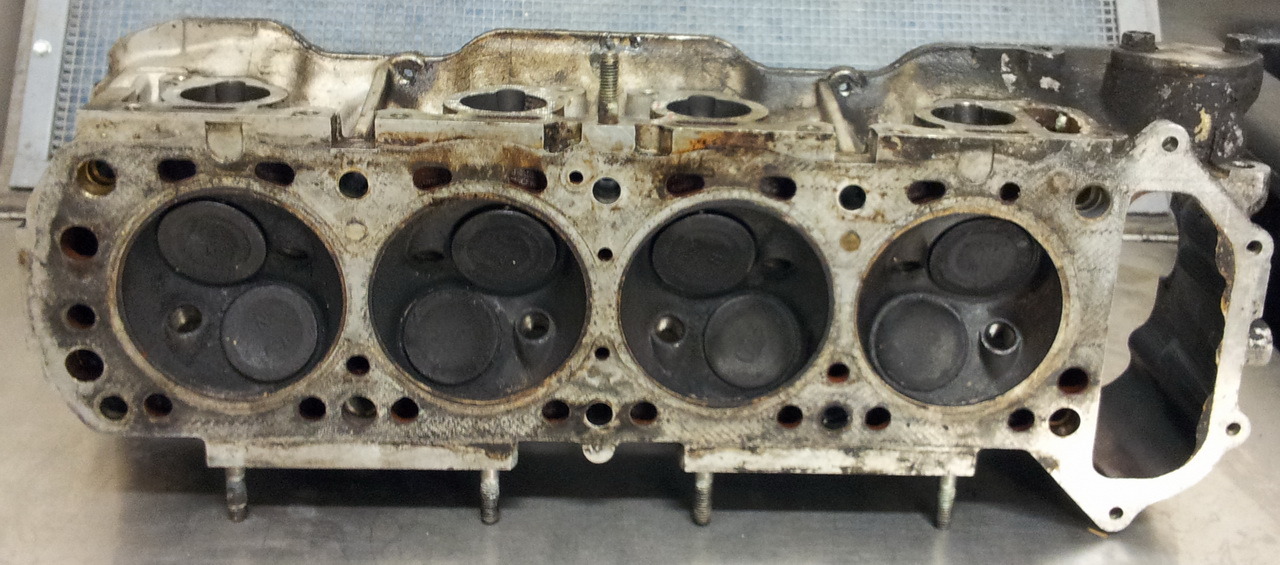
The gratuitous before picture of the carbon coated chamber:
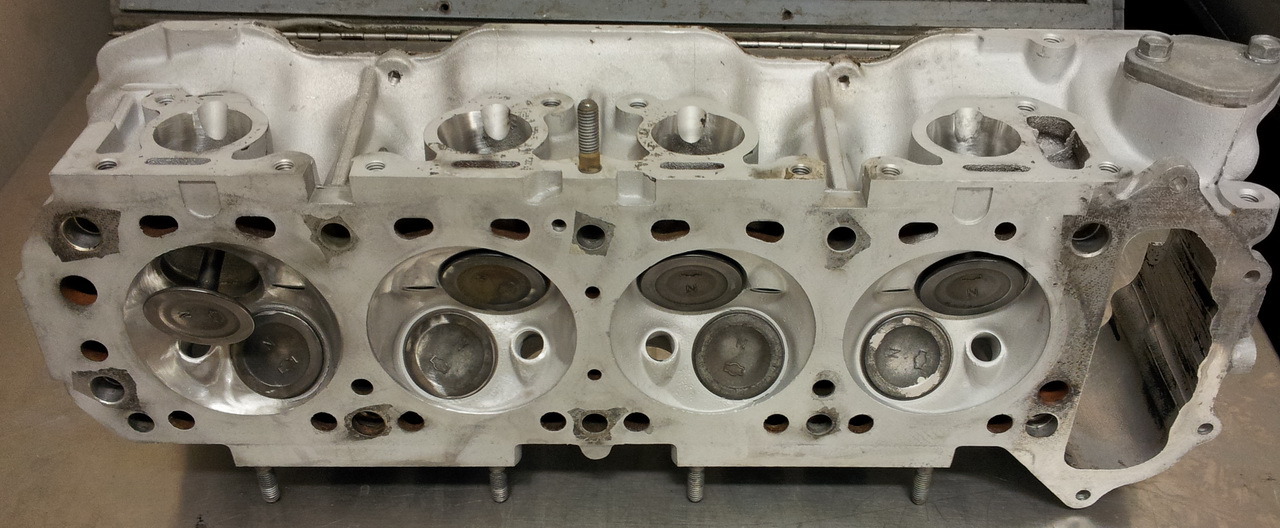
After a good long cleaning:
After I cleaned the combustion chamber I saw quite a bit of damage. Looks like something bounced around in all the chambers. Of course the first one I started working on was the worst and I forgot to take before pictures but you get the idea from this one:

After some sweet loving she's starting to clean up. Still in the process of cleaning the chamber up but it looks like there is hope Tried to remove as little as possible but I'm not too worried about reducing the compression ratio from the small amount of material removed. Just trying to keep the chamber as clean and slick as possible to keep any hot spots to a minimum and thus prevent detonation. It will of course help with flow but reducing detonation is more important IMHO in this turbo application.
The gratuitous before picture of the carbon coated chamber:
After a good long cleaning:
After I cleaned the combustion chamber I saw quite a bit of damage. Looks like something bounced around in all the chambers. Of course the first one I started working on was the worst and I forgot to take before pictures but you get the idea from this one:
After some sweet loving she's starting to clean up. Still in the process of cleaning the chamber up but it looks like there is hope
Tried to remove as little as possible but I'm not too worried about reducing the compression ratio from the small amount of material removed. Just trying to keep the chamber as clean and slick as possible to keep any hot spots to a minimum and thus prevent detonation. It will of course help with flow but reducing detonation is more important IMHO in this turbo application.
Thread Starter
Mr Z++ Wiki
Joined: Sep 2009
Posts: 2,195
From: Victoria, BC
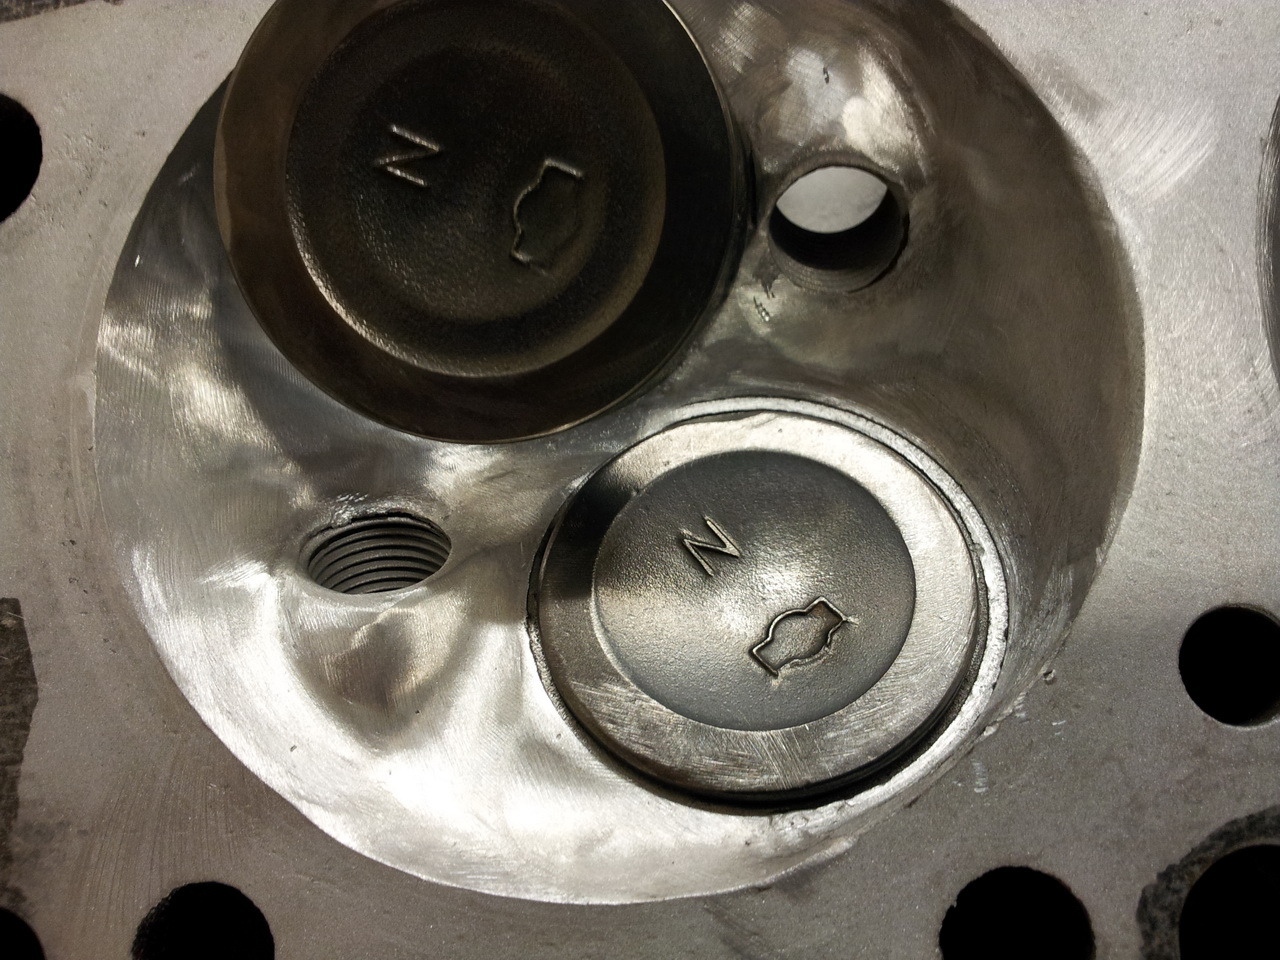
Taped the poodgies out of it as well as heat shrink around the valve steams then I glass beaded the combustion chamber and outside of the head. Blew everything out and washed with soapy water and a heavy brush - rinse repeat multiple times. There can be glass beads impregnated into the aluminum so you want to be sure to remove them all. I'm polishing the combustion chamber so it's highly unlikely anything will remain even if anything got past the previous cleaning. I hit the valves with the wire wheel as I didn't want the glass beader to hit anything but the face of the valve steam.

Registered User
Joined: Jun 2012
Posts: 49
Taped the poodgies out of it as well as heat shrink around the valve steams then I glass beaded the combustion chamber and outside of the head. Blew everything out and washed with soapy water and a heavy brush - rinse repeat multiple times. There can be glass beads impregnated into the aluminum so you want to be sure to remove them all. I'm polishing the combustion chamber so it's highly unlikely anything will remain even if anything got past the previous cleaning. I hit the valves with the wire wheel as I didn't want the glass beader to hit anything but the face of the valve steam.

Thread Starter
Mr Z++ Wiki
Joined: Sep 2009
Posts: 2,195
From: Victoria, BC
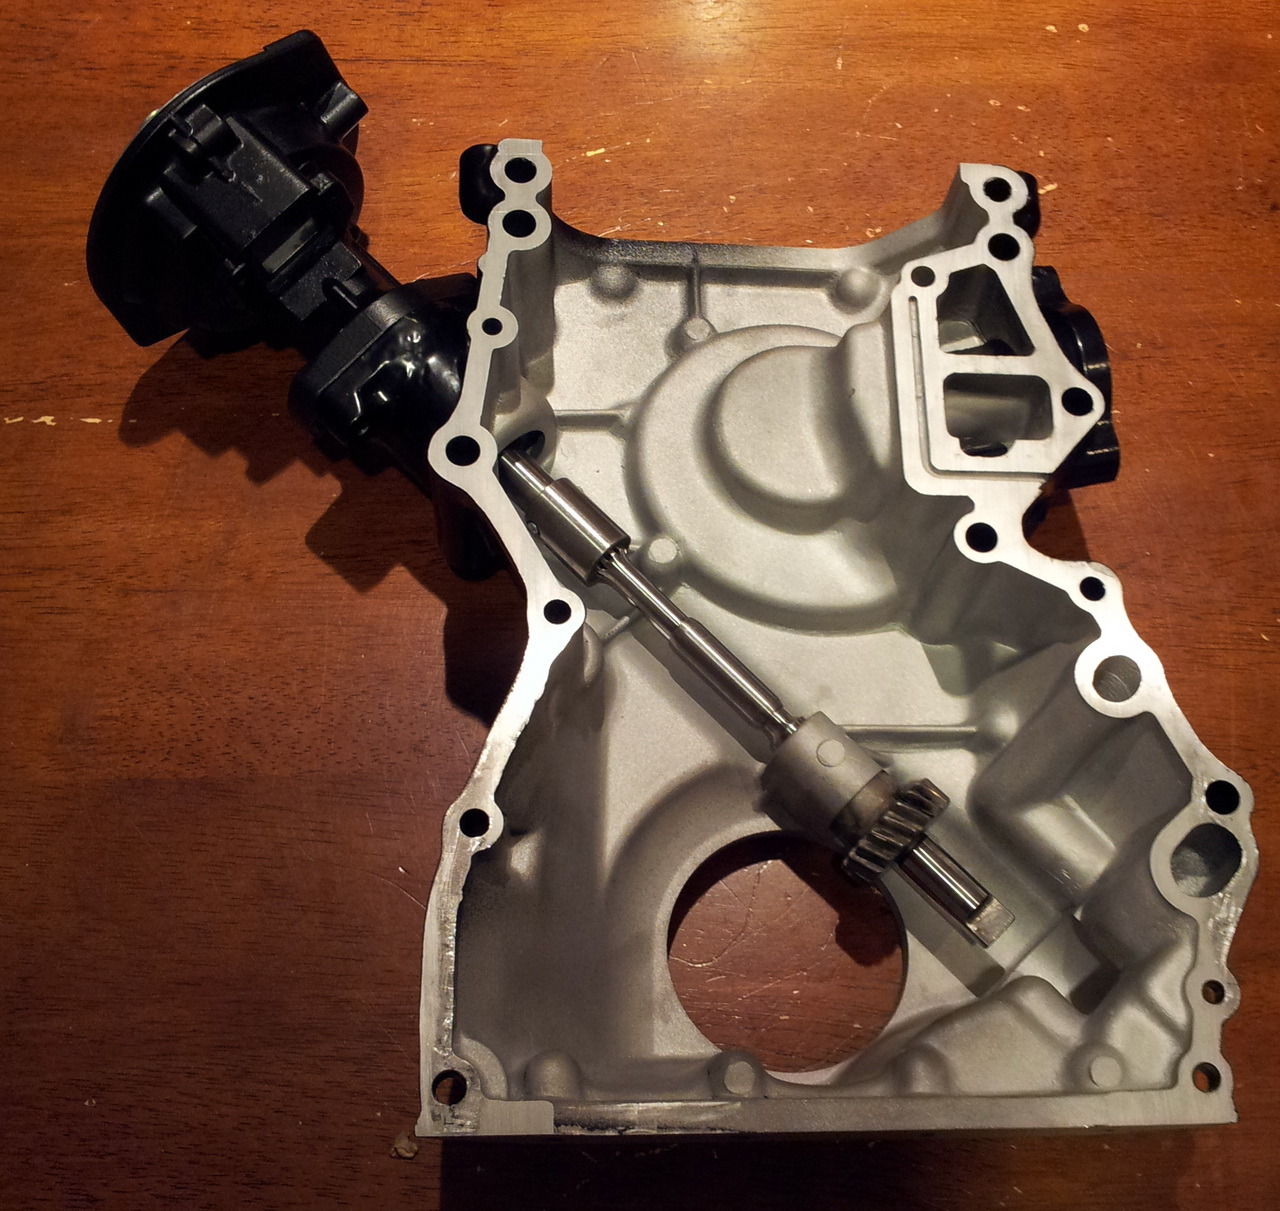
Didn't get a spindle with my Z24i dizzy so I had one "made up" from an L28ET (which is too long) with the optical dizzy (eg not an '81 with the CAS). Sleaved for a nice compression fit. The original stock dizzy spindle beside the modified one.
Thread Starter
Mr Z++ Wiki
Joined: Sep 2009
Posts: 2,195
From: Victoria, BC
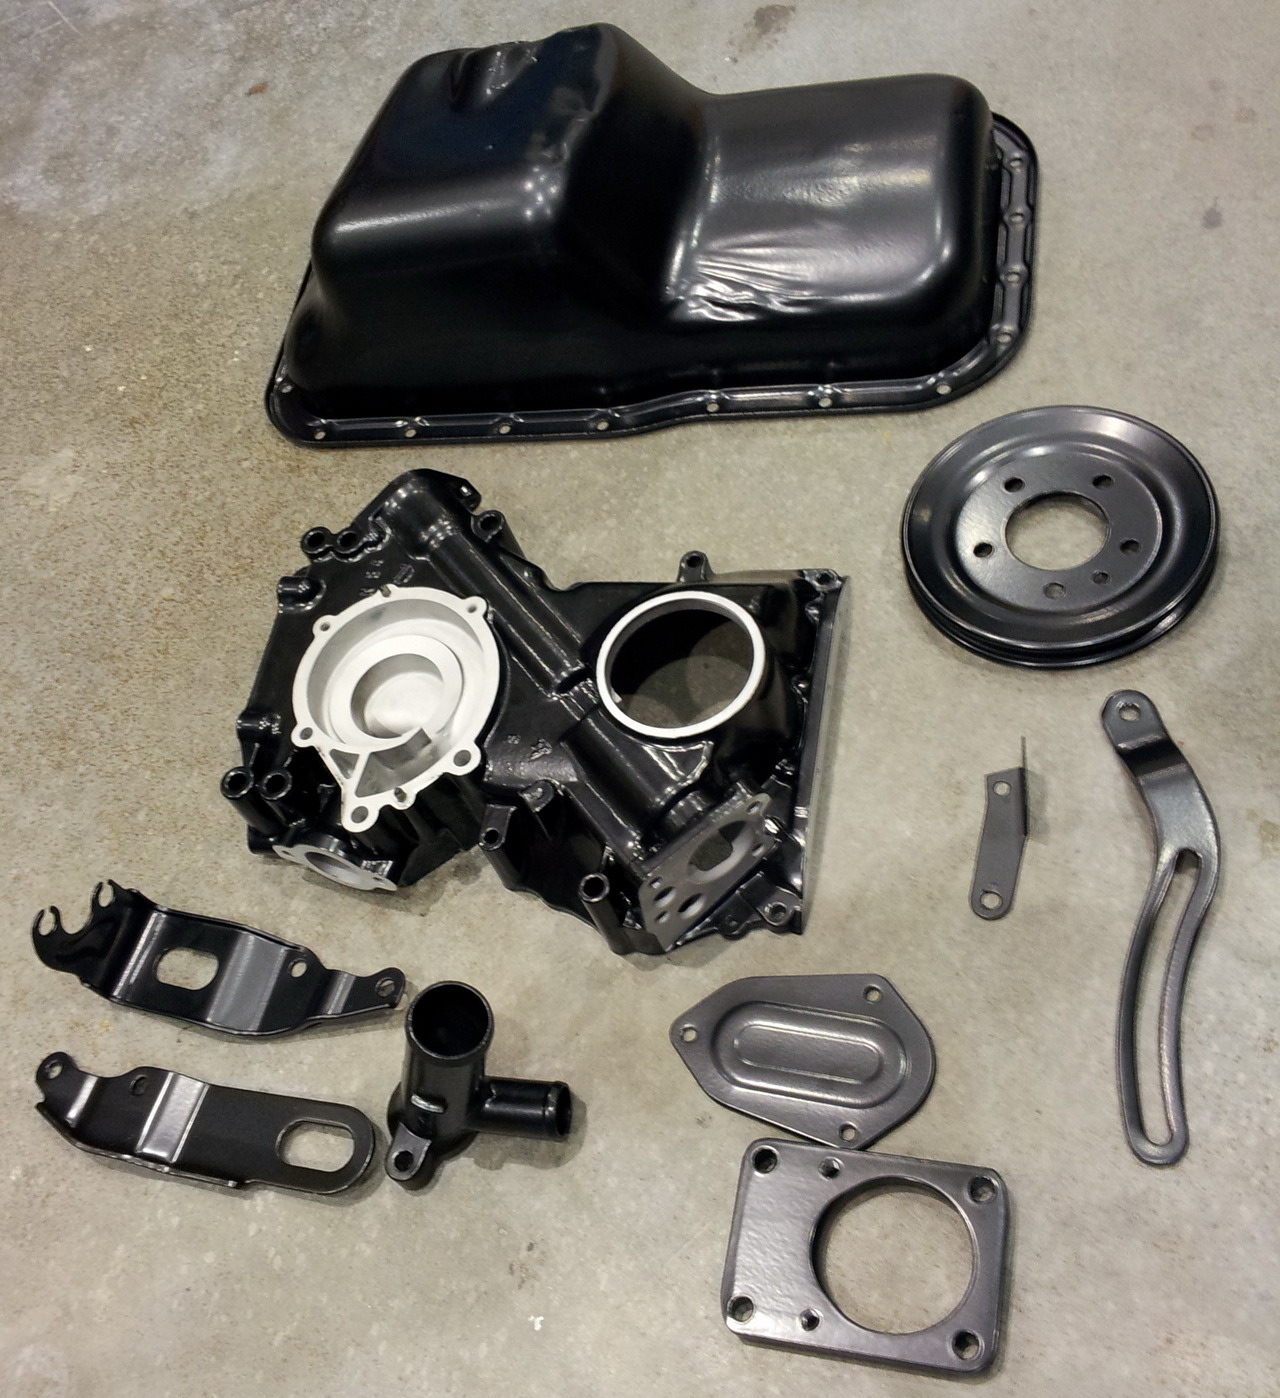
Parts back from powder coating L16b oil pan for the conversion. Valve cover is bright red - for some reason it's bright orange in these pictures

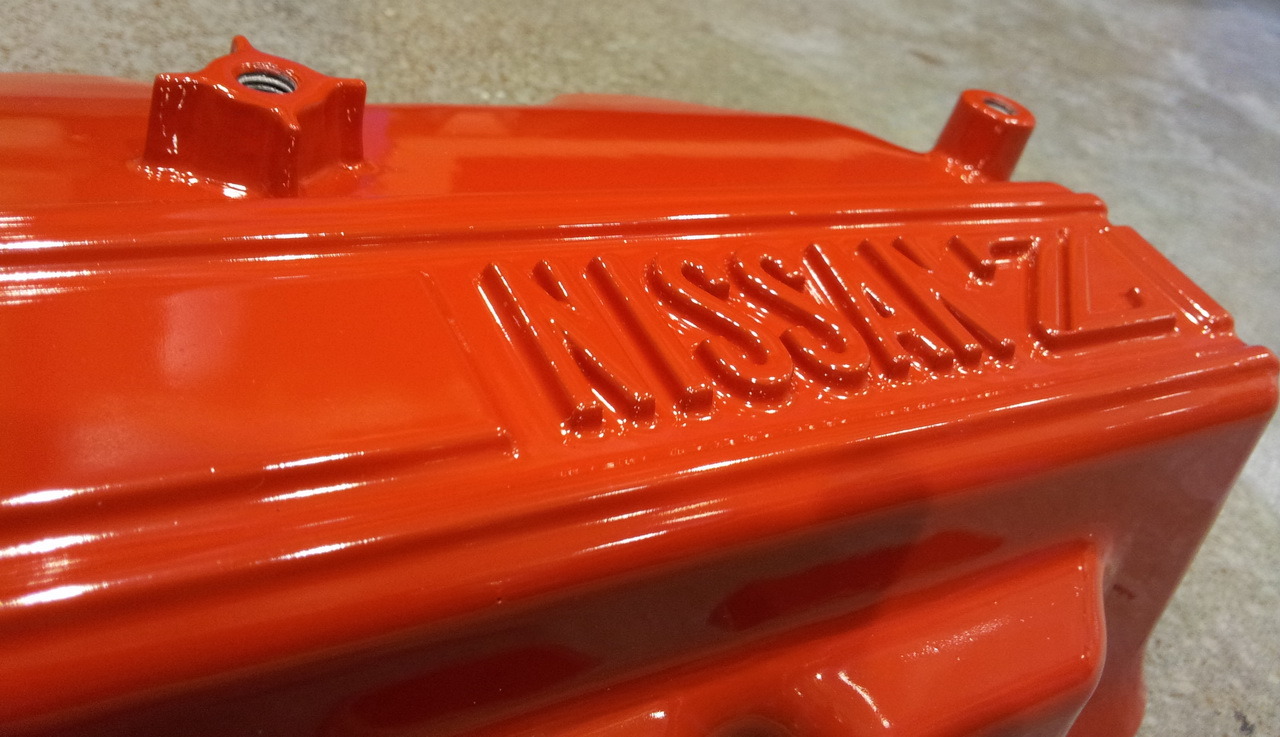
Last edited by FricFrac; Nov 15, 2012 at 07:03 PM.
Thread Starter
Mr Z++ Wiki
Joined: Sep 2009
Posts: 2,195
From: Victoria, BC
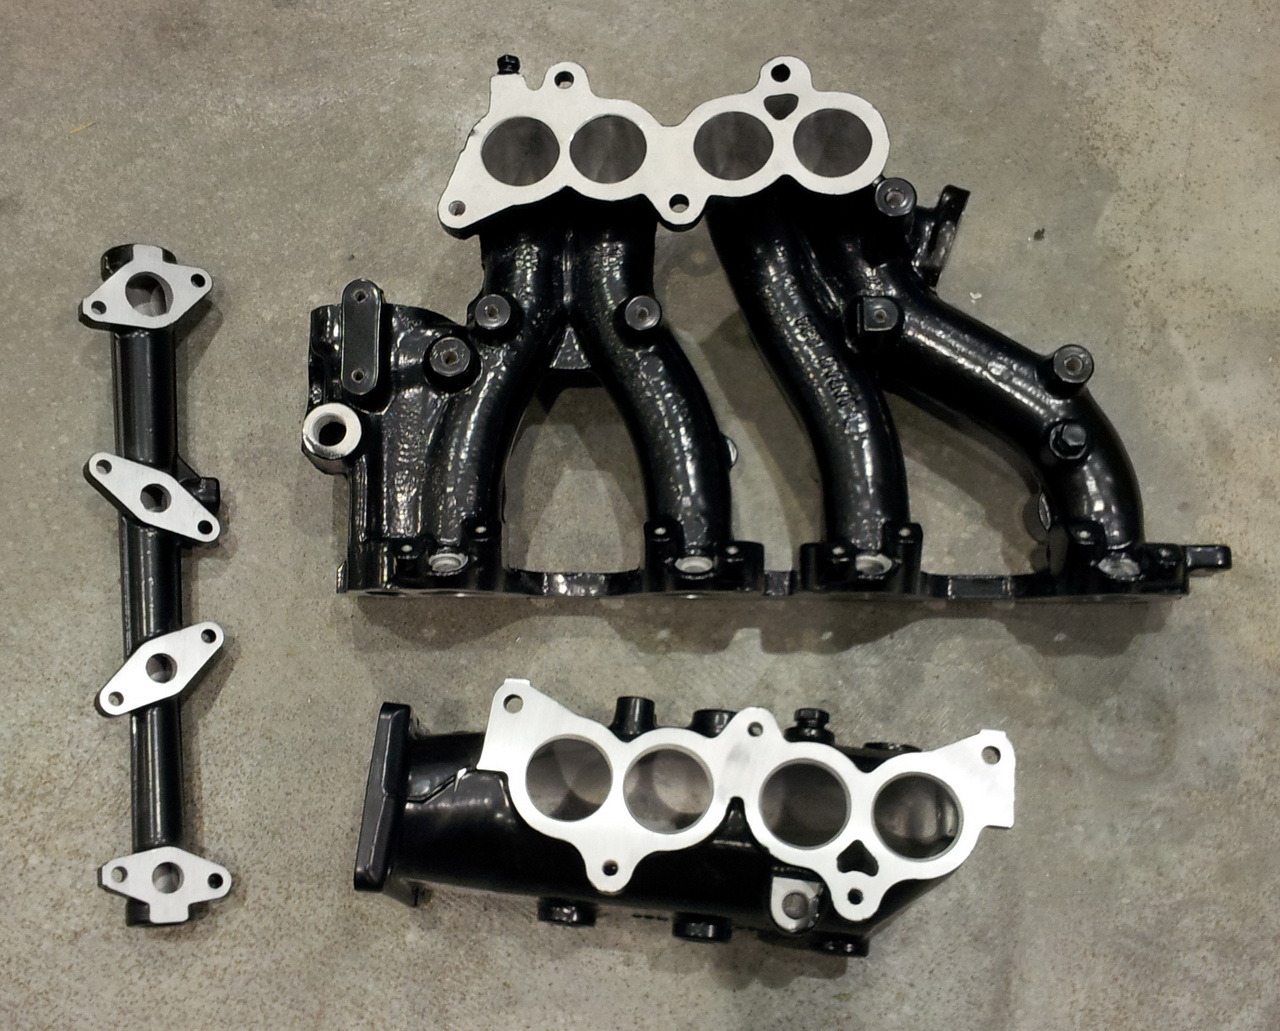
After spending a few days researching I think I might have a solution to my turbo manifold question - as in what am I going to run for a turbo manifold. Someone mentioned that the KA24E exhaust layout was the same as the NAPS Z head. From what I can tell it looks like it will work but there isn't any way to tell without seeing it up against the head. I don't have access to a manifold and I hate to order parts without knowing for sure but I found one for a good price and if it doesn't work there are a ton of S13 guys around who would probably buy it. The exhaust outlet on the Z22 is oval(ish) whereas the manifold for the KA is round so I'll have to do some port matching one way or another which I would have done anyhow.
The other question since I had the option was log or tubular manifold. After much deliberation I went with the log manifold as it will spool faster because of the lower total volume inside the log manifold. There is also less thermal loss in the log manifold compared to the tubular which also helps spool more quickly. While spooling doesn't give you more power it does give you more power under the curve. The log manifold is top mount and it's offset towards the front of the car which should keep out of the way of the strut towers.
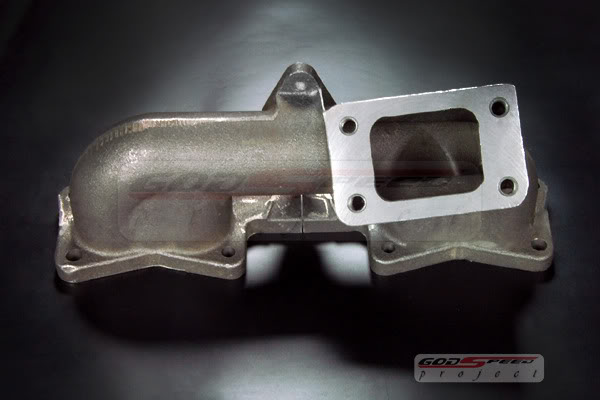
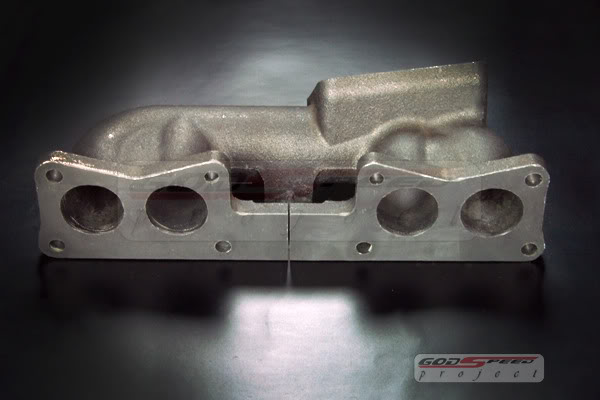
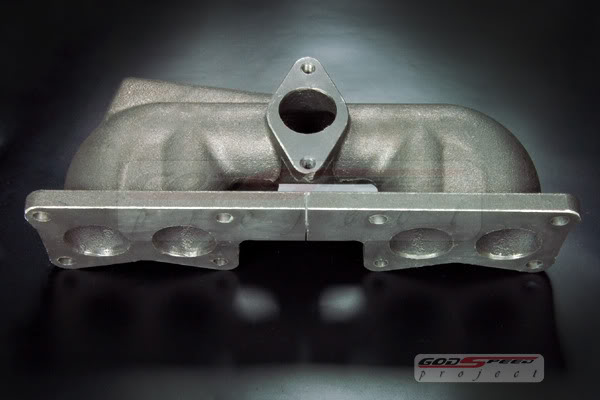
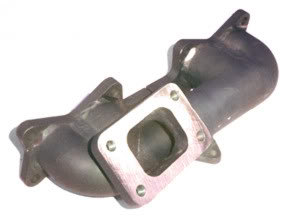
The other question since I had the option was log or tubular manifold. After much deliberation I went with the log manifold as it will spool faster because of the lower total volume inside the log manifold. There is also less thermal loss in the log manifold compared to the tubular which also helps spool more quickly. While spooling doesn't give you more power it does give you more power under the curve. The log manifold is top mount and it's offset towards the front of the car which should keep out of the way of the strut towers.