
NA to Turbo Motor Swap Experience

Thread Starter
Registered User
Joined: Jan 2006
Posts: 203
NA to Turbo Motor Swap Experience
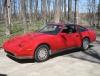
Hello, We have finally started our NA2T conversion on our 1987 2+2. Last weekend we pulled the engine and transmission out.
Some history on this car. We have owned it for 4 yrs and mostly used it for shows. The car is/was 100% stock and a show winner. It's near perfect. But it always seemed a little under powered. So we bought a few parts cars and collected all the parts needed to do a stock turbo conversion.
For anyone considering doing this first take the time to read
http://www.redz31.net/pages/turbo.html
All the info you need is on that site.
However we have discovered some differences between our 87 2+2 and the write up on redz's site almost right away.
We thought making noted here might help others.
First we tested our new fuel rail/injectors before we did anything. The NA engine was still running good. Just T the fuel lines start the car and hook each injector to 12VDC. We did this and sprayed them into a empty water bottle and timed it for 1 min. We had to rev the engine a little so it wouldn't die. After one min measure with a measuring cup to be sure you have 260CC. We are very glad we did, the injectors had been sitting in a box for a few yrs and had stuck closed. So we had to run gas in them let them sit and trigger them many times & lightly tap the outside case to get them firing again. I can't imagine how long that might have taken if we would have just dropped them in the engine and cranked away on the starter. Take it from us TEST your injectors before you put them in.
Second, we noticed right away our alternator was already on the passenger side of the car. Cool we don't have to move it.
Third, We were able to avoid disconnecting the AC lines, thus keeping our working R12 system charged. All you have to do is remove the coil, MAF and exhaust gas recycle controls on the front of the drivers side wheel well and there's enough room to unbolt the AC compressor and swing it over against the wheel well and hang it from a wire by one of the fender bolts.
Forth, If you buy a turbo cross member from ebay or don't remove it yourself be sure to have them include the bolts for the PS rack. The bolts on the 86 turbo are different sizes from what we have on our 87 NA.
We'll add to the list as we go. Right now we have the cross member changed and moving on to the engine this weekend.
Here's a few pics.
Thread Starter
Registered User
Joined: Jan 2006
Posts: 203
OK it's been a week and we have not got as much done as we wanted. Thanks to Autozone taking forever to get some of the parts we need.
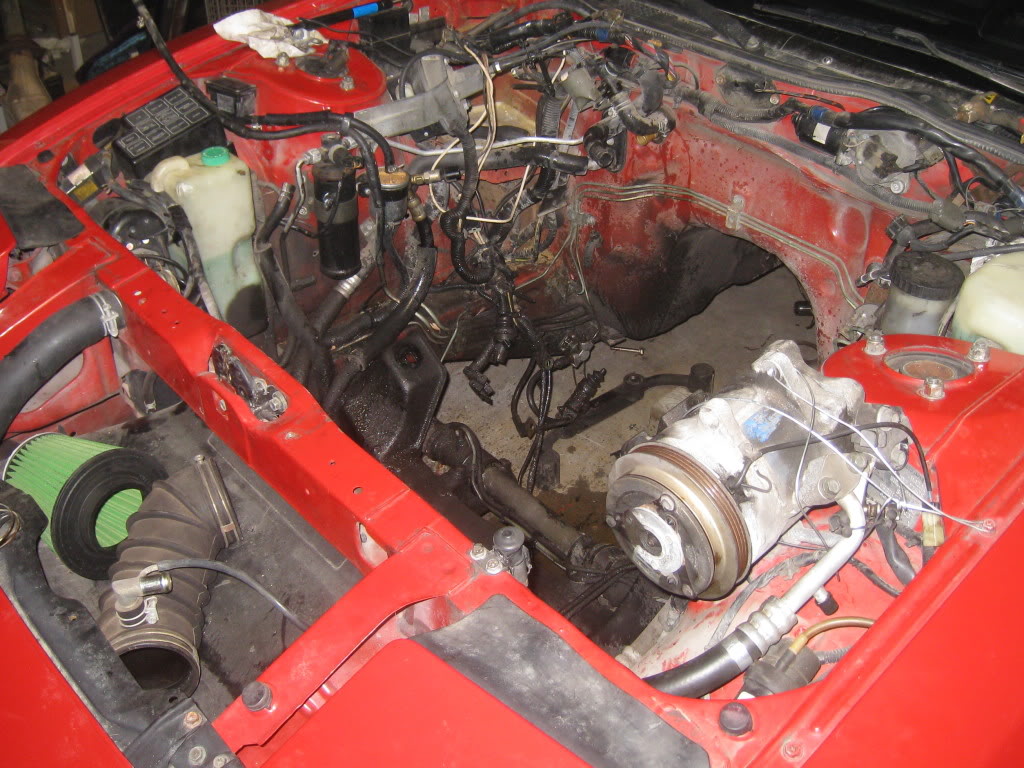
We have found something worth noting. There's a bracket that needs to be put on the engine block before installing the exhaust manifold. There's not a way to get it bolted on if you don't. The bracket holds the metal air ducts going to and from the turbo. The first pic below shows it.
This brings me to something else we have noted. If you just try to buy each part to do the conversion you better make a list. There's all kinds of brackets, bolts and nuts you will need. To many to list really, we keep finding reasons to make the trip out side to the parts car. I couldn't imagine not having a parts car to pull from.
The rest of the pics show our newly powder coat red cross member and the almost completely converted Turbo engine. All the red parts are what we changed. BTW we own a powder coating company so we have gone a little nuts making everything red.....lol

Thread Starter
Registered User
Joined: Jan 2006
Posts: 203
I can see why you said that, looking at the pics it looks like I did powder coat the inside. I had a cap in it but some of the over spray leaked in around it. There's not enough powder in there to cause a problem.
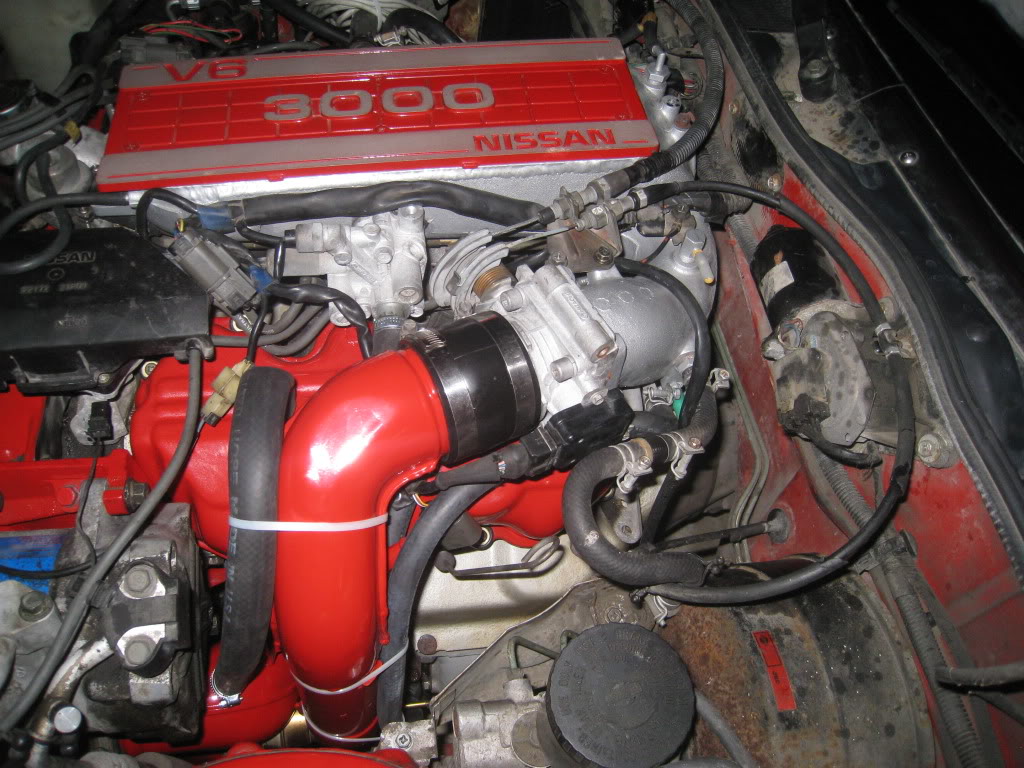
I forgot to mention that a few yrs ago a machinist friend/customer of mine gutted a intake and I installed a throttle body from a 240SX (i think it was a 240) anyway it was bigger than a stock z31.
We have a home town type muffler shop close to us and he will put a 2.5" exhaust on it, from the turbo to tail pipe for $200. This guy has been in business for 20 yrs and makes all his own custom pipes.
We tested the CHTS while we could get to it and found some interesting results. At first it tested bad, (like 5 meg ohms) than after I moved the wires a little it tested good (2-3K). I moved the connector and it was corroded green on the pins. I think I've seen others report this on other threads. It makes me wonder if part of our lack of power problem was related to that connector? Just some advice, while you have the engine out pop the connector off and inspect it. It wouldn't hurt to put some dialectic grease on it before you put it back together.
We would love to put it on a dyno once we are done, if only we can find one local to Indy. Funny Indy is considered the racing capital of the world and no one has a chassis dyno. If anyone knows of one close let us know.
Thread Starter
Registered User
Joined: Jan 2006
Posts: 203
Not much new to report.
We now have the motor ready to put back in. We can tell you that there is a order to how the brackets go back on the engine. if you do not foillow this list you will be removing parts again and again. Trust us we wasted many hours doing just that.
I think I can remember them.
1. The bracket you see in the pic above.
2. Left side (tubro) motor mount.
3. Exhaust man.
4. AC mount.
5. Oil pan.
6. Transmission supports on both sides. Be sure to put the dirt guard on for the fly wheel too.
7. Oil supply tube.
8. Turbo.
9. Oil exit pipe from the turbo to the oil pan.
10. Put the dip stick back. Pull it out before doing the oil pan or it will get stuck.
If you are doing the valve cover gaskets (and you should) they should be done either number one or two.
Thread Starter
Registered User
Joined: Jan 2006
Posts: 203
Not much new to report, but there are a few things we have noted.
We installed a new clutch disk the new clutch face measured .330" our old one was .300" given they are supposed to last down to .012" we had a long way to go. But figured why not put a new one in while it was apart. Also we thought we'd be getting a alignment tool with the disk but guess that's only if you put in a complete clutch kit. The cheap tool from harbor freight ($15) did work but it was a major pain to get it just right.
The engine is back in the car, still need to hook everything back up. it wasn't easy but we did manage to get the drive shaft back on without taking the drive shaft off the rear end. While lowering the engine into place you can guide the shaft into the transmission it helps to use a floor jack under the transmission the level the engine too. Putting the engine back did take us about 2 hrs. Just take it slow and easy, making small adjustments as you go.
Thread Starter
Registered User
Joined: Jan 2006
Posts: 203
Final report, well almost.
As you may have read in another post the turbo we used was bad. It had bad bearings and caused the shaft to bend.
So after a few hours of trying to remove the turbo from the engine we gave up and just pulled the engine again. It says in the haynes manual we should be able to take the turbo out without pulling the engine but we just don't see how. Even though we had just had everything off we still could not get the bolts to brake free. Take it from us if the turbo needs replaced just pull the engine.
So we found a newly rebuilt turbo on Craig's list and sent our $280 via paypal and hoped it would show up(from NC to IN). Thank god it did and wow what a turbo it was. It looked as if it was brand new. The guy we got it from said it had a $400 rebuild and upgrade done to it. Although he couldn't remember what exactly the upgrade was he thought it was on the exhaust side??
After we got the engine back in and fired it up we let it burn in for a few mins while we looked for leeks. Found and fixed a few.
We put a after market pressure gauge on it and ran a short test drive. It ran like a bat out of hell and pushed right at 10PSI boost. It runs very strong, better than my other stock 1984 Z31 turbo.
It has a high flow air filter, 240sx throttle body, and a gutted intake plenum. Plus right now we have no exhaust, just the turbo elbow.
We also put in a short shifter intended for a 240sx. Took some modes to the shifter bushings but it works great. Shifts in less than half the movement.
We still have the old tires on it so went out and did some burn offs. I was not on the brakes at all and held the RPM's at 5500 while passing through the gears until I was in 3rd and going about 30mph still smoking the tires. With the short sifter I was able to make the gears while hold the RPM's without a hitch. Well I also have a lot of exp doing that...lol Figured we test it out before I put $500 worth of new rubber on it.
All I can say is if you are driving a NA Z31 around and wish for more power just convert it to a turbo and be done with it. It took us about about 30 hours total with 2 guys. Not counting the second time because of the bad turbo. The total cost will probably add up to around $500-750. We bought a parts car for $100 but the turbo was bad. Gaskets, hoses, clamps a new clutch disc, the list just went on and before you know it you have $500 spent. But it's worth it...
Now it's on to the car show this weekend, wonder how many will notice it's got a turbo???
Thread Starter
Registered User
Joined: Jan 2006
Posts: 203
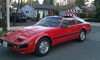
Two year follow up. The car is still running great with no problems after 7500 miles. Well sort of.
When we had to pull the engine the second time to put in a new/good turbo the chain slipped of our fork lift and dropped the engine on the cross member. A quick inspection showed no damage. How ever shortly after we got everything back together we developed a oil leak around the pan. In hind sight we should have just raise the engine and resealed the pan.
Our son drives this car every day 40 miles round trip to school. He loves it and is the envy of all his class mates. The fact he spent many hours working to get the conversion done has given him a since of pride and he babies the car.

Thread
Thread Starter
Forum
Replies
Last Post
Superduner
Wanted (WTB / WTT)
1
Aug 25, 2011 02:54 PM
johnsonsz31tt
300ZX (Z31) Forums
93
May 7, 2008 07:27 PM
81s280zx
FS: 240Z,260Z,280Z & 280ZX (70-83)
14
Oct 7, 2005 10:48 AM
81s280zx
FS: 240Z,260Z,280Z & 280ZX (70-83)
0
Jul 13, 2005 03:57 PM
Bookmarks


