
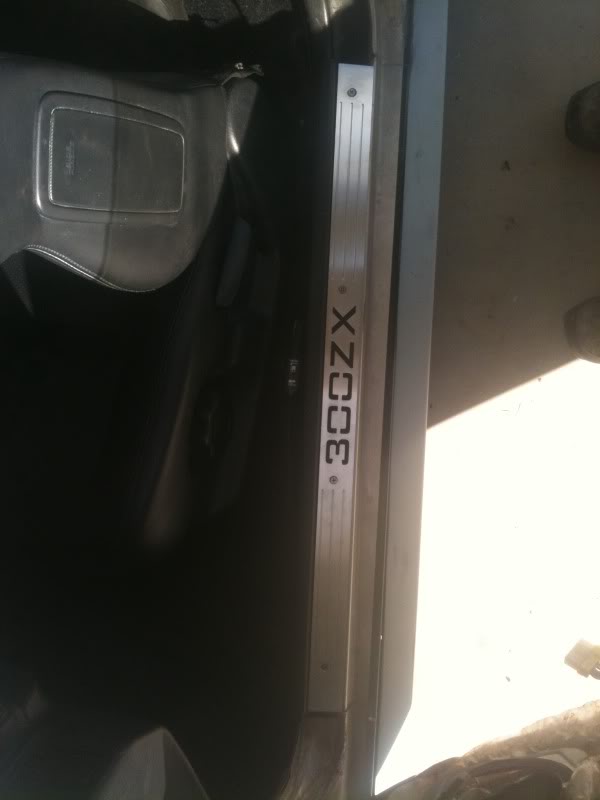
Its been done hello new project


�ber User
Joined: Sep 2005
Posts: 9,532
From: lemont, Illinois
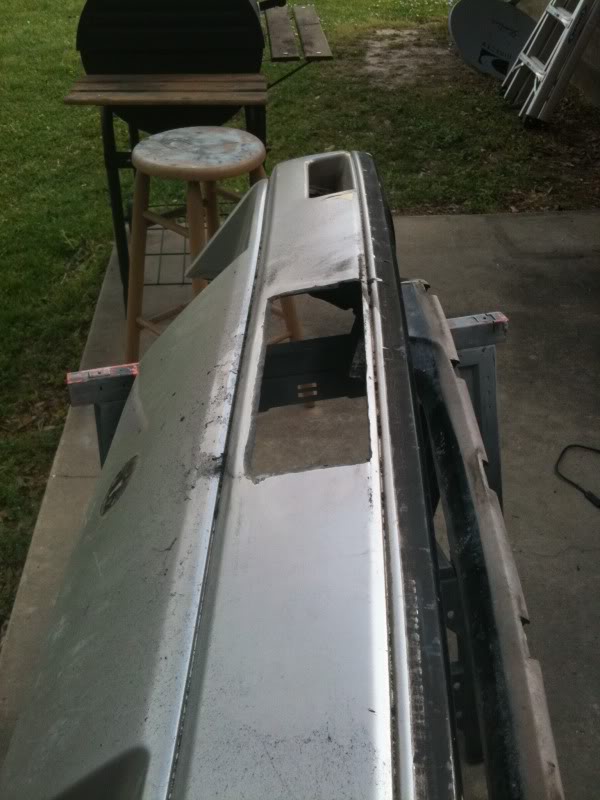
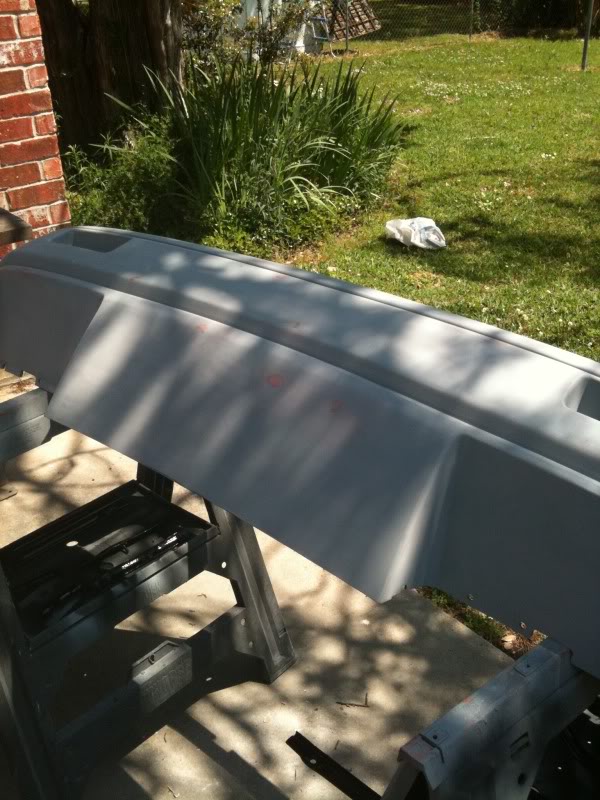
I work full time along with school after and flight in between all that. And I'm trying to force myself to the gym after all that, but I just get so tired, and it's getting in the way of me banging hotties now haha. I just sleep all night instead of stayin up like i used to. This blows. And I gotta re-re-paint my bumpers on my S2000 cause the paint store didn't look up the alternate paint for my year and the shading is off. BLAAAAAAAAAAAAAAAAAAAAA.
�ber User
Joined: Sep 2005
Posts: 9,532
From: lemont, Illinois
Yup. Initially used the original paint as a base coat just sander well. Worked fine till last coat of clear the base cracked. So ressnded n applied a urethane sealer then painted. Just to find the paint didn't match. Now spent 170 bucks ona quart of matched paint n clear as well as reducers and activator. Ugh. **** painting. LOL and the paint storeat napa for not using the model year of my s2000 and getting the associated alternate paint code like they should have to start with. *****
�ber User
Joined: Sep 2005
Posts: 9,532
From: lemont, Illinois
I didn't learn a whole lot, except to read PDS's because they are awesome. lol. other than that, also to not trust paint stores and ride their asses to make sure **** gets done right the first time. otherwise i did nothing wrong. and the reason i say to read the product data sheet, cause i has great info on spraying and flash times and coat types (which i guessed all right luckily the first time) but it did say not to use and wax/grease remover between coats, only on the primered surface or preping for primer, and to just rube down with a micro fiber cloth inbetween. and i think that may be why i got the cracking. that or the clear cured to quickly. tho i mixed it according to their specs

Thread Starter
Stupid Hurricanes...
Joined: Jun 2007
Posts: 1,481
From: louisiana
U dont use wax and grease remover between coats bc it will take the paint off. You should only do it before you start paint. After that you only use a tac rag.Well what type of Hardner you use??? Depends on the temp. You clear coat times should be when the clear cloat is tacky
Thread Starter
Stupid Hurricanes...
Joined: Jun 2007
Posts: 1,481
From: louisiana
had to restart build thread but have new stuff
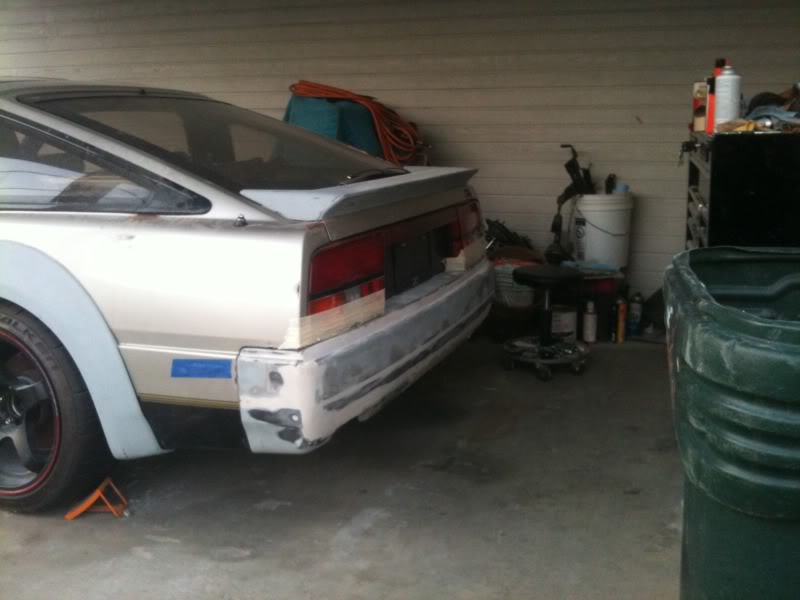
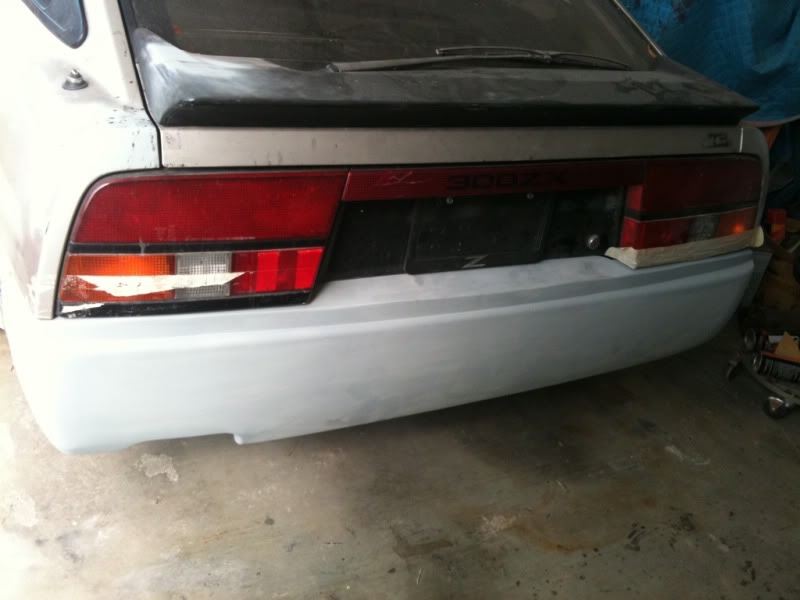
O CRAP what did i do..hmm
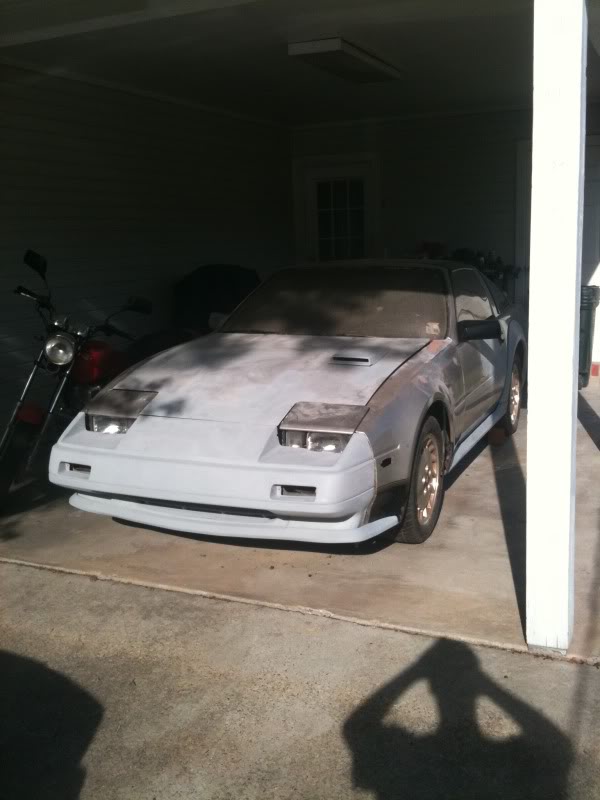
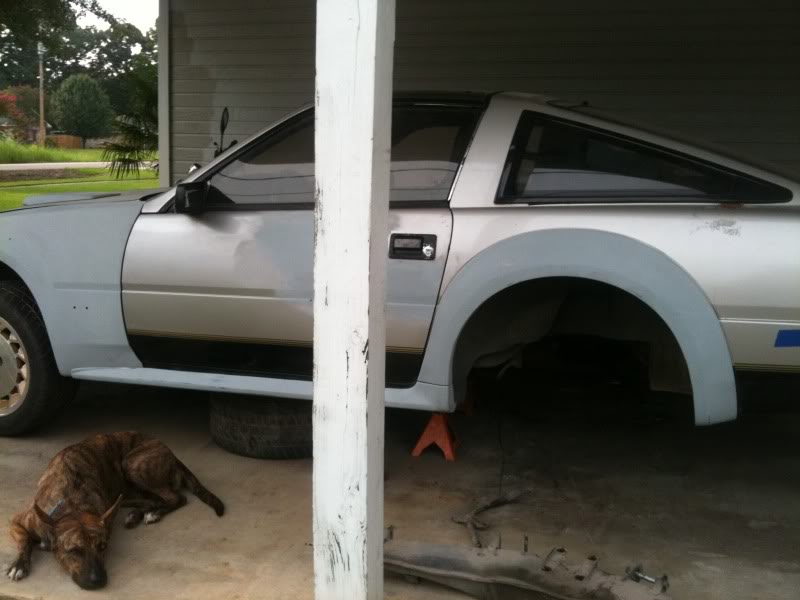
Its not completely mounted and i still need to work on the fenders...But she is gettin somewhere
Im doing all the body work and priming it all. Pretty much when i get done with the body work all i need to do is wetsand the whole thing down bc im already blocking the primer to be ready for paint when ever the hell that might be
Its not completely mounted and i still need to work on the fenders...But she is gettin somewhere
Im doing all the body work and priming it all. Pretty much when i get done with the body work all i need to do is wetsand the whole thing down bc im already blocking the primer
to be ready for paint when ever the hell that might be


Thread Starter
Stupid Hurricanes...
Joined: Jun 2007
Posts: 1,481
From: louisiana
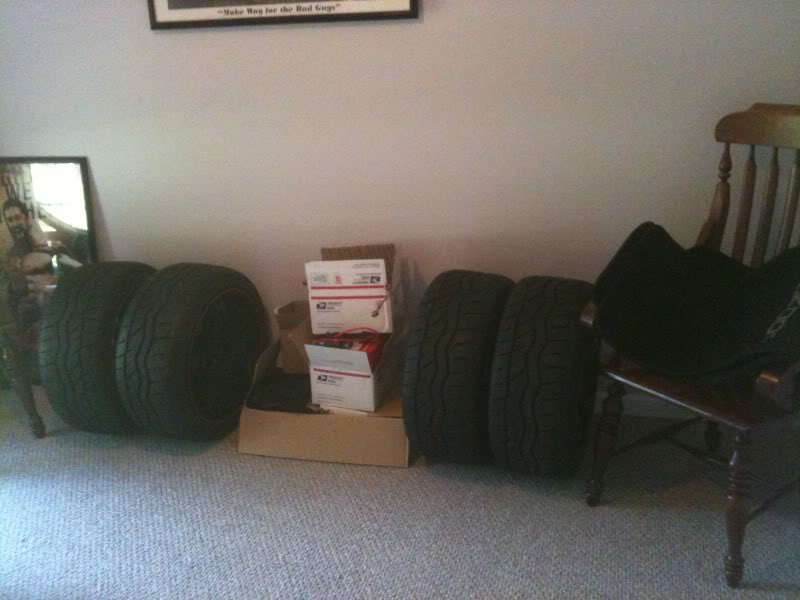
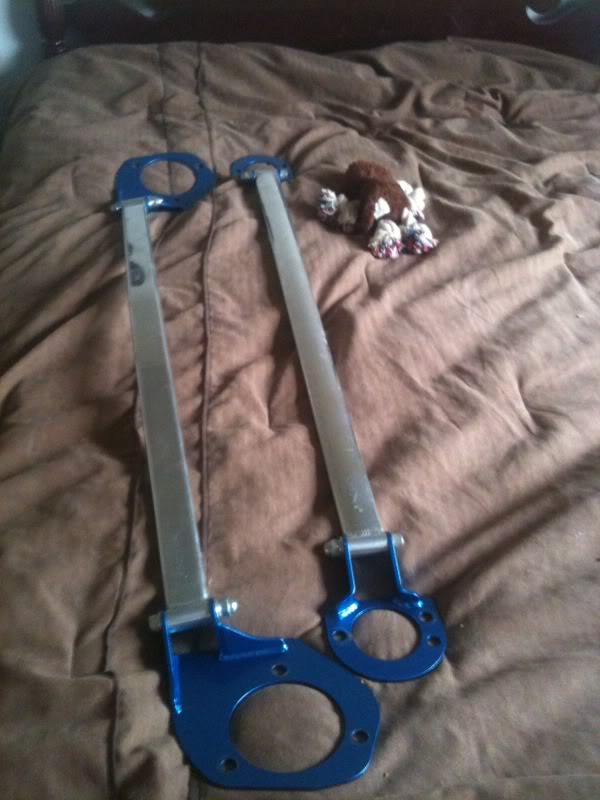
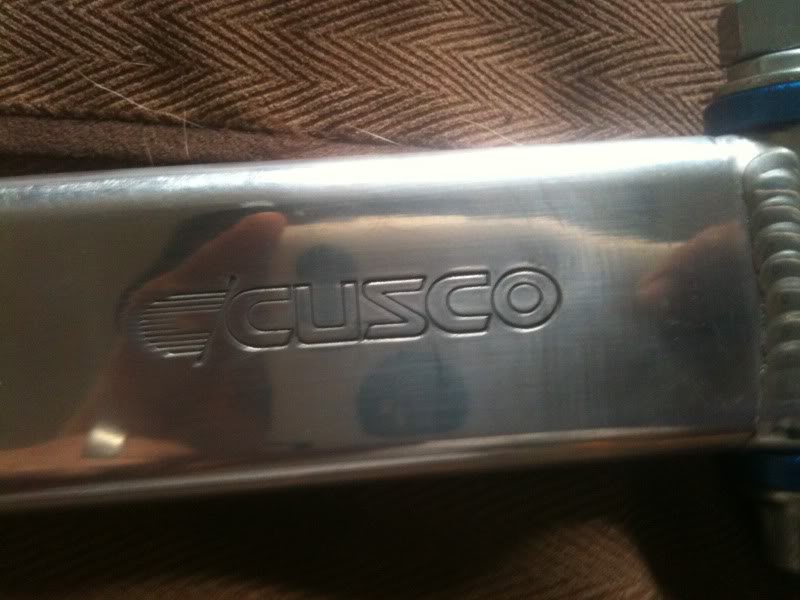
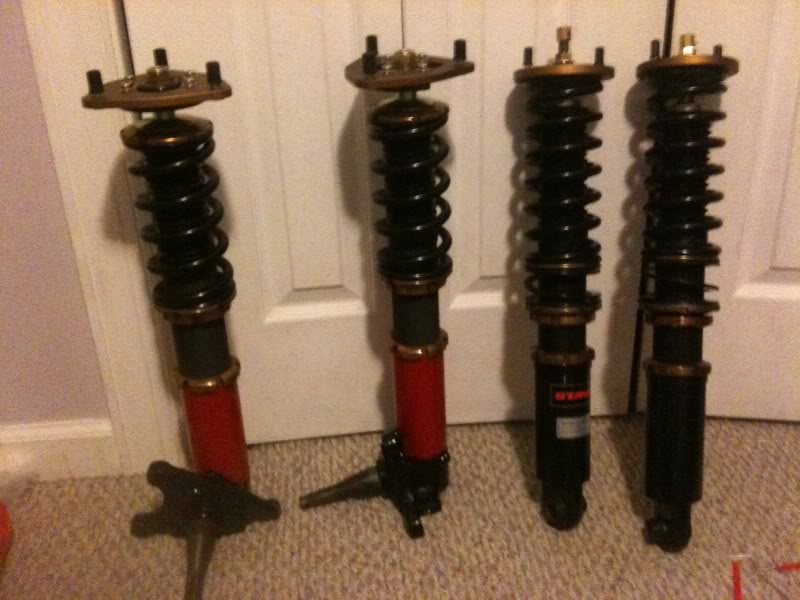
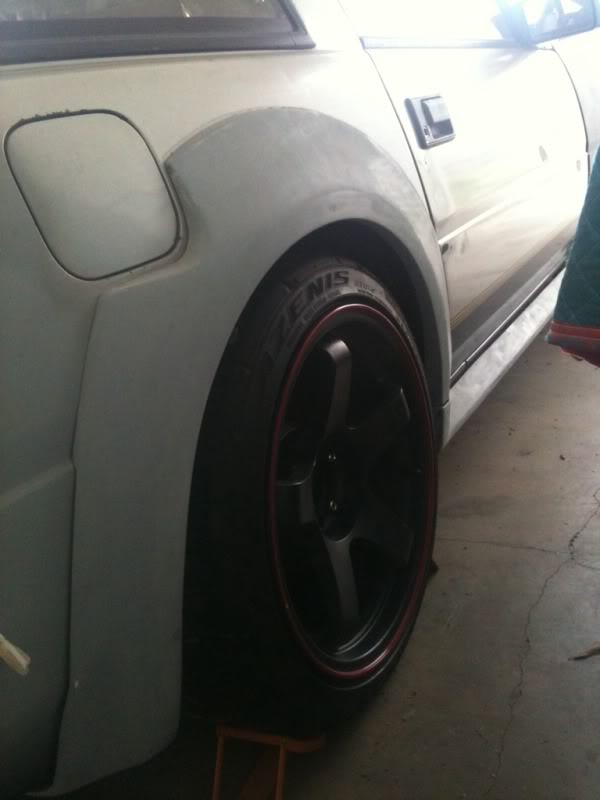
mmm msa sway bars
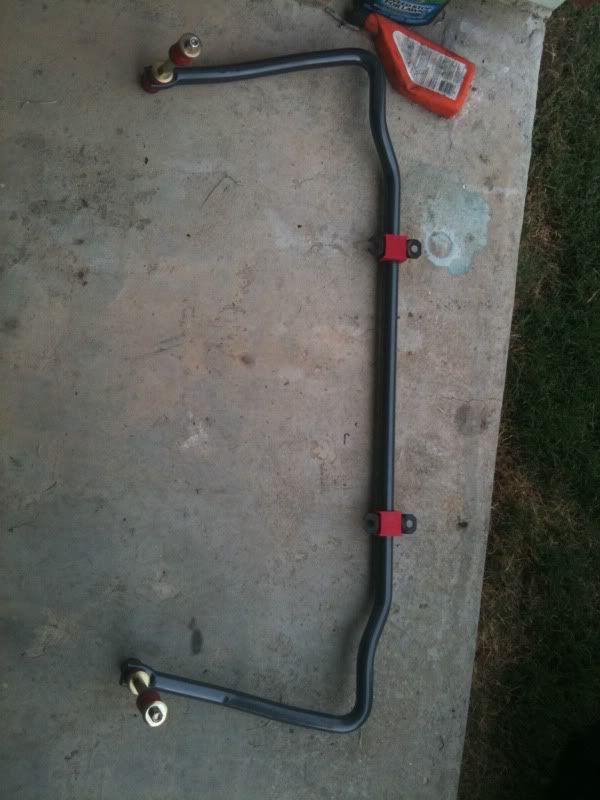
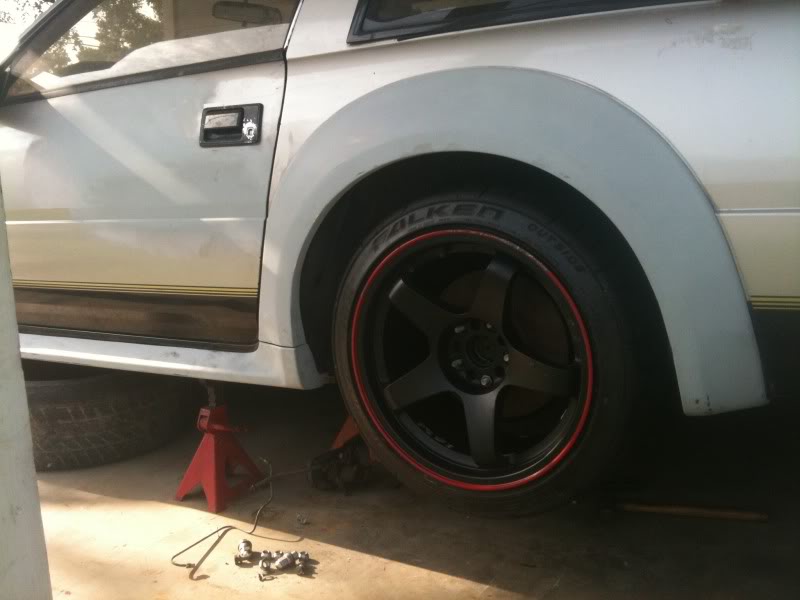
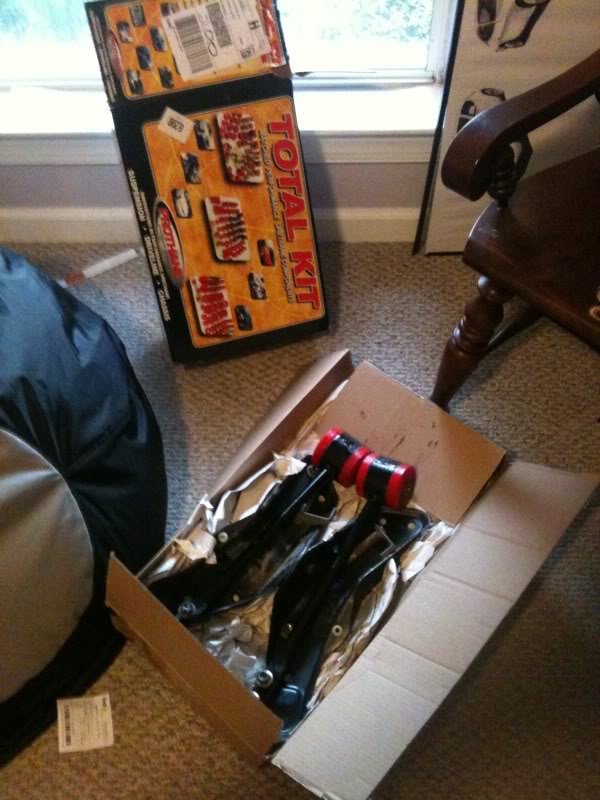
just a little taste will be replacing all the brakes soon as she is rolling, will need more serious rubber.
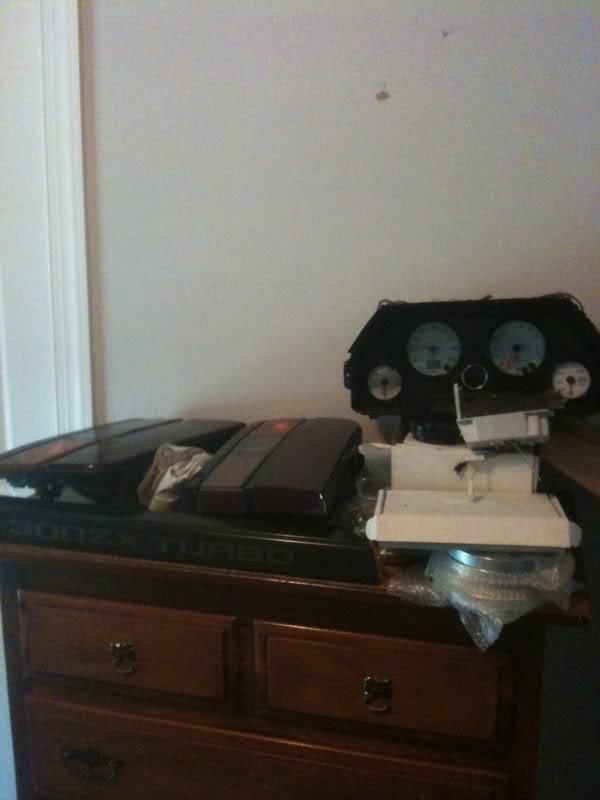
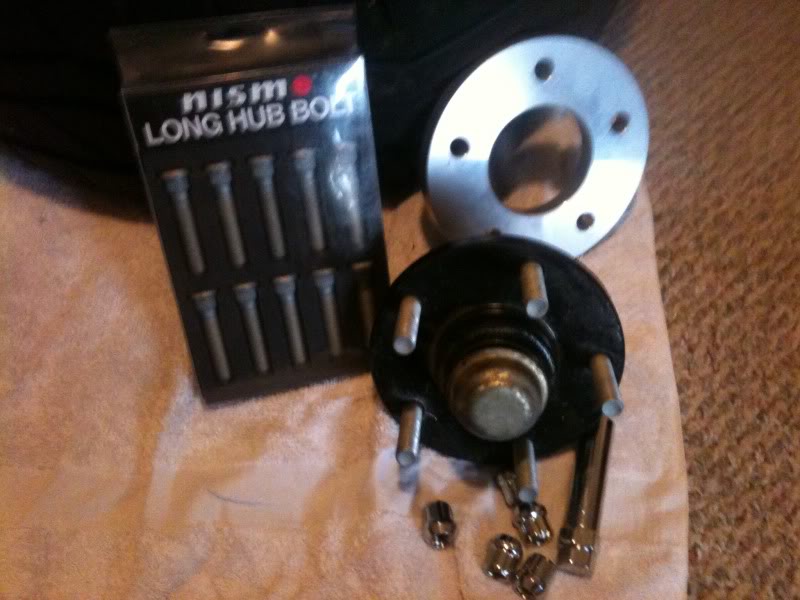
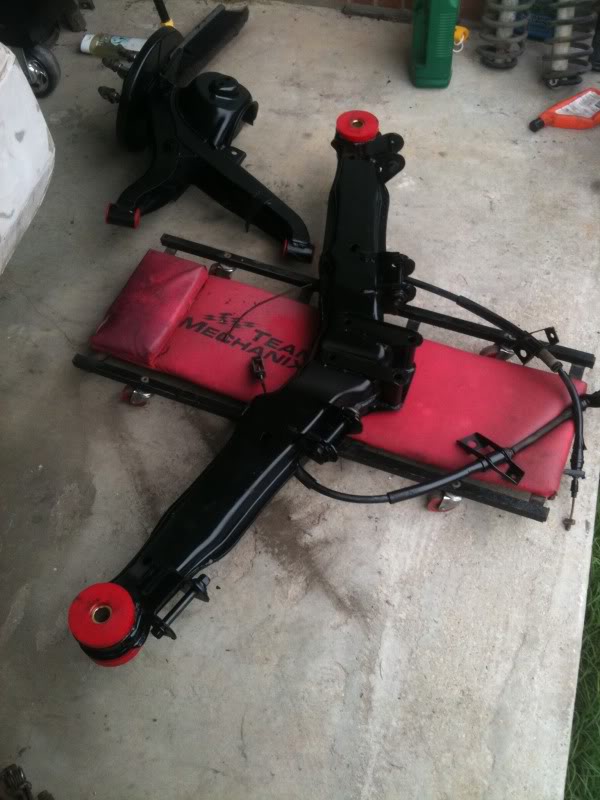
Both the front and rear hubs have been replaced with 60mm studs!
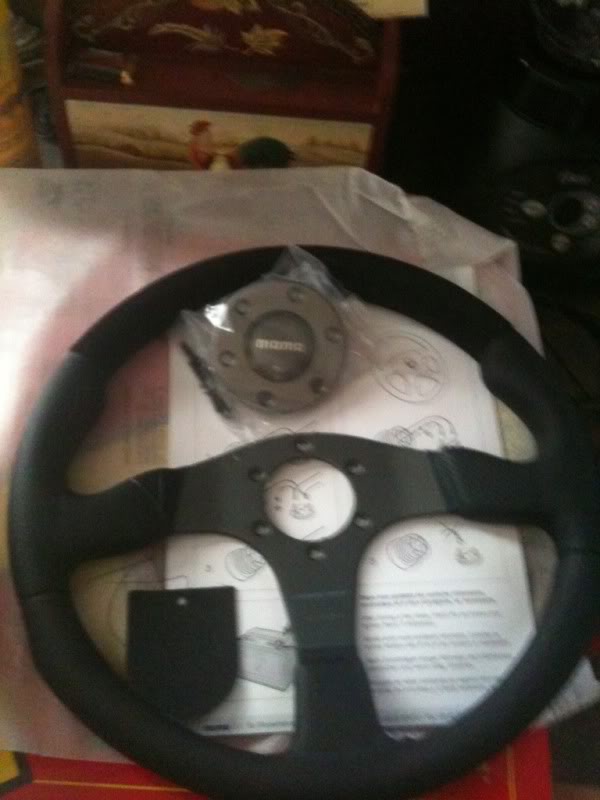
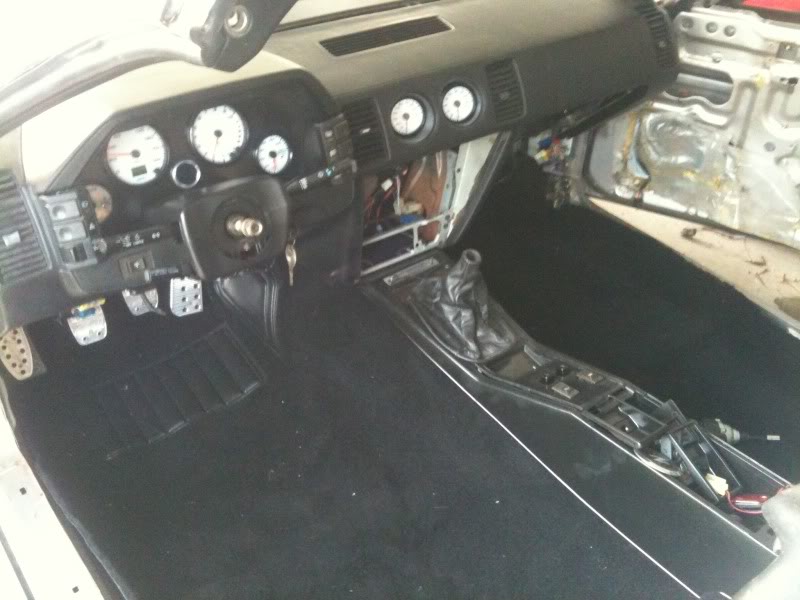
started on interior since the body is kicking my *** right now
(new carpet and cluster install)
just a little taste will be replacing all the brakes soon as she is rolling, will need more serious rubber.
Both the front and rear hubs have been replaced with 60mm studs!
started on interior since the body is kicking my *** right now
(new carpet and cluster install)
Thread Starter
Stupid Hurricanes...
Joined: Jun 2007
Posts: 1,481
From: louisiana
Tuck the *** end a litle

did a little more work on the front
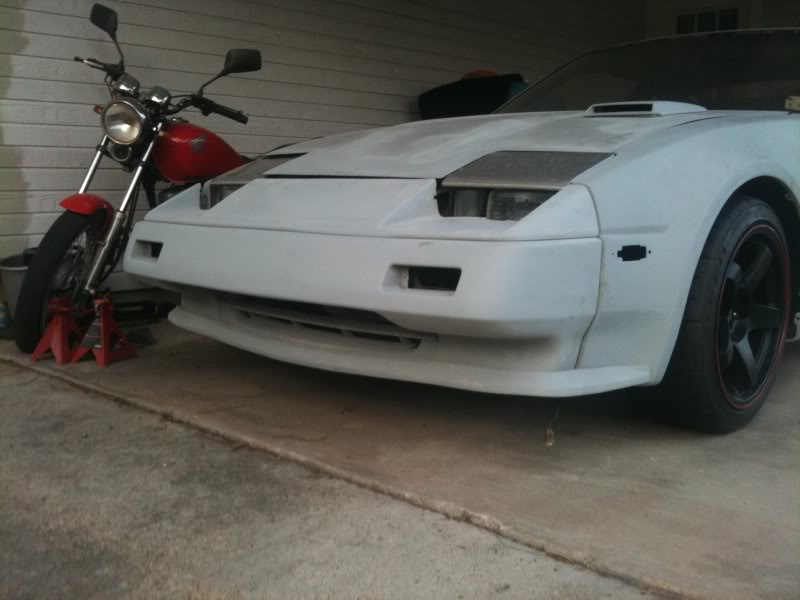
Need more tire and will slam her down when everything is in the car. Currently the z has no engine or trans.
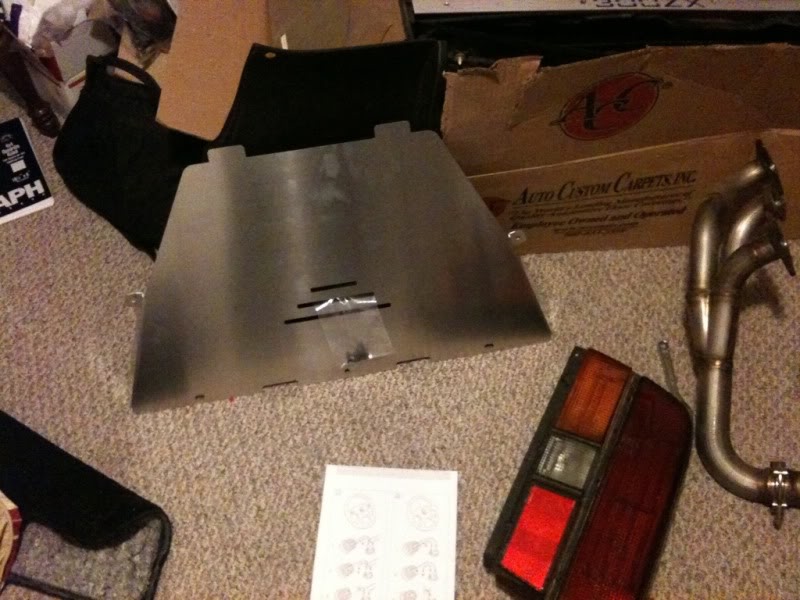
have lexan t-top covers installed, a steering rack gutted and ready to be installed. Also did a LED conversion the smoked tail lights. Will try to get pics!!
Will soon be building the old tired w series engine soon as tax comes in..you know forged pistons/rods etc etc. Also going through the debate of just blacking her all out or keeping the stock colors.
did a little more work on the front
Need more tire and will slam her down when everything is in the car. Currently the z has no engine or trans.
have lexan t-top covers installed, a steering rack gutted and ready to be installed. Also did a LED conversion the smoked tail lights. Will try to get pics!!
Will soon be building the old tired w series engine soon as tax comes in..you know forged pistons/rods etc etc. Also going through the debate of just blacking her all out or keeping the stock colors.
Thread Starter
Stupid Hurricanes...
Joined: Jun 2007
Posts: 1,481
From: louisiana
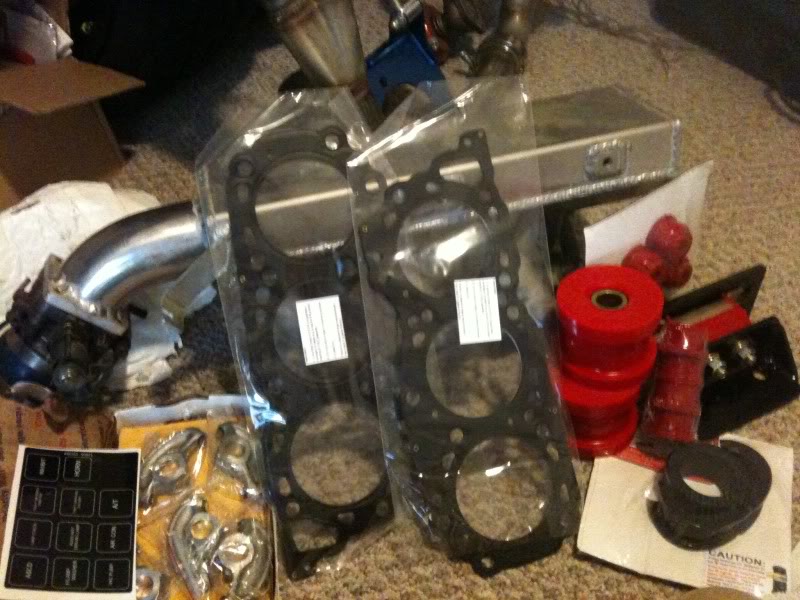
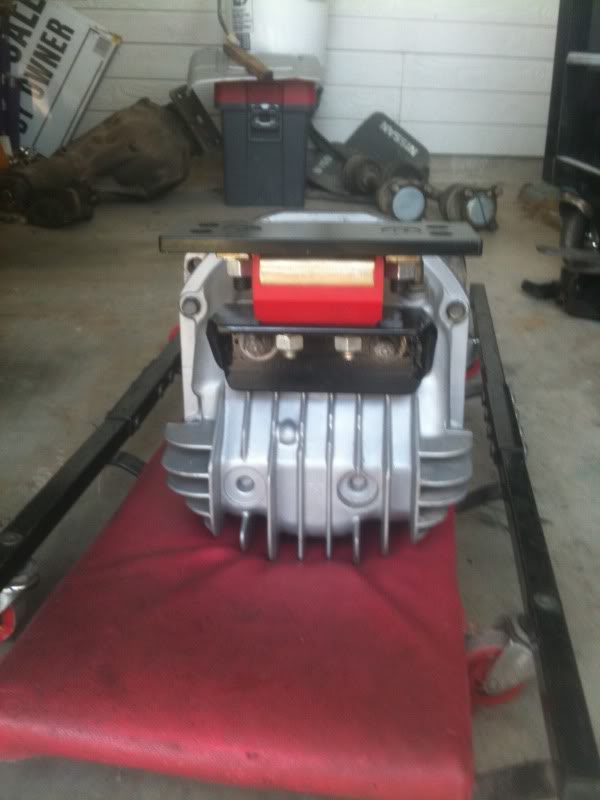
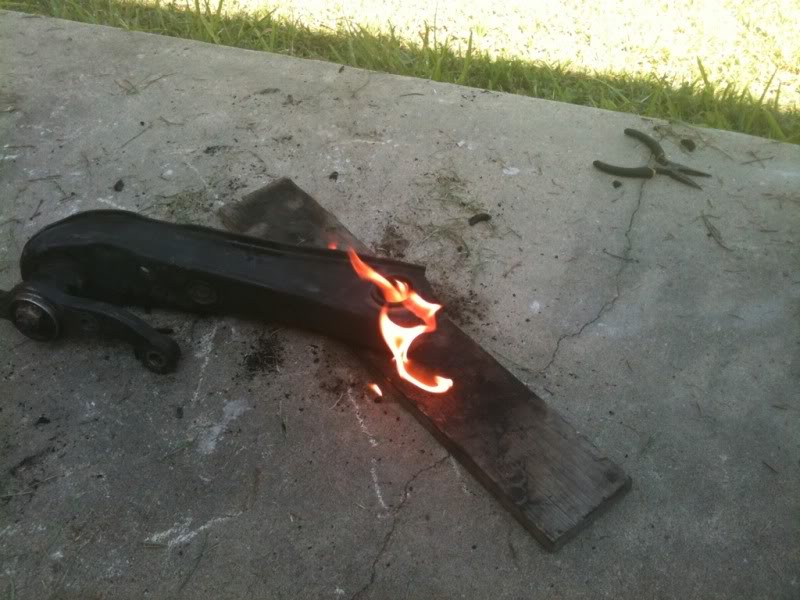
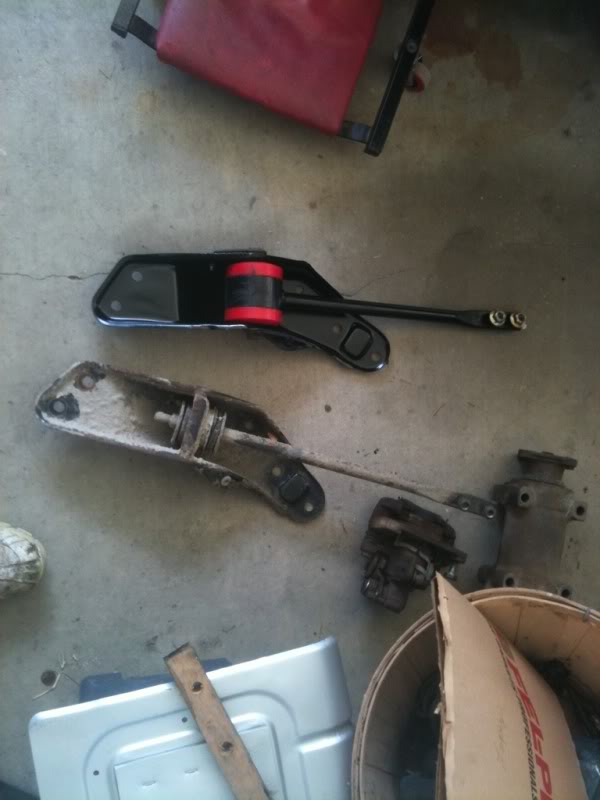
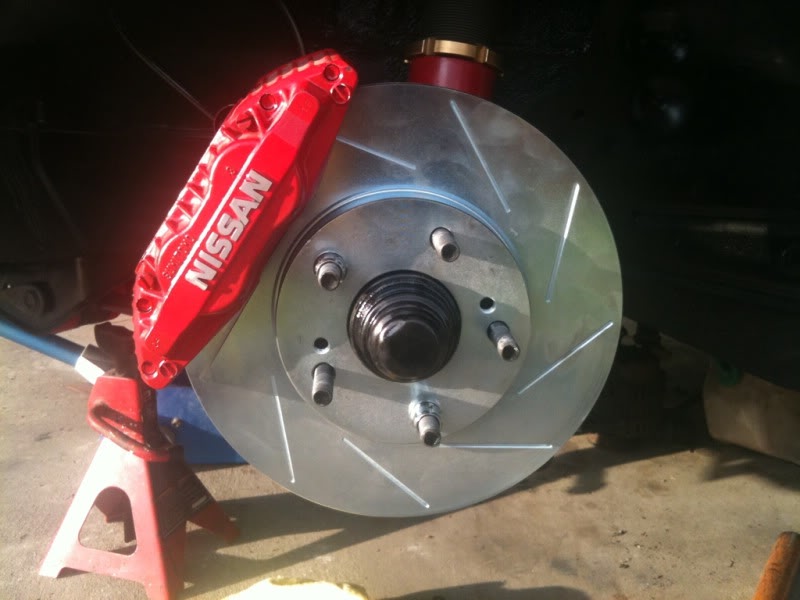
Installed Kouki rear control arms. Cleaned up by wire brush/cleaner and slapped some rustoleum on it. no real pics of the process bc it was pretty much what i did with the Zenki control arms. This would be the outcome. 10MM out with vented disk. was a splurge.
Got a bunch of new parts in such as tie rods,steering knuckles, boots, etc etc But some other big stuff
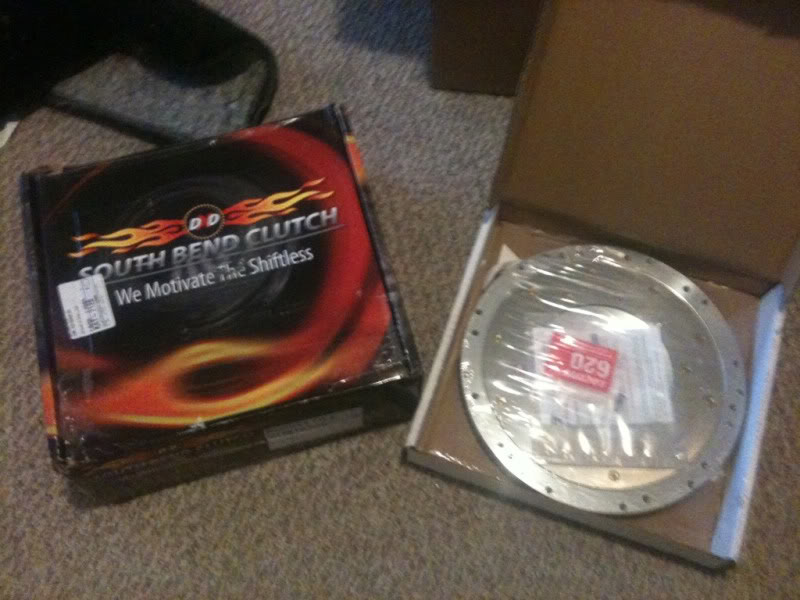
stage 3 and Fidanza flywheel.

heavy duty clutch fork with new pivot ball
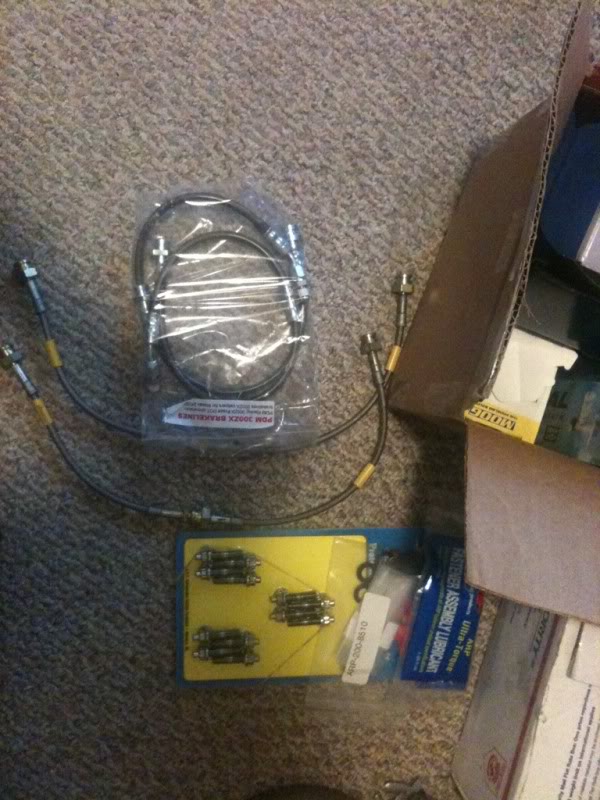
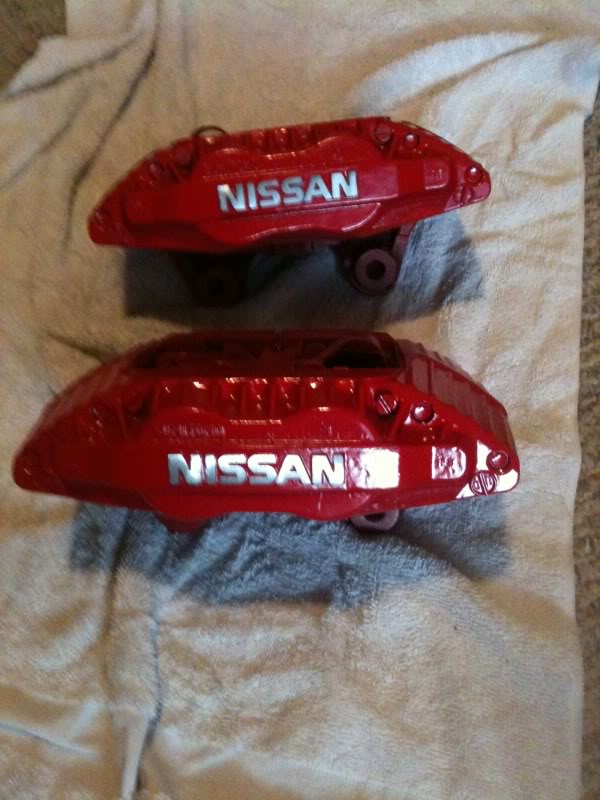
SS brake lines for front z32 calipers and rear. Also have SS arp exhaust studs,Main girdle
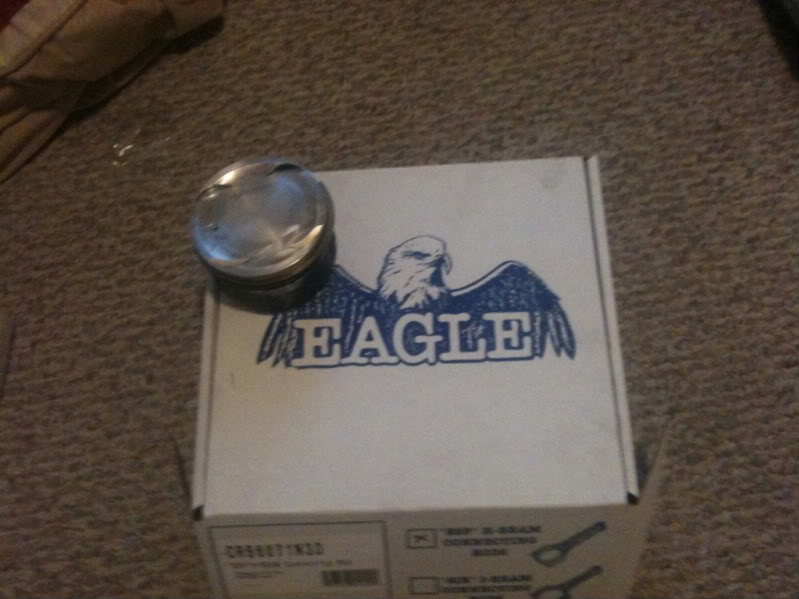
Finally broke down and got the rods to go with the forged pistons..
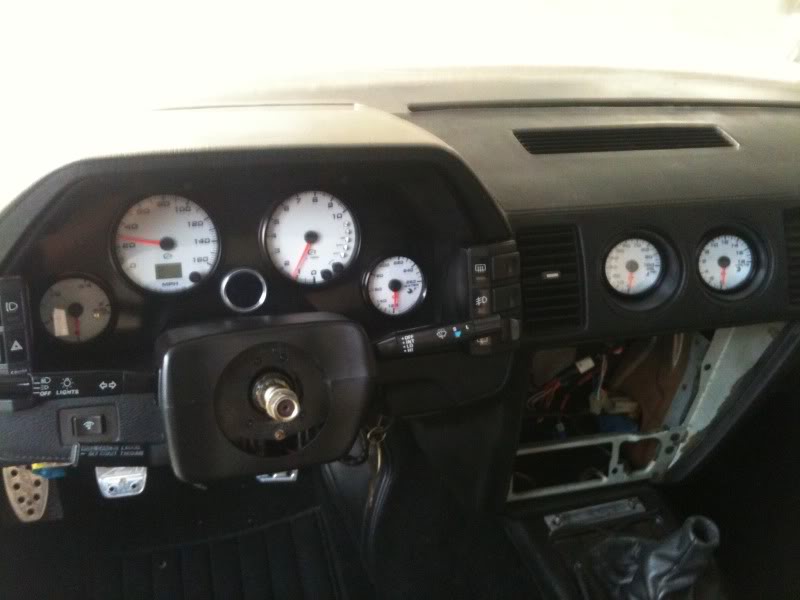
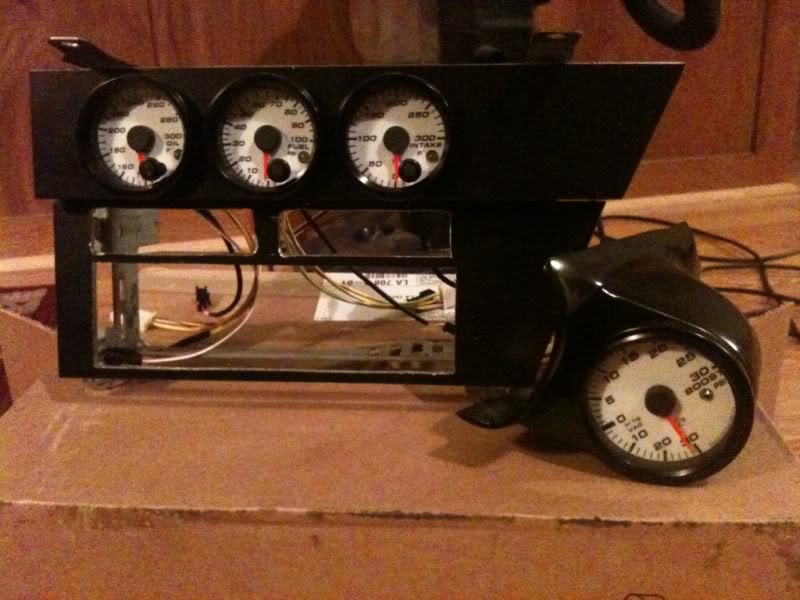
Slow process on the z since weather been odd lately. The engine bay is 50% done. Also installed new hood/hatch struts so i no longer have to use a pole to hold up. 3 new gauges are in the mail hopefully they will get here soon.
got the gauges in the center dash and an A Pillar pod.cut up and plastic welded to fit...universal had laying around to fit the z
Got a bunch of new parts in such as tie rods,steering knuckles, boots, etc etc But some other big stuff
stage 3 and Fidanza flywheel.
heavy duty clutch fork with new pivot ball
SS brake lines for front z32 calipers and rear. Also have SS arp exhaust studs,Main girdle
Finally broke down and got the rods to go with the forged pistons..
Slow process on the z since weather been odd lately. The engine bay is 50% done. Also installed new hood/hatch struts so i no longer have to use a pole to hold up. 3 new gauges are in the mail hopefully they will get here soon.
got the gauges in the center dash and an A Pillar pod.cut up and plastic welded to fit...universal had laying around to fit the z
Thread Starter
Stupid Hurricanes...
Joined: Jun 2007
Posts: 1,481
From: louisiana
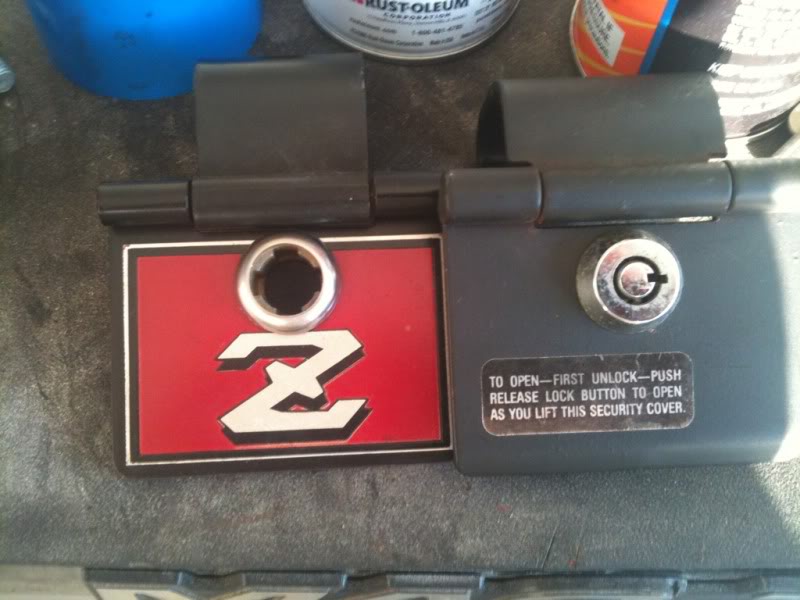
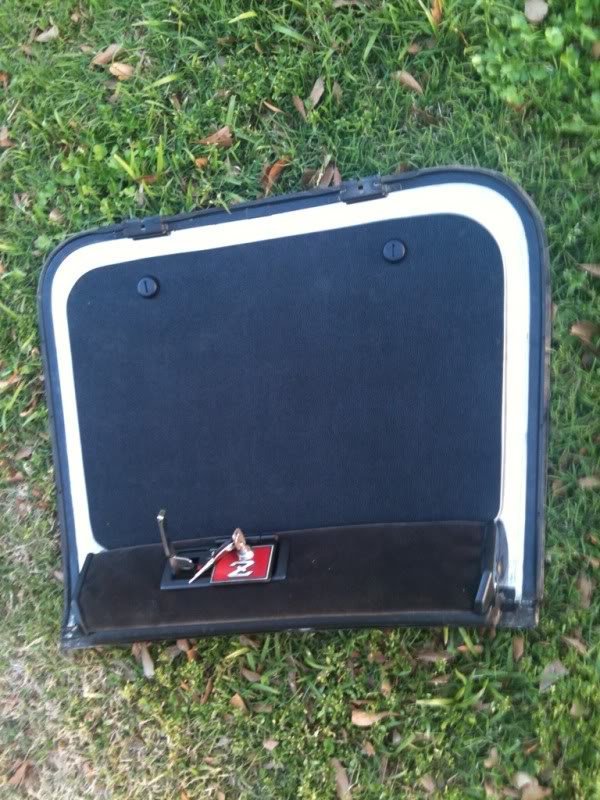
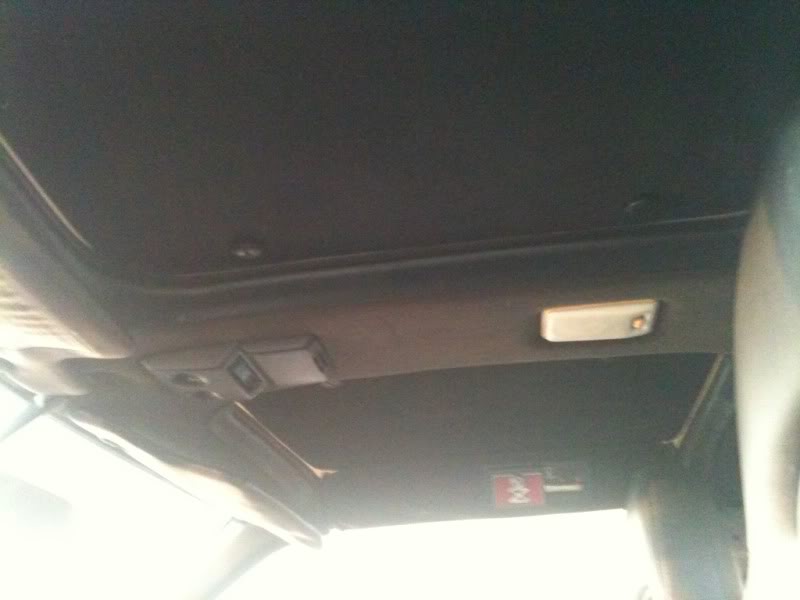
got a little time this weekend so i tackled some things. Needed to replace the keys in the t-top locks. The t-top lock on the left was the one that came off my ae, while the other one is what i picked up.
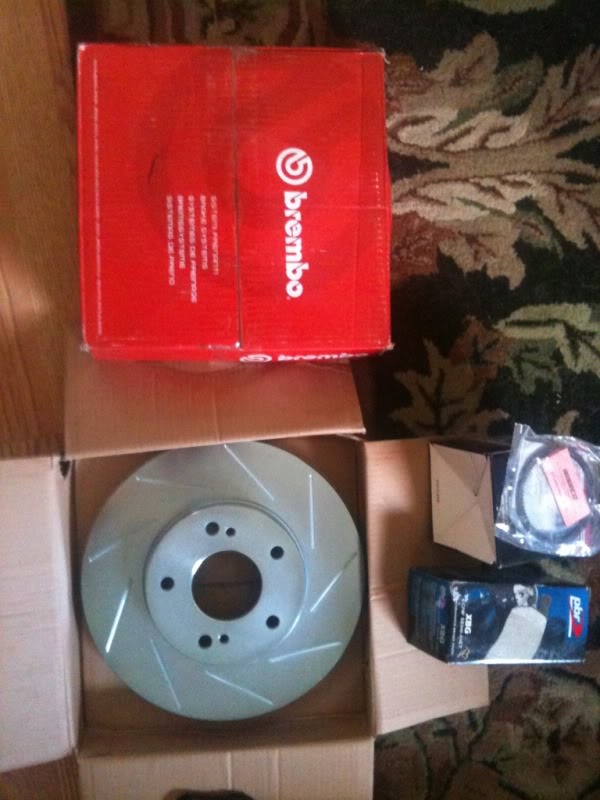
got some other parts in
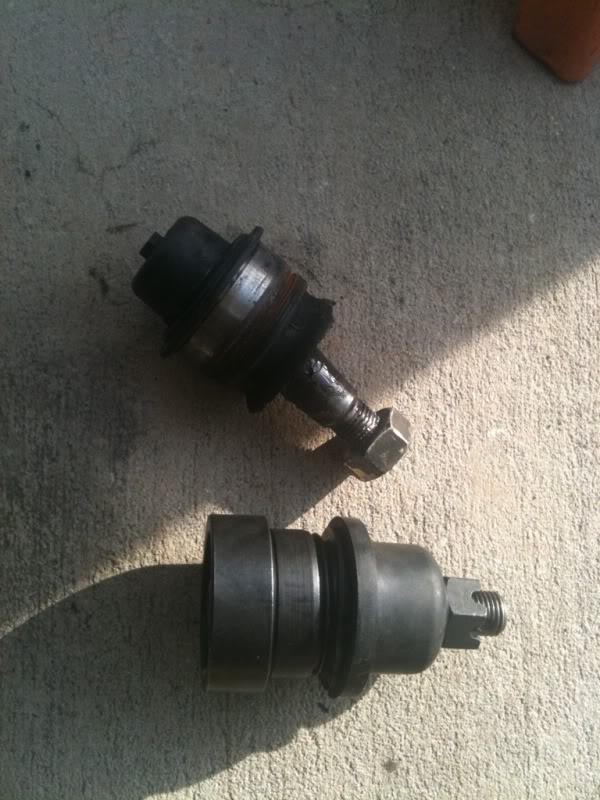
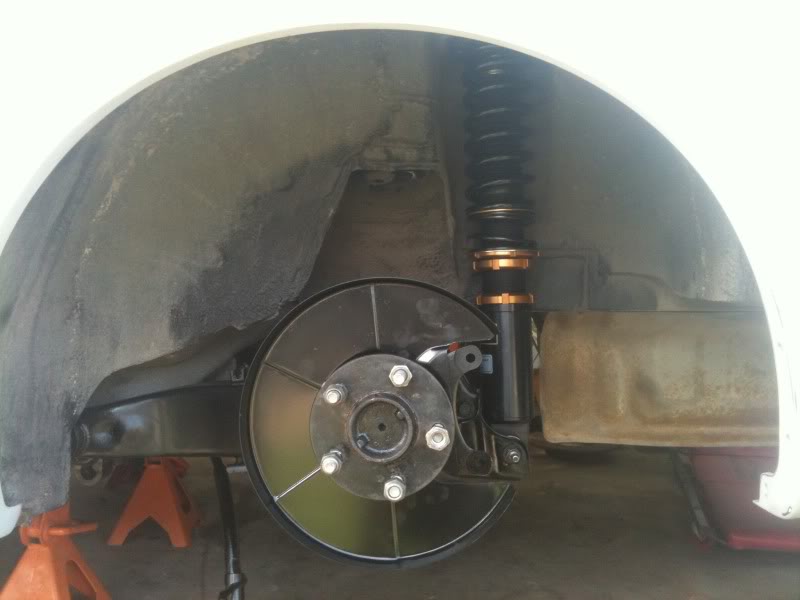
It was definitely time to replace those ball joints.
All comes together at the end of the day, all 4 corners have SS lines installed.
got some other parts in
It was definitely time to replace those ball joints.
All comes together at the end of the day, all 4 corners have SS lines installed.
Thread Starter
Stupid Hurricanes...
Joined: Jun 2007
Posts: 1,481
From: louisiana
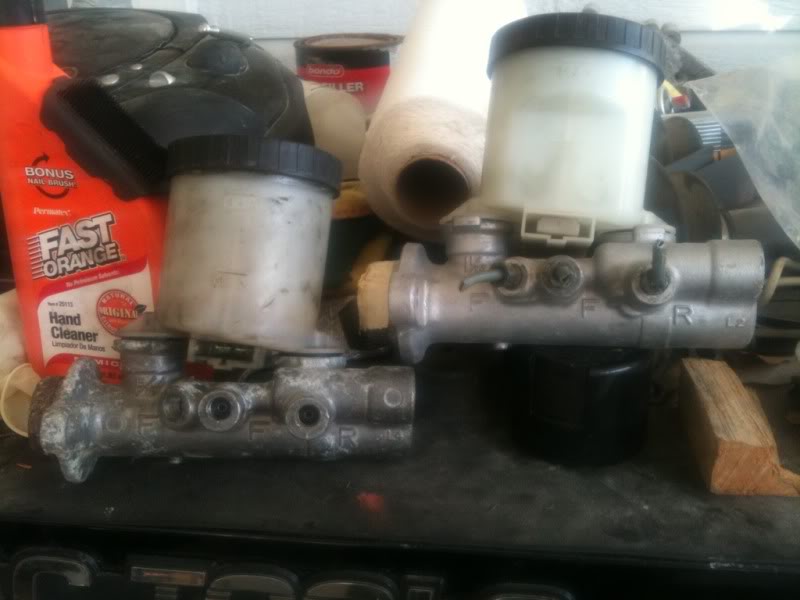
got the z32 brake cylinder ready to go in as well as the master clutch
but i had to finish up cleaning and painting the engine bay.
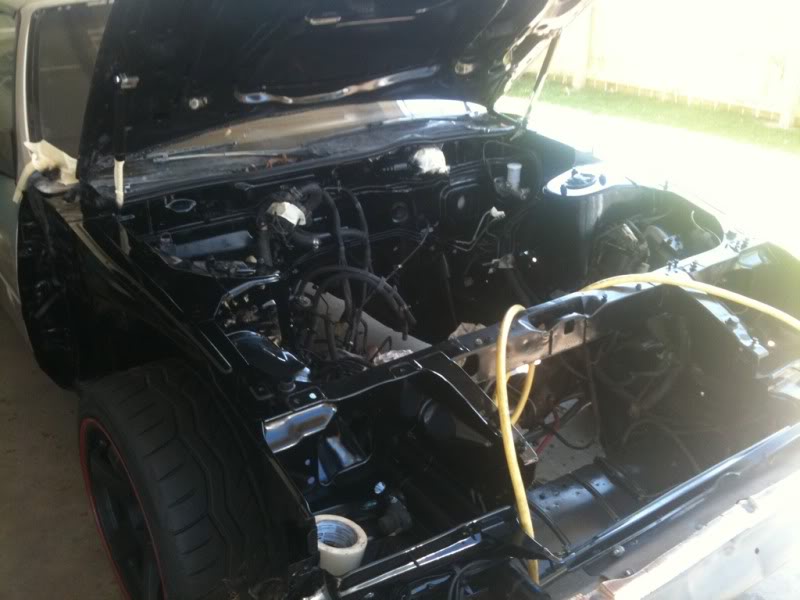
damn engine bay pretty much took all weekend, gutted steering rack with new boots, tie rods is ready to go in this week.
but i had to finish up cleaning and painting the engine bay.
damn engine bay pretty much took all weekend, gutted steering rack with new boots, tie rods is ready to go in this week.


Thread Starter
Stupid Hurricanes...
Joined: Jun 2007
Posts: 1,481
From: louisiana
Sorry been awhile since i updated this page. So ask and you shall receive.
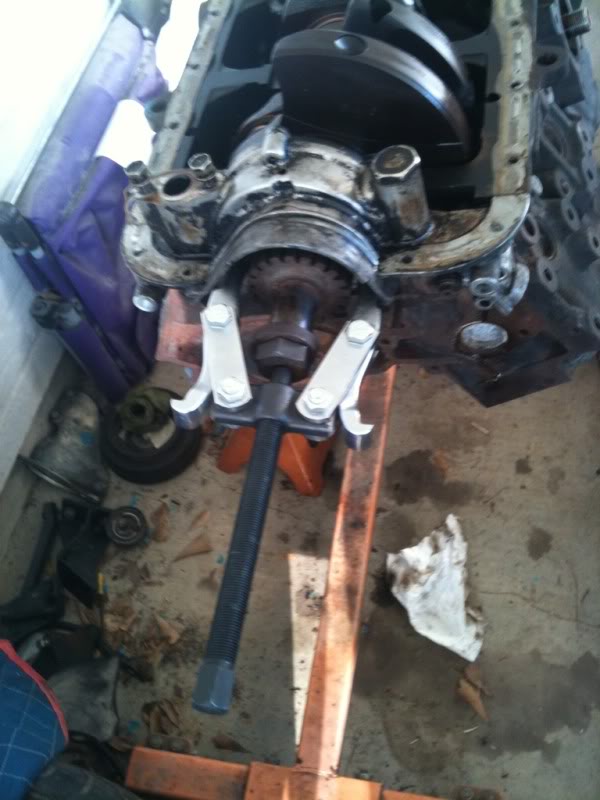
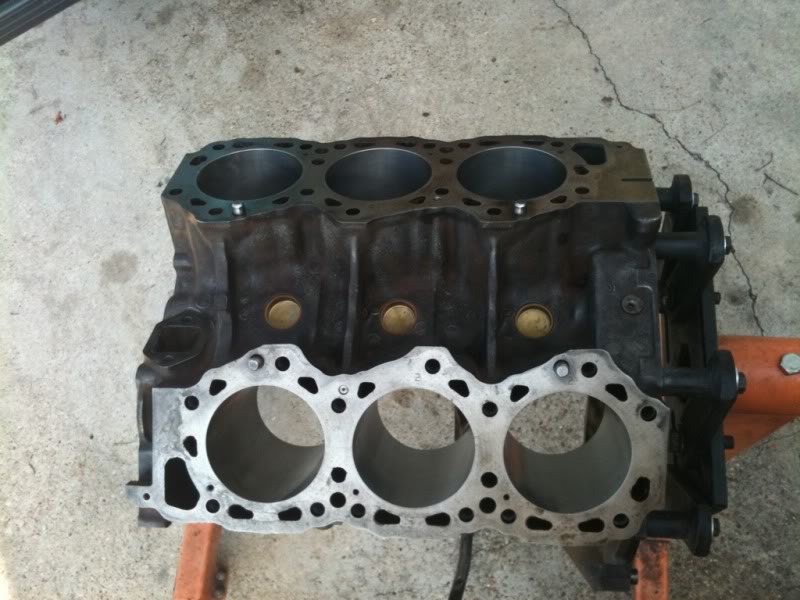
Had to finish stripping the block to send off to the shop
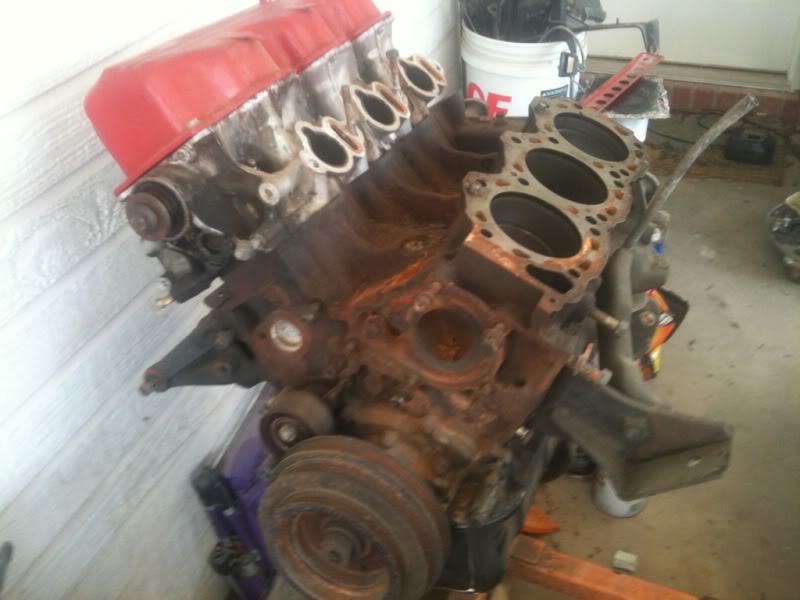
Of course the timing gear was holding me up. Had to buy a new pulley and grind it to fit between the oil pump. Talk about fun!!
Get the block back from the shop all nice and clean with 20 over with new freeze plugs
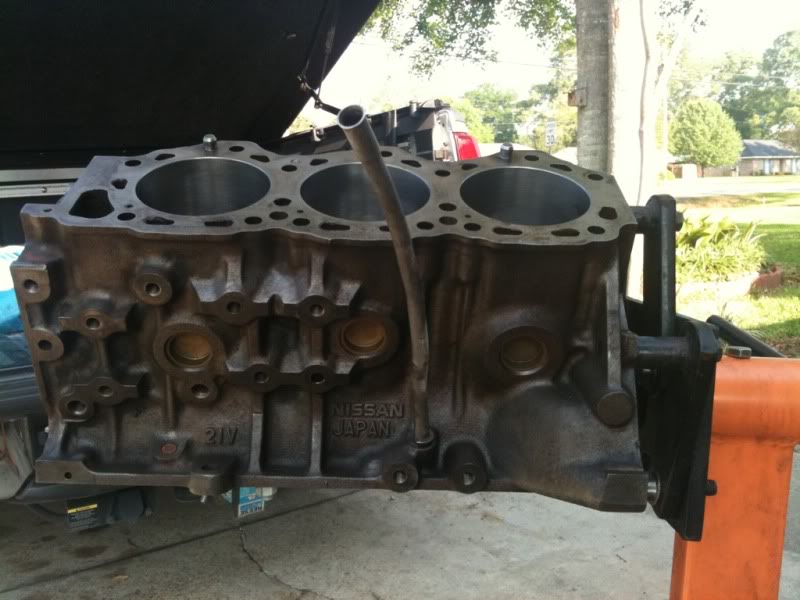
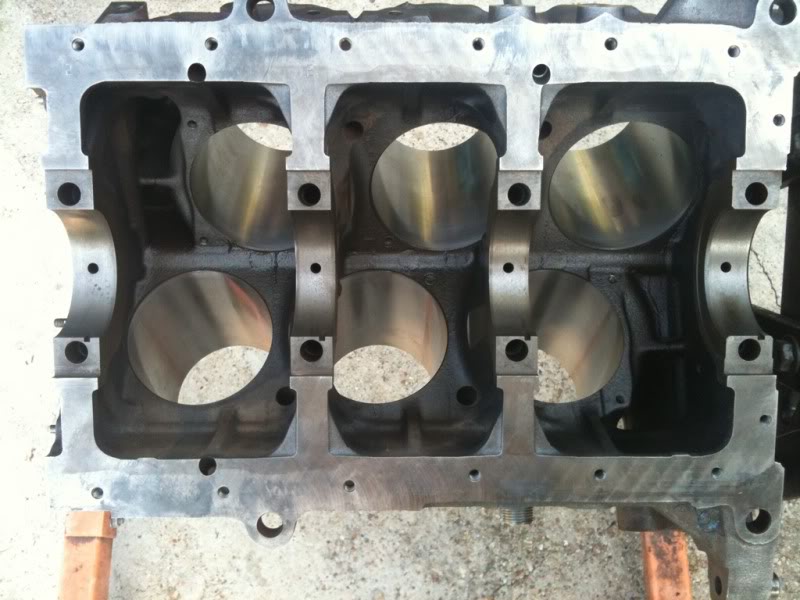
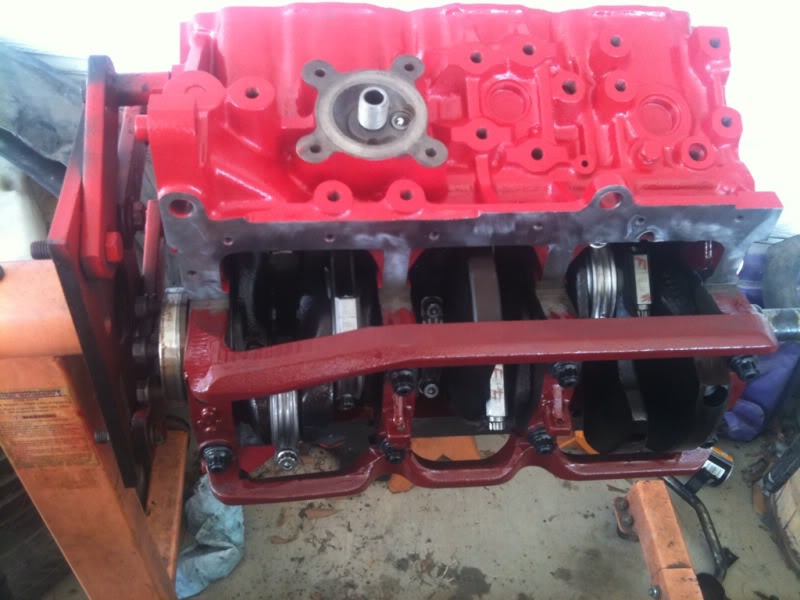
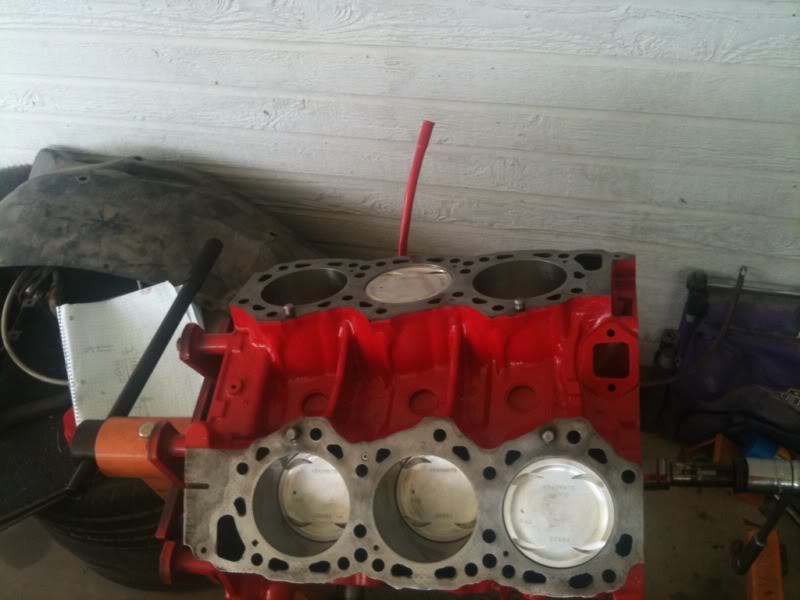
Glyptal the inside of the block. Got the arp girdle studs in, eagle rods with the wiseco pistons installed and tq down.
Had to finish stripping the block to send off to the shop
Of course the timing gear was holding me up. Had to buy a new pulley and grind it to fit between the oil pump. Talk about fun!!
Get the block back from the shop all nice and clean with 20 over with new freeze plugs
Glyptal the inside of the block. Got the arp girdle studs in, eagle rods with the wiseco pistons installed and tq down.
Last edited by 260zturbo; Sep 15, 2012 at 01:14 PM.


