

View Poll Results: Do you want a write up of the install
Yes, write one up.


5
83.33%
Nah, don't want it/ don't care


1
16.67%
Voters: 6. You may not vote on this poll
Installed Profec B! It's great.

Thread Starter
Externally Wastegated
Joined: Oct 2001
Posts: 1,220
From: San Diego
Well, I thought I would wait till I took the car back to the paint shop, but I the temptation was too much! lol  Right now I'm boosting ~.63-5 BAR on the boost gauge, I dunno what that traslates to in PSI, but the pop off valve won't let me go any higher so that thing is the next on my list to be modded. I will post pics or a link here later after I get the photos uploaded to my cpu, but in all truth it wasn't that bad. Took me longer than I had wanted because I noticed I had to fix some minor things and found my reason for an erratic warm idle and rough cold start.
Nonetheless, if you guys want I'll do a full write up along with my pics. I didn't take that many pics, but some is better than none right? Let's what else to report, the boost response has gotten way better, no more soggy throttle on intial tip in. The boost comes on about 300 revs sooner too. Oh, the boost controller I installed was Trust (Greddy, same thing) Profec B. The instructions were in Japanese, but I'm glad they had a good diagram.
John 82ZXT
Right now I'm boosting ~.63-5 BAR on the boost gauge, I dunno what that traslates to in PSI, but the pop off valve won't let me go any higher so that thing is the next on my list to be modded. I will post pics or a link here later after I get the photos uploaded to my cpu, but in all truth it wasn't that bad. Took me longer than I had wanted because I noticed I had to fix some minor things and found my reason for an erratic warm idle and rough cold start. Nonetheless, if you guys want I'll do a full write up along with my pics. I didn't take that many pics, but some is better than none right?
Let's what else to report, the boost response has gotten way better, no more soggy throttle on intial tip in. The boost comes on about 300 revs sooner too. Oh, the boost controller I installed was Trust (Greddy, same thing) Profec B. The instructions were in Japanese, but I'm glad they had a good diagram.John 82ZXT
Guest
Posts: n/a
hey man
im still a year or so away from doing mine but i wouldnt mind a few pics, actually i just like to see what others are doing to there cars
as the progress on my own car came to a stop, although after two years i finally got the bottom end back together this weekend
if anyone else loves there Trust gear as well they have a turbo timer harness so theres no need for cutting wires, part number tt14-21 its for a skyline but has the correct plugs for the zx
Thread Starter
Externally Wastegated
Joined: Oct 2001
Posts: 1,220
From: San Diego
Okay, well, you pressured me to do it Chris... lol j/k. This is gonna be a general description because I think some of it will be self explanatory. First, you'll need your basic socket set, wire cutter/crimper, some electrical tape, and extra hose clamps for vacuum lines (in case Greddy doesn't give you the right amount like they did to me!).
First, remove the J-pipe and brake master cylinder heat shield. For those that have never removed a J-pipe, there are two 10 mm bolts on the intake manifold, the 10mm bolt by the throttle body, and two 8mm screw/bolts on a clamp on the turbo compressor. You might need to find a long flat tip screwdriver as I found that to be the easiest way to get that clamp loose.
Next, find a suitable place to mount the solenoid motor box. My car used to come with a headlight washer so I used that mount as my mount for the box. Oh and now is good time to inspect your PCV valve and hose and any of those other little hoses under the intake manifold. Also, check the turbo's nuts (haha) because they can get loose and cause a severe lack of power. They are 17mm nuts and you'll see them. Now you have to take off the vacuum line to the actuator (the gold colored can thing), be sure to take off the vacuum line after the two lines merge. Using the supplied hosing from Greddy (it's the larger of the two lines by the way), route a vacuum hose from that merger line to the "IN" side of the solenoid motor. Then from the actuator's nipple, you run the rest another line to the "OUT" side of the solenoid motor.
From there, connect the wiring harness of the solenoid motor with the supplied harness line and route that through the firing wall and into your car. Route the line to whereever it is you plan on mounting the unit. I sorta left mine sloppy since you have to set the boost settings using a passenger anyways. Then you hook up a harness with red and black wires to the other harness on the unit and find a power source for the red wire and a ground for the black wire. Finally, take the smaller vacuum hose that's supplied and tee into a vacuum source (if you have a blowoff valve, use that line or your boost gauge's line, if not the fuel pressure regulator line is fine too). Plumb that line to the back of the unit and you're basically done with the install.
Now you have to take the car on a test drive and set the boost levels with help from a friend or if you have extremely long lengths of abandoned roads you can do it yourself. It took me about 15 minutes to get the car dialed in, but with a stock popoff valve the high boost selection isn't an option since the thing keeps venting off past .65 BAR. So for now I only have my low boost level dialed in. Either way the boost response has gone up as the car doesn't feel as soggy. Well, that's all for this write up, I guess I'll post the pics in a picture album somewhere since I don't know how to resize photos. I'll post that link in a little bit...School doesn't exactly like the fact I'm not using this computer for "school work."
John 82ZXT
Guest
Posts: n/a
Yes, I've run mine to 14 psi so far. It's quite tunable, and the dual boost thing is nice too - stock boost, turn it off, low boost for pump gas, high boost for the race gas at the strip. It maintains boost across the rpm band, and you can adjust how fast it comes on, very nice unit.
I bought mine used for $100 - good deal.
I bought mine used for $100 - good deal.
Thread Starter
Externally Wastegated
Joined: Oct 2001
Posts: 1,220
From: San Diego
Mike, man, yeah, I have pics, just can't resize them... They're like 500kb each!  I have them uploaded to my imagestation album, just have to finish up sorting them all out. I put all my pics of the drift comps I went to at Irwindale and a few from HIN. I think there's like 180 pics. It's a lot to sort! The boost controller, I bought that about 4 years ago when I was back in Japan for high school, just never wanted to use it till I was sure about tuning and upping the boost. Better to be safe than sorry. lol
It set me back about 300 or so given the yen rate exchange which was way crappier than it is now. Now, it woulda been about 280. For your POV, how'd you get that lid off? I'm thinking about removing that thing completely. Did you use a chisel or something to pry it off? Anyway, yeah, I will work the pics now so that they'll be up for viewing asap.
John 82ZXT
I have them uploaded to my imagestation album, just have to finish up sorting them all out. I put all my pics of the drift comps I went to at Irwindale and a few from HIN. I think there's like 180 pics. It's a lot to sort! The boost controller, I bought that about 4 years ago when I was back in Japan for high school, just never wanted to use it till I was sure about tuning and upping the boost. Better to be safe than sorry. lolIt set me back about 300 or so given the yen rate exchange which was way crappier than it is now. Now, it woulda been about 280. For your POV, how'd you get that lid off? I'm thinking about removing that thing completely. Did you use a chisel or something to pry it off? Anyway, yeah, I will work the pics now so that they'll be up for viewing asap.
John 82ZXT
Guest
Posts: n/a
Hey John, don't know how you could have waited that long to install that bad boy....when I got my parts, my wife rolled her eyes as she knew no matter what time it was I was going to install it lol. I had the boost controller installed an hour after I got it in my eager hands As for the POV, I used a dremel tool to cut off the middle grommet looking thing up at the top of the cover. That's the only thing holding the cover in it's place. You could prolly get it off with a hammer and a chisel of some sort but cutting it off with a grinder works better. Once it's off, all you have to do is push and twist the innards until it comes out with the spring. After that, all you have to do is pop in "bumper" washers. Like I said, it worked fine for me for a while...it just started to leak anytime I boost over 12psi. Sooo, I got a pipe plug (can't remember the size) from Home Depot for like two bucks and capped it off. The hardest thing is taking the POV out. You need to use a serious crescent wrench to budge the sucker. No more leaking though Are you going to Motorsport? I can't go  have to save money for the Spec stage 4 racing clutch $400+....ouch! But it slips soo bad right now and it sucks as I've been having to baby the car.
As for the POV, I used a dremel tool to cut off the middle grommet looking thing up at the top of the cover. That's the only thing holding the cover in it's place. You could prolly get it off with a hammer and a chisel of some sort but cutting it off with a grinder works better. Once it's off, all you have to do is push and twist the innards until it comes out with the spring. After that, all you have to do is pop in "bumper" washers. Like I said, it worked fine for me for a while...it just started to leak anytime I boost over 12psi. Sooo, I got a pipe plug (can't remember the size) from Home Depot for like two bucks and capped it off. The hardest thing is taking the POV out. You need to use a serious crescent wrench to budge the sucker. No more leaking though Are you going to Motorsport? I can't go have to save money for the Spec stage 4 racing clutch $400+....ouch! But it slips soo bad right now and it sucks as I've been having to baby the car.
Thread Starter
Externally Wastegated
Joined: Oct 2001
Posts: 1,220
From: San Diego
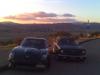
Hey Mike the wait's over man! I finally, finally got all my pics up and ready. Took forever and a day, but they're there. There are about 130 pics I think in 1 album and 40 in the other. Some of them are of my bro, friends and my ugly mug so go ahead and laugh. Thanks for the tip on getting that POV off, yeah I'm probably gonna go your route since I have that boost controller controlling the boost precisely. I doubt it will fail until years down the road. So you're not going to the MSA show? Sucks, but yeah maybe I'll see you next year or at the next Datsun show up in Deer Creek again. Oh before I forget, ") the link for my pics is this: http://www.imagestation.com/members/lifegrddude Sorry about the day delay for the pics, but my school's becoming a bunch of cpu ***** and everyone is getting booted for non-academic work... I still say this is academic since it's helping other people out, but they don't see it that way! Enjoy the pics, some of them are from the drift shows and of the Option video guys like Seigo, Koguchi and Orido. Let me know what you think!
the link for my pics is this: http://www.imagestation.com/members/lifegrddude Sorry about the day delay for the pics, but my school's becoming a bunch of cpu ***** and everyone is getting booted for non-academic work... I still say this is academic since it's helping other people out, but they don't see it that way! Enjoy the pics, some of them are from the drift shows and of the Option video guys like Seigo, Koguchi and Orido. Let me know what you think!
John 82ZXT
Thanks for the tip on getting that POV off, yeah I'm probably gonna go your route since I have that boost controller controlling the boost precisely. I doubt it will fail until years down the road. So you're not going to the MSA show? Sucks, but yeah maybe I'll see you next year or at the next Datsun show up in Deer Creek again. Oh before I forget, the link for my pics is this: http://www.imagestation.com/members/lifegrddude Sorry about the day delay for the pics, but my school's becoming a bunch of cpu ***** and everyone is getting booted for non-academic work... I still say this is academic since it's helping other people out, but they don't see it that way! Enjoy the pics, some of them are from the drift shows and of the Option video guys like Seigo, Koguchi and Orido. Let me know what you think!John 82ZXT
Guest
Posts: n/a
Damn, bro...that was a lot of pictures, you weren't kidding. But it was great to look at. I evny you getting to meet some of the top drfiters. I think I'm going to have to travel to Cail next time. You better have a place for me to stay. Your car looks good...are you happy with the paint, looks like they did a good job. I bet you can't wait to get on the road, huh?
Chris
Your car looks good...are you happy with the paint, looks like they did a good job. I bet you can't wait to get on the road, huh? Chris

Thread
Thread Starter
Forum
Replies
Last Post
Lovenpain
For Sale (VIEW ALL)
1
Feb 26, 2012 12:36 AM
confusedalien22
300ZX (Z32) Performance / Technical
3
Jun 20, 2011 03:01 PM
Turbo86
300ZX (Z31) Performance / Technical
0
May 5, 2007 08:09 PM
Bookmarks


