Datsun 240Z - 1971 Blue Metallic 903 - Resto
 12-08-2018, 03:30 PM
#26
Registered User
Thread Starter

Join Date: Jul 2017
Posts: 42
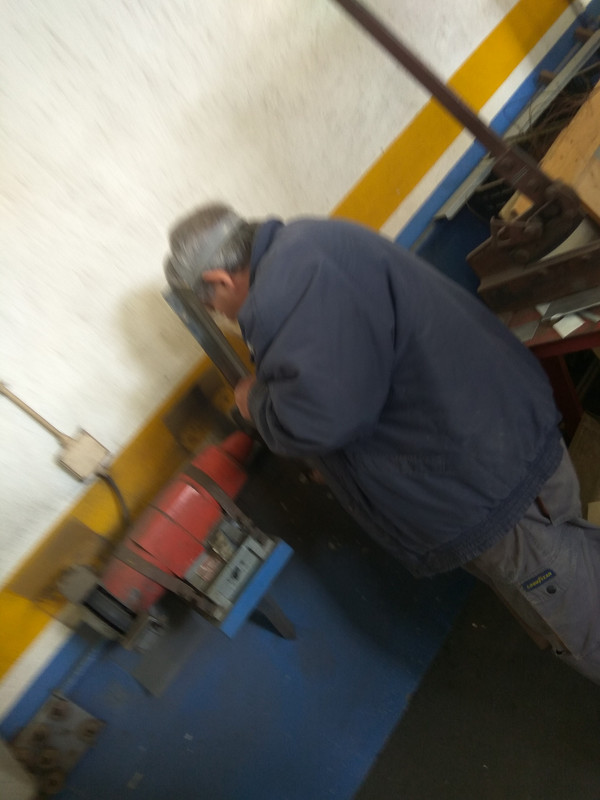
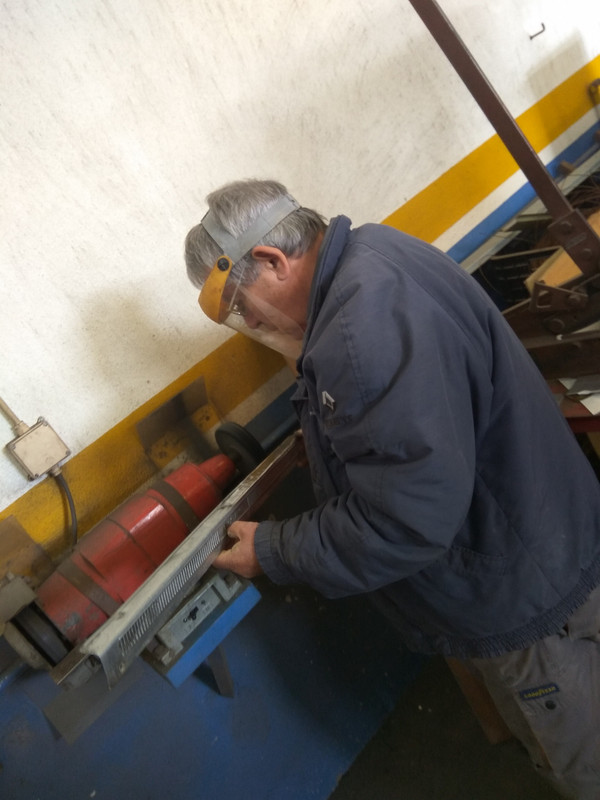
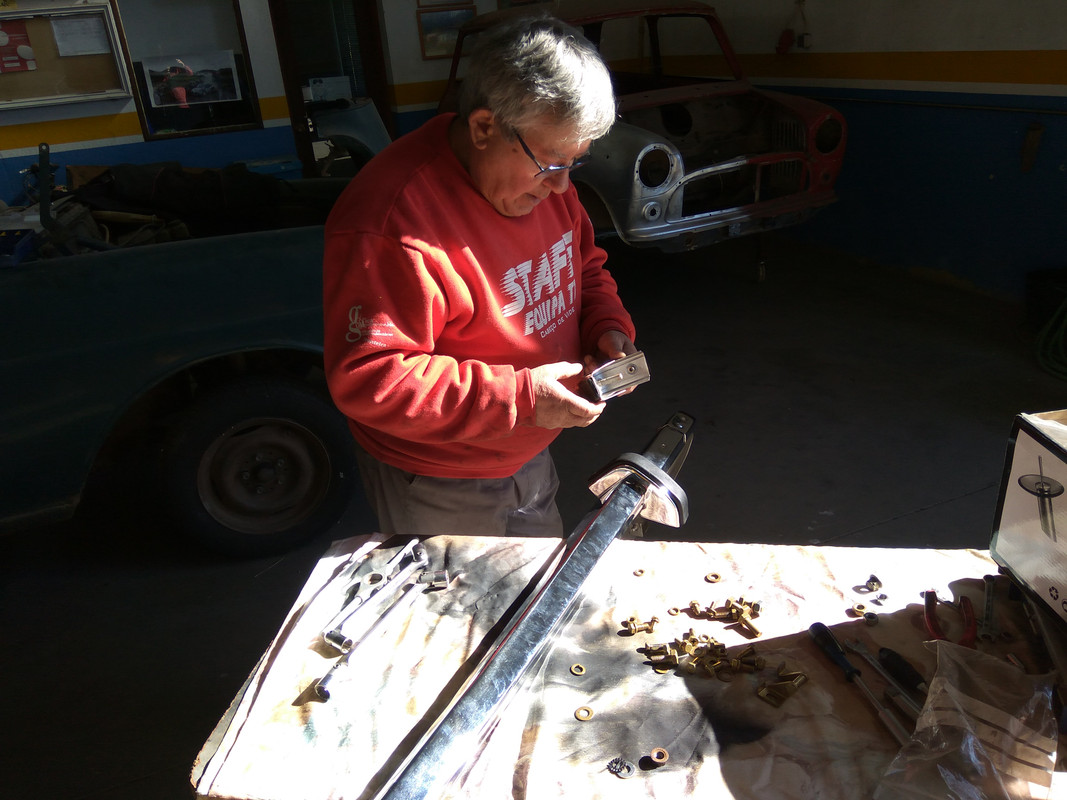
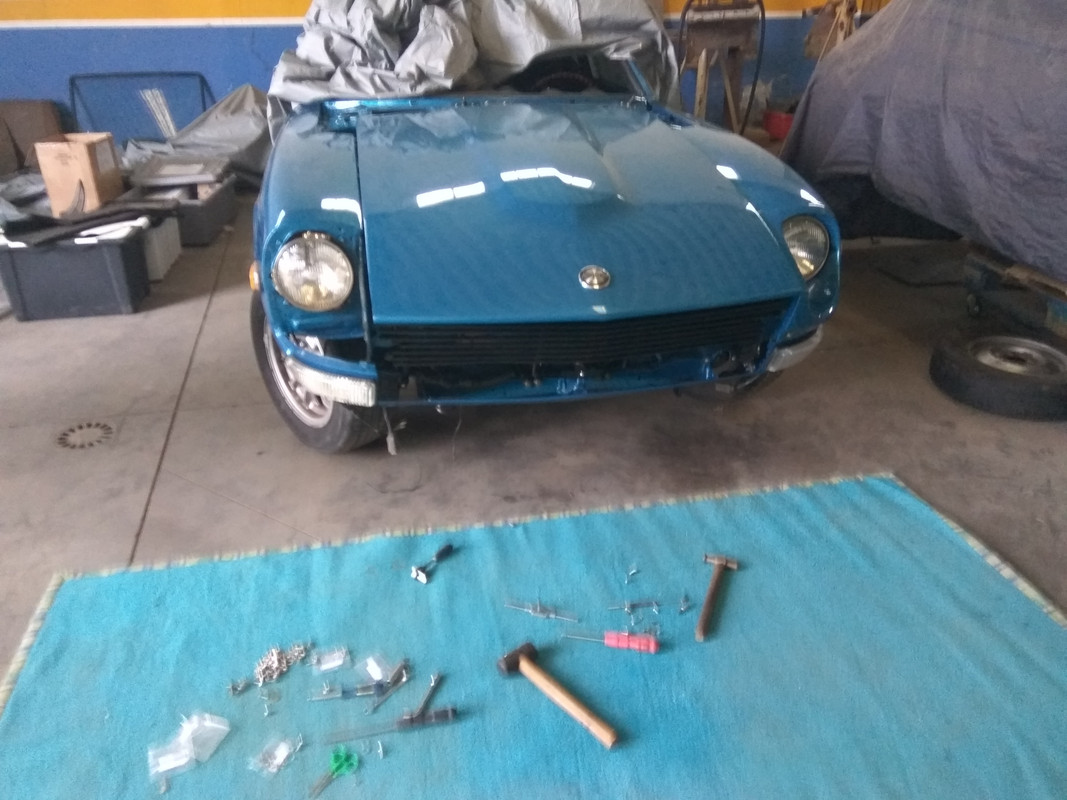
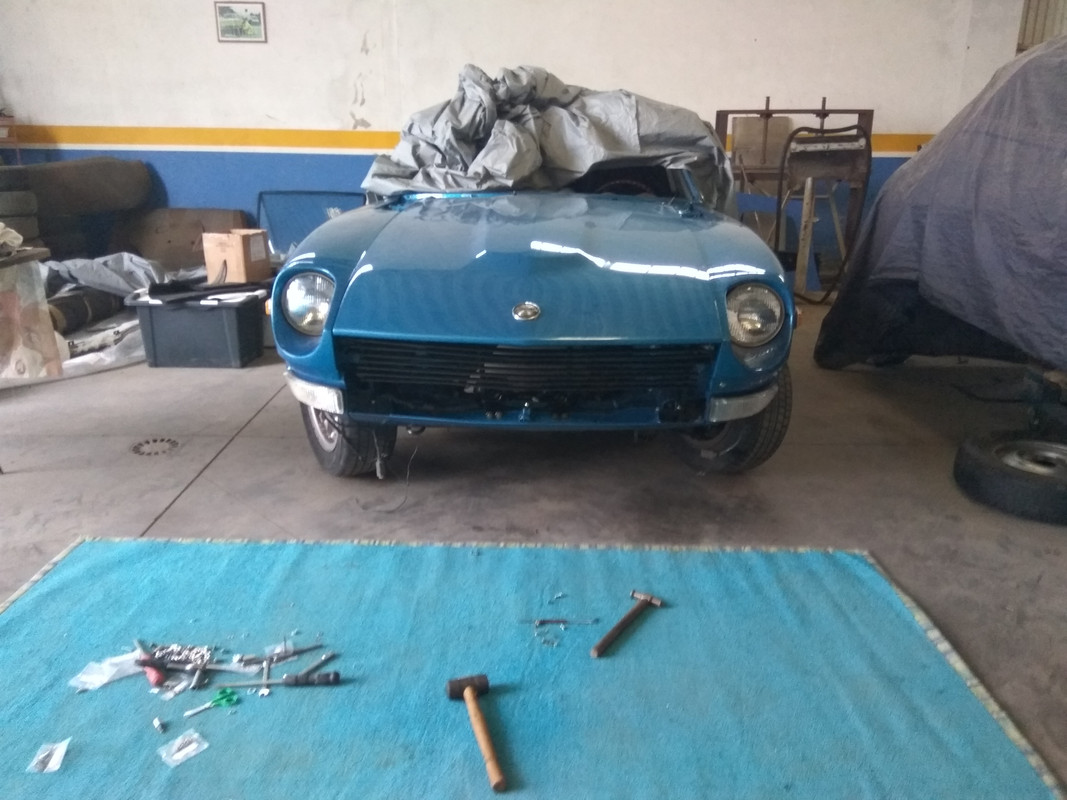
Mr.Vitorino working!
The antenna…nice to see it again on the car…
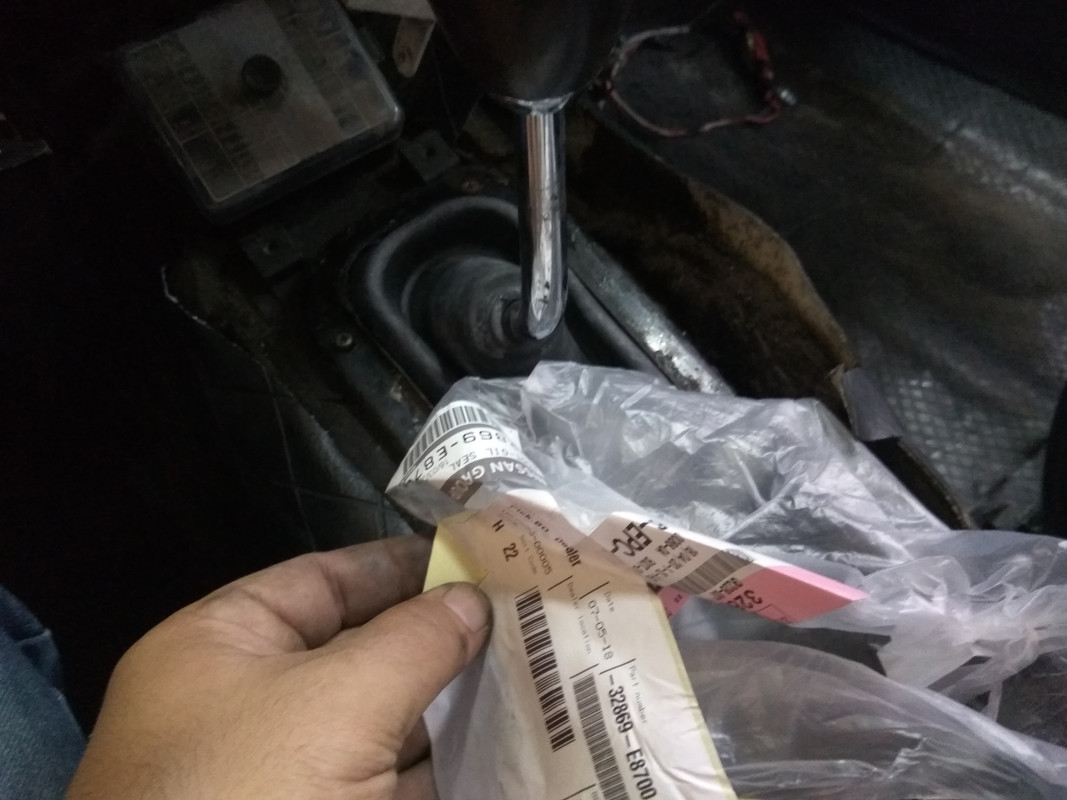
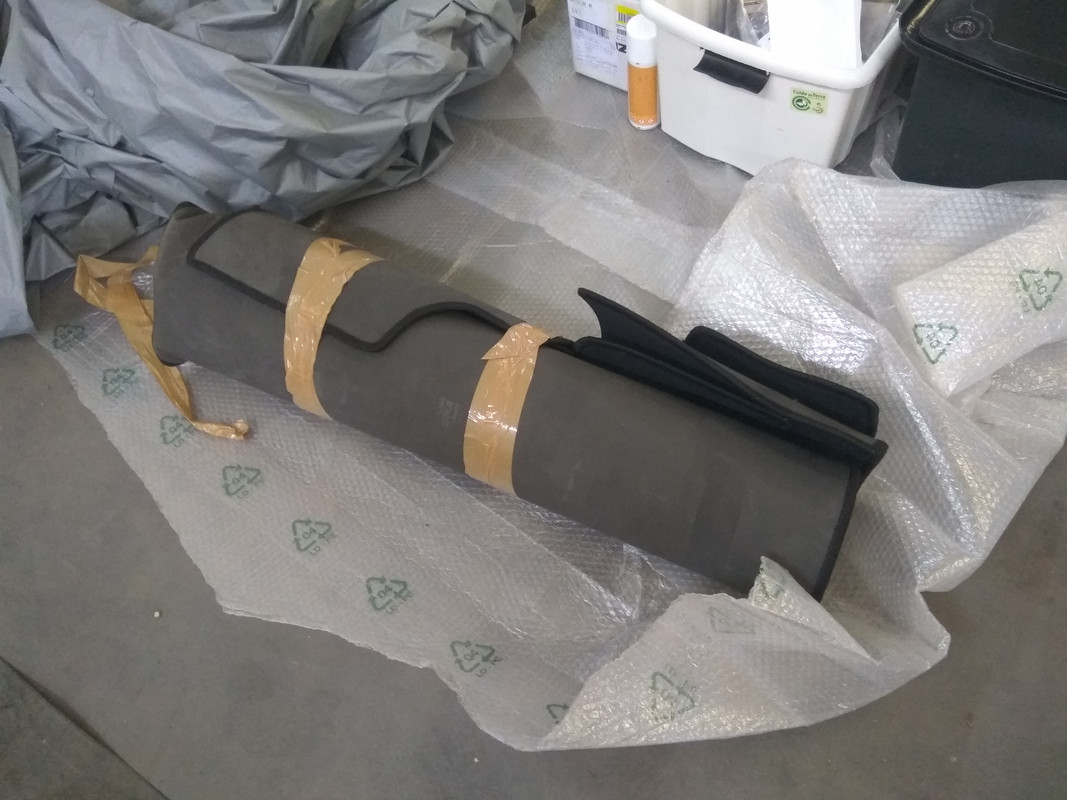
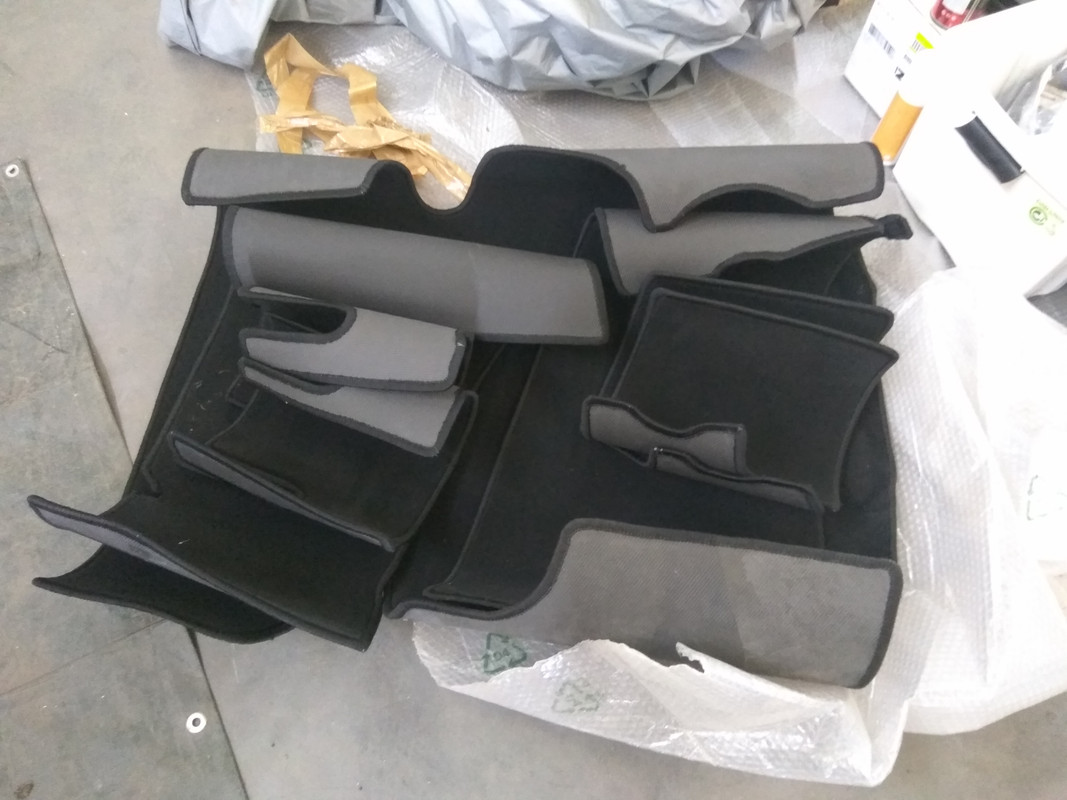
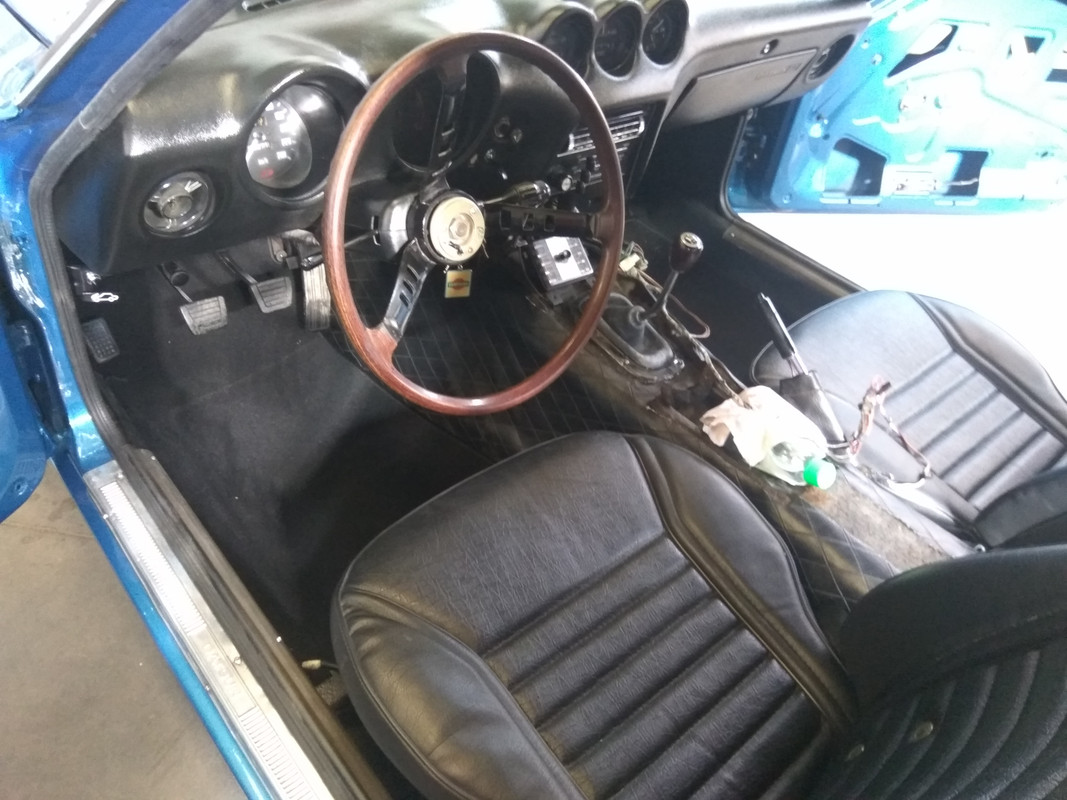
The center console got the texture too and the result was great!
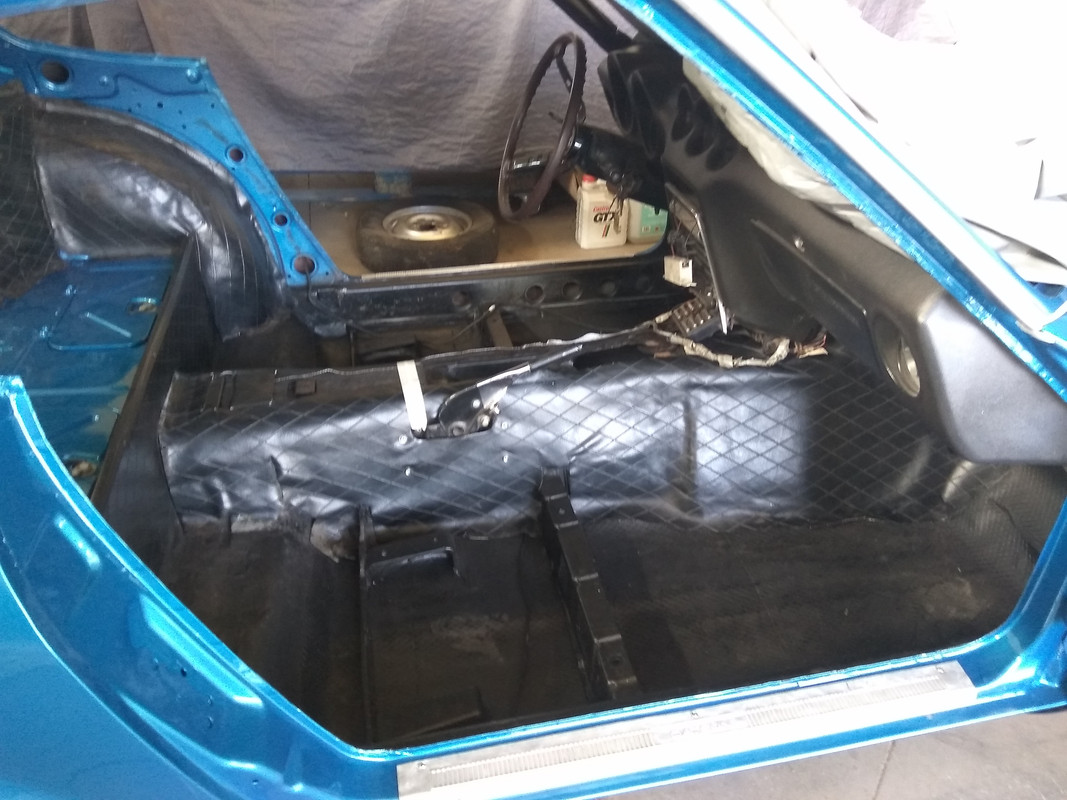
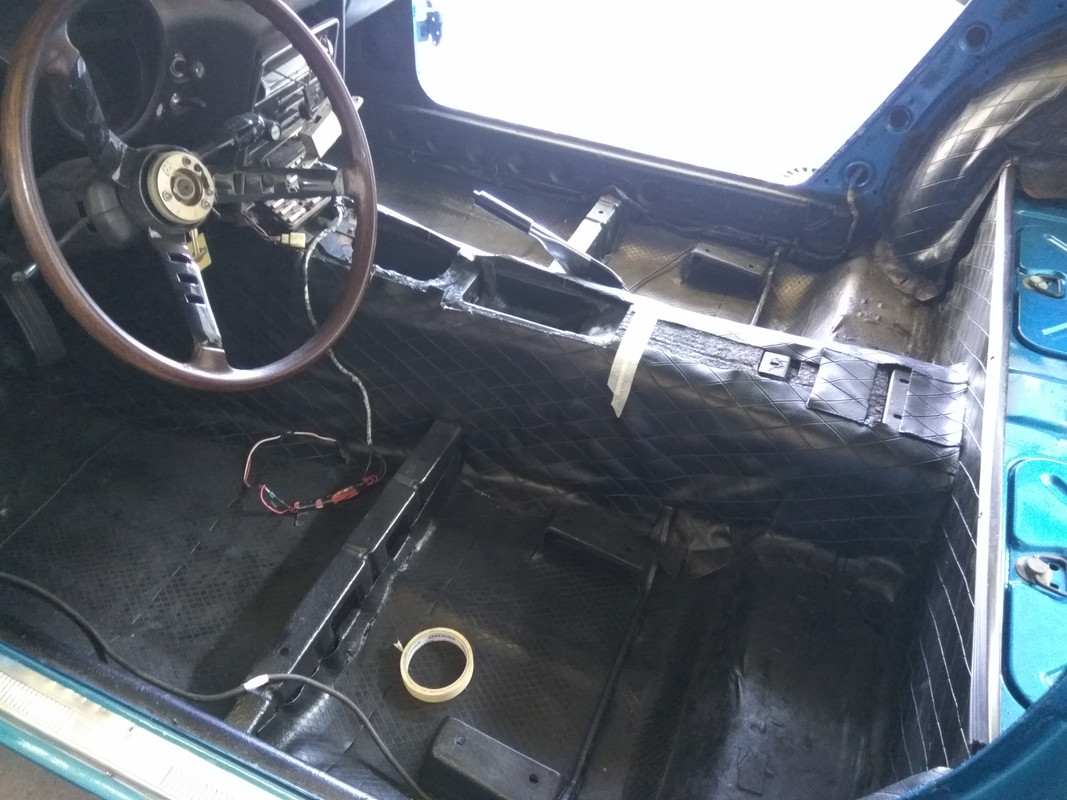
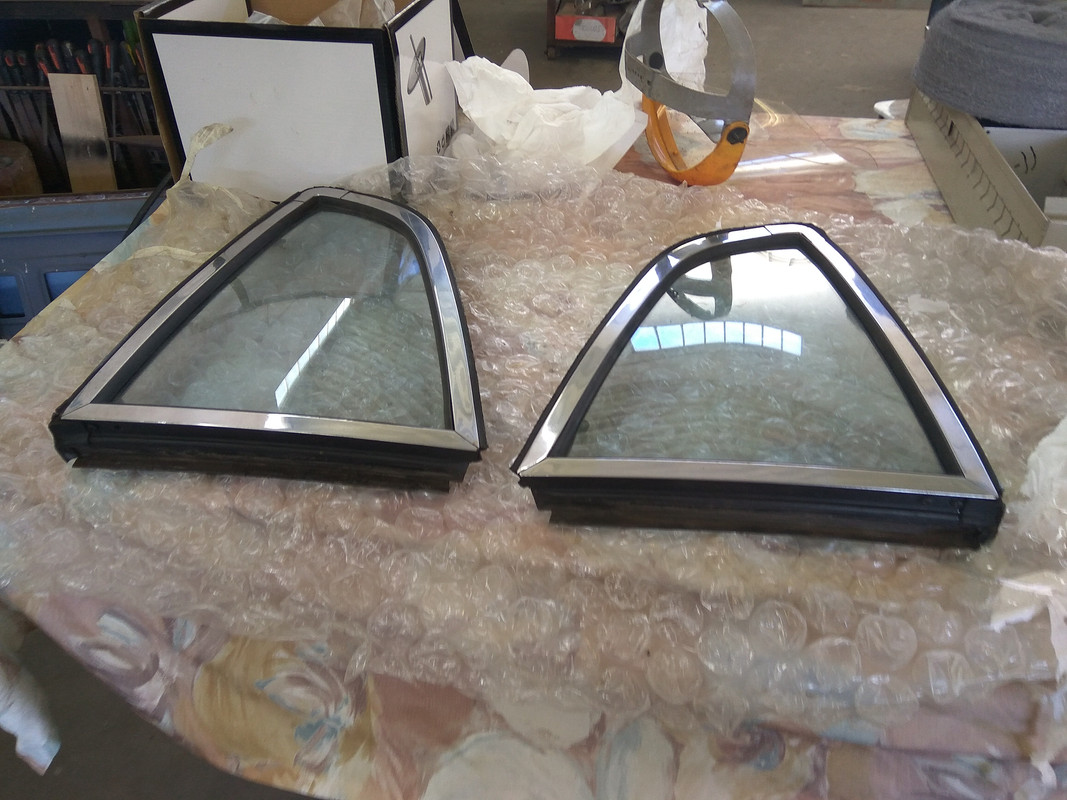
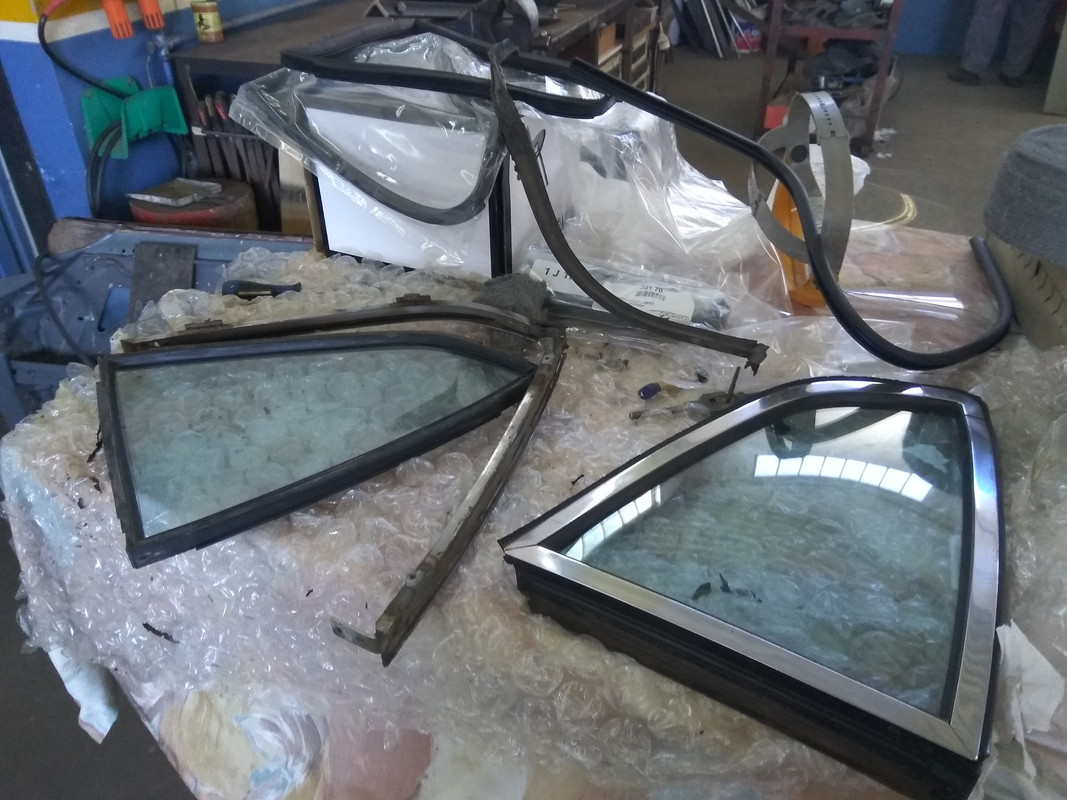
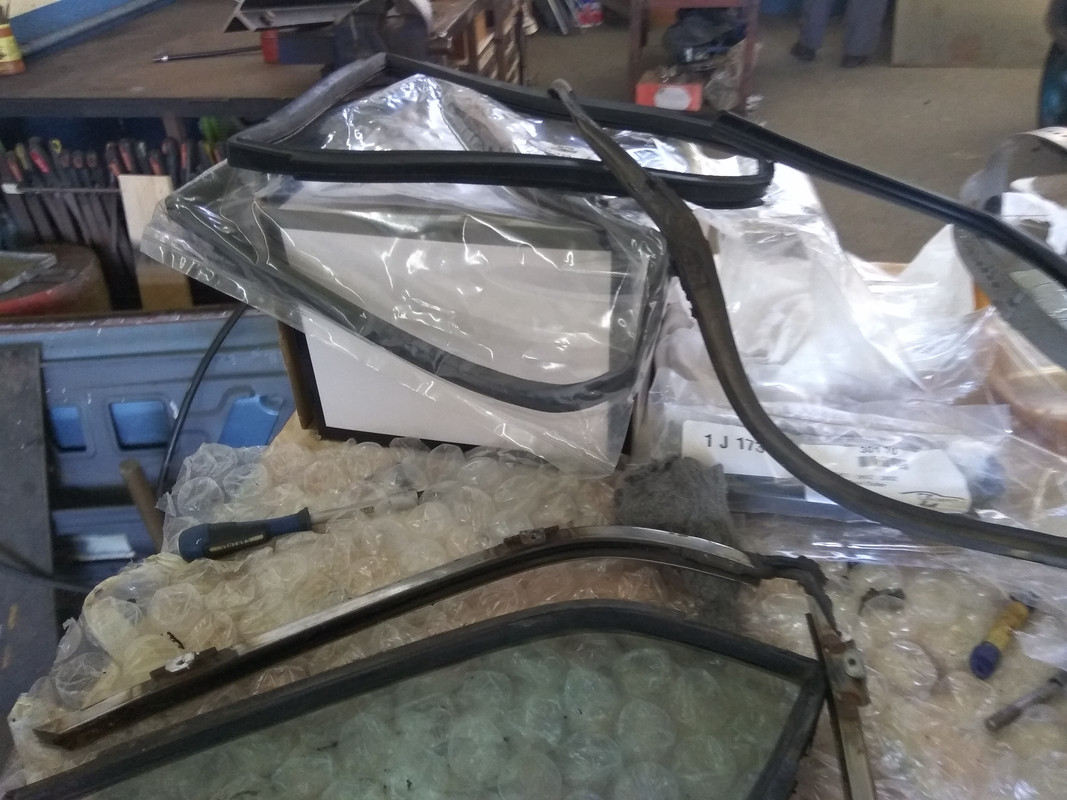
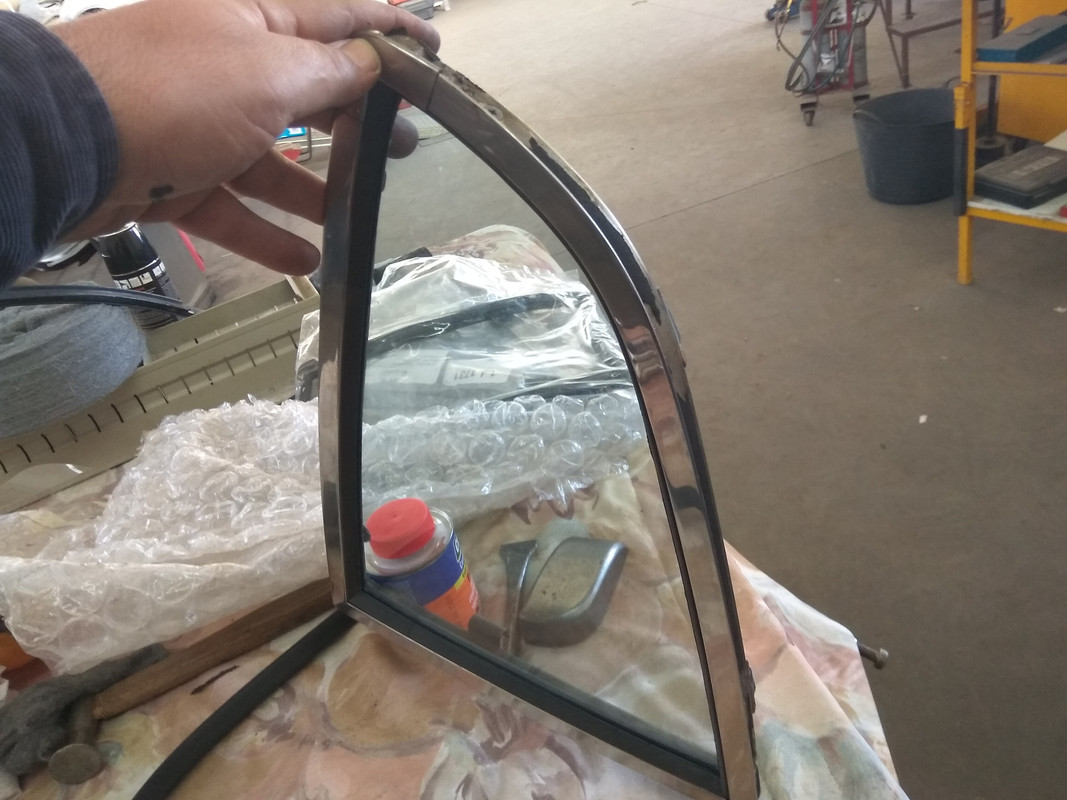
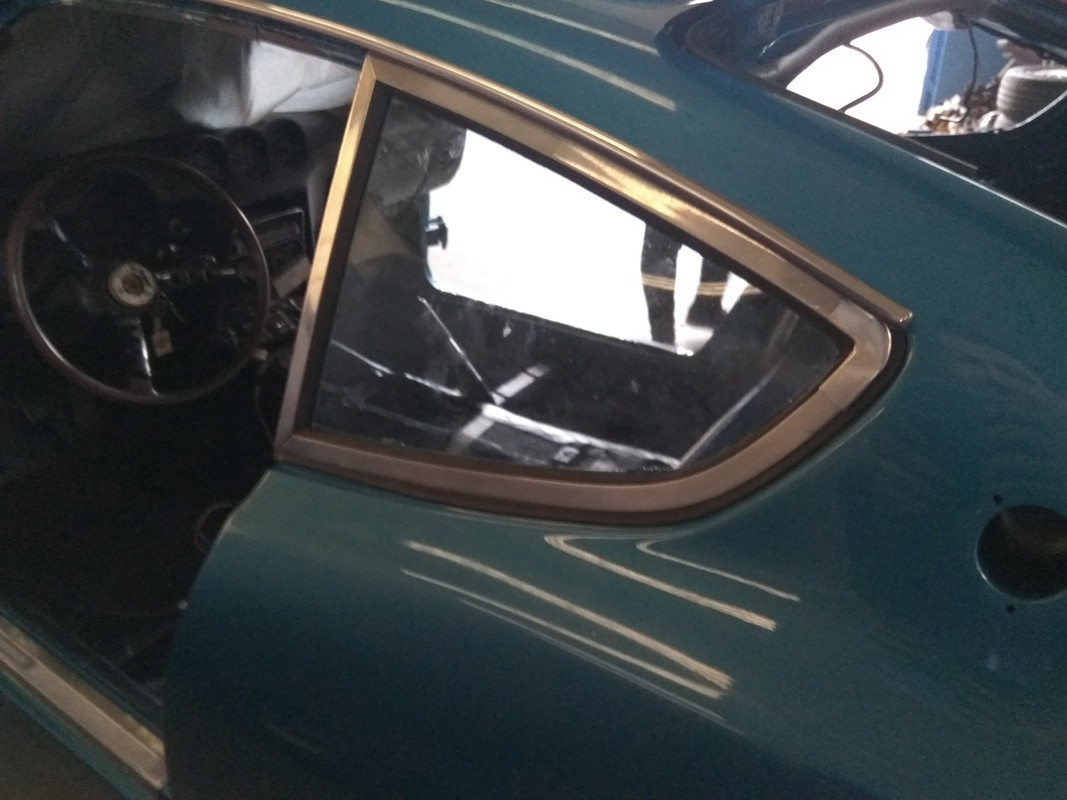
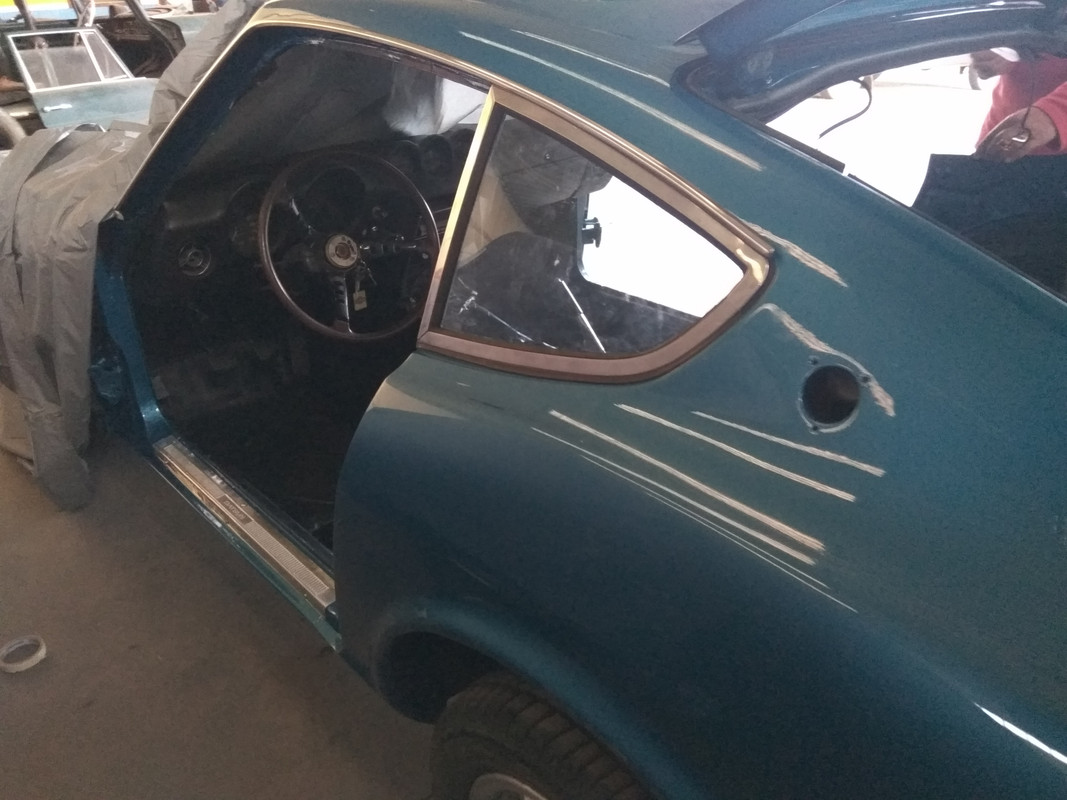
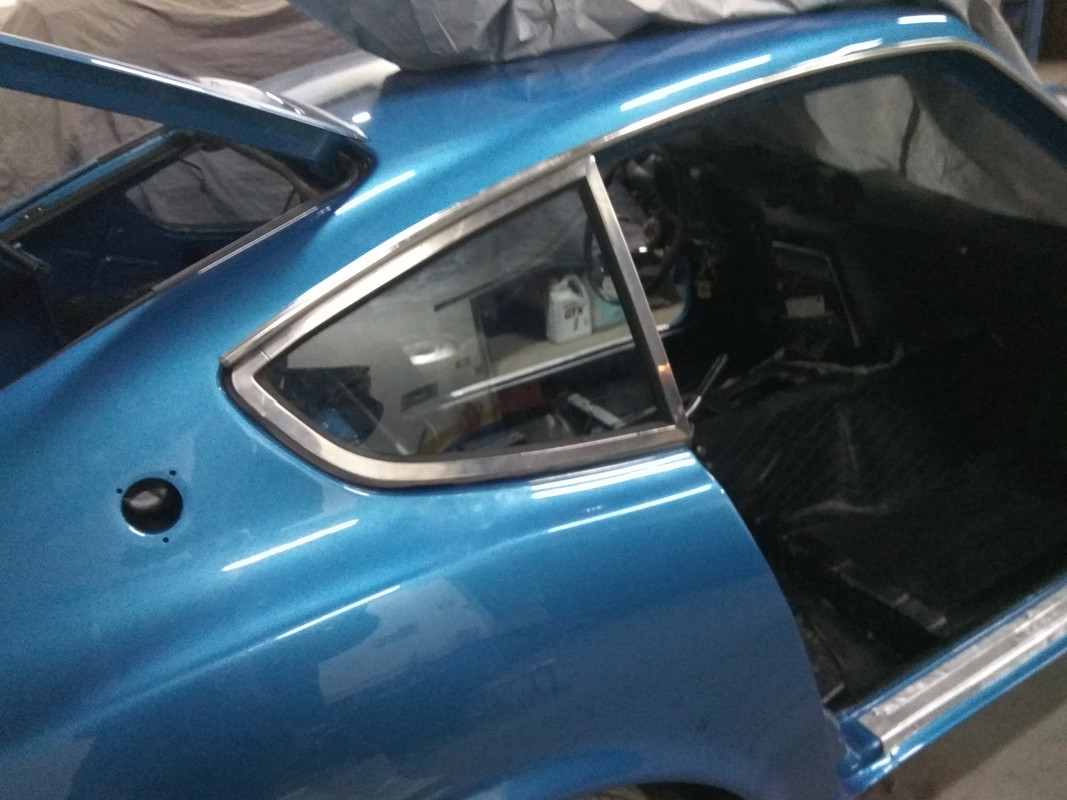
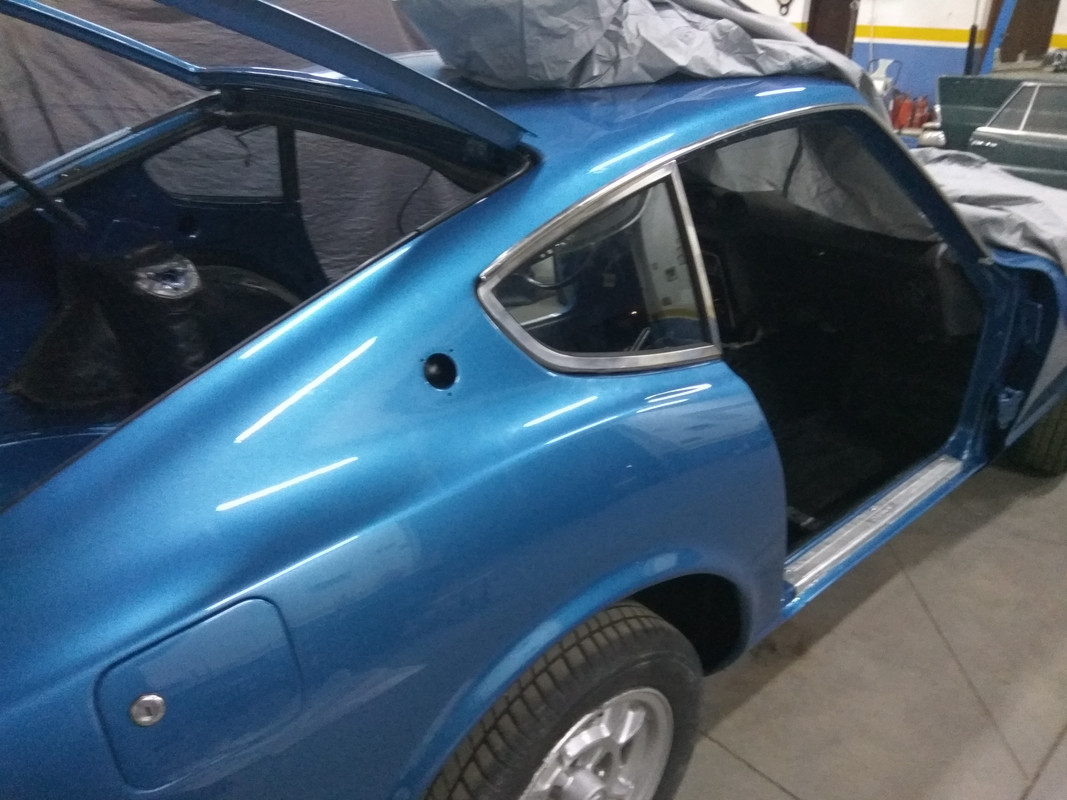
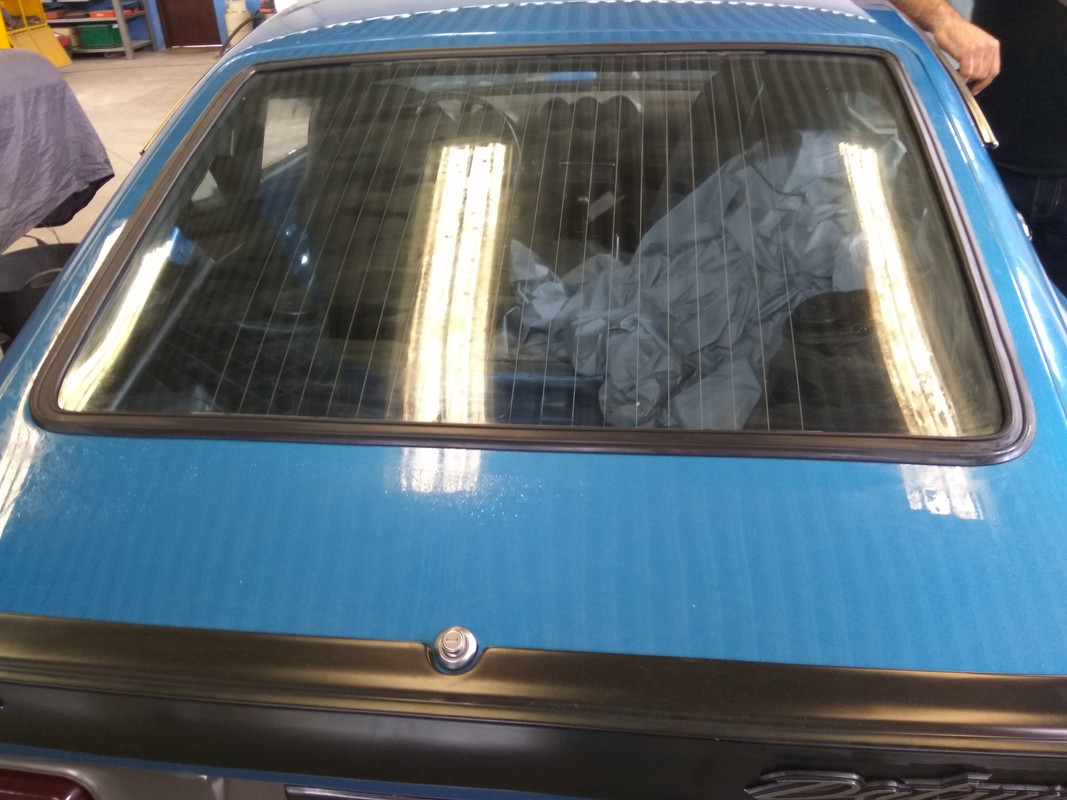
To finish the day we decided to chenge all the rubbers from the rear quarter glasses…what a hassle…it’s a difficult task!!! Never thought it!!! Extreme detail on the system and then on the application…Mr.Vitorino was tired…but the result was good…
By the end…
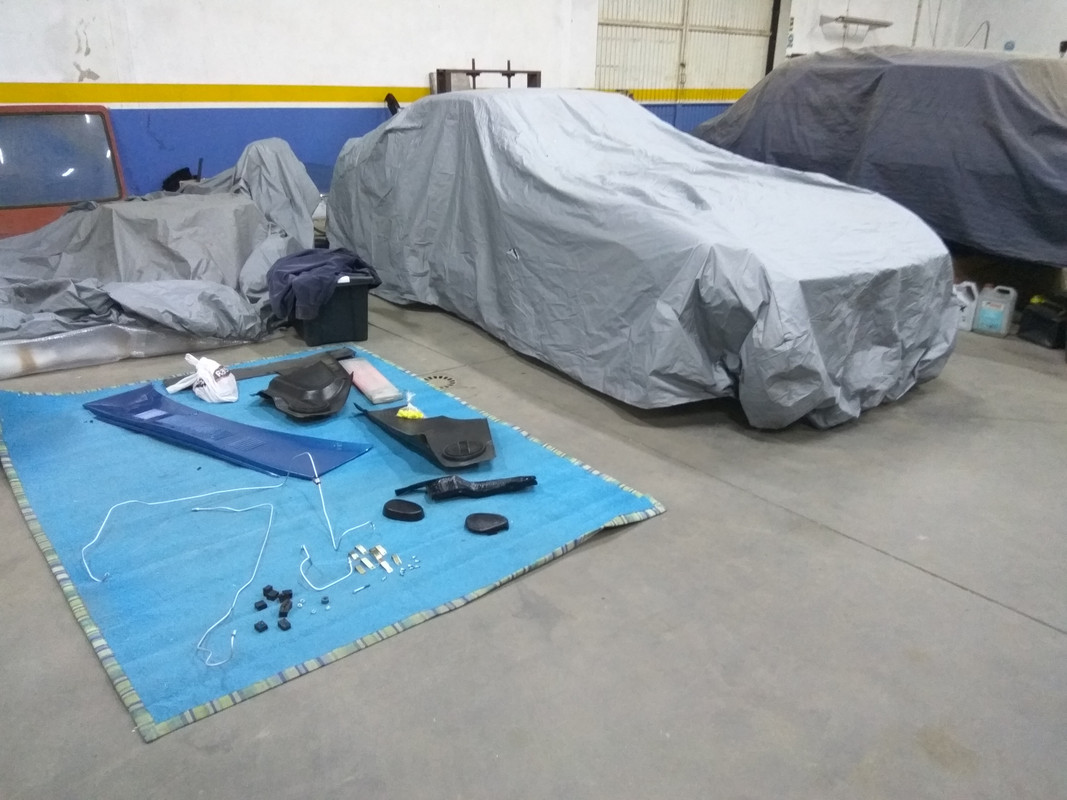
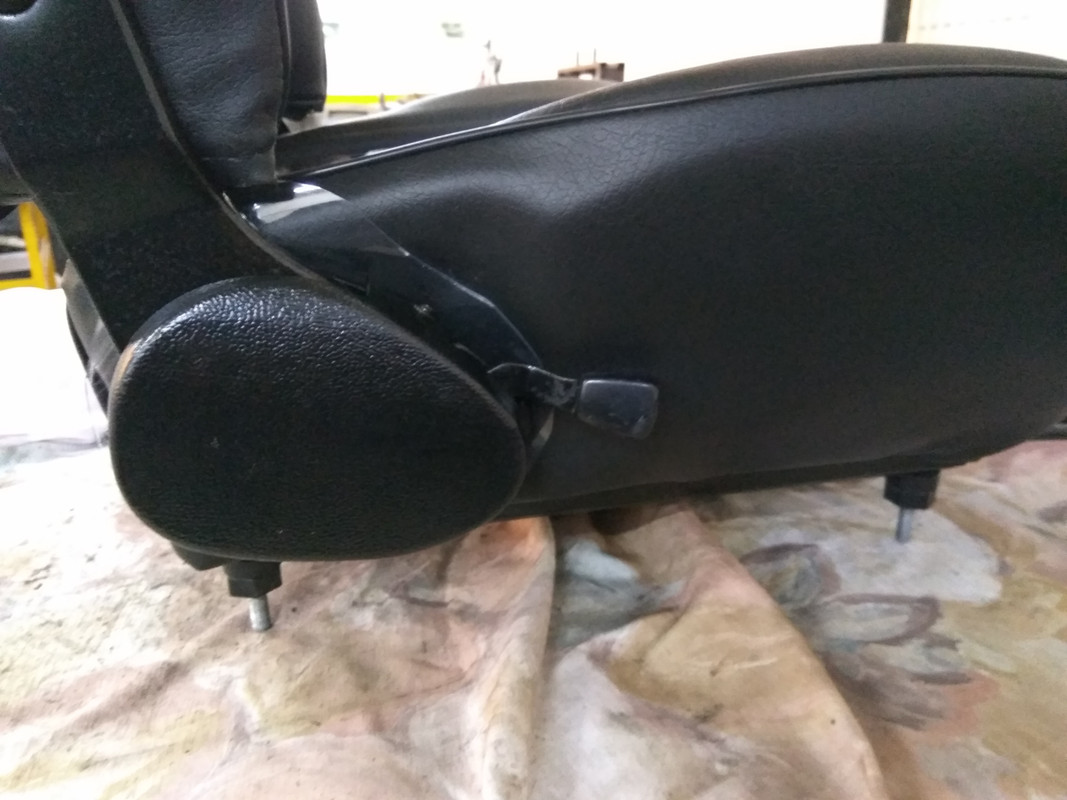
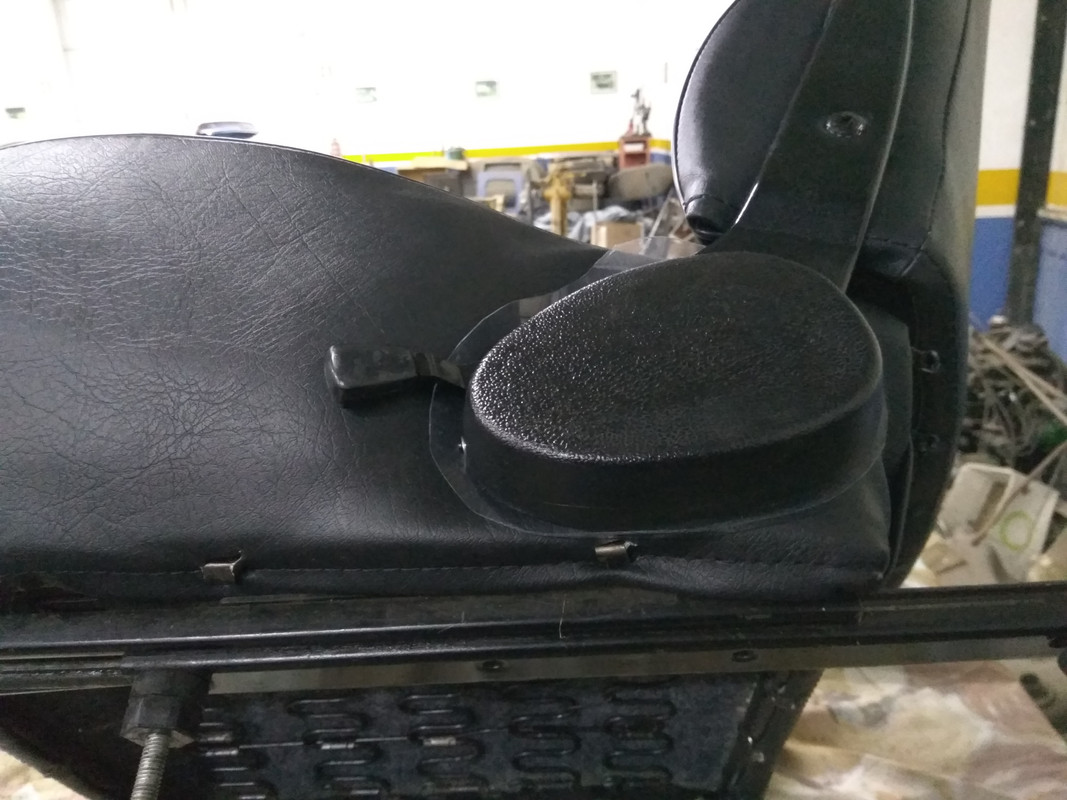
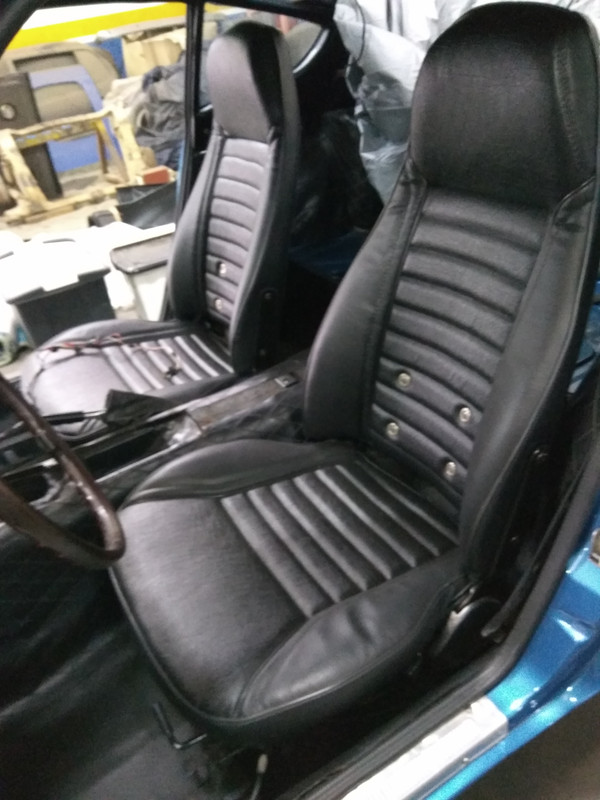
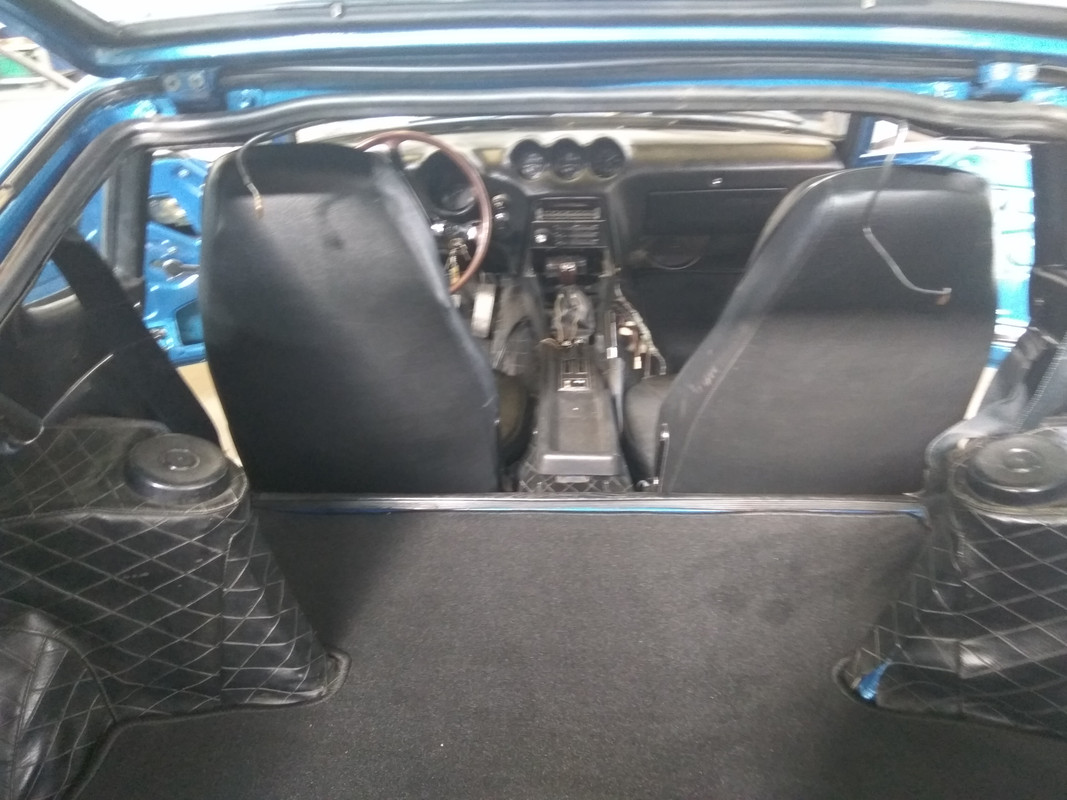
A friend got the seats today…awesome work!!! Next time I’ll put some detailed pictures!!!

Ready to Zleep…
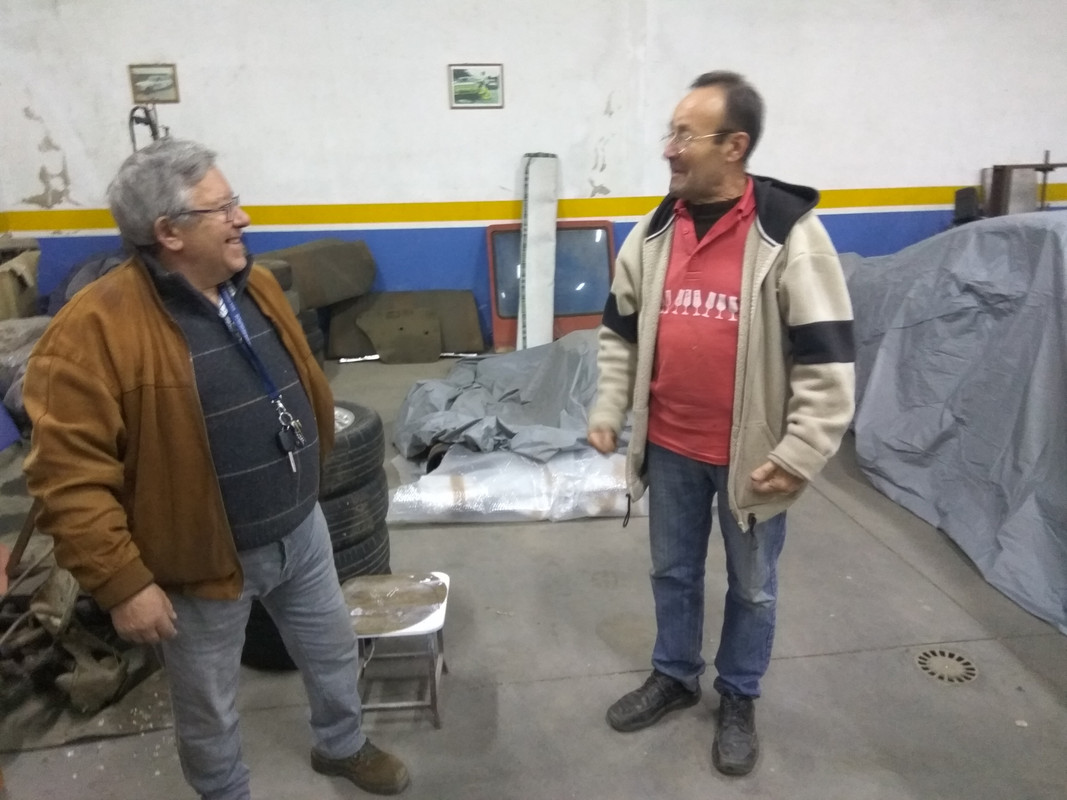
Mr.Vitorino and Mr.Vaqueiro the upholsterer.
Hope you enjoyed so far…
Regards
M�rio
The antenna…nice to see it again on the car…
The center console got the texture too and the result was great!
To finish the day we decided to chenge all the rubbers from the rear quarter glasses…what a hassle…it’s a difficult task!!! Never thought it!!! Extreme detail on the system and then on the application…Mr.Vitorino was tired…but the result was good…
By the end…
A friend got the seats today…awesome work!!! Next time I’ll put some detailed pictures!!!
Ready to Zleep…
Mr.Vitorino and Mr.Vaqueiro the upholsterer.
Hope you enjoyed so far…
Regards
M�rio
 12-21-2018, 03:20 PM
#27
Registered User
Thread Starter
Join Date: Jul 2017
Posts: 42
Hi friends,
Here I come again to show some updates ... because I'm on vacation Z is growing with another rhythm, but still go slow ... Mr. Victory is enjoying holidays ...
In the last 3 days I have cleaned more pieces than in a year of restoration !!! bolts, nuts, washers ... clean, polish, paint ... the luck is that as I was the one who disassembled the car and got everything labeled... in the midst of my disorganization is not going badly...so far�
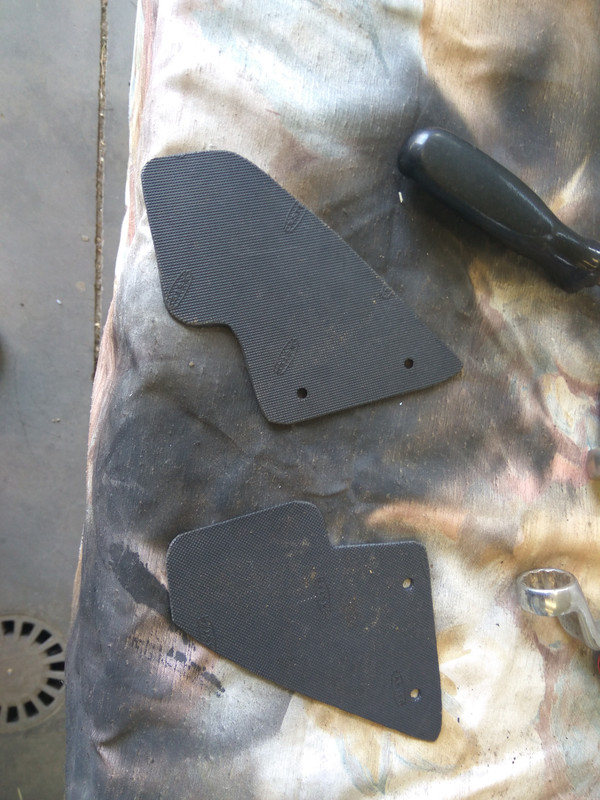
At the moment I am waiting for the pieces of the galvanized process, they must arrive on Wednesday and unexpectedly I have to buy some pieces, I am missing two details that possibly the car no longer had, the central plate of the license plate and two black aluminium scuff plates that are in the inside the car. Possibly they were removed by the previous owner.
The mechanics should come in January and until then we will build what we can !!!
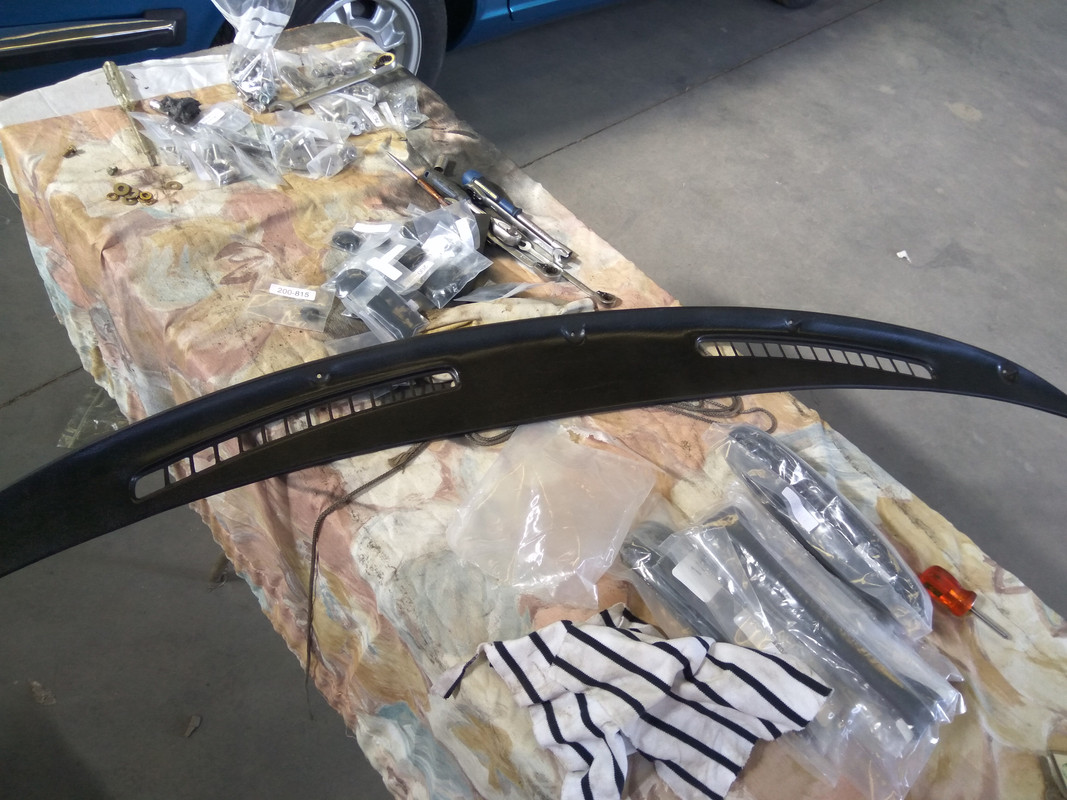
Let's go to the photos:
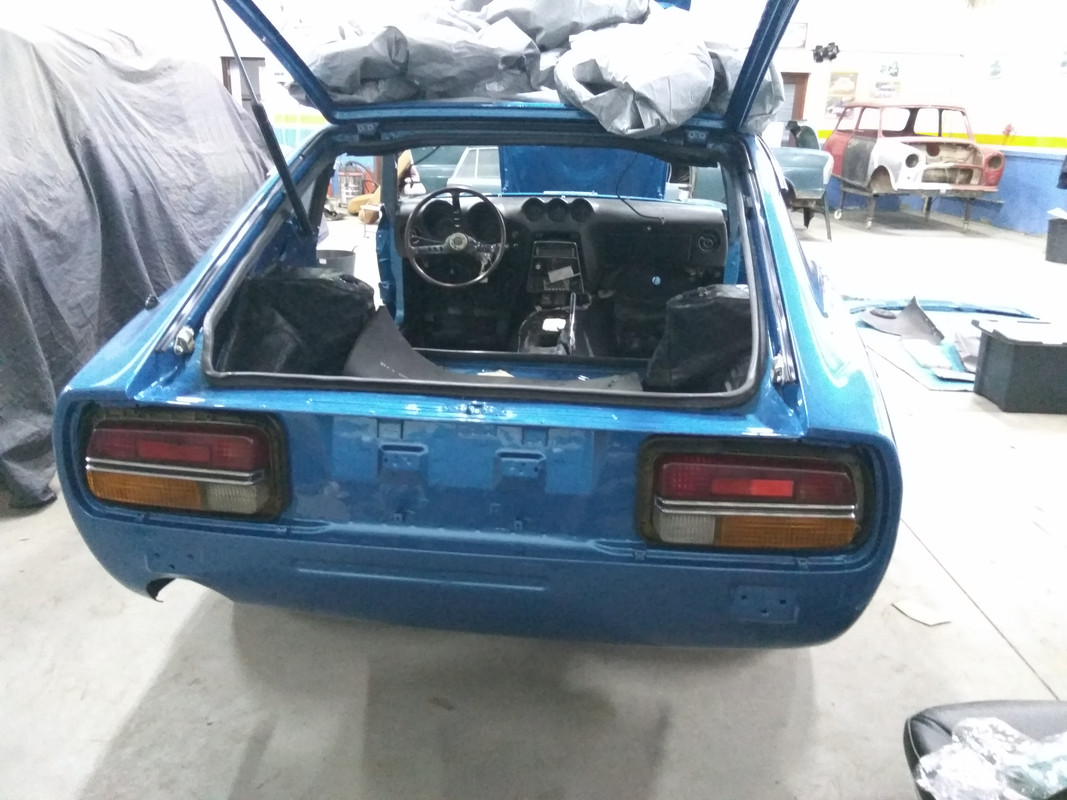
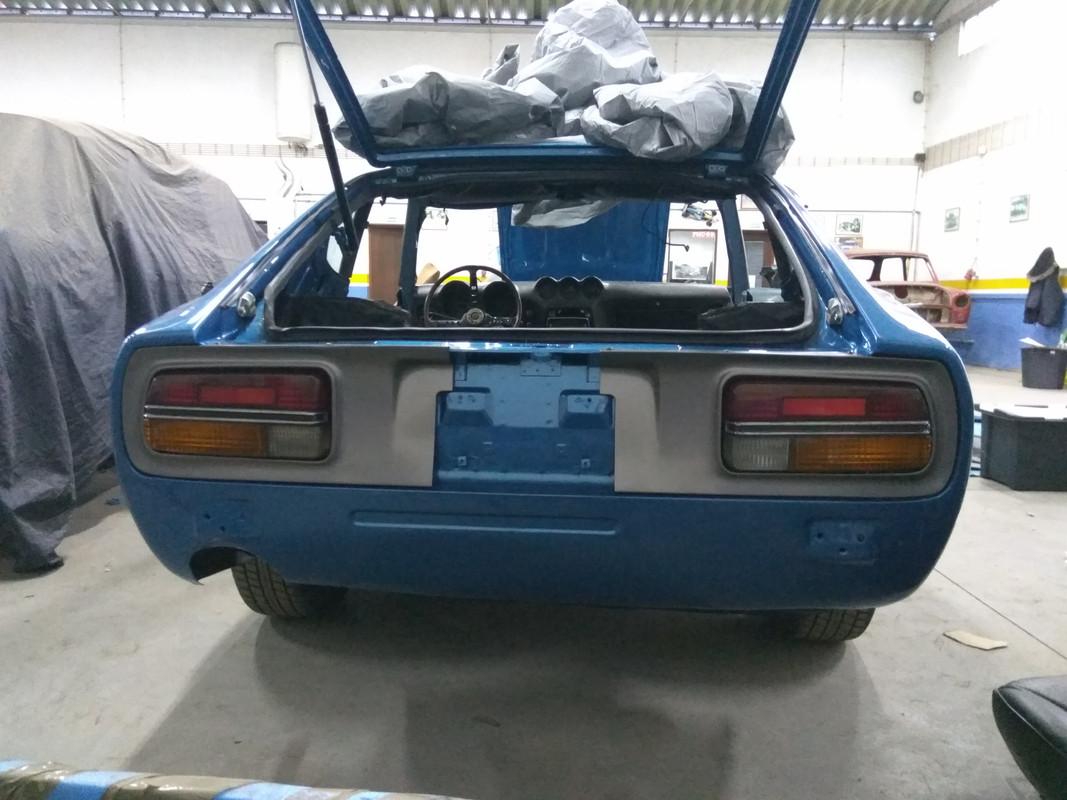
After a cleaning and a polishing were very good! After it was applied with new screws and new rubbers, the old pieces were miserable.
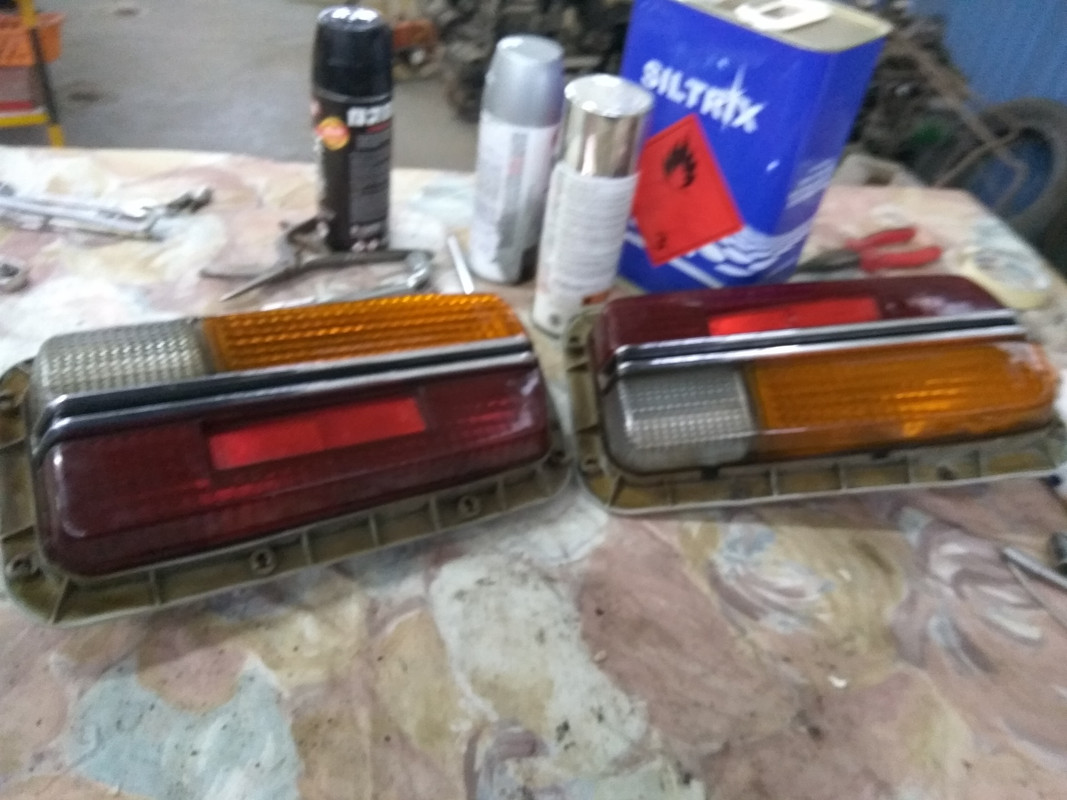
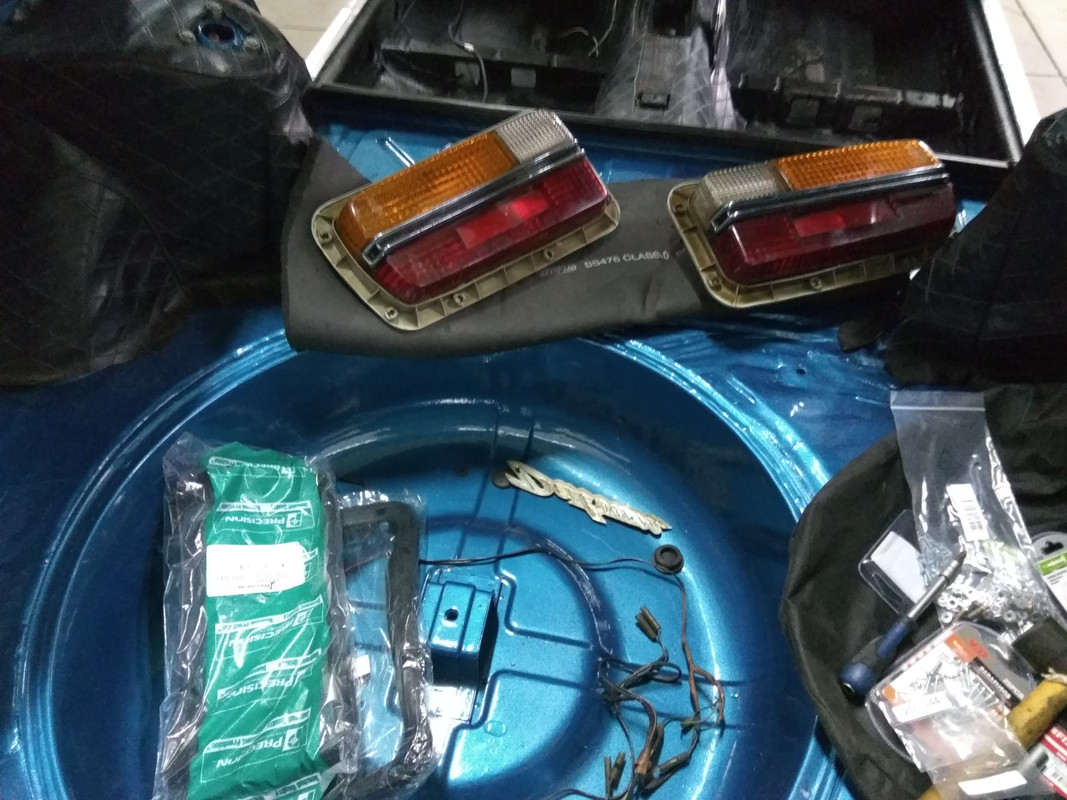
In this photo we can see the missing part ... Let�s see if I can find one quickly!
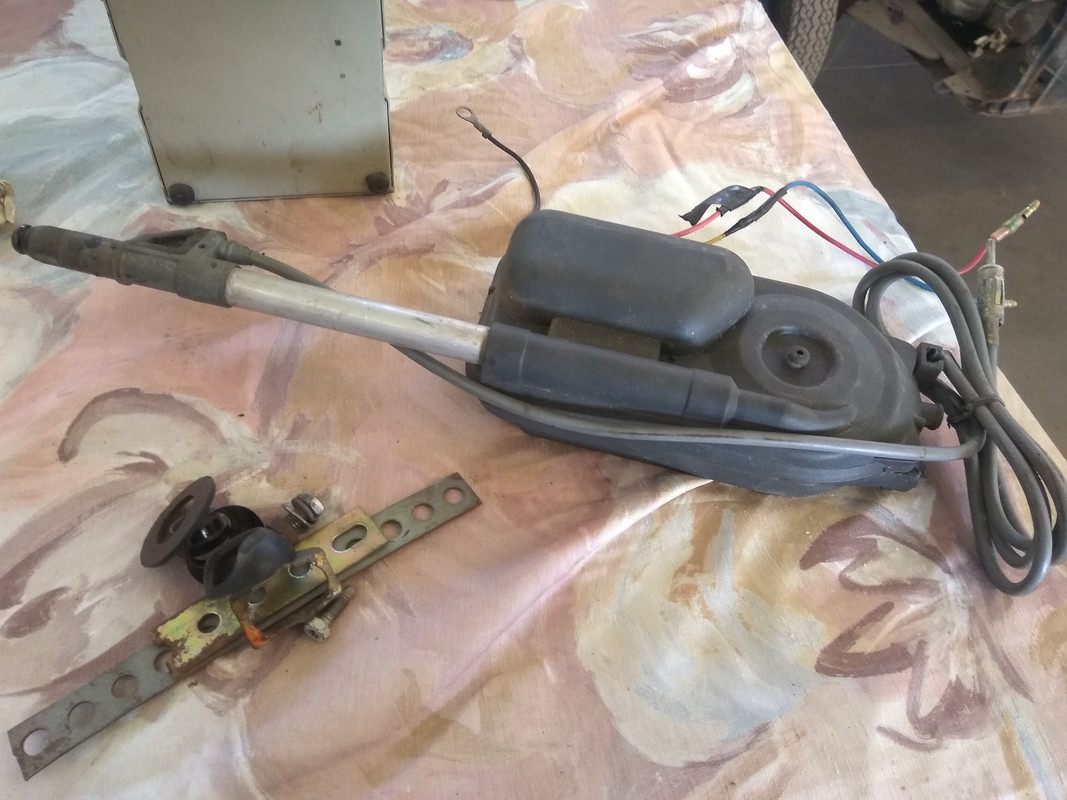
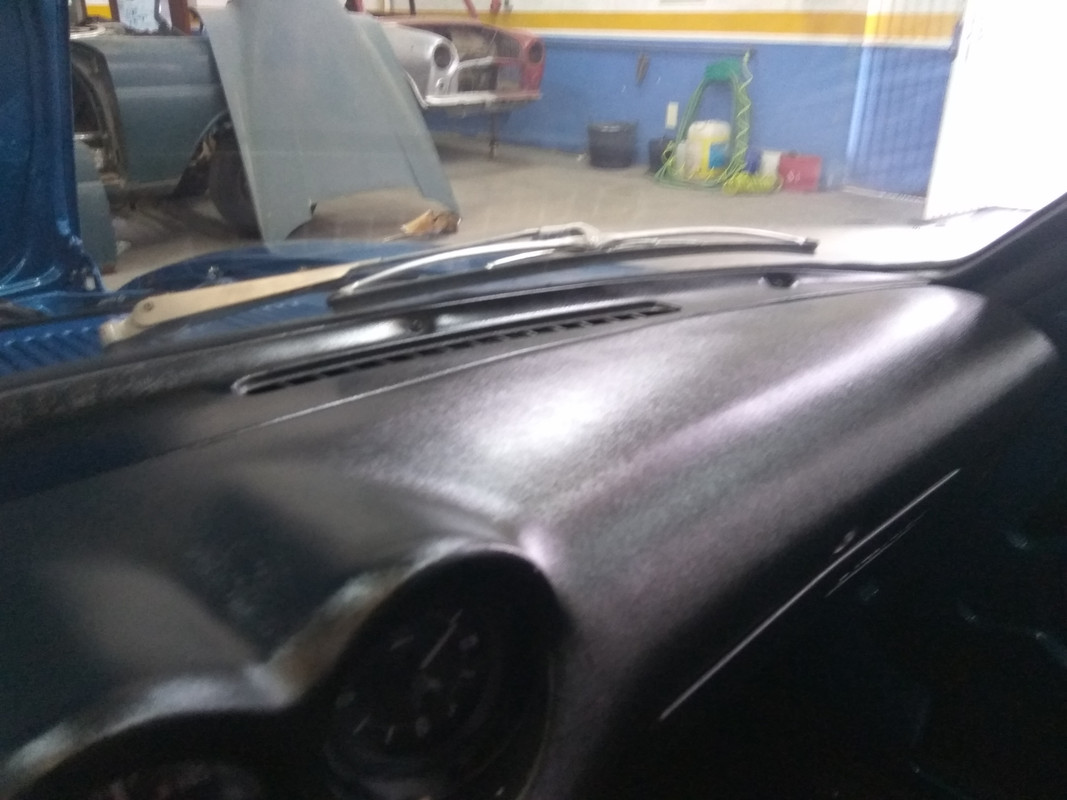
I also installed the windscreen wiper motor. Tough task, I never thought it would take that long. I was afraid to scratch the car ... eheheeh
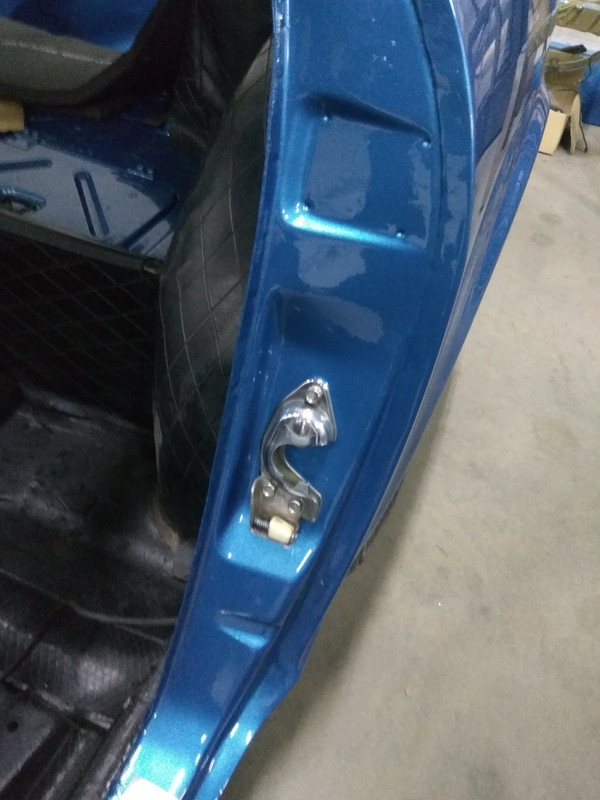
The door locks were painted in the old car colour, I still thought of having zinc, but chrome is funnier and the result is very curious ... I like it !!!
Here already applied ...
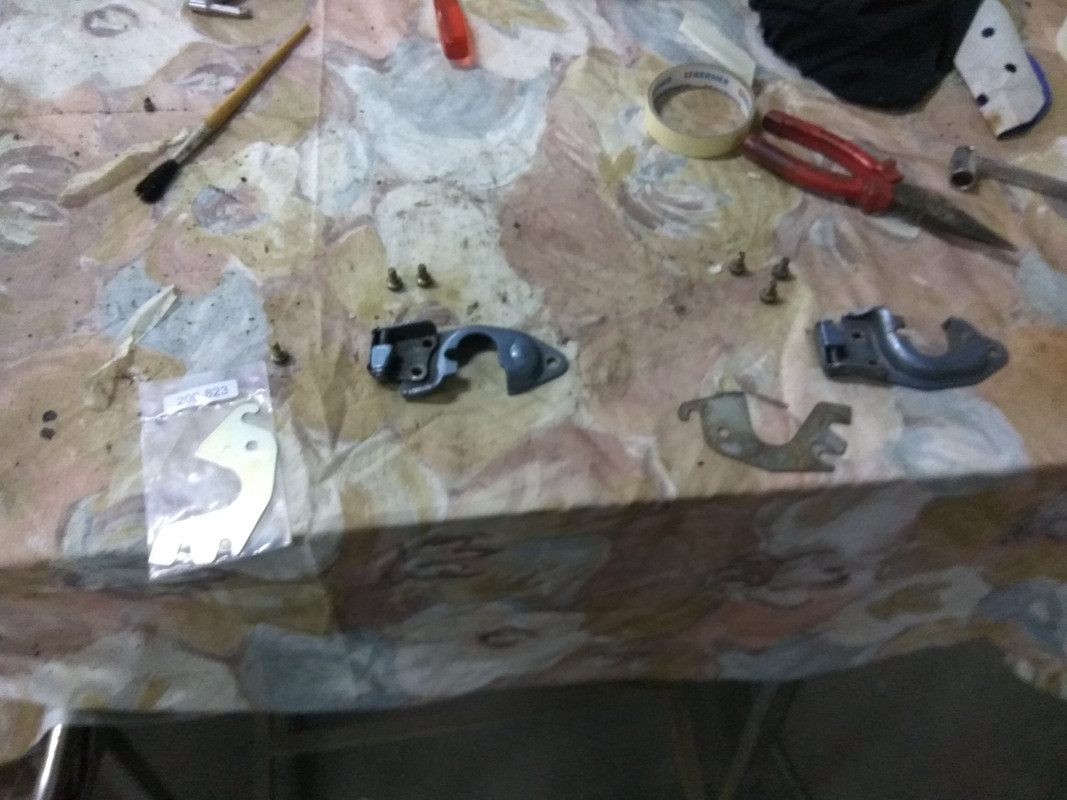
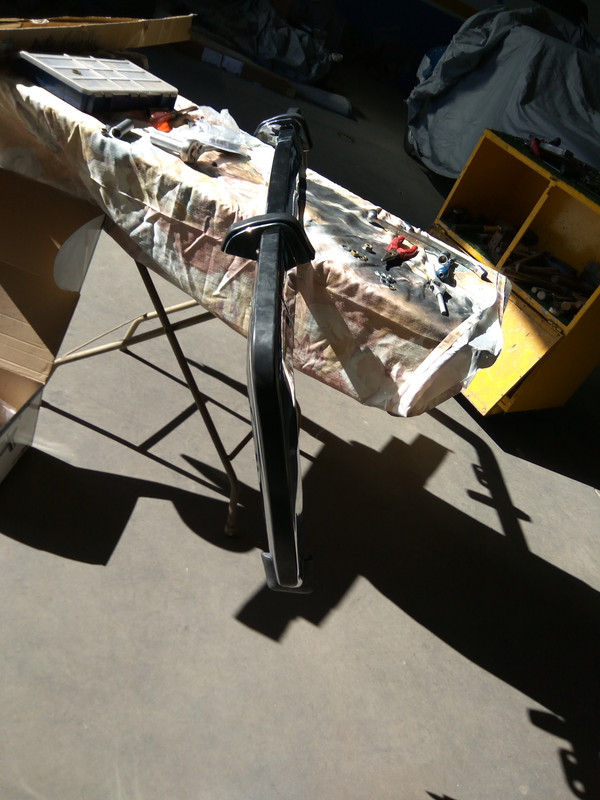
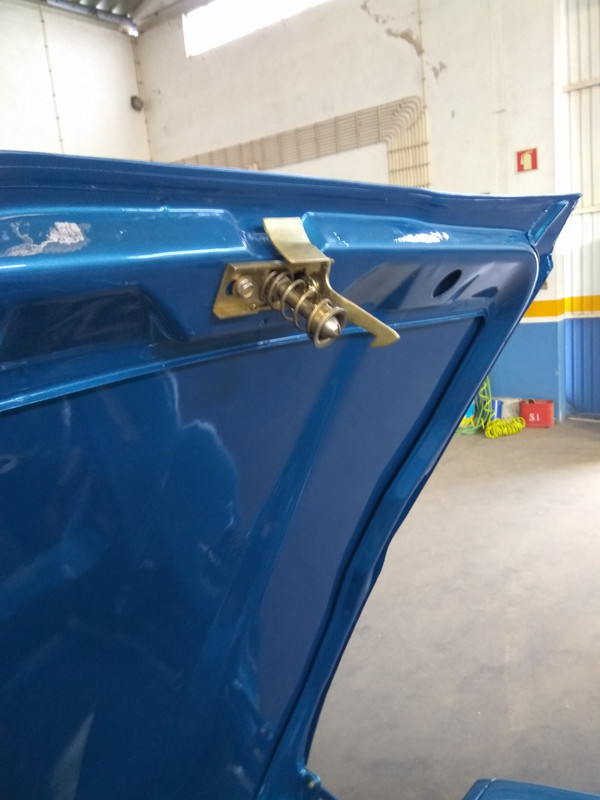
The Z hook was in need of a good turn ...
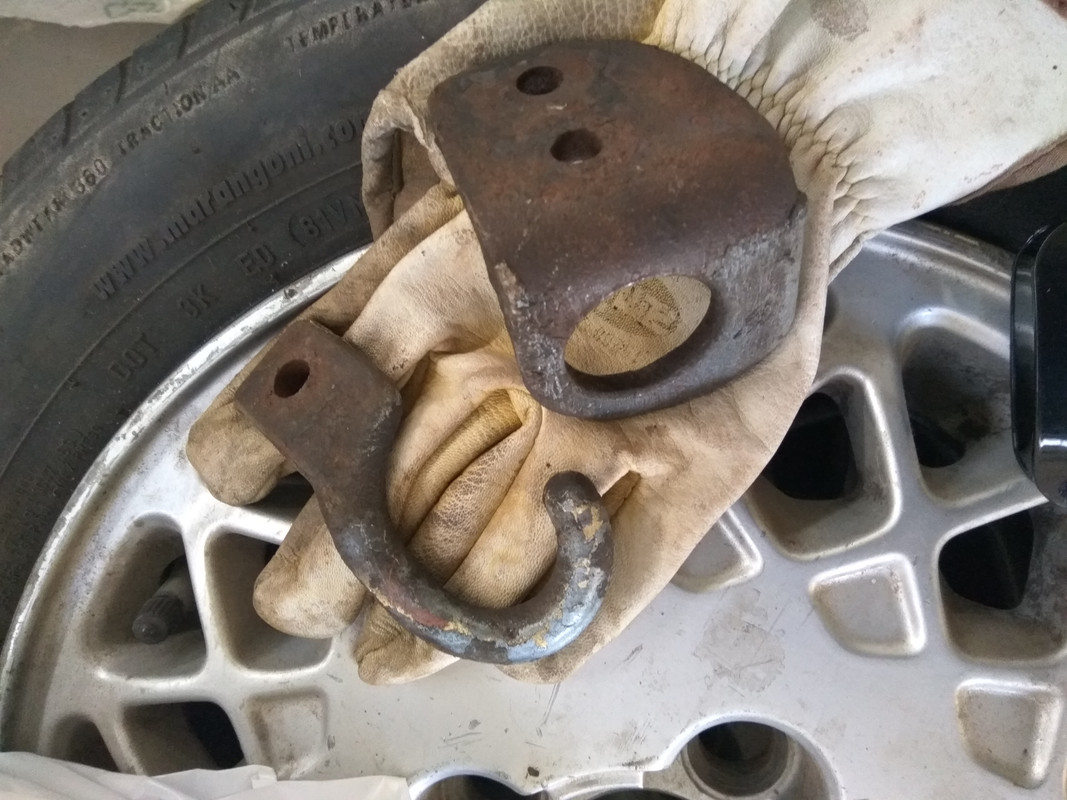
They were like this ...
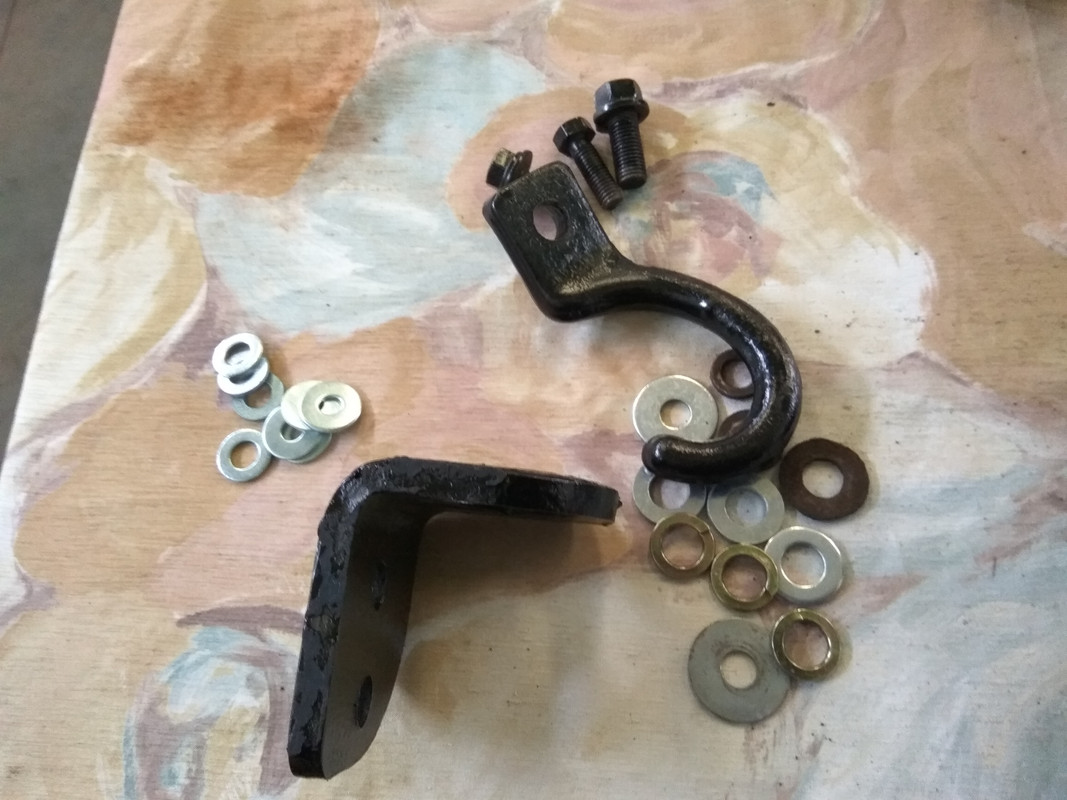

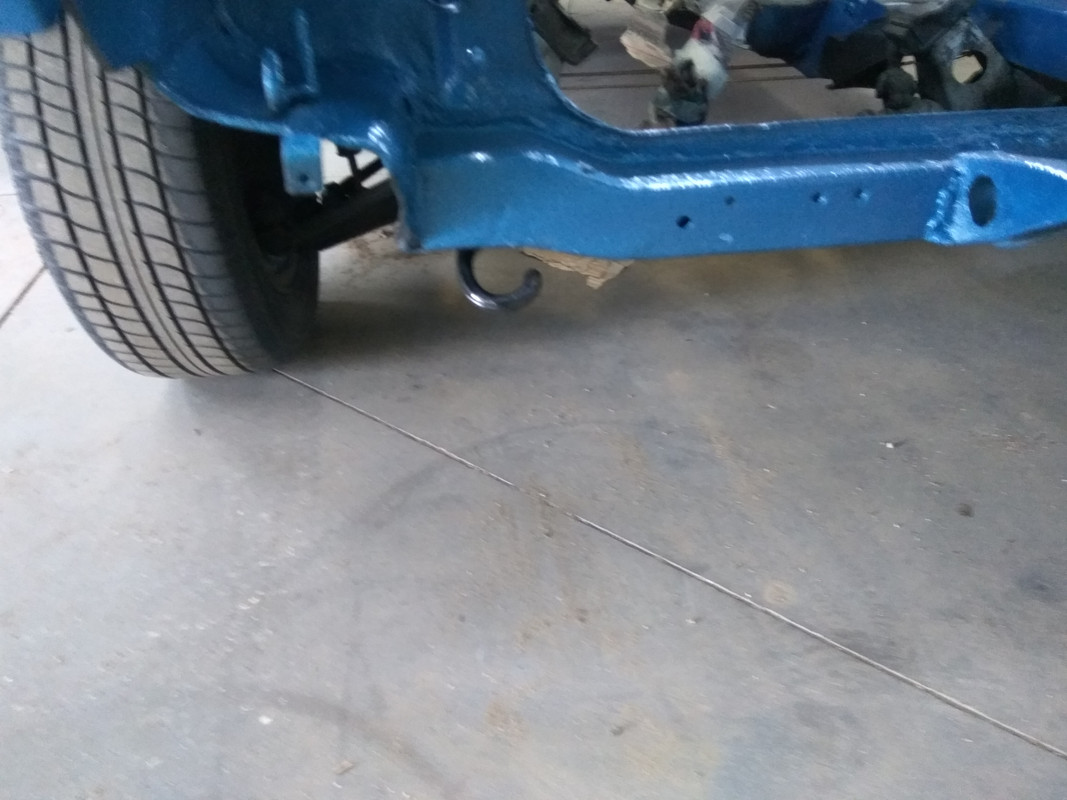
Here applied on place...
[img] https://i.postimg.cc/VkGD40Ts/IMG-20181220-132549.jpg
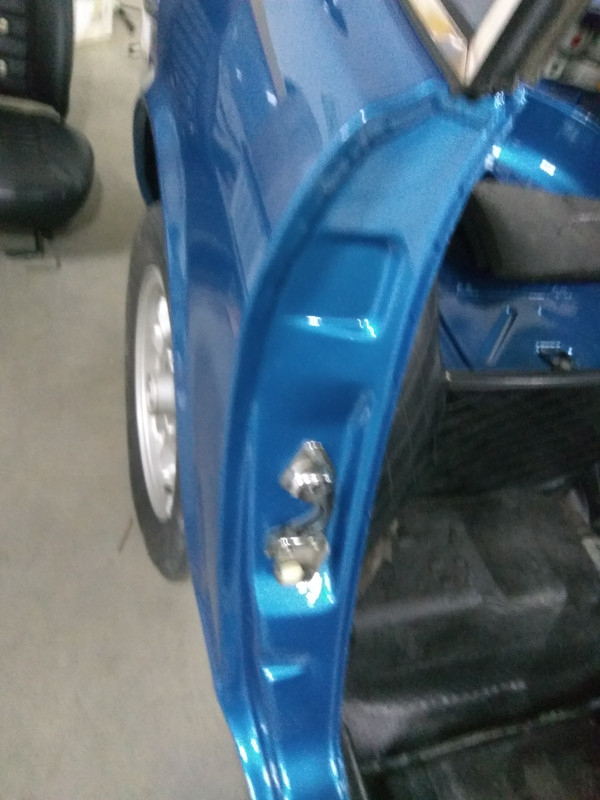
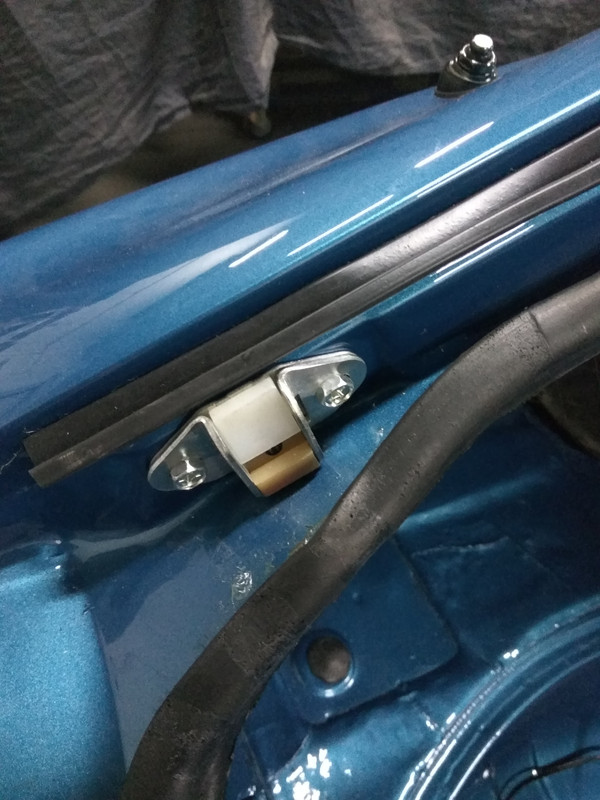
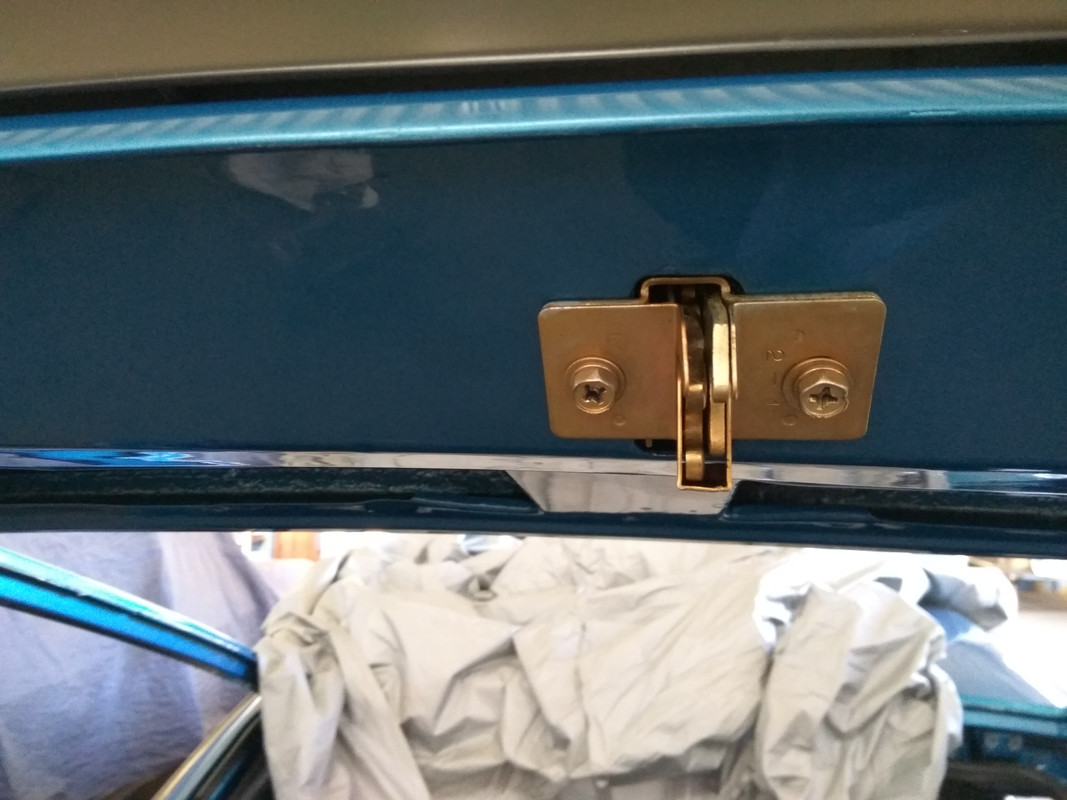
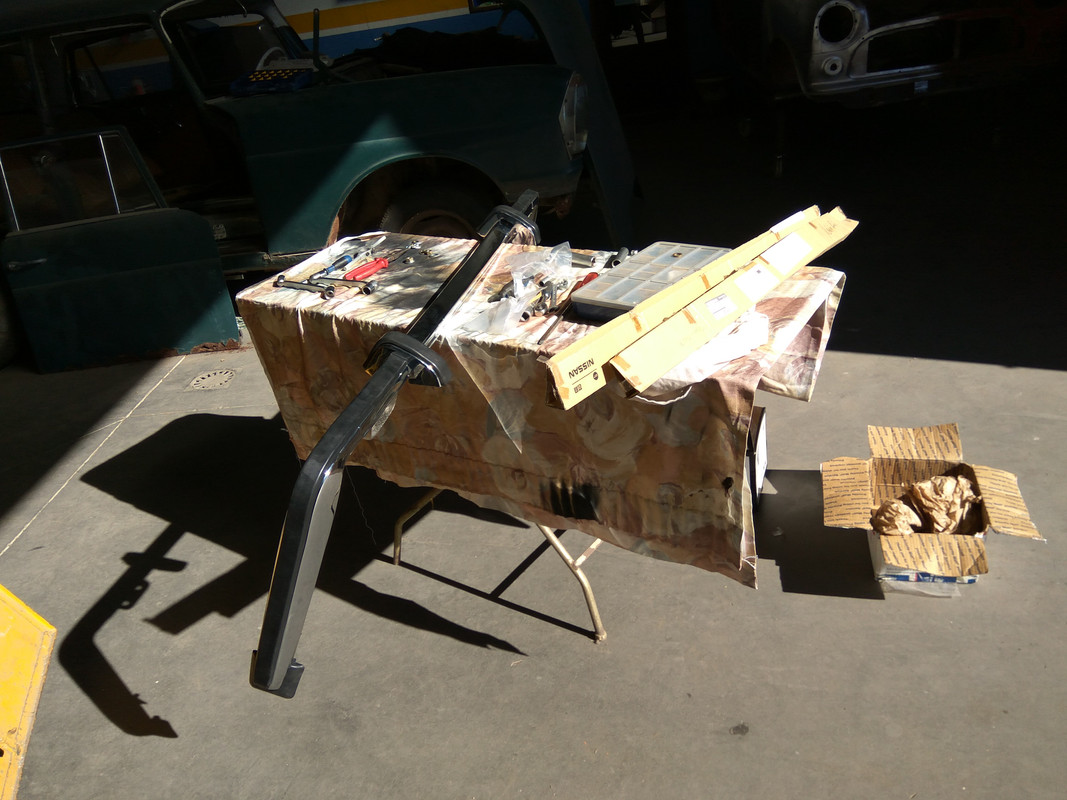
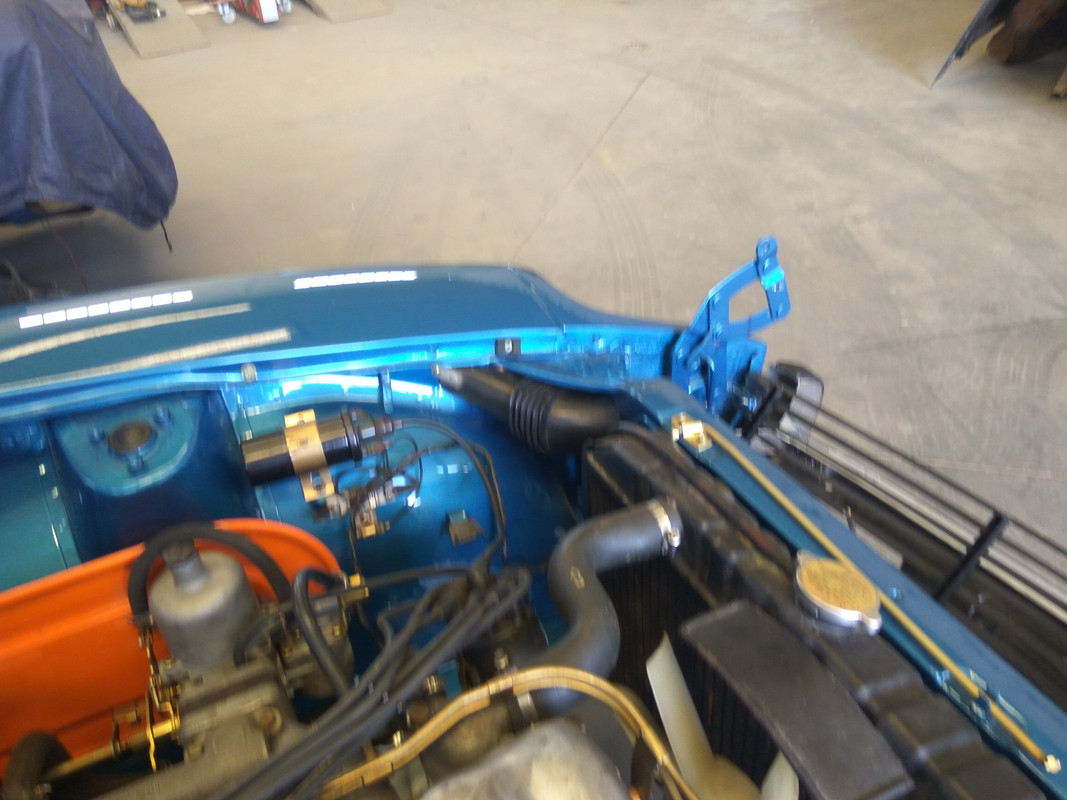
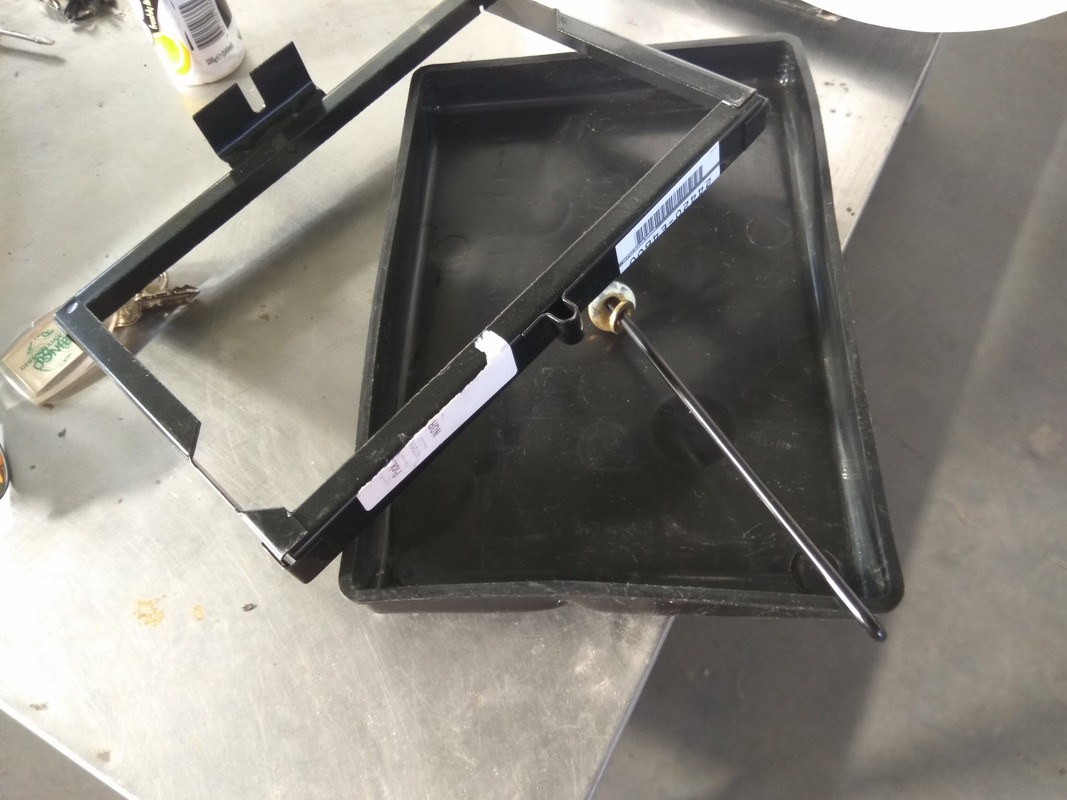
I opened two new parts ... the tailgate supports ...
[img] https://i.postimg.cc/TYx7P6gx/IMG-20181217-174404.jpg
[img] https://i.postimg.cc/Jz4pb5pd/IMG-20181217-174421.jpg
Here I come again to show some updates ... because I'm on vacation Z is growing with another rhythm, but still go slow ... Mr. Victory is enjoying holidays ...
In the last 3 days I have cleaned more pieces than in a year of restoration !!! bolts, nuts, washers ... clean, polish, paint ... the luck is that as I was the one who disassembled the car and got everything labeled... in the midst of my disorganization is not going badly...so far�
At the moment I am waiting for the pieces of the galvanized process, they must arrive on Wednesday and unexpectedly I have to buy some pieces, I am missing two details that possibly the car no longer had, the central plate of the license plate and two black aluminium scuff plates that are in the inside the car. Possibly they were removed by the previous owner.
The mechanics should come in January and until then we will build what we can !!!
Let's go to the photos:
After a cleaning and a polishing were very good! After it was applied with new screws and new rubbers, the old pieces were miserable.
In this photo we can see the missing part ... Let�s see if I can find one quickly!
I also installed the windscreen wiper motor. Tough task, I never thought it would take that long. I was afraid to scratch the car ... eheheeh
The door locks were painted in the old car colour, I still thought of having zinc, but chrome is funnier and the result is very curious ... I like it !!!
Here already applied ...
The Z hook was in need of a good turn ...
They were like this ...
Here applied on place...
[img] https://i.postimg.cc/VkGD40Ts/IMG-20181220-132549.jpg
I opened two new parts ... the tailgate supports ...
[img] https://i.postimg.cc/TYx7P6gx/IMG-20181217-174404.jpg
[img] https://i.postimg.cc/Jz4pb5pd/IMG-20181217-174421.jpg
12-21-2018, 03:21 PM
#28
Registered User
Thread Starter
Join Date: Jul 2017
Posts: 42
And along with new and original screw and washers ... here we have them in place.

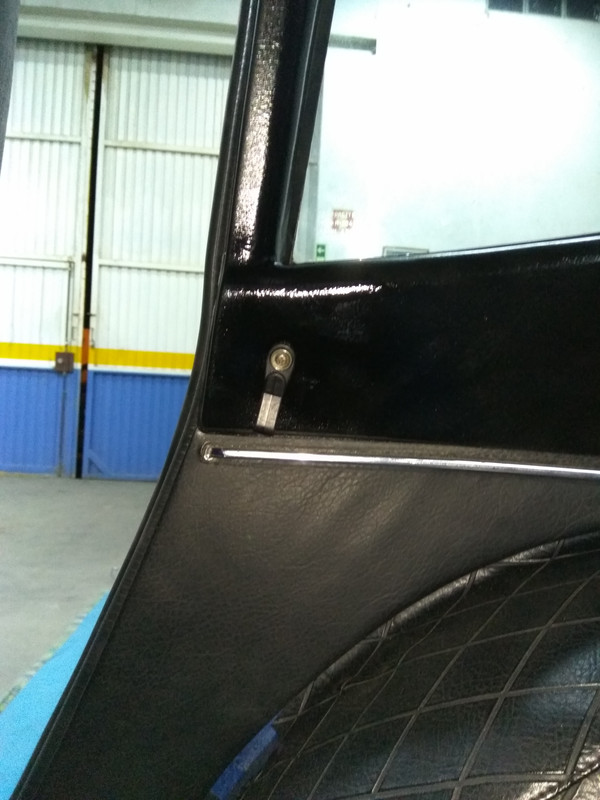
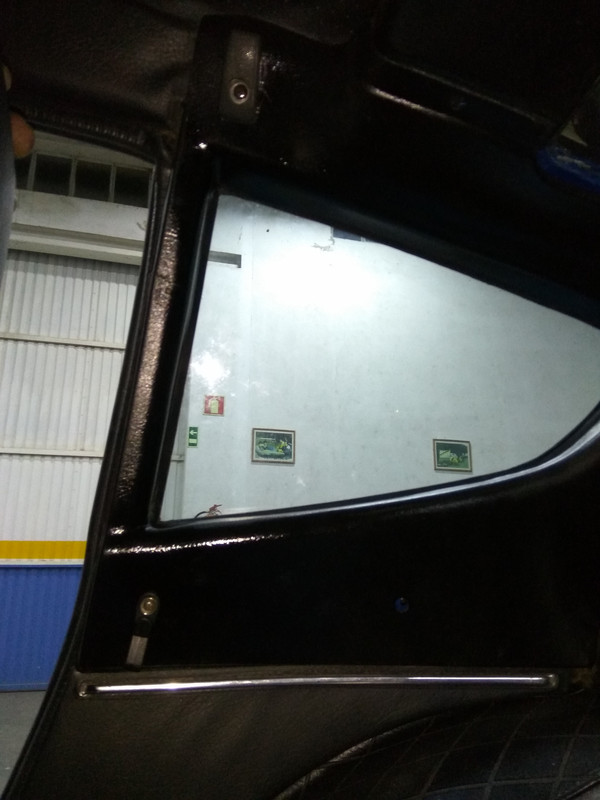
Rubber from the doors already in the place ...

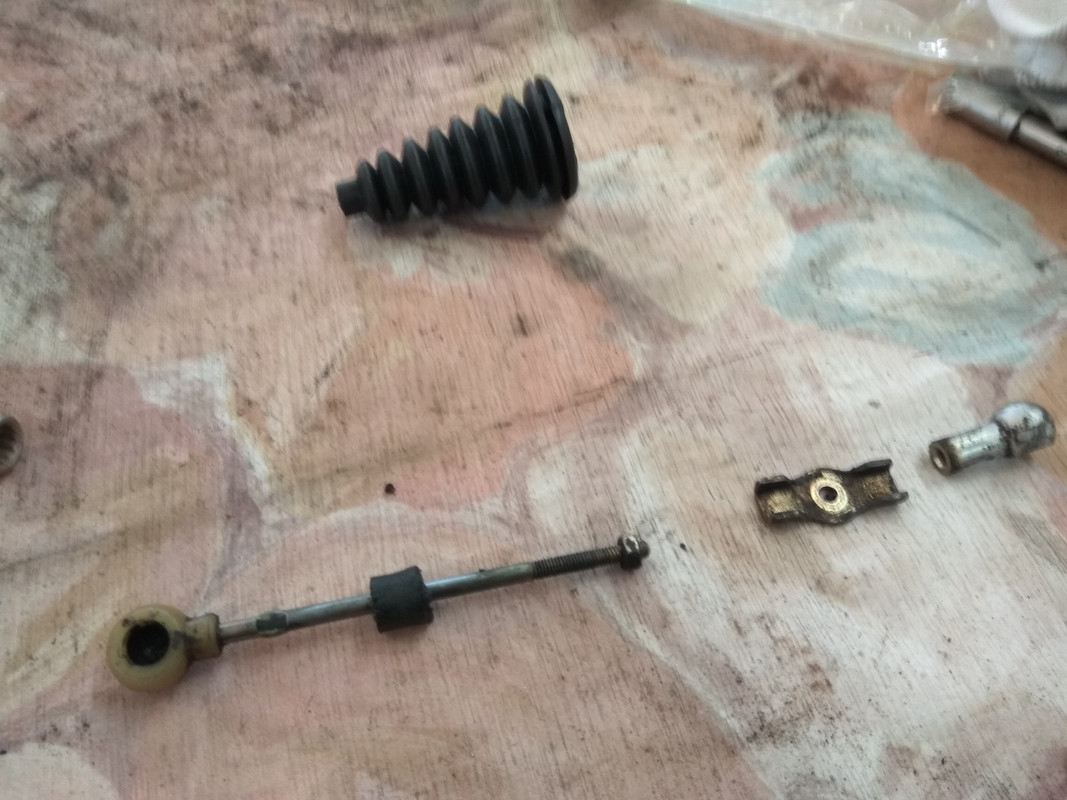
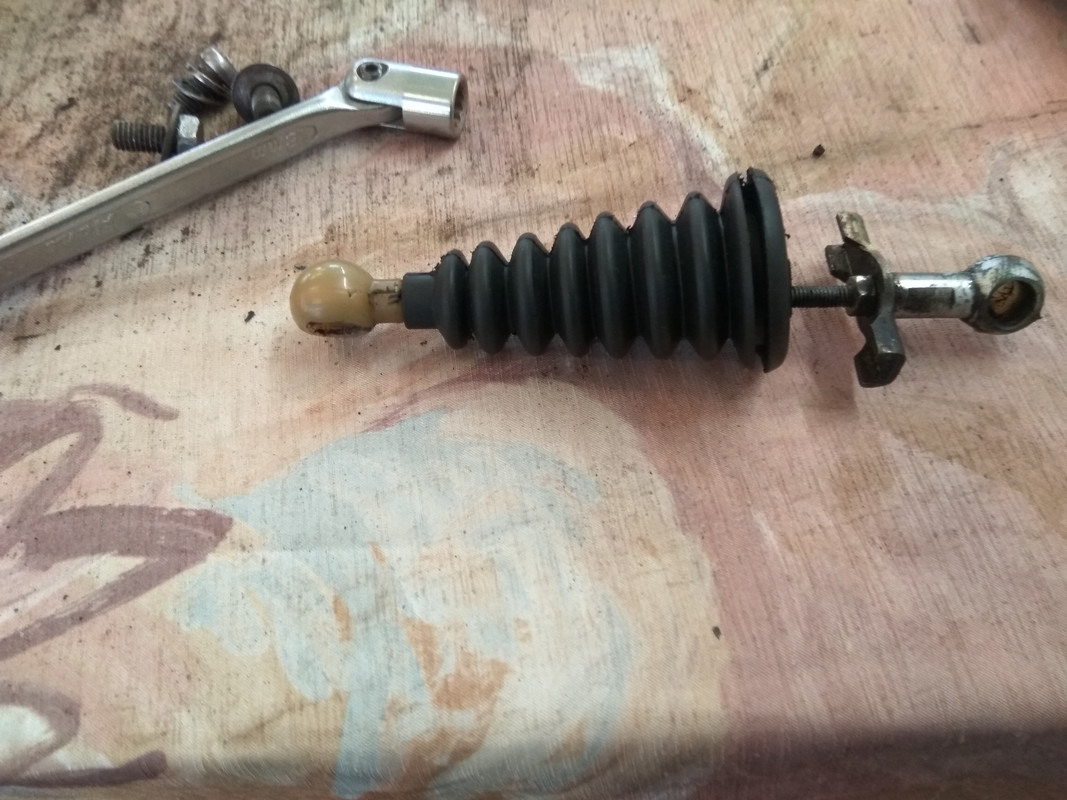
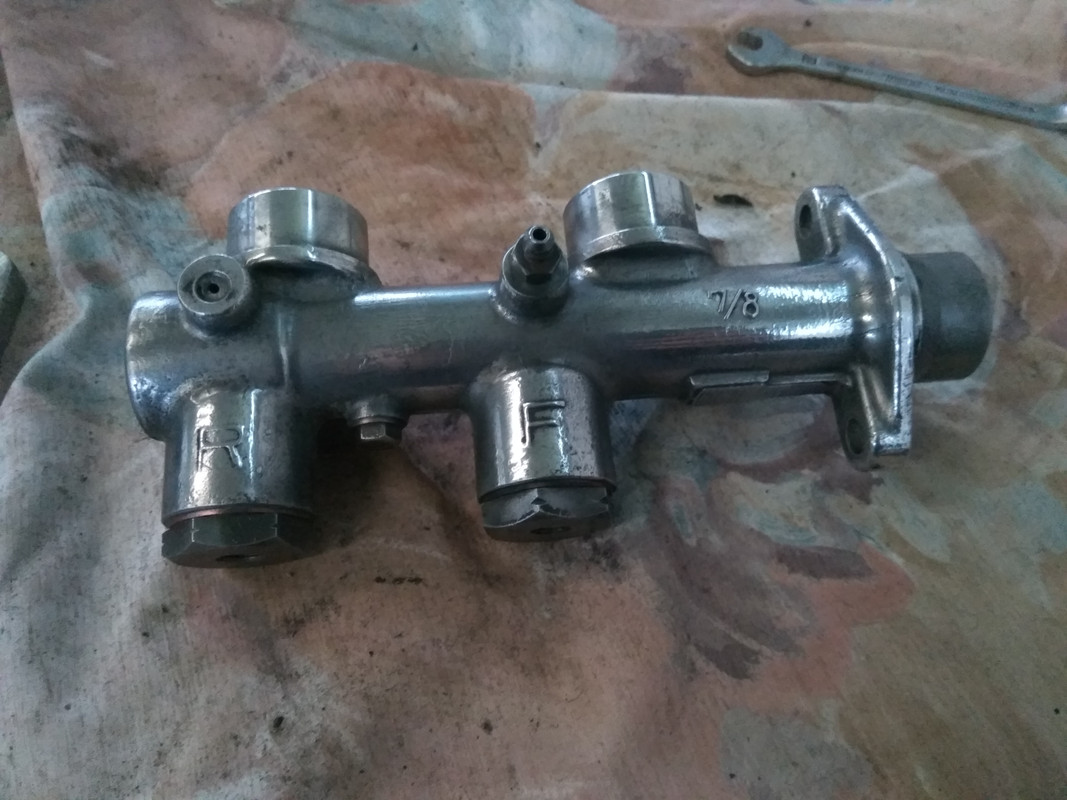
Cleaning the clutch pump, and polishing. I'm new to this, but it turned out well !!!

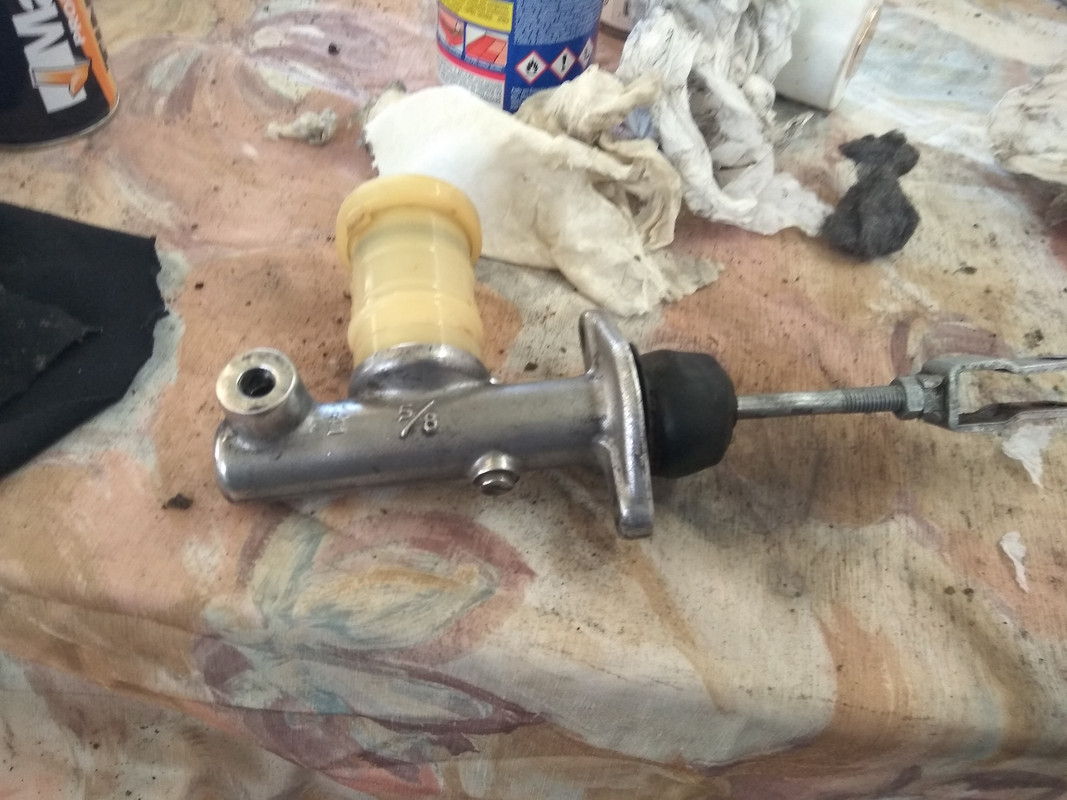
Here it is already on the place...

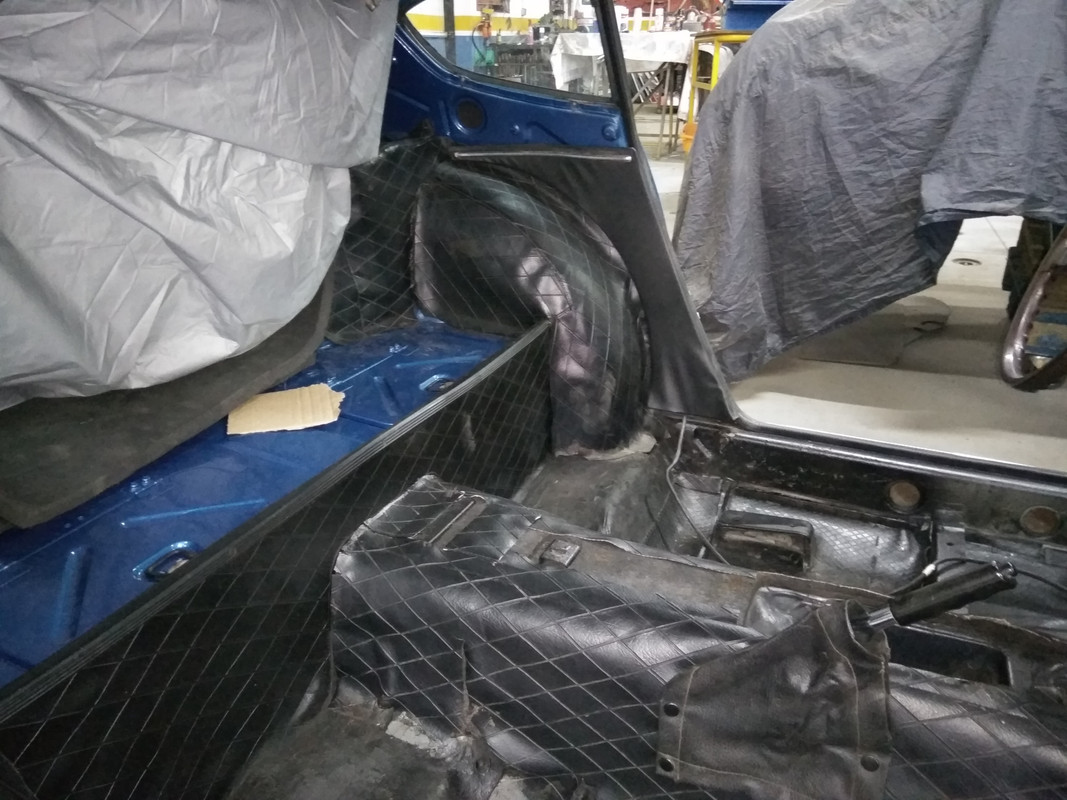
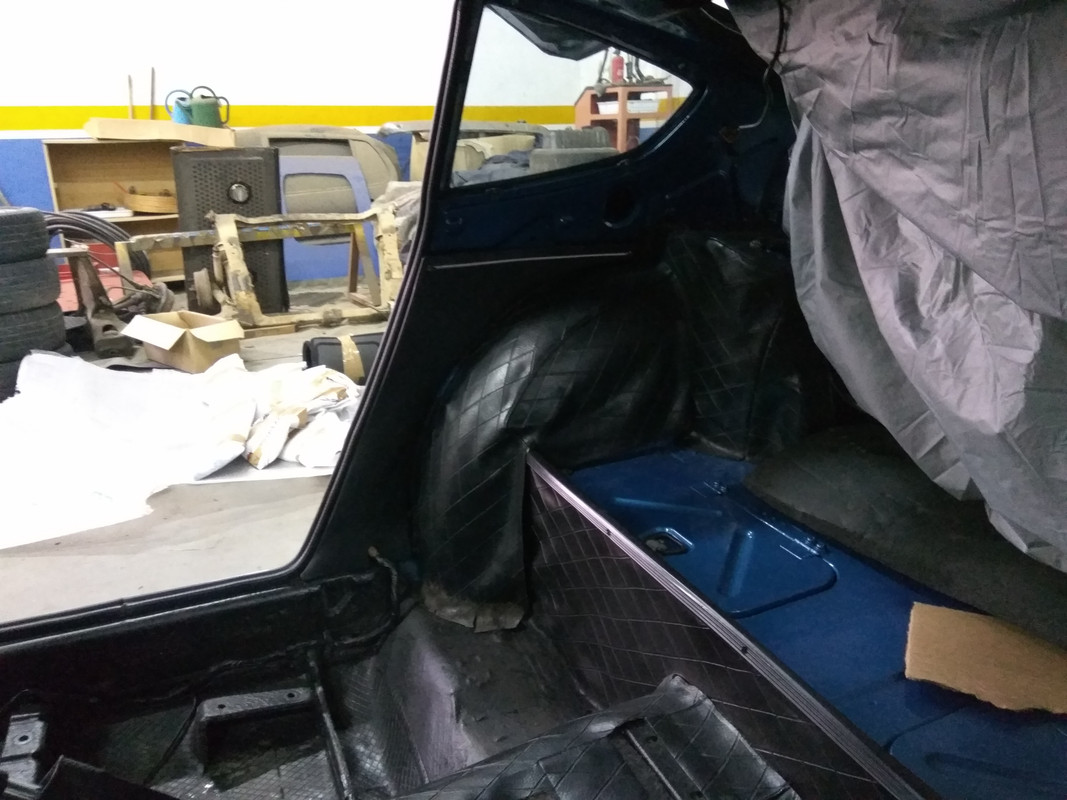
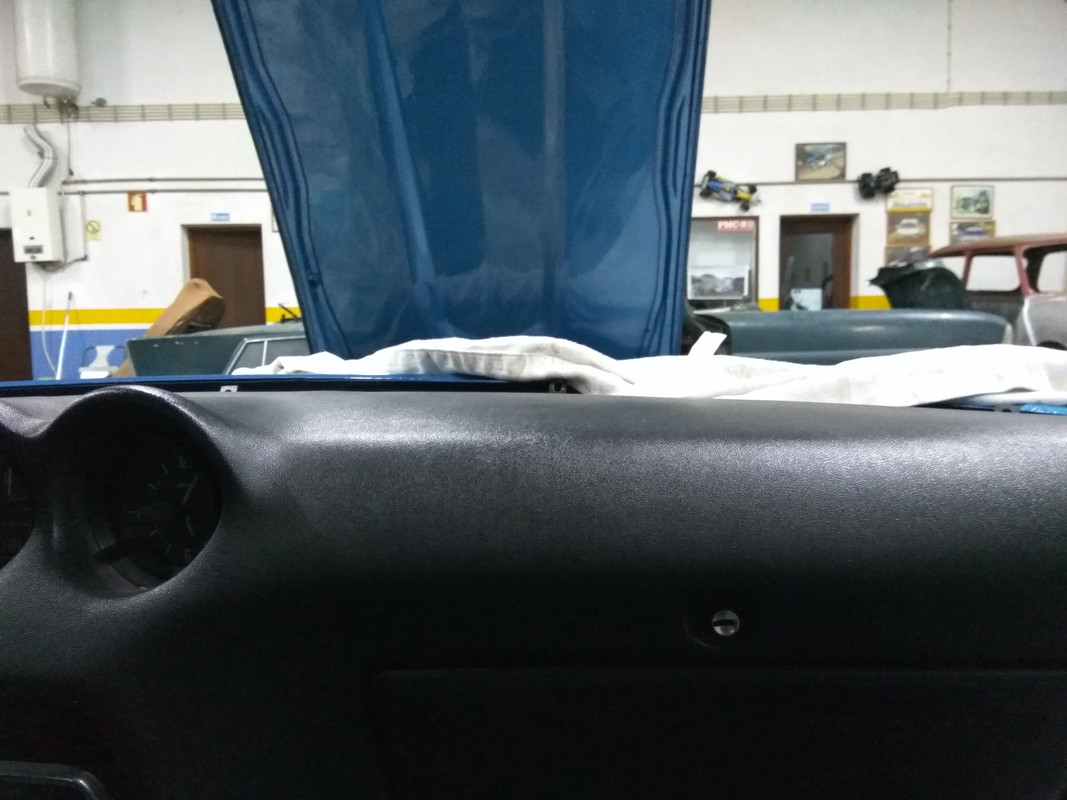
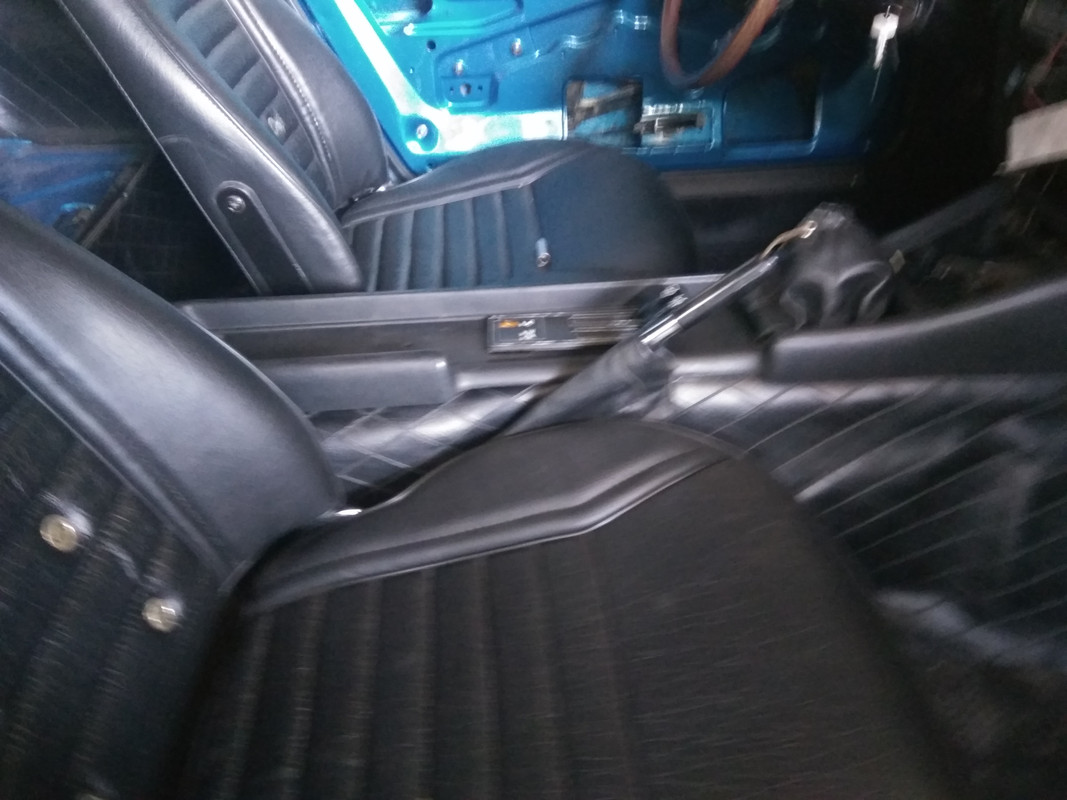
I started by putting some pieces inside ... the "dogleg" already there! There are a few details missing ... especially stretching the vinyl ... let�s see if I can do it myself !!!
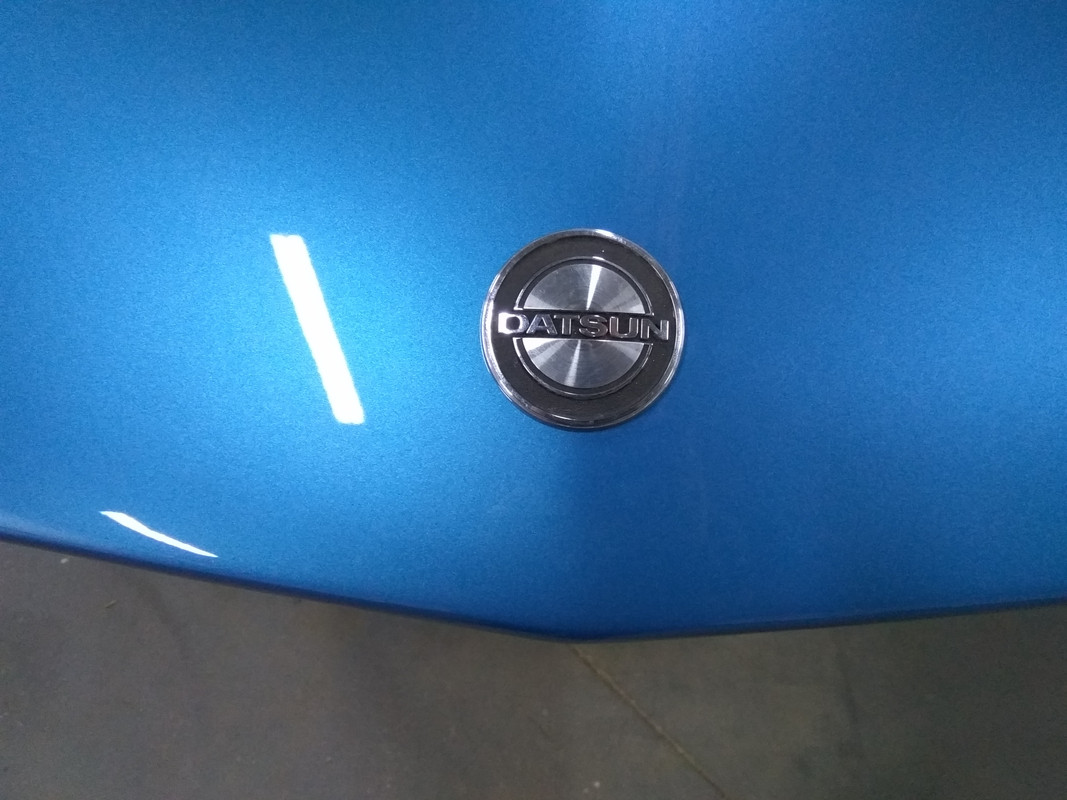
I put the first symbols ...
I had to take out the spoiler, but the result was very good!

Here is the original color ... it was black ... but it should turn to grey ... I've been cleaning it for more than 30 minutes ...
during the day I was just treating some pieces and going to the car on the next visit .. maybe Sunday..

I hope you continue to like the result, I would like to finish it before the end of January ... but it will be very hard.
Regards
M�rio
Rubber from the doors already in the place ...
Cleaning the clutch pump, and polishing. I'm new to this, but it turned out well !!!
Here it is already on the place...
I started by putting some pieces inside ... the "dogleg" already there! There are a few details missing ... especially stretching the vinyl ... let�s see if I can do it myself !!!
I put the first symbols ...
I had to take out the spoiler, but the result was very good!
Here is the original color ... it was black ... but it should turn to grey ... I've been cleaning it for more than 30 minutes ...
during the day I was just treating some pieces and going to the car on the next visit .. maybe Sunday..
I hope you continue to like the result, I would like to finish it before the end of January ... but it will be very hard.
Regards
M�rio
12-29-2018, 08:12 AM
#29
Registered User
Thread Starter
Join Date: Jul 2017
Posts: 42
Hello my friends,
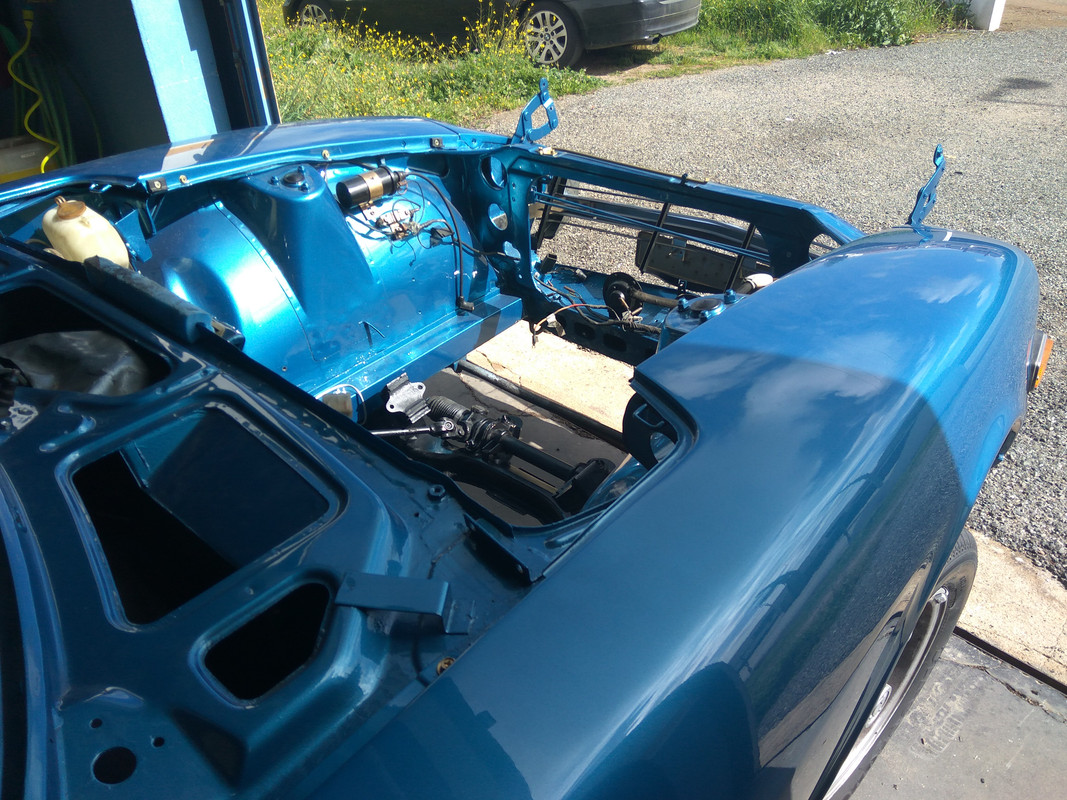
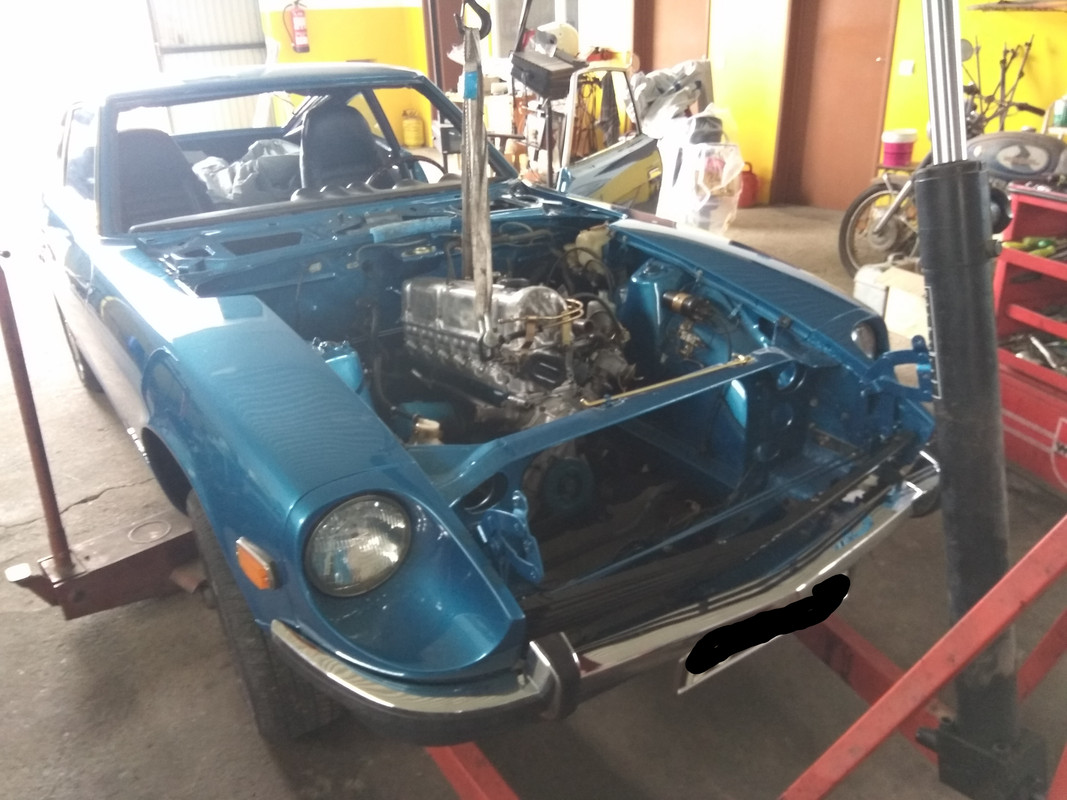
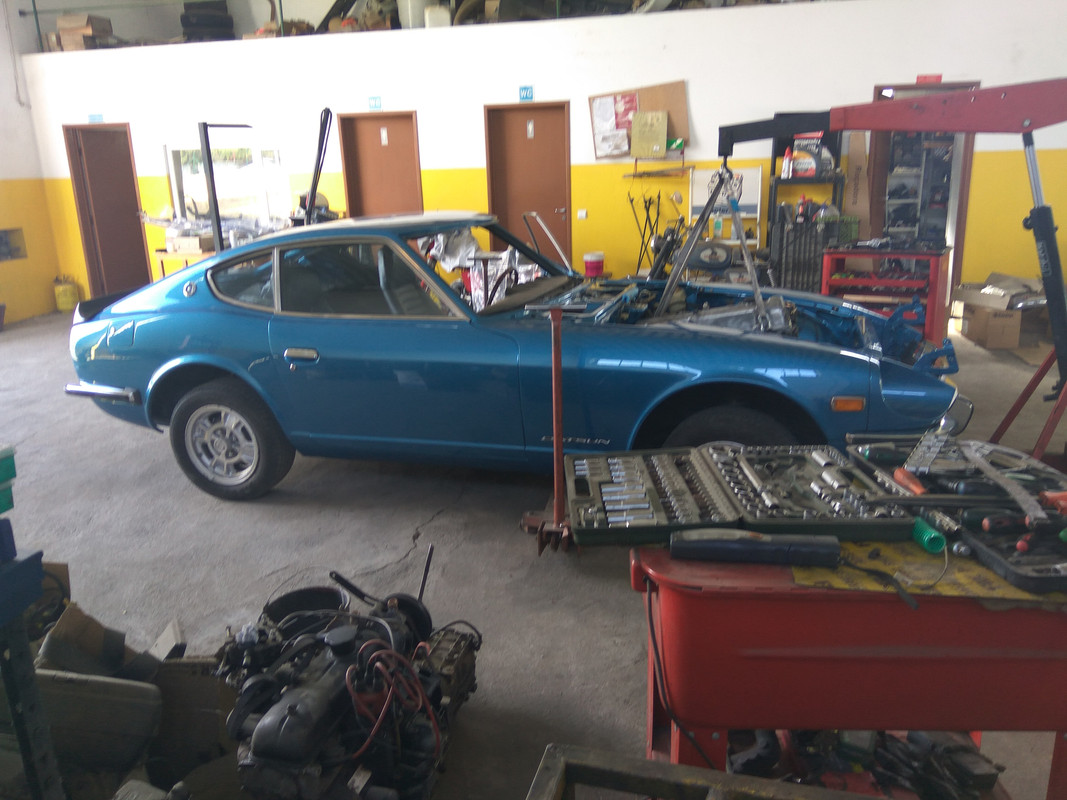
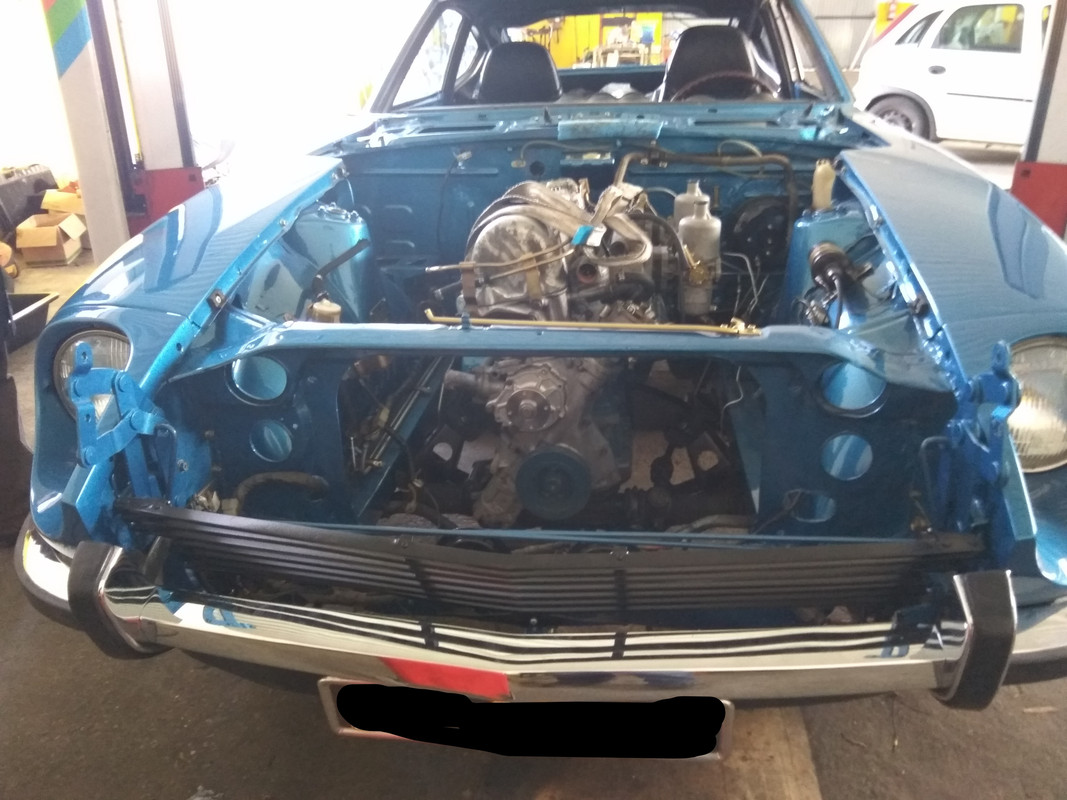
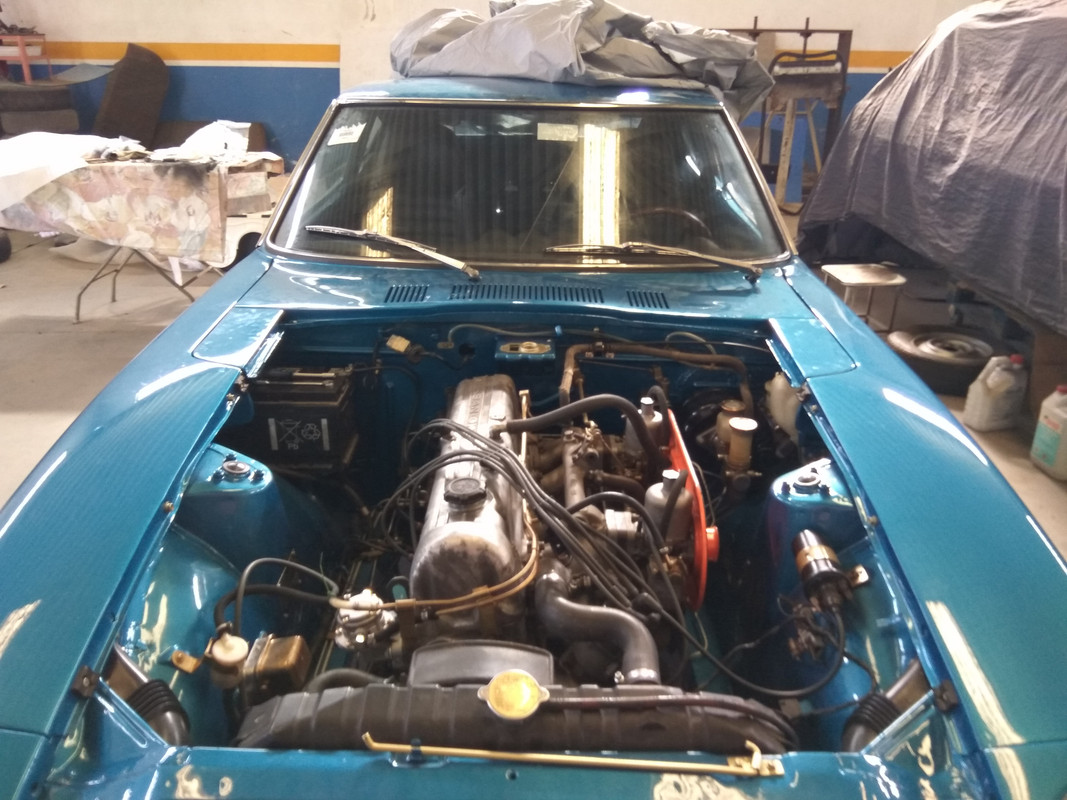
Some more parts intalled during this week! I wish I could finish it before the end of February…let’s see if it’s possible! Right now the issue is to assemble the engine and clean/paint the members under the car.
The next task is prepare the car to receive the engine and ear box…I’ll take the hood and fenders again.
Let’s see the photos…
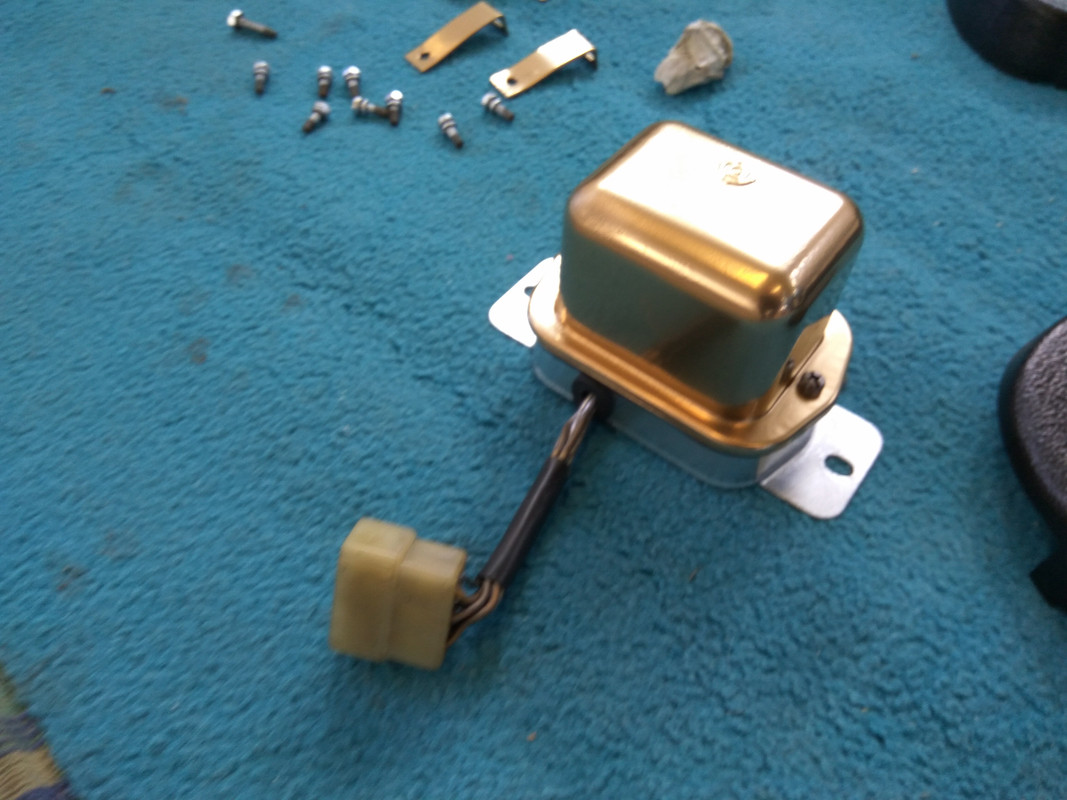
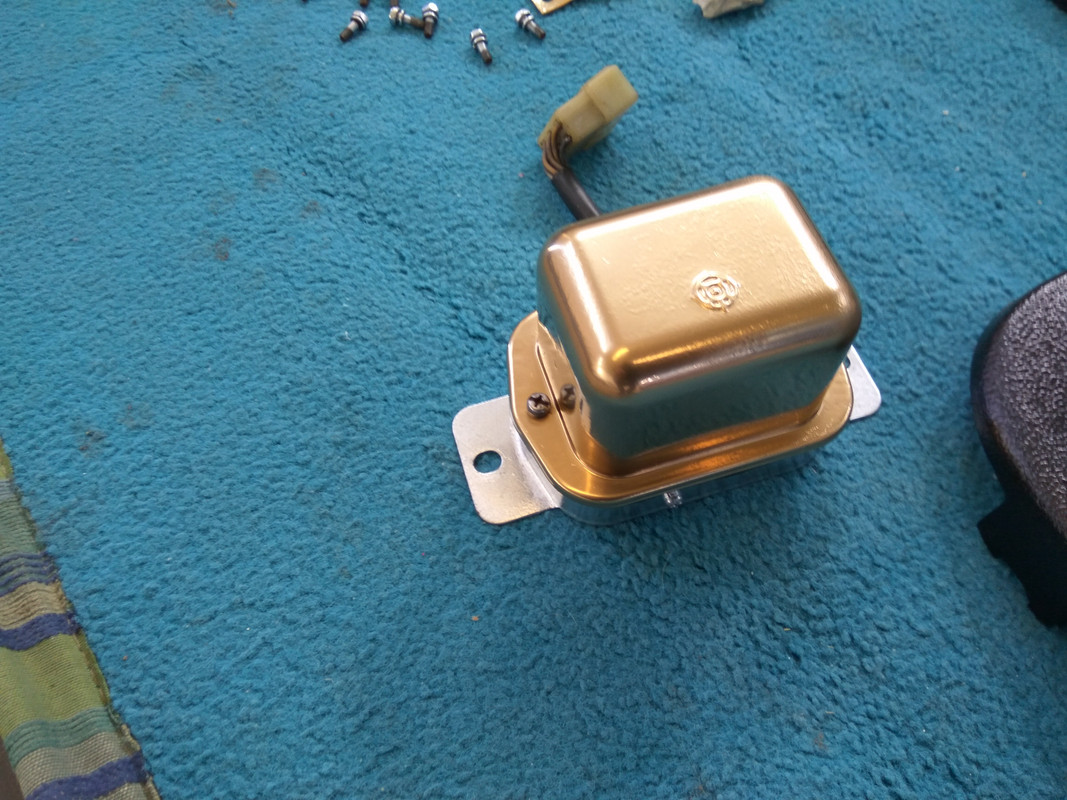
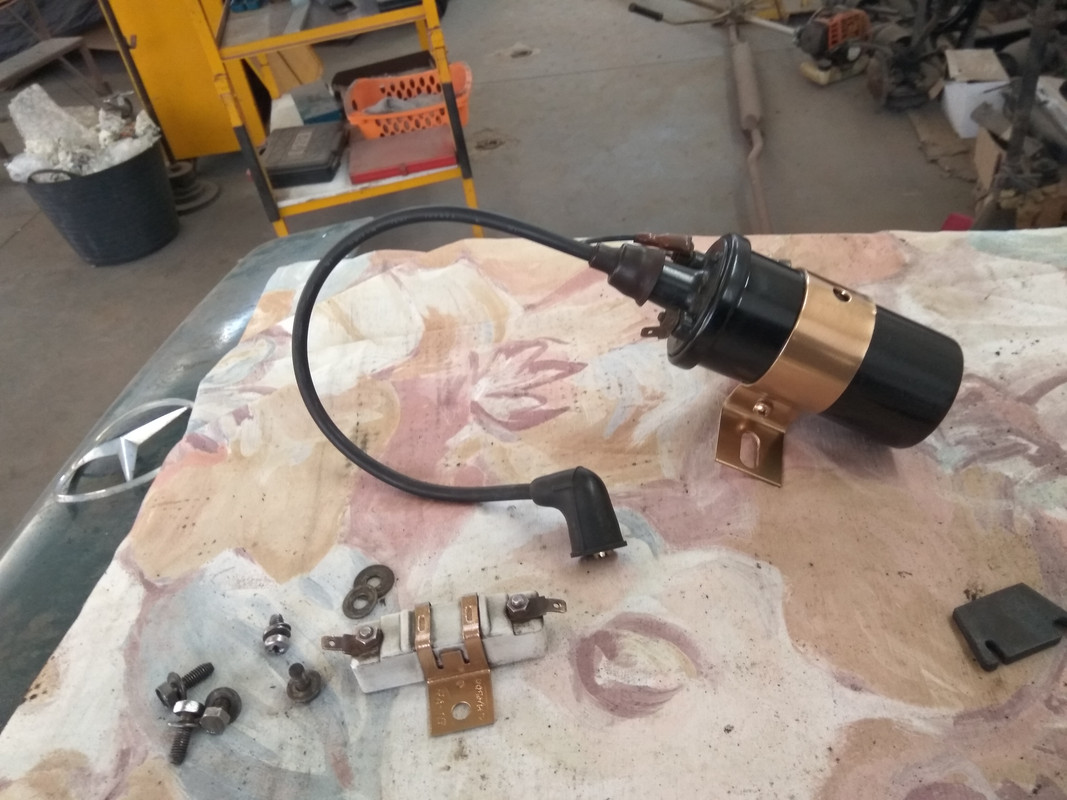
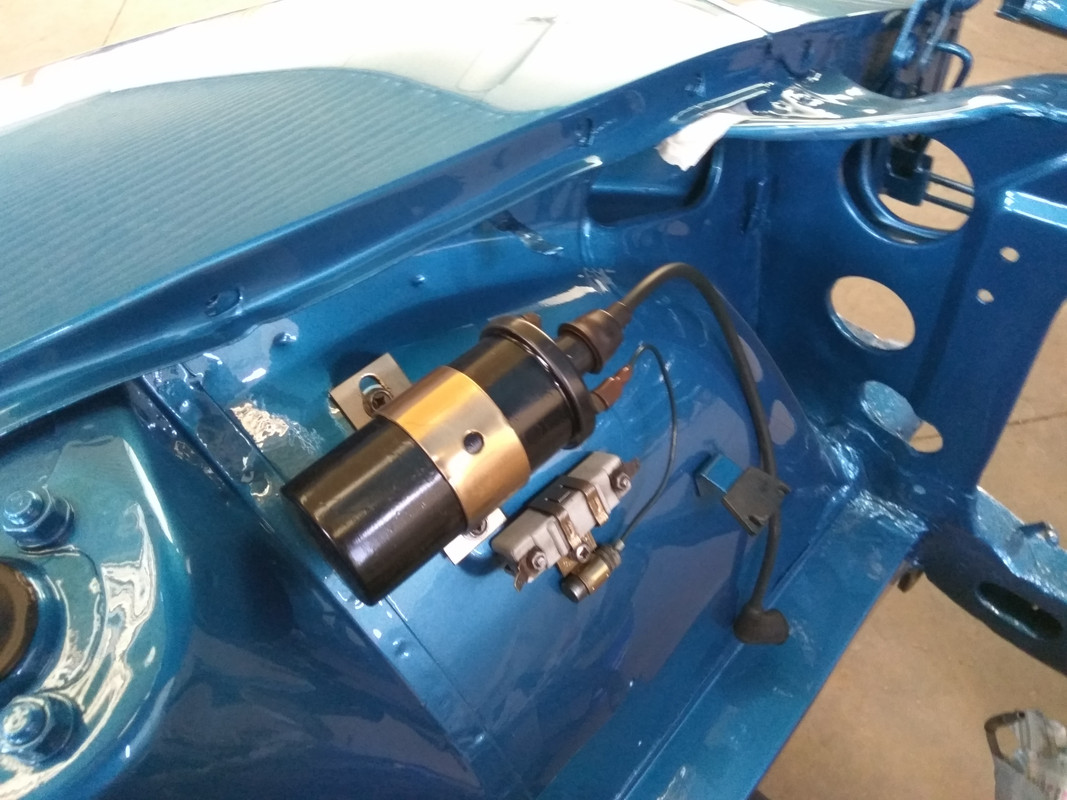
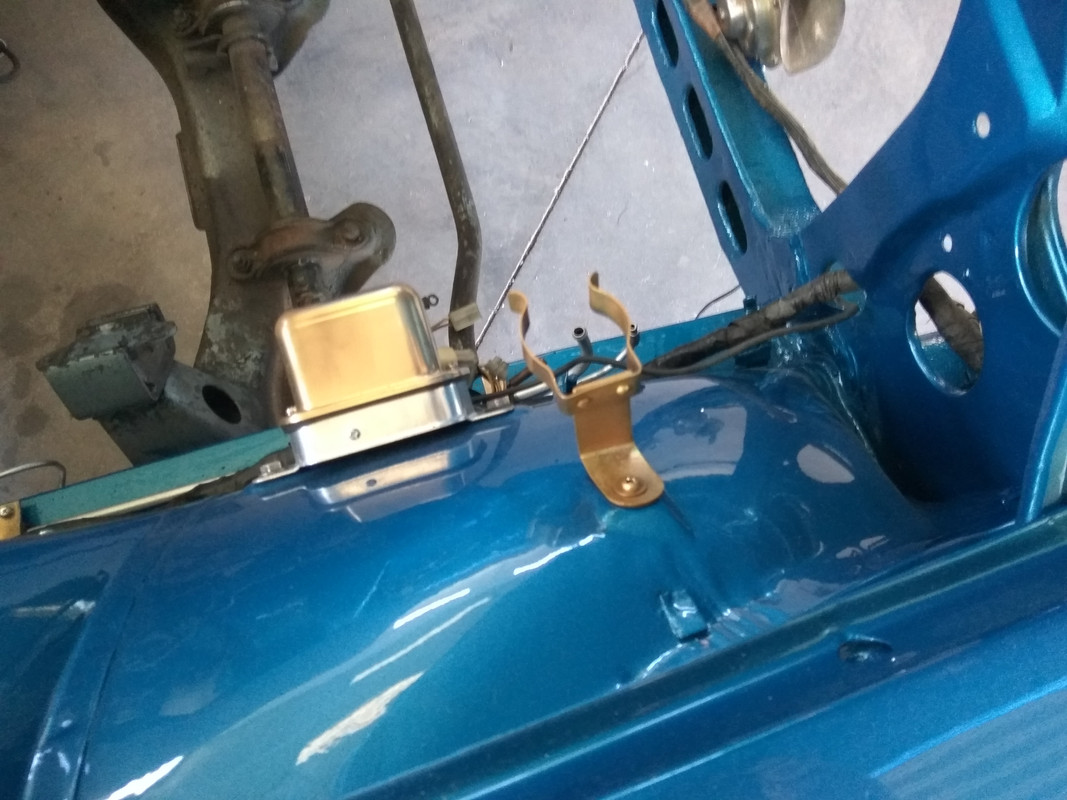
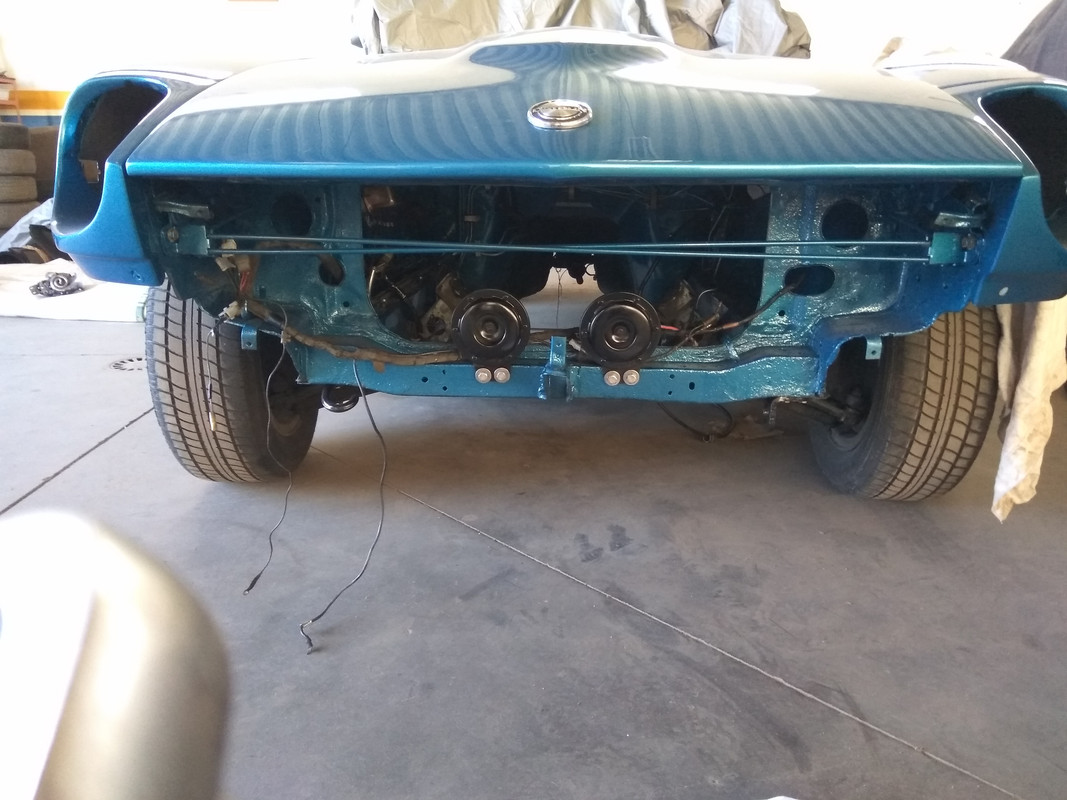
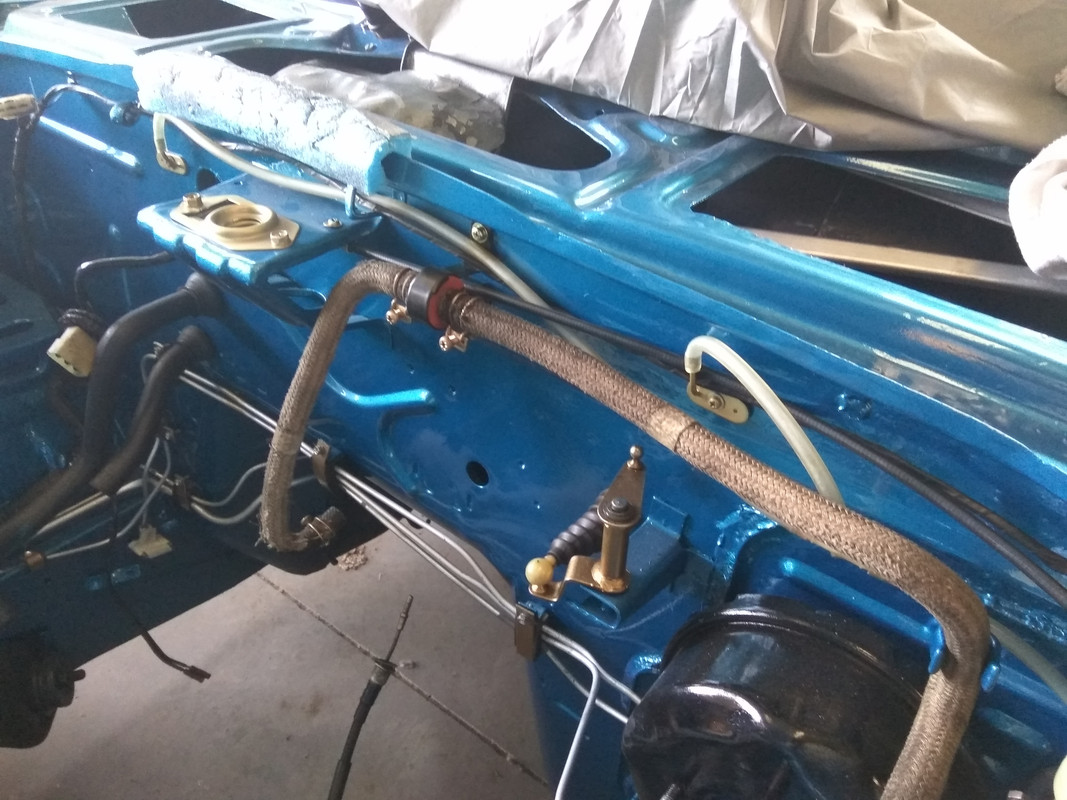
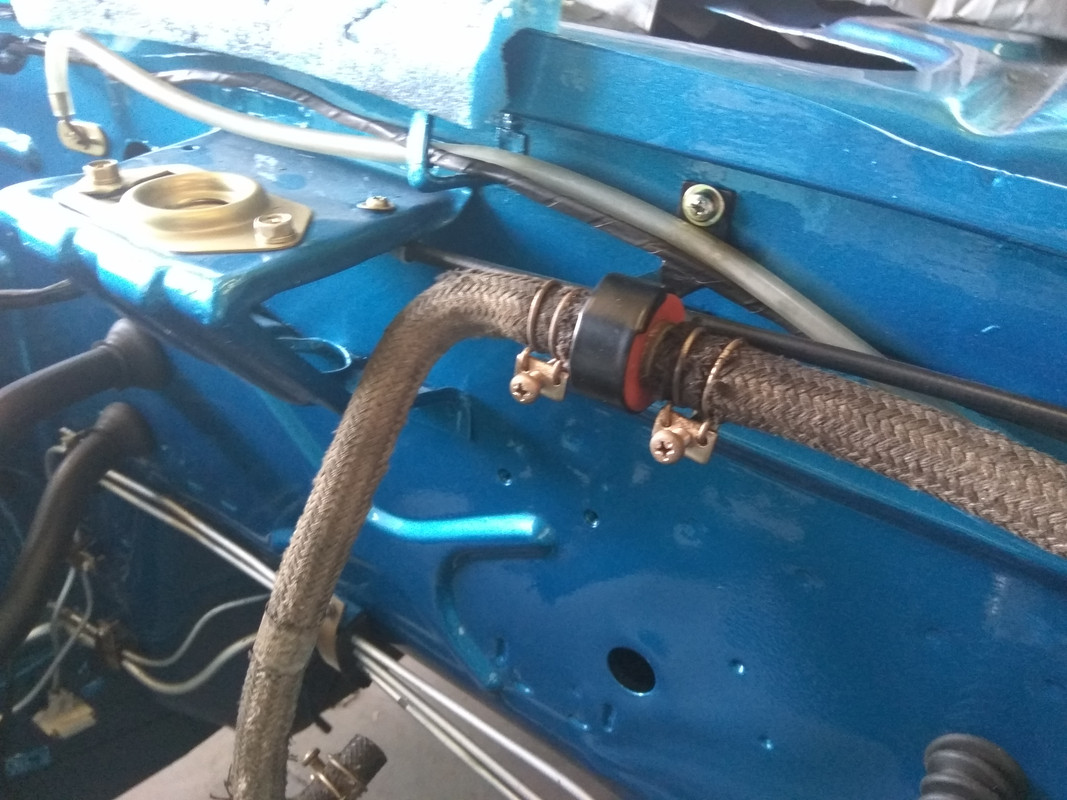
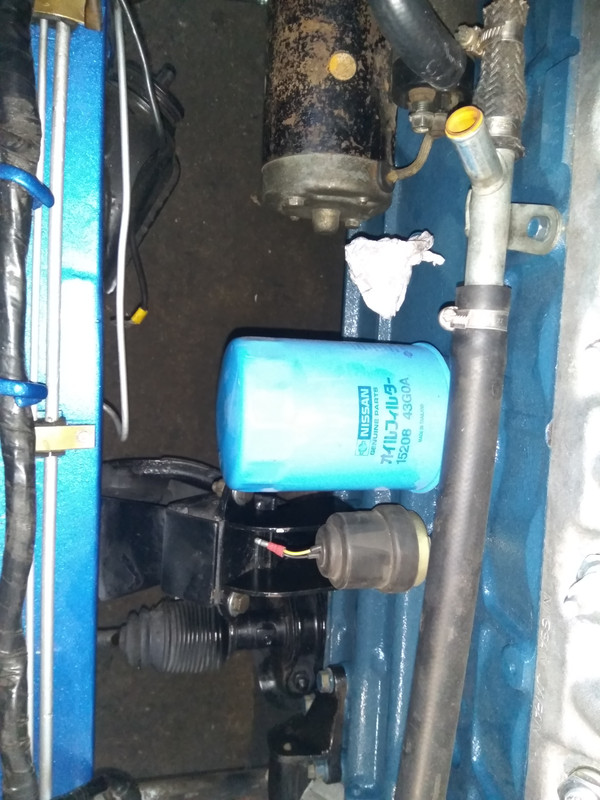
Relay…I don’t know where to install it…
New rubber a cleaning…
Installed…

The resistanse installed too

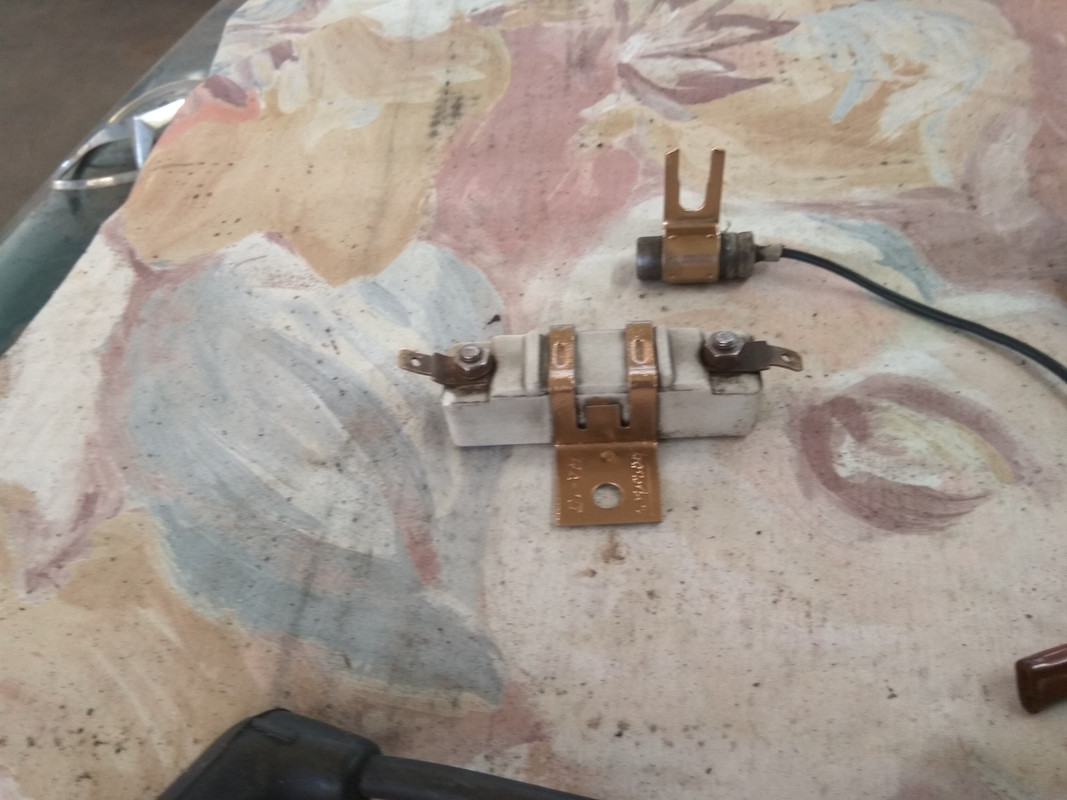
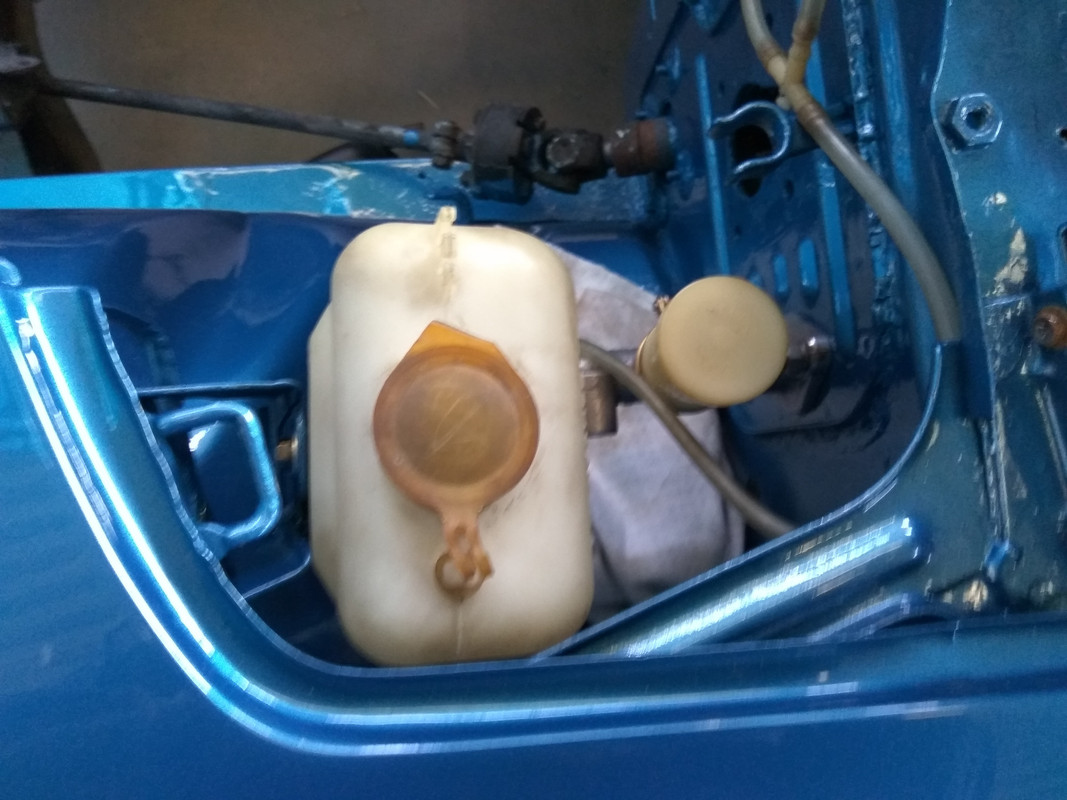
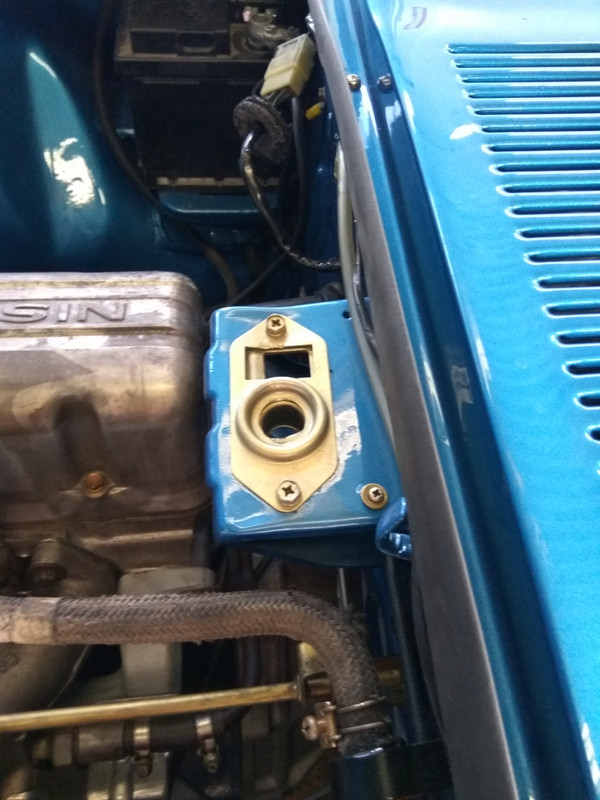
Water bottle and the famous piece…

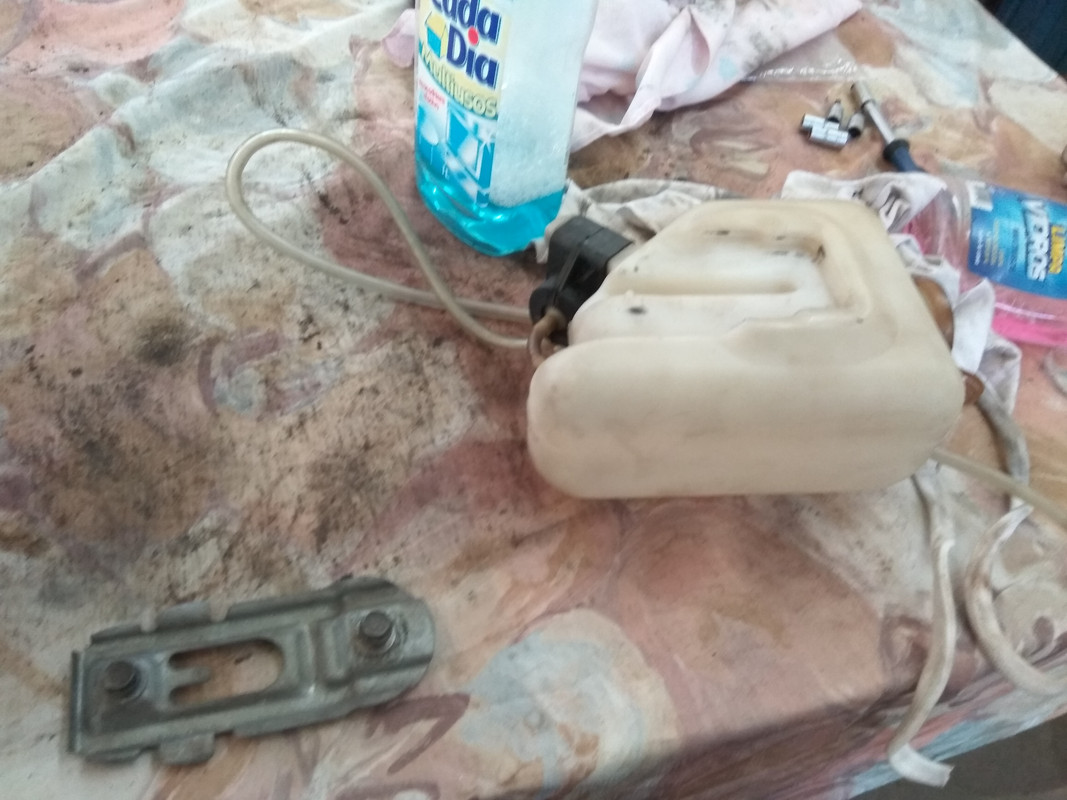
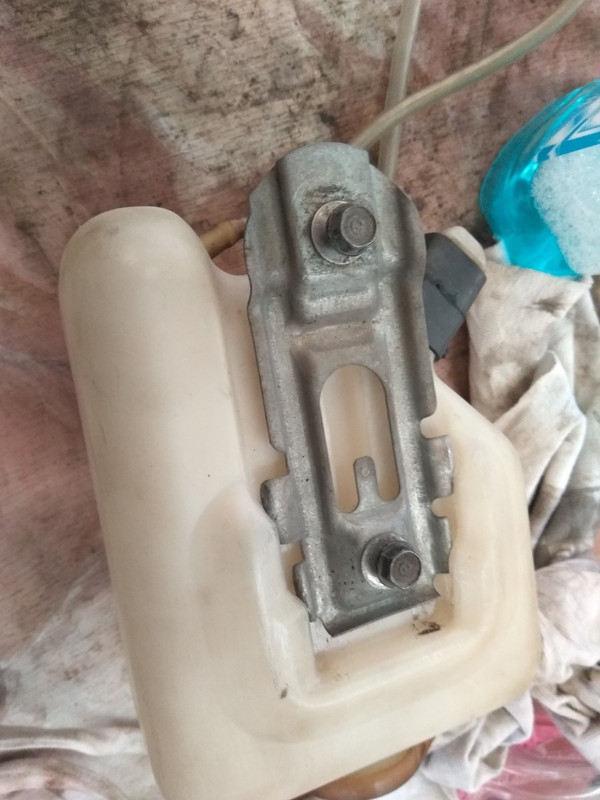
Installed…
Some more parts intalled during this week! I wish I could finish it before the end of February…let’s see if it’s possible! Right now the issue is to assemble the engine and clean/paint the members under the car.
The next task is prepare the car to receive the engine and ear box…I’ll take the hood and fenders again.
Let’s see the photos…
Relay…I don’t know where to install it…
New rubber a cleaning…
Installed…
The resistanse installed too
Water bottle and the famous piece…
Installed…


 02-03-2019, 03:12 PM
#32
Registered User
Thread Starter
Join Date: Jul 2017
Posts: 42
Hi everybody!
Today I bring fresh news!!!
During the last weekends we were working on the car…but some minor bad luck happened…we didn’t progress as we like!!! But bolt by bolt we are assembling the BIG puzzle!!!
At this moment there is a willfull rubber, the one from the hatch glass…it will go directly to the litter! I bought an original in japan and I’m waiting for it!
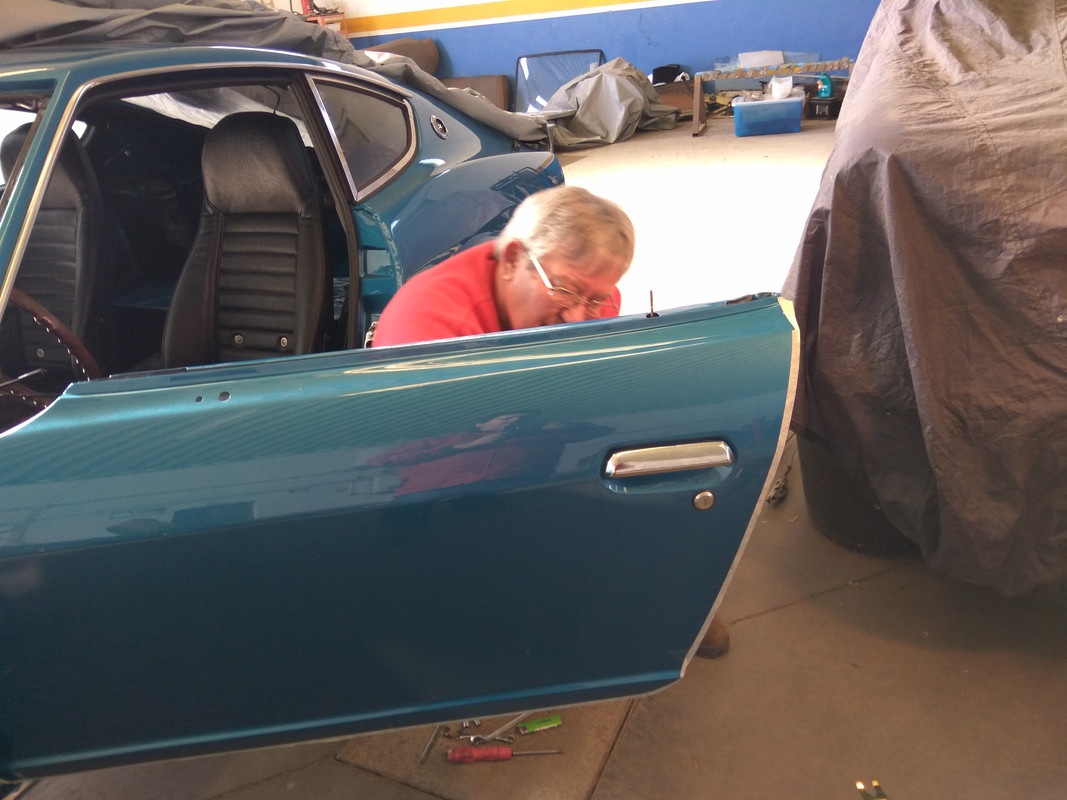
Then the doors…we didn’t finish the driver’s door because the inside locker is broken and we were unable to tune the door properly.
I’m getting bored with all these tasks…only adjustments and tunning and…and…and… too much time spent on each part!!!
The only goal that is keeping me excited is getting her to it’s original condition…and it’s almost done!
Let’s see the photos!!!
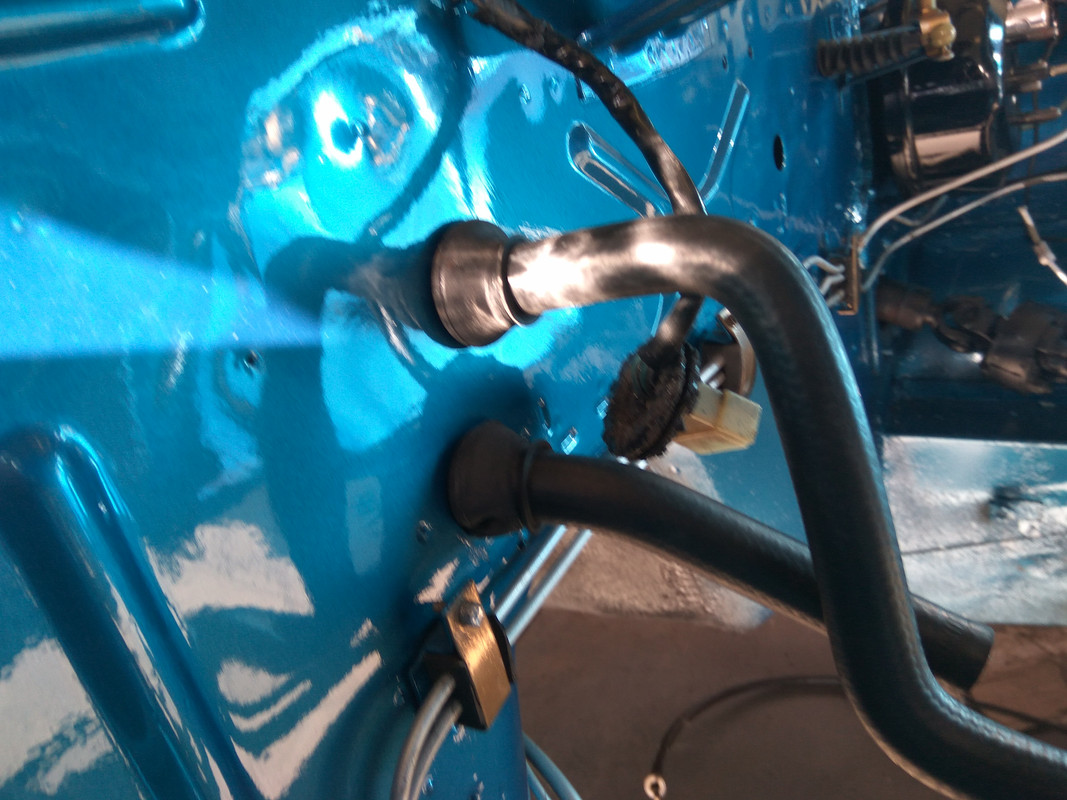
Plated and zinc parts…
The fuel filter stand is originaly painted black, but I’ll leave it zinc…it’s cleanerto the engine bay…I think!

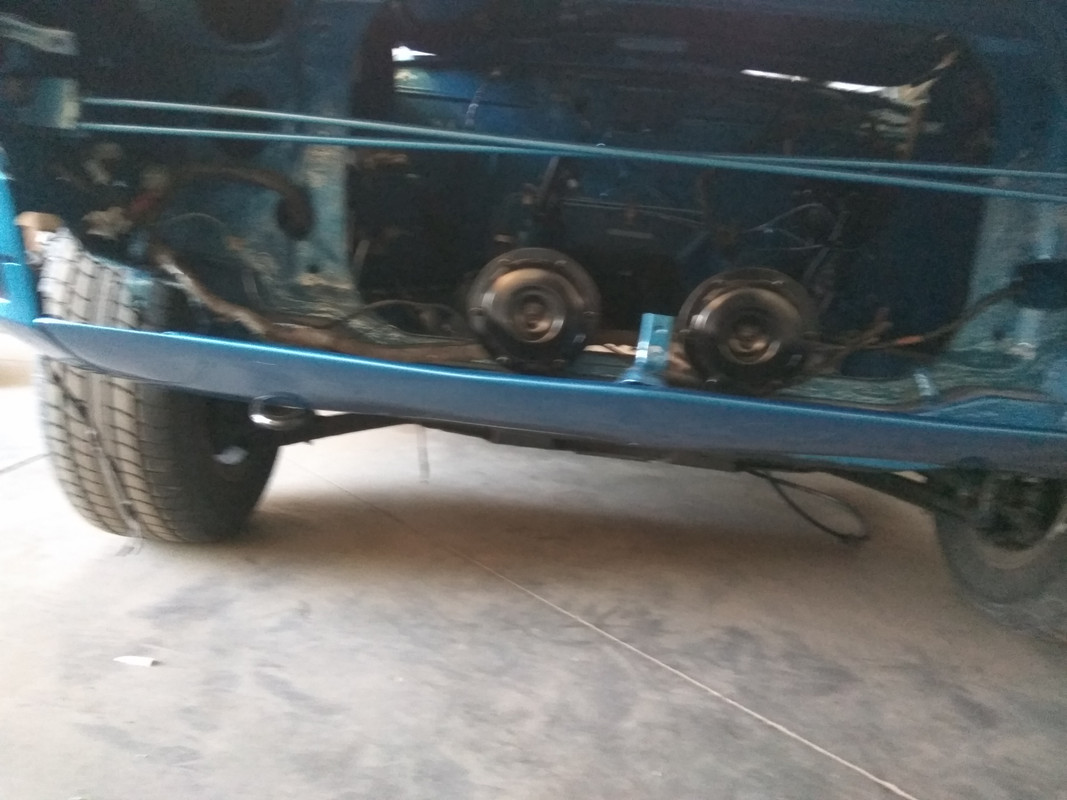
New horns…before there were the giant vintage bosh…
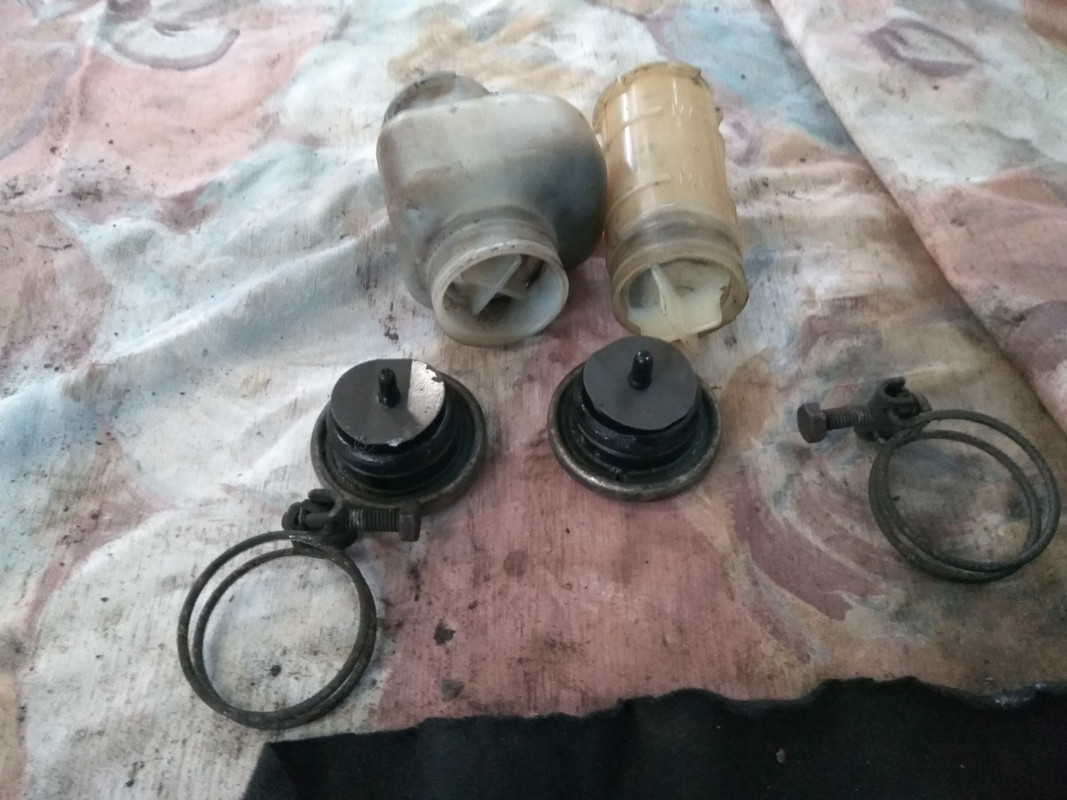
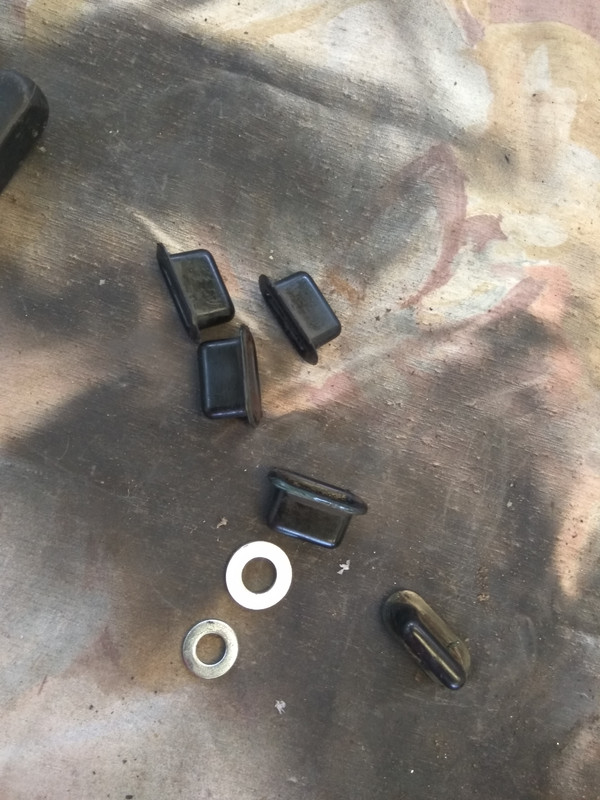
New heater grommets…
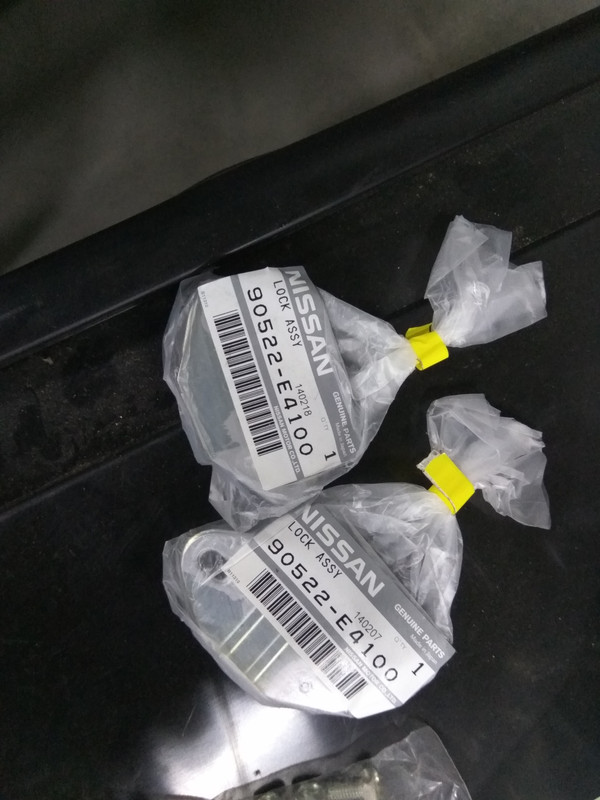
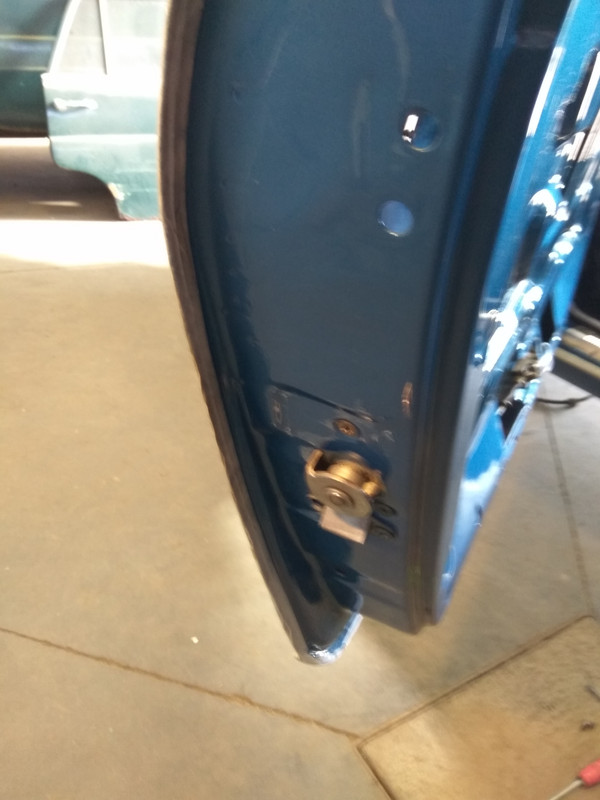
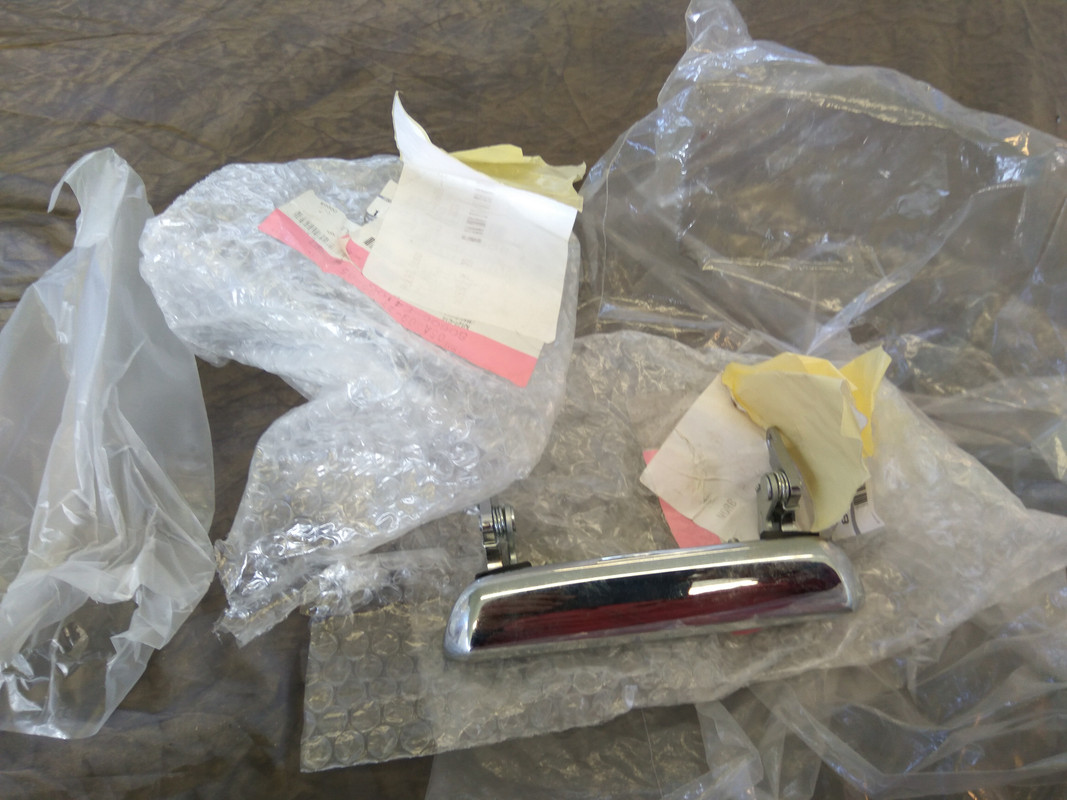
Installing the door. New key lockers, new door handles, glass elevators and the main lock. This last one borke down. I suspected before the resto, that it didn’t opened the door properly!
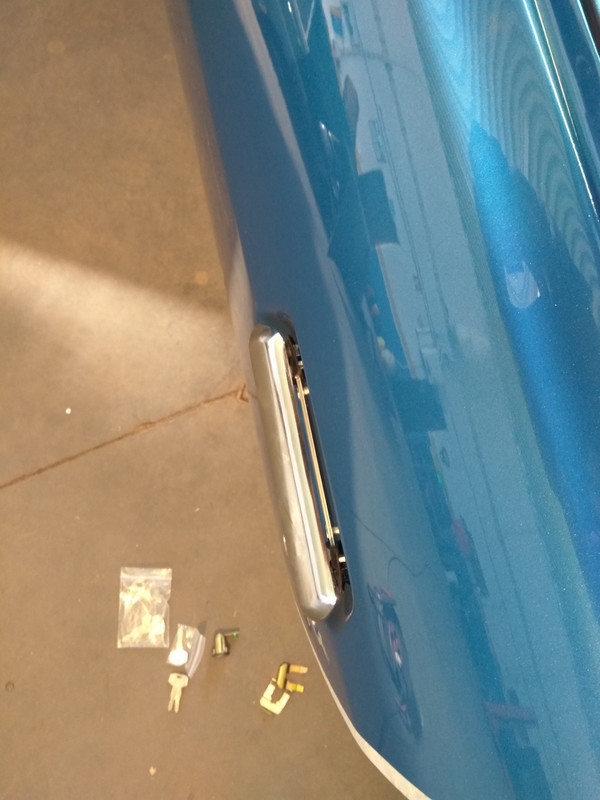
New hood handle...the previous one wasn’t original and didn’t match S30!
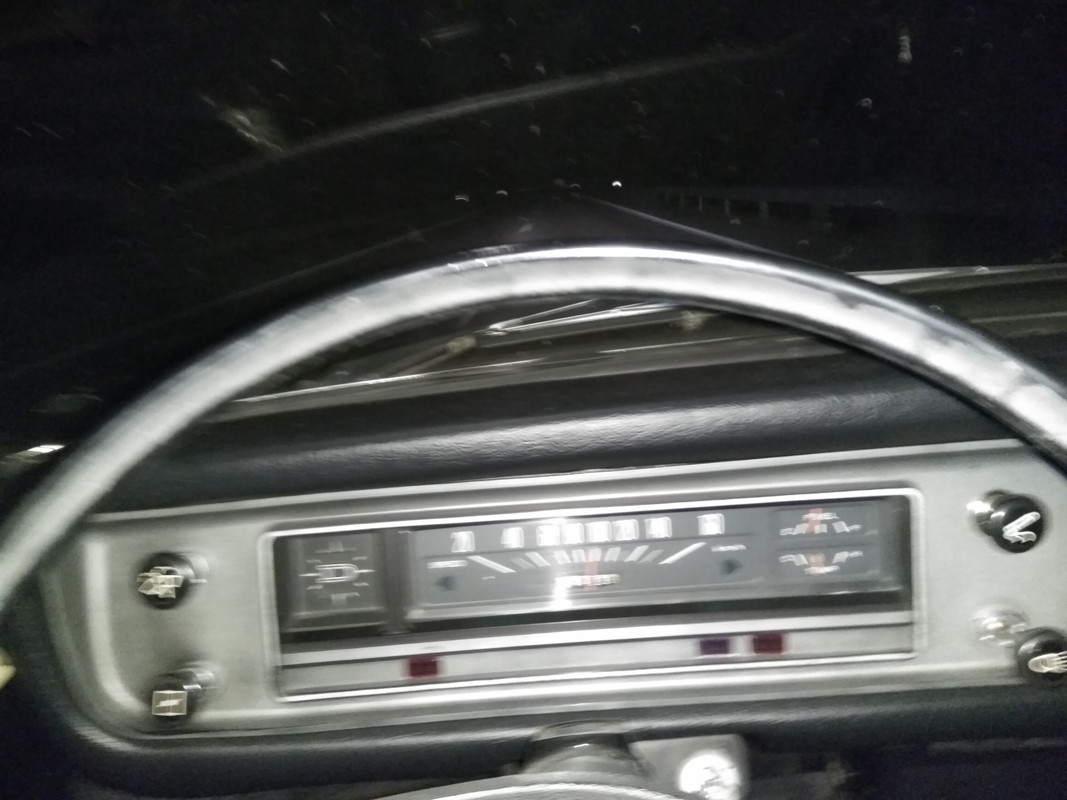
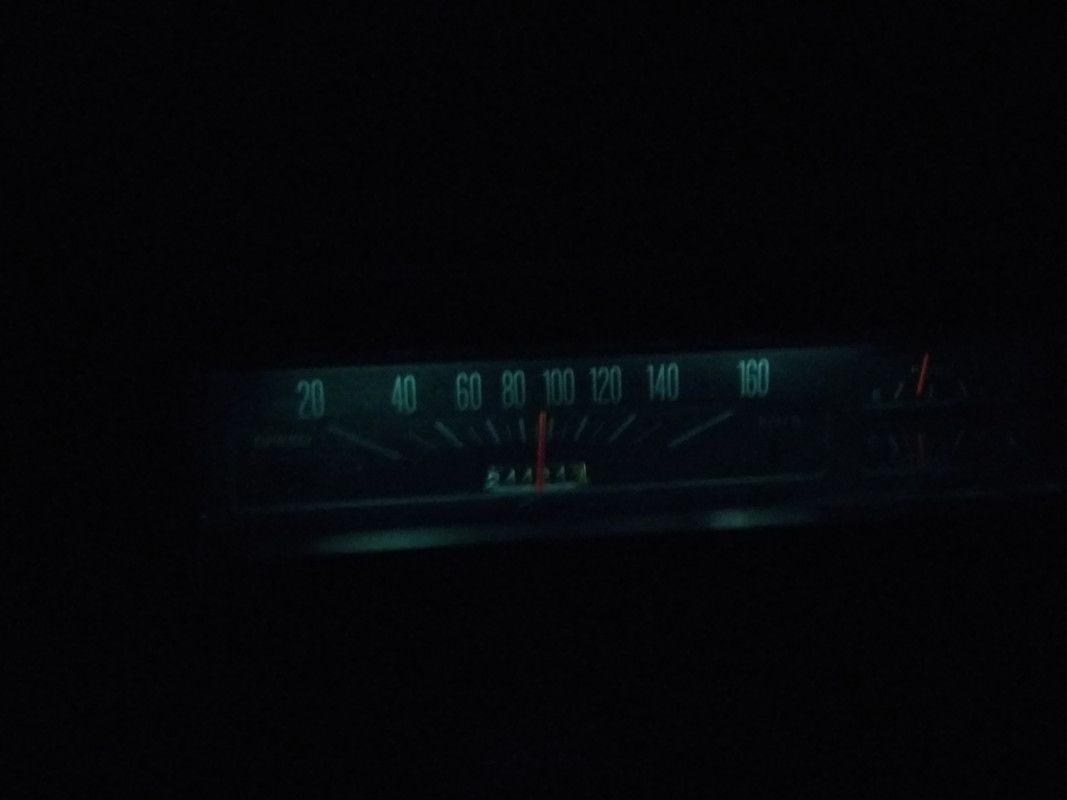
New rubbers for hood handle and km mark.
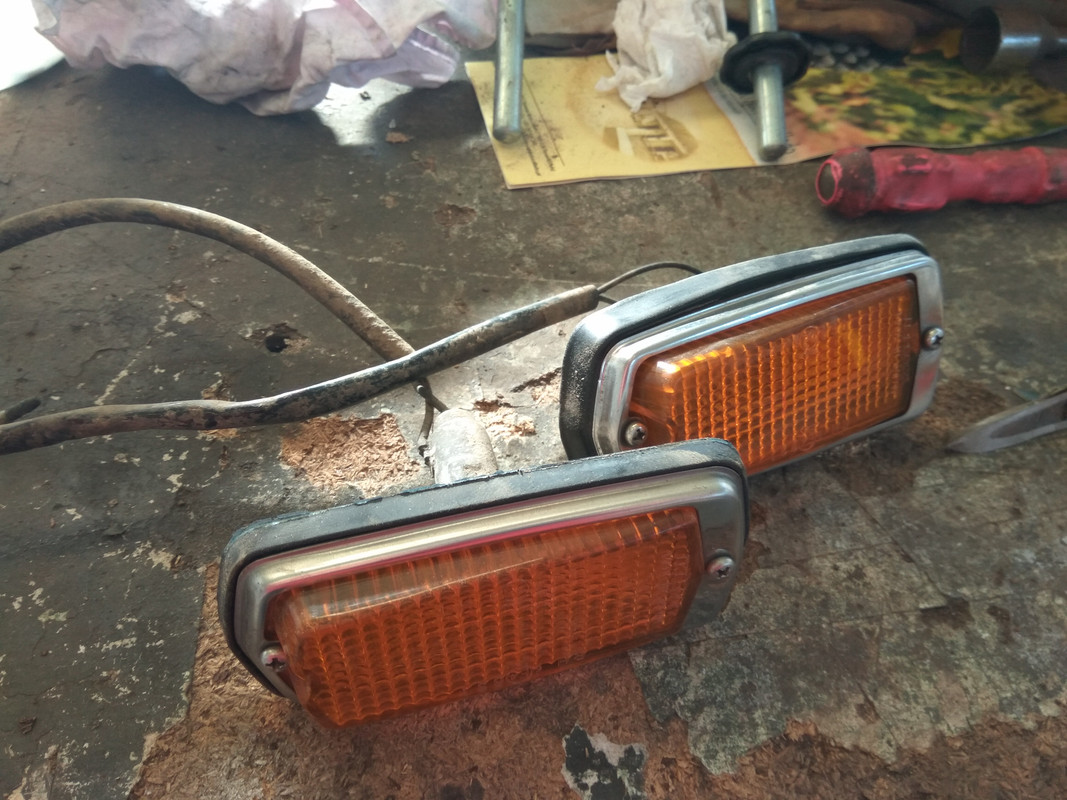
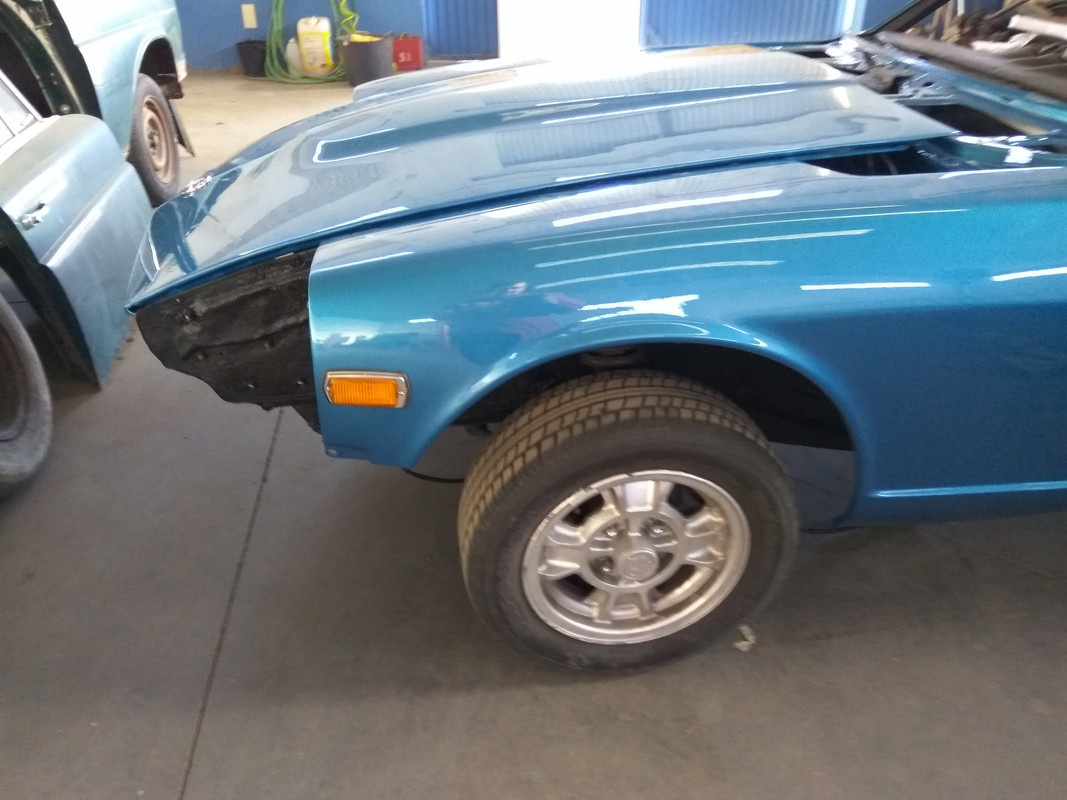
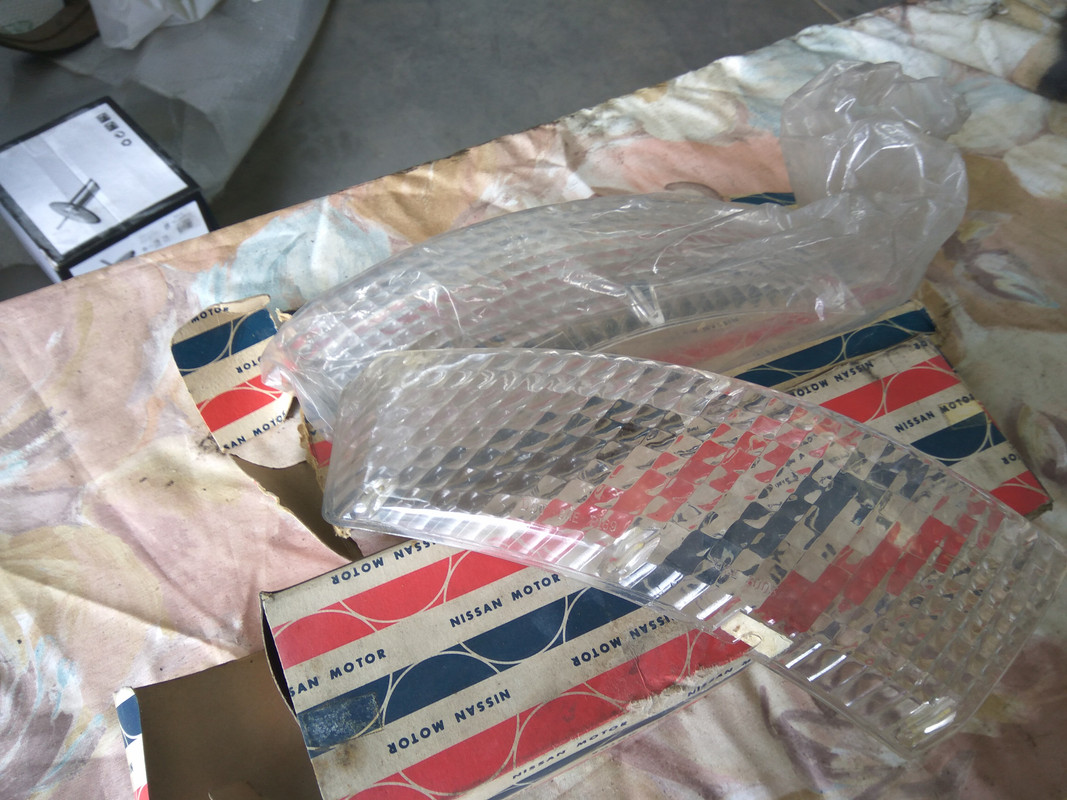
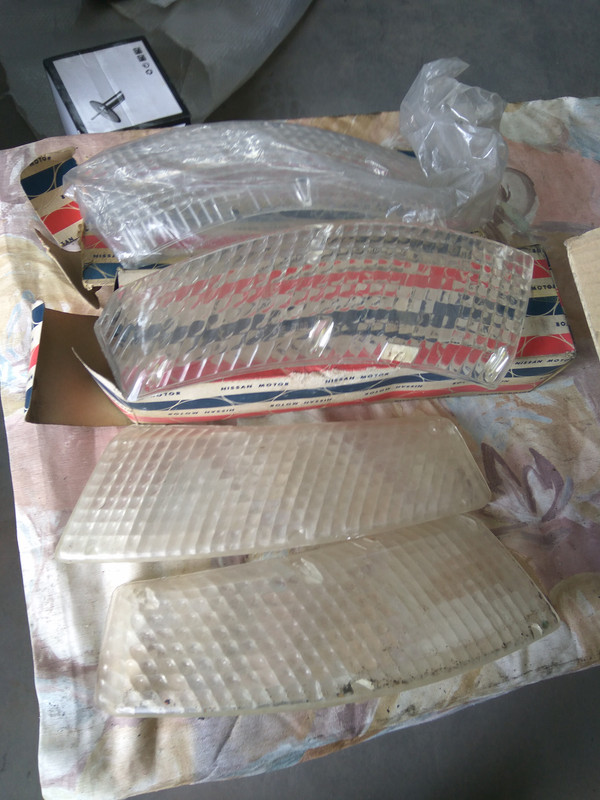
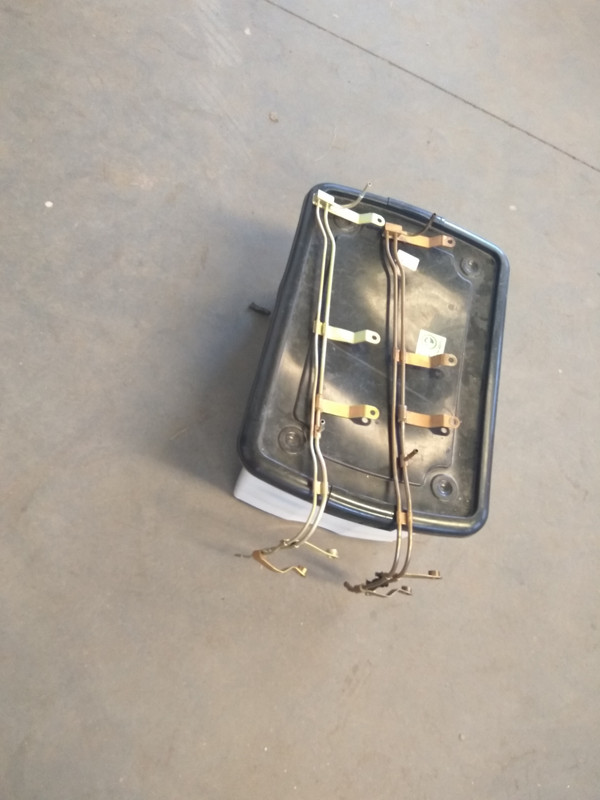
Cleaning and installing the side markers.
Today I bring fresh news!!!
During the last weekends we were working on the car…but some minor bad luck happened…we didn’t progress as we like!!! But bolt by bolt we are assembling the BIG puzzle!!!
At this moment there is a willfull rubber, the one from the hatch glass…it will go directly to the litter! I bought an original in japan and I’m waiting for it!
Then the doors…we didn’t finish the driver’s door because the inside locker is broken and we were unable to tune the door properly.
I’m getting bored with all these tasks…only adjustments and tunning and…and…and… too much time spent on each part!!!
The only goal that is keeping me excited is getting her to it’s original condition…and it’s almost done!
Let’s see the photos!!!
Plated and zinc parts…
The fuel filter stand is originaly painted black, but I’ll leave it zinc…it’s cleanerto the engine bay…I think!
New horns…before there were the giant vintage bosh…
New heater grommets…
Installing the door. New key lockers, new door handles, glass elevators and the main lock. This last one borke down. I suspected before the resto, that it didn’t opened the door properly!
New hood handle...the previous one wasn’t original and didn’t match S30!
New rubbers for hood handle and km mark.
Cleaning and installing the side markers.
02-03-2019, 03:12 PM
#33
Registered User
Thread Starter
Join Date: Jul 2017
Posts: 42
Installed..they fit very well!

And left side almost ready…
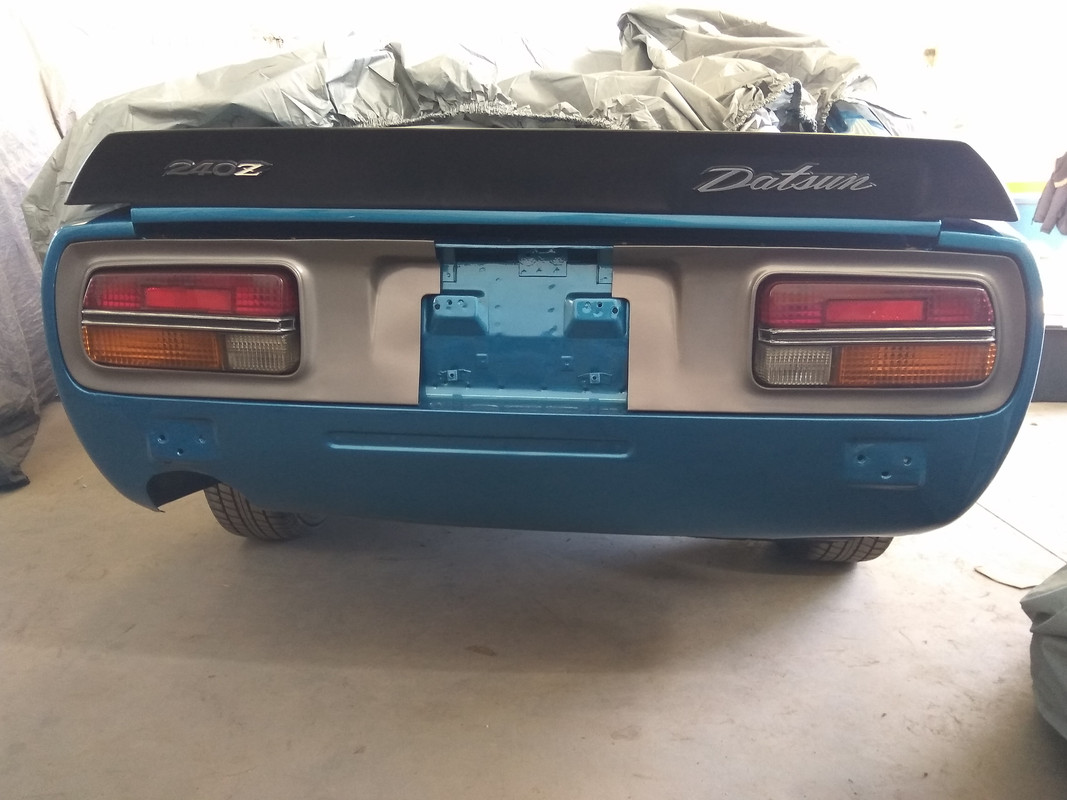
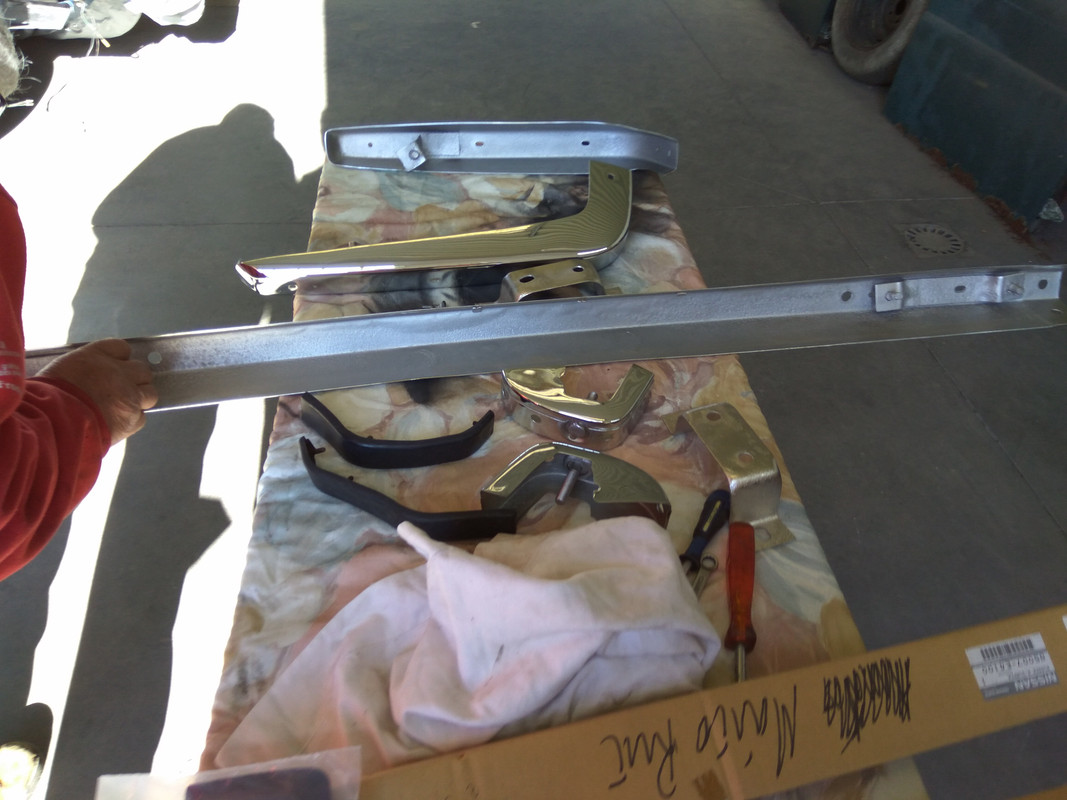
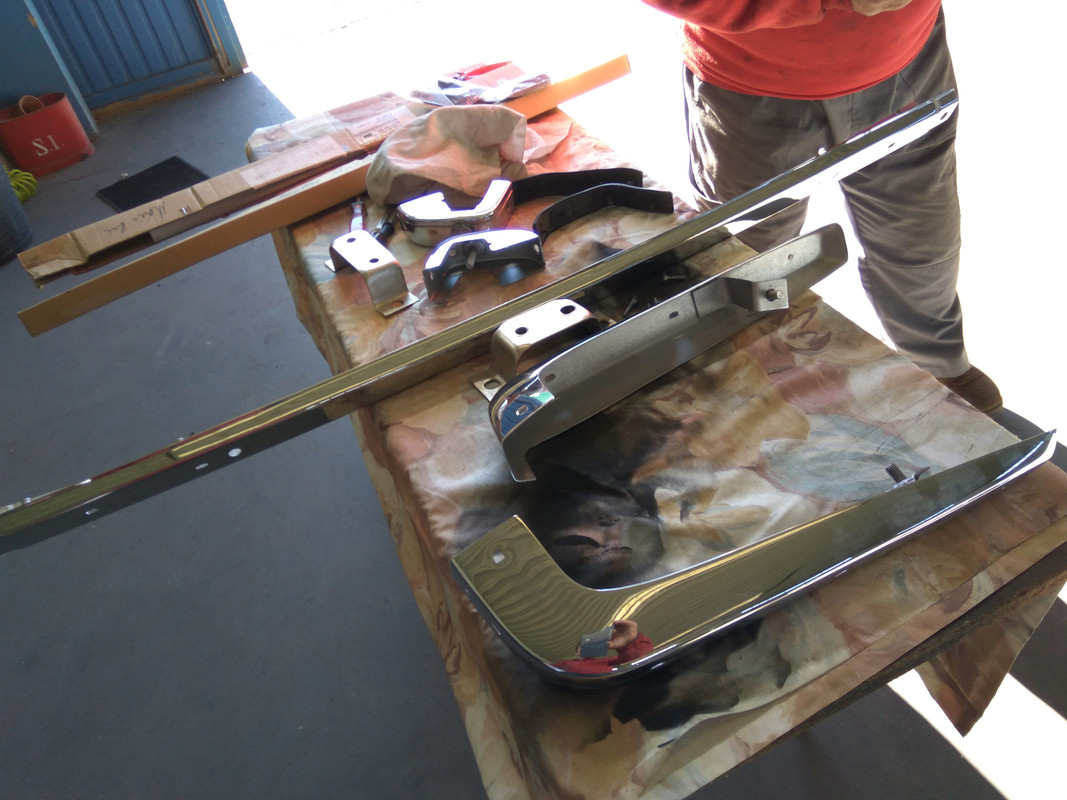
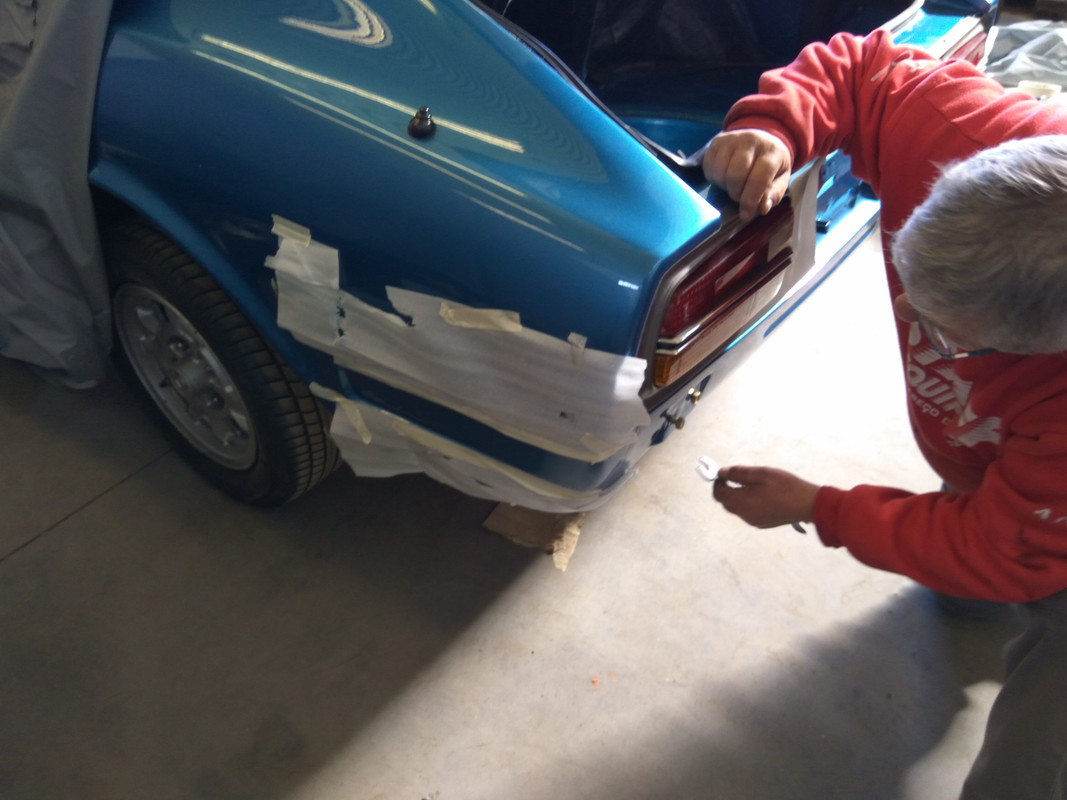
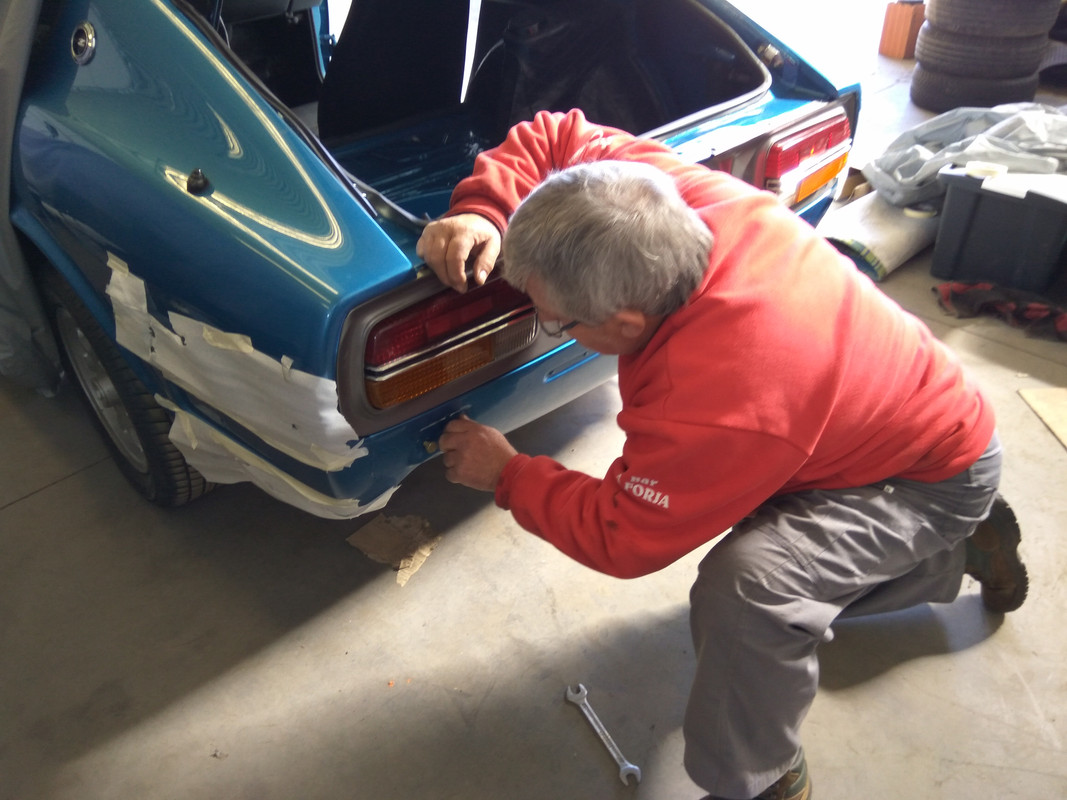
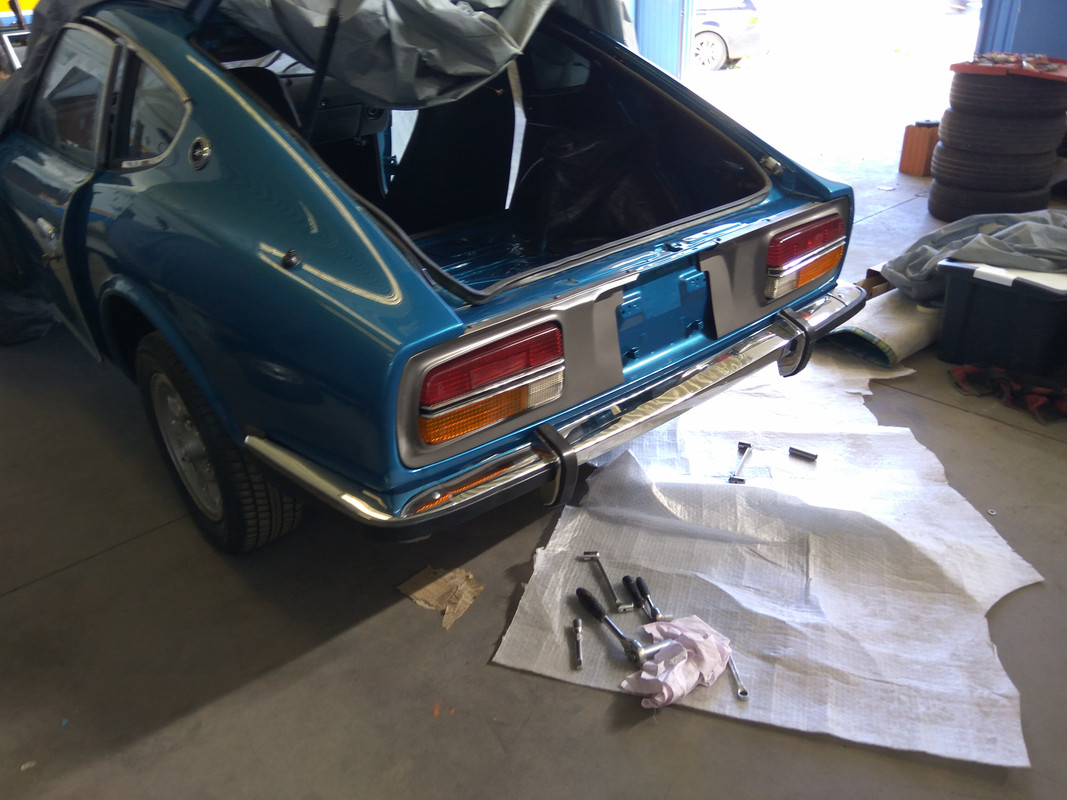
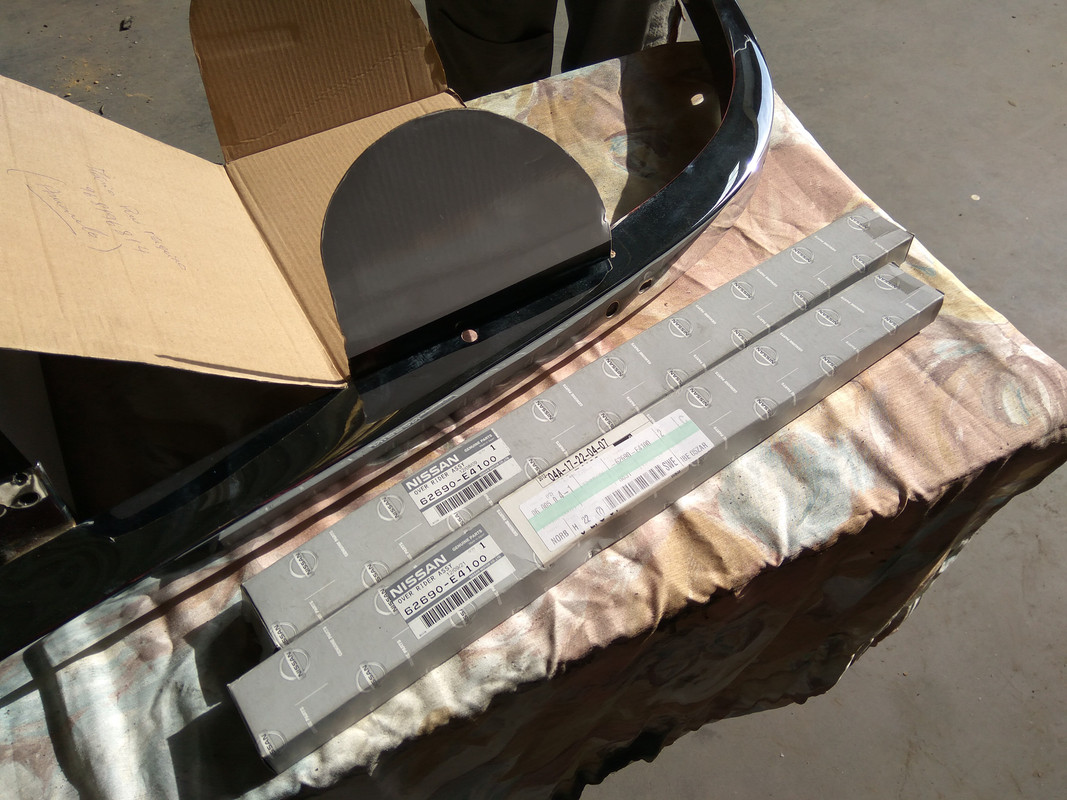
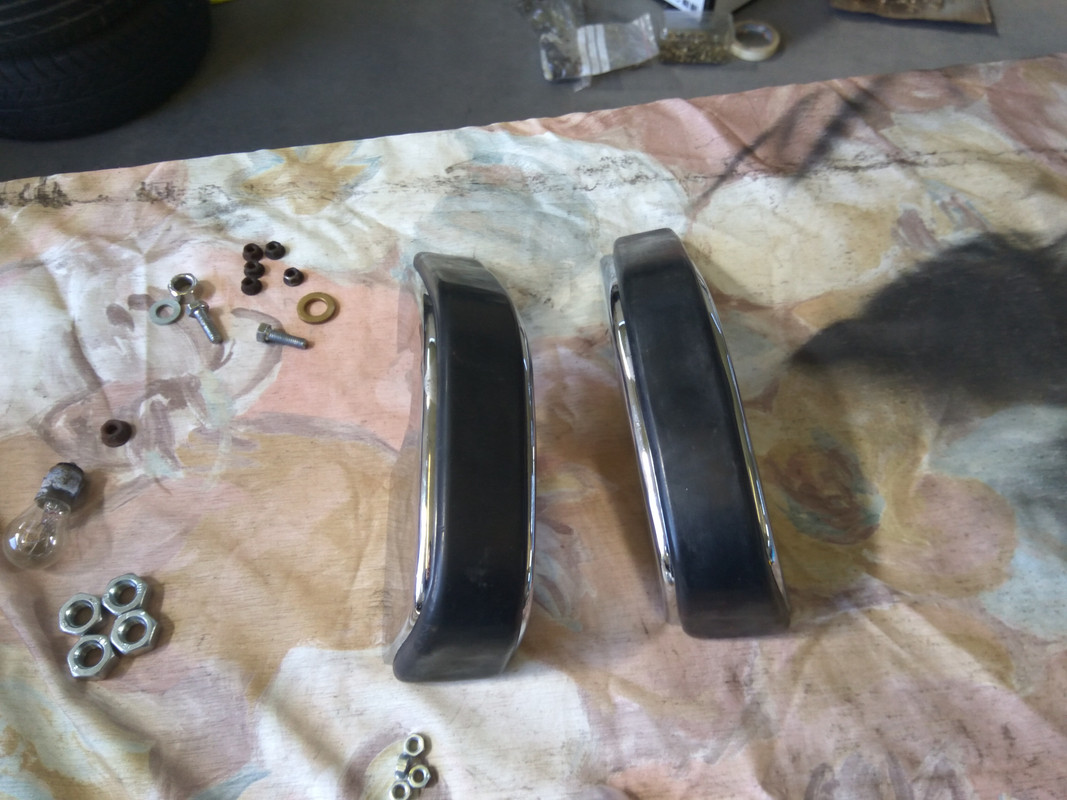
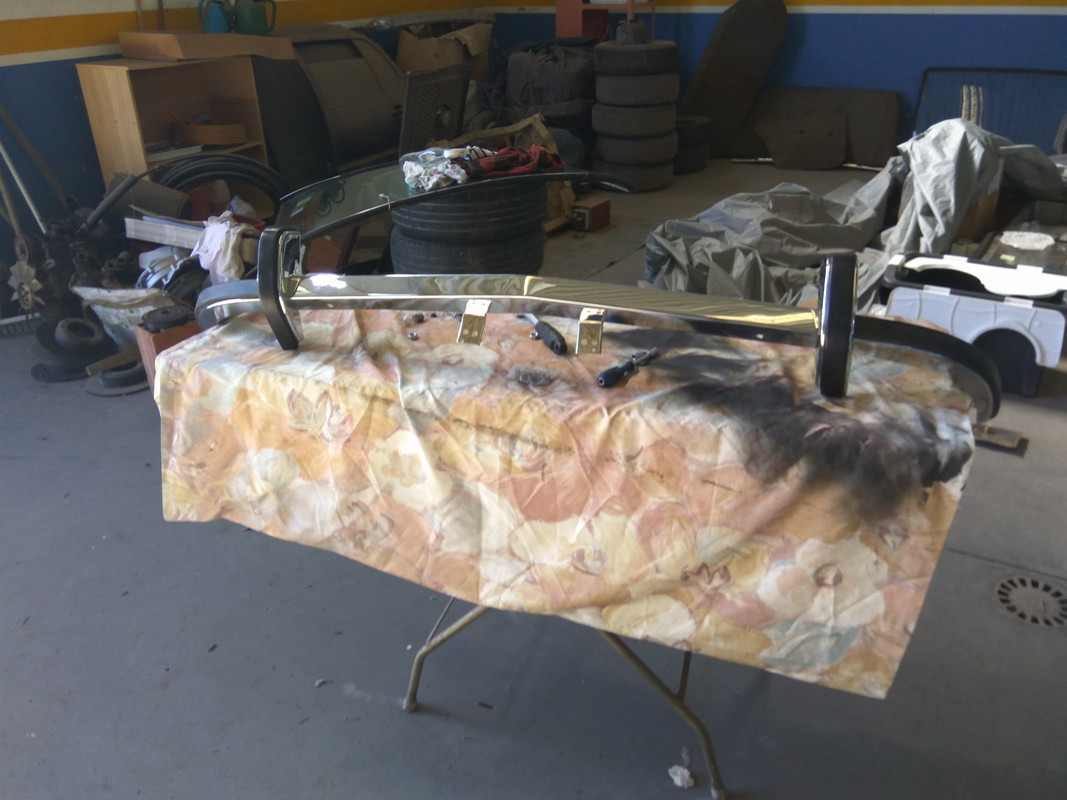
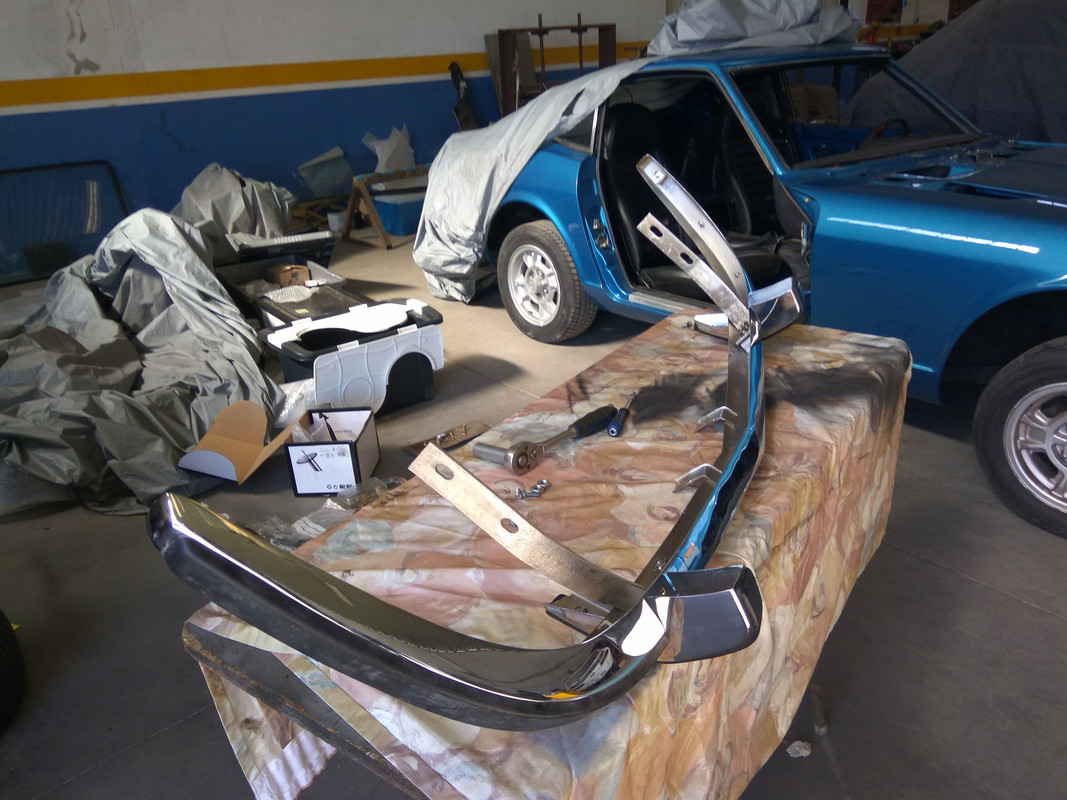
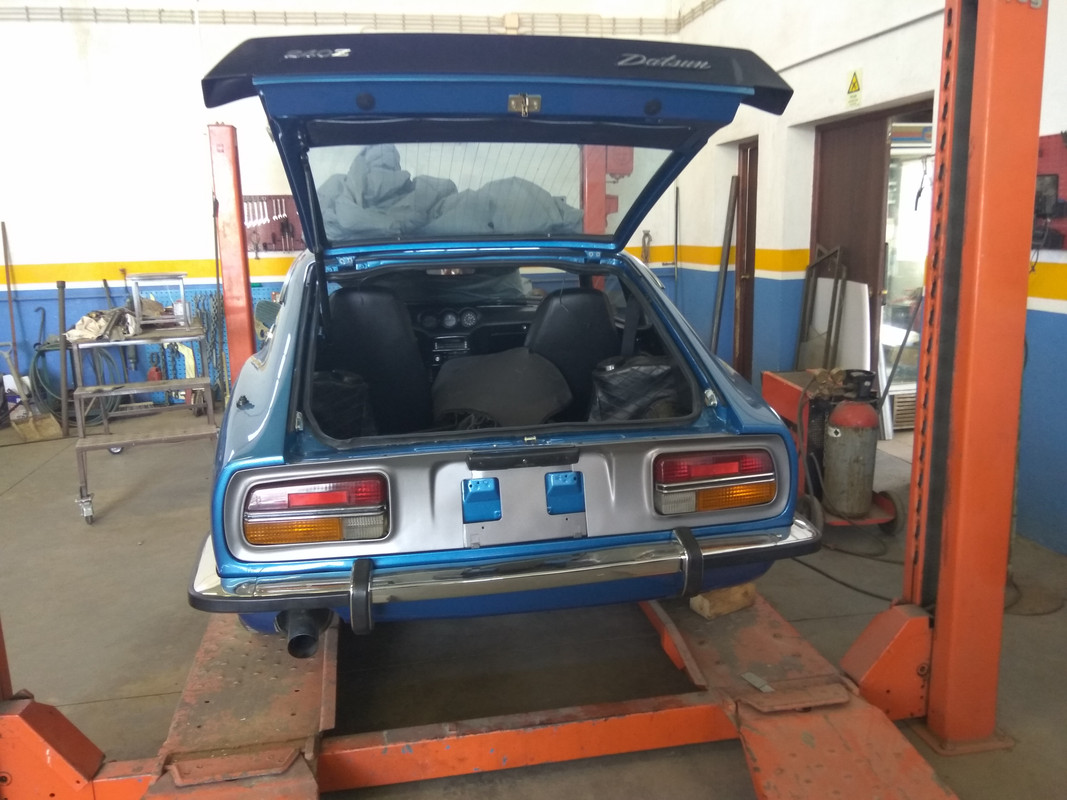
Rear bumper installation! What an enormous task!!! 3 hours until the end!!! Too much parts, rubbers, guards, bolts, tune and so on…luckily everything is original and fitted well!!!

All the new parts…
The result before it goes to the car!
Before the installation we cover the sides with sphincter to avoid some scratches!
Annoying car said Mr.Vitorino...
Almost!!!
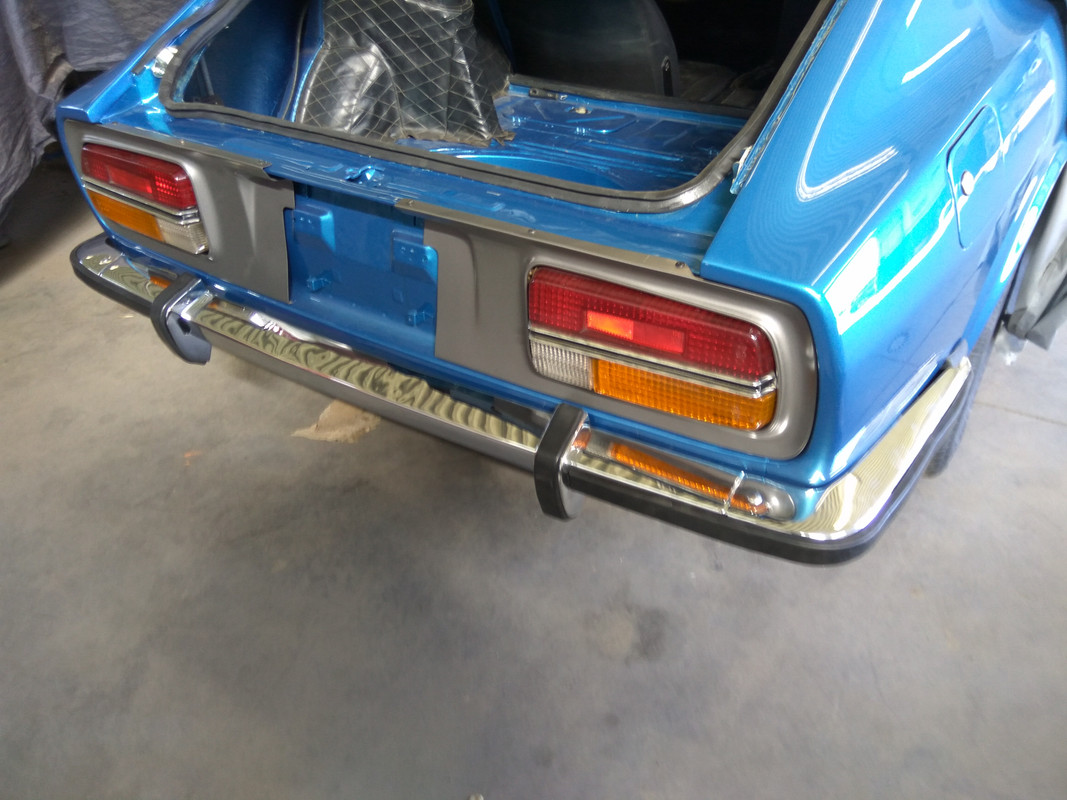
And here is the result!!!
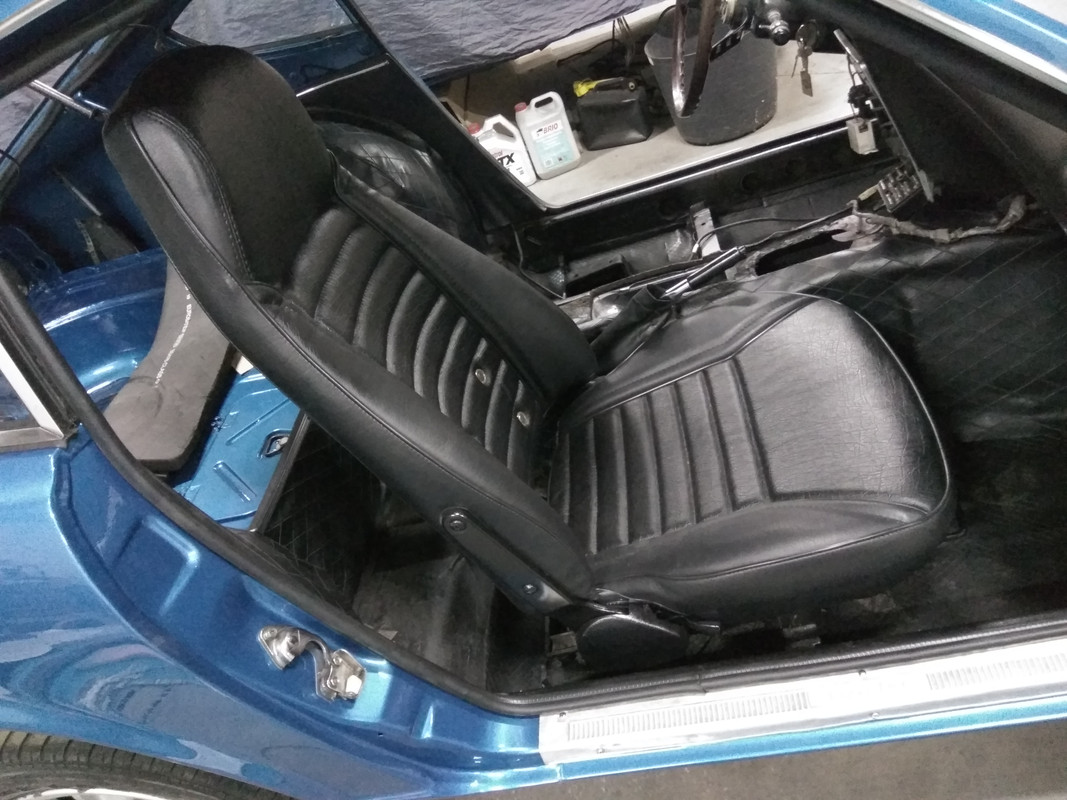
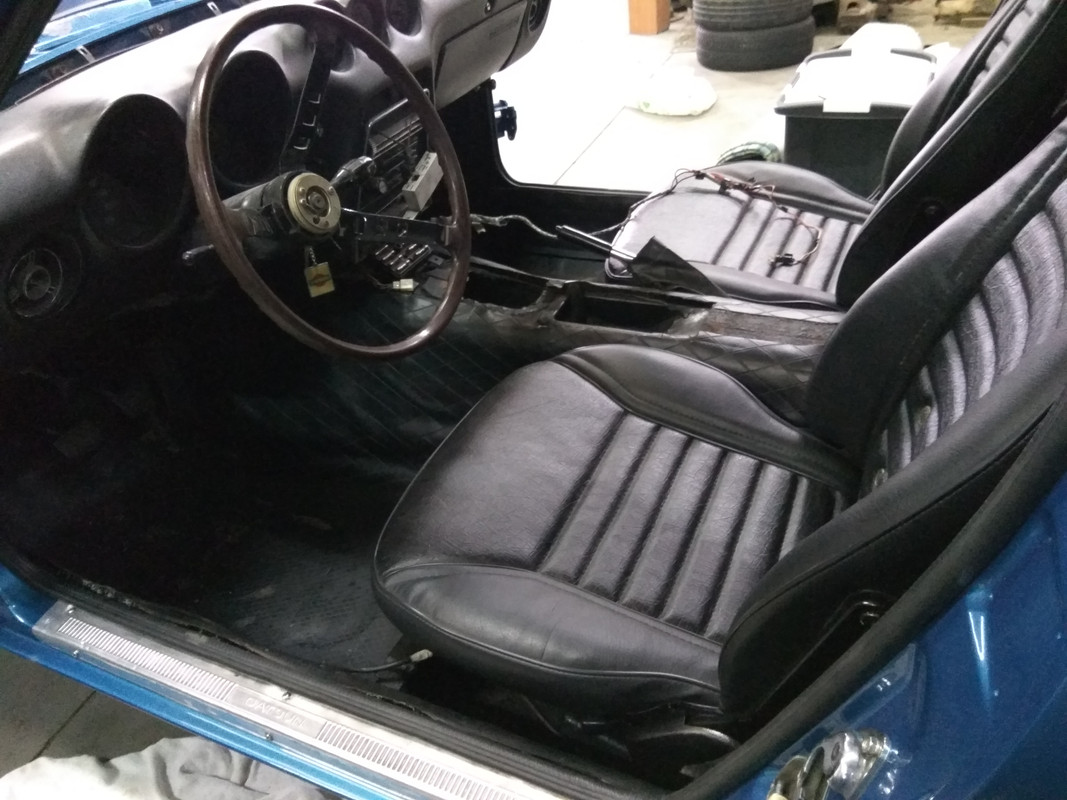
Seat in it’s place…
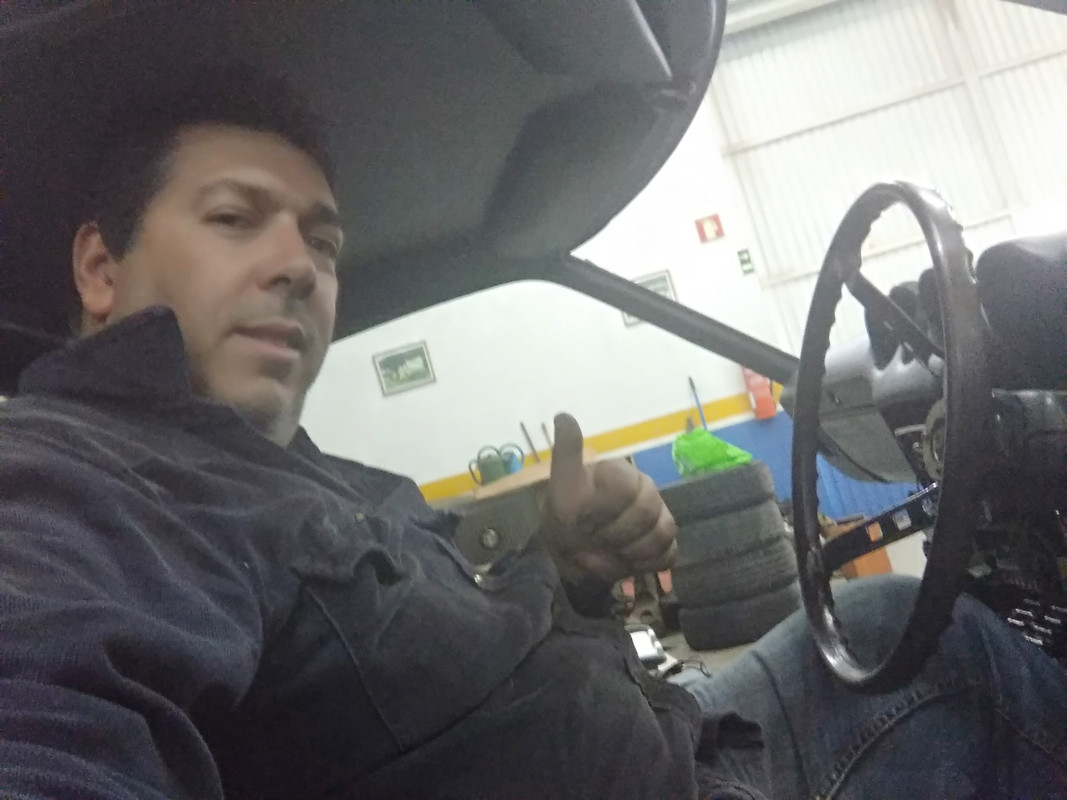
With a Zelfie I finish this report…
Hope you enjoyed all the results…next week some more news…I believe!!!
Regards
M�rio
And left side almost ready…
Rear bumper installation! What an enormous task!!! 3 hours until the end!!! Too much parts, rubbers, guards, bolts, tune and so on…luckily everything is original and fitted well!!!
All the new parts…
The result before it goes to the car!
Before the installation we cover the sides with sphincter to avoid some scratches!
Annoying car said Mr.Vitorino...
Almost!!!
And here is the result!!!
Seat in it’s place…
With a Zelfie I finish this report…
Hope you enjoyed all the results…next week some more news…I believe!!!
Regards
M�rio
02-10-2019, 03:05 PM
#34
Registered User
Thread Starter
Join Date: Jul 2017
Posts: 42
Hi again!
Another great weekend!!
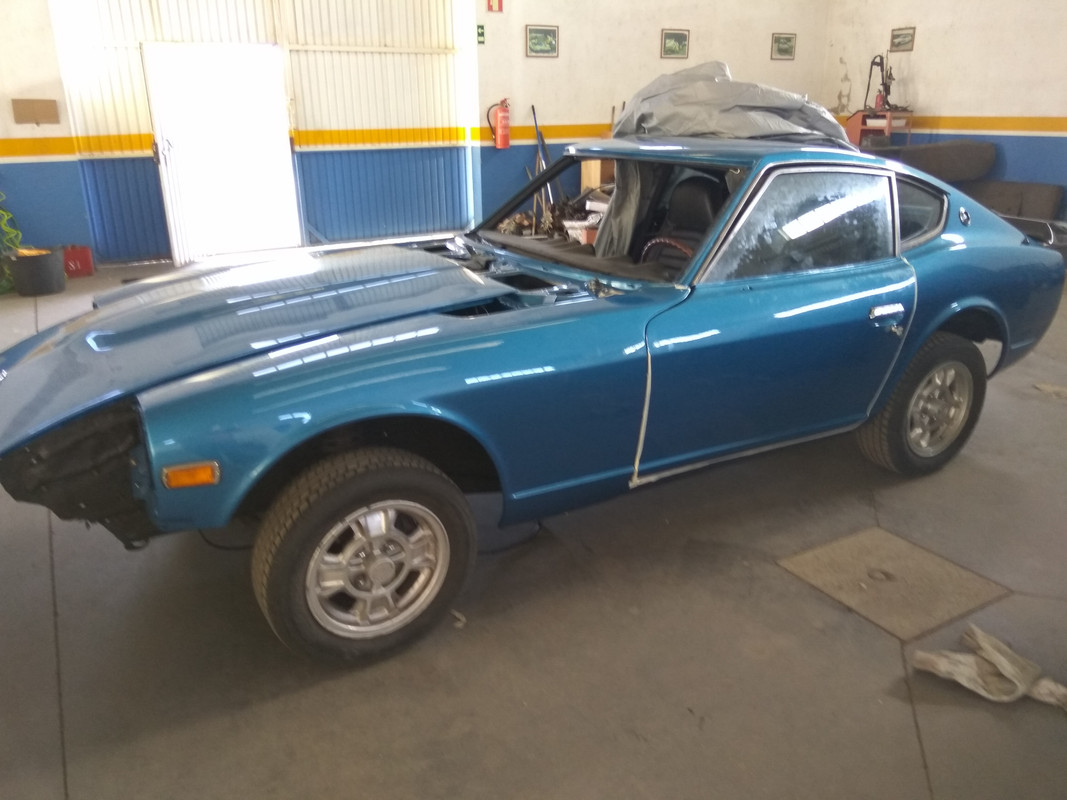
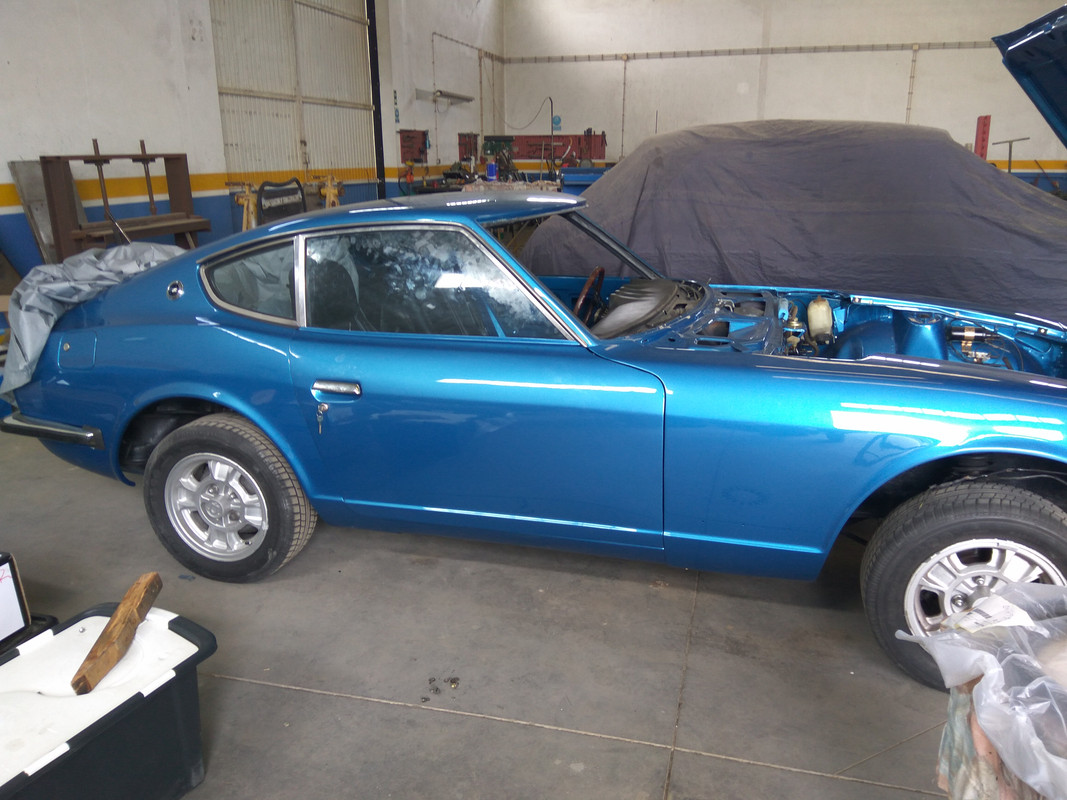
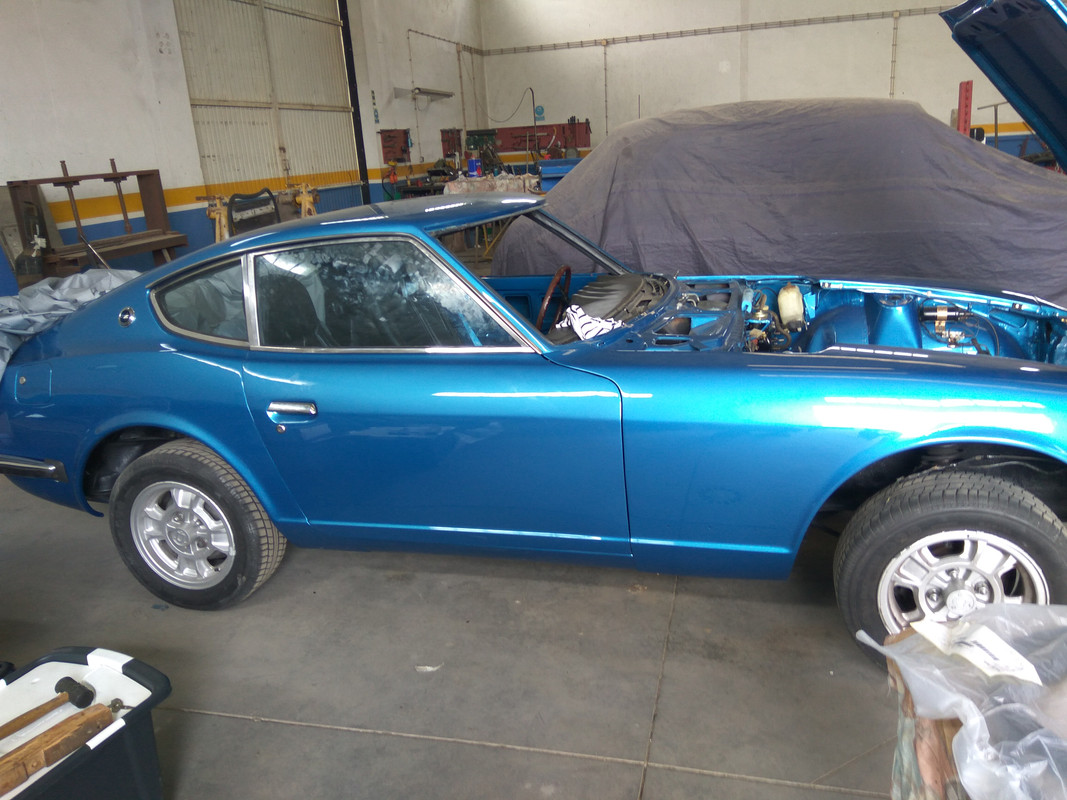
The Z is getting shape!!! And all the weekend was dedicated to it! Now it looks like a Z…I’m very happy with all the results! But it’s a hard car to work!!!Too many bolts and tunning around the parts!
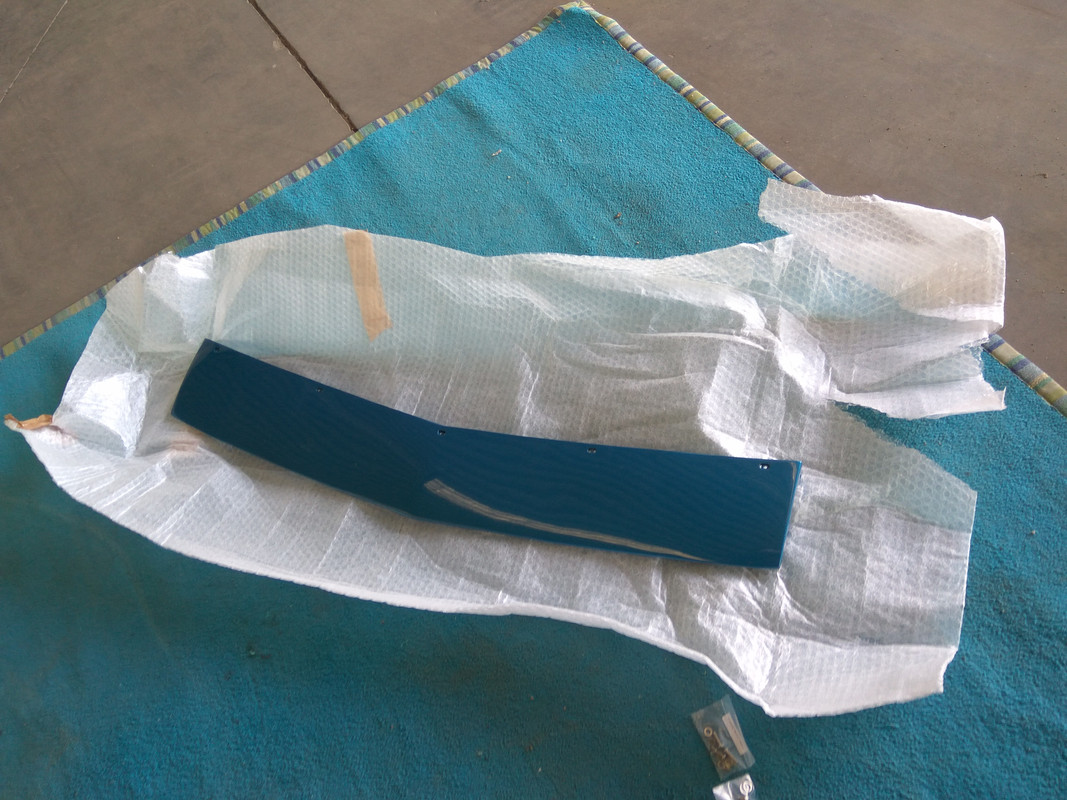
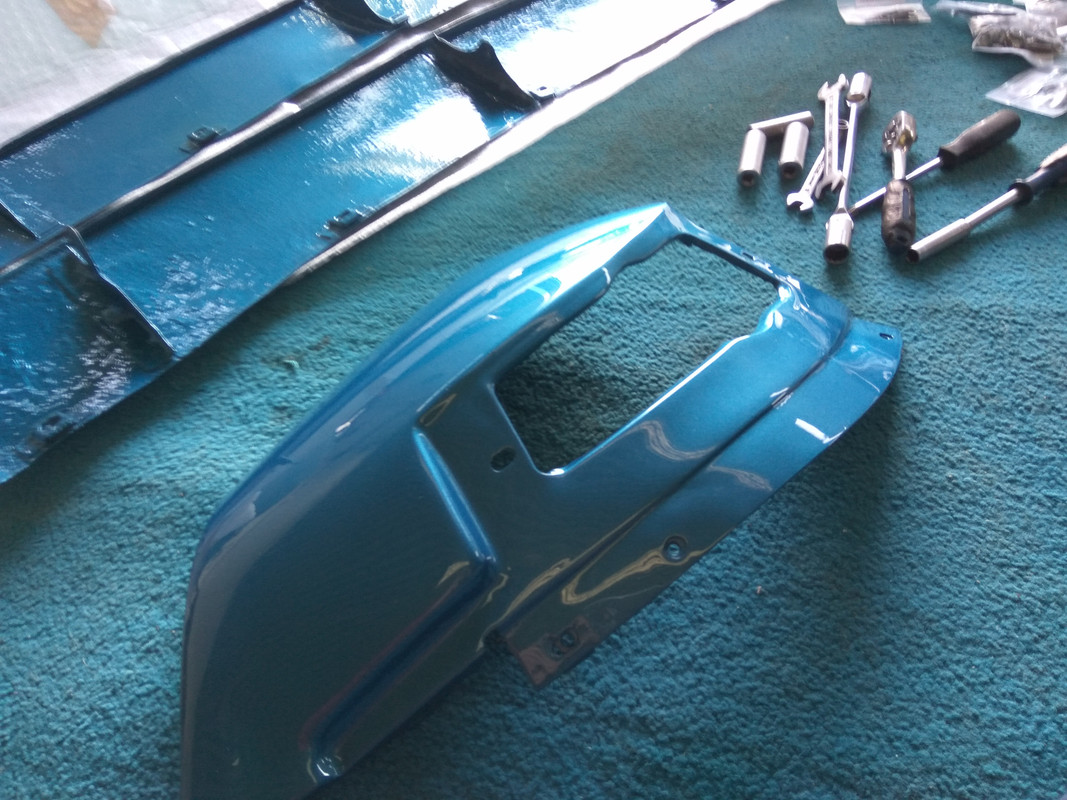
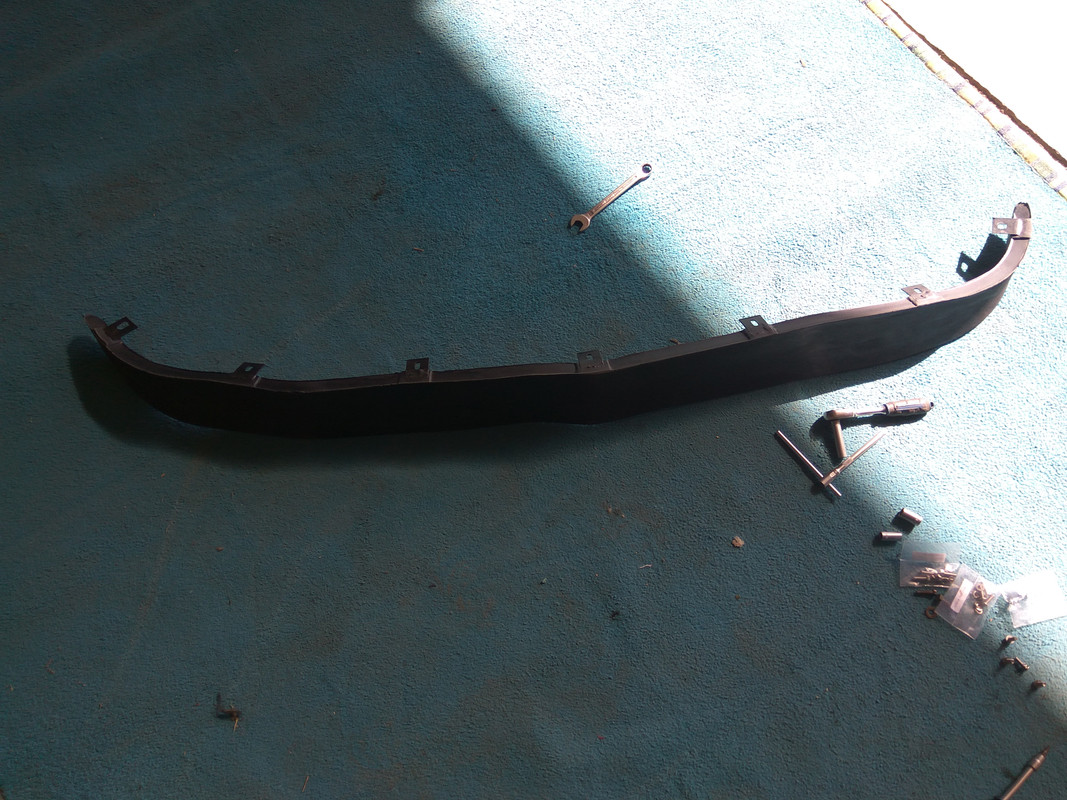
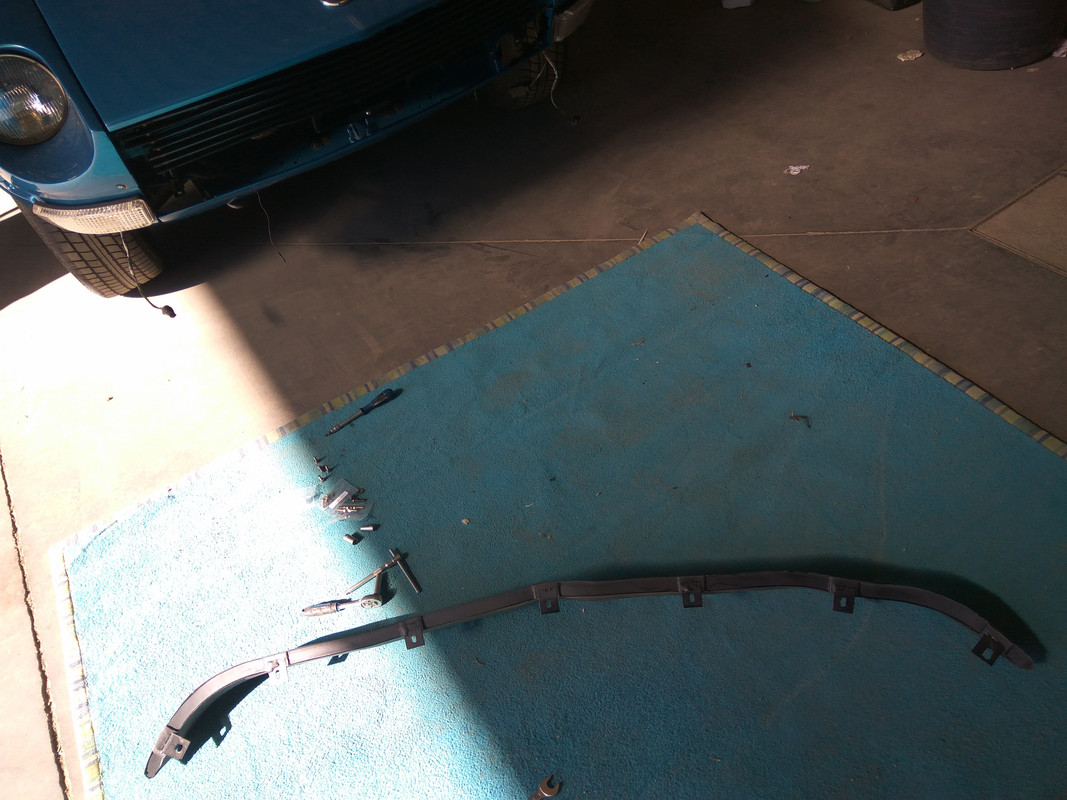
I started with the lower and center valances, then the headlights and finally the surroundings.~
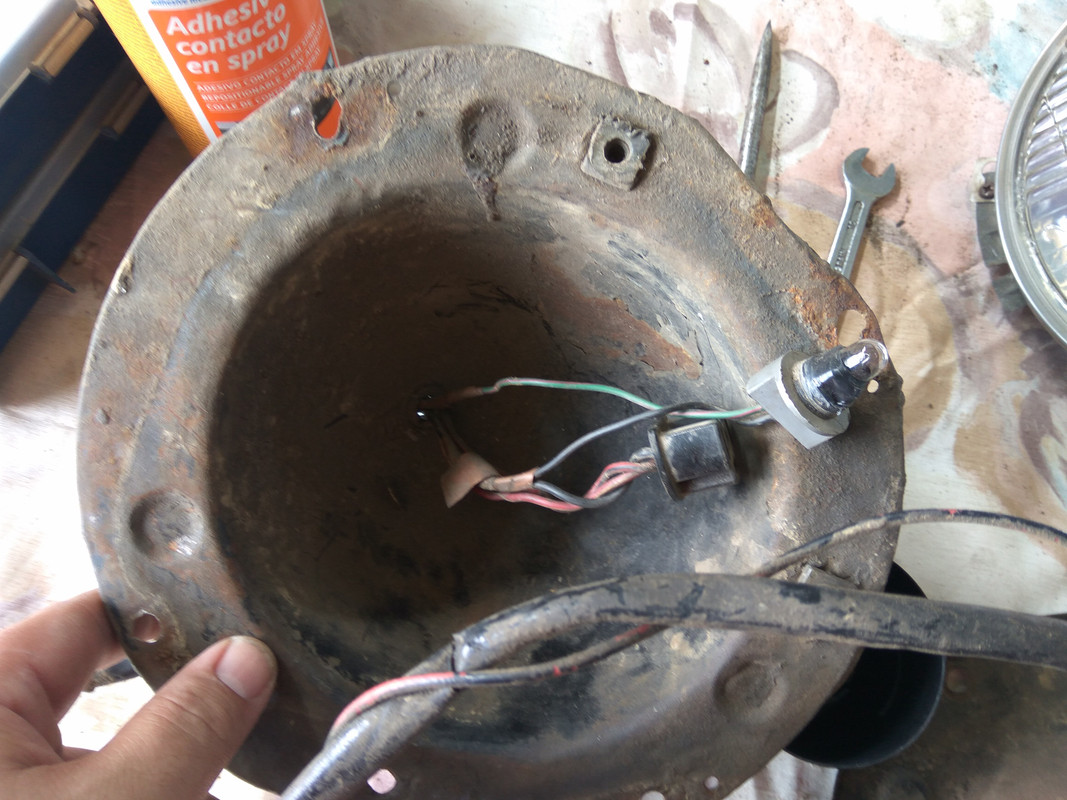
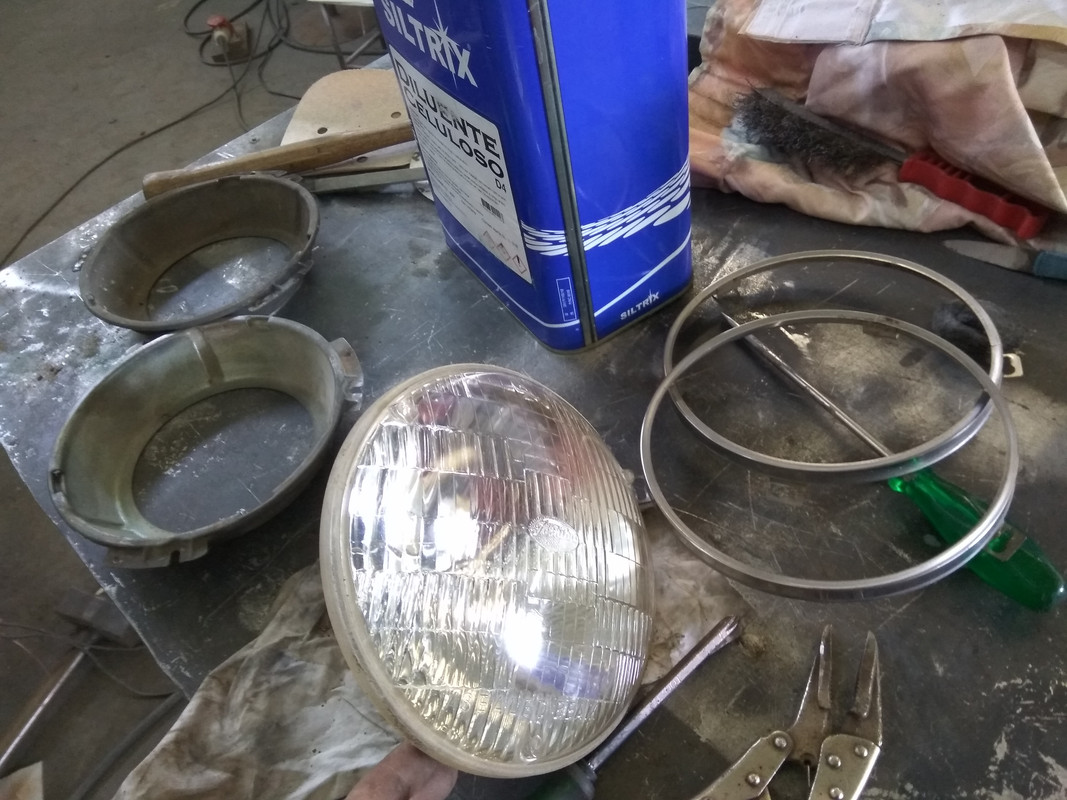
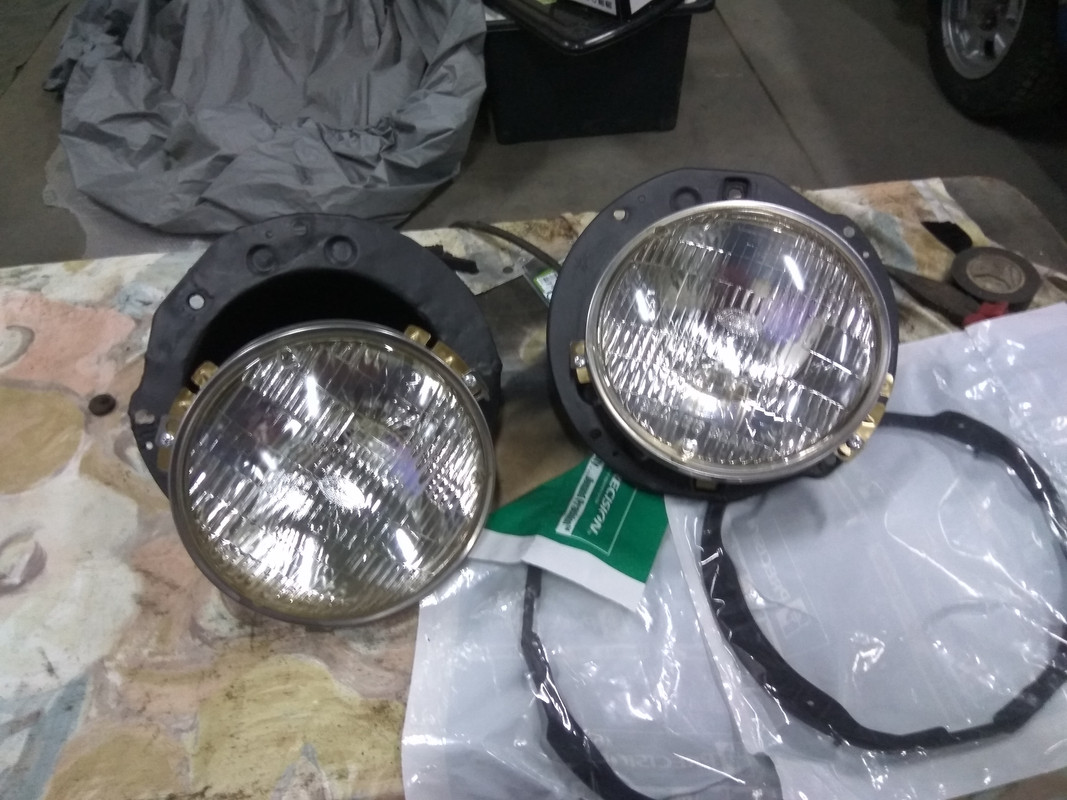
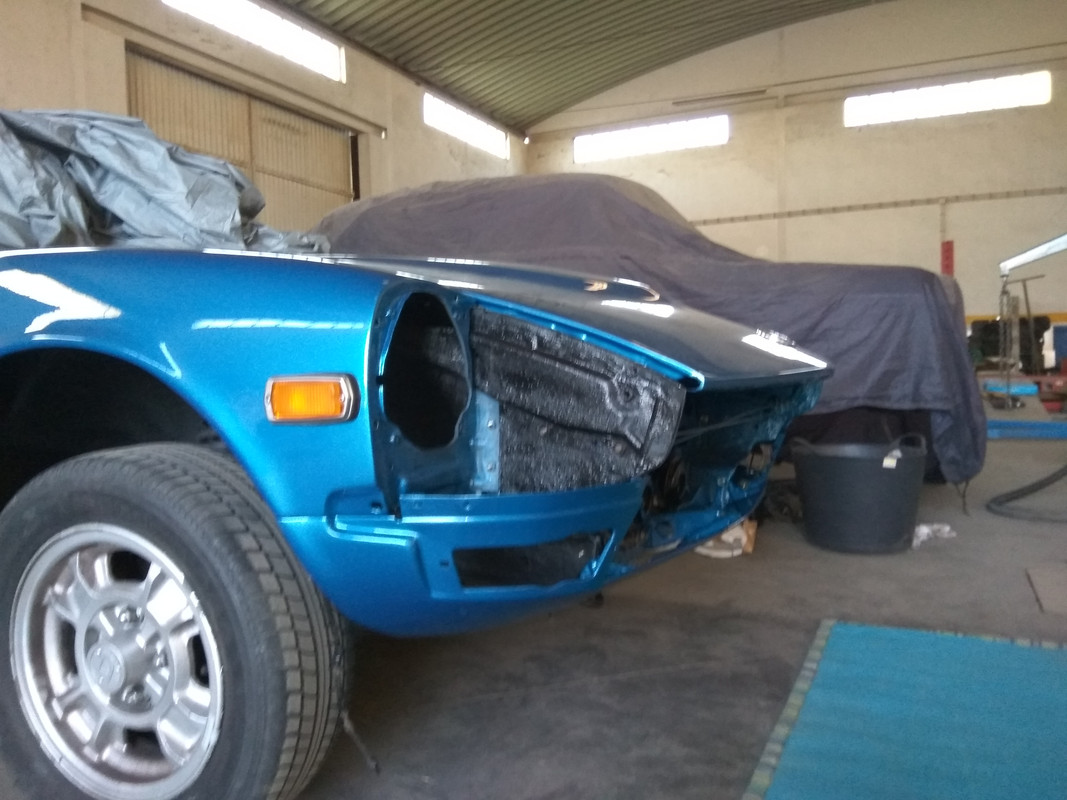
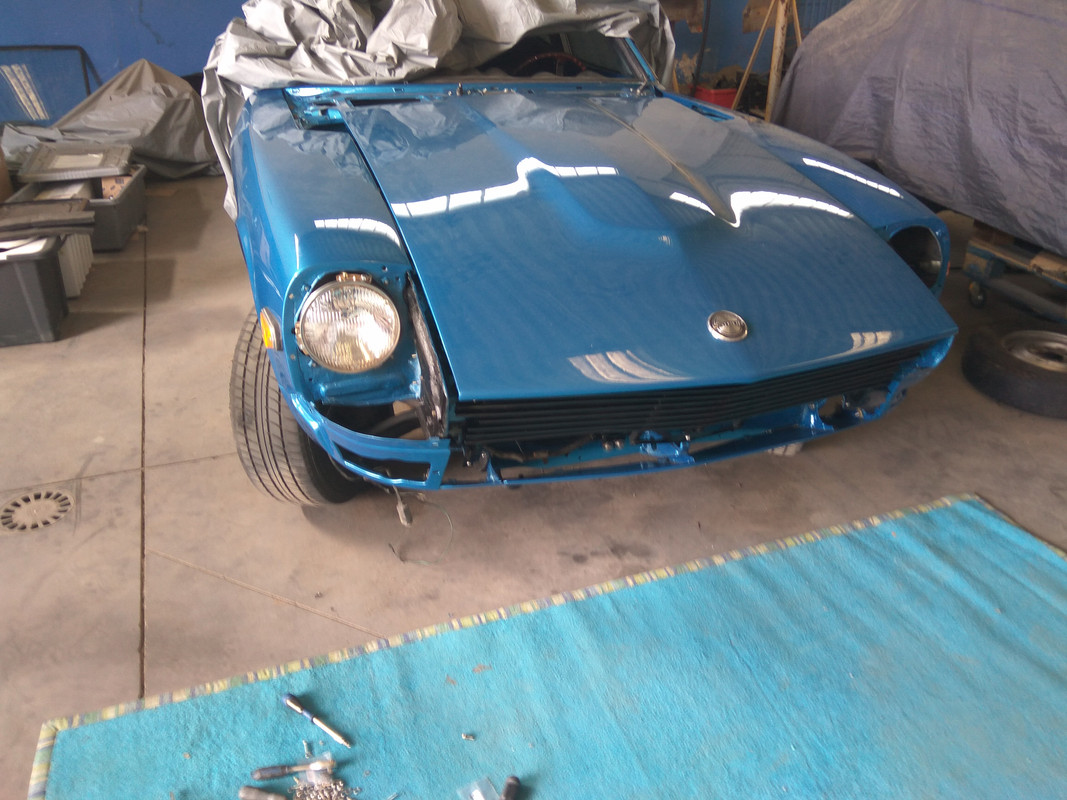
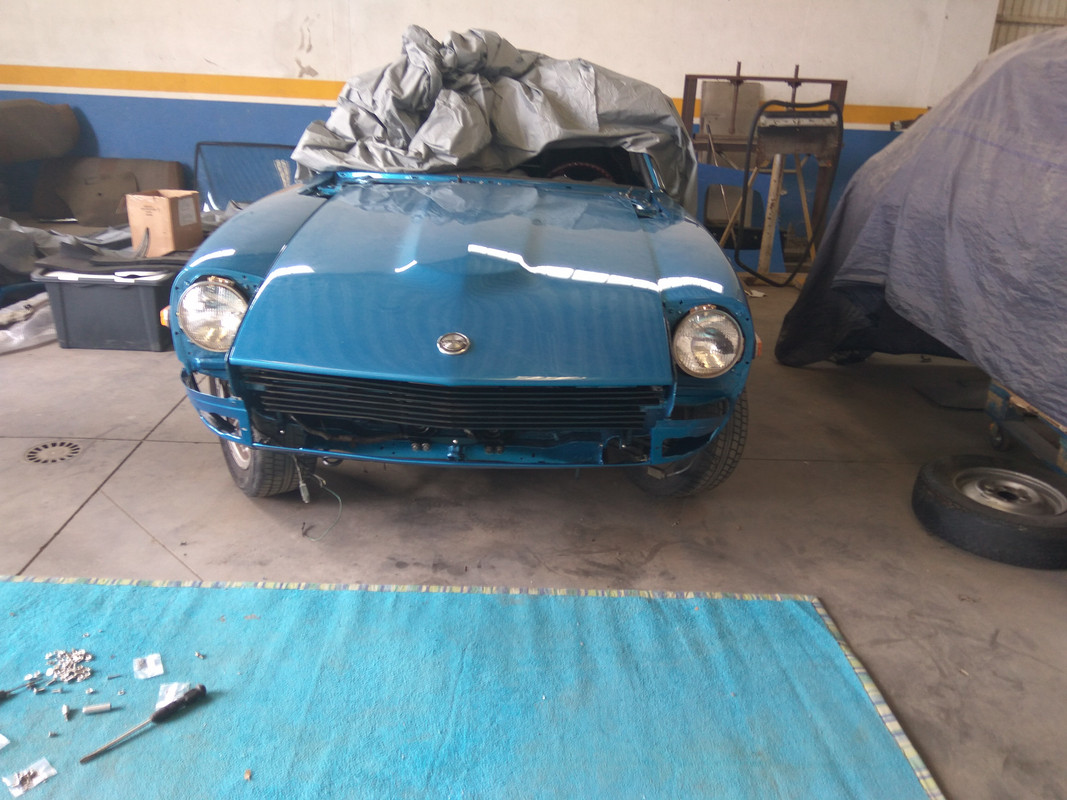
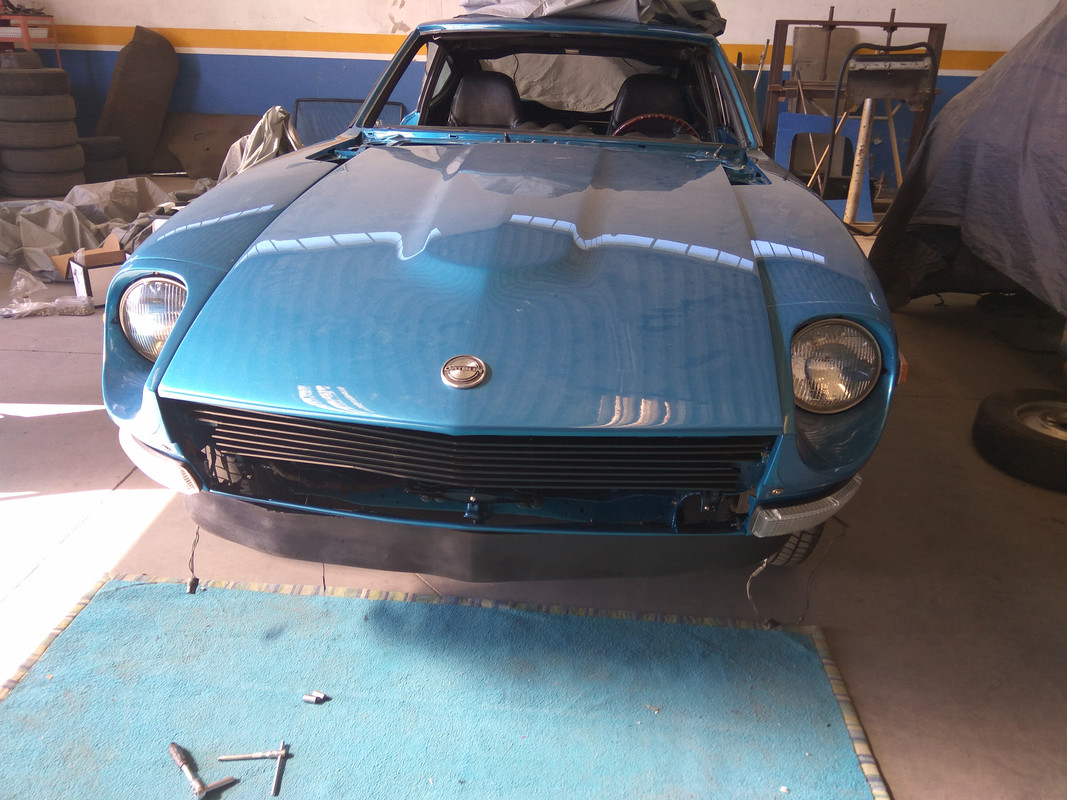
On the lights, my car is from 2/71 and had the 3rd series front, now I’m restoring it to the original shape. Now I placed the original Toshiba headlights and get rid of the wires excess, even the lamps!!! After a deep cleaning all went simple and clear! I’m waiting for the test…
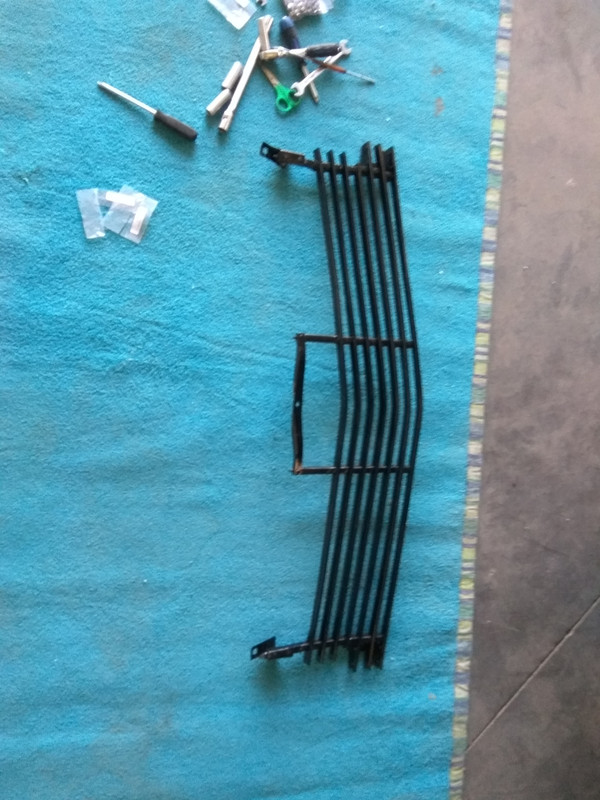
About the grill, I’ll keep the original one, but I don’t know if I will put the 432 instead! But only for the aesthetic reason!
Let’s see the photos….
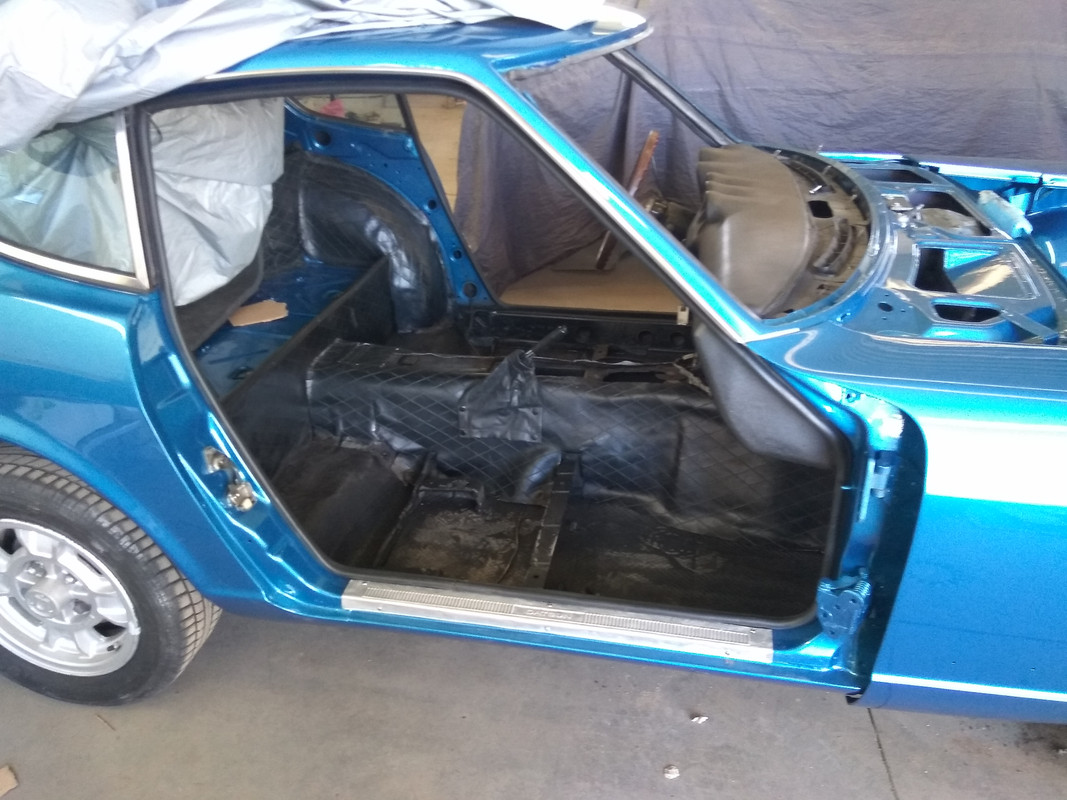
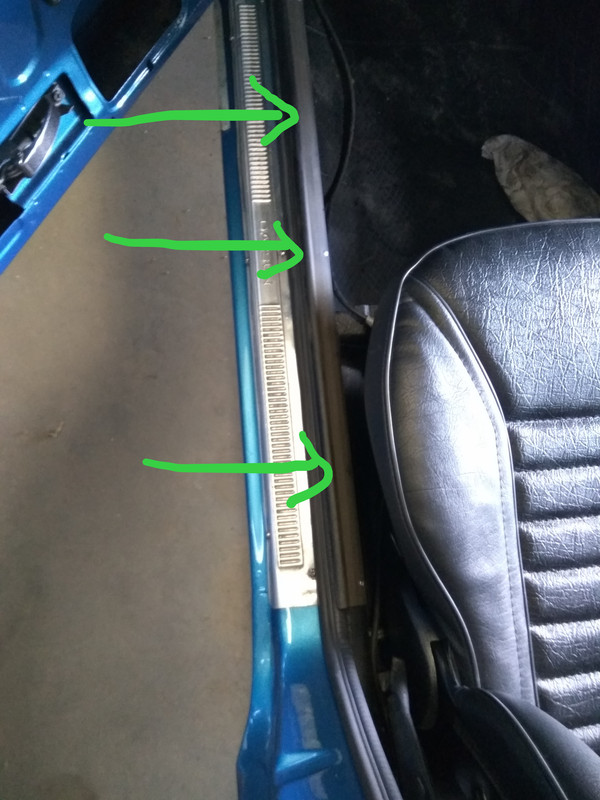
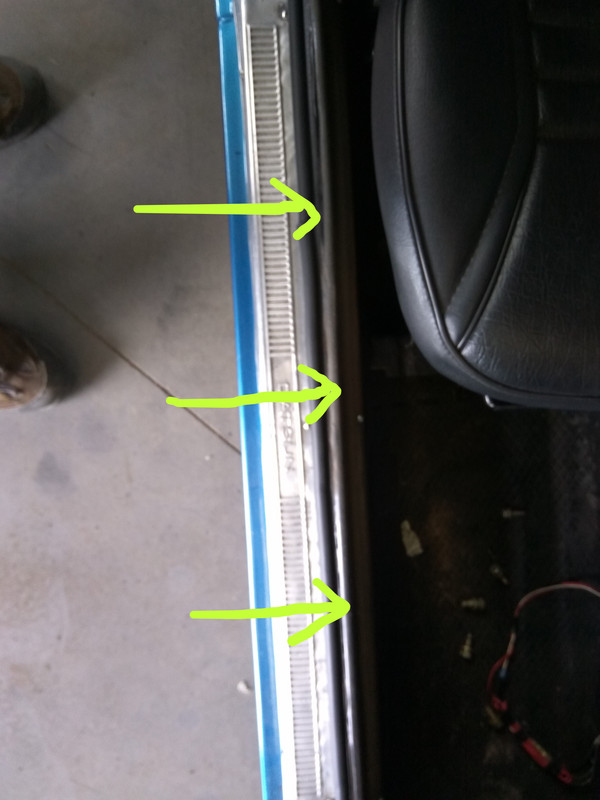
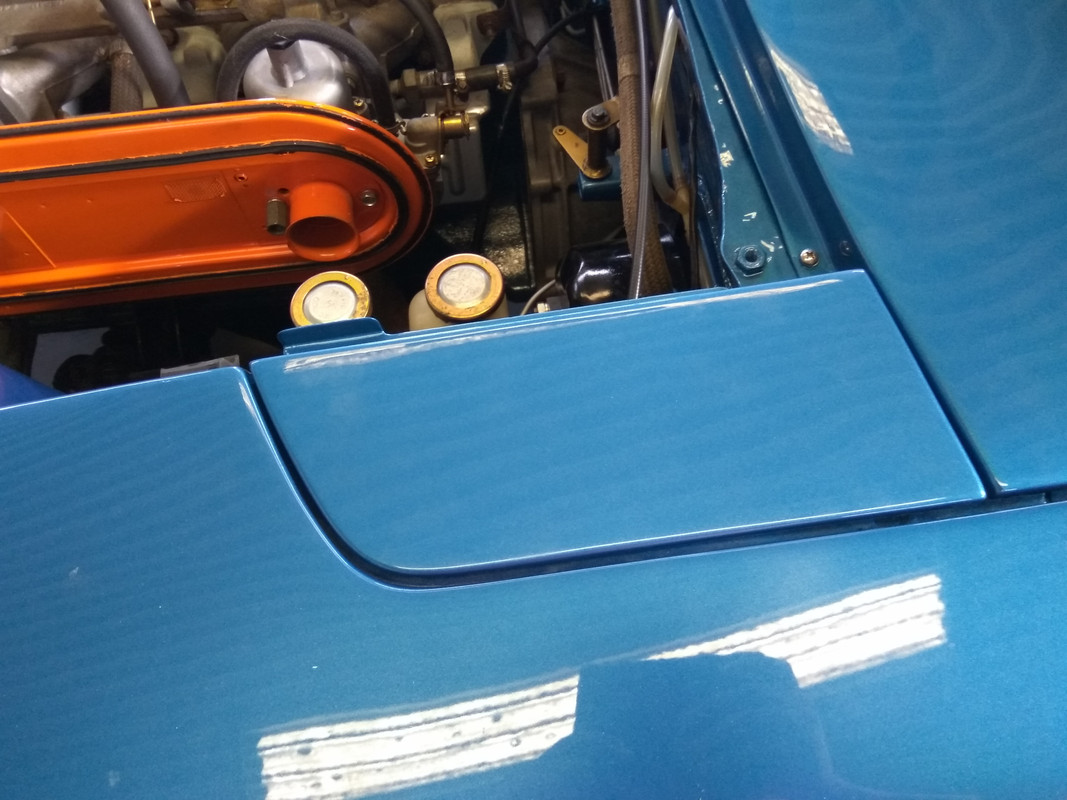
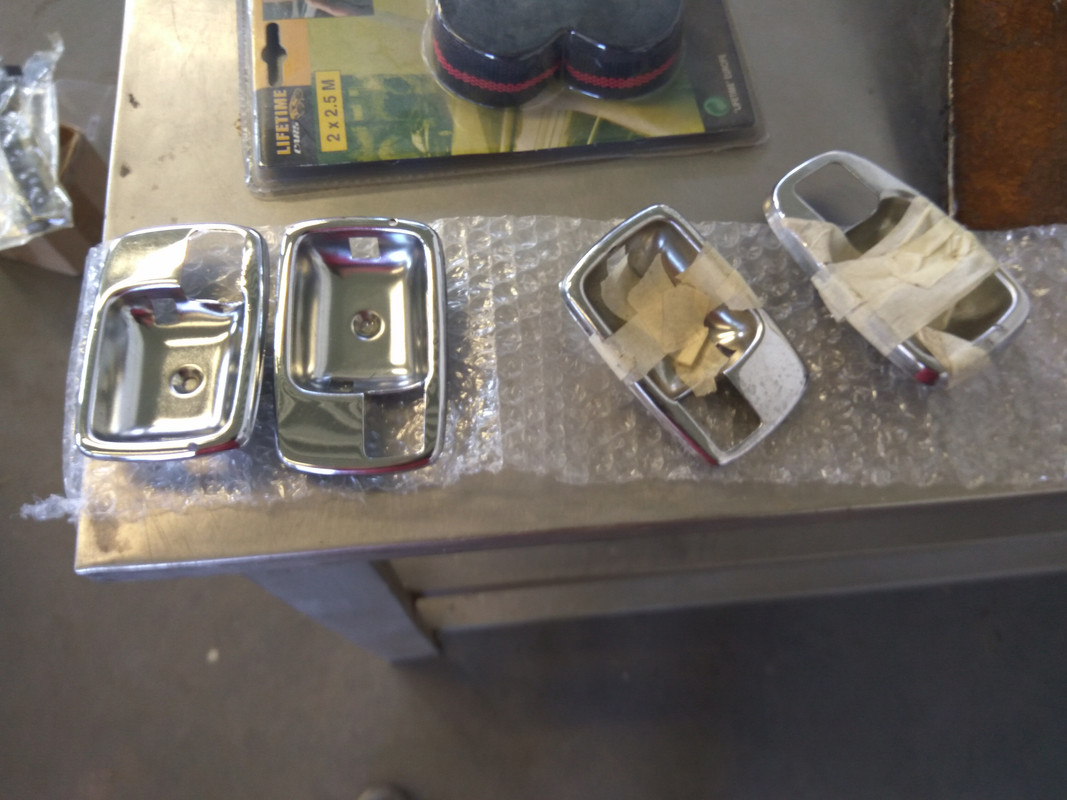
The sill plates were on the shop and I decides to install them! These ones are original, second hand, because the new ones from Nissan are just aluminium made, and these ones are covered with vinil with the same pattern as the seats and interior plastic covers!
The headlghts…before…
[img]


In the end….
Valances…
Installed…
Another great weekend!!
The Z is getting shape!!! And all the weekend was dedicated to it! Now it looks like a Z…I’m very happy with all the results! But it’s a hard car to work!!!Too many bolts and tunning around the parts!
I started with the lower and center valances, then the headlights and finally the surroundings.~
On the lights, my car is from 2/71 and had the 3rd series front, now I’m restoring it to the original shape. Now I placed the original Toshiba headlights and get rid of the wires excess, even the lamps!!! After a deep cleaning all went simple and clear! I’m waiting for the test…
About the grill, I’ll keep the original one, but I don’t know if I will put the 432 instead! But only for the aesthetic reason!
Let’s see the photos….
The sill plates were on the shop and I decides to install them! These ones are original, second hand, because the new ones from Nissan are just aluminium made, and these ones are covered with vinil with the same pattern as the seats and interior plastic covers!
The headlghts…before…
[img]
In the end….
Valances…
Installed…
02-10-2019, 03:05 PM
#35
Registered User
Thread Starter
Join Date: Jul 2017
Posts: 42
The grill…
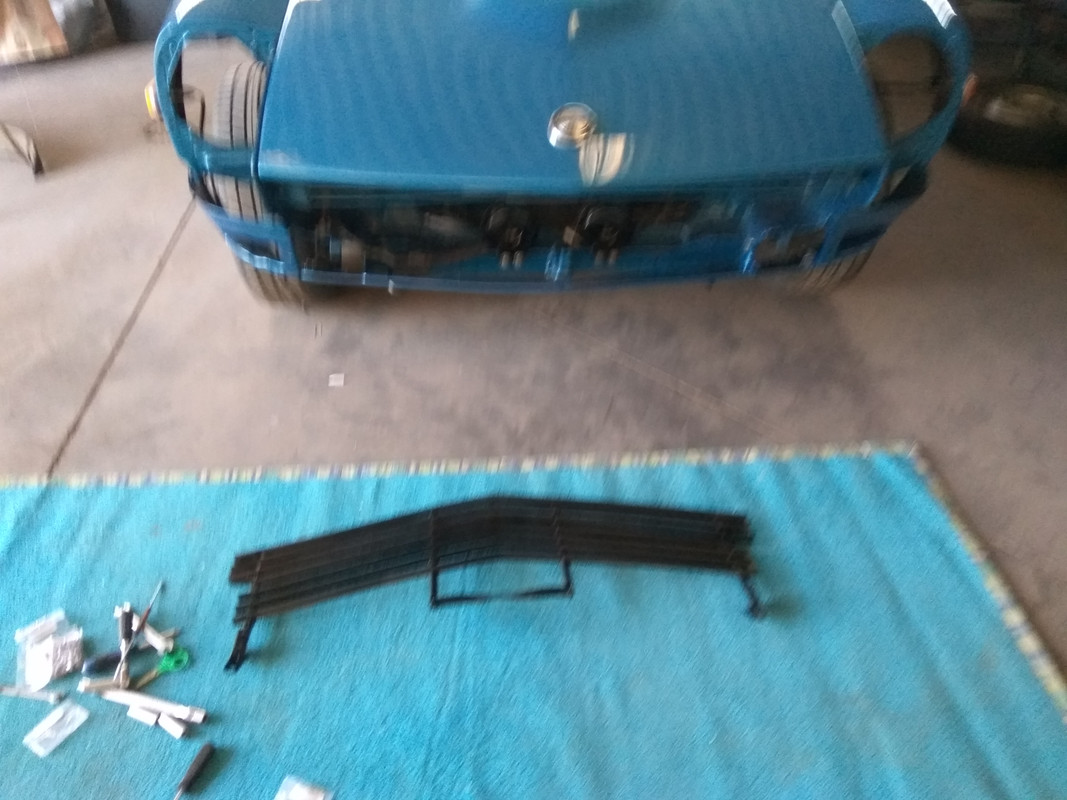
Installed….
The headlights...and the gift…
Then work and pacience…ehehehehhe

In the end, only the right side of the car needs a hand…only tunning, but it’s a work for Mr.Vitorino…not me!!!
Hope you are enjoying so far!!!
Regards,
M�rio
Installed….
The headlights...and the gift…
Then work and pacience…ehehehehhe
In the end, only the right side of the car needs a hand…only tunning, but it’s a work for Mr.Vitorino…not me!!!
Hope you are enjoying so far!!!
Regards,
M�rio
03-05-2019, 05:50 AM
#36
Registered User
Thread Starter
Join Date: Jul 2017
Posts: 42
Hi folks,
Here are some up-grades on the Z.
I’m getting tired…the Z has so many detailZ…and I need to ride the car…I know when the resto will be concluded the effort will be forgotten but until then…
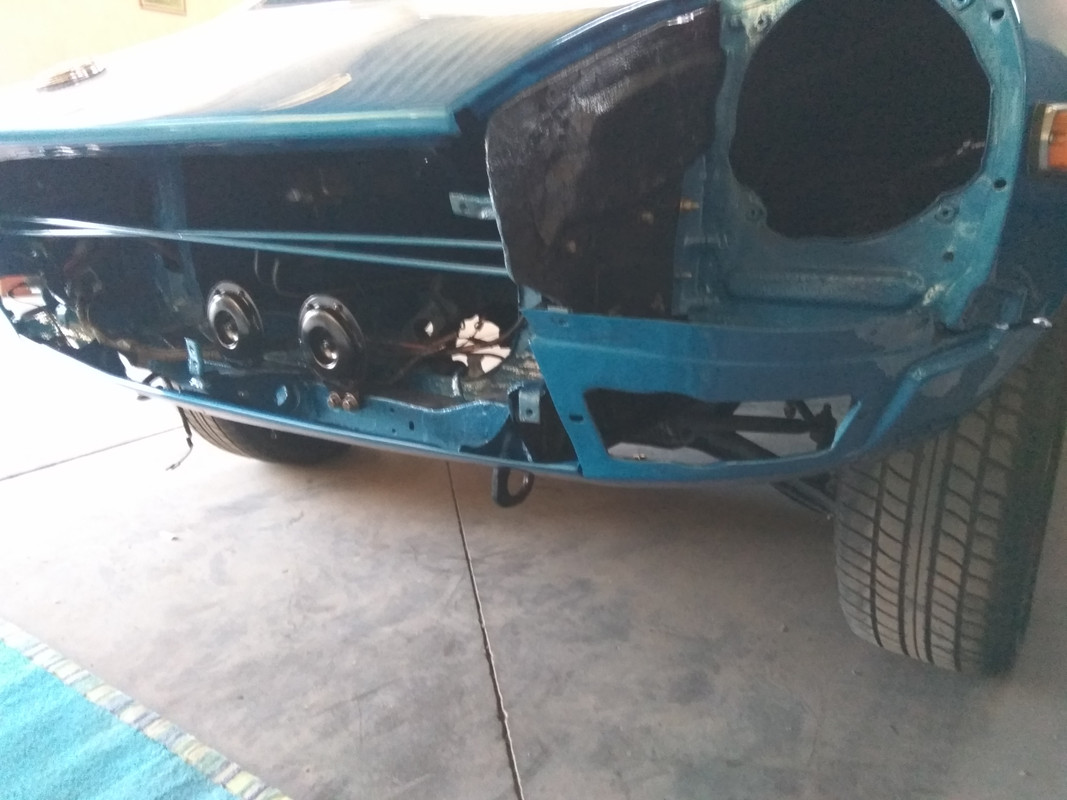
On the past 2 weeks we have done some body work and assemble mostly structures on doors, bumpers and small details.
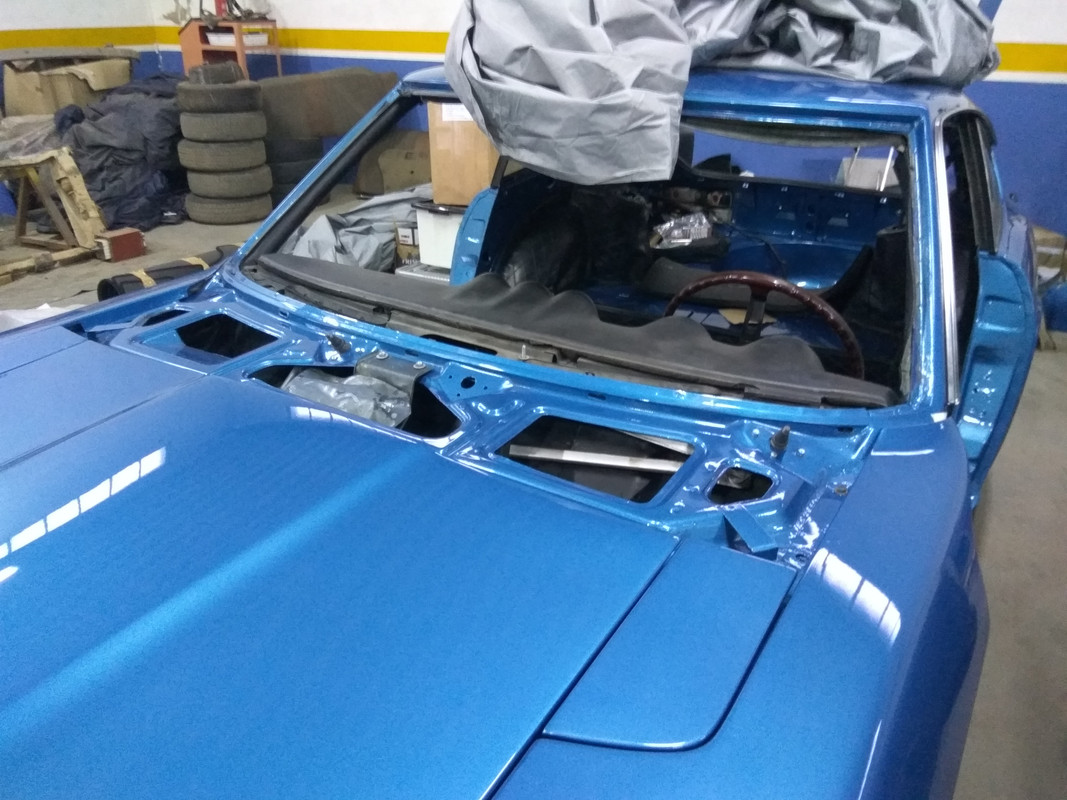
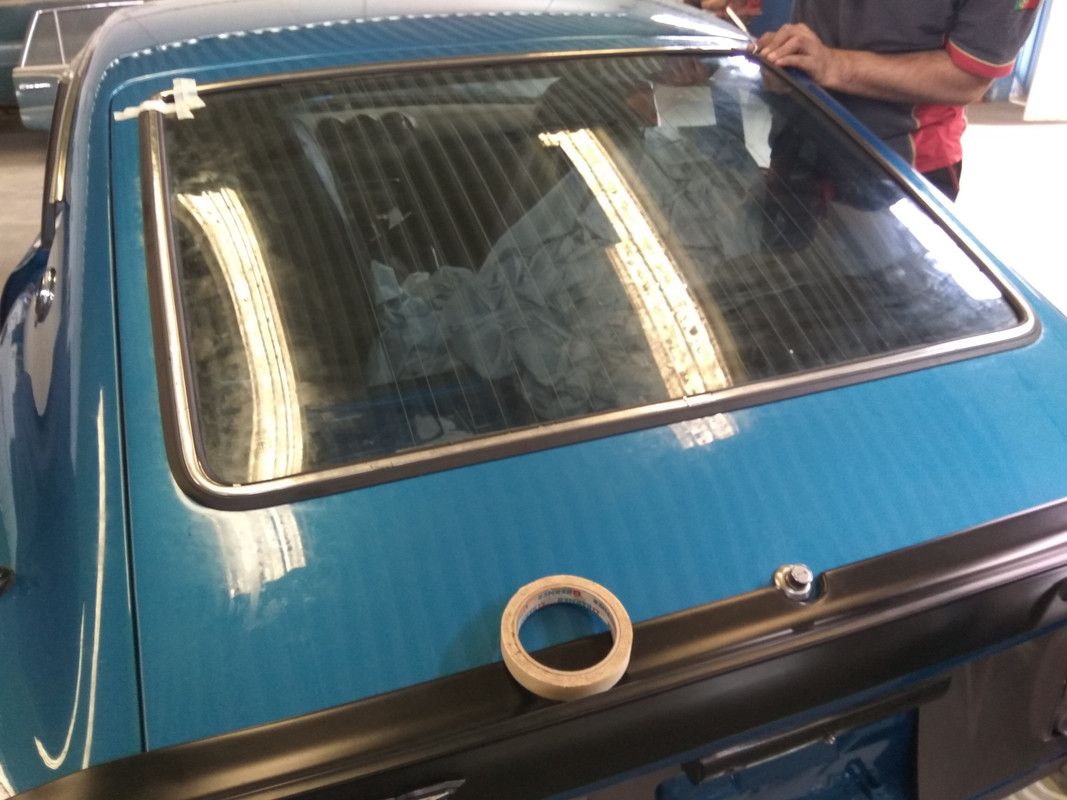
We had an issue with the front windshield, perhaps I’ve to look for a new one, and on the rear hatch glass in order to avoid problems, I bought a new rubber from Nissan.
The tunning on panels is very hard to do, on my B110 was simple and easy, but not this one…even the locks aren’t closing totally, I don’t know what I’m doing wrong…well…all will be solved…I think!!!
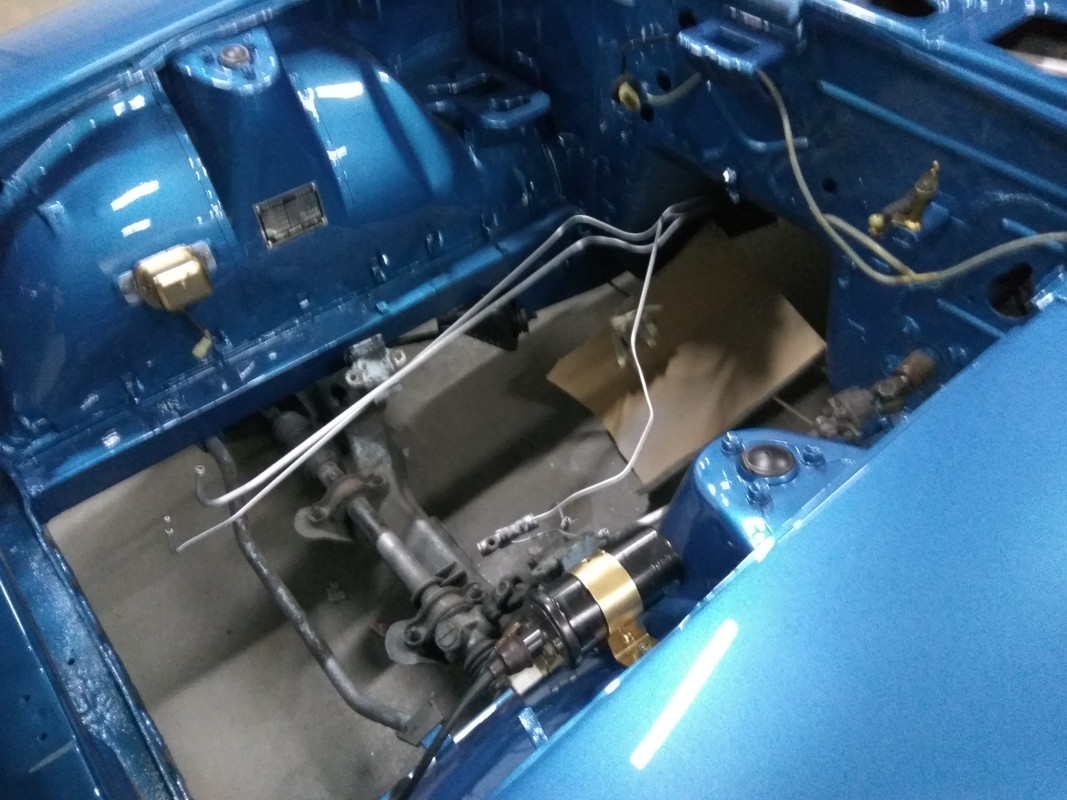
Tomorrow the engine and gear box will be mounted and hope that on Saturday will be running…let’s see. To finish some trouble, the electric system has to be redone too…
Let’s see the upgrades…
Assembling the bumpers…
Side rubbers.
Schuteons and rubbers.
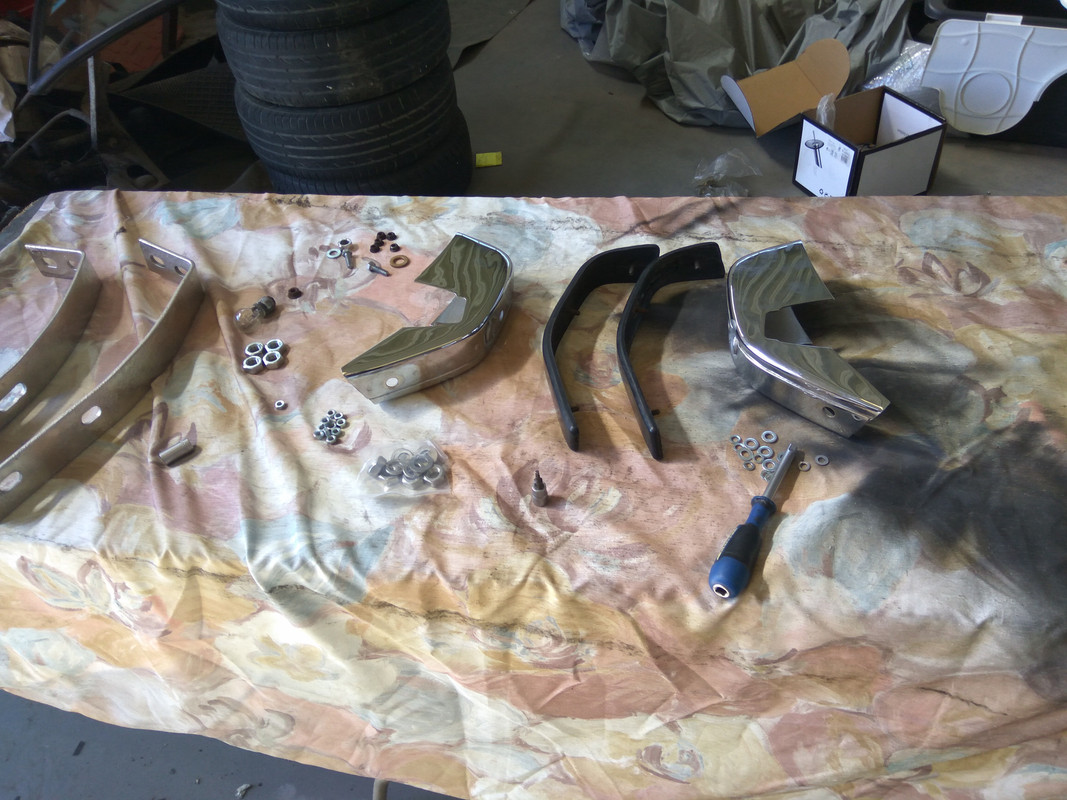
Ready to fit…
On the car.
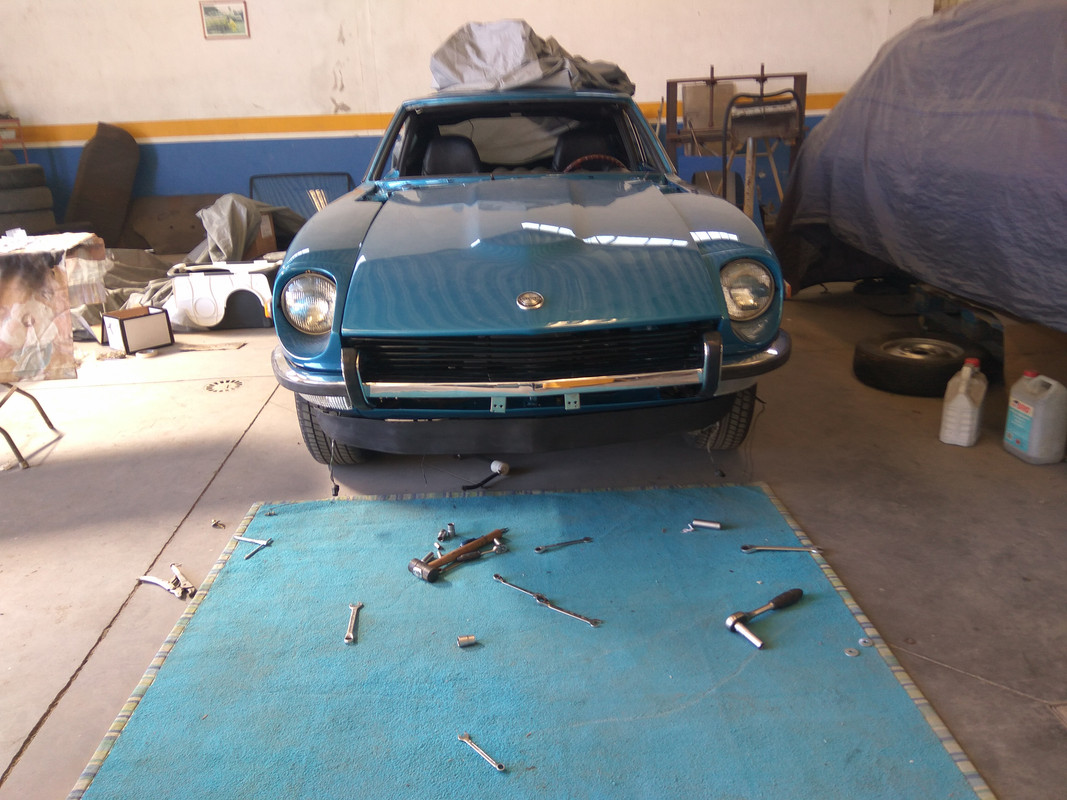
Before we had put in place the front lip.
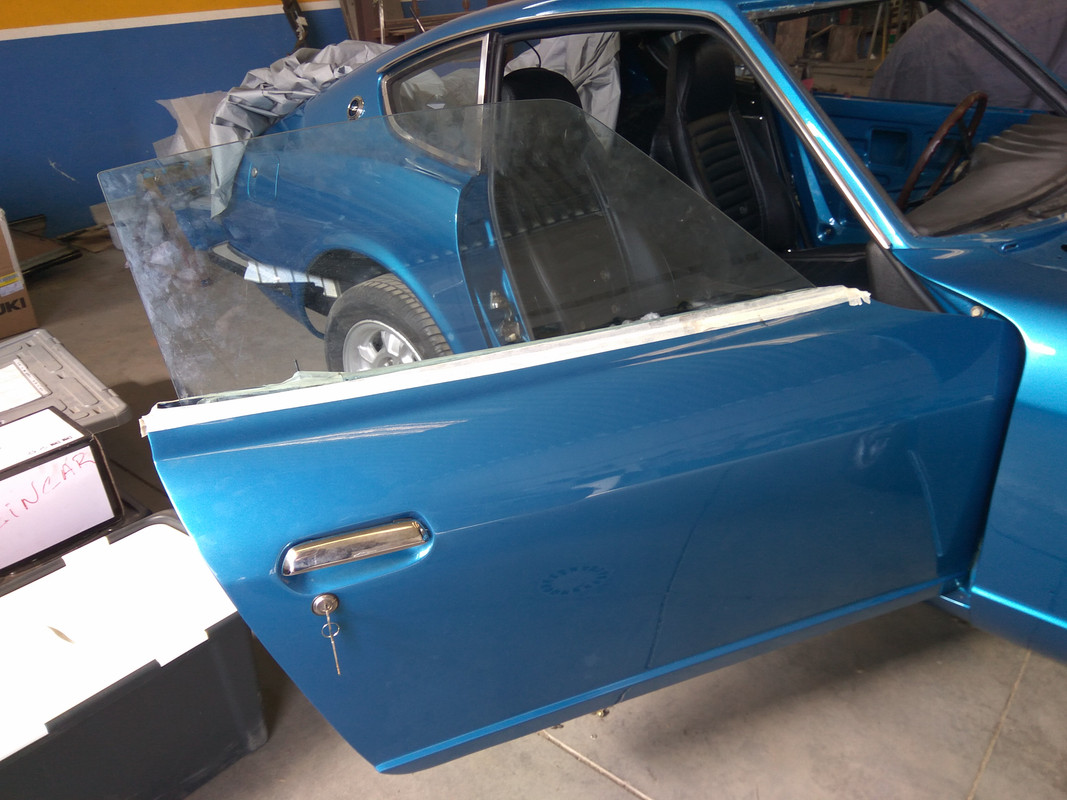
Now the right door….

New handles…
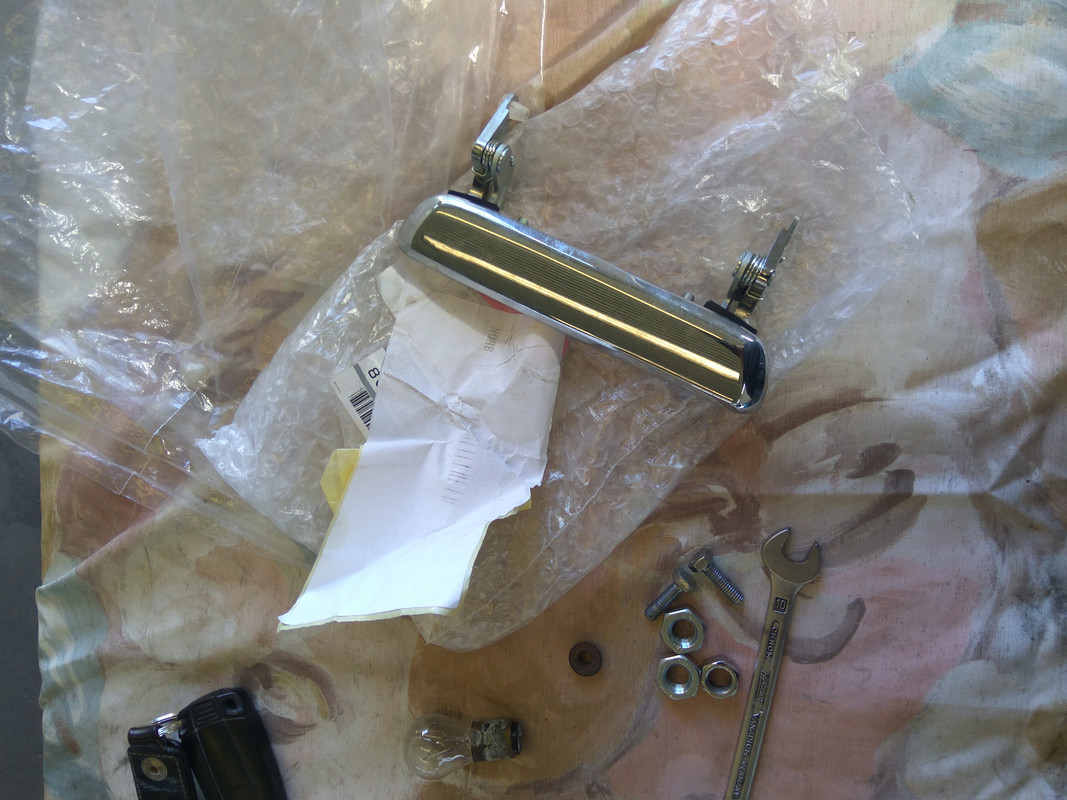
Locks and handles…

Before we placed the window some care was took no the top of the doors…


Here are some up-grades on the Z.
I’m getting tired…the Z has so many detailZ…and I need to ride the car…I know when the resto will be concluded the effort will be forgotten but until then…
On the past 2 weeks we have done some body work and assemble mostly structures on doors, bumpers and small details.
We had an issue with the front windshield, perhaps I’ve to look for a new one, and on the rear hatch glass in order to avoid problems, I bought a new rubber from Nissan.
The tunning on panels is very hard to do, on my B110 was simple and easy, but not this one…even the locks aren’t closing totally, I don’t know what I’m doing wrong…well…all will be solved…I think!!!
Tomorrow the engine and gear box will be mounted and hope that on Saturday will be running…let’s see. To finish some trouble, the electric system has to be redone too…
Let’s see the upgrades…
Assembling the bumpers…
Side rubbers.
Schuteons and rubbers.
Ready to fit…
On the car.
Before we had put in place the front lip.
Now the right door….
New handles…
Locks and handles…
Before we placed the window some care was took no the top of the doors…
03-05-2019, 05:50 AM
#37
Registered User
Thread Starter
Join Date: Jul 2017
Posts: 42
Almost…
And completed with trims…is missing the interior. Maybe next weekend!
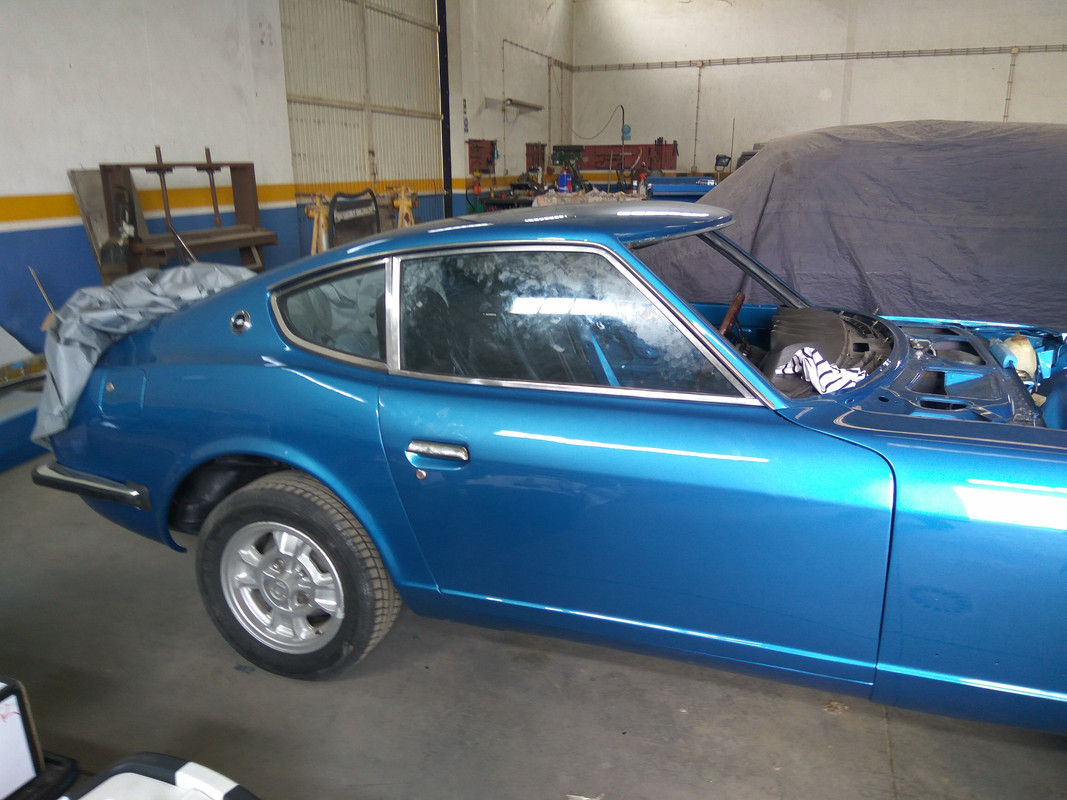
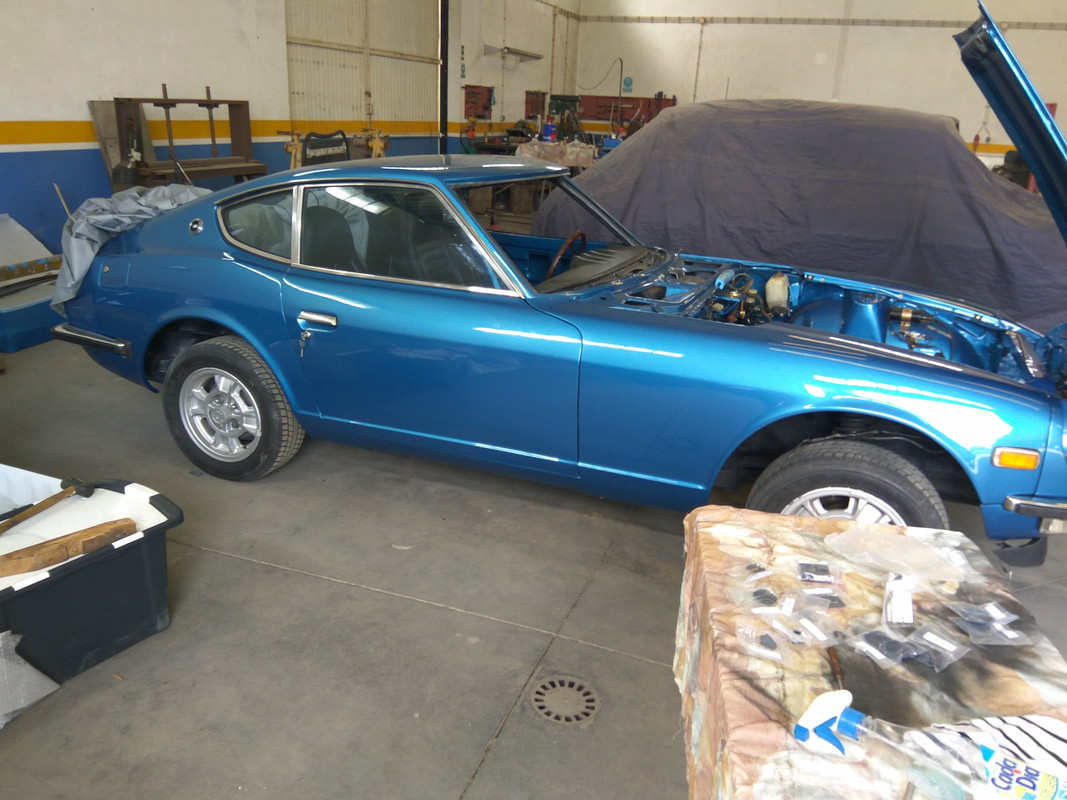
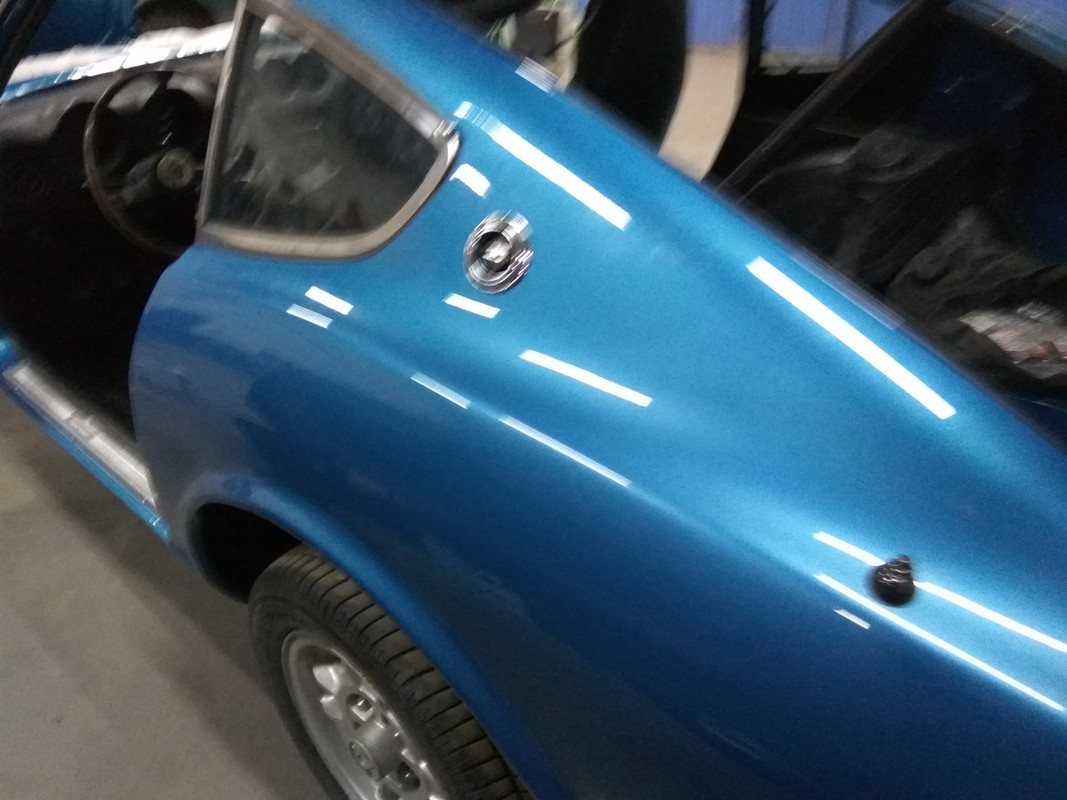
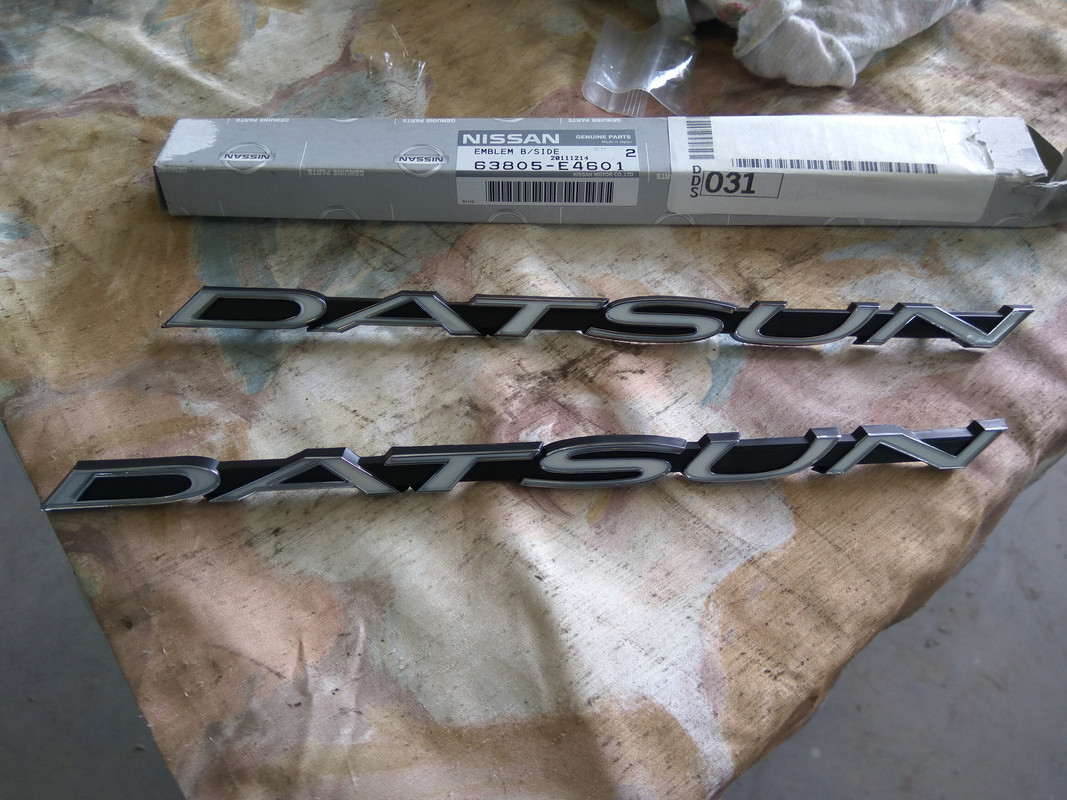
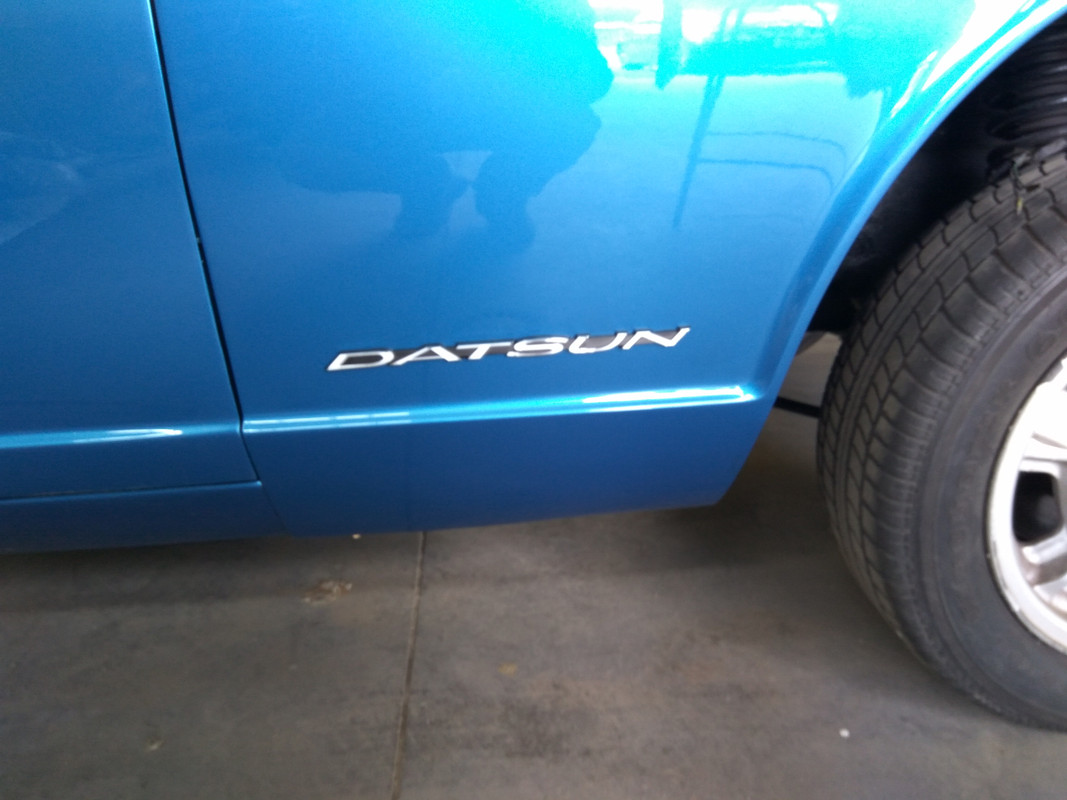
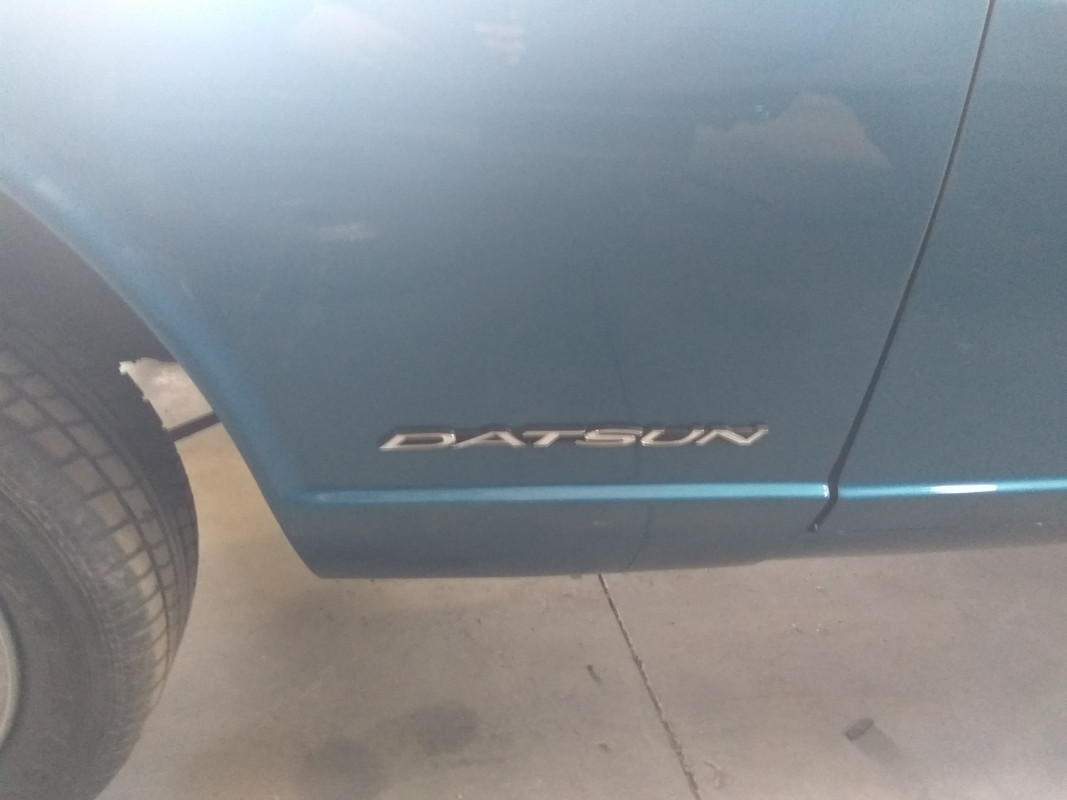
New Datsun symbols on the guards.
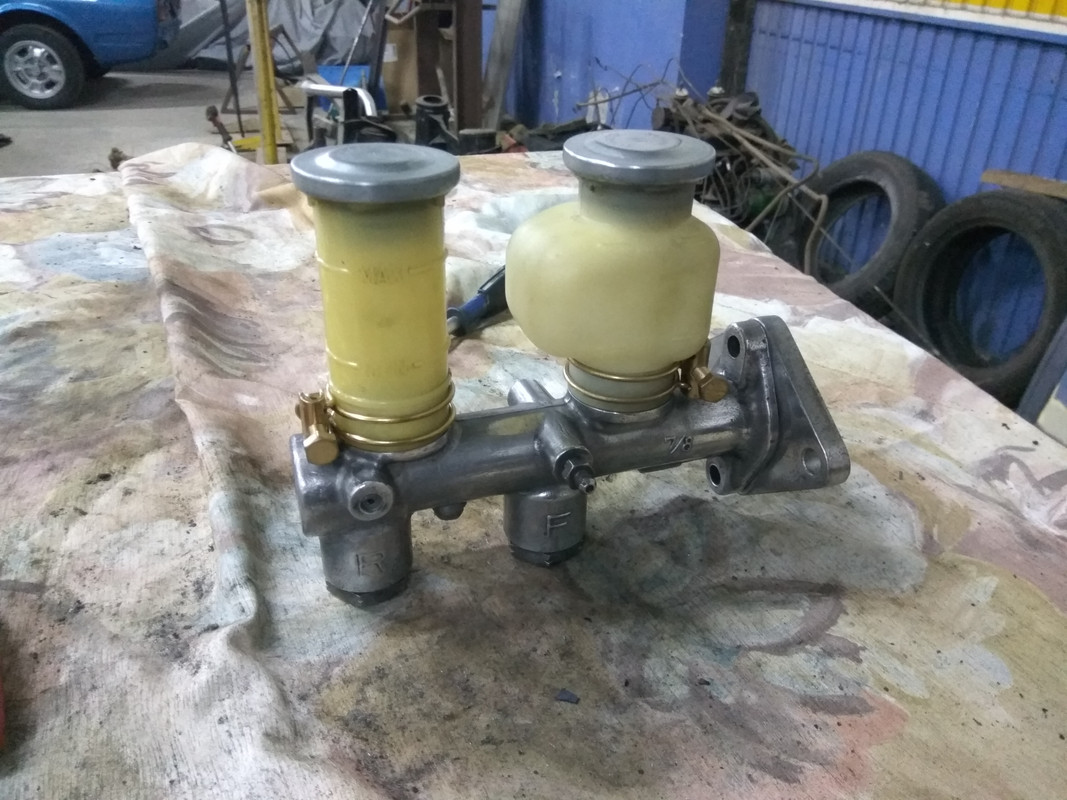
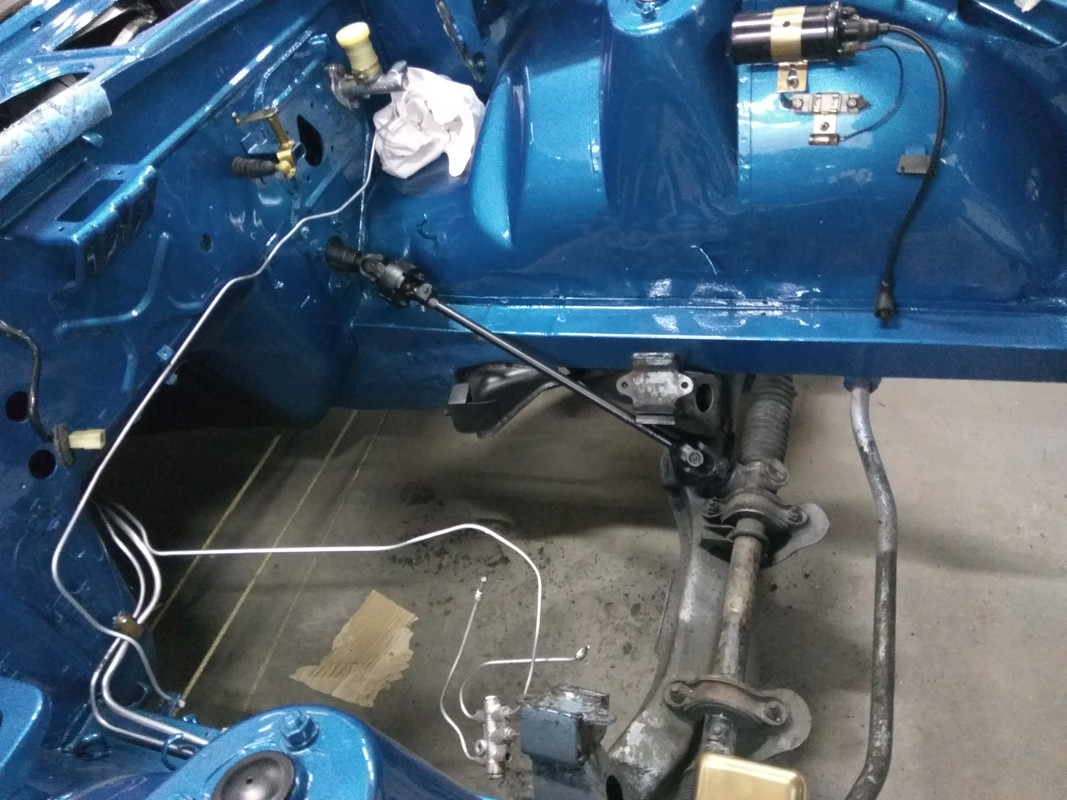
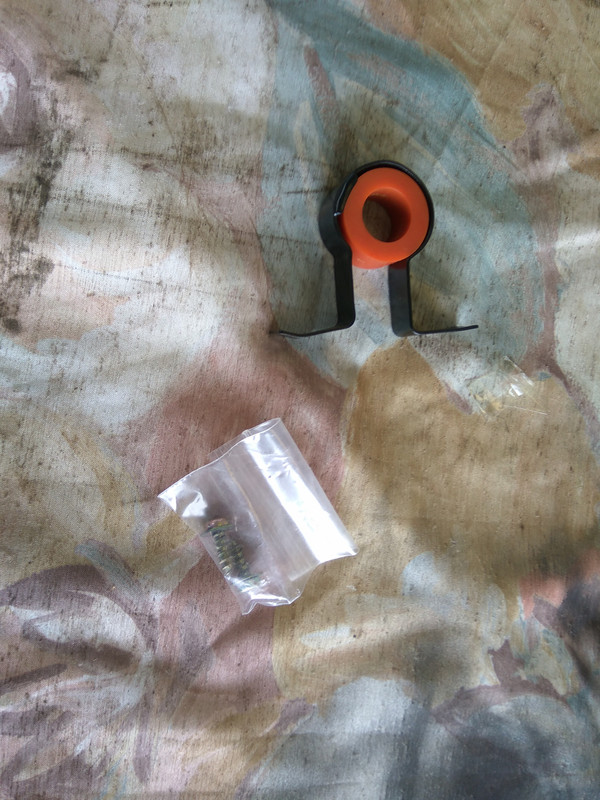
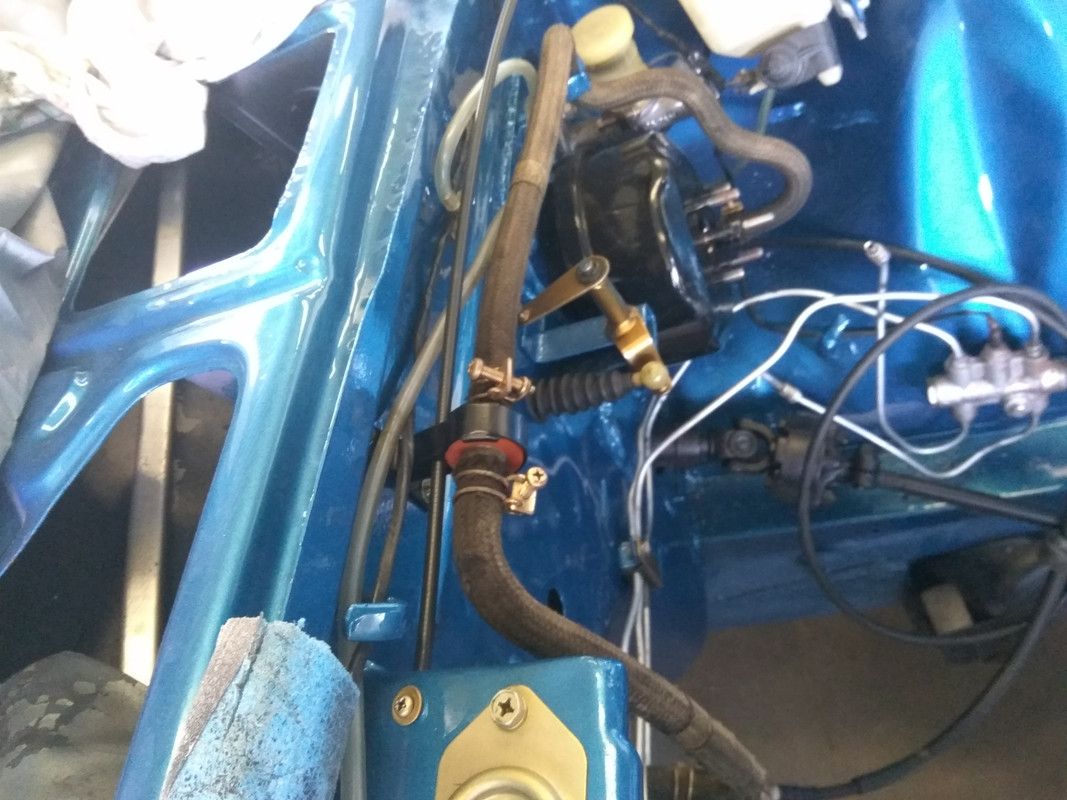
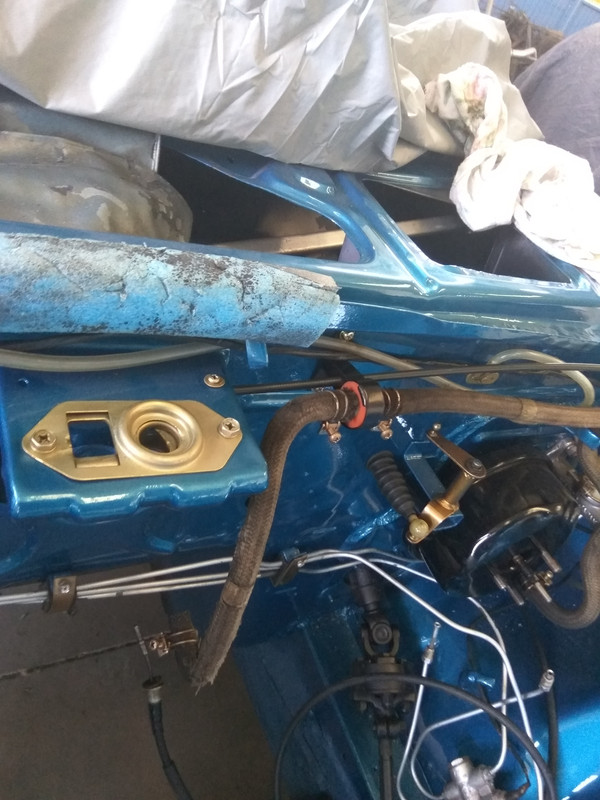
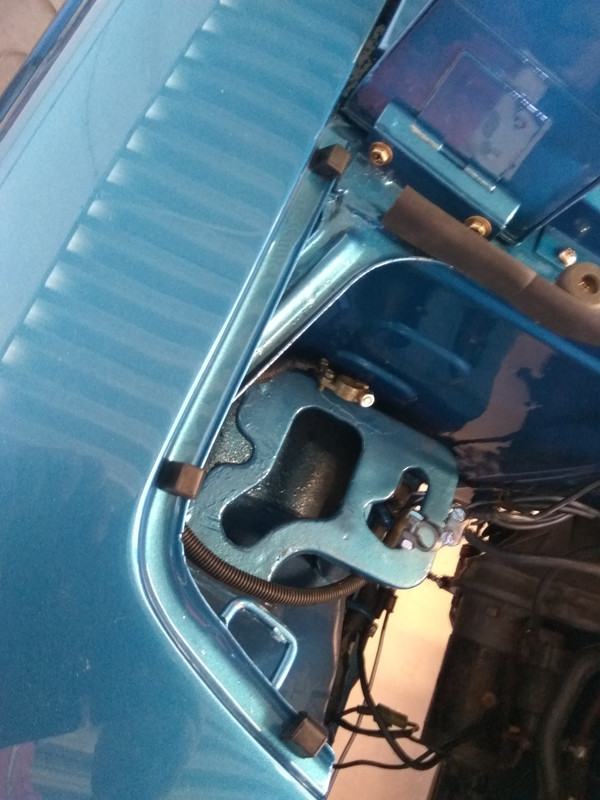
The brakes system had to be revisioned. I stared with the bracket and rubber. My car didn’t have the bracket for the valve, now it’s complete again!

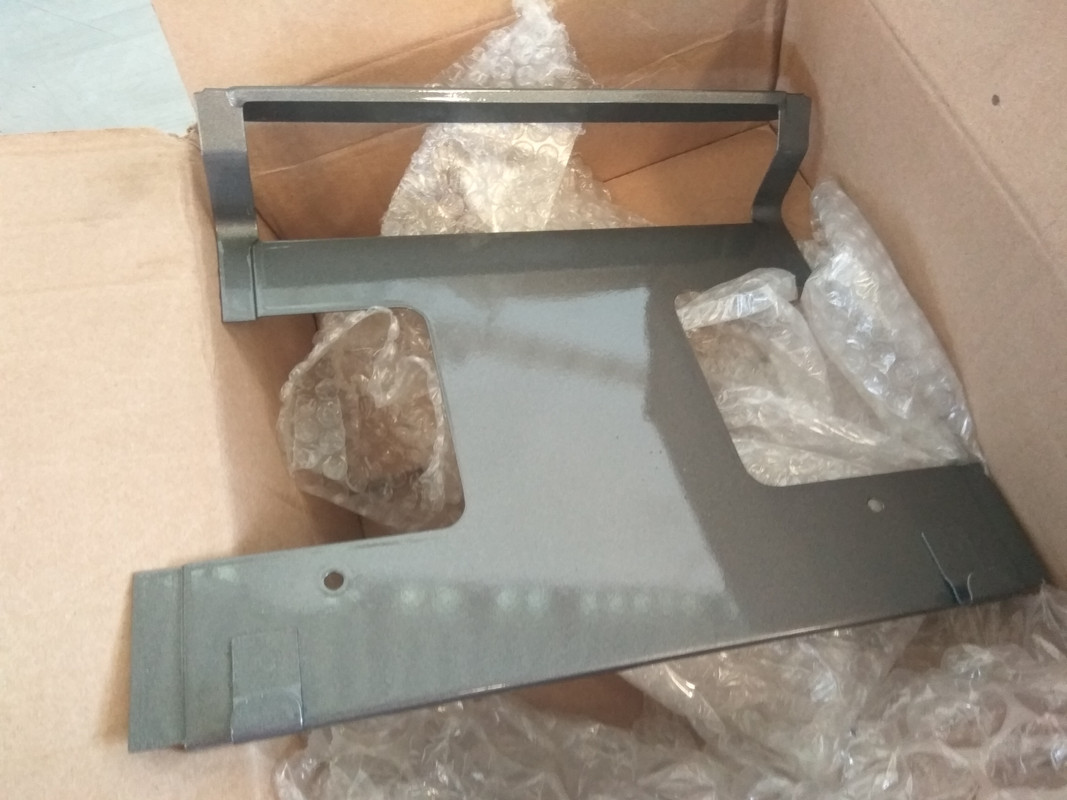
New parts…
Ready to use!
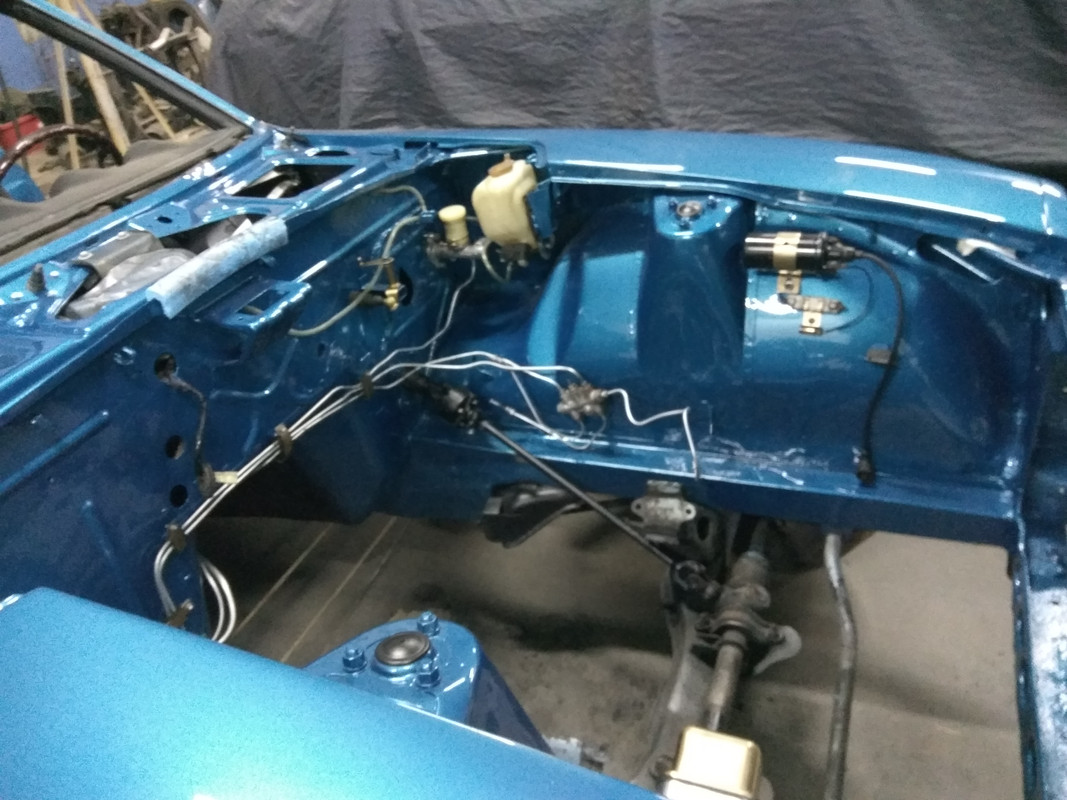
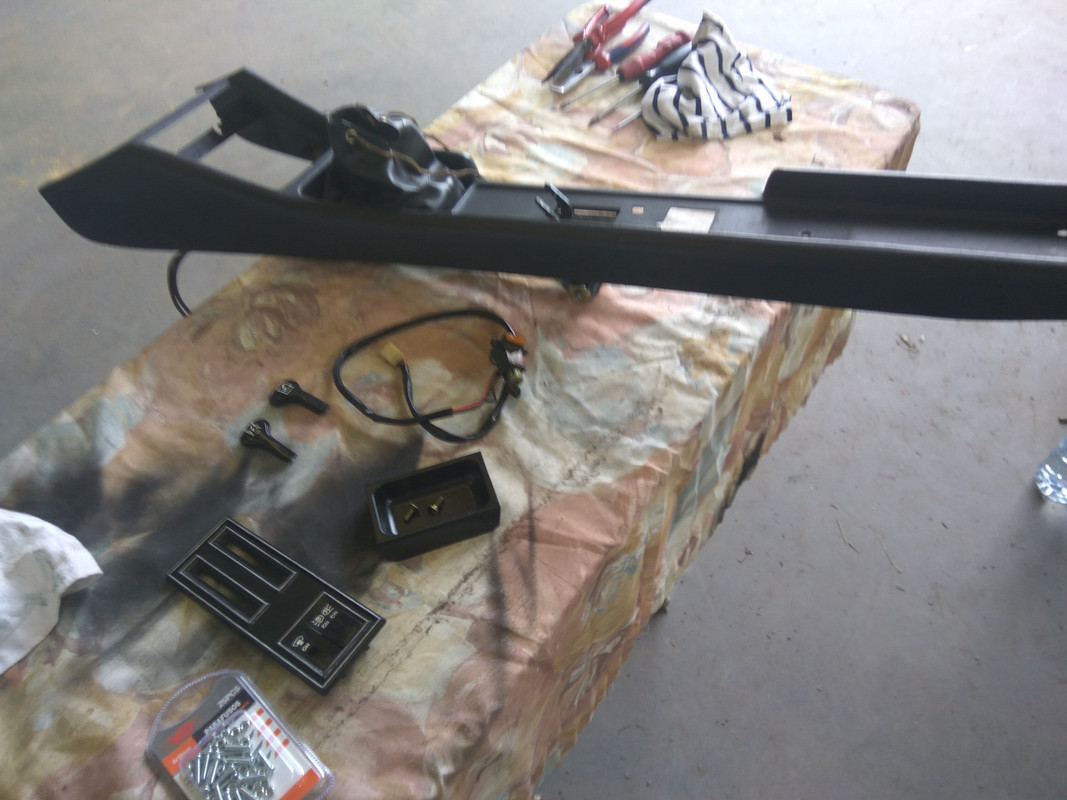
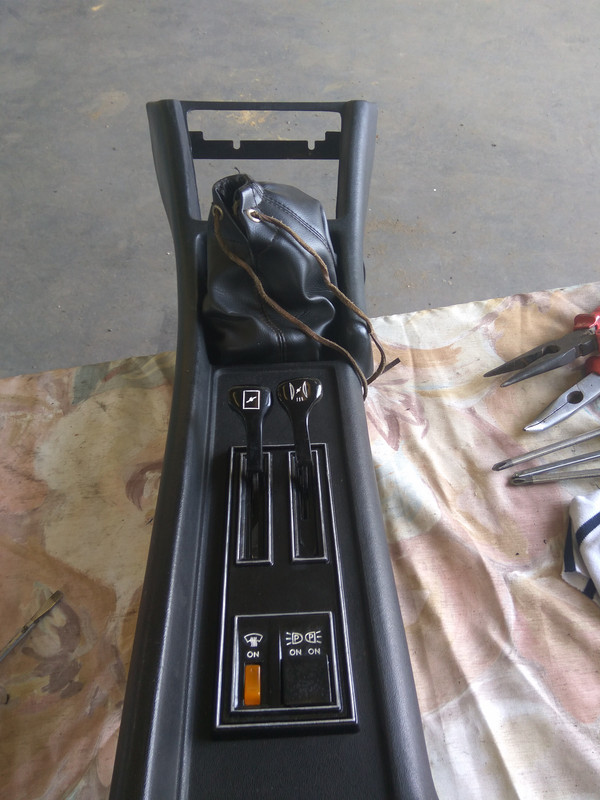
We decided to try the center console because tomorrow will receive the engine.
There is a little issue, I guess easy to solve, my Z had the 3rd series center console, but it wasn’t correct, and when I tried this one, the series � the bolts miss the bracket for 4 cm’s. Is the center console small? Something isn’t right for sure, but I’ll try to check what’s going wrong.
Have you changed the center console? What differences can we find on mounting the screws?
I love this “downgrade” to the original…
Here it is…

Almost…
Now is going to sleep until receive her “heart” again…
Hope you enjoy it.
Regards
M�rio
And completed with trims…is missing the interior. Maybe next weekend!
New Datsun symbols on the guards.
The brakes system had to be revisioned. I stared with the bracket and rubber. My car didn’t have the bracket for the valve, now it’s complete again!
New parts…
Ready to use!
We decided to try the center console because tomorrow will receive the engine.
There is a little issue, I guess easy to solve, my Z had the 3rd series center console, but it wasn’t correct, and when I tried this one, the series � the bolts miss the bracket for 4 cm’s. Is the center console small? Something isn’t right for sure, but I’ll try to check what’s going wrong.
Have you changed the center console? What differences can we find on mounting the screws?
I love this “downgrade” to the original…
Here it is…
Almost…
Now is going to sleep until receive her “heart” again…
Hope you enjoy it.
Regards
M�rio
04-18-2019, 05:41 AM
#38
Registered User
Thread Starter
Join Date: Jul 2017
Posts: 42
Hi everybody!
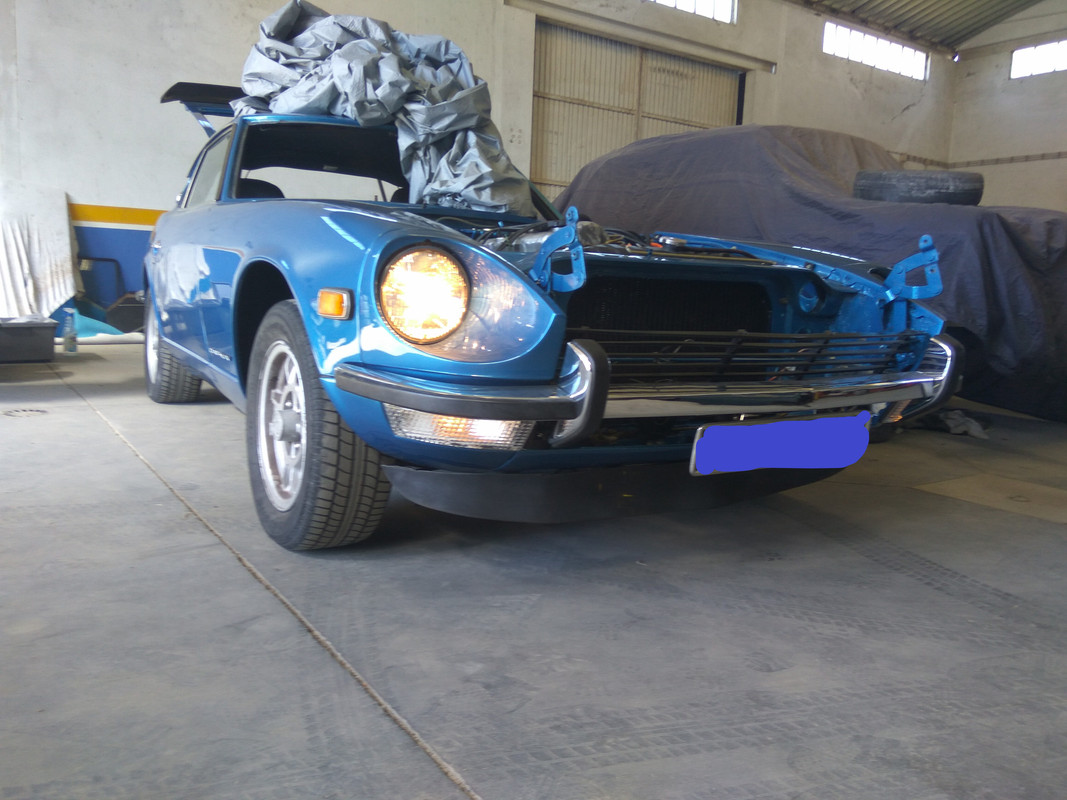
Here I am on the Easter holyday�I�m tired fo working on the car�but is almost done. I hope the car will be ready soon! At least It is working, it brakes and I�ve tried it�almost 2 years since the beginning of the resto.
At this moment there are only small details to finish like the interior, centre console and many many more other parts�some are on its way!
Aside a broken windshield, a broken door during the assembling, it�s time to relax and make everything carefully�this is such a puzzle!!!
The rubbers got installed and the windshield and hatch were fitted�I had to buy original rubbers�the ones from precision brand weren�t as good as they said! On the rear hatch it misses for 2cm each side, and on the front the gap was huge on the upper right.
Tuning the hood was easy�but damn�the door latch is tricky as hell!!! It didn�t close until I discover that the inside handle and its main cable has some adjustment. I was desperate to lock the door, the driver�s side only�I hope now all works for life,,,ahahaha�
Let�s wait for the end of the resto�meanwhile�
This was the starting point 1 month ago, last time I worked on it

Centre console
Changing shop�
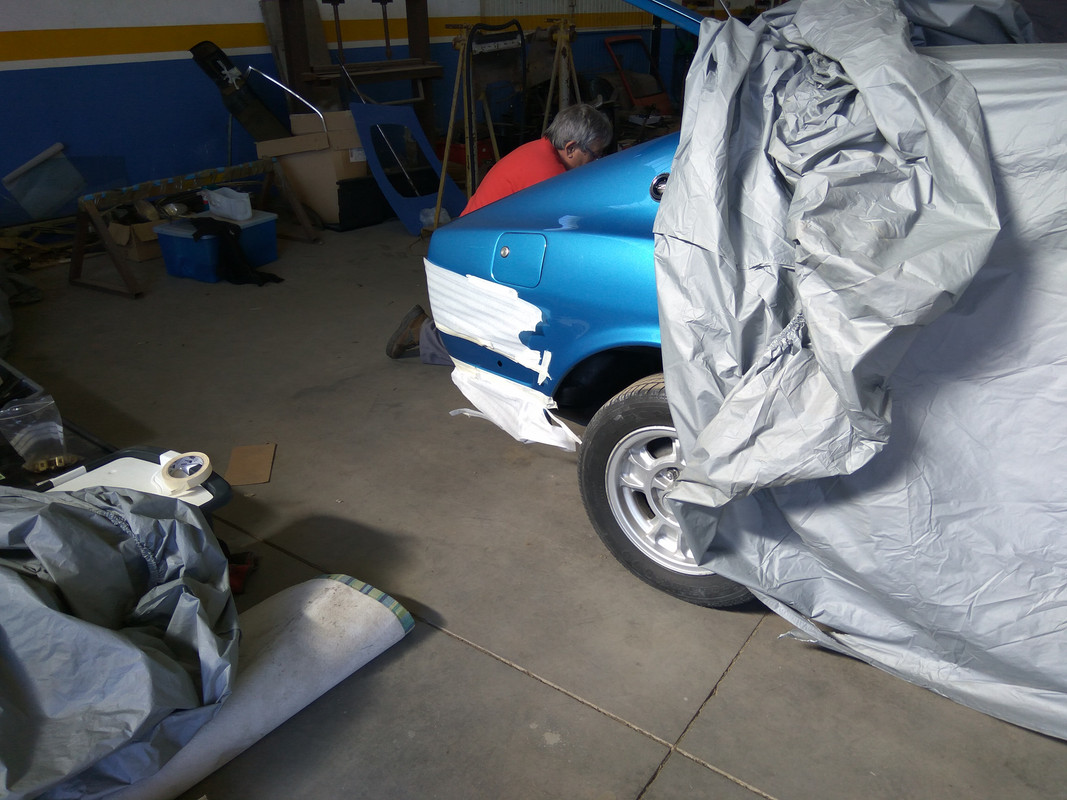
The day was very cloudy and even the car is outside, the colour doesn�t shine as it should be�
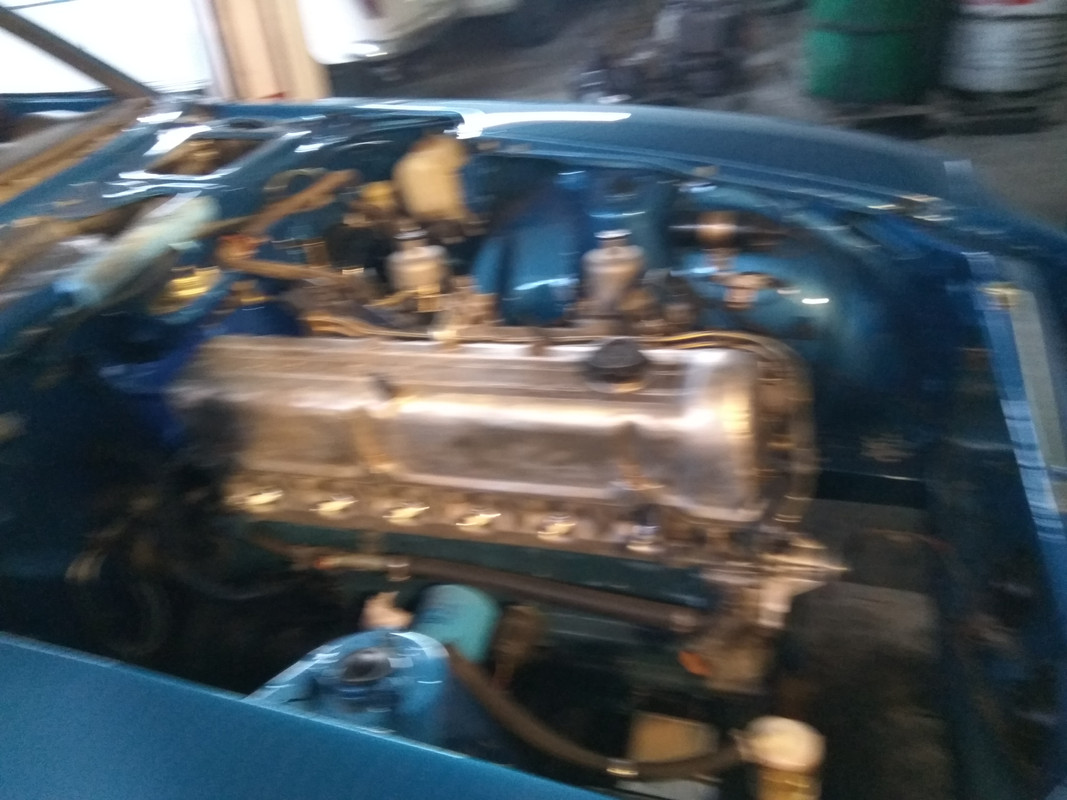
L24 on the way�
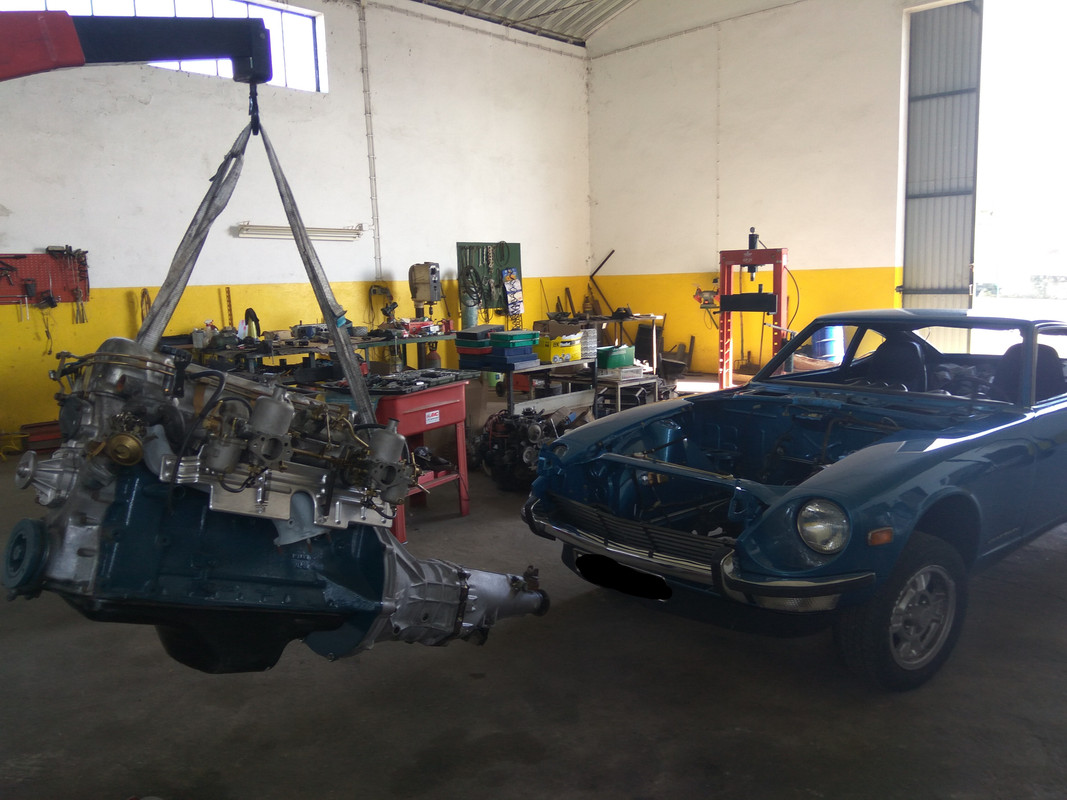
Easy�right�
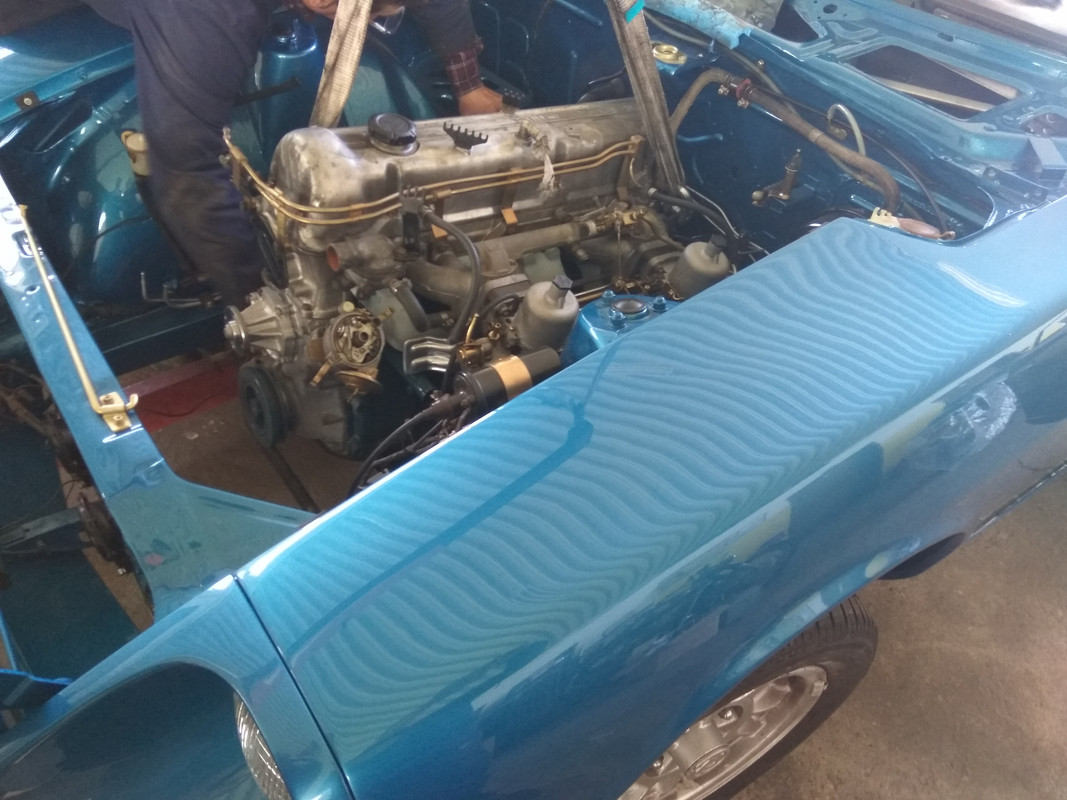
Then we assemble the differential, fluids, bolts and substitute all the rubbers.
Final result�but the starter will be replaced�this one is stopping once in a while�

The electric system�now getting back to 71�I think the car is very happy�agagagag
Here I am on the Easter holyday�I�m tired fo working on the car�but is almost done. I hope the car will be ready soon! At least It is working, it brakes and I�ve tried it�almost 2 years since the beginning of the resto.
At this moment there are only small details to finish like the interior, centre console and many many more other parts�some are on its way!
Aside a broken windshield, a broken door during the assembling, it�s time to relax and make everything carefully�this is such a puzzle!!!
The rubbers got installed and the windshield and hatch were fitted�I had to buy original rubbers�the ones from precision brand weren�t as good as they said! On the rear hatch it misses for 2cm each side, and on the front the gap was huge on the upper right.
Tuning the hood was easy�but damn�the door latch is tricky as hell!!! It didn�t close until I discover that the inside handle and its main cable has some adjustment. I was desperate to lock the door, the driver�s side only�I hope now all works for life,,,ahahaha�
Let�s wait for the end of the resto�meanwhile�
This was the starting point 1 month ago, last time I worked on it
Centre console
Changing shop�
The day was very cloudy and even the car is outside, the colour doesn�t shine as it should be�
L24 on the way�
Easy�right�
Then we assemble the differential, fluids, bolts and substitute all the rubbers.
Final result�but the starter will be replaced�this one is stopping once in a while�
The electric system�now getting back to 71�I think the car is very happy�agagagag
04-18-2019, 05:43 AM
#39
Registered User
Thread Starter
Join Date: Jul 2017
Posts: 42
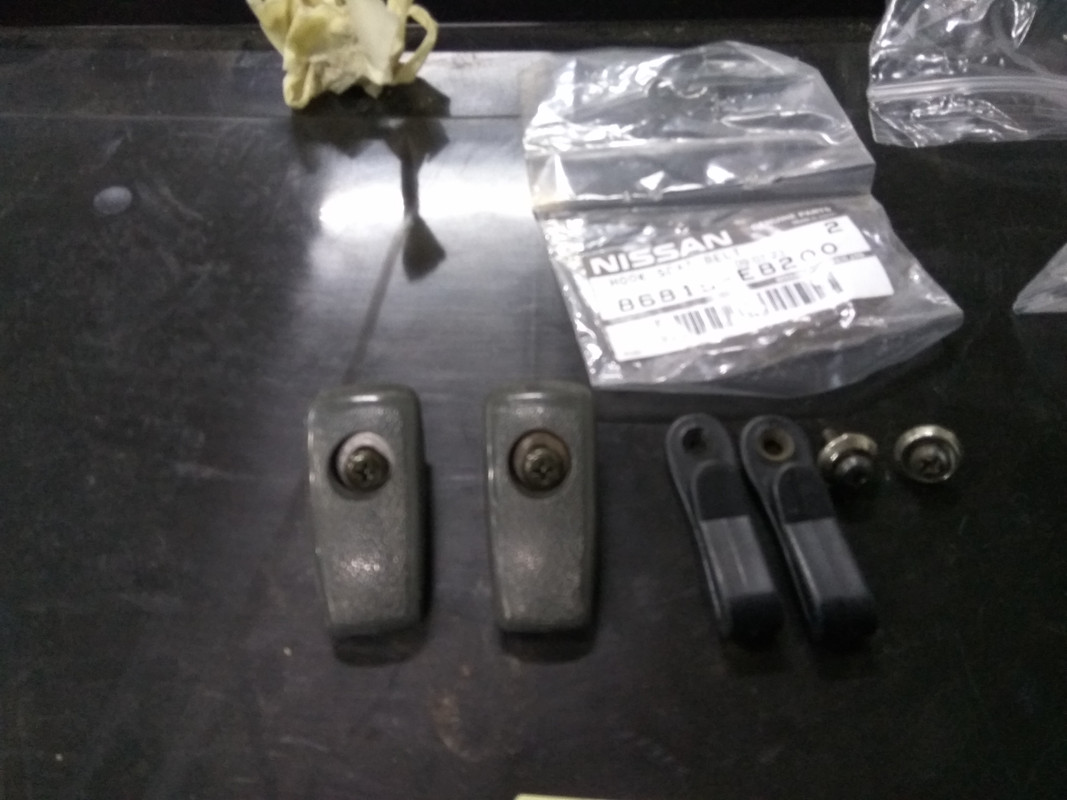
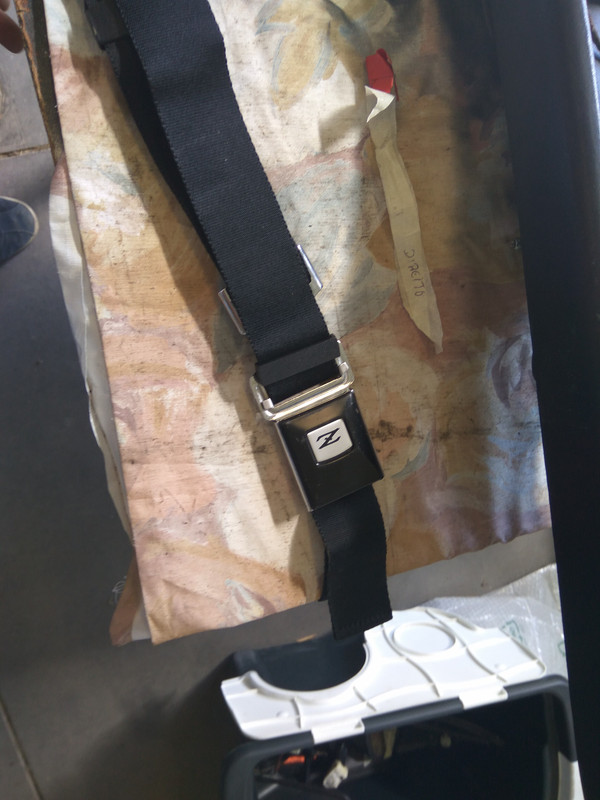
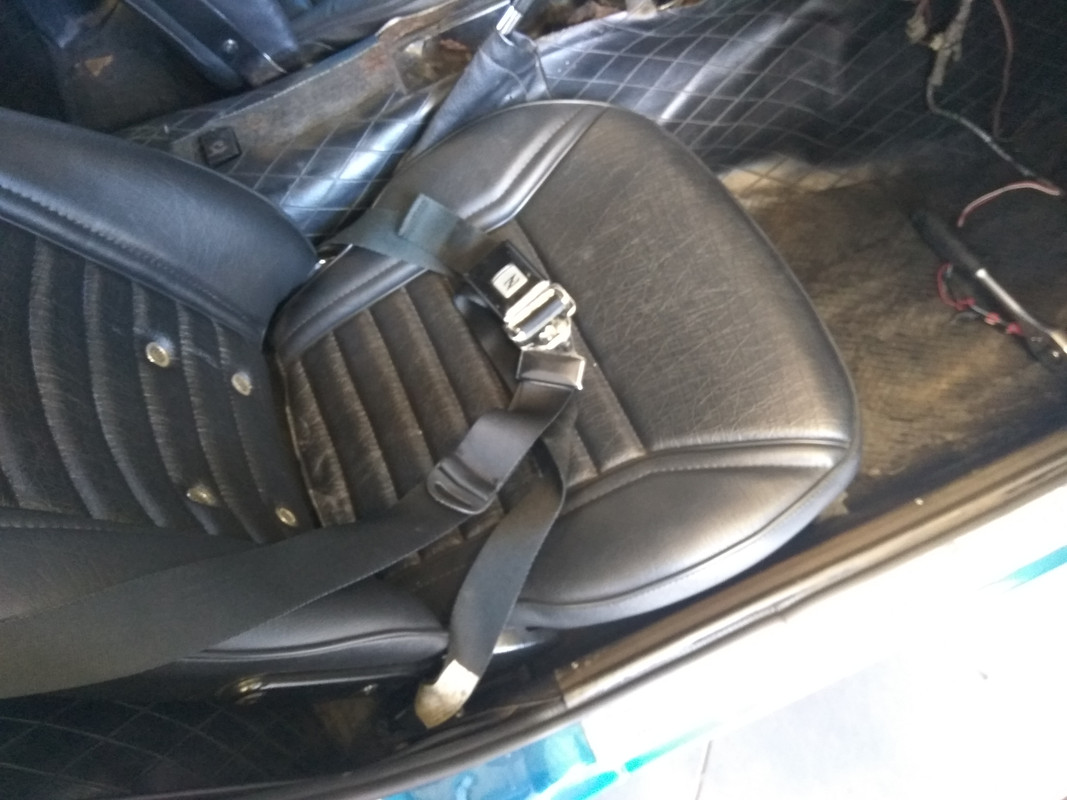
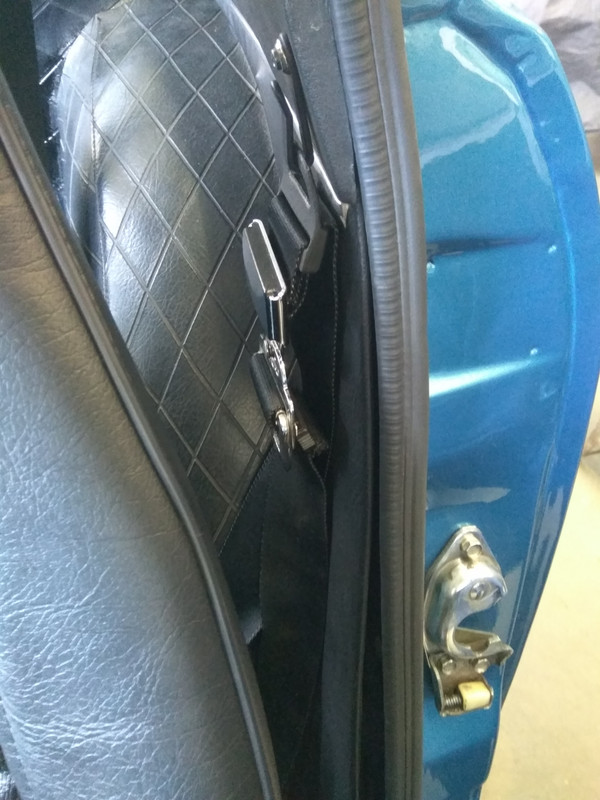
The seat belts…
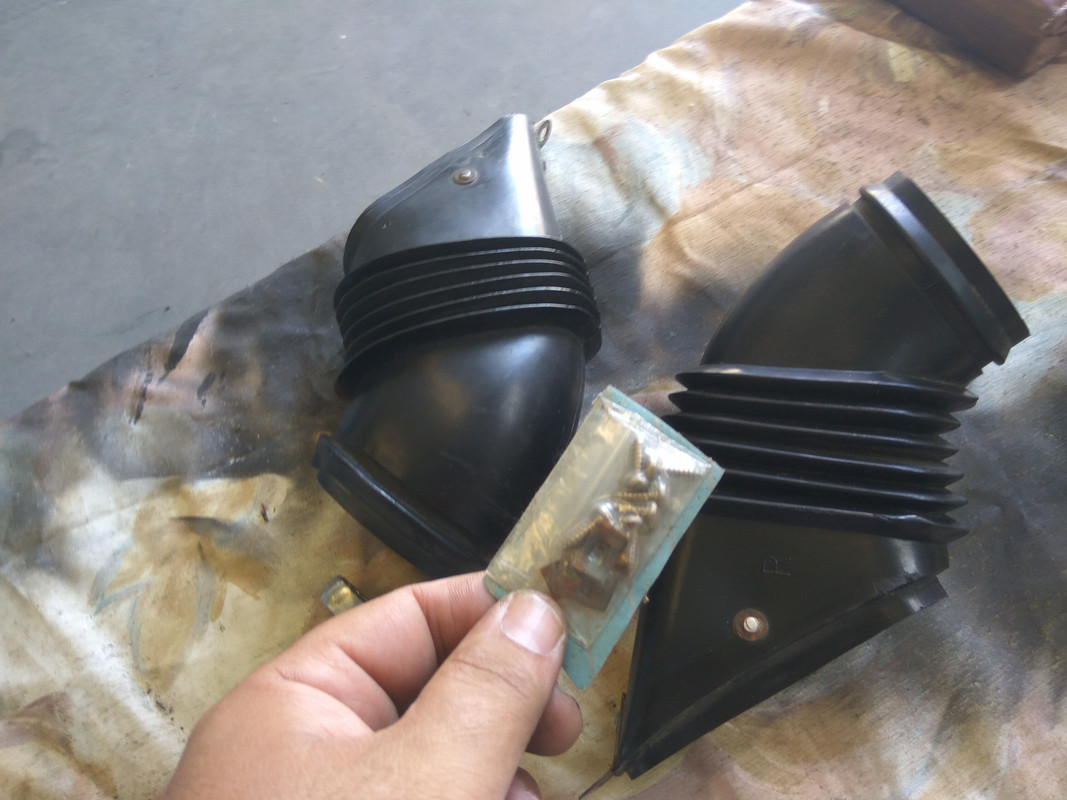
The vent ducts were missing when I bought the car…now they are part of the car again.
These rubber caps were made by my father….they are better than the original…

The splash is awesome…a great detail…
The windshields….
On the front…


The vent ducts were missing when I bought the car…now they are part of the car again.
These rubber caps were made by my father….they are better than the original…
The splash is awesome…a great detail…
The windshields….
On the front…
04-18-2019, 05:43 AM
#40
Registered User
Thread Starter
Join Date: Jul 2017
Posts: 42
Hatch…
People that collaborated during the process…
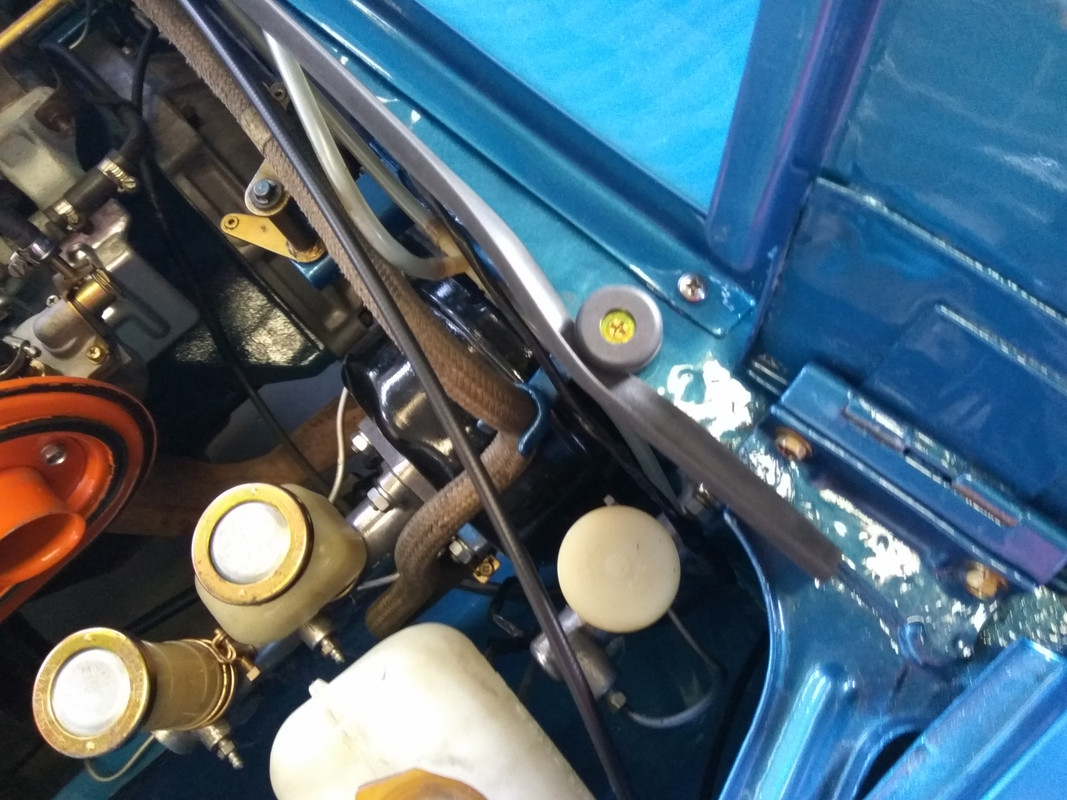
Windshield wipers are now working…awesome…
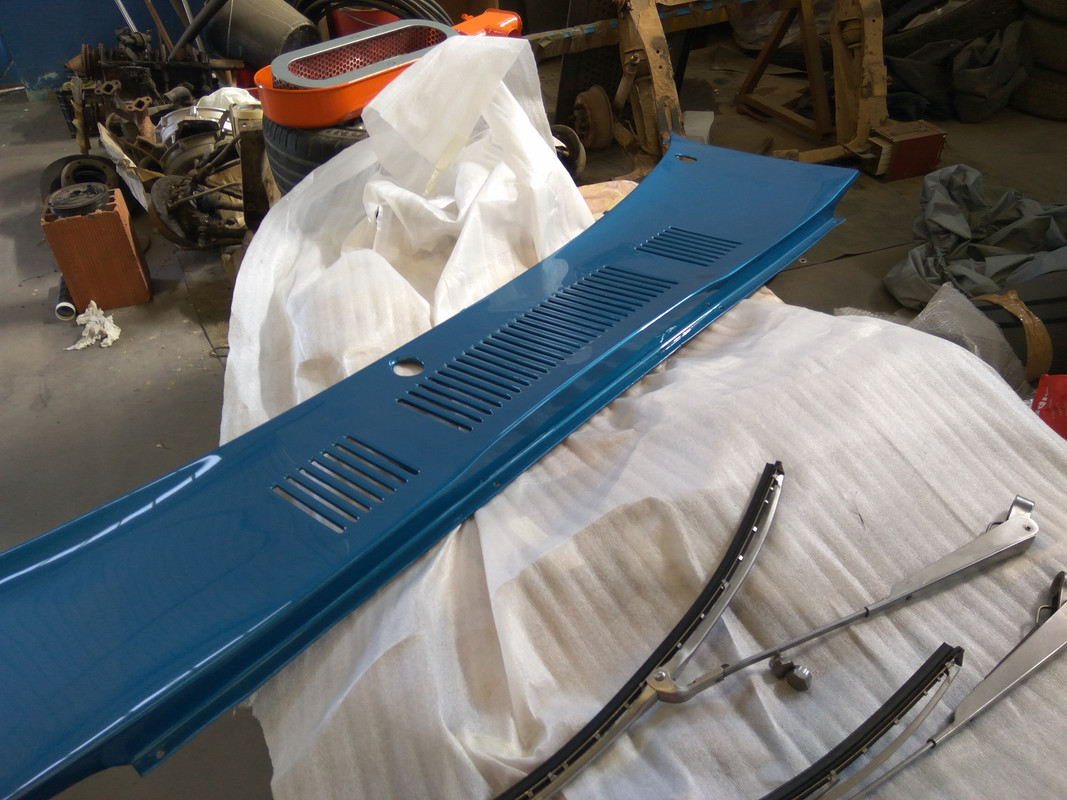
Top cowl grill got installed too…
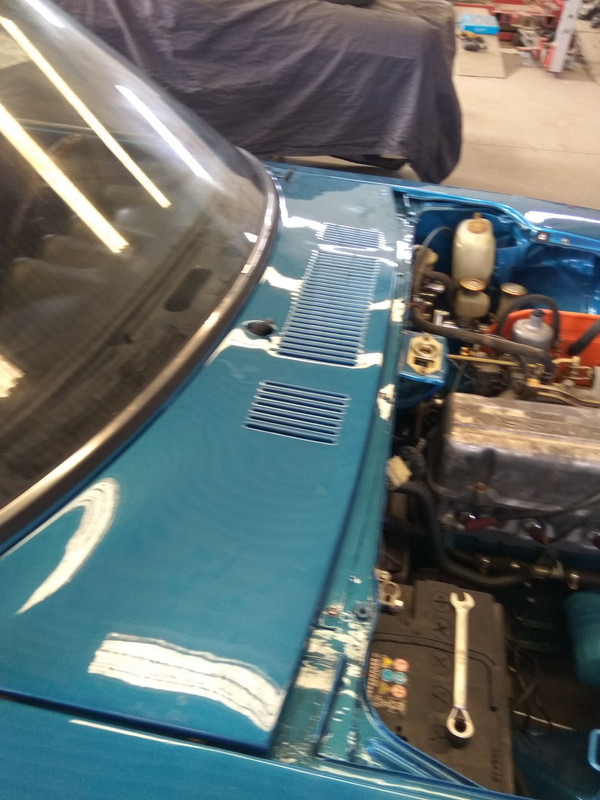
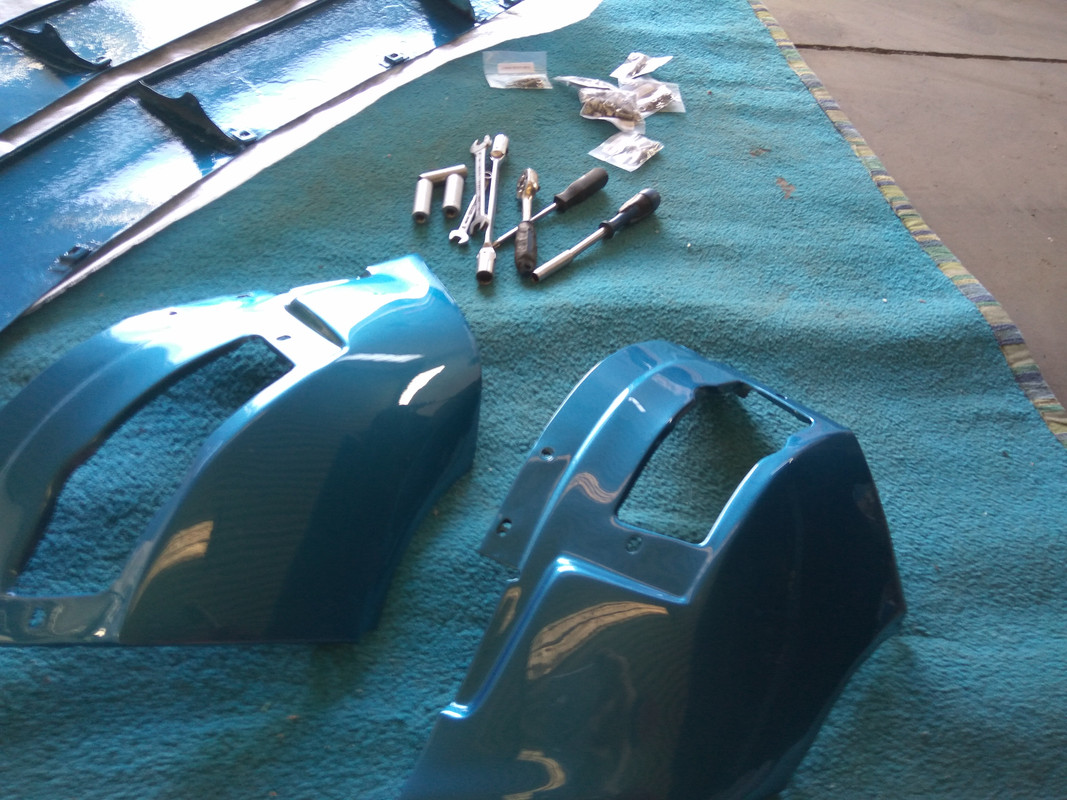
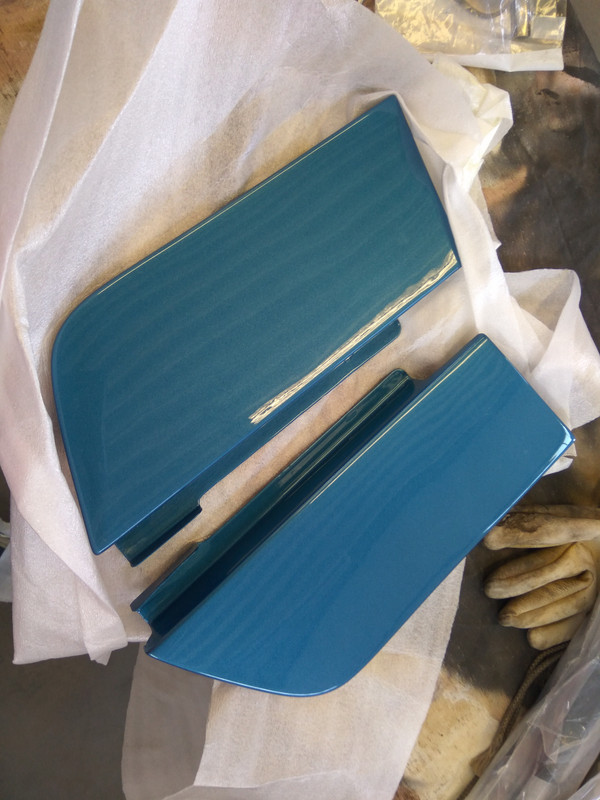
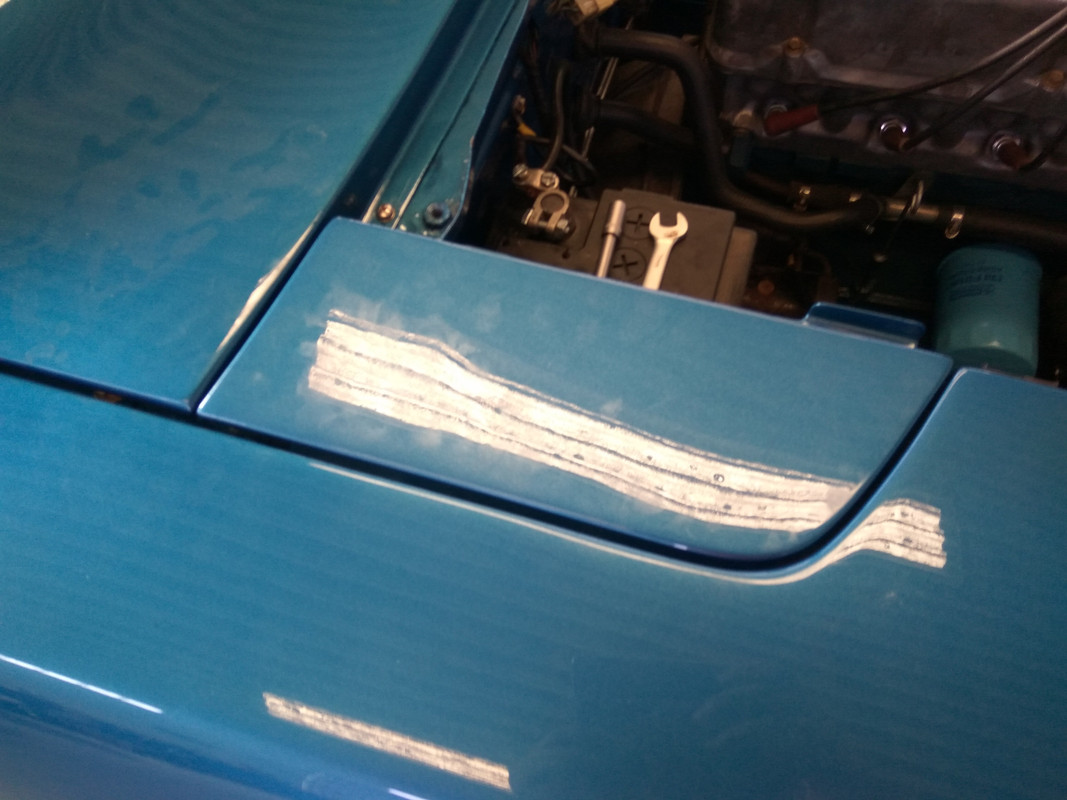
The side lids…
Final results…
Tuning the hood with new stoppers..
Hood tuning…what a hard task!!!
Final result…
The car is almost ready…I bet tomorrow will be just missing the interior…for sure I’ll be driving it…
Hope you enjoy these last works on the car…
Cumps.
M�rio
People that collaborated during the process…
Windshield wipers are now working…awesome…
Top cowl grill got installed too…
The side lids…
Final results…
Tuning the hood with new stoppers..
Hood tuning…what a hard task!!!
Final result…
The car is almost ready…I bet tomorrow will be just missing the interior…for sure I’ll be driving it…
Hope you enjoy these last works on the car…
Cumps.
M�rio
06-01-2019, 06:41 AM
#41
Registered User
Thread Starter
Join Date: Jul 2017
Posts: 42
Hi again!
The car runs and drives very good…but I’m moving it to another shop for the past details.
The tunings will not be deep, but will consist in verifying the electrical system with the addition of new connectors, recovering a corner on the dash, applying the centre console, tuning the front bumpers and correcting the leather parts on the back!
The wheels will be recovered into the original charcoal colour!
These works will make the car looks better and will make me rest fine…I’m tired of waiting…
Let’s go to the works:
Interior glass trim.
Hood latch


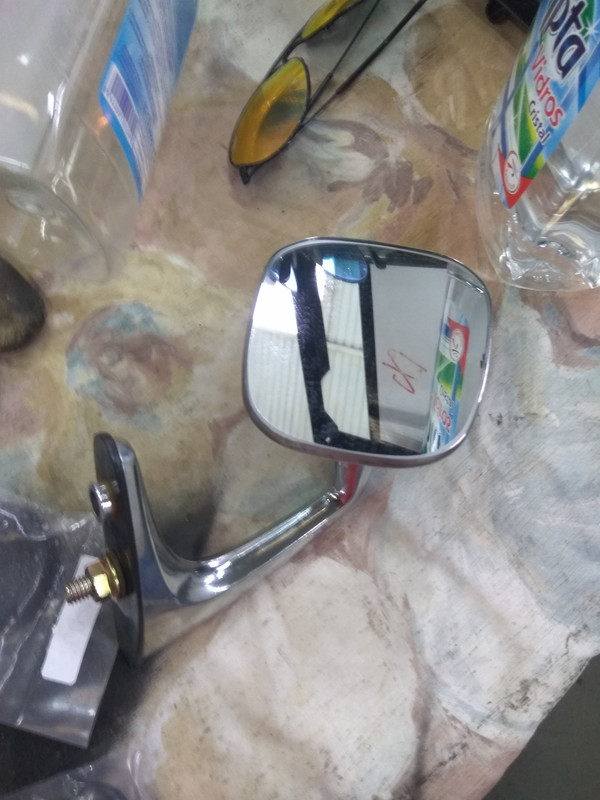
Almos tone hour to aplly the mirror…
Gearbox insulator applied…
New interiors…worked very good!!!
Some details…
The car runs and drives very good…but I’m moving it to another shop for the past details.
The tunings will not be deep, but will consist in verifying the electrical system with the addition of new connectors, recovering a corner on the dash, applying the centre console, tuning the front bumpers and correcting the leather parts on the back!
The wheels will be recovered into the original charcoal colour!
These works will make the car looks better and will make me rest fine…I’m tired of waiting…
Let’s go to the works:
Interior glass trim.
Hood latch
Almos tone hour to aplly the mirror…
Gearbox insulator applied…
New interiors…worked very good!!!
Some details…
06-01-2019, 06:41 AM
#42
Registered User
Thread Starter
Join Date: Jul 2017
Posts: 42
The plate gate arrived and was apllied.
I state the fuel rail wasn’t the correct for the 71 generation…so, I applied a correct one!
Some more details…
Here is the result befere went home!

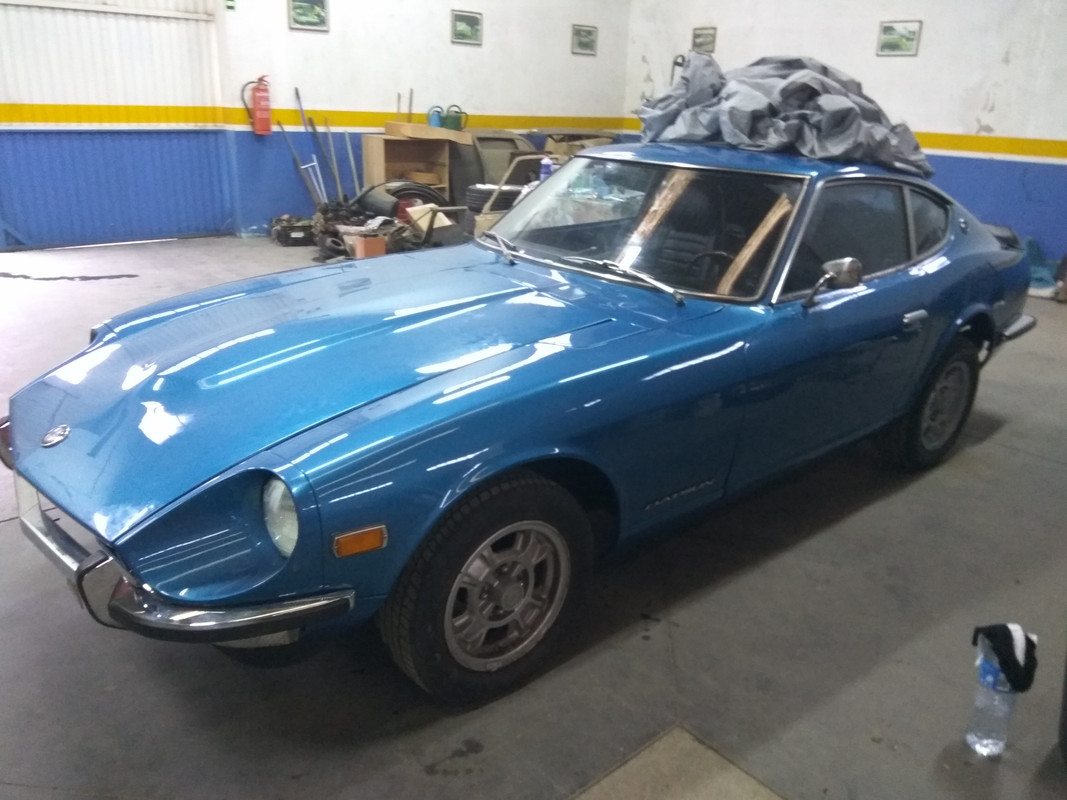
Filling up the tank…so great…
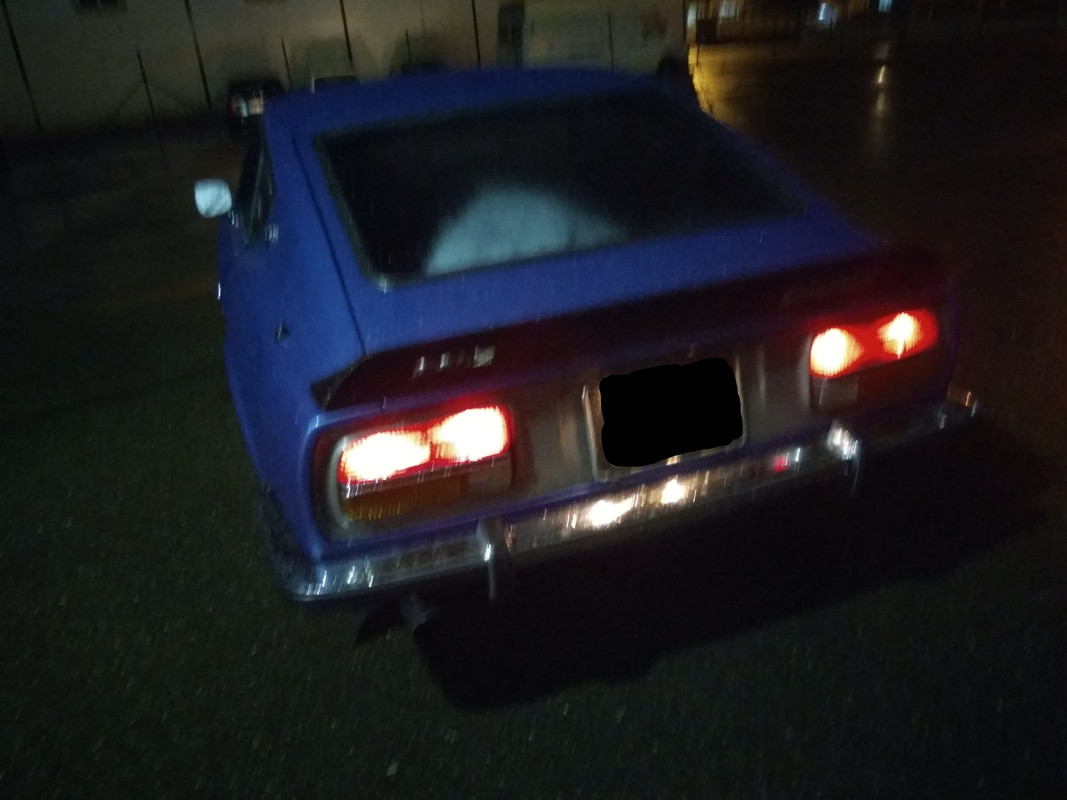
At home…near the 510 SSS

Hope you liked it…let’s wait 15 days to get it completely done!!!
Regards
M�rio
I state the fuel rail wasn’t the correct for the 71 generation…so, I applied a correct one!
Some more details…
Here is the result befere went home!
Filling up the tank…so great…
At home…near the 510 SSS
Hope you liked it…let’s wait 15 days to get it completely done!!!
Regards
M�rio
 12-23-2019, 12:13 PM
#44
Registered User
Thread Starter
Join Date: Jul 2017
Posts: 42
Hi friends,
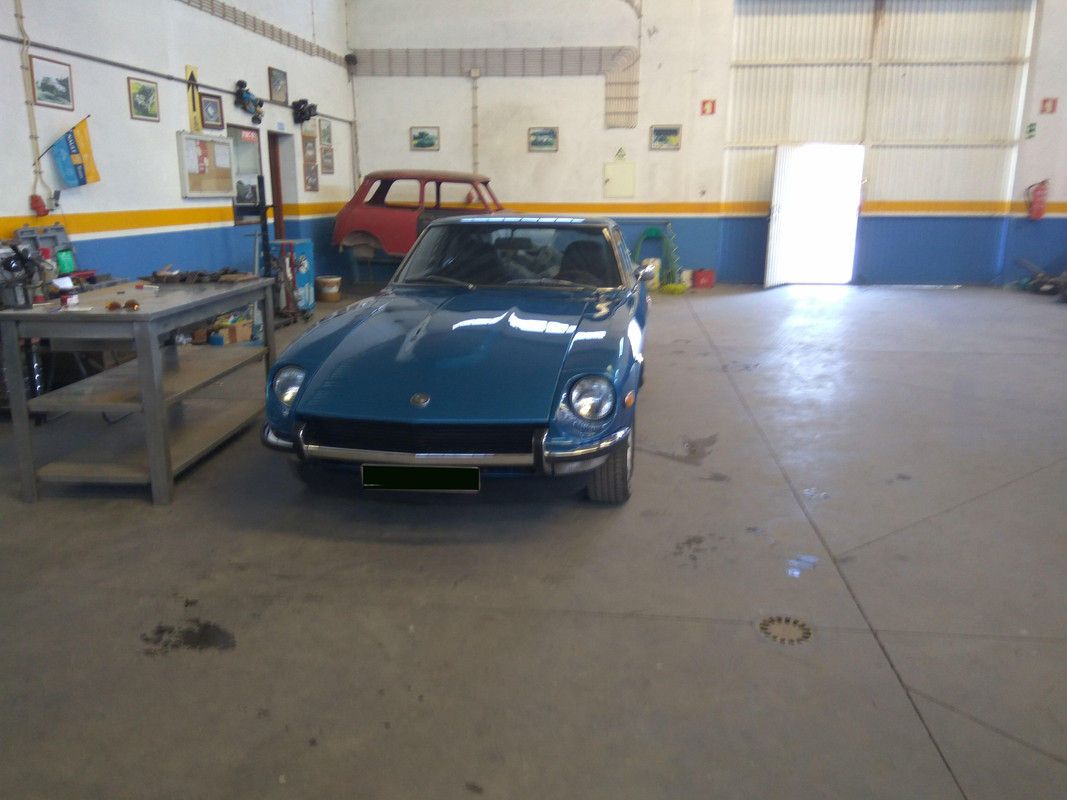
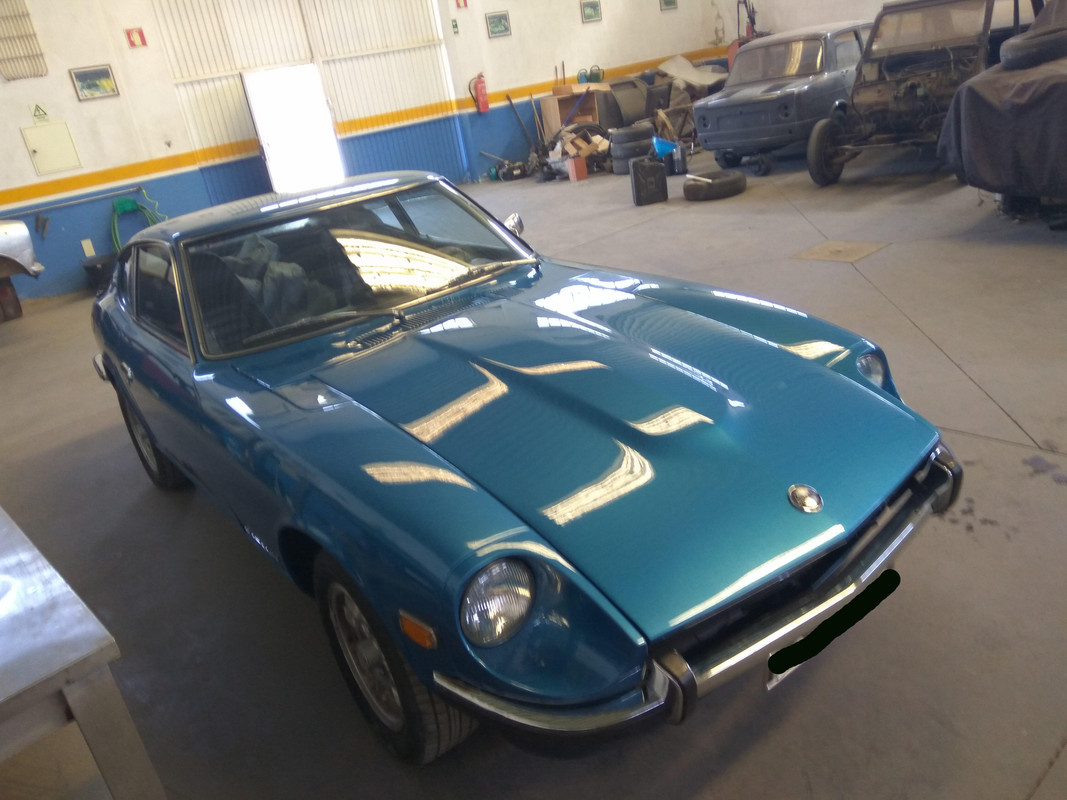
The Z is still on the mechanic, I think this year, 2019, will finish the resto! I hope!!!ahahahha
The ca ris almost done, the exceptions are related to some metal work and the systems that have to be revisioned like the brake system, fuel system. The interiors need some detail attention and that’s it…sound a bit like quick things, but it’s not!
But the car already has the MOT and left the garage for a marriage…ahahahah…
Let’s see the photos…
Regards
M�rio
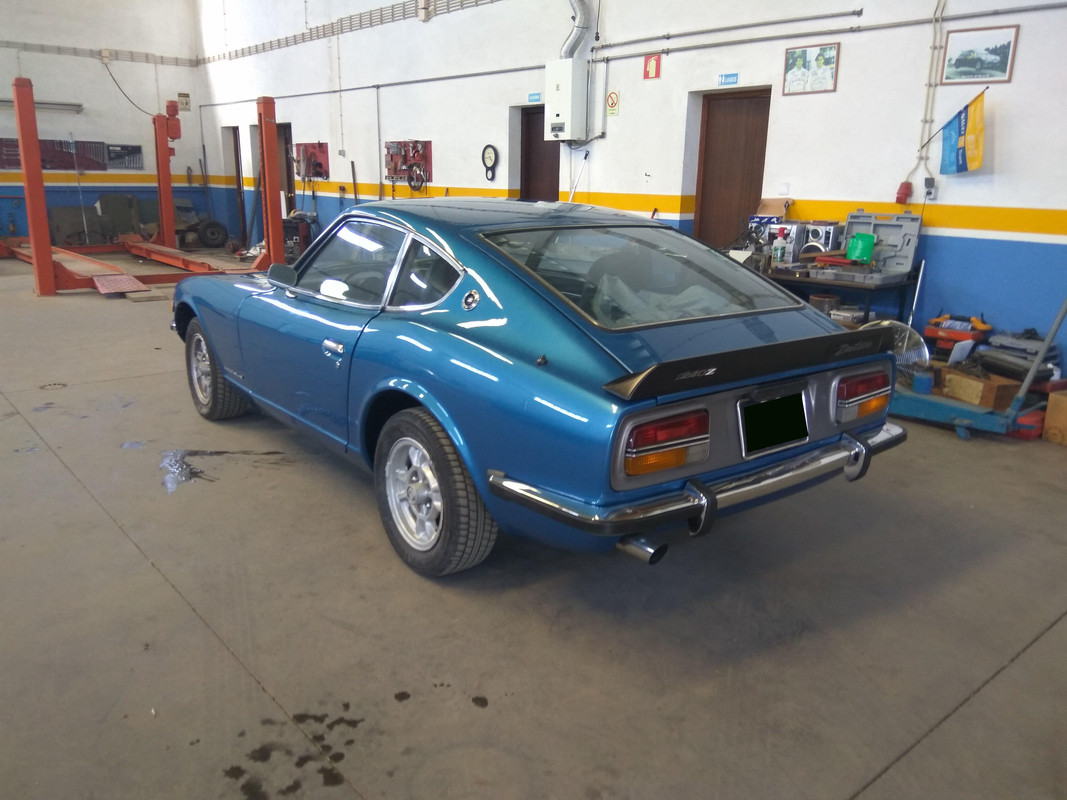
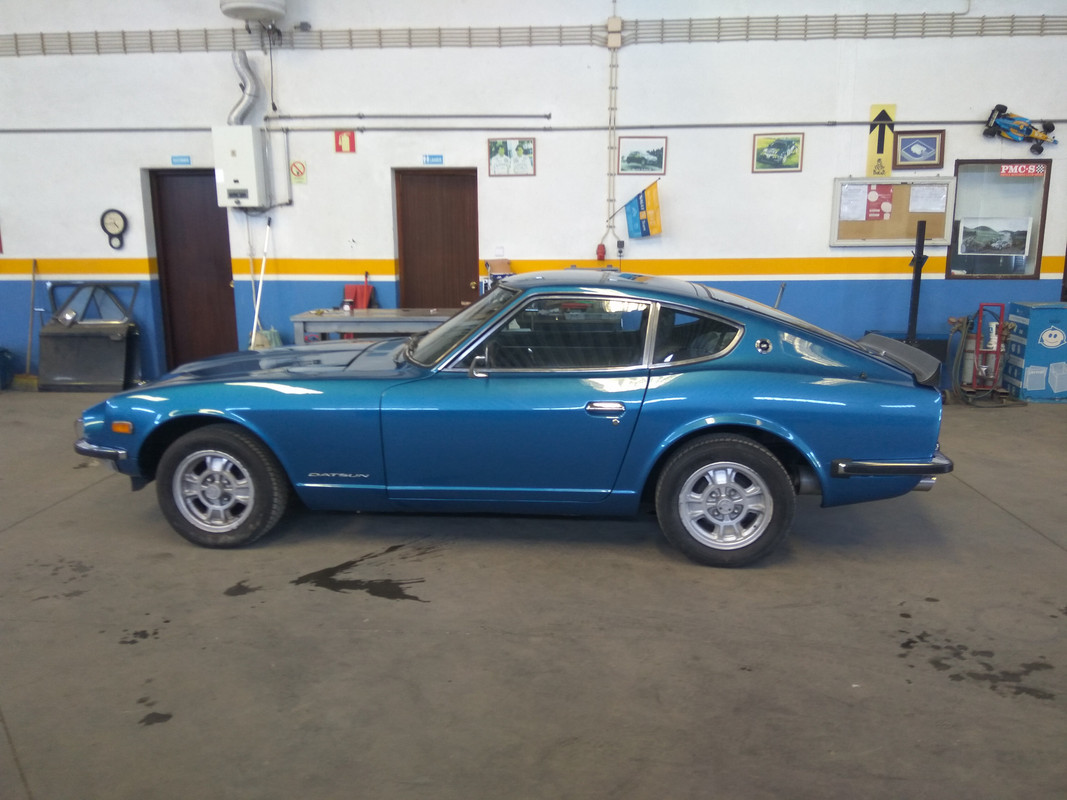
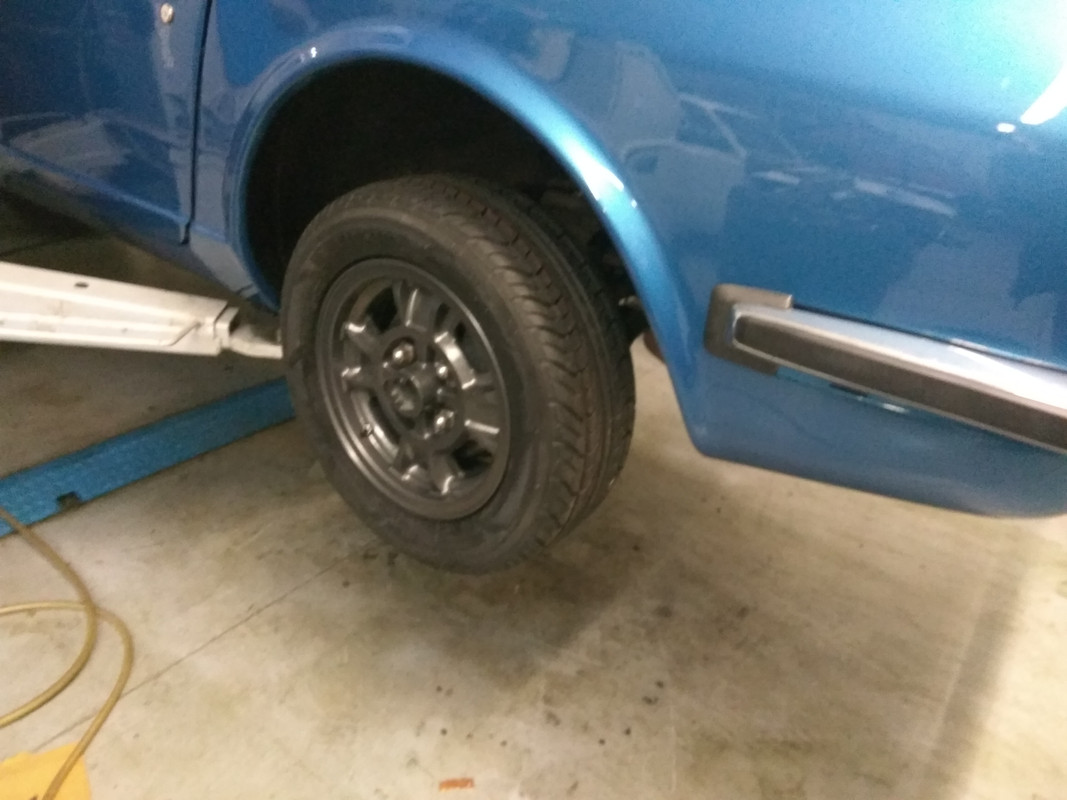
The car waiting for the original wheels…still watanabe…
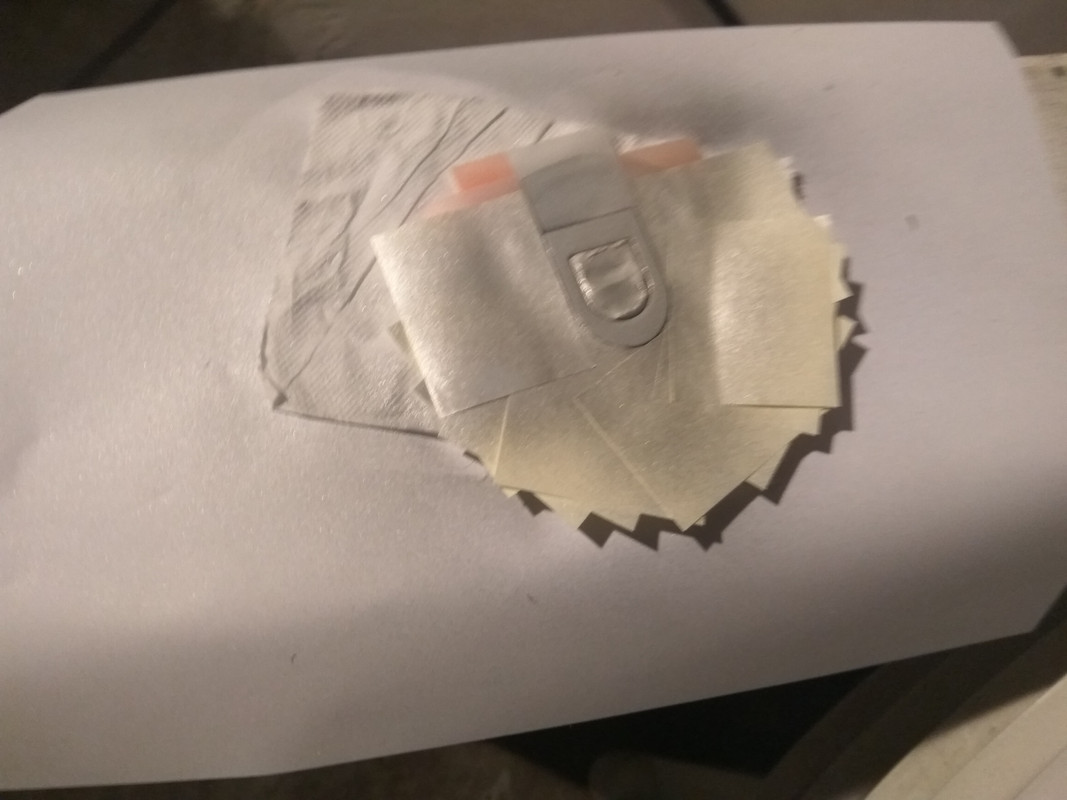
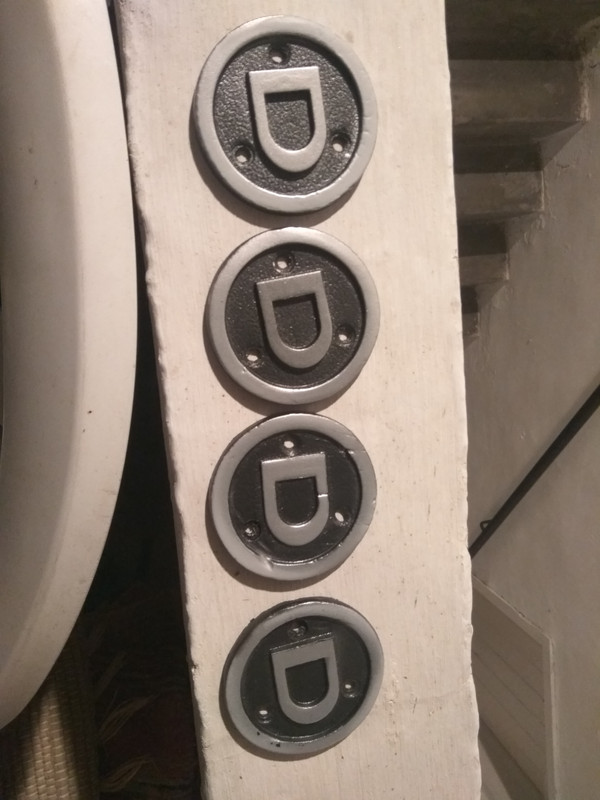
Preparing the centre caps for the Kobe Seiko wheels…
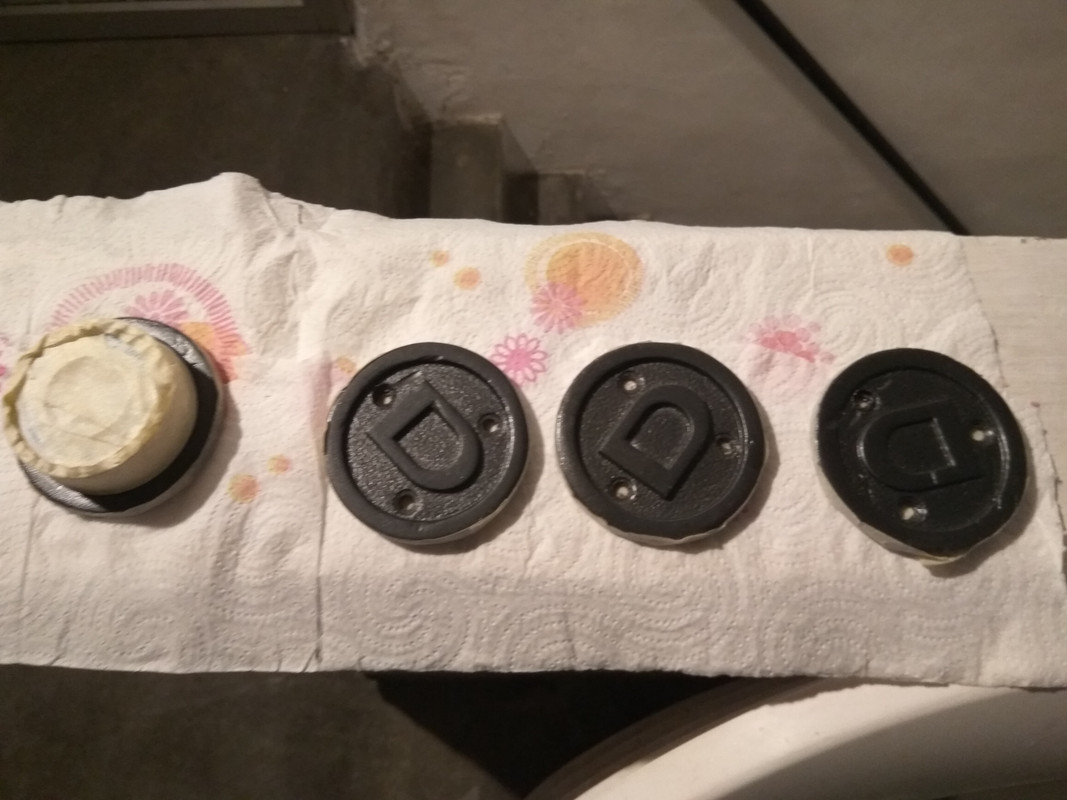
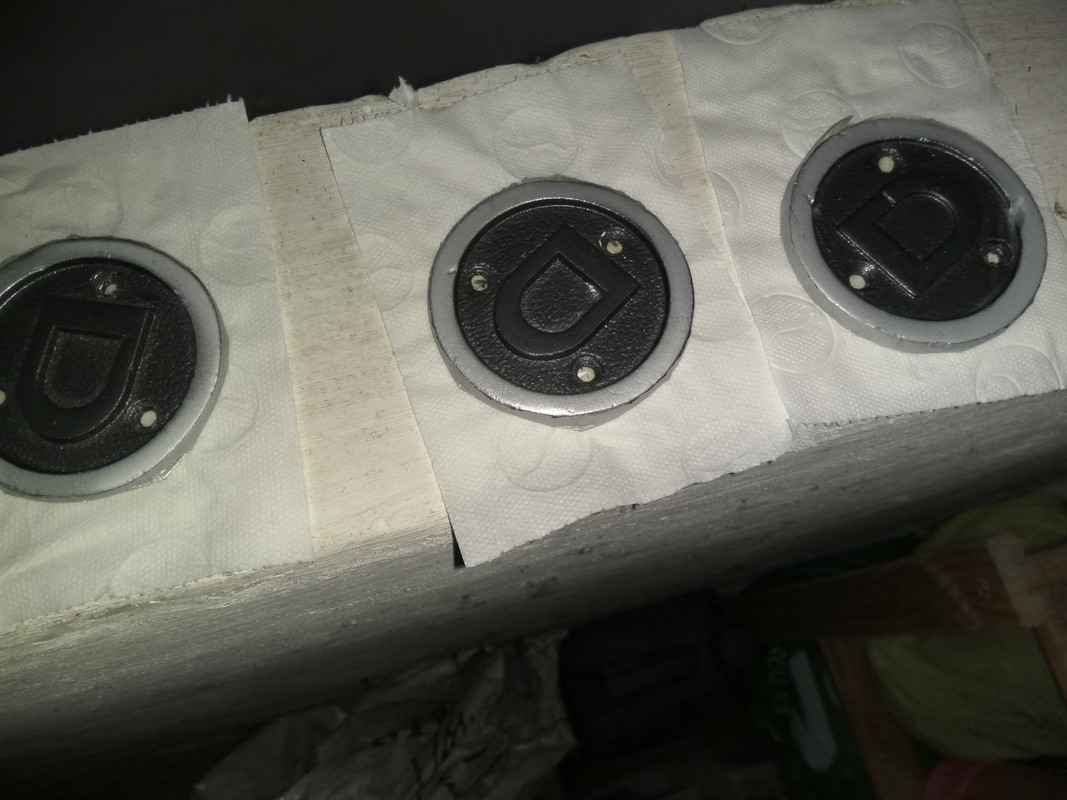
Changing to the original shape!
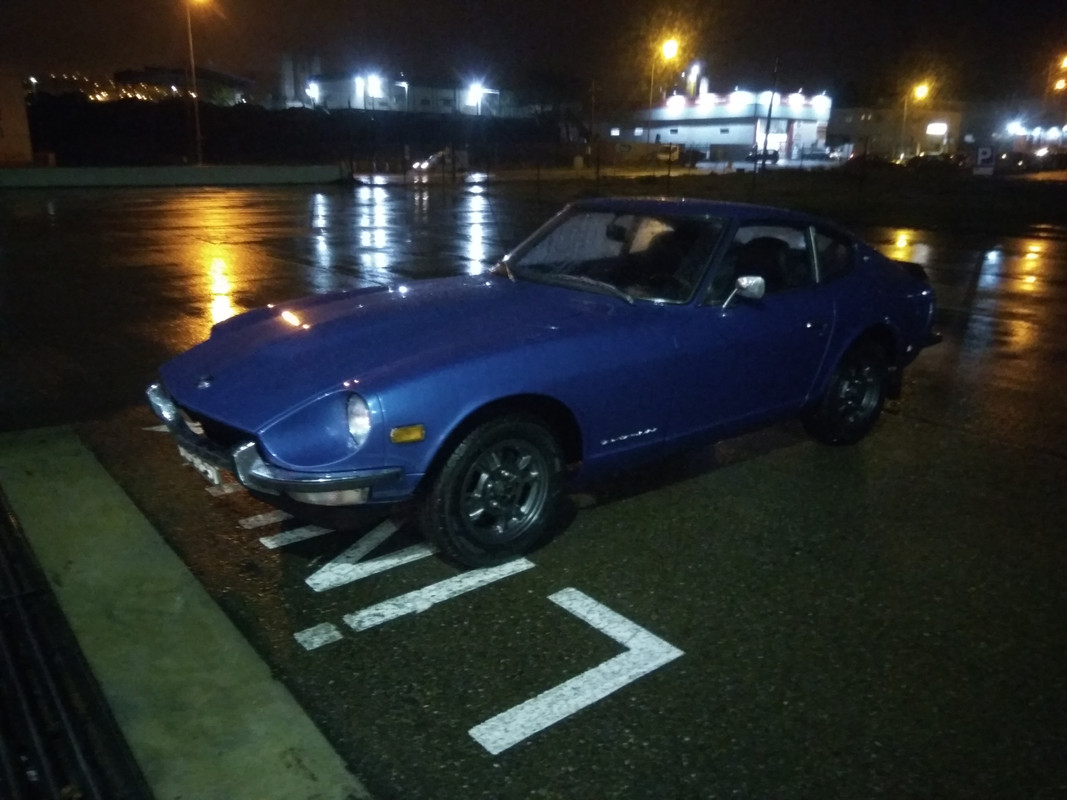
MOT…nothing to say…zero problems…
The Z is still on the mechanic, I think this year, 2019, will finish the resto! I hope!!!ahahahha
The ca ris almost done, the exceptions are related to some metal work and the systems that have to be revisioned like the brake system, fuel system. The interiors need some detail attention and that’s it…sound a bit like quick things, but it’s not!
But the car already has the MOT and left the garage for a marriage…ahahahah…
Let’s see the photos…
Regards
M�rio
The car waiting for the original wheels…still watanabe…
Preparing the centre caps for the Kobe Seiko wheels…
Changing to the original shape!
MOT…nothing to say…zero problems…

Thread
Thread Starter
Forum
Replies
Last Post
bigjim240z
240Z, 260Z, 280Z Appearance Exterior, Interior
32
02-02-2007 05:13 PM
NismoPick
Other Cars
11
05-12-2006 06:00 AM
Bookmarks


