86 Project INTRO
 06-02-2014, 05:33 AM
#1
Registered User
Thread Starter

Join Date: May 2014
Posts: 28
86 Project INTRO
Hello all!
I wanted to introduce myself to the boards! I am in the Army and just picked up my first 300ZX (Z31) car yesterday. I will post plenty of pictures ASAP. I plan on starting work on the car (real work....) middle of June. I have a training event kicking off Friday and won't be back until mid June so... Here are the rough sketches of whats going to be happening with my project come June...
Clean / Prep Engine bay (Paint then replace bay components, wires, tubes, hoses, master, clutch master/slave, etc.. etc..)
Repair frame rails (BTW I need to know if anyone has found ready to weld in floor pans or if I will be spending time over at the break and metal shear...)
Repair a few rust spots in the trunk
have gas tank flushed and coated (already out of the car...) then install new fuel pump and re-install with new hoses and filler neck (or I may just clean and powder coat the one I have depending on what it looks like sanded down...)
Once I get this done I will either find a replacement fender for driver side or patch the 1" hole near the bottom... Then I will start tearing down the N/A 3.0 VG30E motor and will send it to the machine shop to be dipped cleaned, magnafluxed and honed... I will also probably send the heads as well... Then re-assemble with my overhaul kit (which I think is complete but I may be missing a gasket but I'll handle that when I get there... Thanks JIS Engine..)
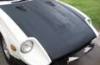
Well that's the plan for June, I will post plenty of pictures once the destruction starts when I get back. But for now, here are some of her being brought home... I won't be naming her until I get my first drive cuz I'm not sure what kind of attitude she will have!!!
Yes later on down the road I will be turning this 9:1 motor into a turbo motor. Yes I know I will need the turbo cross member, turbo ECU, Injectors, I will probably find a new turbo harness (I expect that will cost 3 arms and 2 legs...) and a turbo controller.
Thanks for reading! (Crap pics won't upload I need to resize... I will do that and post pics shortly!)
I wanted to introduce myself to the boards! I am in the Army and just picked up my first 300ZX (Z31) car yesterday. I will post plenty of pictures ASAP. I plan on starting work on the car (real work....) middle of June. I have a training event kicking off Friday and won't be back until mid June so... Here are the rough sketches of whats going to be happening with my project come June...
Clean / Prep Engine bay (Paint then replace bay components, wires, tubes, hoses, master, clutch master/slave, etc.. etc..)
Repair frame rails (BTW I need to know if anyone has found ready to weld in floor pans or if I will be spending time over at the break and metal shear...)
Repair a few rust spots in the trunk
have gas tank flushed and coated (already out of the car...) then install new fuel pump and re-install with new hoses and filler neck (or I may just clean and powder coat the one I have depending on what it looks like sanded down...)
Once I get this done I will either find a replacement fender for driver side or patch the 1" hole near the bottom... Then I will start tearing down the N/A 3.0 VG30E motor and will send it to the machine shop to be dipped cleaned, magnafluxed and honed... I will also probably send the heads as well... Then re-assemble with my overhaul kit (which I think is complete but I may be missing a gasket but I'll handle that when I get there... Thanks JIS Engine..)
Well that's the plan for June, I will post plenty of pictures once the destruction starts when I get back. But for now, here are some of her being brought home... I won't be naming her until I get my first drive cuz I'm not sure what kind of attitude she will have!!!
Yes later on down the road I will be turning this 9:1 motor into a turbo motor. Yes I know I will need the turbo cross member, turbo ECU, Injectors, I will probably find a new turbo harness (I expect that will cost 3 arms and 2 legs...) and a turbo controller.
Thanks for reading! (Crap pics won't upload I need to resize... I will do that and post pics shortly!)
 06-02-2014, 06:47 AM
#2
Registered User
Thread Starter
Join Date: May 2014
Posts: 28
Pictures
Wow, ok that sucked... the image resizer I downloaded also put a nice lil piece of crapware on my box... Changed all my proxy settings, how irritating..Now that is fixed... on with the pics!
*Edit* By the way, does anyone know what wheels these are?!
*Edit* By the way, does anyone know what wheels these are?!
Last edited by 86ZxPROJECT; 06-02-2014 at 06:48 AM. Reason: Forgot to ask...
06-02-2014, 05:02 PM
#3
Registered User
Join Date: Aug 2013
Posts: 1,103
Welcome to ZDriver! You got a great Z! Impressive project, too. Looks like that Z has received some great care over the years. Always a good sign.
No doubt you have your factory manual (FSM) It's at XenonZ31 Reference along with a lot of other good docs - and they're free. Your FSM is your friend, full of great inspection and troubleshooting steps that are easy to follow.
We are looking forward to your posts as you make progress. Feel free to ask any questions you have. We know our Zs here.
Gotta say I have never seen those wheels before - but they're not bad. Pretty good condition, too - like your Z31. Great find!
You got a great Z! Impressive project, too. Looks like that Z has received some great care over the years. Always a good sign.No doubt you have your factory manual (FSM) It's at XenonZ31 Reference along with a lot of other good docs - and they're free. Your FSM is your friend, full of great inspection and troubleshooting steps that are easy to follow.
We are looking forward to your posts as you make progress. Feel free to ask any questions you have. We know our Zs here.
Gotta say I have never seen those wheels before - but they're not bad. Pretty good condition, too - like your Z31. Great find!
Last edited by zxguy1986; 06-02-2014 at 05:06 PM.
06-02-2014, 05:18 PM
#4
Registered User
Join Date: Jul 2008
Location: Florida
Posts: 154
Welcome to the world of Z cars. But I warn you, once you catch the diZeaZe, you have it for life. I've had at least 1 Z since 1973, now I have 2. One was not enough.
Almost anything that can or has gone wrong with a Z31 probably has a write up on how to fix it at one of the major forums. The Z31's VG30 engine is over engineered and can put out twice as much power as Nissan put into it back in 1986. You would require an intercooler, boost controller, bigger fuel pump, bigger injectors, engine management system, electric fans, etc. to go crazy, but just adding a boost controller to the stock turbo setup can get you big gains.
Almost anything that can or has gone wrong with a Z31 probably has a write up on how to fix it at one of the major forums. The Z31's VG30 engine is over engineered and can put out twice as much power as Nissan put into it back in 1986. You would require an intercooler, boost controller, bigger fuel pump, bigger injectors, engine management system, electric fans, etc. to go crazy, but just adding a boost controller to the stock turbo setup can get you big gains.
06-03-2014, 06:33 AM
#5
Registered User
Thread Starter
Join Date: May 2014
Posts: 28
Update on tear down... found some uglies..
Thankfully nothing I have found is going to be hard to repair... I have pics to show here. I found something that does irritate me, but, like I said it's not too hard to replace... Someone cut the wiring harness in two places. They cut the engine harness (ugh lazy jerks can't even pull a motor correctly...) and they cut the body harness under the passenger seat... SOOO... Add making a new harness to my list, OR I may use a painless wiring harness and just upgrade the entire harness (Yes I have all the de-pinning tools to put new wires into factory connectors).
Also will be needing seat belts... not sure how the drivers belt got in the shape that it is in...
Feast your eyes on the destruction!
Also will be needing seat belts... not sure how the drivers belt got in the shape that it is in...
Feast your eyes on the destruction!
06-03-2014, 06:35 AM
#6
Registered User
Thread Starter
Join Date: May 2014
Posts: 28
more pic
one didn't fit...
So the car was most apparently silver as it started life, someone painted over it, and then thought painting rattle can silver on a rusty floorboard must make it 200% stronger... (ugh, some people...) So i will be stripping the floors and replacing all metal that is bad that I can find, and I will be repairing or replacing frame rails they have taken a beating and repeated attempts (failed...) to jack up the car with the rails...
The last pic here is in the trunk on driver side the gas tank and latch release. Curiously the antenna mast hole is sealed well and no rust behind it...
ALSO! The wheels are stamped "GOTTI" i will be searching for those soon.
Last edited by 86ZxPROJECT; 06-03-2014 at 06:42 AM. Reason: clicked just too fast...
06-05-2014, 11:11 AM
#7
Registered User
Thread Starter
Join Date: May 2014
Posts: 28
update
So after much digging, I have discovered exactly what these wheels are... They are GOTTI J55C 3 piece wheels. True 3 piece wheels from spun aluminum. They were original equipment on Ferrari 308's as well as a couple year of Ferrari Dino. They also seem to have been quite popular with the Porsche 911 crowd of the late 70's and 80's. They are still manufactured but in FRANCE on a made to order basis. They are cool but I think the going price of these wheels in the condition they are in justifies my selling them to fund more goodies for the Z31. So they will be up for sale soon enough. Also, found a nasty spot on the frame in the engine bay, I am going to have to weld it as well... So I think tonight or tomorrow I will completely strip the engine bay and get it ready for my return mid June. The welder is looking lonely in the corner by the plasma cutter... Pics to follow soon.
06-05-2014, 12:56 PM
#8
Registered User
Thread Starter
Join Date: May 2014
Posts: 28
Update on Engine bay badness...
OK so attached are pics of the disaster I find in my engine bay. Granted the car came without a motor so I can only guess the owner prior to the guy I bought it from did this... The previous owner said he bought it without motor also and intended to rebuild and never got to it... (Or he got overwhelmed and decided to sell, which is my vote on why he sold it...)
I have to replace the entire friggin wiring harness to this car. I half thought about updating the entire harness with a Painless harness from Summitracing. It will give me 21 circuits to work with I would just have to make my splices to put the ECU in. (Not a horribly hard task just kinda tedious) OR... I could find a harness in a yard with good connectors and just re-wire that harness. Considering I plan on putting the 3.3L VG33 into the car later I think that may be the way to go.
Also the small boo boo on the frame I will have to repair. Also there seems to be some missing (eroded away) Body bonding material from the firewall to the frame. So I will address that after I true/square the frame. I will weld in patch material to the frame. I may wind up fabricating my own floor pan if I just can't find NEW ones to buy. Why is finding replacement floor pans so hard?! I find floor pans for a freaking YUGO but not the Z31... Can anyone help on that front???

 06-22-2014, 04:03 PM
#10
Registered User
Thread Starter
Join Date: May 2014
Posts: 28
Back and at it again!!
OMFG, So I get whats left of the chopped wiring harness out of my way, THEN I get the front bumper off, THEN the radiator out etc. etc...
I see the absolute STUPIDITY in my engine bay in it's full horrifying glory!
The previous owner repaired front collision frame damage (sheared the passenger side in two pieces...) WITH A GIANT WASHER WELDED TO EACH PIECE ... THAT what his idea of "Fixing it"... SMH!!! Sooo, adding to my list of things to replace are both front frame pieces, left and right... I found them for about $200 a piece new. I am just going to replace them as there is no way in hell I can honestly feel good about repairing what has been damaged and know the geometry is correct... SO ordering that today. Found a guy parting out a car and am getting wiring harness from him ($75). I will be posting pictures later tonight on this catastrophy... HOWEVER, on a positive note, I have decided the color I will paint the car. BMW Cosmos black metallic. Well... back to the garage to continue tearing it down so I can get her put back together.
 06-23-2014, 03:53 PM
#12
Registered User
Thread Starter
Join Date: May 2014
Posts: 28
Pics of stupidity as promised...
Feast your eyes on my troubles... I mean seriously, who the hell thought this was a good idea and put it back on the road like this.. OMFG...
LOL well at the very least I've started piling up new parts in the garage, and when I get this frame issue fixed up I will paint the engine bay and start reconstruction!!!
More to follow tomorrow...
LOL well at the very least I've started piling up new parts in the garage, and when I get this frame issue fixed up I will paint the engine bay and start reconstruction!!!
More to follow tomorrow...
 06-23-2014, 05:10 PM
#14
Registered User
Thread Starter
Join Date: May 2014
Posts: 28
heh..
Well I was left in the garage by myself because as I'm told, "It looked as if I was going to need an exorcist..." YEP, pissed me the hell off when I saw that. Good new tho, I found a parts car an hour away and the guy is being very nice about me chopping his car into tiny pieces to put mine back together. SOOO, getting his frame pieces, and floor pan, motor, wiring harness, etc etc...
ONLY thing I need to double check is the wiring diffrences between the Manual and Automatic Trans. Donor wiring harness is auto trans, my ECU / Car is manual... SOOOO... may have to swap a lil stuff around but hopefully not toooo bad.
ONLY thing I need to double check is the wiring diffrences between the Manual and Automatic Trans. Donor wiring harness is auto trans, my ECU / Car is manual... SOOOO... may have to swap a lil stuff around but hopefully not toooo bad.
06-23-2014, 05:36 PM
#15
very cool
Nice that u found a car you can cut up, I have 2 z31's I will at some point cut to bits with a sawzall and sell for scrap, I am going to keep everything I can unbolt, and hopefully someone like you will need parts, both my bodies are rust free, my 84 just got crushed on the front right corner, basically the fender took the brunt, but the door and firewall crumpled, so the insurance said it's totaled, sad day.
06-23-2014, 05:36 PM
#16
Registered User

Join Date: Sep 2012
Location: Montana
Posts: 233
06-24-2014, 07:15 PM
#17
Registered User
Thread Starter
Join Date: May 2014
Posts: 28
So update on progress... sorta...
Well I had to duck and run for cover while trying to pull parts off of the donor car because of a severe thunderstorm... SOOO, in the morning I will be back out there grabbing up parts and figuring out how the hell I'm going to put all of it in the FJ cruiser... LOL, that being said, I have sourced a VG30 motor, allllll the wiring, etc. (Taking the entire engine bay from the parts car, minus the Auto Trans crap), and the back seats (Yes, converting my car to a 2+2, mostly so the house troll don't gripe about another 2 seat car...)
So I will have lots of pics tomorrow of the new goodies, then the teardown will start on the motor, then the block will be sent to machine shop for cleaning and refurb. I'll have them check the decks, hone, etc. etc. then I will paint the block when I get it back. Since I have documentation on the donor engine and know it was in good running order I shouldn't have to replace too much internally except bearings and seals. I will however be replacing things like, water pump, timing belts, seals, bearings, oil pump etc...
I am however struggling with the wheels... Damn these rare wheels... ugh...
06-25-2014, 08:01 PM
#18
Registered User
Thread Starter
Join Date: May 2014
Posts: 28
New goodies update...
Well, so after getting poured on allll day long pulling this motor and goods from a car parked on the side of a barn... Here are the prelim shots of what I've got to work with now.
VG30 motor, unfortunately started life as an automatic (fixing that asap...) the ENTIRE wiring harness, and all components of the engine bay. Fuses, relays, coil, cruise control, EVERYTHING...
Soooo now I have to go over it all with a fine tooth comb tomorrow evening and begin the teardown so I can get the block over to the machine shop. So for now, here are the pics. I will also be working on the wiring harness to swap whatever needs to be swapped, jumped, or deleted to function properly on my car. THEN I will check continuity on every single damn wire and inspect 100% of the wiring harness, then re-wrap the entire loom.
06-26-2014, 01:56 PM
#19
Registered User
Thread Starter
Join Date: May 2014
Posts: 28
Machine shop love...
So I have a machine shop I've used a few times before. They don't always work really fast, but they do excellent work and are unbeatable on pricing. SO
$75.00 to dip, inspect block, machine decks, clean engine completely, polish crank, and install new plugs...
$50.00 to wet hone and bore cylinders if needed....
SO tearing the motor down today, dropping it off at the machine shop tomorrow. Easy enough! I will most likely drop off the heads as well and have them overhauled and a 3 angle valve job done on them. This way I put the motor back together and it will be completely fresh and ready to roar... (Provided the injectors I have are not shot..)
Pics of the teardown will follow later tonight.
Other notes, color of the car has been selected. I will be using the 2013 BMW color LeMans Blue Metallic. I want to stand out just a bit, black was really my first choice, but everyone seems to have black.. LOL
PPG paint 3 quarts = $374.00
PPG Clear kit $150.00
Free paint booth at my friends place... Priceless
Metal work on the car will start next week and should be finished just prior to engine coming back to be re-assembled. Ordered engine seal kit today, just need to know about piston rings and crank bearings. Hopefully everything will be fine and I won't need oversized anything...
06-26-2014, 02:20 PM
#21
Registered User
Thread Starter
Join Date: May 2014
Posts: 28
First sad face of the motor teardown...
Well the exhaust manifold is cracked... time to start sourcing another.. just the driver side, the passenger side and connecting piece are in good shape. Ugh pics to follow.
Anyone need a AT flywheel and torque converter ?
Anyone need a AT flywheel and torque converter ?
06-26-2014, 03:24 PM
#22
Registered User
Join Date: Jul 2008
Location: Florida
Posts: 154
Since you will have to replace the driver's side manifold if you go turbo, why not weld up the NA manifold and be done with it and replace it later with the turbo one?
BTW here is a great source for parts like wiring harnesses, missing or broken interior/exterior parts, etc..... Steve is a great guy too.
300zx Parts For You webpage
BTW here is a great source for parts like wiring harnesses, missing or broken interior/exterior parts, etc..... Steve is a great guy too.
300zx Parts For You webpage
06-26-2014, 03:51 PM
#23
Registered User
Thread Starter
Join Date: May 2014
Posts: 28
Manifold issues
Well I am going to source a new one to replace the cracked section only because I will probably take 6 months to build my turbo motor. I am using a VG33 motor and will be swapping in the VG30 crank and a few other items to build a 3.3L turbo for the car. So in the mean time I will be driving the car as an N/A until I have the turbo motor built, the ECU, and the subframe for the turbo swap.
So for now just going to toddle along with a fresh new N/A motor and I will sell the low mileage rebuilt N/A motor when I am ready to do the turbo swap.
Good link on the parts. Stay tuned for some interesting updates on "Parts" I have a good source for aftermarket interior parts that are "reproduction" parts from factory originals. (To be announced later...)
06-30-2014, 05:14 PM
#24
Registered User
Thread Starter
Join Date: May 2014
Posts: 28
Wheels
OK so the Gotti wheels finally have a new home. A fellow traded me a set of 91 Z32 wheels + $250 for my Gotti's.
That being said, I am wondering if a spacer and longer bolts may be required for the front...Anyone have some good info on this? I checked around the forum and have come up with the answer of... Z32 will fit Z31, but what's the deal on fitment issues... Hrrm, may have to add Z32 brakes to the list of mods on this car... LOL, why not, everything else is getting new parts.
Let me know if anyone has put Z32 wheels on a Z31 and what they had to do to fit them on... (Yes I searched but could not find a real suitable answer other than.. "Yes they fit...")
07-01-2014, 02:50 PM
#25
Registered User
Thread Starter
Join Date: May 2014
Posts: 28
Motor update
So the teardown of the motor was delayed a few days. But here are some pics... odd discoloration on the passenger side valve train.
Block is being dropped off today, will come back mucho shiny, then I have to paint it immediately LOL...
I see there are no comments / good advise about my wheel situation... anyone???
*** So after a few phone calls and some more searching on the forum, I have found this info. To use the Z32 wheels on my car I will need 1" spacers all around to ensure I get proper fitment. That being said, Eibach offers a Pro-Spacer for the INFINITY that fits my car perfectly.
5 Lug bolt pattern: 5x4.5(5x114.3)
Studs are m12x1.25
Centerbore is 66.1mm
1" spacer
EIBACH PT# 90.4.25.019.4 List price $174.00 a PAIR, they can however be ordered cheaper from JEGS, JC Whitney, and Summit Racing Equipment.
In case anyone had the same issue on Z32 to Z31 Wheel fitment ***
Last edited by 86ZxPROJECT; 07-01-2014 at 03:16 PM. Reason: Added wheel fitment info


