How to: overhaul your underbody
 01-01-2009, 07:08 PM
#1
�ber User
Thread Starter
Join Date: Sep 2005
Location: lemont, Illinois
Posts: 9,532
How to: overhaul your underbody
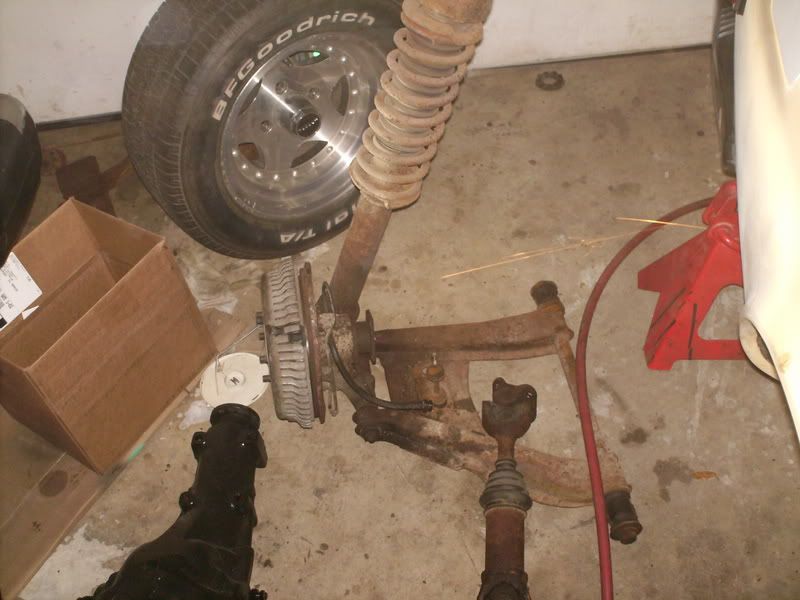
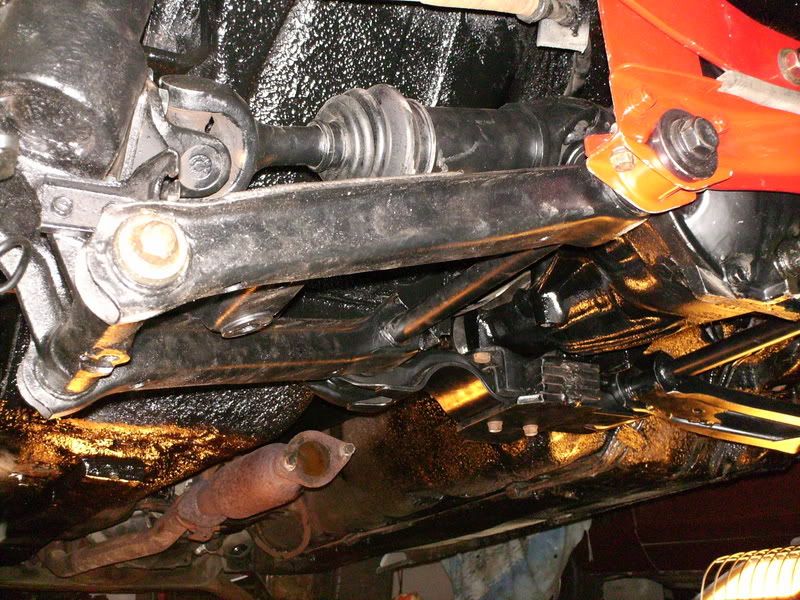
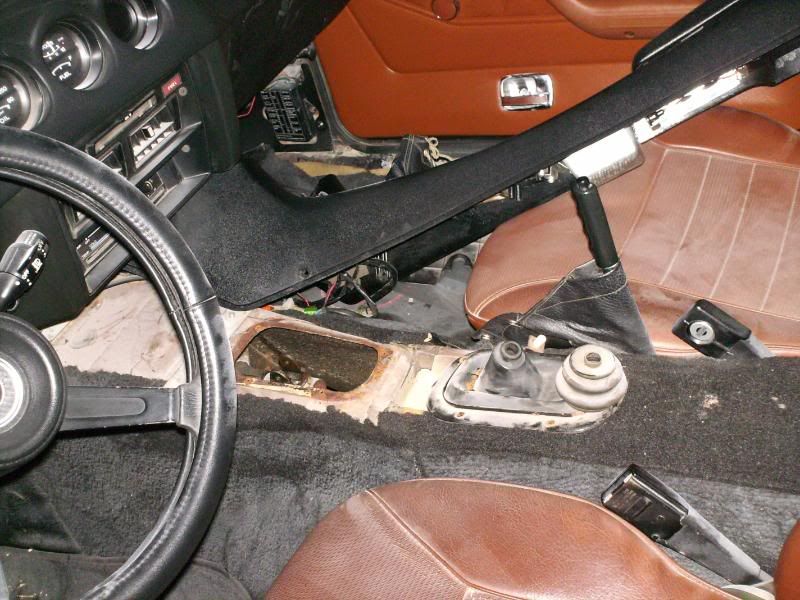
well, i started an awesome project. NOT. my arms are bruised and torn and so are my hands. this is a day by day update on the overhauling of the rear subframe.
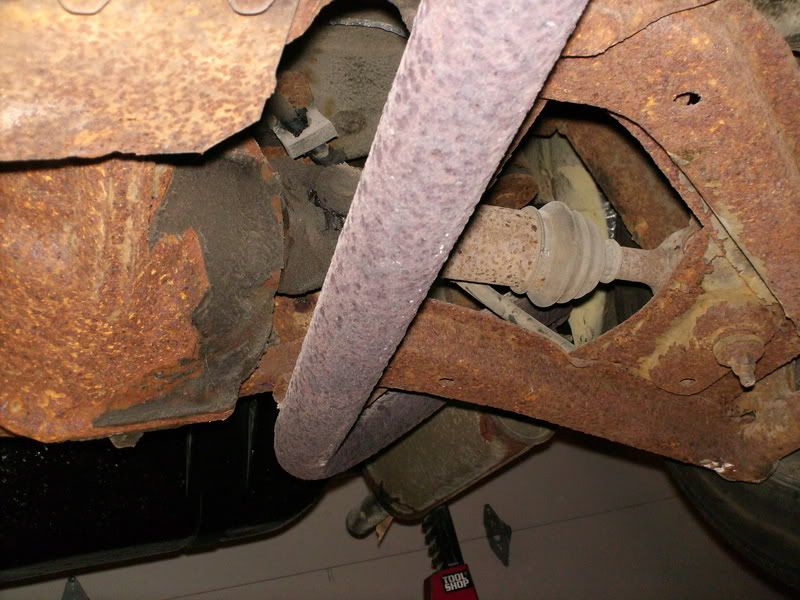
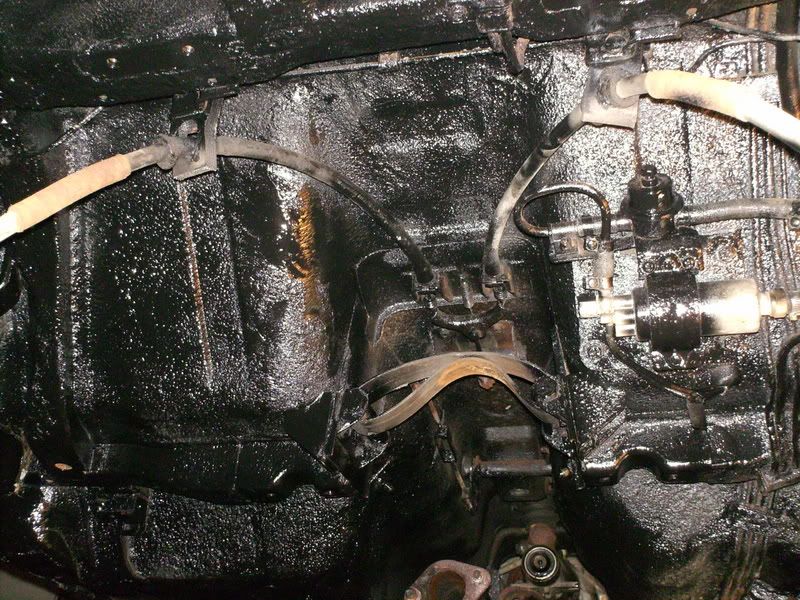
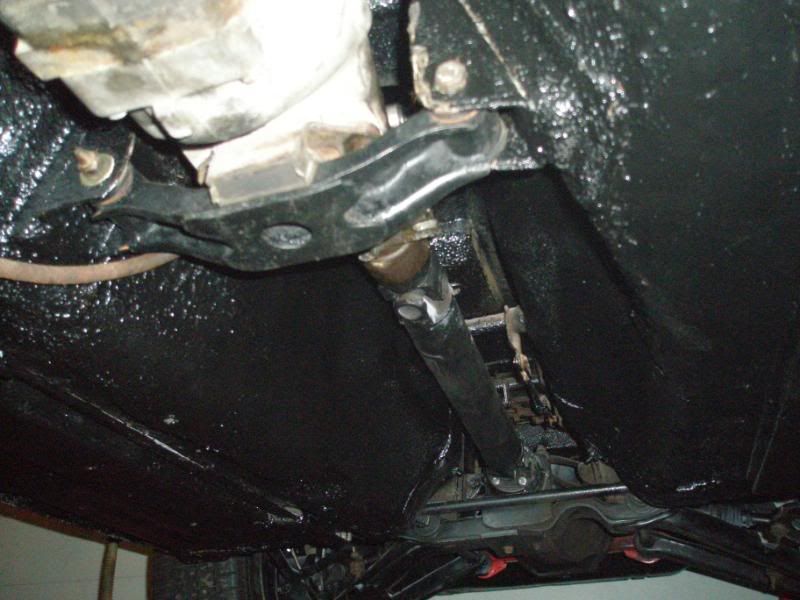
this, is day one:
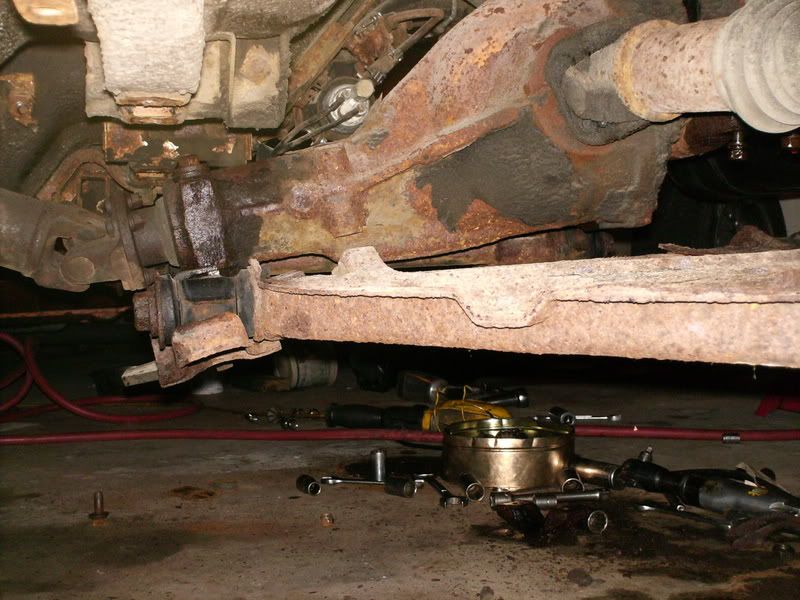
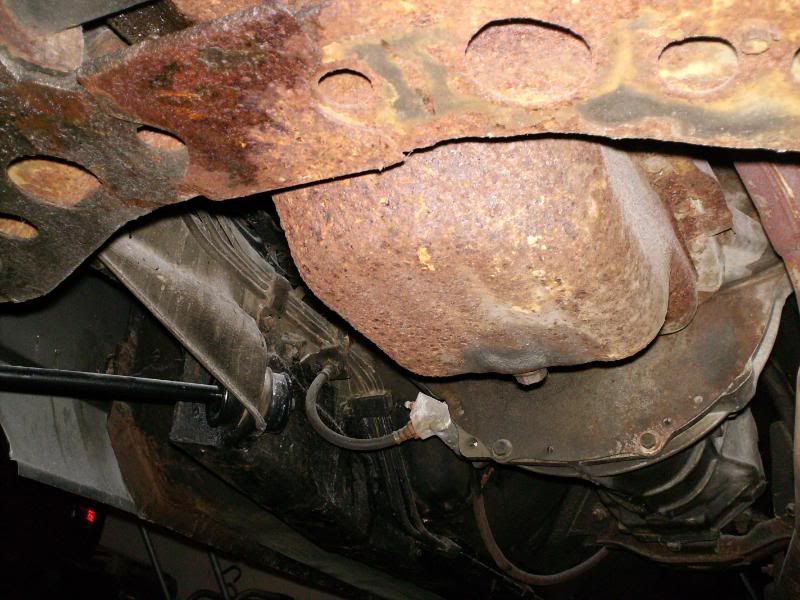
well, i need to undercoat my car. right? wrong. i need to do alot more. the frame is in good shape, but i think it could use a better job. i will probably also replace the engine cradle and steering rack with one i refurbished. soon. not now though. but, first things first. your day one, isnt going to get you much. just do this. order poly urethane bushings and if your lucky like me, get the parts you want to fix so you can take your time on them and do it right. this is what i have to work with, my canvas if you will. you will also need to drop the axle back section of your exhaust. mine actually came off very easily. if only my axles were as stubborn as the exhaust. aka easy! dont forget to take all nuts and bolts and clearly label them in a plastic baggy or by sticking them in a piece of cardboard, OR by butting them back into their original spot with out obviously the piece the held mounted in place attatched.
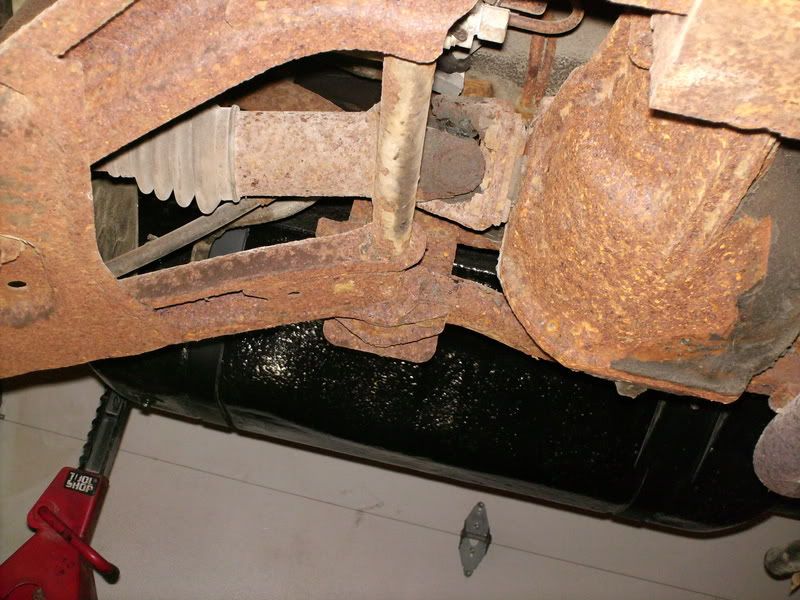
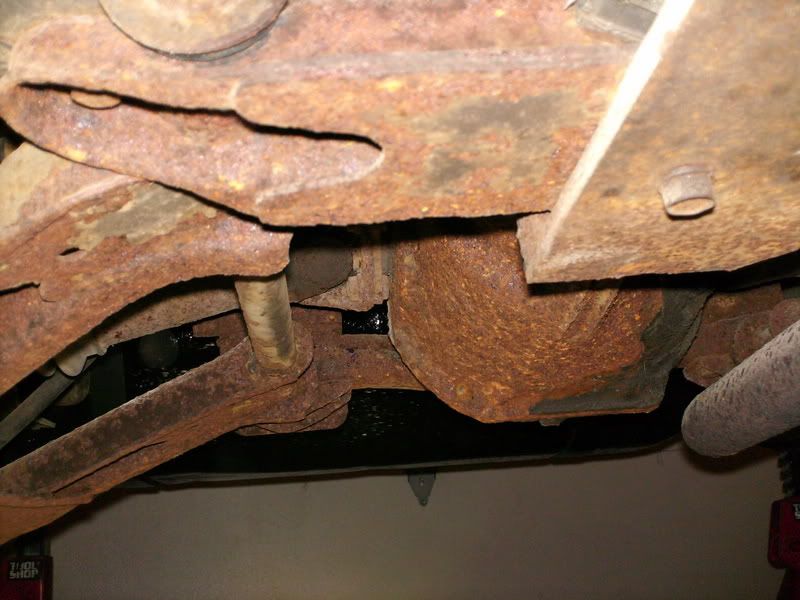
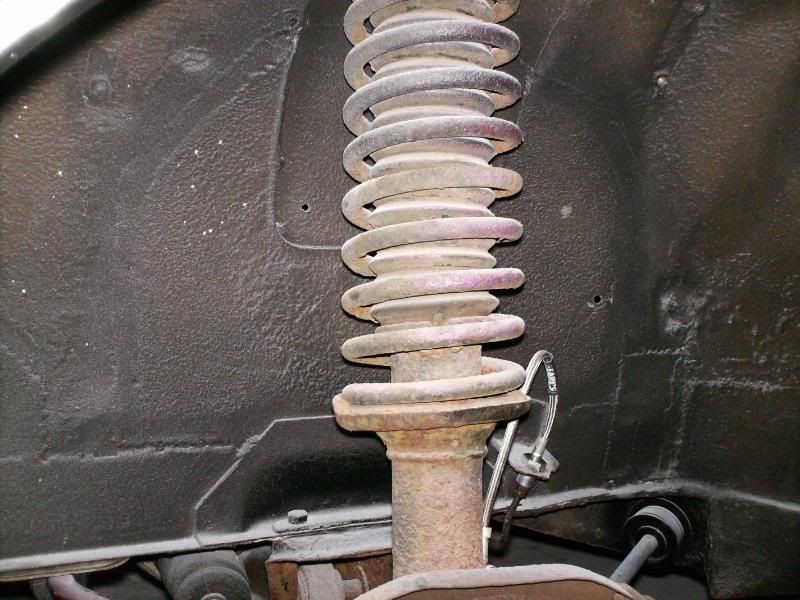
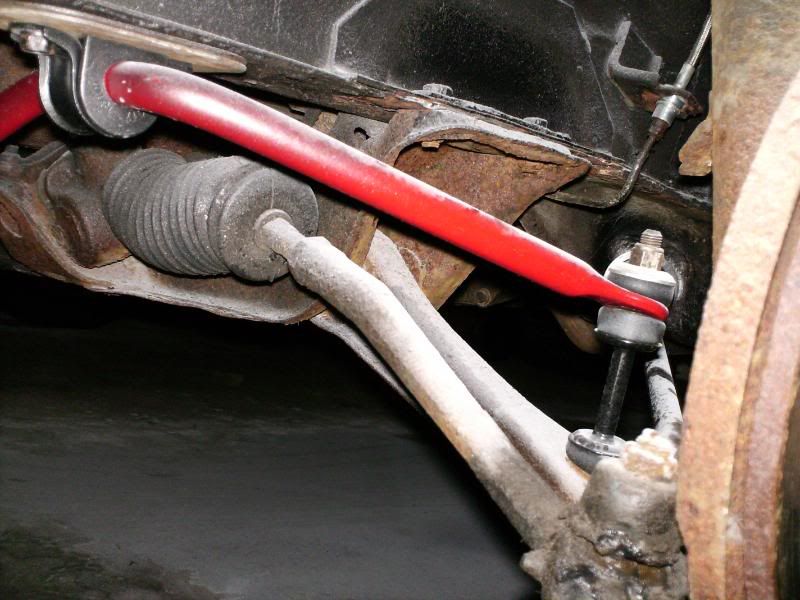
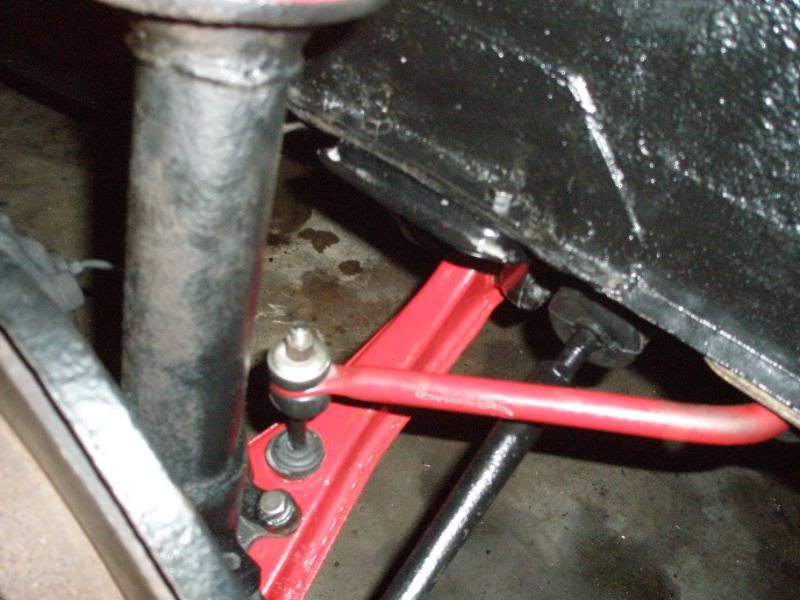
not pretty i know. day one you can drop soem stuff, but if your life lieks to kick you in the ***** like me, you'll bust your sway bar endlinks! hurray!!! you also my axle nuts are frozen in place. remove your wheels and all other pieces you can easily unbolt. your best bet then is to blast everything with PB blaster let if sit till morning. blast them again, and try to work on it when your back from your day at work or school, or w/e you do. (mike) this is as far as i was able to get
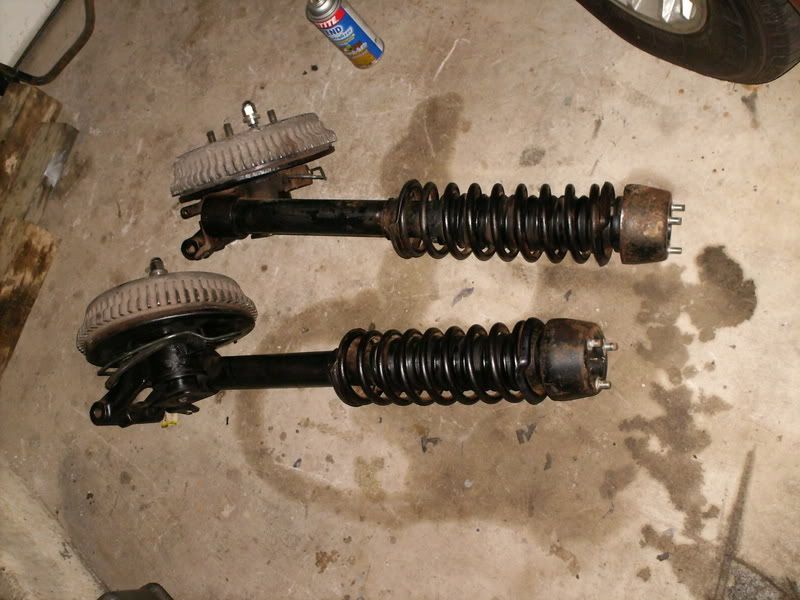
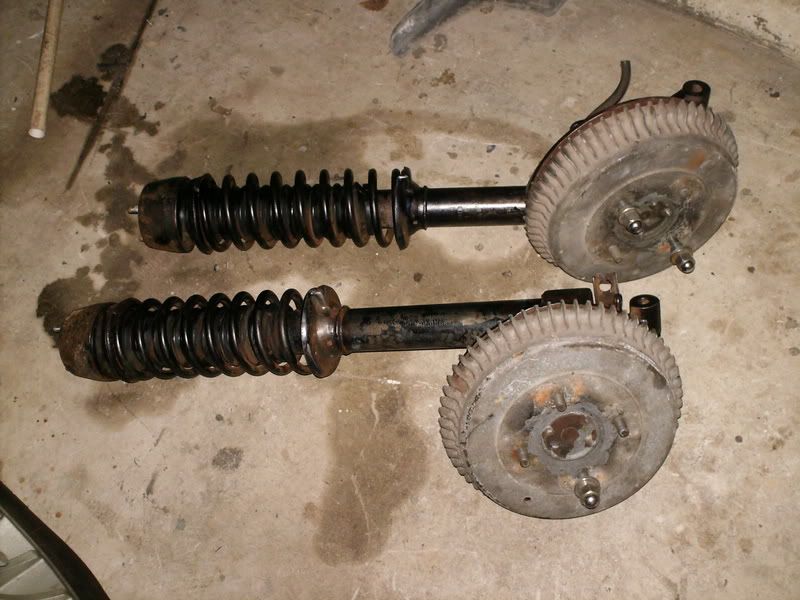
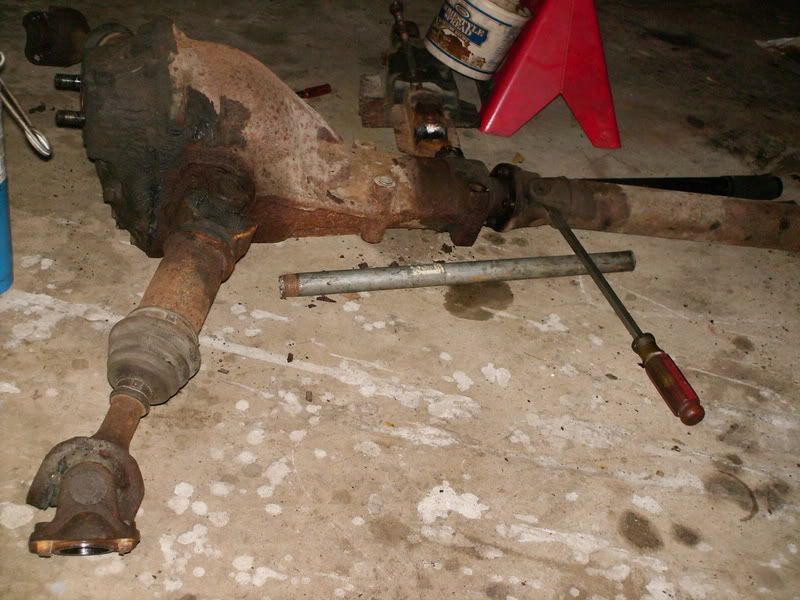
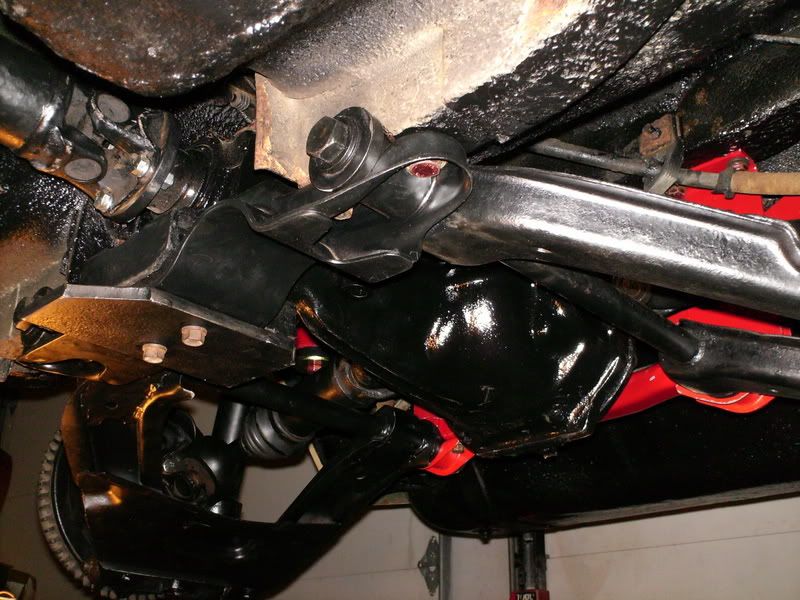
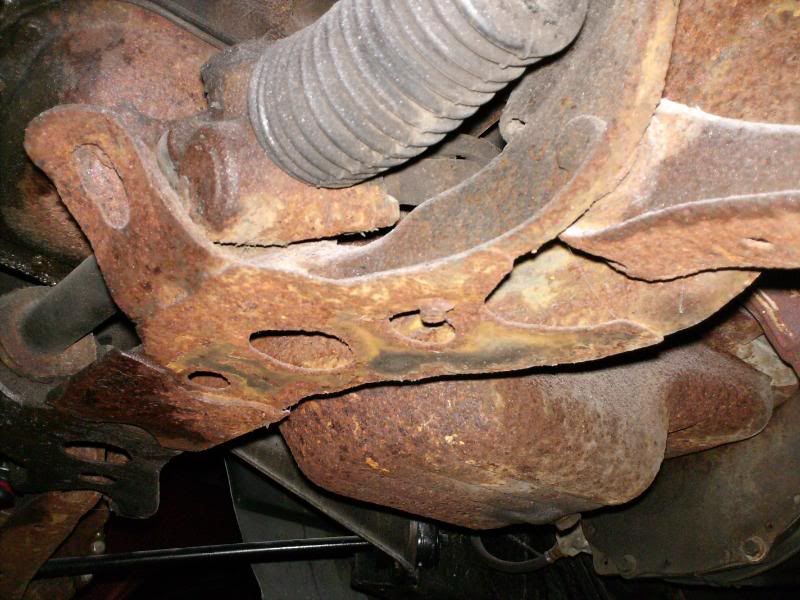
however i am very resourceful. i picked up low mileage parts, and did them up right. sandblasted and painted and my poly bushings. this is what i have to work with once i drop the 90k rust bucket ****.
ohhh yeah... this is going to look sweet. tune in next time for hopefully, an empty rear end with a nice coat of sealer on it all.
this, is day one:
well, i need to undercoat my car. right? wrong. i need to do alot more. the frame is in good shape, but i think it could use a better job. i will probably also replace the engine cradle and steering rack with one i refurbished. soon. not now though. but, first things first. your day one, isnt going to get you much. just do this. order poly urethane bushings and if your lucky like me, get the parts you want to fix so you can take your time on them and do it right. this is what i have to work with, my canvas if you will. you will also need to drop the axle back section of your exhaust. mine actually came off very easily. if only my axles were as stubborn as the exhaust. aka easy! dont forget to take all nuts and bolts and clearly label them in a plastic baggy or by sticking them in a piece of cardboard, OR by butting them back into their original spot with out obviously the piece the held mounted in place attatched.
not pretty i know. day one you can drop soem stuff, but if your life lieks to kick you in the ***** like me, you'll bust your sway bar endlinks! hurray!!! you also my axle nuts are frozen in place. remove your wheels and all other pieces you can easily unbolt. your best bet then is to blast everything with PB blaster let if sit till morning. blast them again, and try to work on it when your back from your day at work or school, or w/e you do. (mike)
this is as far as i was able to gethowever i am very resourceful. i picked up low mileage parts, and did them up right. sandblasted and painted and my poly bushings. this is what i have to work with once i drop the 90k rust bucket ****.
ohhh yeah... this is going to look sweet. tune in next time for hopefully, an empty rear end with a nice coat of sealer on it all.
 01-01-2009, 07:08 PM
#2
�ber User
Thread Starter
Join Date: Sep 2005
Location: lemont, Illinois
Posts: 9,532
DAY 2:
well i couldnt get quite as far as i wanted. but still. good progress. my nuts (lol) connecting the drive shaft to diff were siezed. so i droped everything around it and am working on them. turns out i had shock towers with the pins already removed. so the only original part going back up will be the short cross member and drive shaft. but today i dropped everything but the strut towers (since the brake line is also siezed to the brakes) and cleaned and prepped my other parts for paint. this is how everything stands now
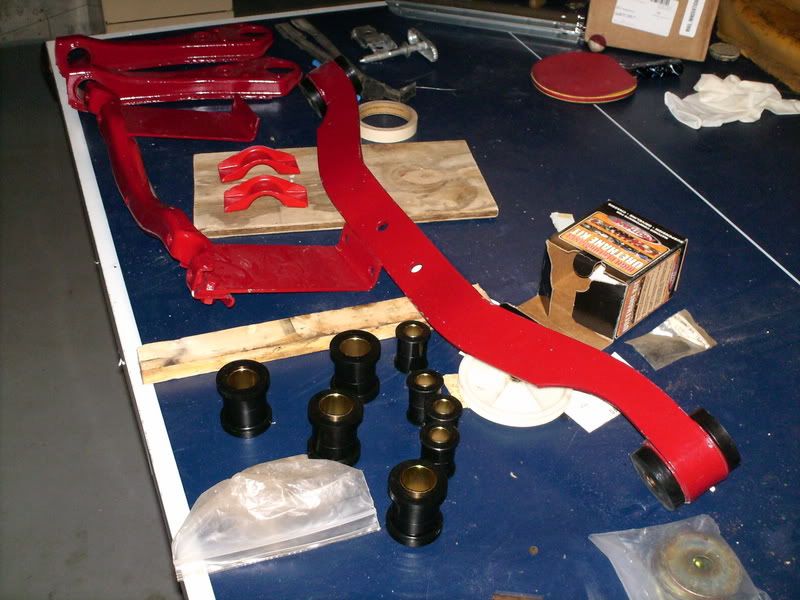
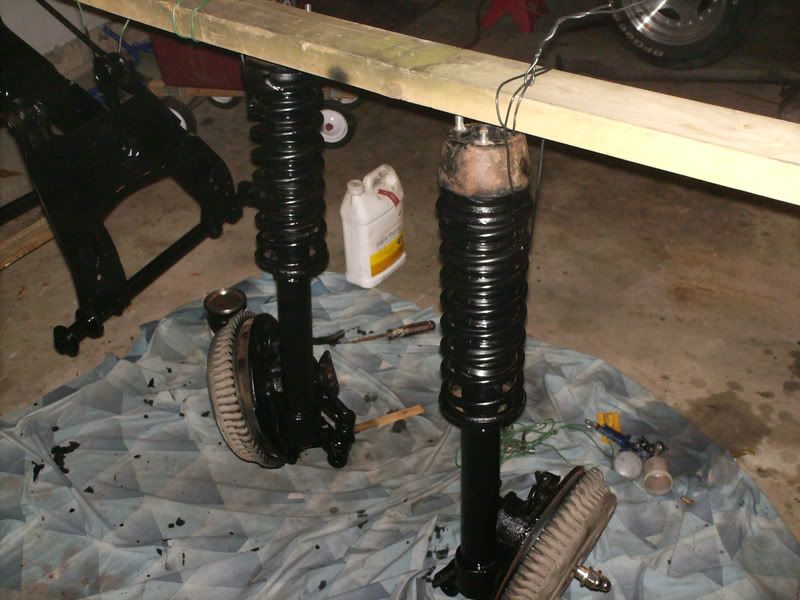
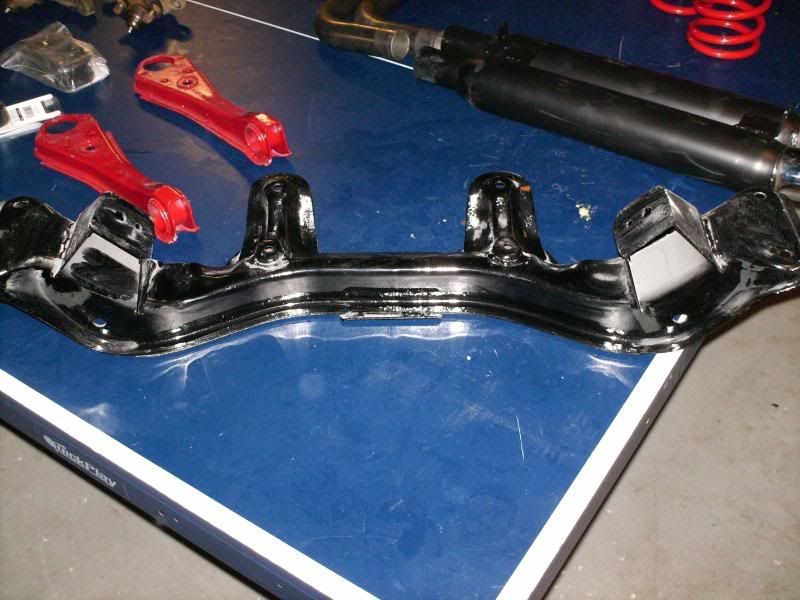
prepped for paint strut tower and all:
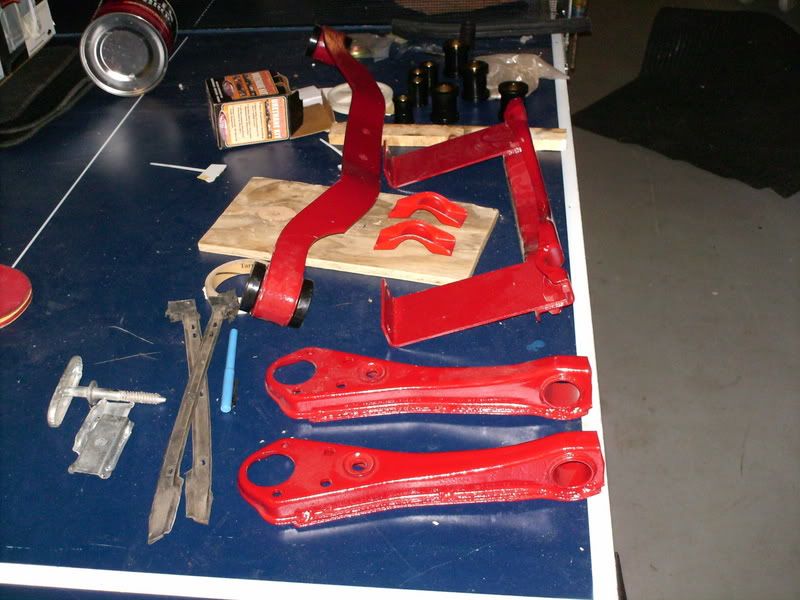
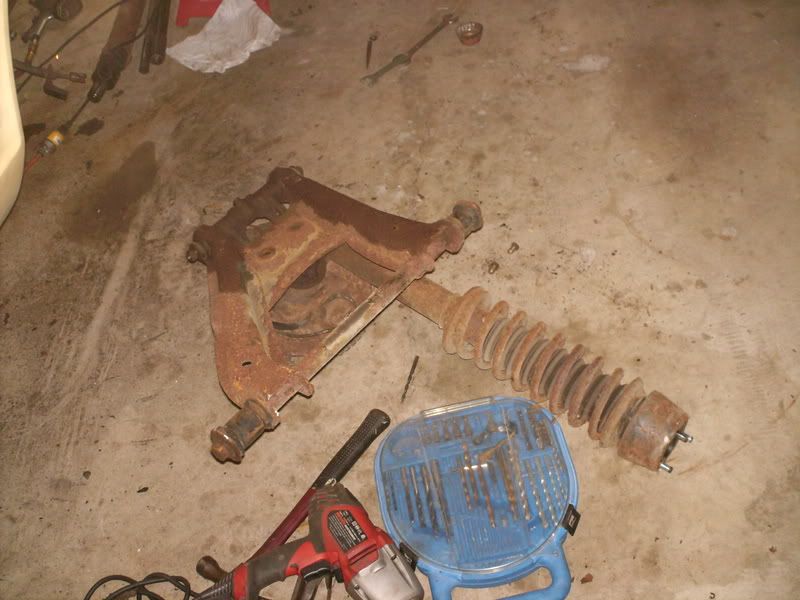
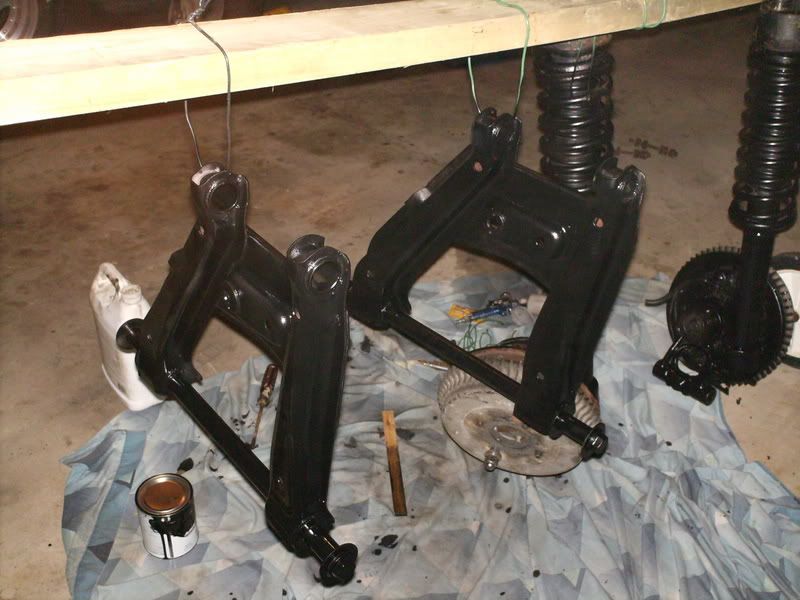
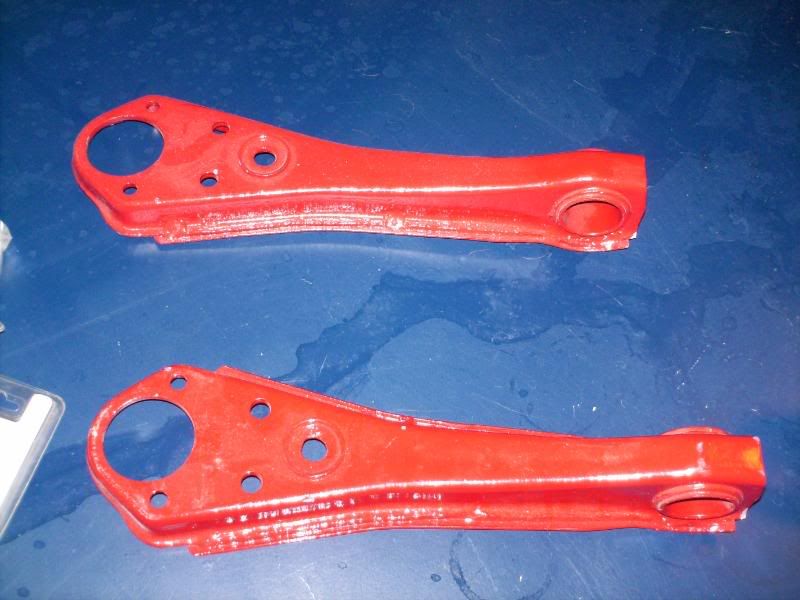
prepped for paint swing arms, one already in primer:
this one only ground down and sprayed to with the GREAT rust converter stuff that also preps for paint at teh same time:

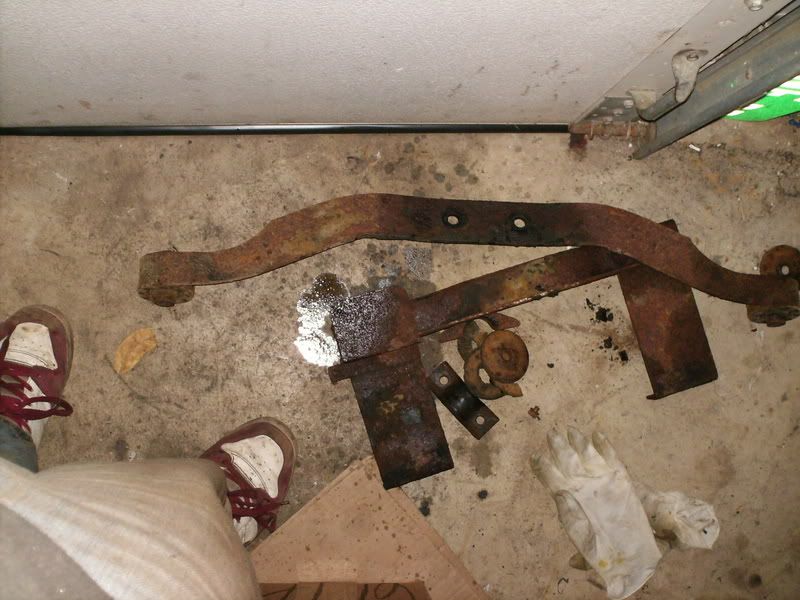
Junk parts, GOOD RIDDENS:
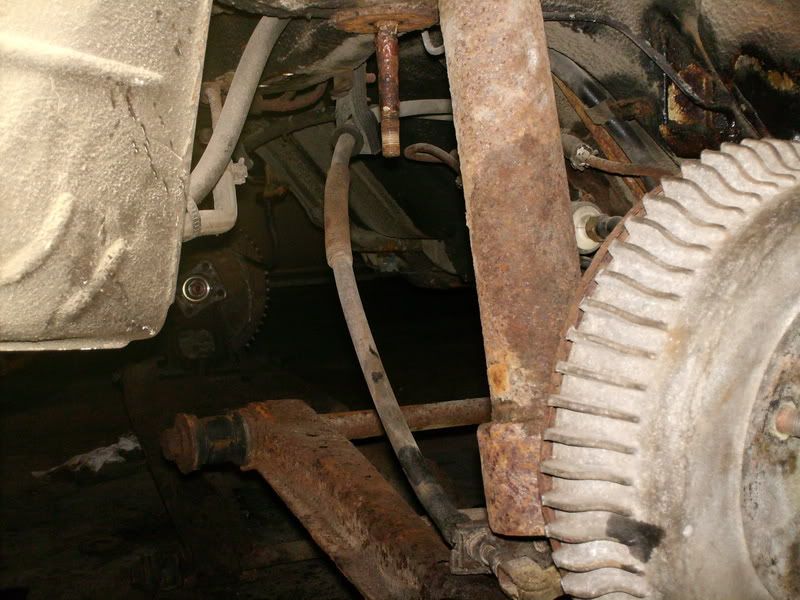
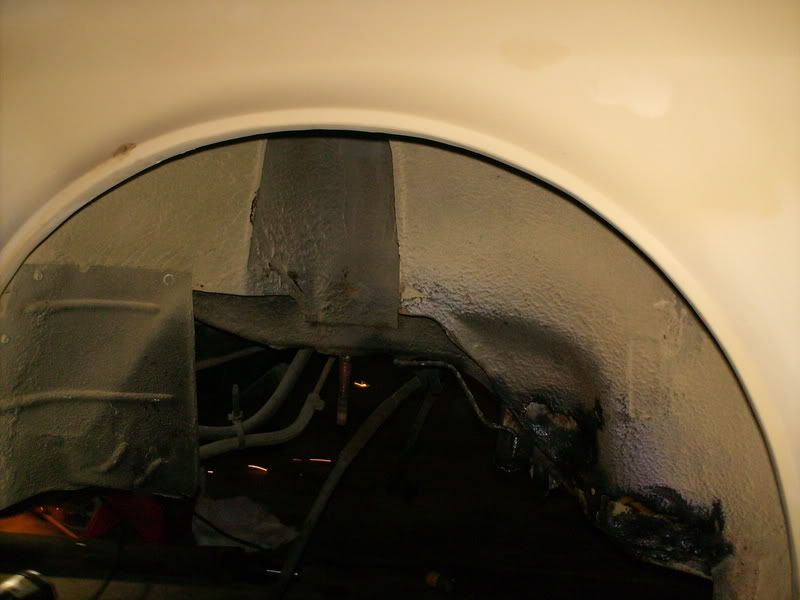
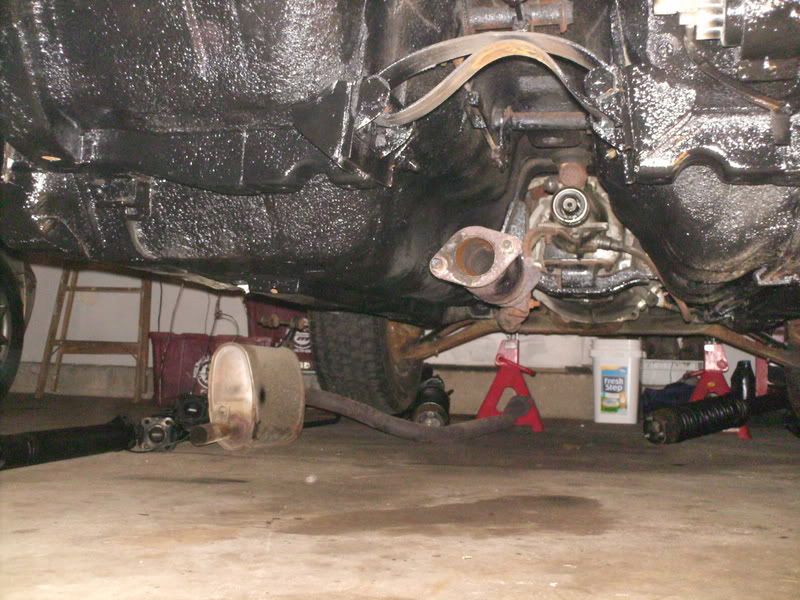
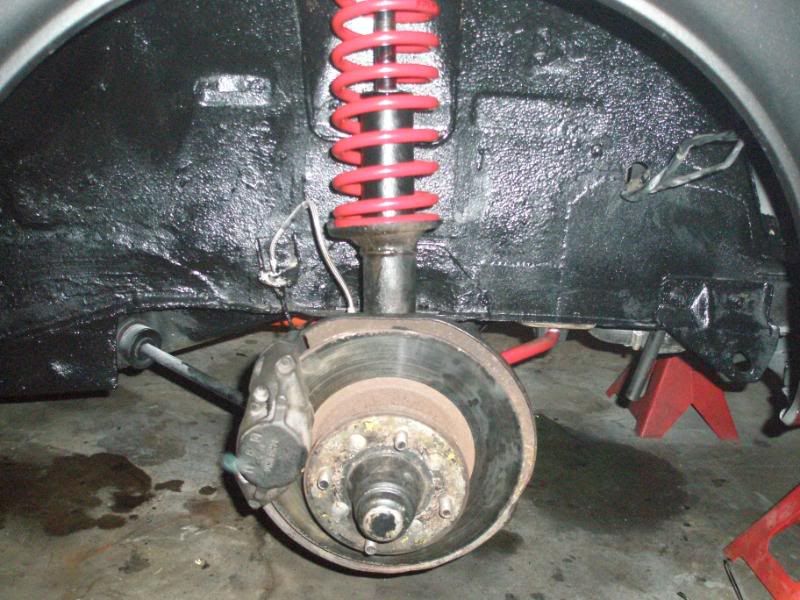
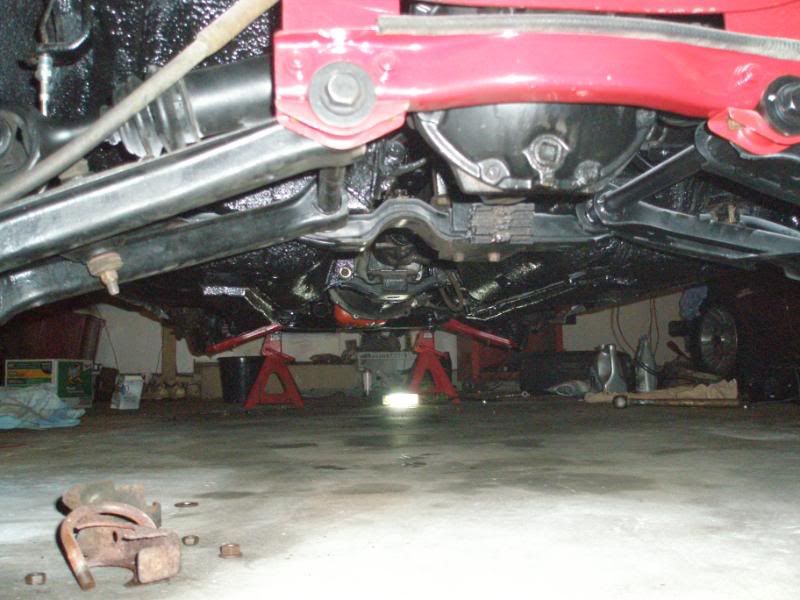
and how the rear sits as of this moment, not to bad once all those parts have been removed:
well i couldnt get quite as far as i wanted. but still. good progress. my nuts (lol) connecting the drive shaft to diff were siezed. so i droped everything around it and am working on them. turns out i had shock towers with the pins already removed. so the only original part going back up will be the short cross member and drive shaft. but today i dropped everything but the strut towers (since the brake line is also siezed to the brakes) and cleaned and prepped my other parts for paint. this is how everything stands now
prepped for paint strut tower and all:
prepped for paint swing arms, one already in primer:
this one only ground down and sprayed to with the GREAT rust converter stuff that also preps for paint at teh same time:
Junk parts, GOOD RIDDENS:
and how the rear sits as of this moment, not to bad once all those parts have been removed:
01-01-2009, 07:09 PM
#3
�ber User
Thread Starter
Join Date: Sep 2005
Location: lemont, Illinois
Posts: 9,532
Day 3
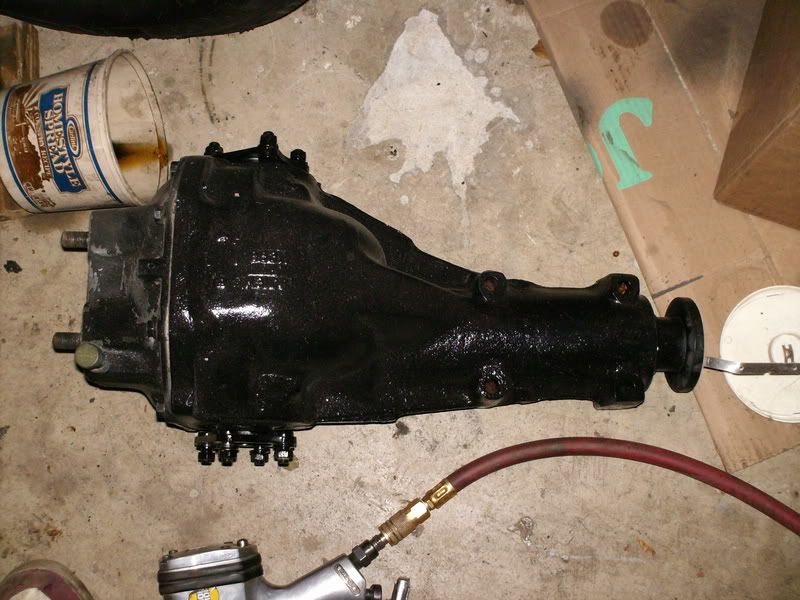
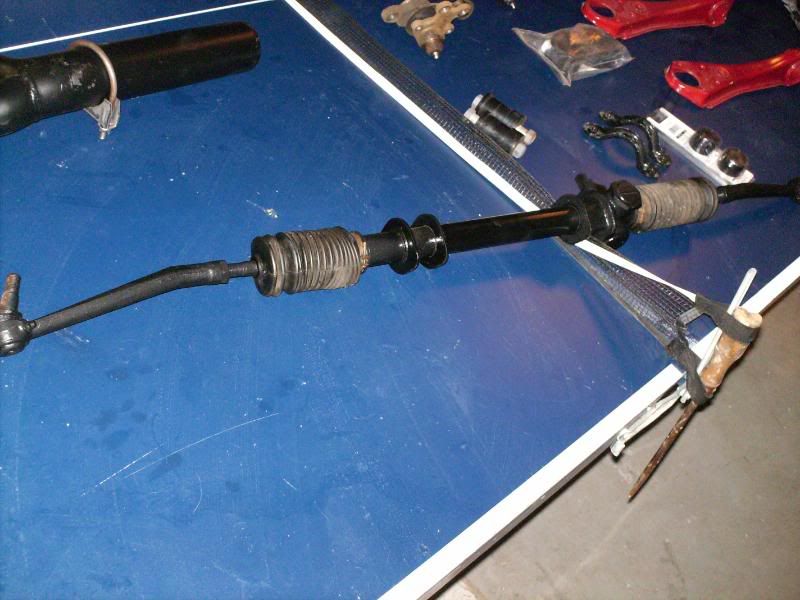
soo, today i was able to drop the rest. and got jsut about all my parts painted and teh half shafts and drive shaft off teh diff. it was one hellofa project. im beat to ****. but i have ALL new bushings except for the sway bars, but that will be a B-day or X-mas present since they are 21 days apart lol. but its all looking good. and im gonna get me sum SS brake lines since my rubber ones are seperating
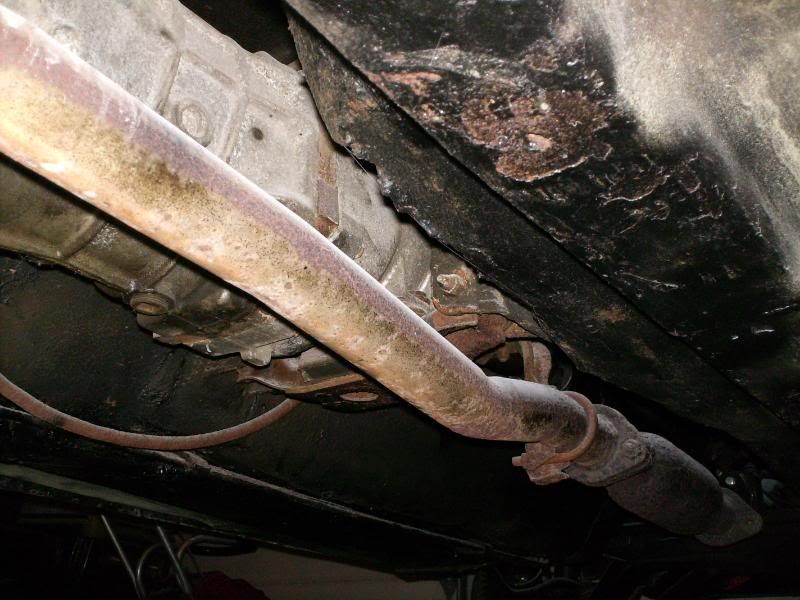
just like before, out with the old:
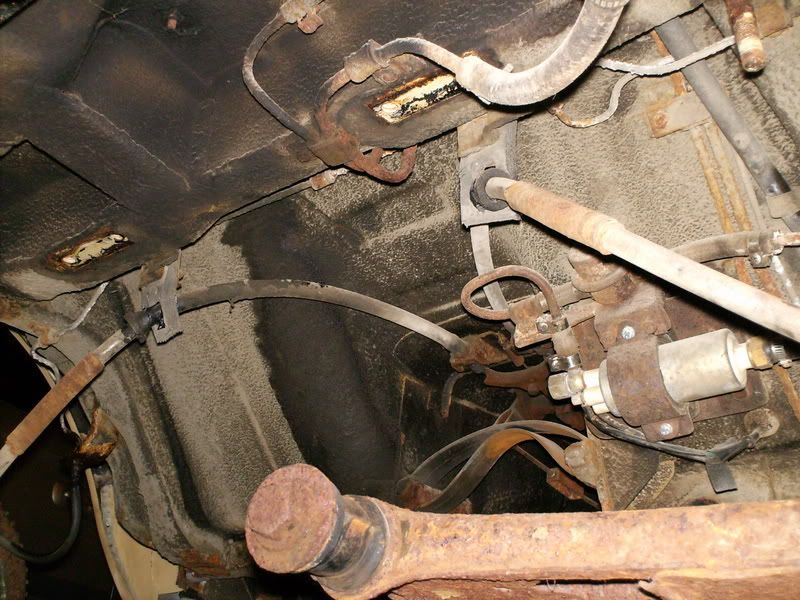
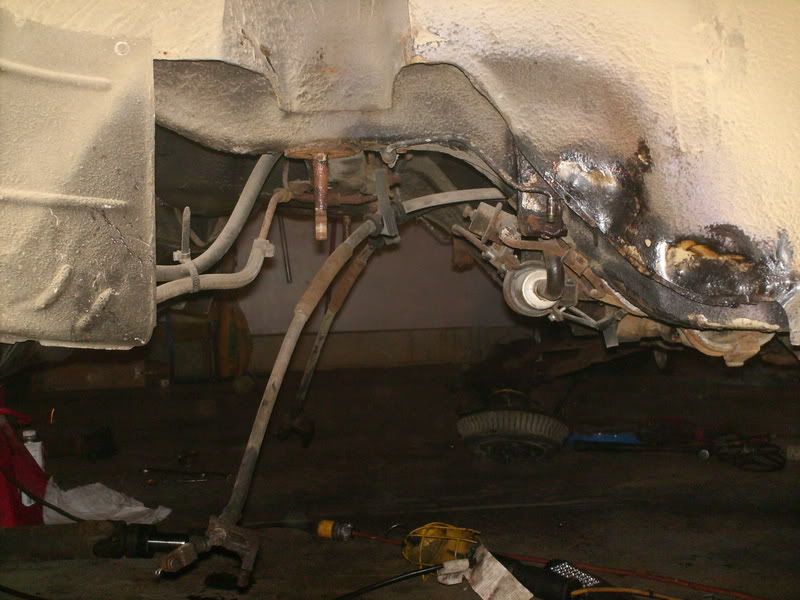
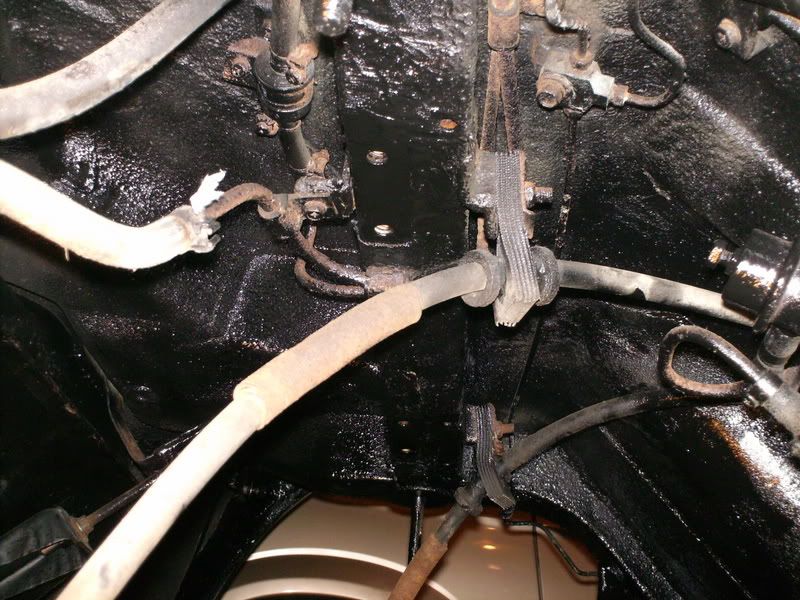
and.... in with, nothing? thats right its just stripped only brake lines and fuel lines left up there:
and since all of you RAVE over rustoleum paint jobs, i did a rustoleum paint job..... here:

got rustoleum reduced it and sprayed. tommorow i sand blast and paint... well, maybe... i forgot its a friday. lol. man, i cant WAIT to drive this thing, all new rear bushings. soo nice. then ima pull the motor, power wash it paint the engine bay replace the engine cradle with my "new" one and steering rack. ahhh, all this stuff has only 60k. soo nice
soo, today i was able to drop the rest. and got jsut about all my parts painted and teh half shafts and drive shaft off teh diff. it was one hellofa project. im beat to ****. but i have ALL new bushings except for the sway bars, but that will be a B-day or X-mas present since they are 21 days apart lol. but its all looking good. and im gonna get me sum SS brake lines since my rubber ones are seperating
just like before, out with the old:
and.... in with, nothing? thats right its just stripped only brake lines and fuel lines left up there:
and since all of you RAVE over rustoleum paint jobs, i did a rustoleum paint job..... here:
got rustoleum reduced it and sprayed. tommorow i sand blast and paint... well, maybe... i forgot its a friday. lol. man, i cant WAIT to drive this thing, all new rear bushings. soo nice. then ima pull the motor, power wash it paint the engine bay replace the engine cradle with my "new" one and steering rack. ahhh, all this stuff has only 60k. soo nice
01-01-2009, 07:09 PM
#4
�ber User
Thread Starter
Join Date: Sep 2005
Location: lemont, Illinois
Posts: 9,532
day 4
this day was full of sand blasting followed by power washing the underneath. then i went to undercoating.
i seemed to have lost my day 3 pictures though.... well, most of themthis is how the under neath stands now
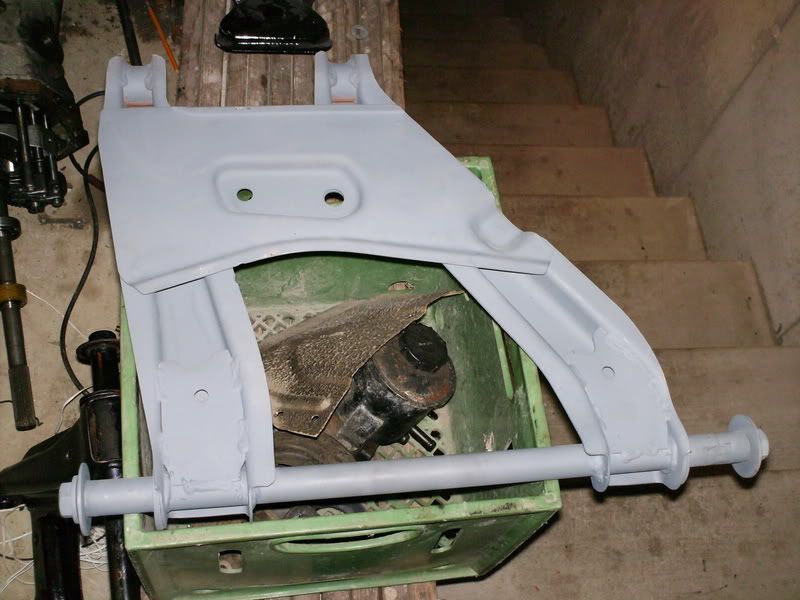
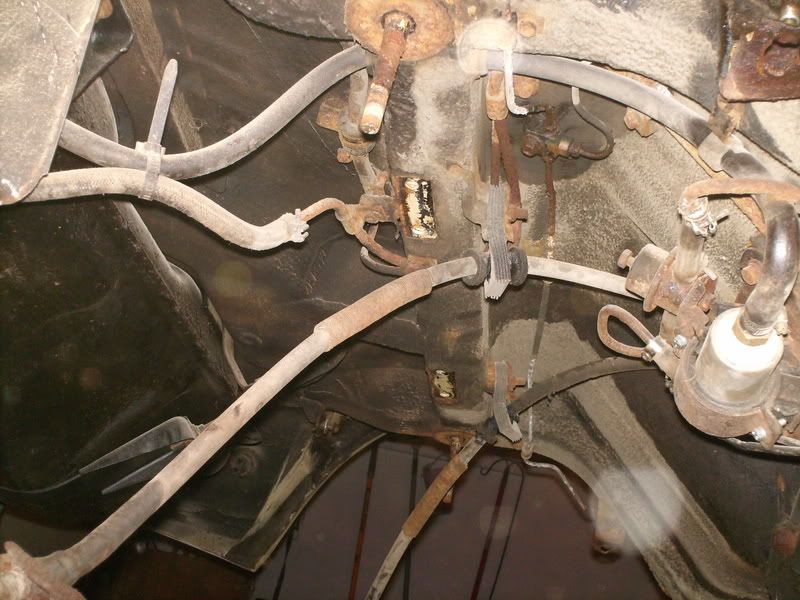
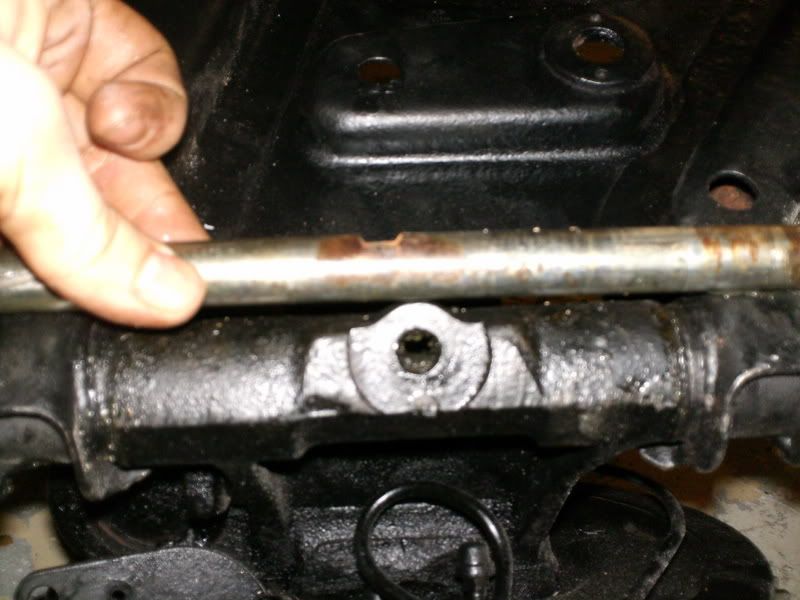
now for th etricky part, even thoguh you dont have to, i wanted polyurethane bushings ALL around. even where the A arms meet the strut towers. to do this you need to remove teh pins. very very hard to do right. there is a pin in the middle that you take the nut off of and then tap it out. TAP. then loosin the nuts on both ends of the rods holding the A arms to the towers. then tap those out, use a punch if you have one in the center cause you dont want to ruin the threads my hitting directly on the ends of the rods. they should come out far enough to get a vice grip on and tist it and pull or tap the vice. it will come out, eventually. now press in your bushing, i was able to get them in with C clamps. now for the hard part. getting the rods back in. if you notice (which i didnt) the rods NEED to go in a certain way, the notches in them for the pins are off center. illustrated in this picture:
where the pin goes
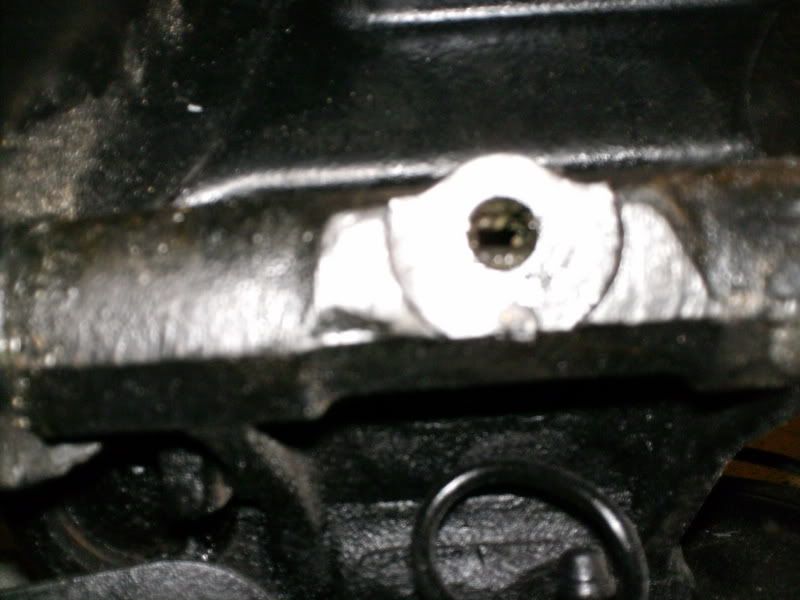
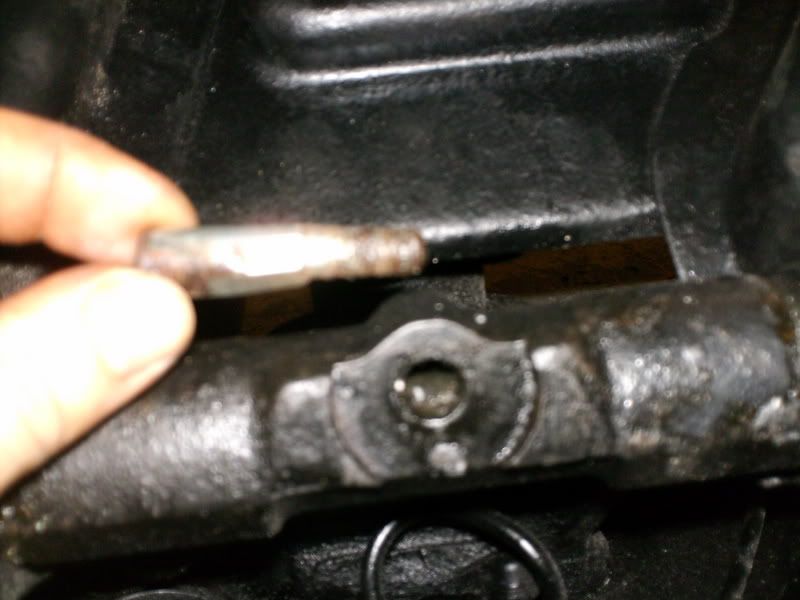
wrong way to put the pin in. notice how if held evenly at both ends the notche and pin hole doesnt line up
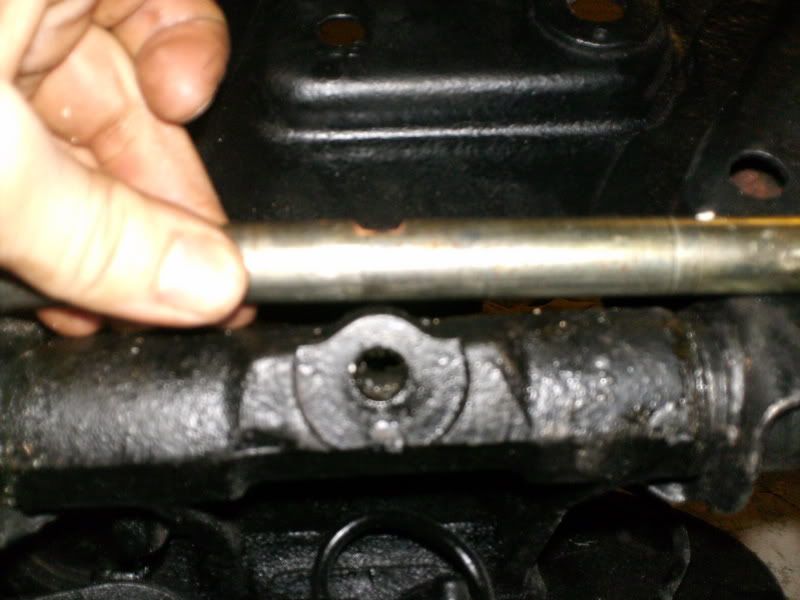
the right way
now grease up EVERYTHING. the rod inside the hole for the rod and bushing. now for a little trick. stick the rod in the freezer. and let it sit in there for at least 20 mins. mean while, slowly heat with a torch (move it around so dont just heat one spot) around the casting the rods goes in
do this for 10 mins it should get pretty damn hot but not hot enough to melt the bushing. now take the rod out of the freezer, stick multiple washers on one end and twist the nut on, not you have a secure surface you can hit on to pound the pin in without fear of ruining the threads. it will take some good hitting (dont slam them just be forgive yet stern) and they will go right in. i vouched for not using those pins to hold the rods in cause quite frankly, they dont really do squat. the nuts will never back off cause they go on tight, and even if they did, that pin isnt going to just work its way out. they are reletivly pointless.
hopefully tommorow i assemble the rear and drop her back down
this day was full of sand blasting followed by power washing the underneath. then i went to undercoating.
i seemed to have lost my day 3 pictures though.... well, most of themthis is how the under neath stands now
now for th etricky part, even thoguh you dont have to, i wanted polyurethane bushings ALL around. even where the A arms meet the strut towers. to do this you need to remove teh pins. very very hard to do right. there is a pin in the middle that you take the nut off of and then tap it out. TAP. then loosin the nuts on both ends of the rods holding the A arms to the towers. then tap those out, use a punch if you have one in the center cause you dont want to ruin the threads my hitting directly on the ends of the rods. they should come out far enough to get a vice grip on and tist it and pull or tap the vice. it will come out, eventually. now press in your bushing, i was able to get them in with C clamps. now for the hard part. getting the rods back in. if you notice (which i didnt) the rods NEED to go in a certain way, the notches in them for the pins are off center. illustrated in this picture:
where the pin goes
wrong way to put the pin in. notice how if held evenly at both ends the notche and pin hole doesnt line up
the right way
now grease up EVERYTHING. the rod inside the hole for the rod and bushing. now for a little trick. stick the rod in the freezer. and let it sit in there for at least 20 mins. mean while, slowly heat with a torch (move it around so dont just heat one spot) around the casting the rods goes in
do this for 10 mins it should get pretty damn hot but not hot enough to melt the bushing. now take the rod out of the freezer, stick multiple washers on one end and twist the nut on, not you have a secure surface you can hit on to pound the pin in without fear of ruining the threads. it will take some good hitting (dont slam them just be forgive yet stern) and they will go right in. i vouched for not using those pins to hold the rods in cause quite frankly, they dont really do squat. the nuts will never back off cause they go on tight, and even if they did, that pin isnt going to just work its way out. they are reletivly pointless.
hopefully tommorow i assemble the rear and drop her back down
01-01-2009, 07:10 PM
#5
�ber User
Thread Starter
Join Date: Sep 2005
Location: lemont, Illinois
Posts: 9,532
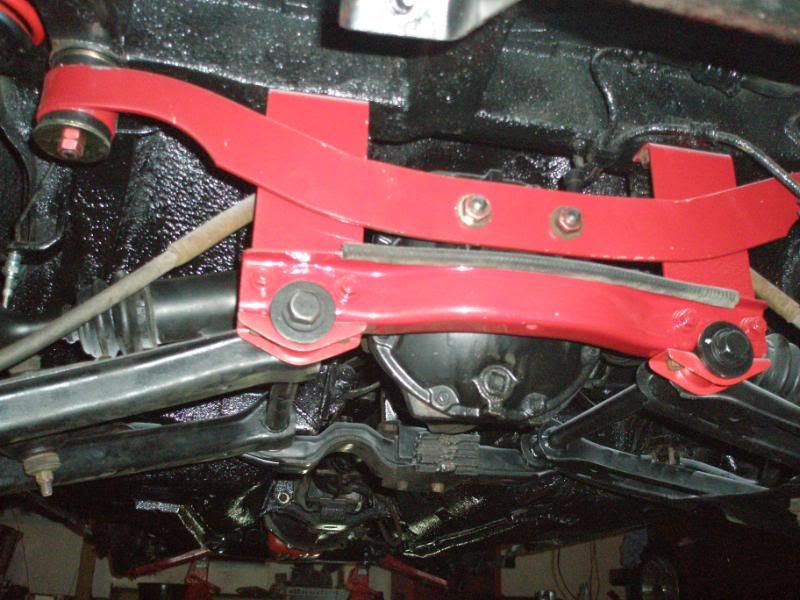
final day! ( still need to toss up the way bar and change a stud on the hub, no biggie )
well, ill explaine first then post the finishing picks. this last part is best done with a buddy. because its a bitch. now that you have your A arms assembled take them out and stick them back up. (also go buy all new nuts and bolts) this is done with a buddy up top to put teh nuts on and you down lifting the heavy *** things up into the well and holding them there till he can get 2 nuts on. then tighten them up. now you can stick up your mustache bar. 2 nuts no big. then the rear carriage that goes under it. it can be done by yourself but since its kinda bulky and will move around its best with a partner. 4 bolts there and use lock washers or at least loctite. tighten those all up evenly though dont just tighten one all the way then the other. make a pattern. now your ready for the rear diff. bolt the axles and front cross member to the diff. stick it on a jack and slide it under the car. now have a buddy jack it up while you hold the nose of it. once its in place you might have to rotate it to get the studs to line up with the holes with the mustache bar. then have you buddy pull the diff and jack back until in the holes and just start the nuts on them. now you can slip the A arm bushing into that cross member on the diff and bolt those up. use lock washers people.you can now tighten those up and remember you do them evenly not one at a time. then get the rear A arms bolted up with the bottom bracket piece that holds tehm to the carrage. now you should be able to finish up teh rest. new nuts and bolts on the axles to the stub axles. and then slide the drive shaft on and bolt. vvuwala!! your finished. now admire.
i still have yet to finish the undercoating. next time we do the front end so its poly bushings all around and a show car under carrage.
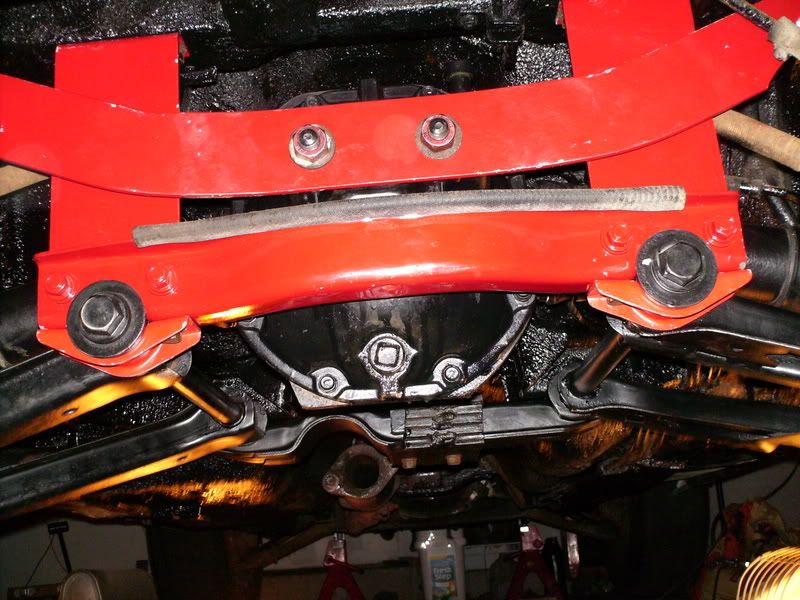
01-01-2009, 07:11 PM
#6
�ber User
Thread Starter
Join Date: Sep 2005
Location: lemont, Illinois
Posts: 9,532
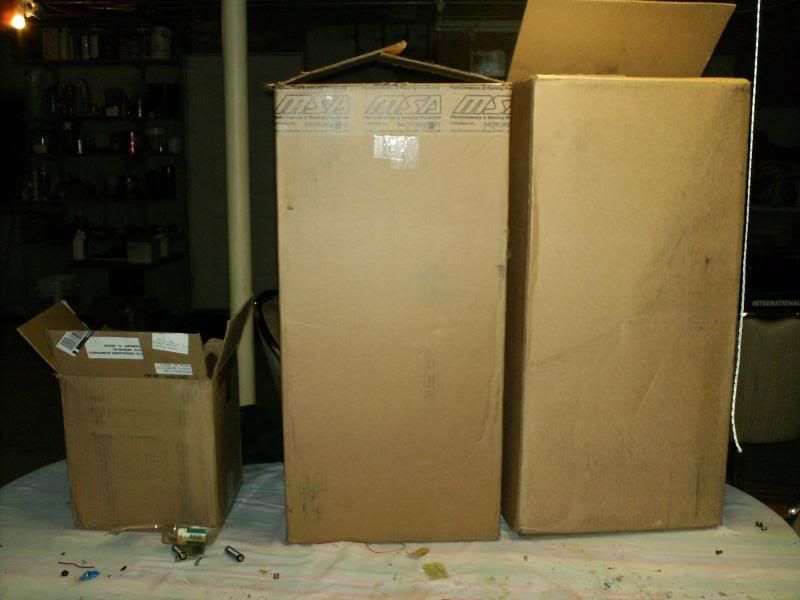
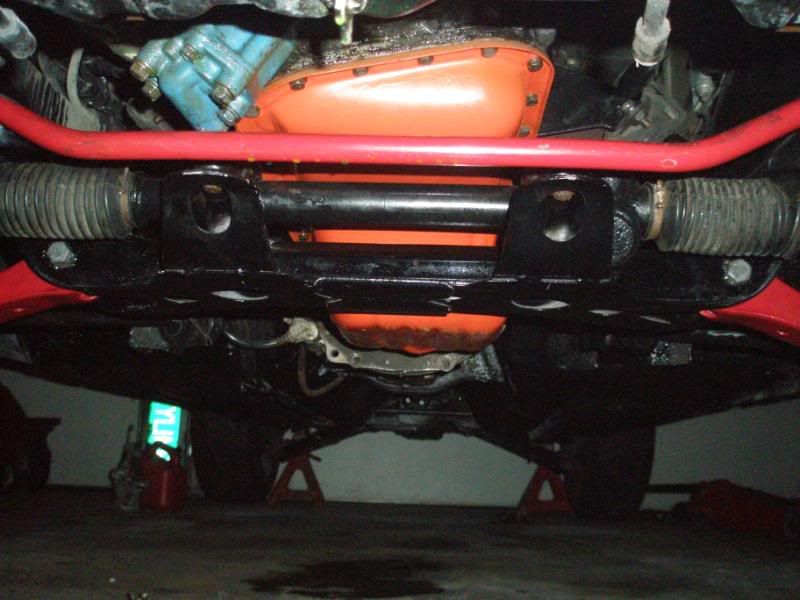
well ladies, this is my part 2 for the subframe overhaul to make your show car under carriage. this time its for the front end though and im going ***** out. you may remember my previous subframe overhaul that showed the tear down and the steps i took to create my rear subframe finished product. now we do the front. here is a quick summary of what till happen (pics to be uploaded when i get home) this is just the introduction and will be a day by day progression to this thread. hold onto your panties!!!!
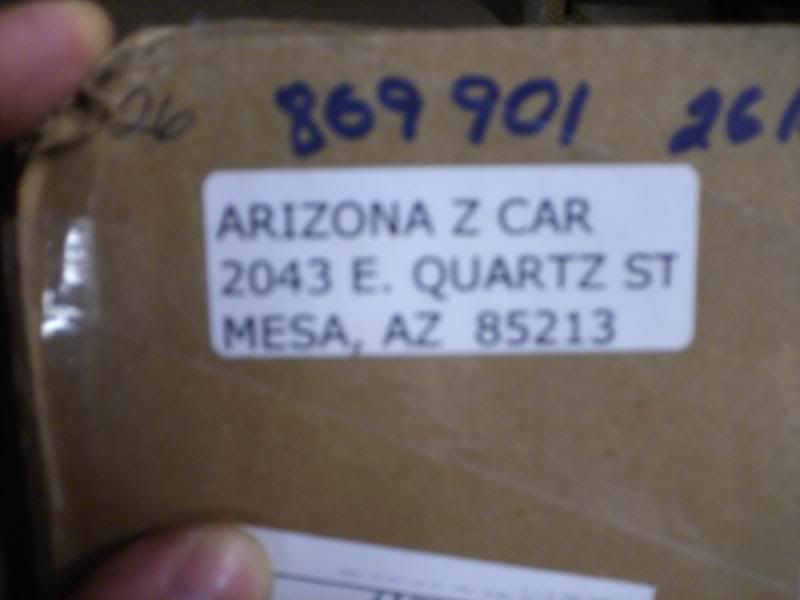
the undy twisting boxes that arrive at your front door :
:
ooo we all know that box tape
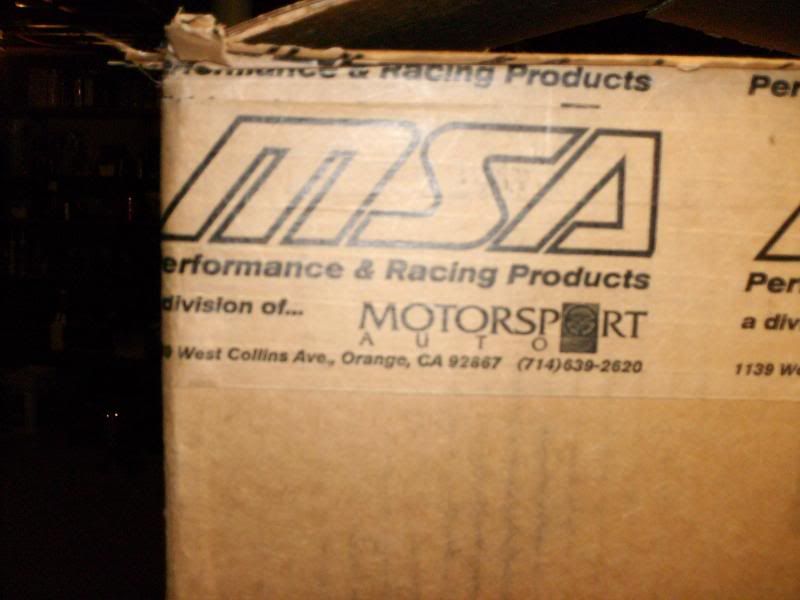
and the other guy... who rocks! :
well first things first, you might as well get all the parts you want to put on the car that will associate with this process or is made easier (ie clutches, headers, motor mounts etc) because there is going to be one bare and very workable engine bay on your hands. now if your smart you will do what i did. look at what is coming out of the car, and try to get a second set of those parts. like me i have 60K engine cradle, swing arms, steering rack, etc as pictured and of course a a new bushing set. only 2 different bushings are up here though . now we clean all these parts down with a grinder that has a wire brush attatchment to get that all new clean bare metal surface. after that. we simply paint them! or powder coat if you wanna get crazy  . this process helps with down time of the car and also with less down time you get
A) more enjoyment time
B) more garage space
C) more memory of how **** goes back together.
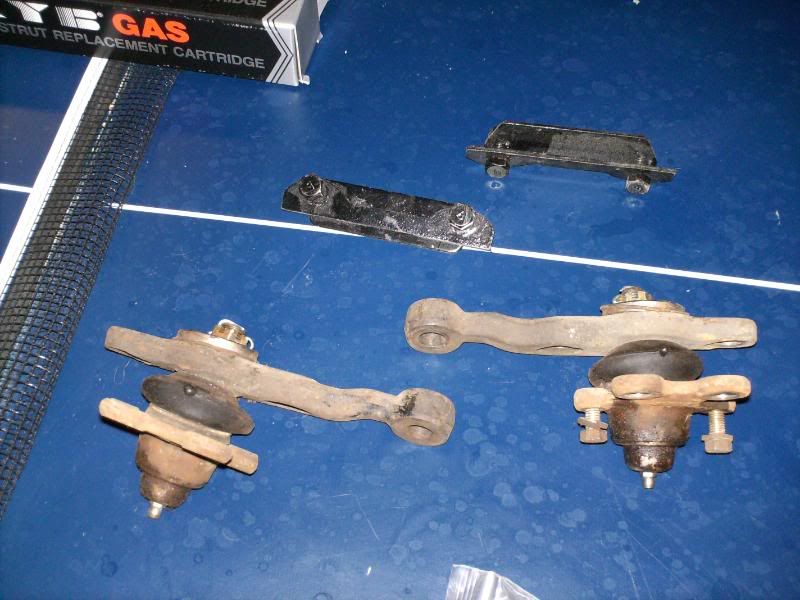
as for me, im starting out with all these parts pre-painted ( i gotta see if i got front shock towers though )
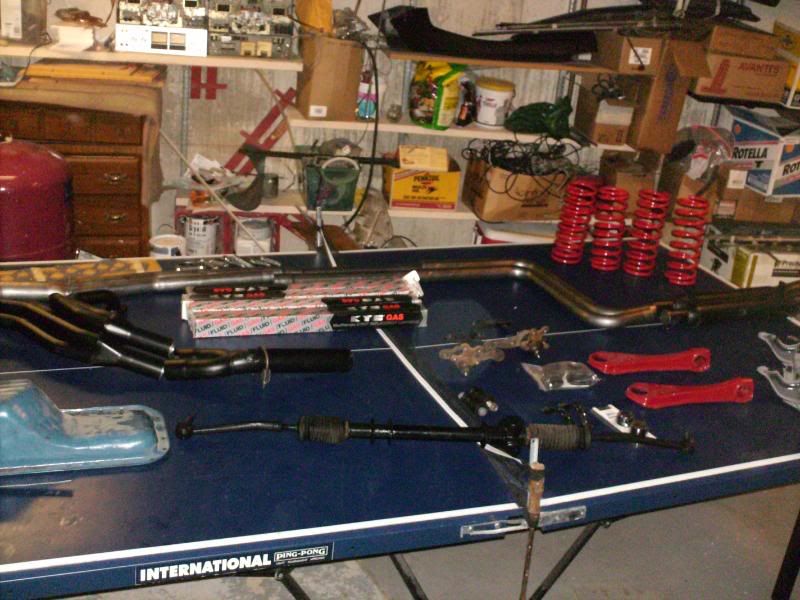
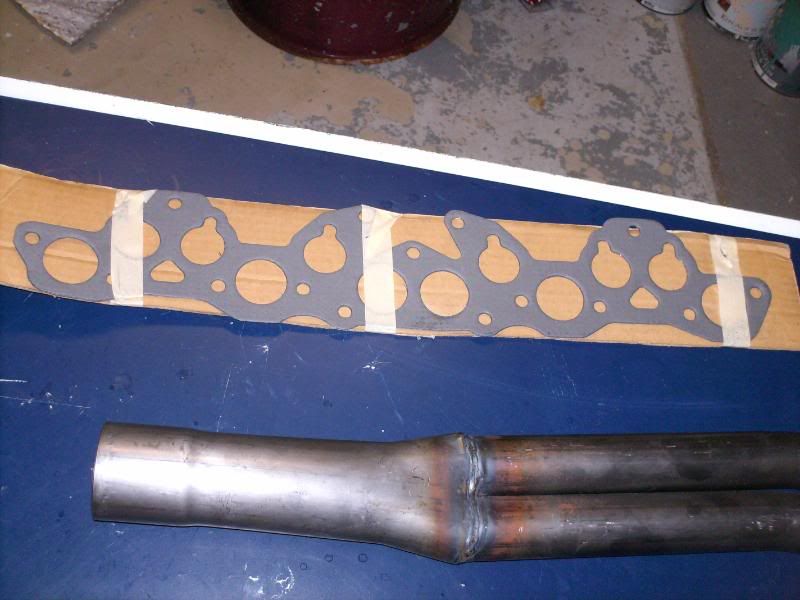
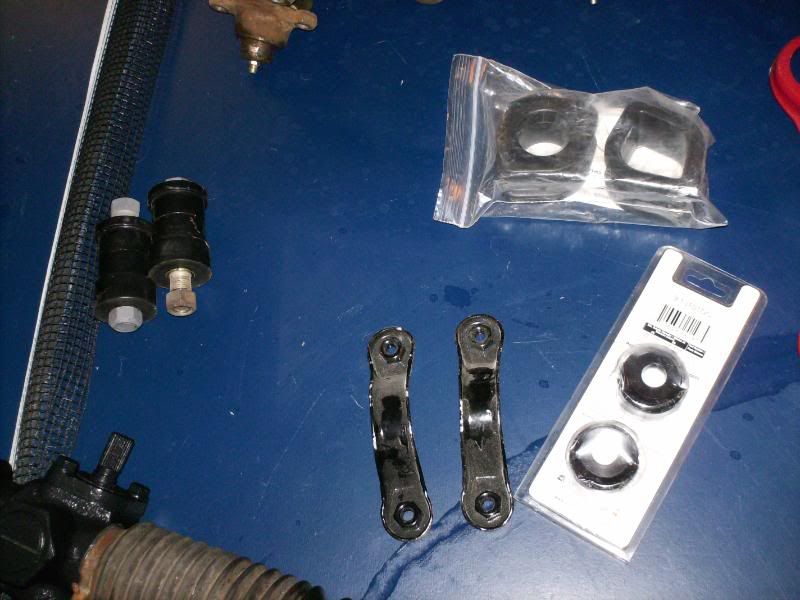
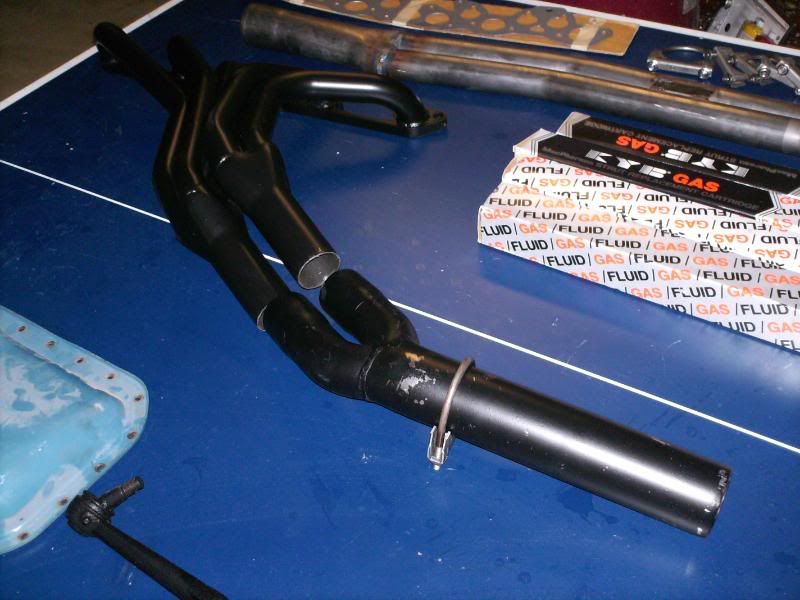
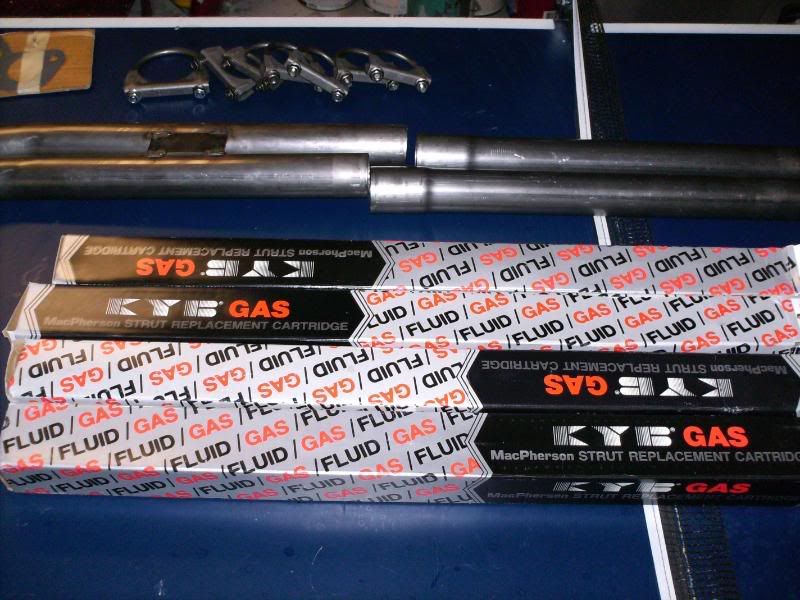
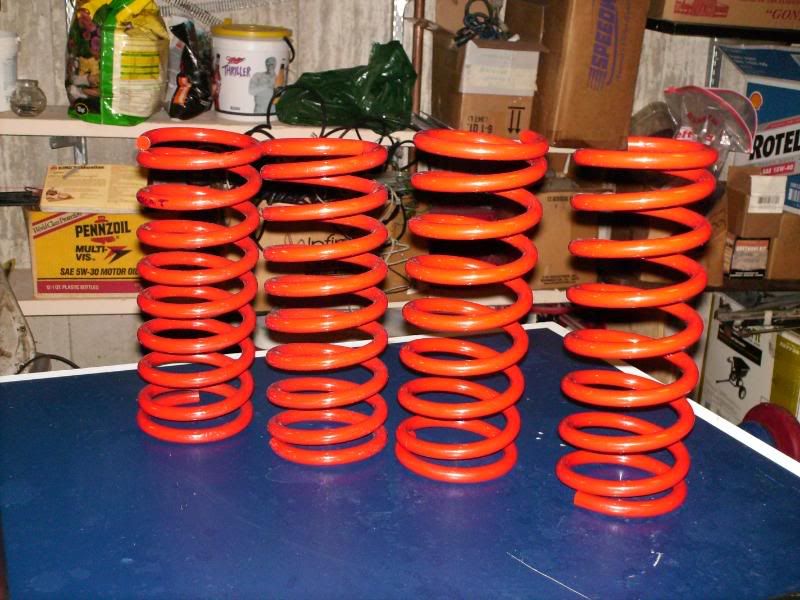
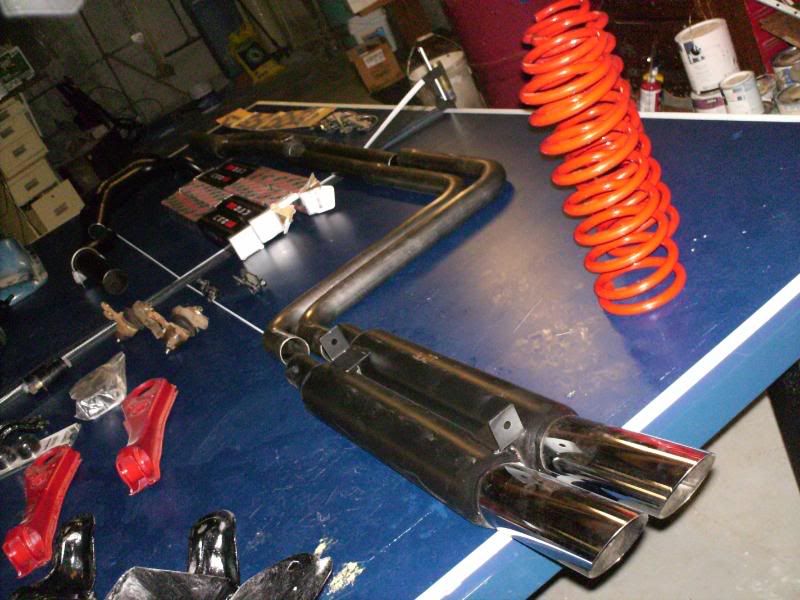
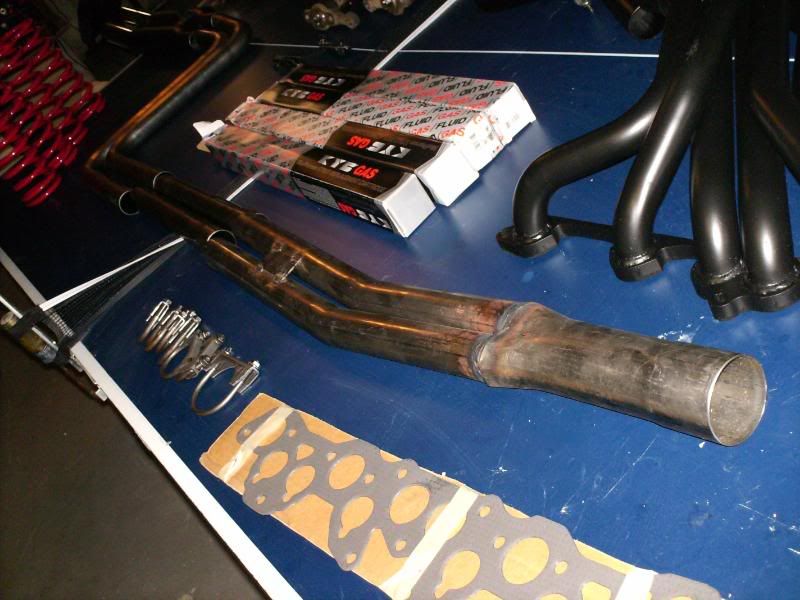
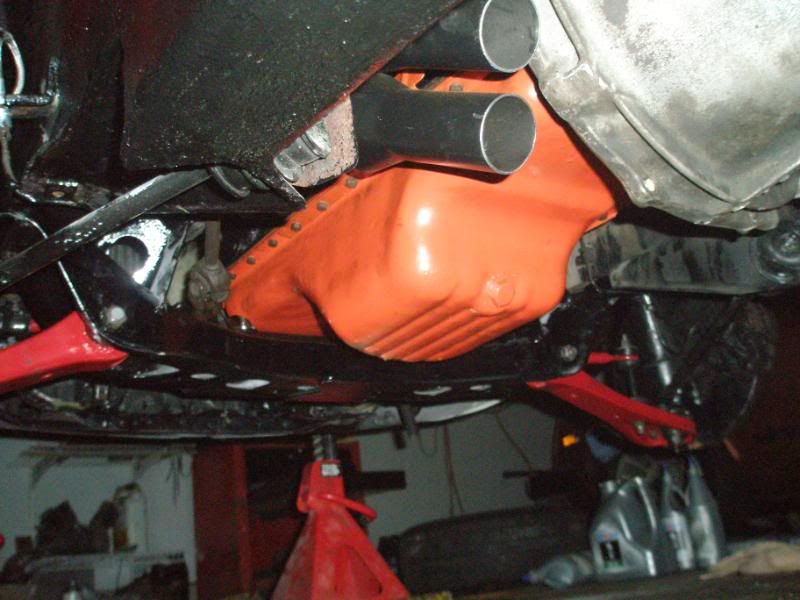
im also starting out with a nice little aftermarket pile and oil pan so i can get that painted and also clean the engine bay, paint any attention needed spots and the engine itself. i also got a new MSA 6-2-1 header with the MSA twice pipes (god i hope they sound good im still so worried) all new KYB shocks and arizona Z car springs. im also going to be cleaning up my N42 intake and a valve cover to give the entire engine bay a nice clean show car look (now lets see if i can maintain it though). here are the pictures of my parts pile, sooooo nice!!!! :
the pile:
the little stuff:
the undy twisting boxes that arrive at your front door
: ooo we all know that box tape
and the other guy... who rocks! :
well first things first, you might as well get all the parts you want to put on the car that will associate with this process or is made easier (ie clutches, headers, motor mounts etc) because there is going to be one bare and very workable engine bay on your hands. now if your smart you will do what i did. look at what is coming out of the car, and try to get a second set of those parts. like me i have 60K engine cradle, swing arms, steering rack, etc as pictured and of course a a new bushing set. only 2 different bushings are up here though
. now we clean all these parts down with a grinder that has a wire brush attatchment to get that all new clean bare metal surface. after that. we simply paint them! or powder coat if you wanna get crazy . this process helps with down time of the car and also with less down time you get A) more enjoyment time
B) more garage space
C) more memory of how **** goes back together.
as for me, im starting out with all these parts pre-painted ( i gotta see if i got front shock towers though )
im also starting out with a nice little aftermarket pile and oil pan so i can get that painted and also clean the engine bay, paint any attention needed spots and the engine itself. i also got a new MSA 6-2-1 header with the MSA twice pipes (god i hope they sound good im still so worried) all new KYB shocks and arizona Z car springs. im also going to be cleaning up my N42 intake and a valve cover to give the entire engine bay a nice clean show car look (now lets see if i can maintain it though). here are the pictures of my parts pile, sooooo nice!!!! :
the pile:
the little stuff:
01-01-2009, 07:11 PM
#7
�ber User
Thread Starter
Join Date: Sep 2005
Location: lemont, Illinois
Posts: 9,532
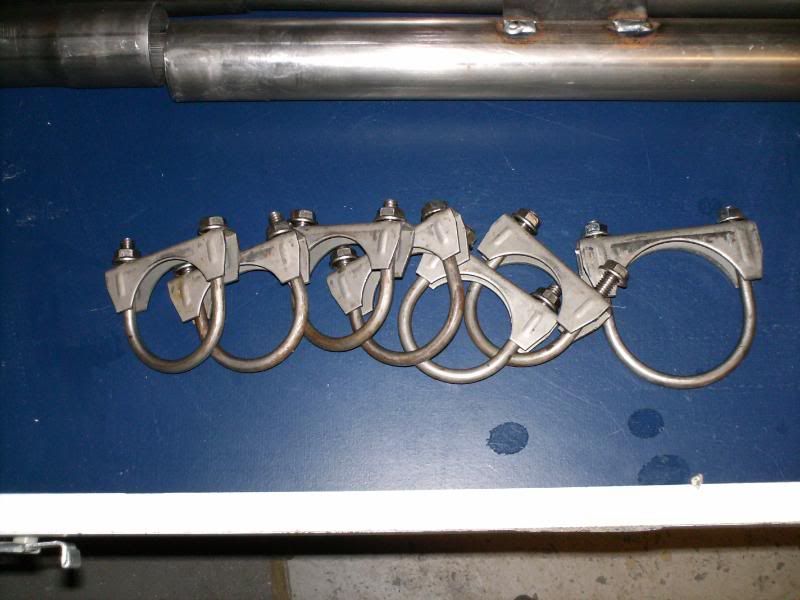
the little stuff continued:
this will be painted... mmm... i think orange:
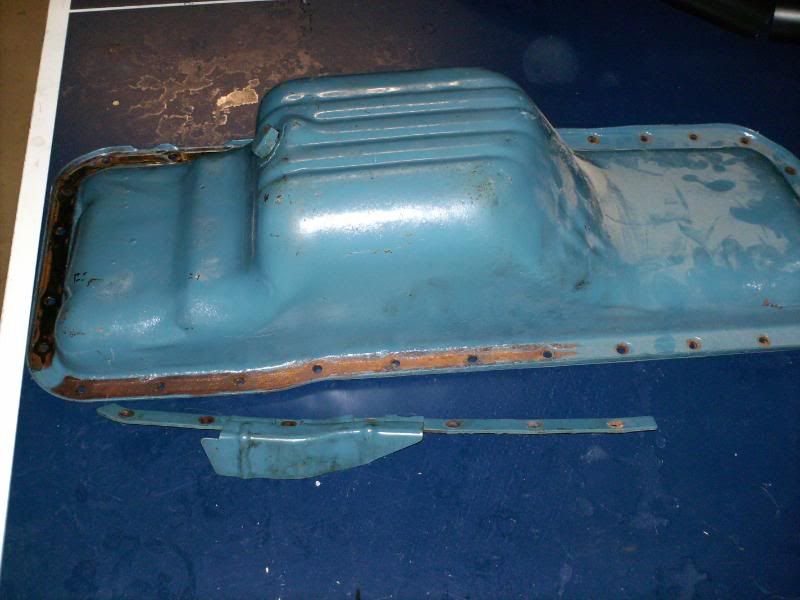
this will be painted... mmm... i think orange:
01-01-2009, 07:12 PM
#8
�ber User
Thread Starter
Join Date: Sep 2005
Location: lemont, Illinois
Posts: 9,532
and goods!!!!
this is going to be an amazing week... hopefully i can get it done before friday when i leave for U of I unofficial party, then saturday over to bradley to stay in a house full of girls (score!!!) and then mon-fri snowboarding in colo-****in-rado!!!!
this is going to be an amazing week... hopefully i can get it done before friday when i leave for U of I unofficial party, then saturday over to bradley to stay in a house full of girls (score!!!) and then mon-fri snowboarding in colo-****in-rado!!!!
01-01-2009, 07:12 PM
#9
�ber User
Thread Starter
Join Date: Sep 2005
Location: lemont, Illinois
Posts: 9,532
lol!!! seein as i got it already i think ur be spyin on me!
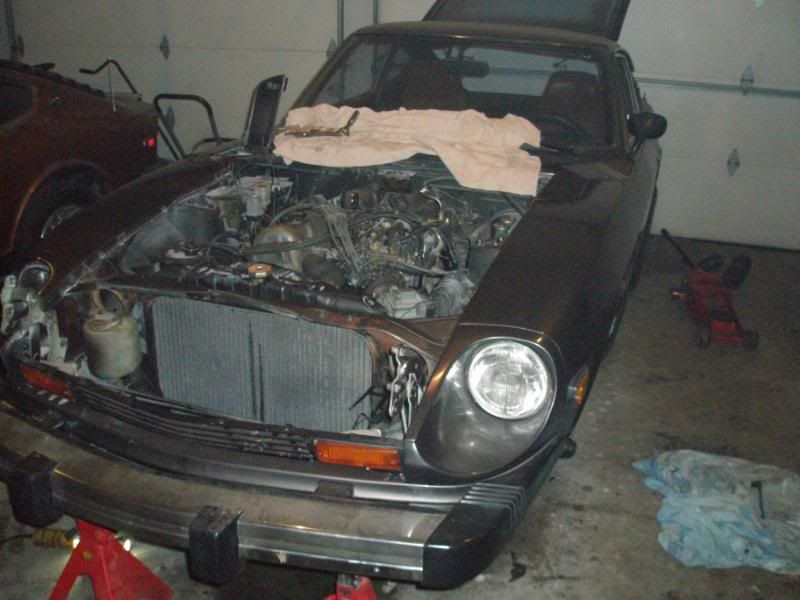
also i didnt get much work done AT ALL! a new thread will be up explaining why, but here is where the car sits now and some before pictures.
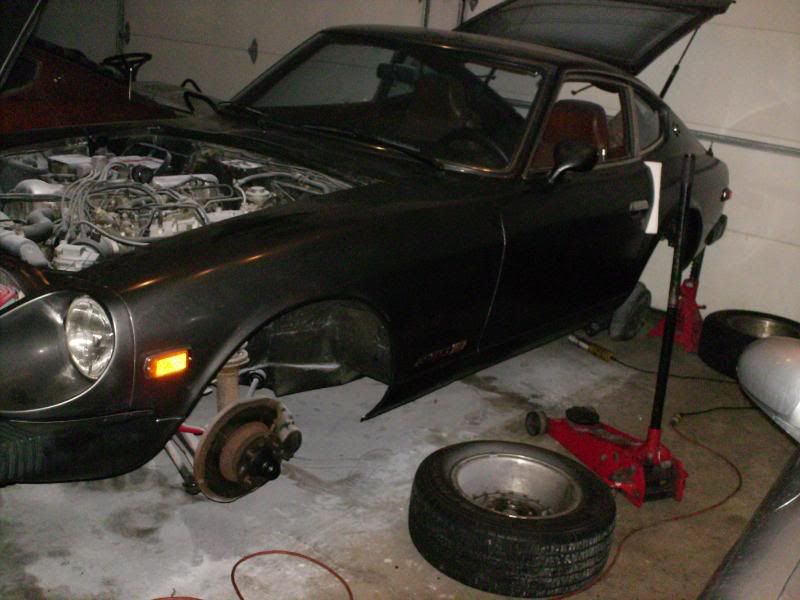
notice the paper towels in the door. the S30 bodies are that thin that they flex on jack stands so the door gaps close up so i stuck paper towels in there so when the gaps close they dont chip my paint
also i didnt get much work done AT ALL! a new thread will be up explaining why, but here is where the car sits now and some before pictures.
notice the paper towels in the door. the S30 bodies are that thin that they flex on jack stands so the door gaps close up so i stuck paper towels in there so when the gaps close they dont chip my paint
01-01-2009, 07:13 PM
#10
�ber User
Thread Starter
Join Date: Sep 2005
Location: lemont, Illinois
Posts: 9,532
the engine free revs so fast with a lighter fly wheel, its from 700-7000 in about 1 sec lol. its nuts! i gots a vid of the open header, fyi twice pipes are a pain in the fawkin *** to put on, but i did it. and they sound sick. ive seen one video with them and they sound like **** on that car. my car is just sex now. heres the pics, i know a lilttle later than 15 minutes but a party came up lol.
n42 polshed bitches, need to clean up the junk on it though lol
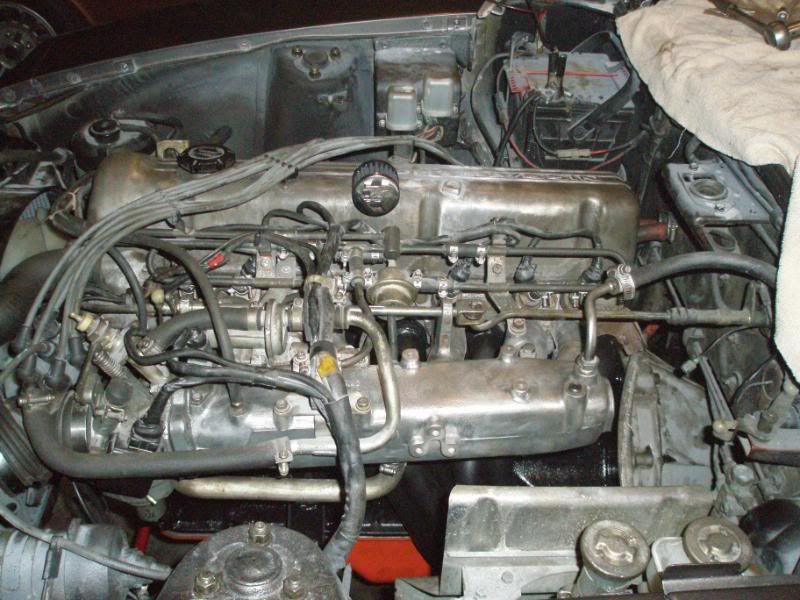
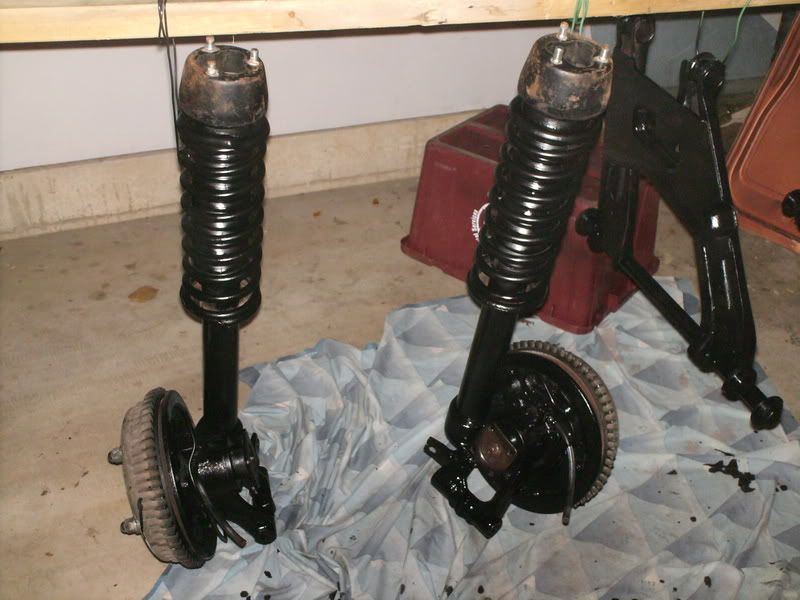
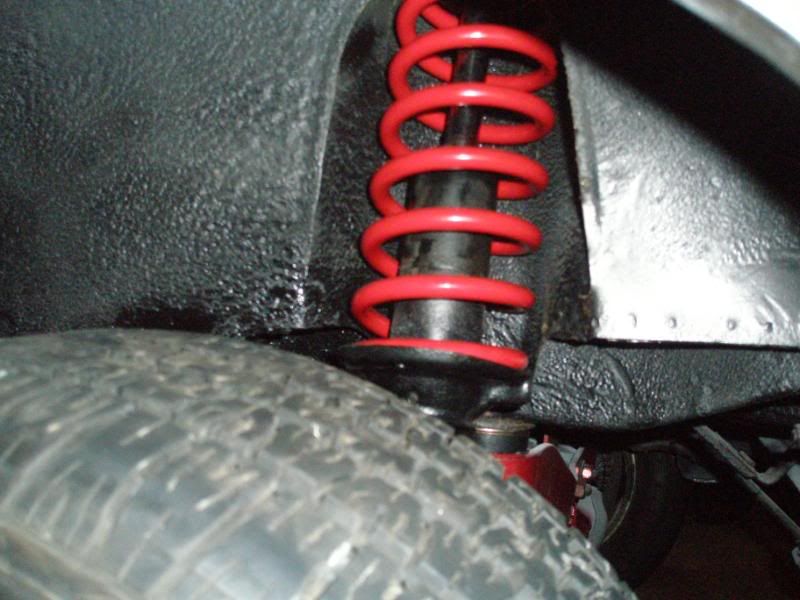
painted strut housings with AZcar springs
i also scrubed and painted the block and painted the pan i had, need to polish my valve cover though

n42 polshed bitches, need to clean up the junk on it though lol
painted strut housings with AZcar springs
i also scrubed and painted the block and painted the pan i had, need to polish my valve cover though
01-01-2009, 07:13 PM
#11
�ber User
Thread Starter
Join Date: Sep 2005
Location: lemont, Illinois
Posts: 9,532
 01-01-2009, 07:14 PM
#12
�ber User
Thread Starter
Join Date: Sep 2005
Location: lemont, Illinois
Posts: 9,532
here ya go puffs
01-01-2009, 07:16 PM
#13
�ber User
Thread Starter
Join Date: Sep 2005
Location: lemont, Illinois
Posts: 9,532
bonus material!!!!!
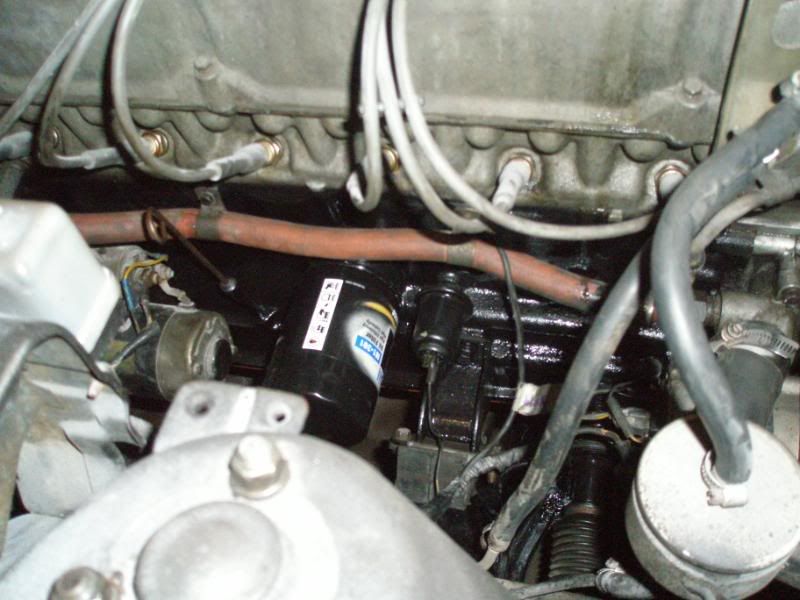
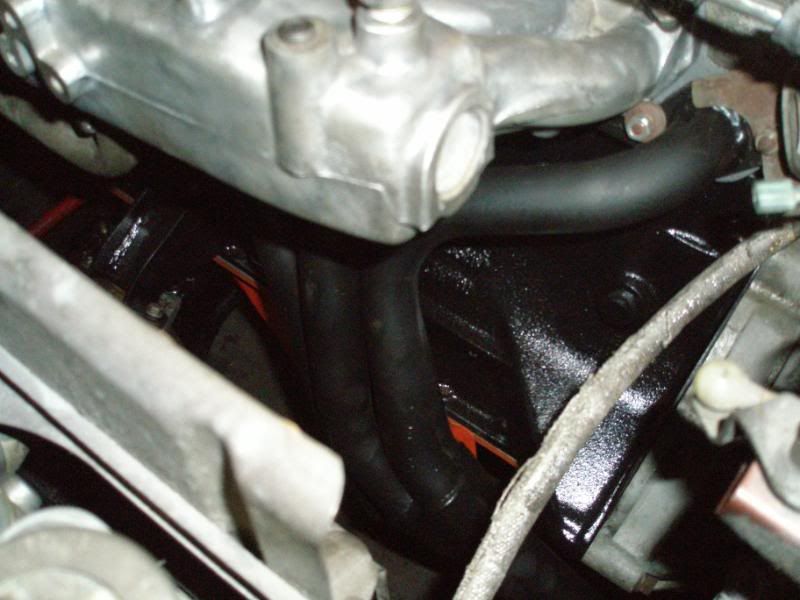
well, i havent had much need to do anything other than stop a horrible oil leak, i change the oil pump and pan gasket all at once and to my surprise after 5 hours of work no change! found out it was the timing cover seal so i had to pull the pulley off yannk that bitch out and pop a new one in, once i tapped the pulley off it was a 5 min job very simple and i didnt even have to remove the fan or radiator. im proud of myself cuase normally a pulley puller would be needed.
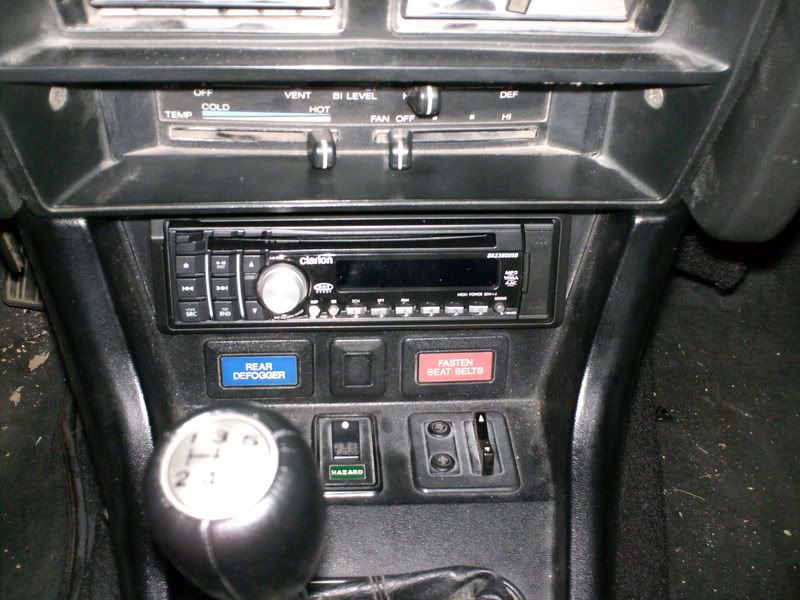
in my boredom i did this though, installed a new 08 clarion radio its baller **** lol and took one of my old valve covers and transformed it! before and after pictures as always:


now im trying to get TOF to get me a cougar SC cause its PERFECT for a custom SC setup. expect some mild fun things from this car. now if you dont mind im off to wash the 280 and maybe a little follow up wet sanding.
well, i havent had much need to do anything other than stop a horrible oil leak, i change the oil pump and pan gasket all at once and to my surprise after 5 hours of work no change! found out it was the timing cover seal so i had to pull the pulley off yannk that bitch out and pop a new one in, once i tapped the pulley off it was a 5 min job very simple and i didnt even have to remove the fan or radiator. im proud of myself cuase normally a pulley puller would be needed.
in my boredom i did this though, installed a new 08 clarion radio its baller **** lol and took one of my old valve covers and transformed it! before and after pictures as always:
now im trying to get TOF to get me a cougar SC cause its PERFECT for a custom SC setup. expect some mild fun things from this car. now if you dont mind im off to wash the 280 and maybe a little follow up wet sanding.
01-01-2009, 07:17 PM
#14
�ber User
Thread Starter
Join Date: Sep 2005
Location: lemont, Illinois
Posts: 9,532
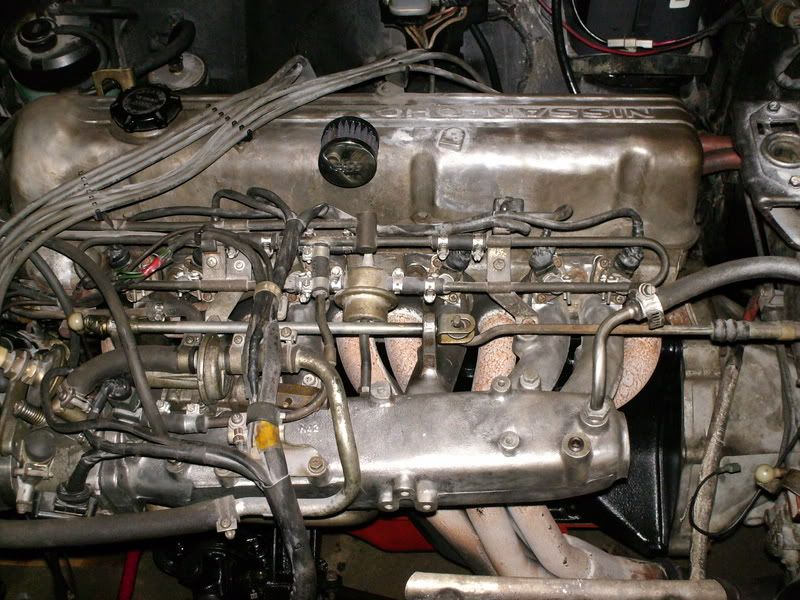
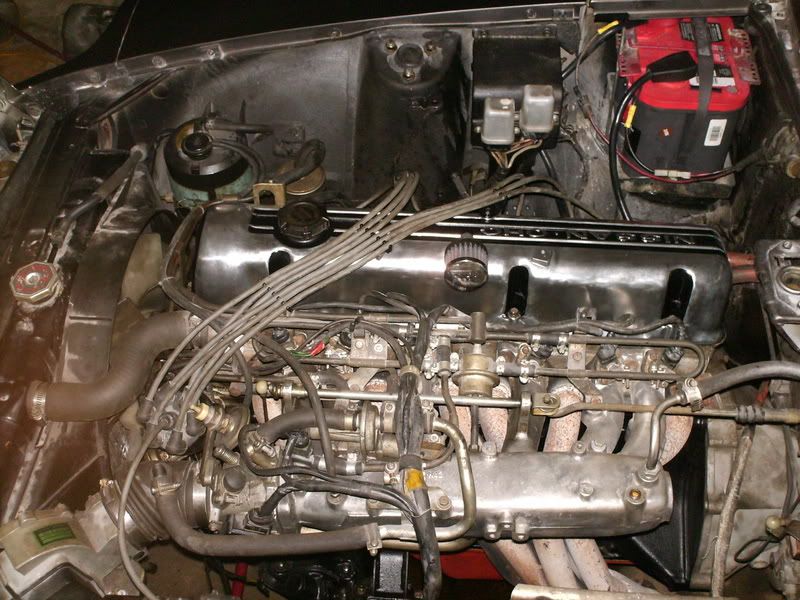
ahhhh... all fixed! so lets do a re-cap of the events, here is how the valve cover started out looking on the car
soooooo pretty right???? RIGHT?!?!?!
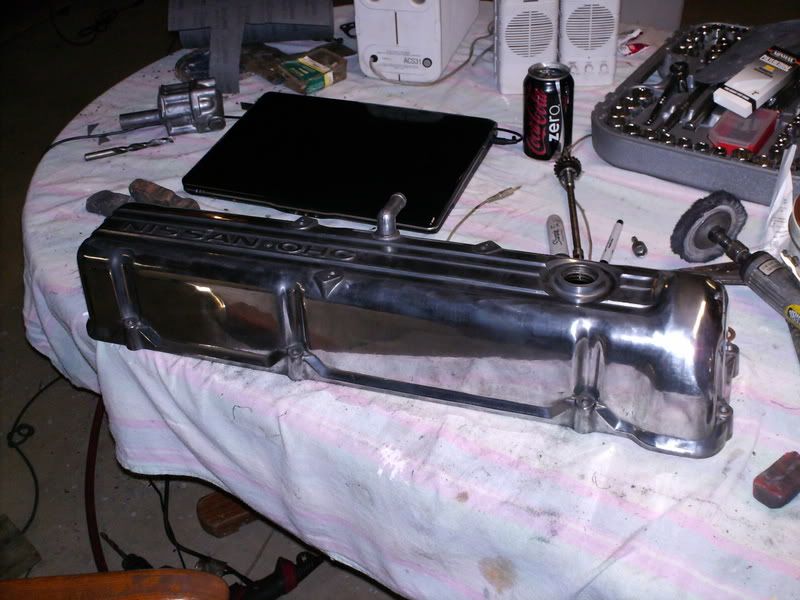
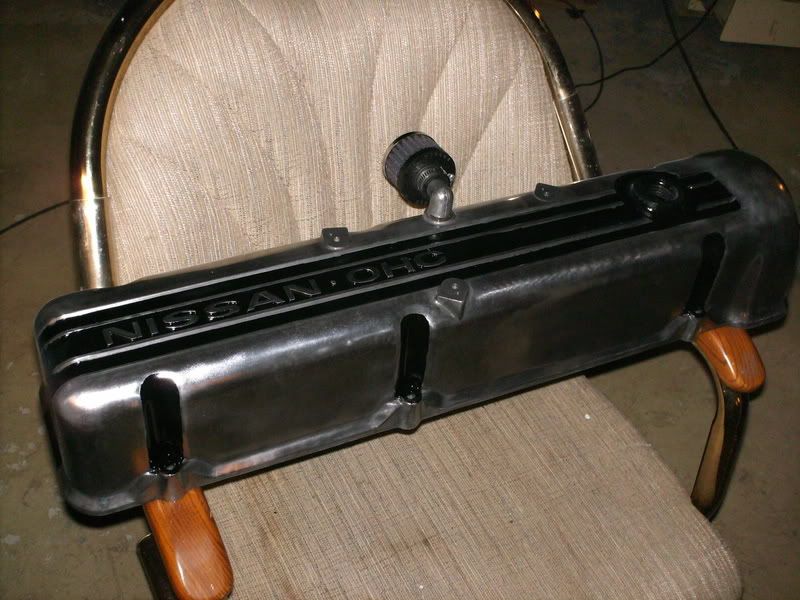
well i started out filling my utility sink with scolding hot water and placing the cover in it for an hour, then with a constant hot/warm water i rinsed it off after that used MANY hous hold degreasers such as amonia and comet lol cleaned it right up then a normal soap and of course a scotch bright pad and scrub brush then sponge with the normal soap. after that used 1000 grit sand paper for many hours on it till it was all sparkle sparkle. then used the polishing wheel on my air whizz wheel and the polishing bars to bring it to a smooth shine. then using a clean rag with a dab of rubbing alcohol on it whipped it all down to remove any grease and wax etc. then i masked off all the parts i didnt want painted and cut out the letters etc with and exacto knife. this is a steady hand job, then sprayed on several coats using WHEEL paint because it will adhere to metal be oil resistant and some what heat resistant. then CAREFULLY peel the tape by pulling backwards on it not up, not forward but backward so it seperates from the paint and not tears it off the cover. then many coats of wheel clear coat. and this is what i got
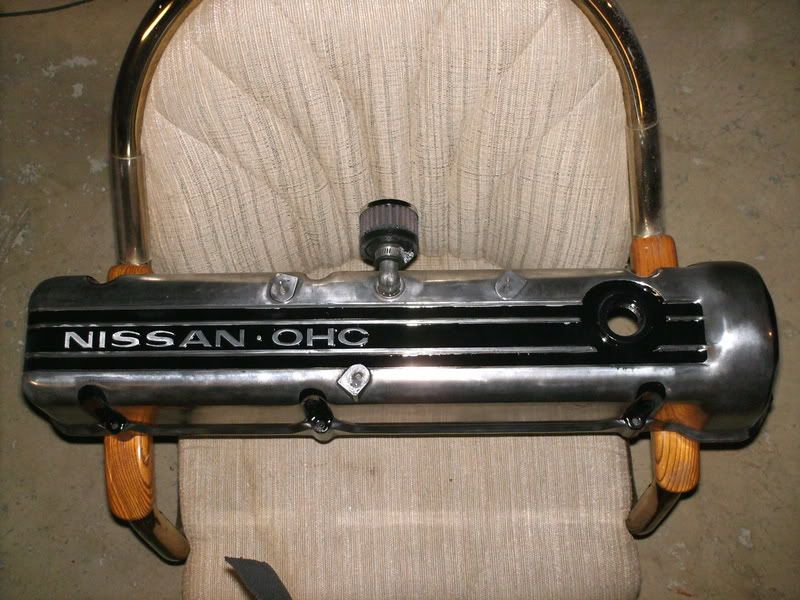
and here she is all nice a pretty on the car. also, the leak is finally solved

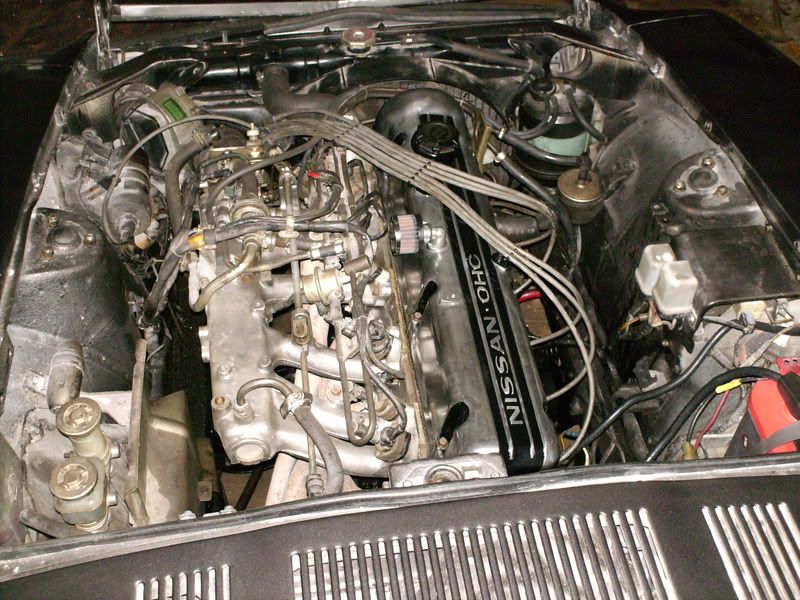
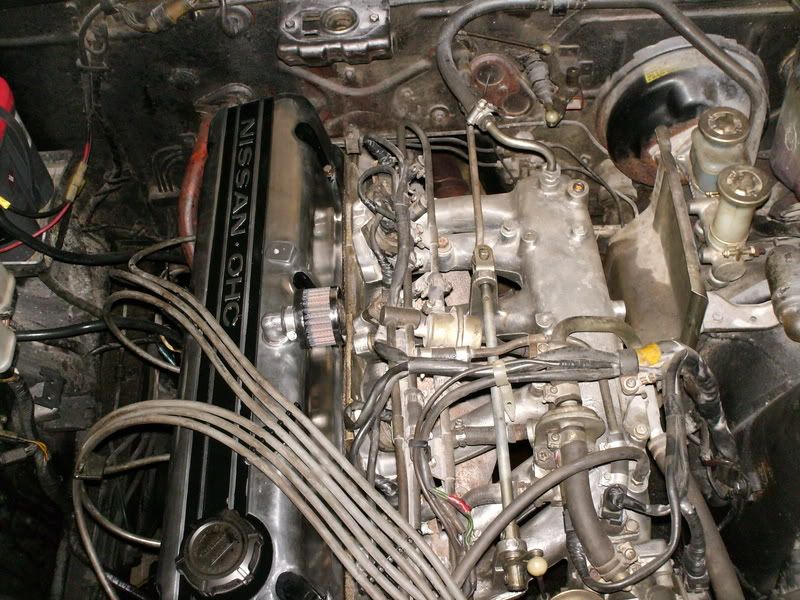
there we are! all nice and sparkle. now i think im going to remove the cold start crap from the manifold and perhaps either paint or powder coat it black also getting some nice new NGK plugs and red taylor hi-pro wires. i need to clean up the heat shield by all the master cylinders and replace all the hoses specailly the heater hoses that are red ICK! and clean up the head. all should be better.
soooooo pretty right???? RIGHT?!?!?!
well i started out filling my utility sink with scolding hot water and placing the cover in it for an hour, then with a constant hot/warm water i rinsed it off after that used MANY hous hold degreasers such as amonia and comet lol cleaned it right up then a normal soap and of course a scotch bright pad and scrub brush then sponge with the normal soap. after that used 1000 grit sand paper for many hours on it till it was all sparkle sparkle. then used the polishing wheel on my air whizz wheel and the polishing bars to bring it to a smooth shine. then using a clean rag with a dab of rubbing alcohol on it whipped it all down to remove any grease and wax etc. then i masked off all the parts i didnt want painted and cut out the letters etc with and exacto knife. this is a steady hand job, then sprayed on several coats using WHEEL paint because it will adhere to metal be oil resistant and some what heat resistant. then CAREFULLY peel the tape by pulling backwards on it not up, not forward but backward so it seperates from the paint and not tears it off the cover. then many coats of wheel clear coat. and this is what i got
and here she is all nice a pretty on the car. also, the leak is finally solved
there we are! all nice and sparkle. now i think im going to remove the cold start crap from the manifold and perhaps either paint or powder coat it black also getting some nice new NGK plugs and red taylor hi-pro wires. i need to clean up the heat shield by all the master cylinders and replace all the hoses specailly the heater hoses that are red ICK! and clean up the head. all should be better.

Thread
Thread Starter
Forum
Replies
Last Post
lww
280ZX (S130) Forums
7
05-19-2007 09:17 AM
Bookmarks


