The Rust Bucket.
 02-02-2016, 09:33 PM
#1
Registered User
Thread Starter

Join Date: Jan 2016
Location: Military
Posts: 40
The Rust Bucket.
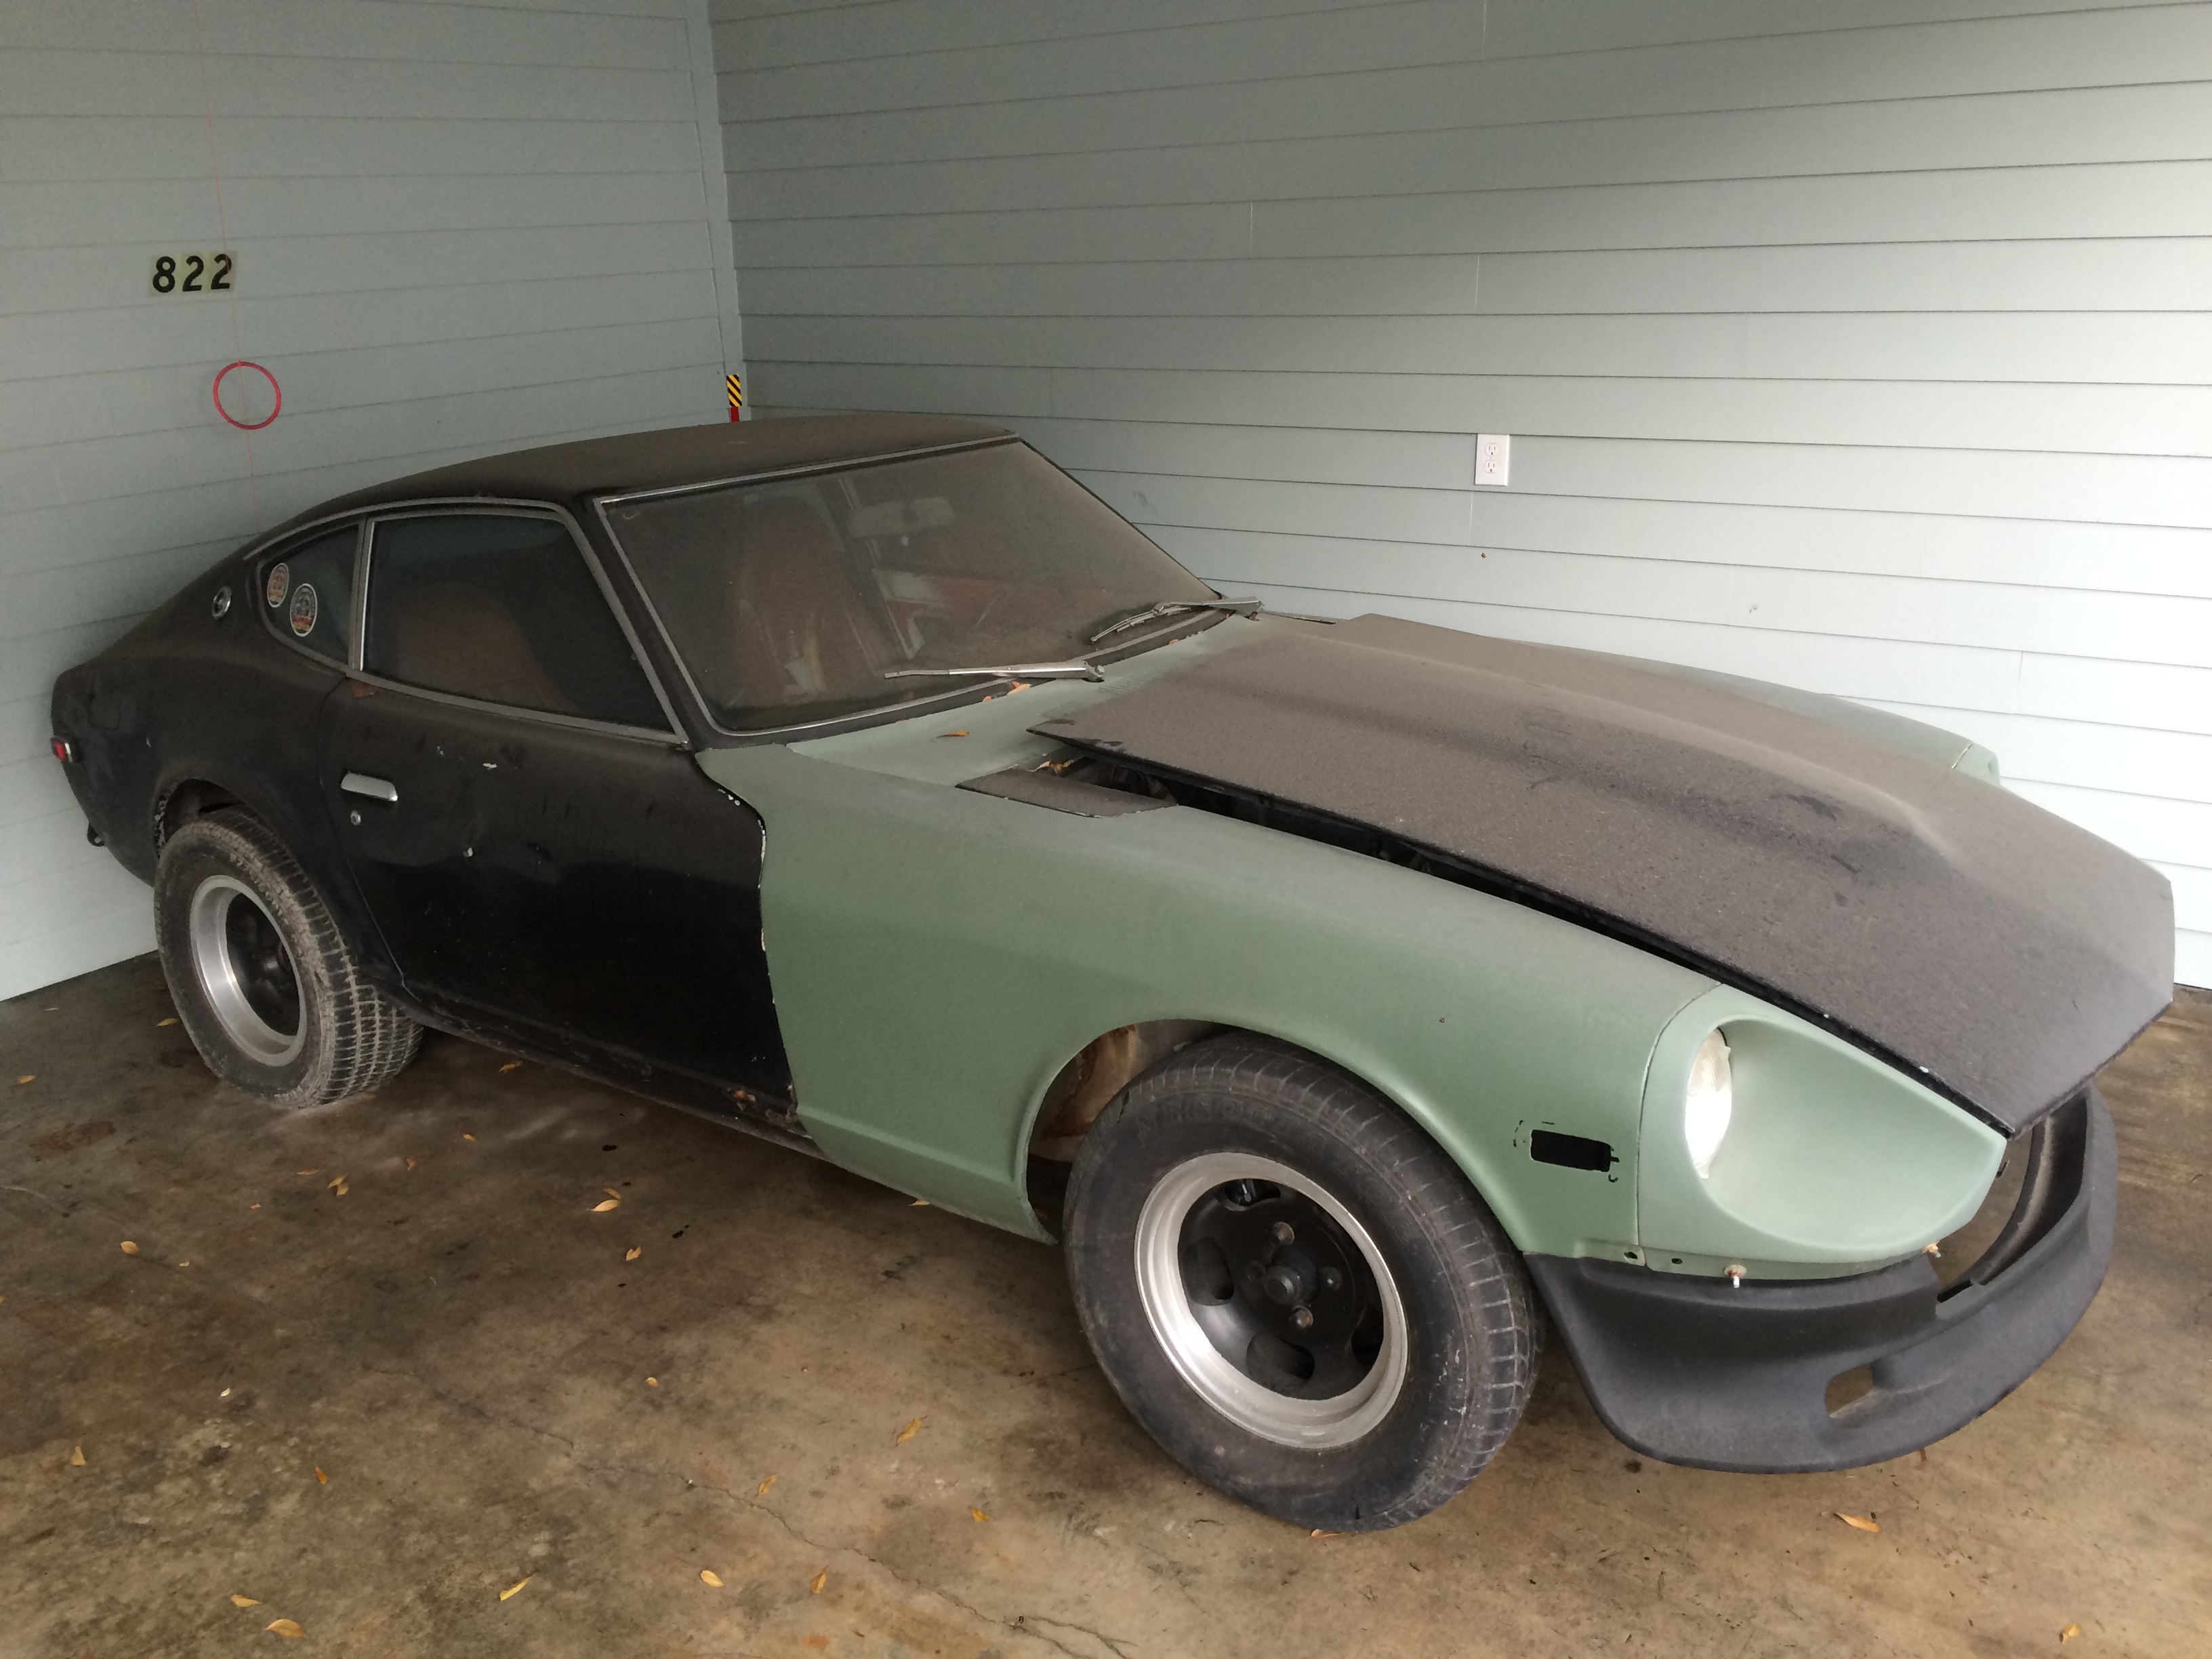
Starting this to keep myself accountable for working on my car.
I'm going to say that my Z build officially started today, and by that I mean I sat in the driver's seat of my non-running 76' making turbo noises for about 4 hours while I contemplated how cool it was gonna be to drive this thing around town with a pair of aviators and no pants on (don't worry... I'm gonna tint the windows).
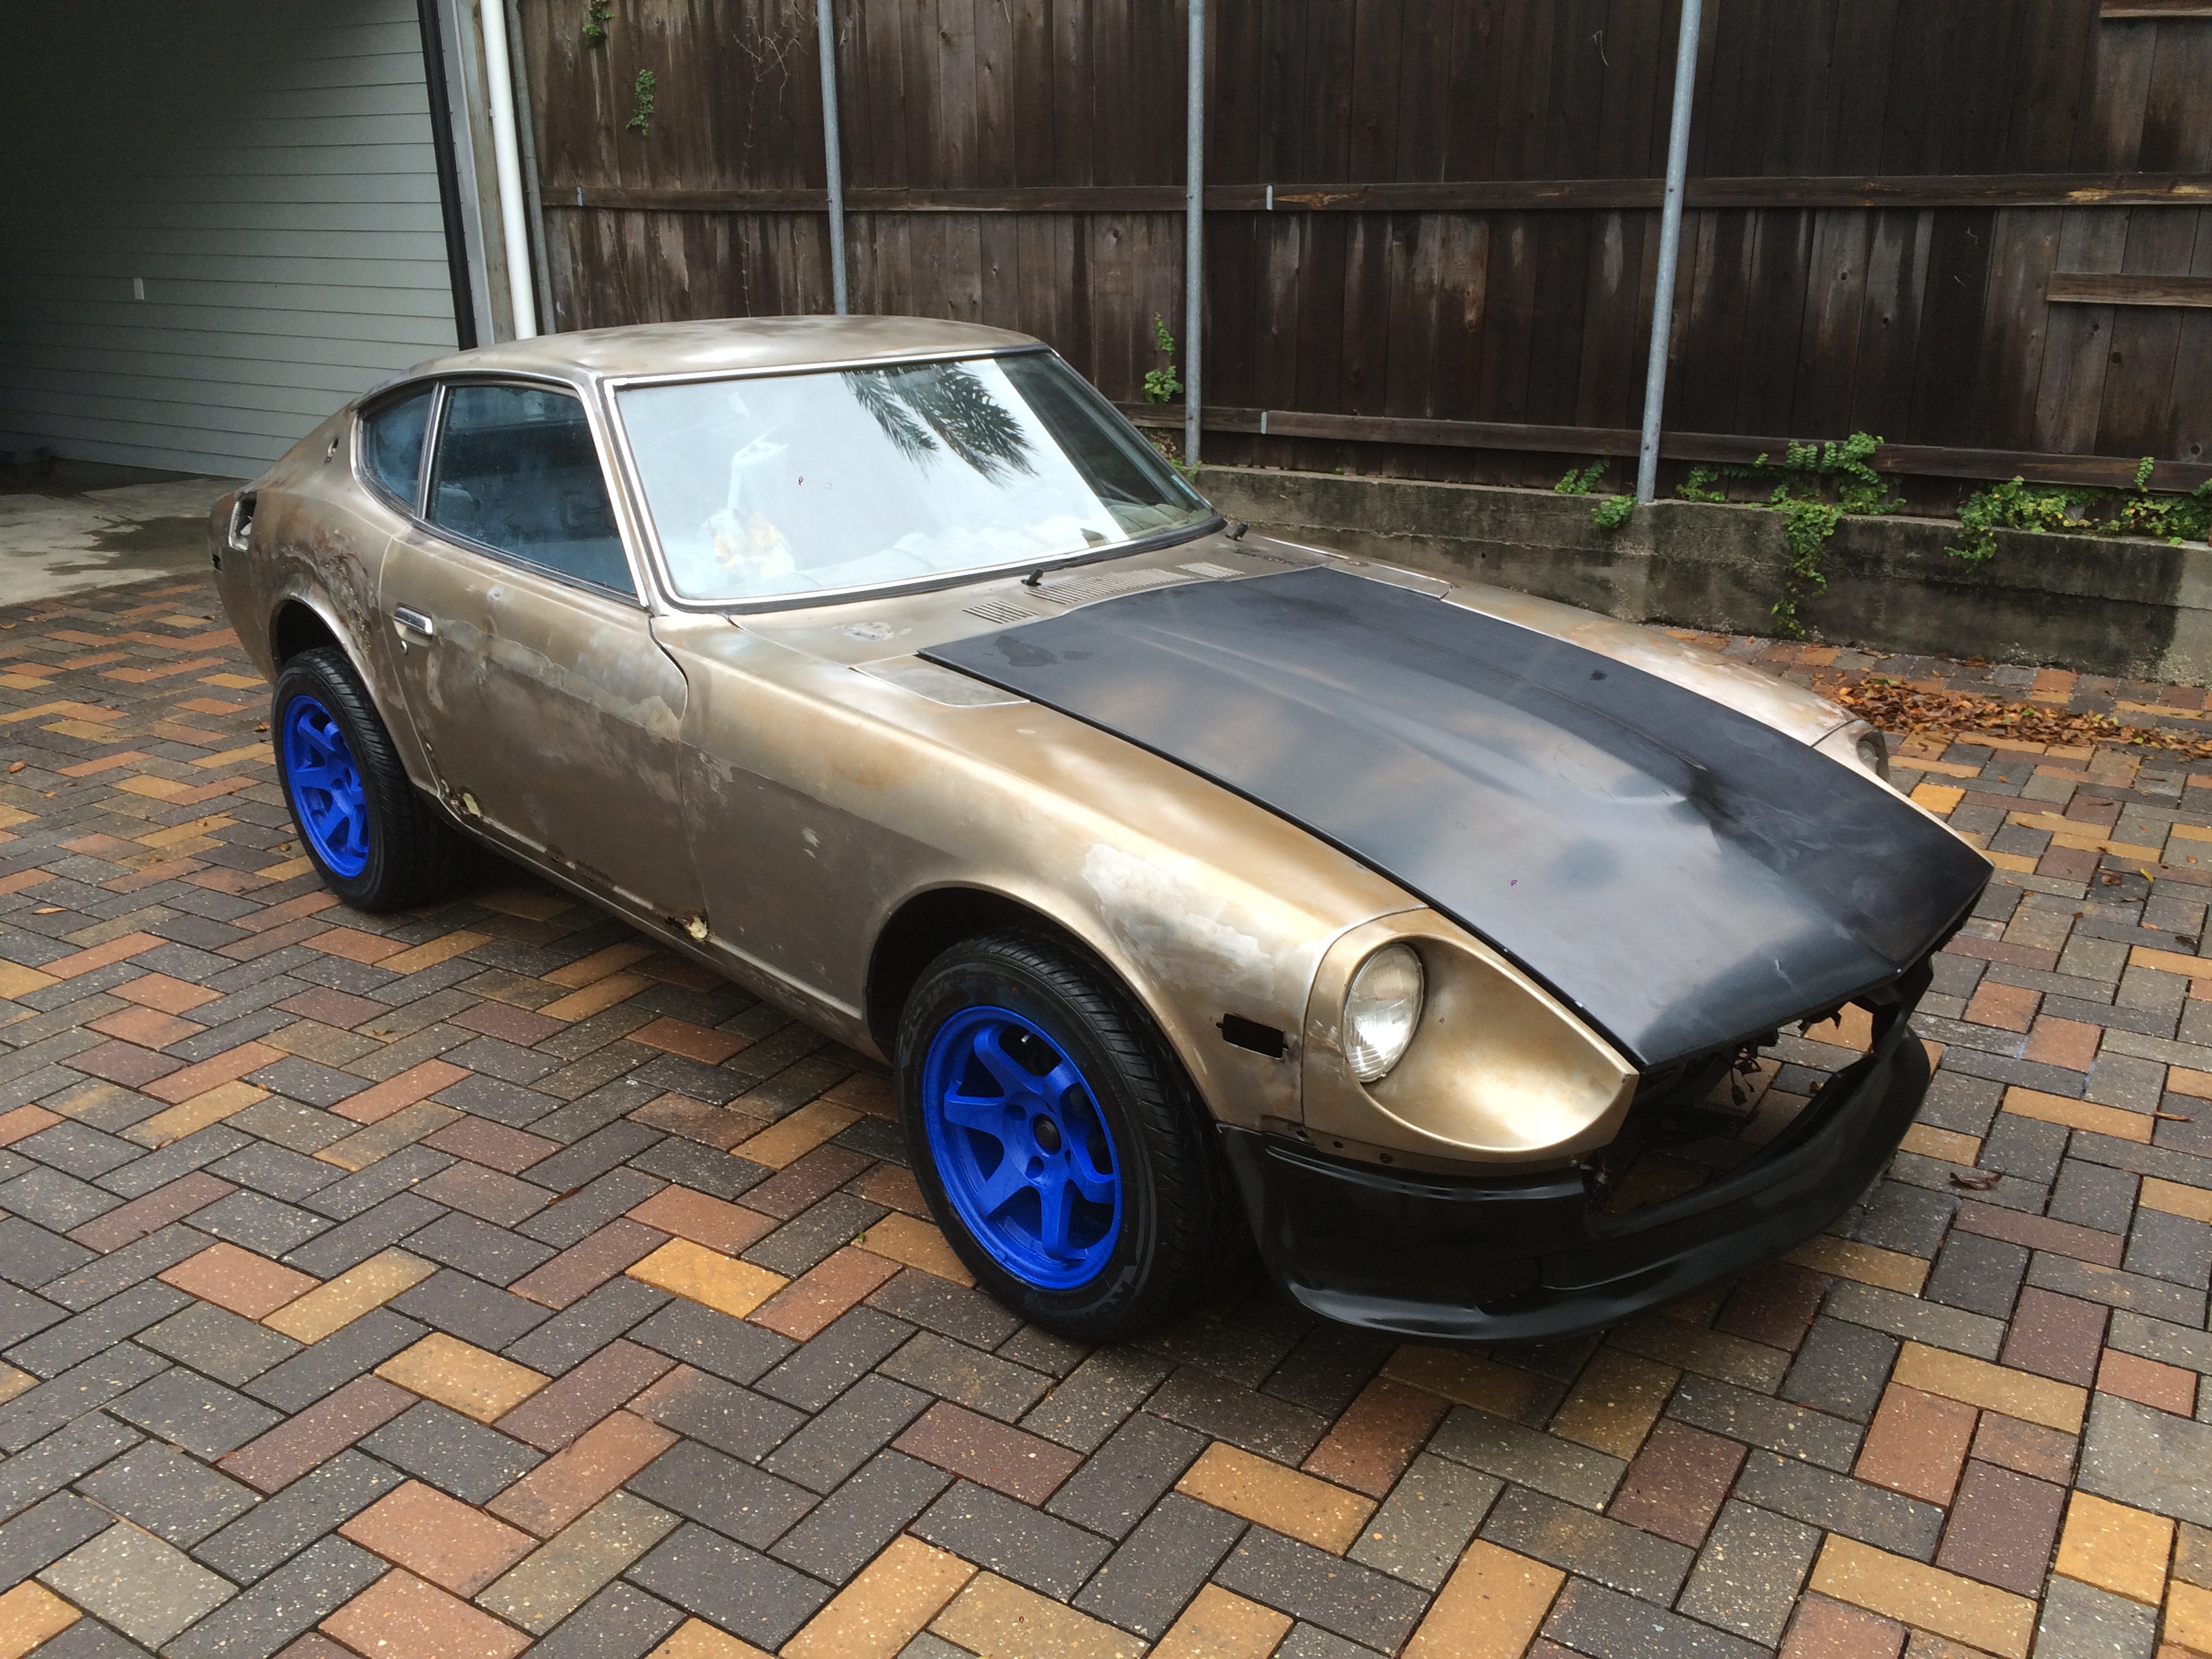
I own a rust bucket. I've finally come to terms with it, and well, admitting is the first step right? My Name is Josh, and I Own a Rust Bucket. I'm not sure yet what level of rust remediation I'm going to put into this thing at this point. Part of me wants to do it right and strip it down to get everything, but the other part of me just wants to have as much fun in this thing for the least amount of money, and then Dukes of Hazard it off the cliff into the lake back home in a fiery ball of glory.

I'll probably at least need to replace the passenger side floor pans before I take Taylor Swift out on her last first date. Wouldn't want the future Mrs. Josh to get her feet wet when I go through puddles sideways...
I did actually fix something today, I discovered the retaining arm on the glove box door made a horrendous metal-on-metal screeching when I reached over to retrieve my license and registration for the imaginary officer that pulled me over. So naturally, I bent that s*^* back straight and now she's smooth as butter.

Tomorrow I'm going to remove the seats, and gut the interior and remove as much rust as I can with a shopvac... LOL.


I'm going to say that my Z build officially started today, and by that I mean I sat in the driver's seat of my non-running 76' making turbo noises for about 4 hours while I contemplated how cool it was gonna be to drive this thing around town with a pair of aviators and no pants on (don't worry... I'm gonna tint the windows).
I own a rust bucket. I've finally come to terms with it, and well, admitting is the first step right? My Name is Josh, and I Own a Rust Bucket. I'm not sure yet what level of rust remediation I'm going to put into this thing at this point. Part of me wants to do it right and strip it down to get everything, but the other part of me just wants to have as much fun in this thing for the least amount of money, and then Dukes of Hazard it off the cliff into the lake back home in a fiery ball of glory.
I'll probably at least need to replace the passenger side floor pans before I take Taylor Swift out on her last first date. Wouldn't want the future Mrs. Josh to get her feet wet when I go through puddles sideways...
I did actually fix something today, I discovered the retaining arm on the glove box door made a horrendous metal-on-metal screeching when I reached over to retrieve my license and registration for the imaginary officer that pulled me over. So naturally, I bent that s*^* back straight and now she's smooth as butter.
Tomorrow I'm going to remove the seats, and gut the interior and remove as much rust as I can with a shopvac... LOL.
Last edited by Joshua Paul; 02-02-2016 at 09:41 PM.
 02-03-2016, 03:44 PM
#2
Registered User
Thread Starter
Join Date: Jan 2016
Location: Military
Posts: 40
Tires.
Today's a quick day, I have a hot date with Amy Poehler later, no time to work on the Dats. The UPS guy got some work in for me though, I came home to these puppies on my back porch. I was too lazy to cut the packaging straps to take a photo, but they're gonna look sweet. I'm pretty impressed with these Kumhos so far, they have a good weight to them and got decent gas mileage as they rolled across the ground from my back porch to my garage... only took one kick!

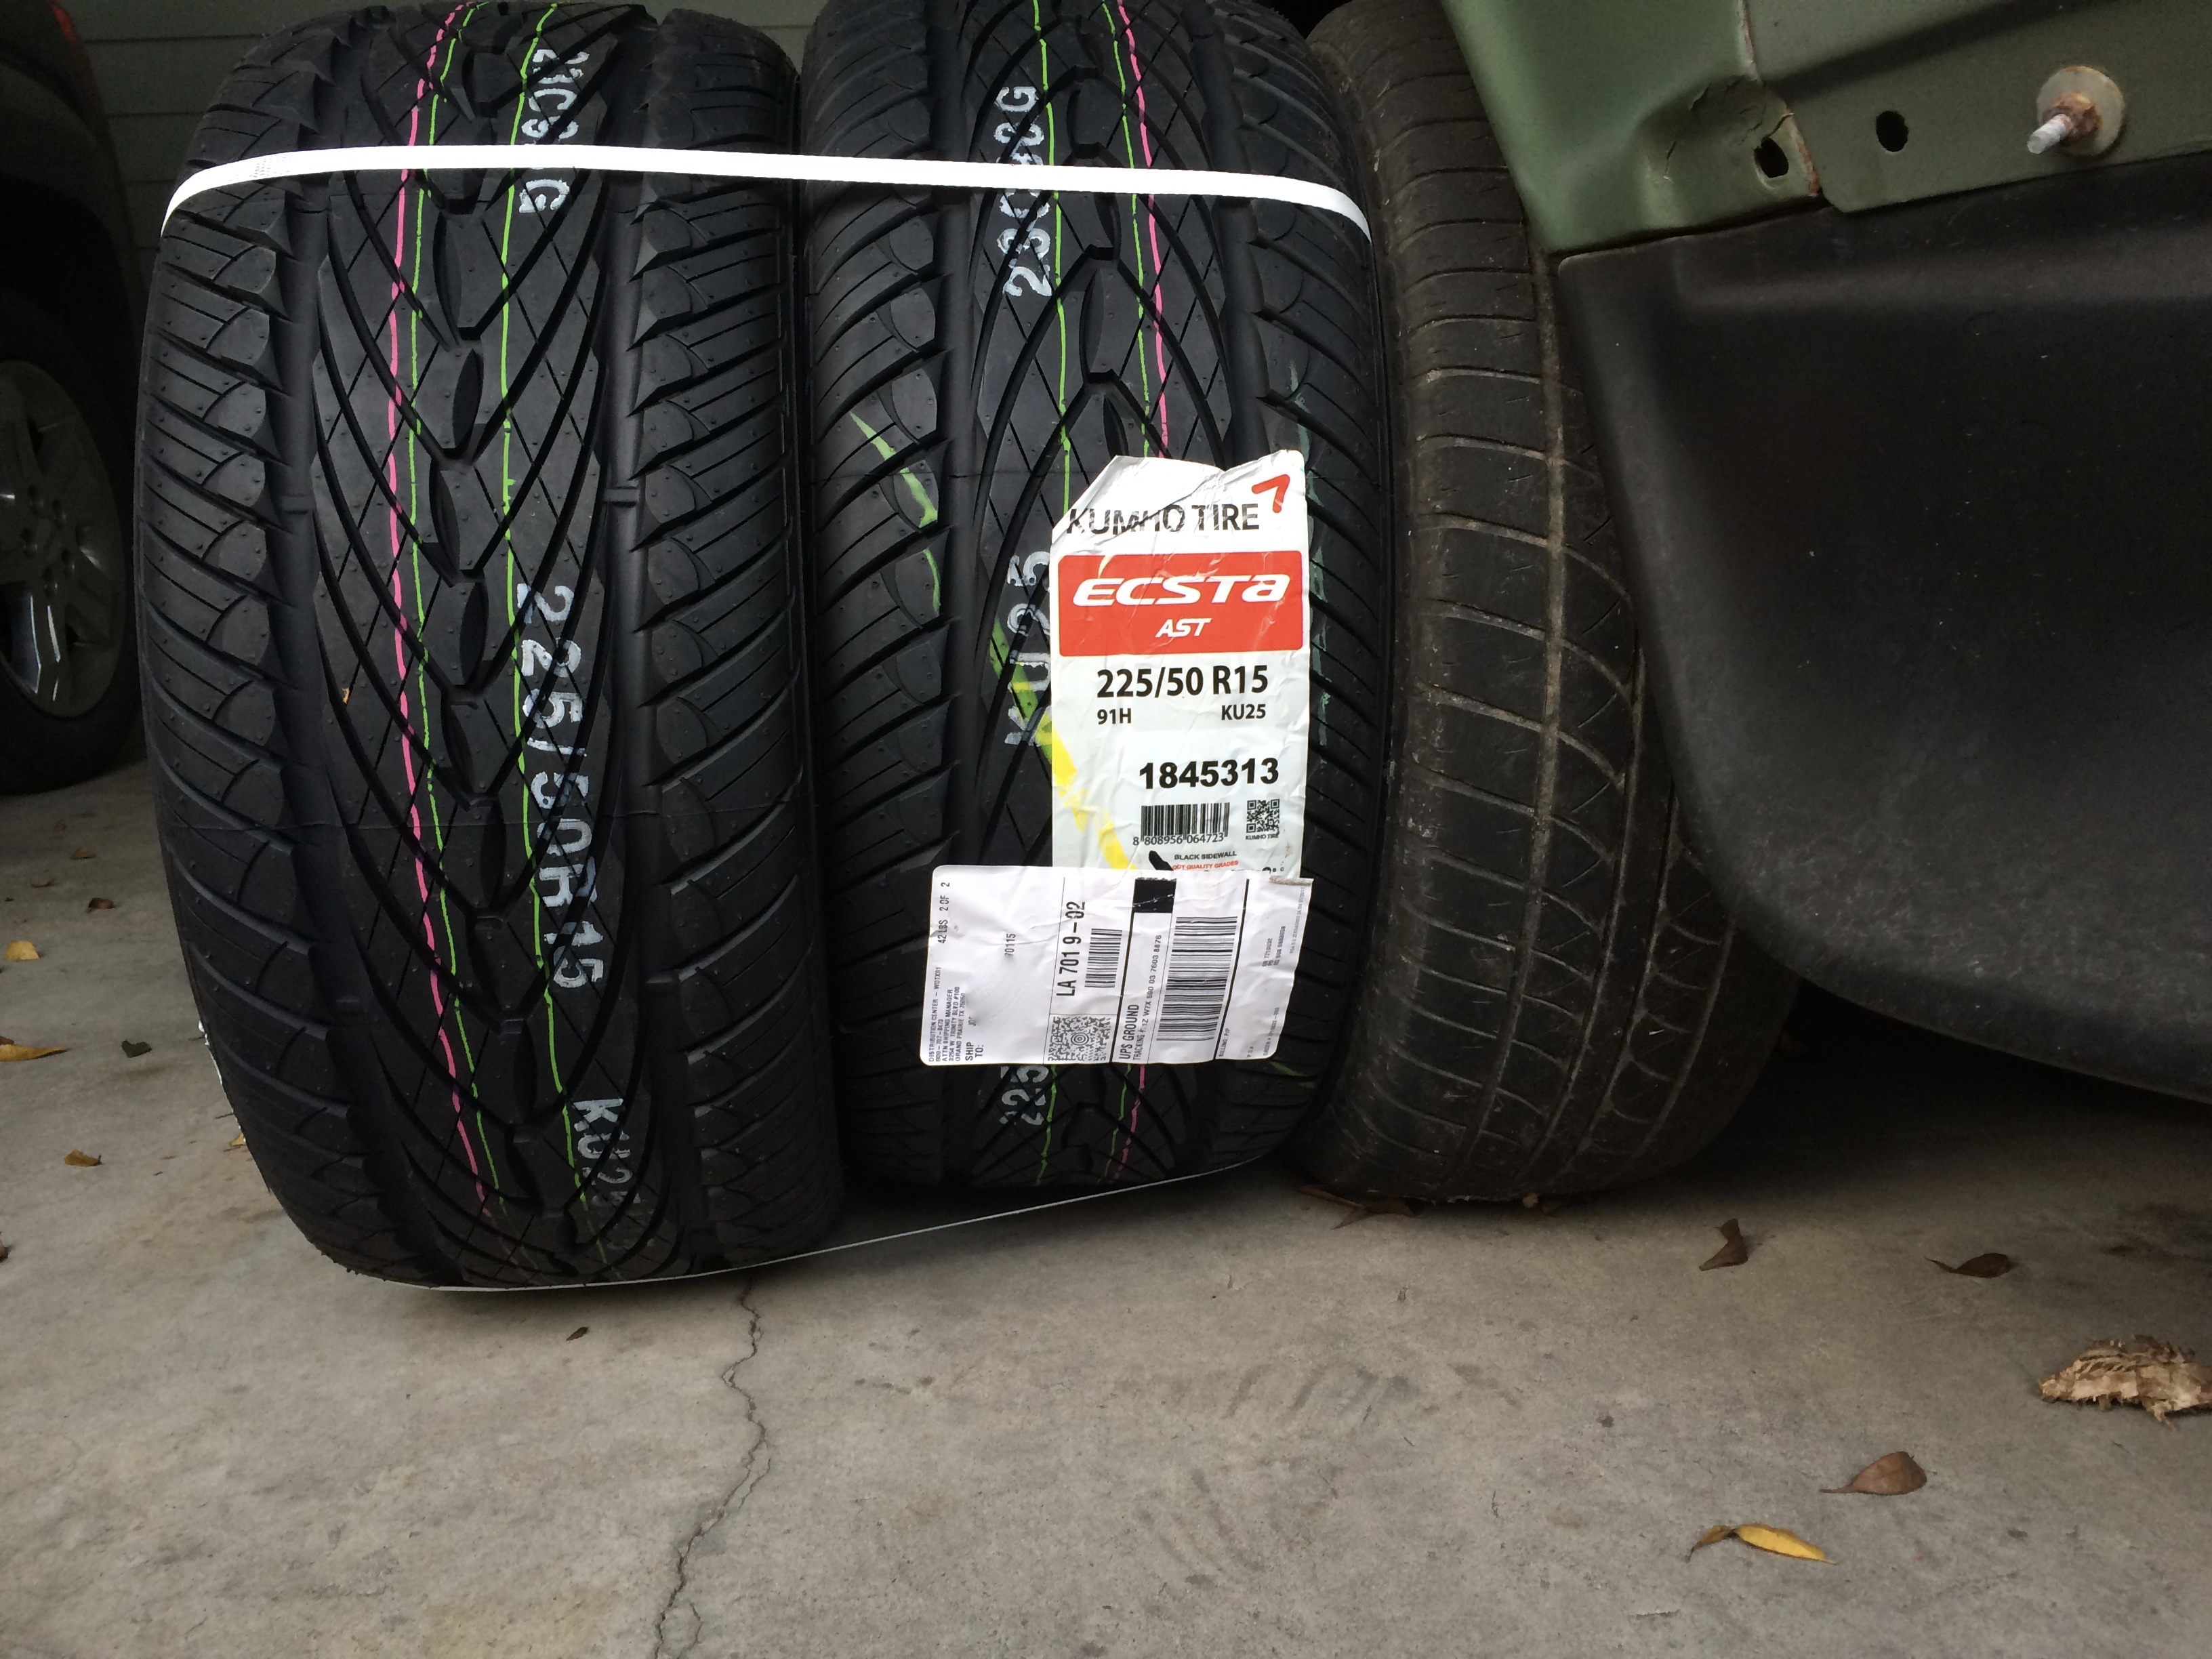

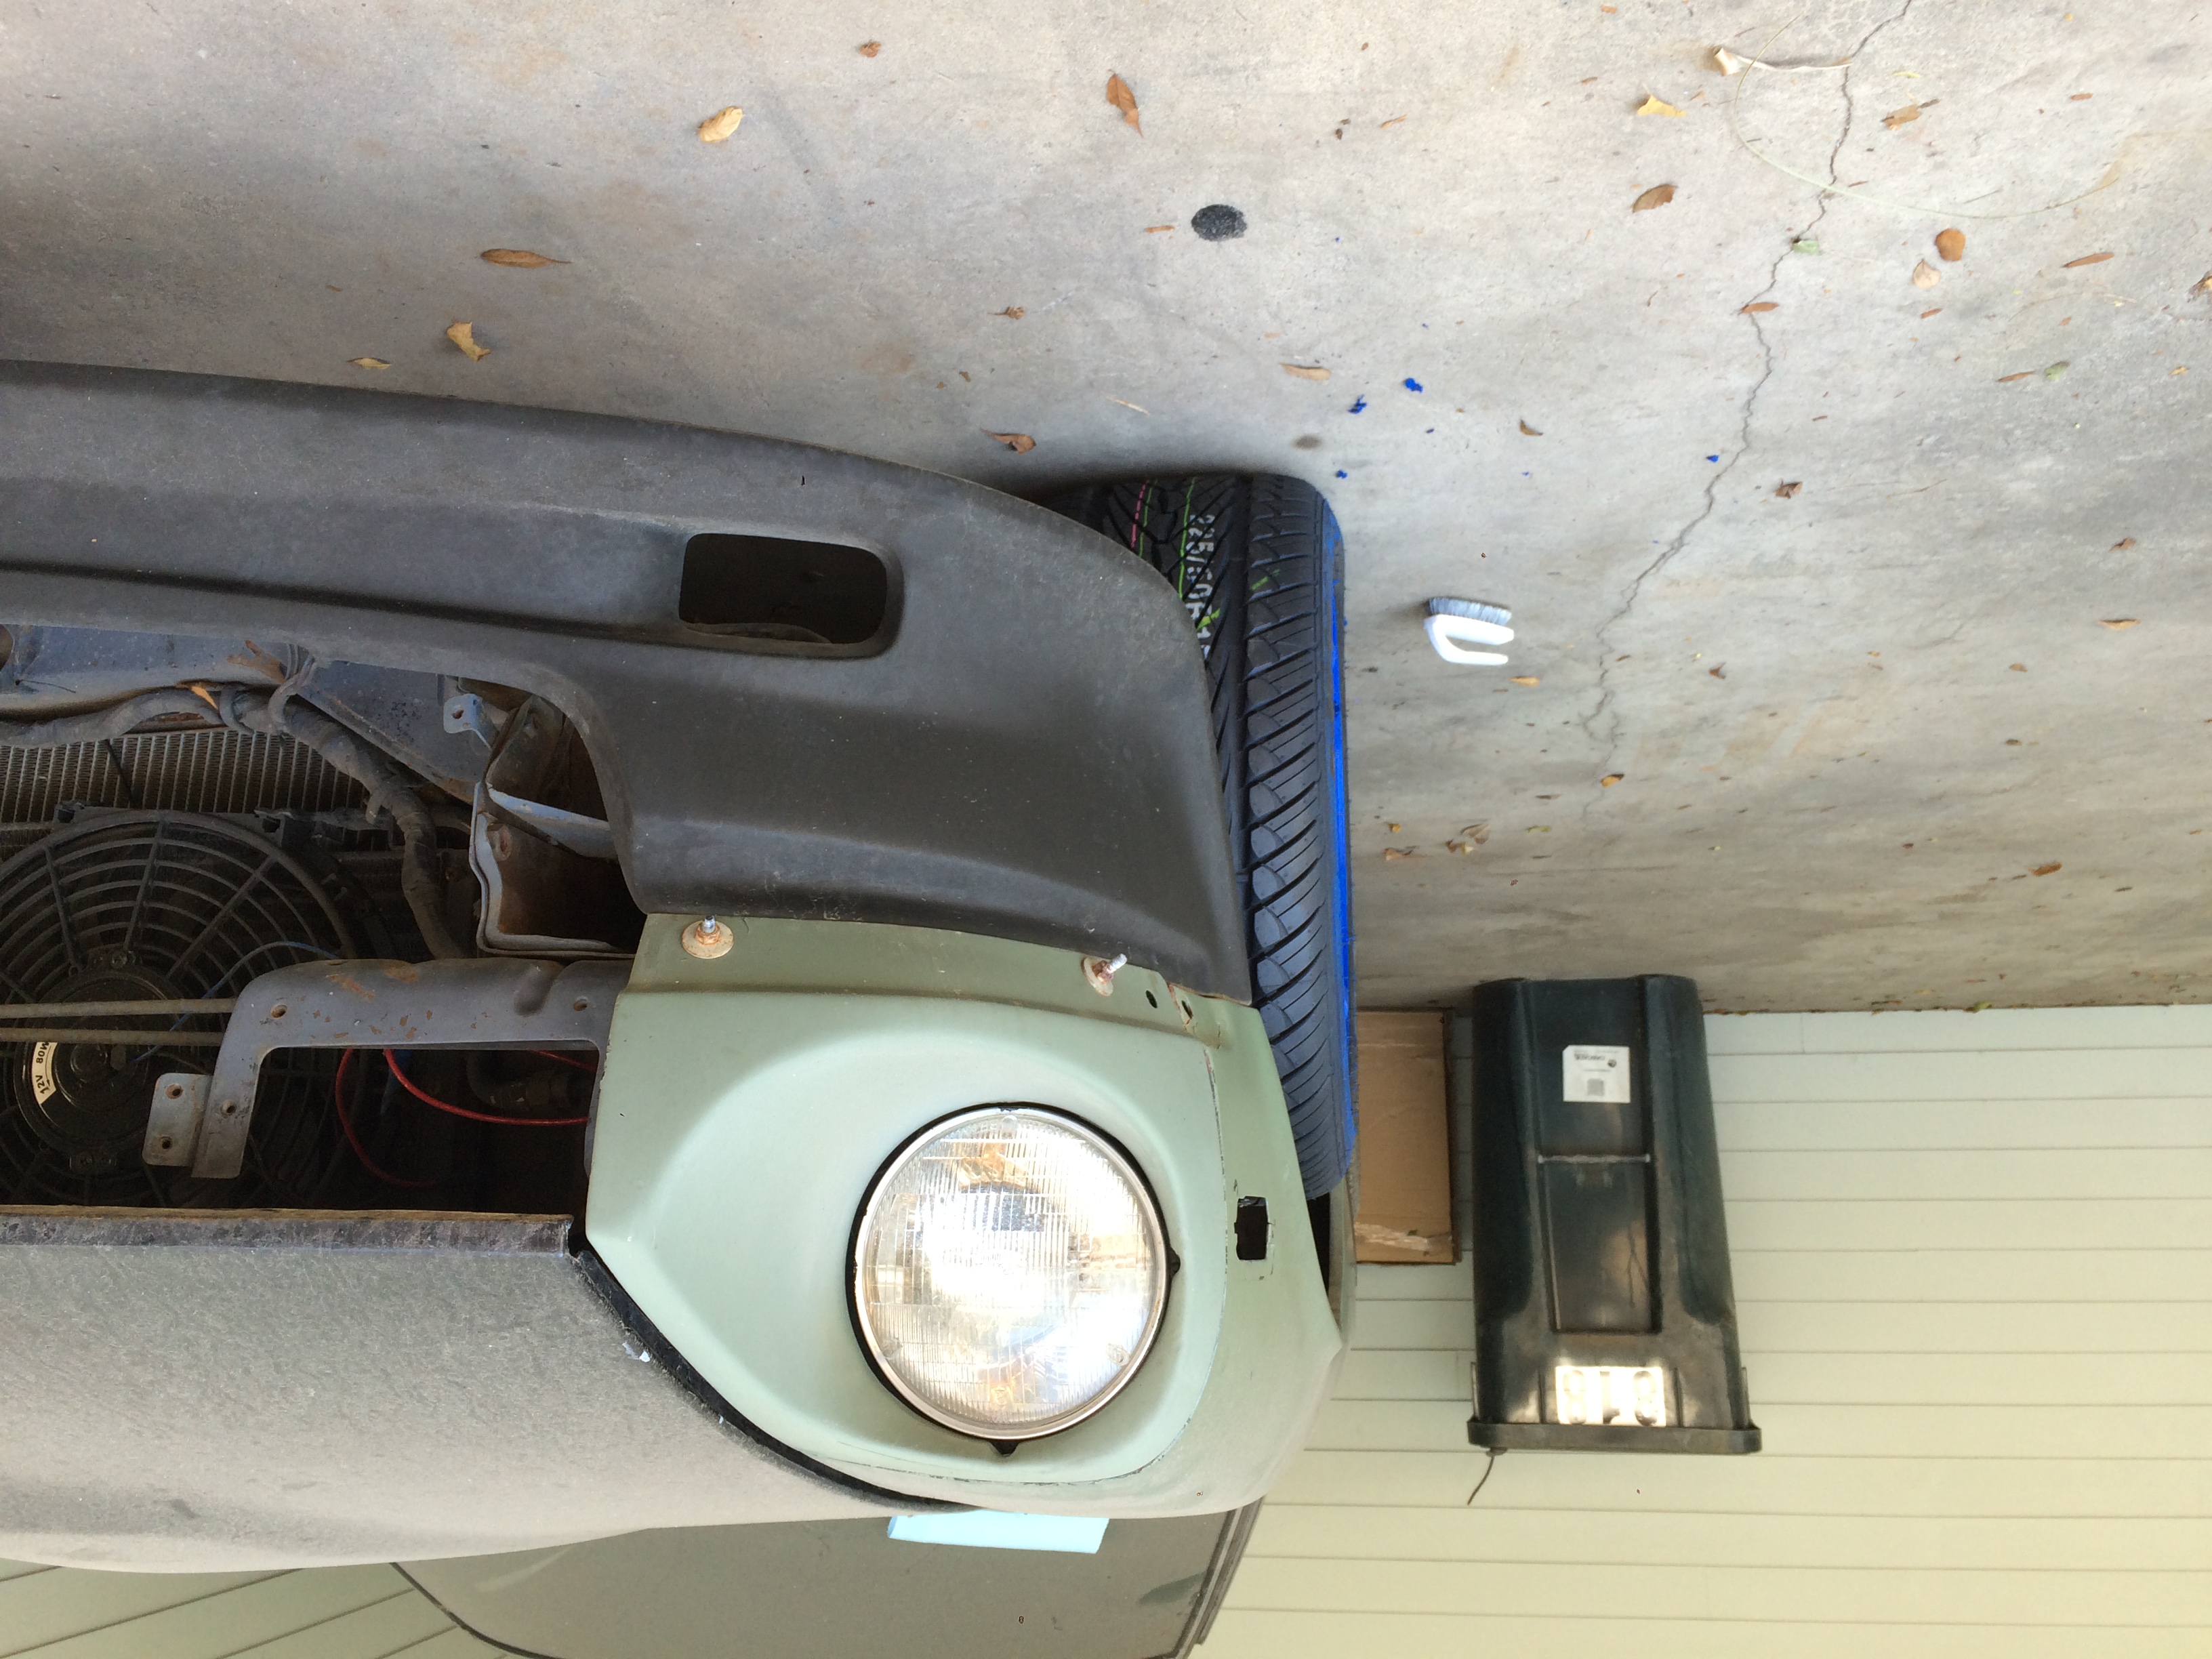
serious note. these tires are obviously (at 225/50) considerably wider than the tires that are on there (205/70s i think) which IS what I wanted, but now that I see them in person... whether or not they'll rub on the inside, I haven't had a chance to look under the car to really see how much clearance I have between the tires and what nots down there; partly because I'm lazy, and partly because I don't have a floor jack to pick the car up... probably have to get one before this weekend. Has anyone had clearance problems running 225/50R15s on 15x8 +0 s? hope not.
I have tomorrow off work so I'll clean the interior out tomorrow, and I have some rims that should be here before next week. which is good, because all my tires are pretty much flat and I can't even roll it around. LOL.
I just realized i'm going to have to replace some studs and buy new lugs before I can't mount the rims this weekend too, so now its Harbor freight AND Oreilley's, don't you just love that?
Future Josh Problems
Happy Hump Day.
Josh.
p.s. how do i flip the pictures?
Last edited by Joshua Paul; 02-03-2016 at 08:13 PM.
02-03-2016, 08:22 PM
#3

W00t! Lookin good!
You need a photo program to flip the pictures... MS paint is built in to Windows. And most Android phones can rotate pics in the gallery. You're on your own if you have an iPhone.
You need a photo program to flip the pictures... MS paint is built in to Windows. And most Android phones can rotate pics in the gallery. You're on your own if you have an iPhone.
02-03-2016, 08:47 PM
#4
Registered User
Thread Starter
Join Date: Jan 2016
Location: Military
Posts: 40
thanks,
Josh.
02-04-2016, 02:32 PM
#5
Registered User
Thread Starter
Join Date: Jan 2016
Location: Military
Posts: 40
Gut.
Good News!
I'm about 2 hours into gutting the interior, and so far i've found $.84, two sockets, a screw driver, AND a wire stripper.

the Screw driver is Pretty worthless considering I already have AT LEAST two; but I think the wire strippers might be Snap-On. I looked them up and they're valued at about $899.16. So at this point i've pretty much broke even on my Z.
Took me a while to fill the tires up to operating pressure...

But I got enough air into them to roll the Z far enough out to get some work done.
Removed the seats as well, I've always understood that the driver's side is going to be a little more worn than the passenger side, but this is a little ridiculous.
I really like these seats actually. the passenger is still really comfortable, anybody know of anybody who can fix this other one? LOL.

Had a couple stuck bolts, Idk if any of you have one of these, but it's probably the best tool I own. Made short work of removing the seats.

Plus side is both my seat sliders work ridiculously well, so I've got that going for me.
Down side is my floorboards are WAY worse than I thought they were.
I mean HOLES.

Floors will definitely need to be replaced, plus side is the rest of the car isn't nearly as bad as the floor pans.

Spare wheel well is repairable, trunk section is manageable, and the shock towers are really good.
I noticed this puppy on my hub today.

is this an old school locking lug nut? if so does anyone know where i can find the key for it? will the parts stores have one? if not i'm just going to have to cut it off.
up next is the world's longest Shop Vac-ing. hopefully I don't suck my floor boards off... wait... that didn't come out right...
I'm about 2 hours into gutting the interior, and so far i've found $.84, two sockets, a screw driver, AND a wire stripper.
the Screw driver is Pretty worthless considering I already have AT LEAST two; but I think the wire strippers might be Snap-On. I looked them up and they're valued at about $899.16. So at this point i've pretty much broke even on my Z.
Took me a while to fill the tires up to operating pressure...
But I got enough air into them to roll the Z far enough out to get some work done.
Removed the seats as well, I've always understood that the driver's side is going to be a little more worn than the passenger side, but this is a little ridiculous.
I really like these seats actually. the passenger is still really comfortable, anybody know of anybody who can fix this other one? LOL.
Had a couple stuck bolts, Idk if any of you have one of these, but it's probably the best tool I own. Made short work of removing the seats.
Plus side is both my seat sliders work ridiculously well, so I've got that going for me.
Down side is my floorboards are WAY worse than I thought they were.
I mean HOLES.
Floors will definitely need to be replaced, plus side is the rest of the car isn't nearly as bad as the floor pans.
Spare wheel well is repairable, trunk section is manageable, and the shock towers are really good.
I noticed this puppy on my hub today.
is this an old school locking lug nut? if so does anyone know where i can find the key for it? will the parts stores have one? if not i'm just going to have to cut it off.
up next is the world's longest Shop Vac-ing. hopefully I don't suck my floor boards off... wait... that didn't come out right...
Last edited by Joshua Paul; 02-04-2016 at 02:35 PM.
02-05-2016, 10:41 AM
#6
Registered User
Thread Starter
Join Date: Jan 2016
Location: Military
Posts: 40
Floor Prep
After about 6 hours of work I have managed to remove all of the factory... insulation? maybe? whatever they glued down to the floors. Whatever it is it had hardened and the only way I could figure to remove it was to chip it all off with a hammer and putty knife.


Here's what it all looks like now.


Are those not the most gorgeous floor pans you've ever seen?

I realized about halfway through it that it's a waste of labor to chip the insulation off the actual floor pans themselves, because i'm going to cut them out. so instead I focused on getting it off everywhere else in sort of preparation for cutting and welding.

I don't think I'm going to replace the pans this month. It's not ENTIRELY necessary to replace the pans to get this thing running and driving so I will refrain. plus if it's running I can drive it to work where I have my welder and what not. So for now I'm going to simply spray some stop rust everywhere to protect and prevent it from getting any worse and hopefully save as much of my rockers as I can. then I'll re-prime everything on the interior to seal it. spray some undercoating on the bottom and call it good until I have enough time to deal with it properly.
Once I have the interior primed, Hopefully tomorrow, I'll reinstall the driver's seat. which I still need to swap over from the passenger side slider. Then from there it's finish wheels/tires and install a battery and theoretically she'll run. minus the fact that I need to install a new harmonic balancer.
After that i'm going to remove the dash, build a custom dash, and rewire the entire car. I've decided to just rewire the whole thing. any suggestions on wiring kits? I'm probably just going to get the EZwire-21 unless someone has any reasons I shouldn't.
I want to rewire it because I want to swap the headlights, and put in some relays. I also want to wire my Fan, Ignition, and Fuel pump to Switches on the dash, because let's be honest I want to have to flip lots of switches to turn my car on.
and a Huge red guarded switch for my starter motor. https://www.zdriver.com/forums/image...es/biggrin.gif
All in favor say I?
this should keep me busy for like... next week at least.
Sounds fun.
cool.
good plan guys.
keep up the hard work.
josh.
Here's what it all looks like now.
Are those not the most gorgeous floor pans you've ever seen?
I realized about halfway through it that it's a waste of labor to chip the insulation off the actual floor pans themselves, because i'm going to cut them out. so instead I focused on getting it off everywhere else in sort of preparation for cutting and welding.
I don't think I'm going to replace the pans this month. It's not ENTIRELY necessary to replace the pans to get this thing running and driving so I will refrain. plus if it's running I can drive it to work where I have my welder and what not. So for now I'm going to simply spray some stop rust everywhere to protect and prevent it from getting any worse and hopefully save as much of my rockers as I can. then I'll re-prime everything on the interior to seal it. spray some undercoating on the bottom and call it good until I have enough time to deal with it properly.
Once I have the interior primed, Hopefully tomorrow, I'll reinstall the driver's seat. which I still need to swap over from the passenger side slider. Then from there it's finish wheels/tires and install a battery and theoretically she'll run. minus the fact that I need to install a new harmonic balancer.
After that i'm going to remove the dash, build a custom dash, and rewire the entire car. I've decided to just rewire the whole thing. any suggestions on wiring kits? I'm probably just going to get the EZwire-21 unless someone has any reasons I shouldn't.
I want to rewire it because I want to swap the headlights, and put in some relays. I also want to wire my Fan, Ignition, and Fuel pump to Switches on the dash, because let's be honest I want to have to flip lots of switches to turn my car on.
and a Huge red guarded switch for my starter motor. https://www.zdriver.com/forums/image...es/biggrin.gif
All in favor say I?
this should keep me busy for like... next week at least.
Sounds fun.
cool.
good plan guys.
keep up the hard work.
josh.
02-05-2016, 02:36 PM
#7
Registered User
Join Date: Aug 2013
Posts: 1,103
Very impressed with your work. 
There are lots of old posts on this site re: patching/replacing floor metal, sound insulating under new carpet, etc., so be sure to locate them. She will be a knockout when you're finished, finally. Keep that in mind if you get weary.
Well done, all around!
There are lots of old posts on this site re: patching/replacing floor metal, sound insulating under new carpet, etc., so be sure to locate them. She will be a knockout when you're finished, finally. Keep that in mind if you get weary.
Well done, all around!
02-06-2016, 03:31 PM
#8
Registered User
Thread Starter
Join Date: Jan 2016
Location: Military
Posts: 40
Thanks.
Very impressed with your work.
There are lots of old posts on this site re: patching/replacing floor metal, sound insulating under new carpet, etc., so be sure to locate them. She will be a knockout when you're finished, finally. Keep that in mind if you get weary.
Well done, all around!
There are lots of old posts on this site re: patching/replacing floor metal, sound insulating under new carpet, etc., so be sure to locate them. She will be a knockout when you're finished, finally. Keep that in mind if you get weary.
Well done, all around!
02-06-2016, 03:48 PM
#9
Registered User
Thread Starter
Join Date: Jan 2016
Location: Military
Posts: 40
Floors.
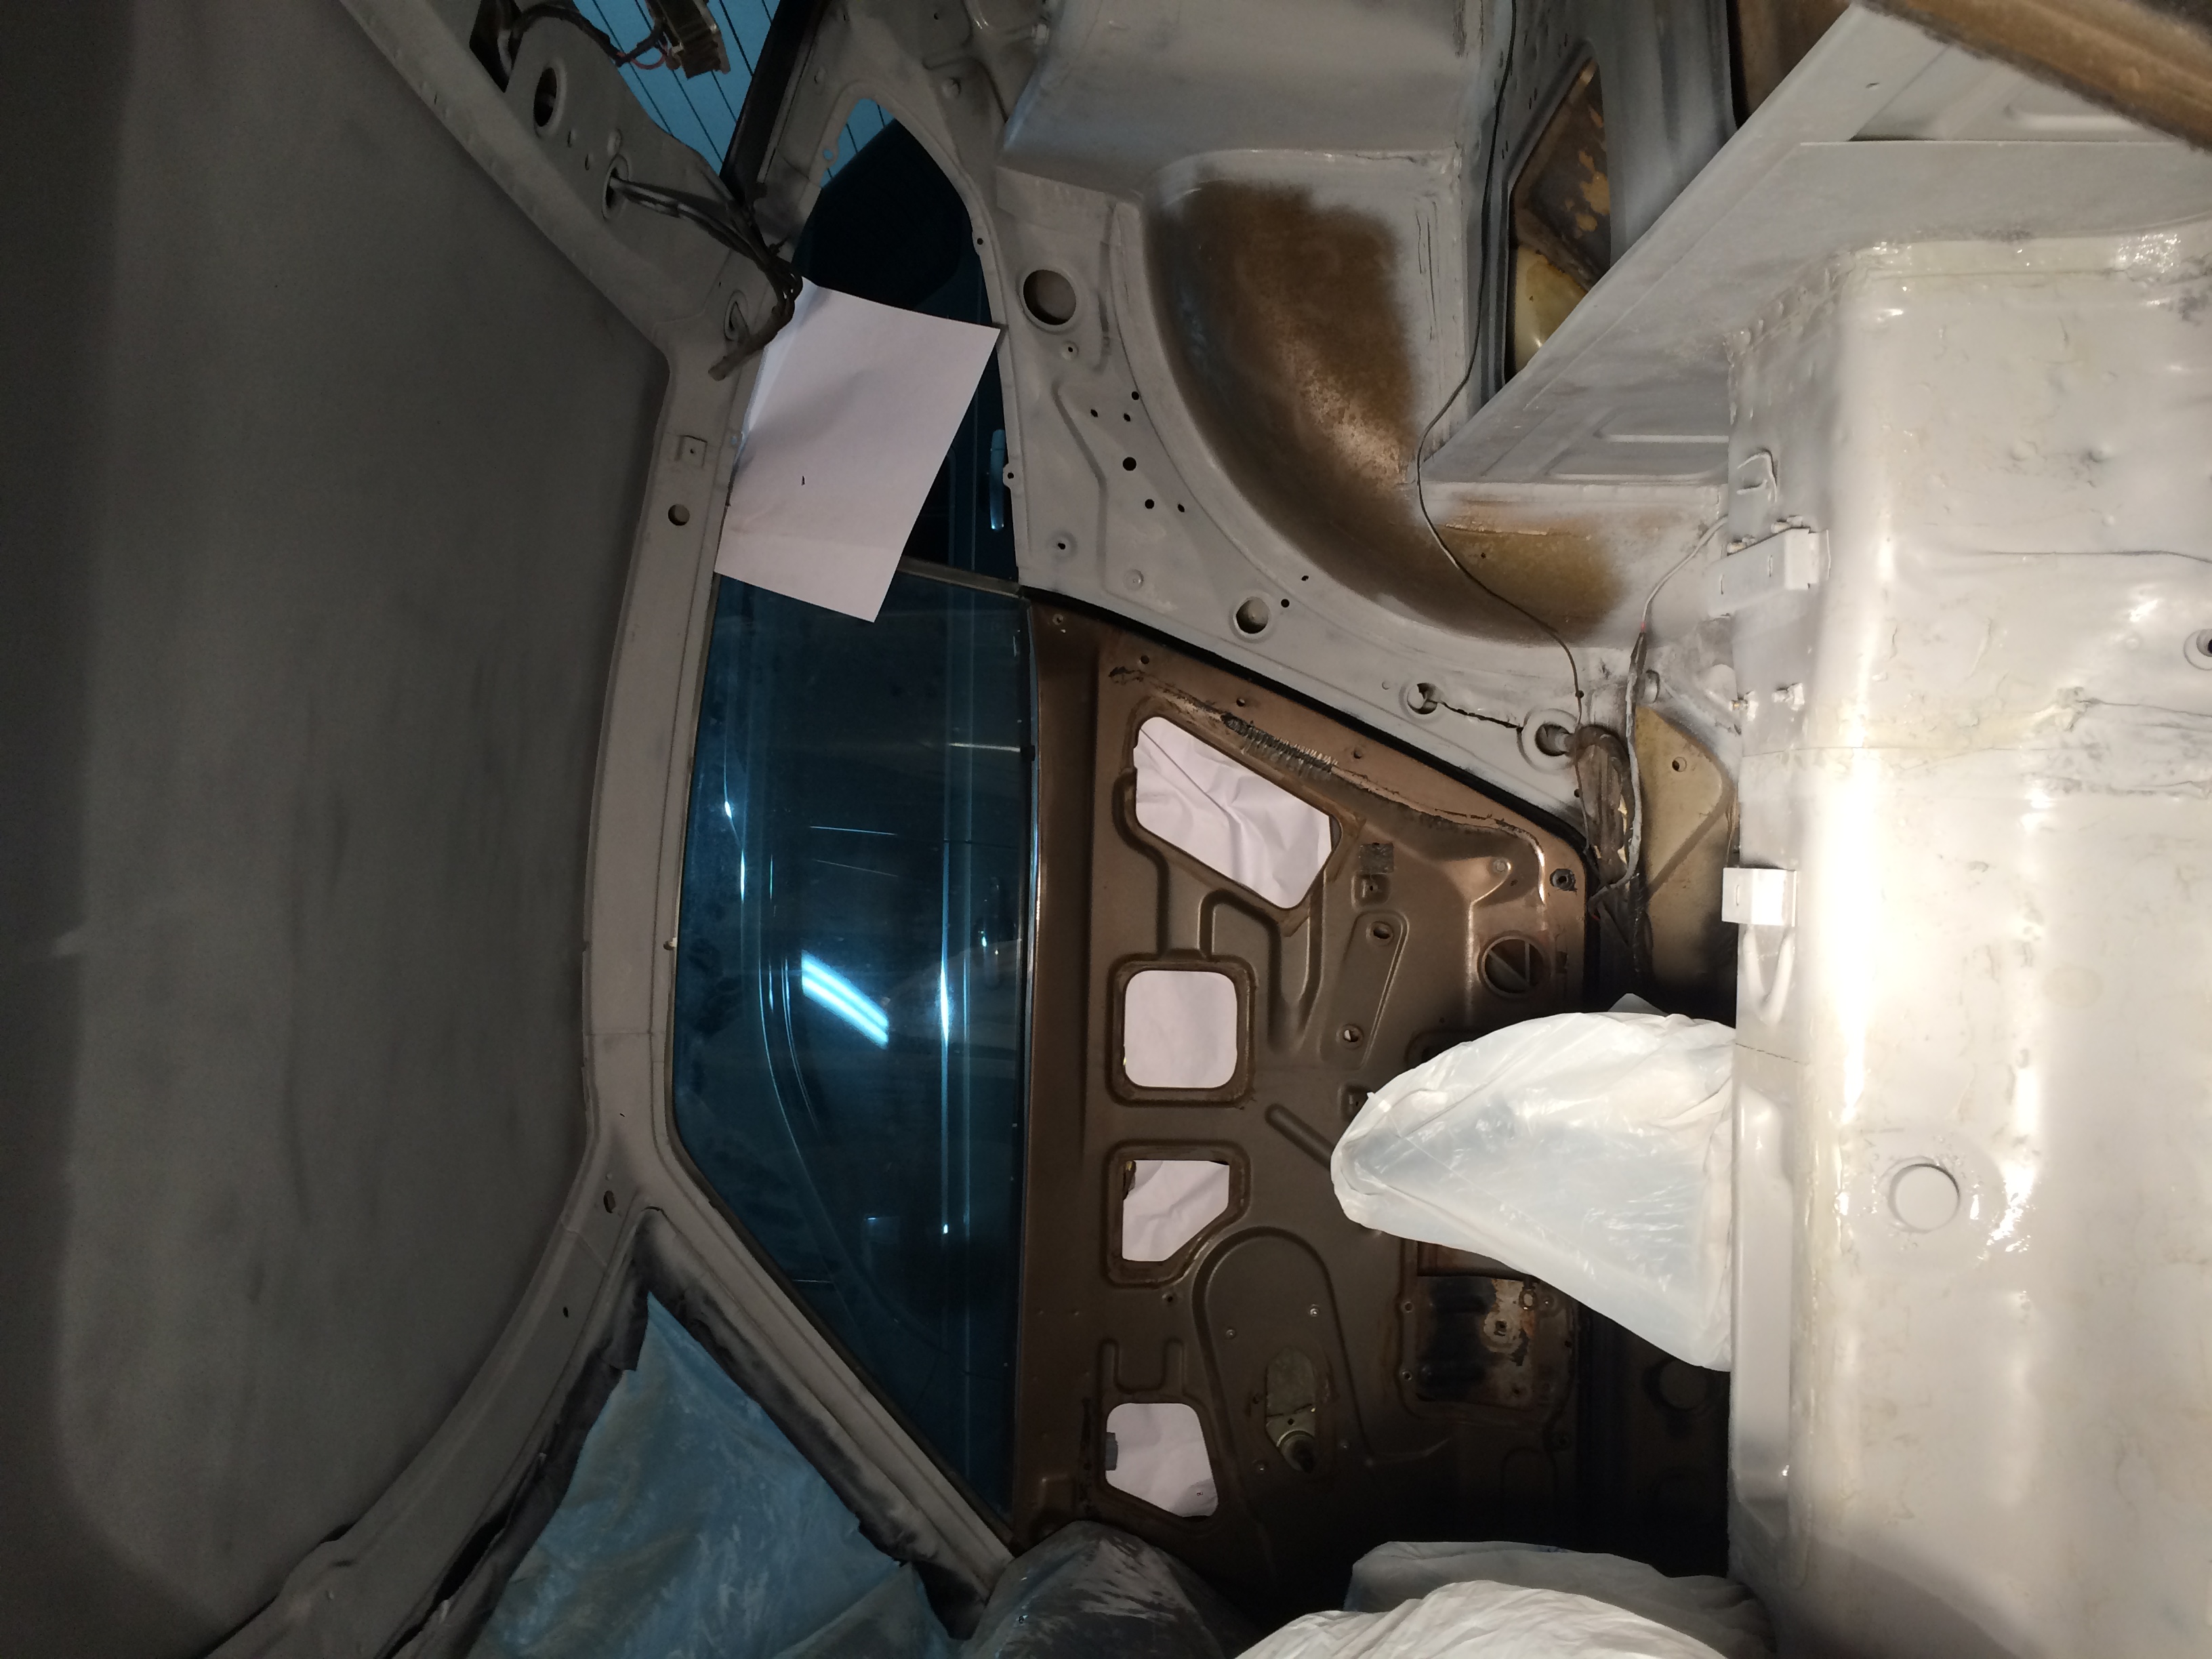
Treated the rust on the floors today. They're so bad. I'm over it, but it turned out pretty good for what it is. I started with the right angle grinder and a wire wheel.
the spare wheel well turned out the best.

You can see that there is still a decent amount of solid metal under the rust,

once I had that dull shine of almost rusty metal, I got a good coat of Stop Rust on it.

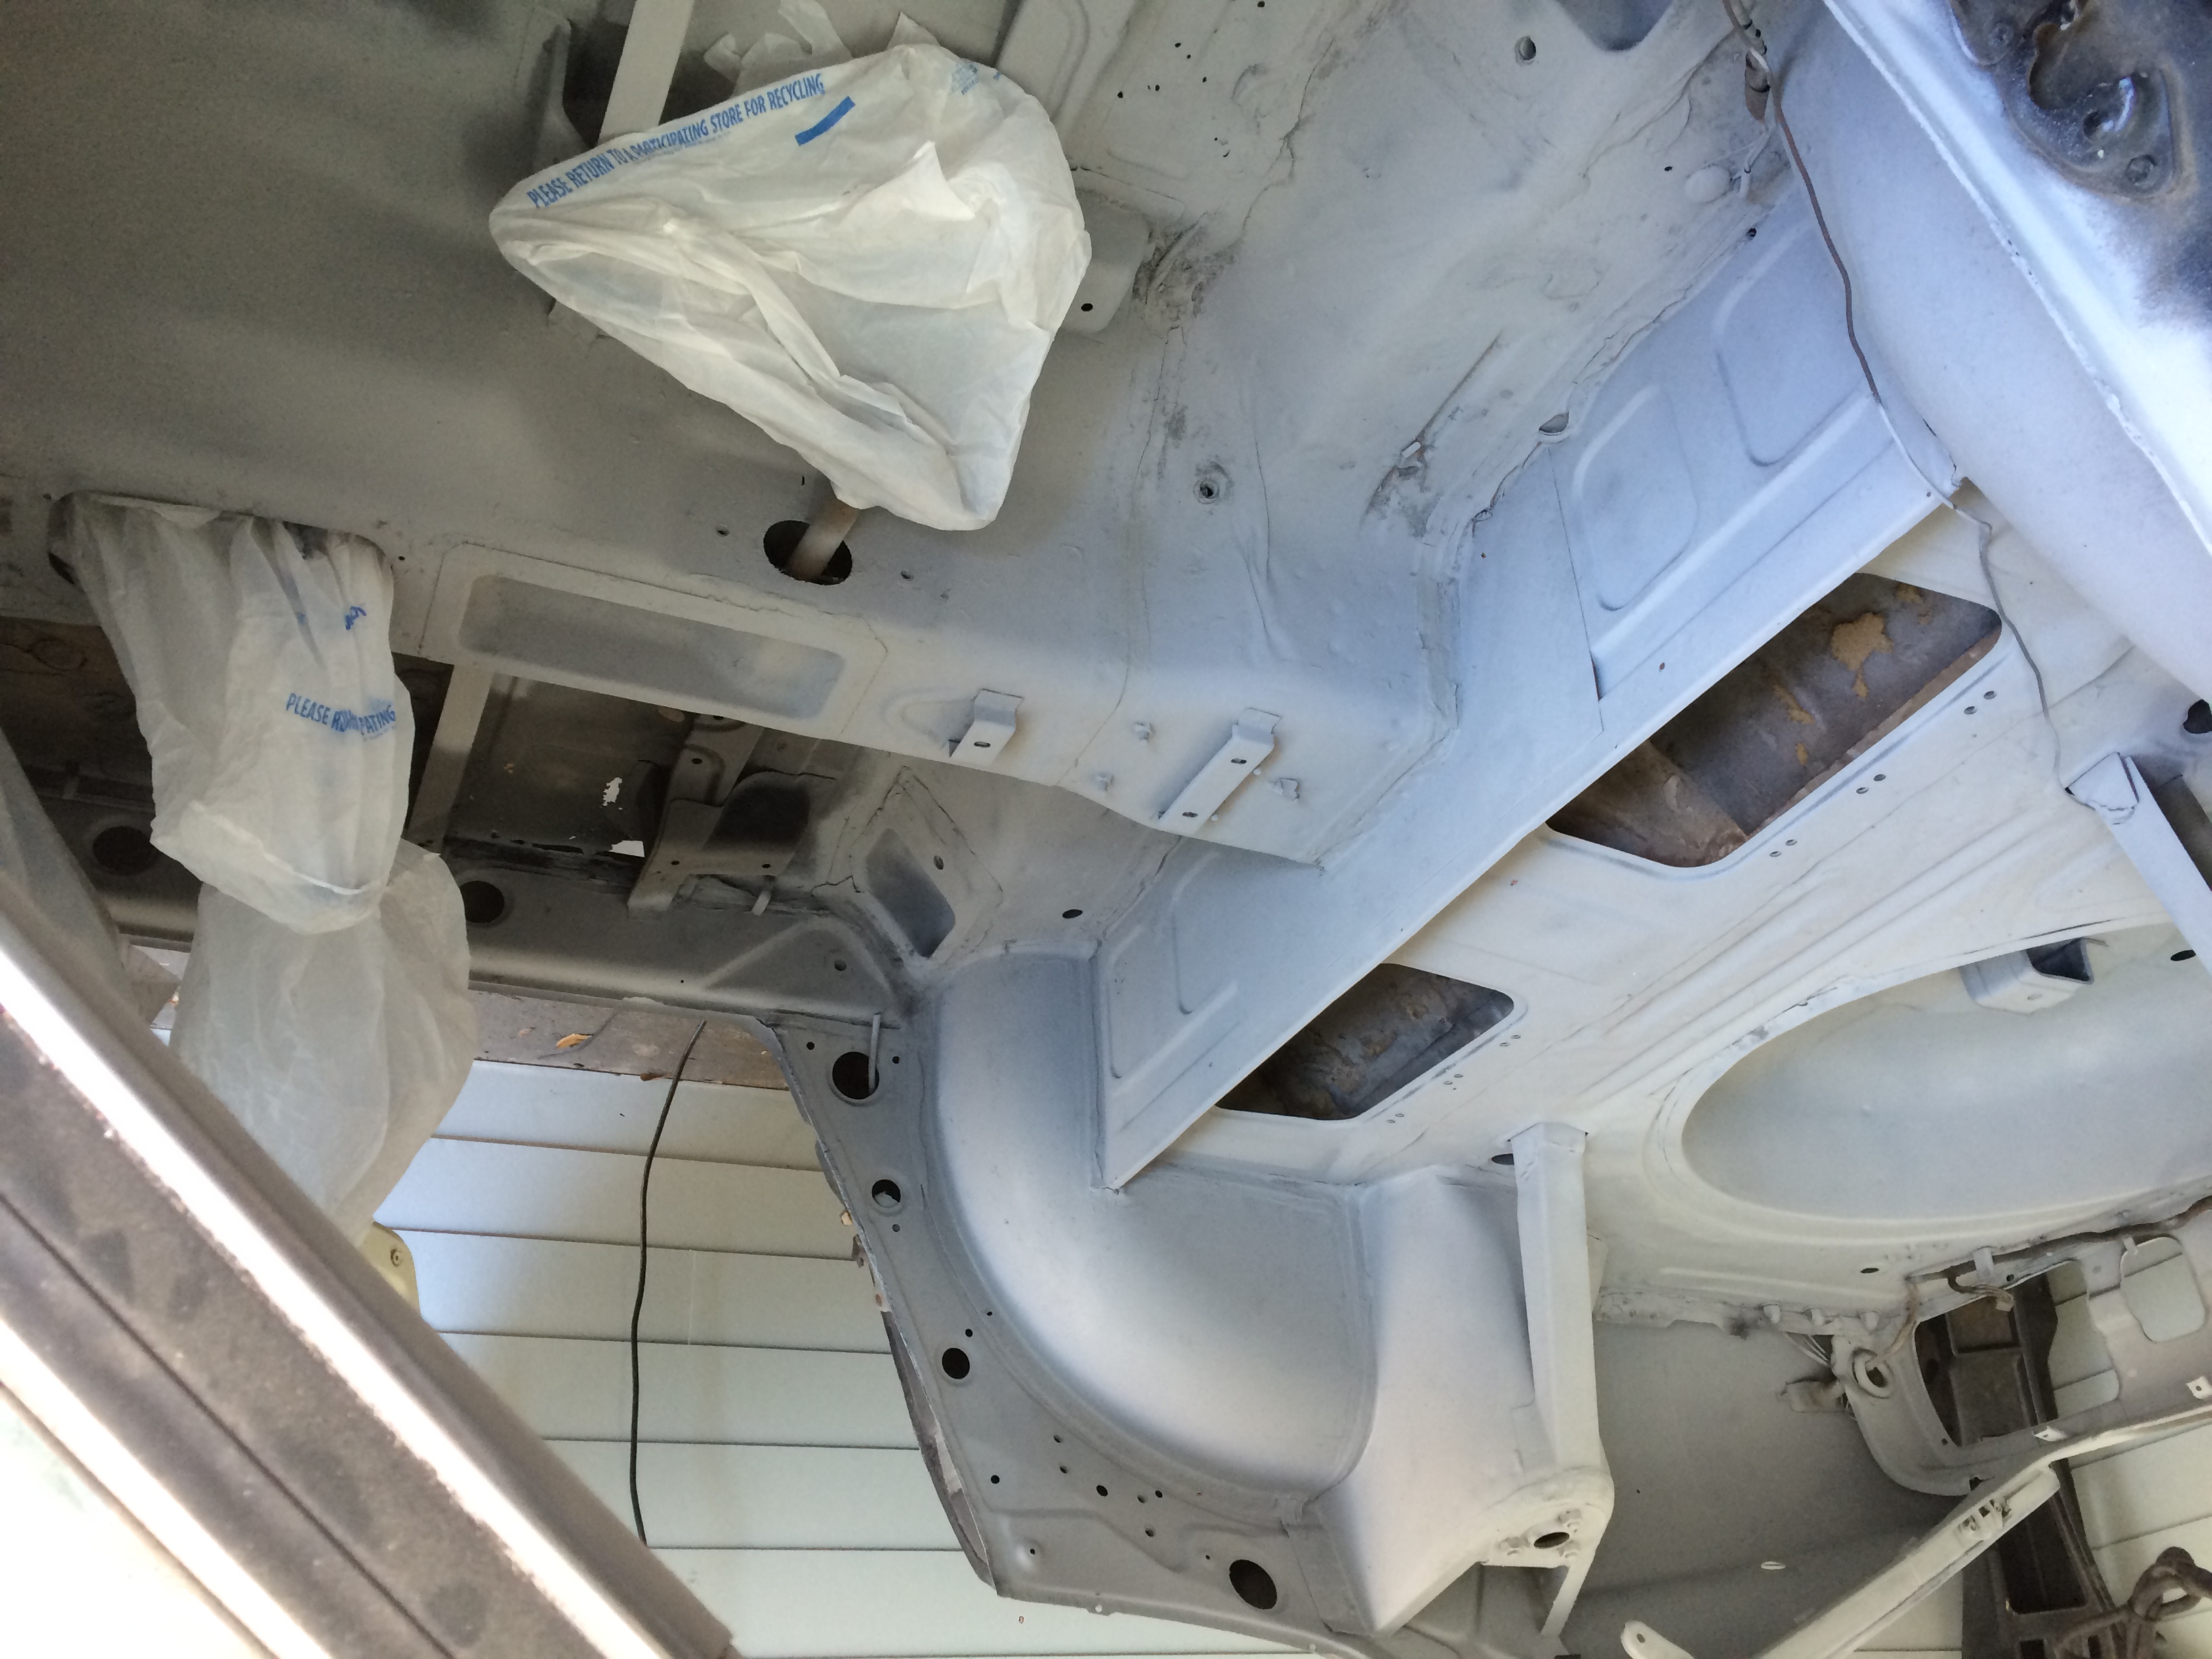
next I moved up to the floors. Took as much off as could, but I mainly focused on the cross-members I figure if i'm going to replace the floors later than I don't need to spend as much time on them, let the Stop Rust do the work for me. you can see even my cross members are starting to go. the driver's side is worse, but I only got a photo of the passenger side.


Tomorrow I'm going to finish removing the headliner, and the interior panels. I'll probably remove the hatch just for ***** and grins. then I can primer the interior to get a decent protective layer down and also clean up the look. I haven't decided yet if I am going to remove the dash now or later. probably now,
I've always wanted to make a custom dash.
we'll see.
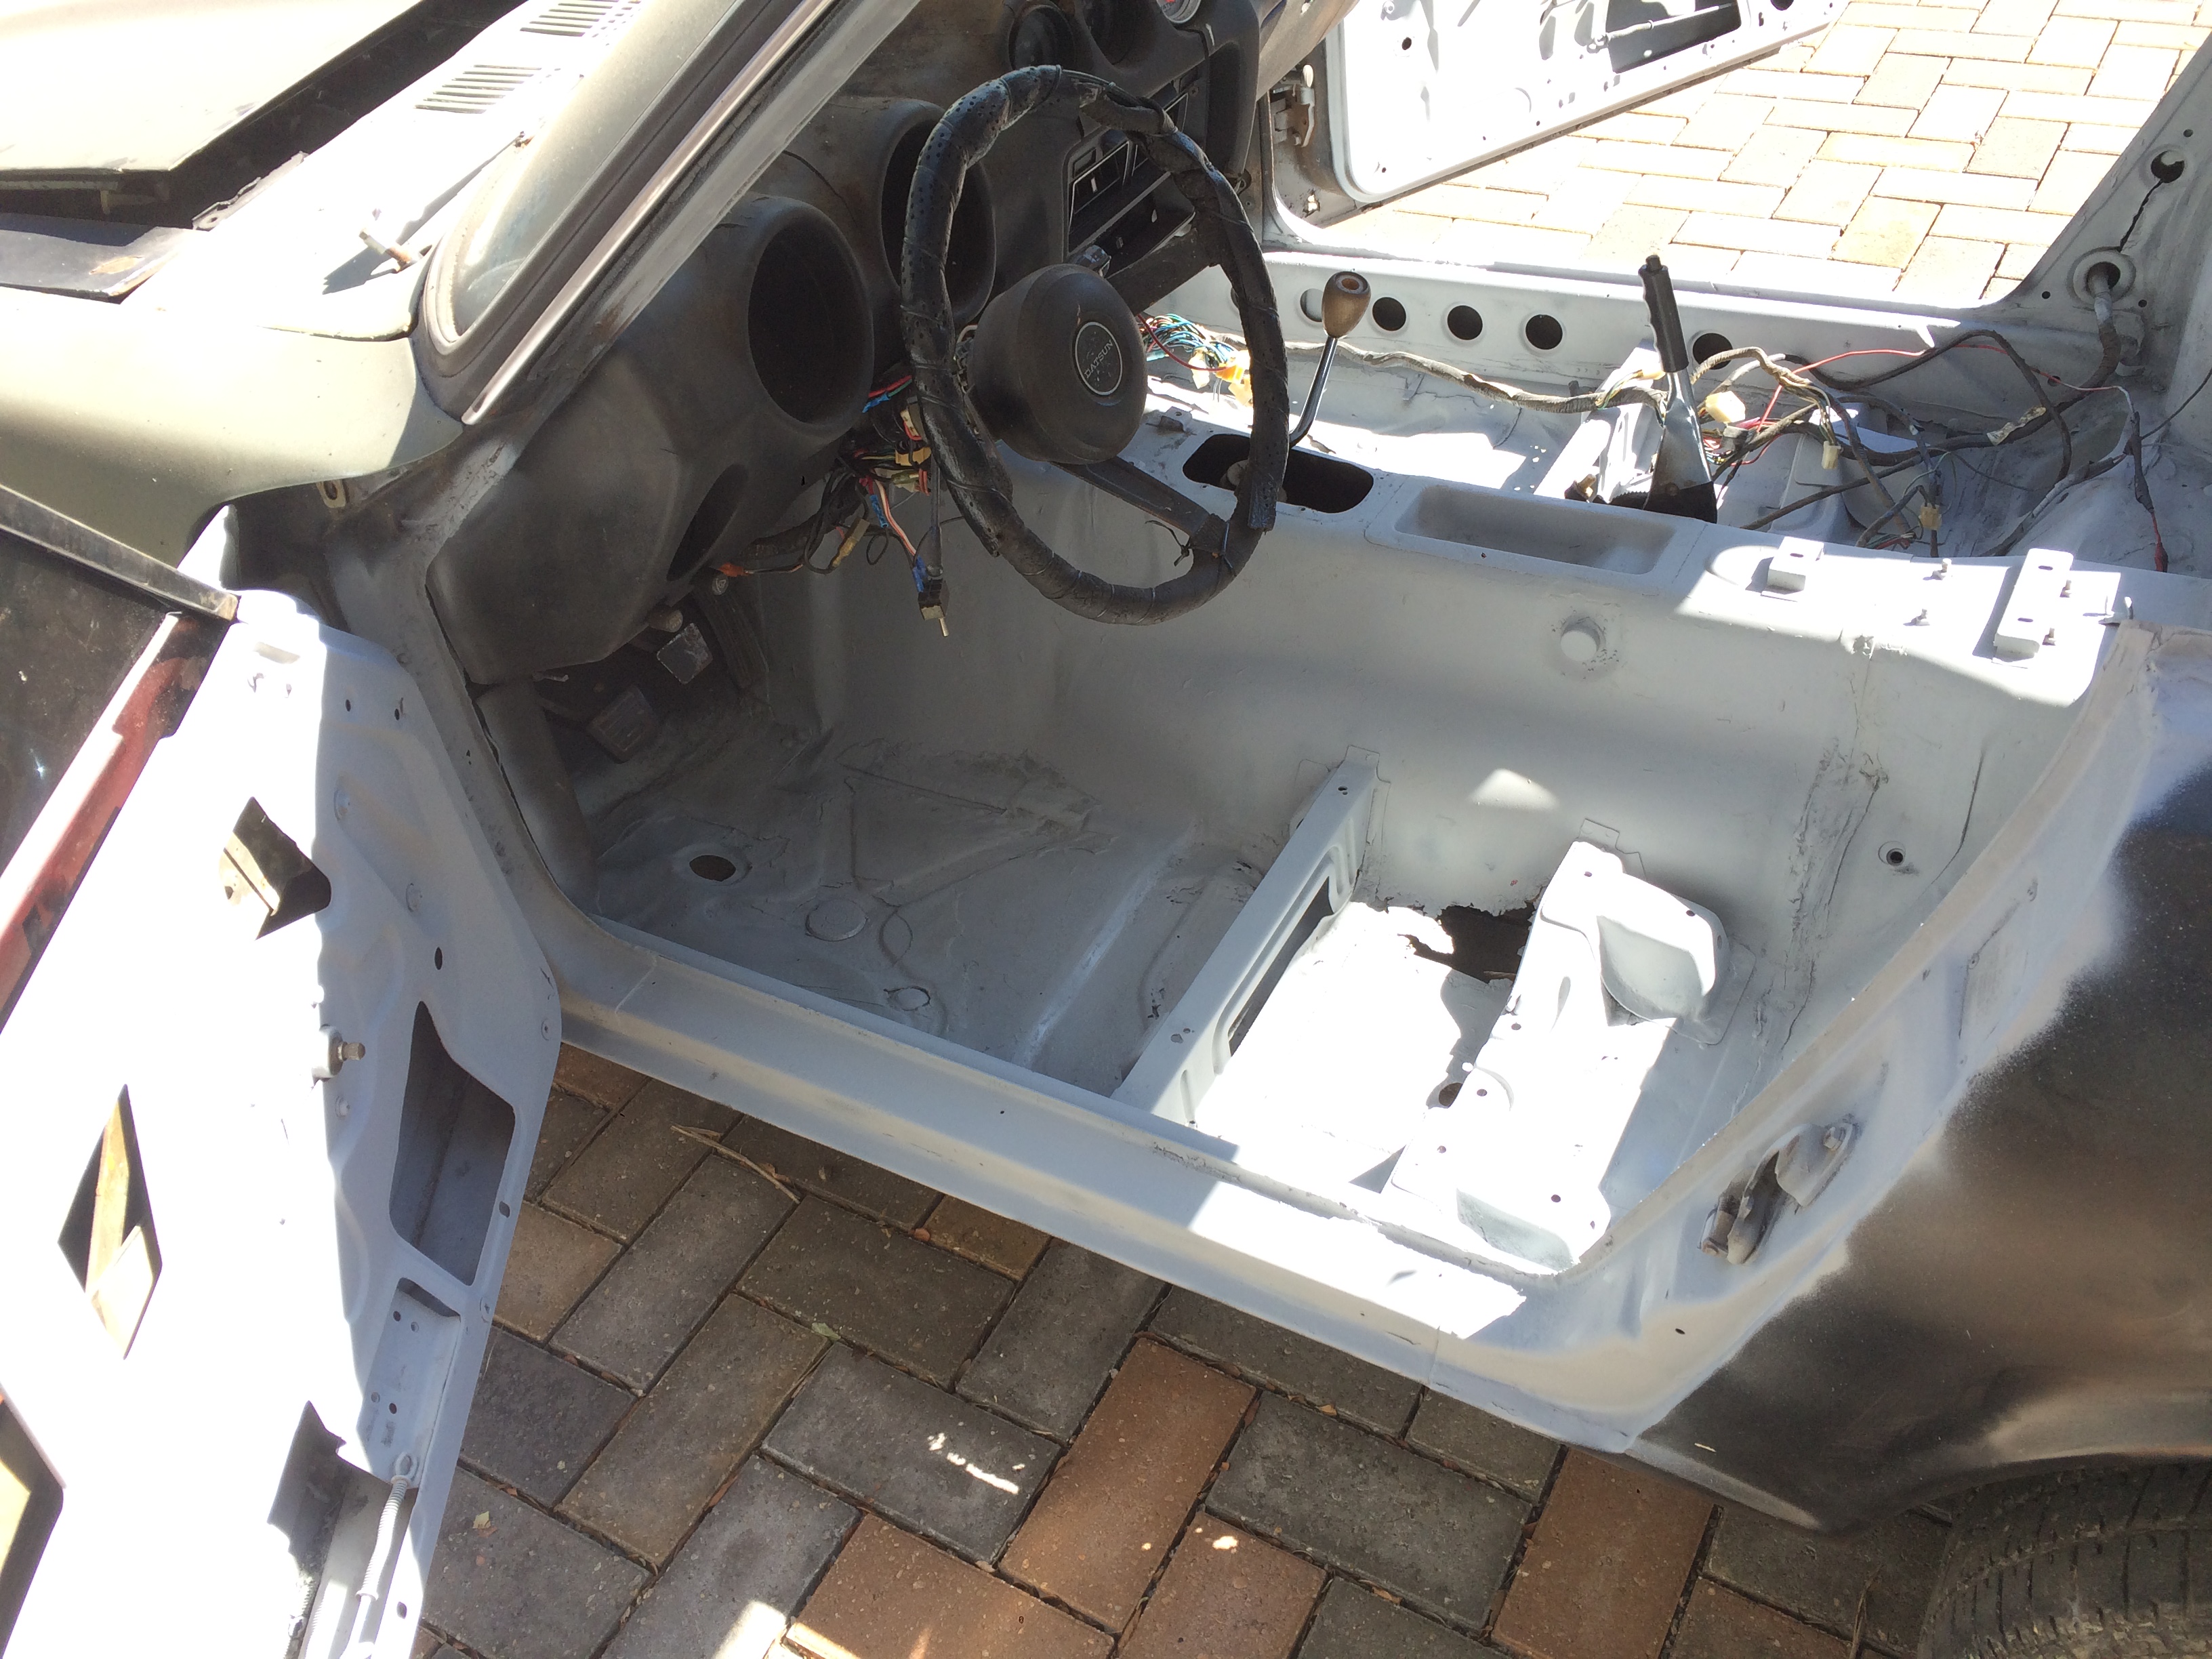
As she sits now.

I think it's funny that i'm putting so much time into the appearance of this car when truthfully I don't even know if it's going to run well enough to drive yet. ha!
I'm going on faith.
I have a Harmonic Balancer on order. I'm going to remove the AC compressor when I swap the balancer, the AC doesn't work anyway, besides, who needs AC? it's only New Orleans...
the spare wheel well turned out the best.
You can see that there is still a decent amount of solid metal under the rust,
once I had that dull shine of almost rusty metal, I got a good coat of Stop Rust on it.
next I moved up to the floors. Took as much off as could, but I mainly focused on the cross-members I figure if i'm going to replace the floors later than I don't need to spend as much time on them, let the Stop Rust do the work for me. you can see even my cross members are starting to go. the driver's side is worse, but I only got a photo of the passenger side.
Tomorrow I'm going to finish removing the headliner, and the interior panels. I'll probably remove the hatch just for ***** and grins. then I can primer the interior to get a decent protective layer down and also clean up the look. I haven't decided yet if I am going to remove the dash now or later. probably now,
I've always wanted to make a custom dash.
we'll see.
As she sits now.
I think it's funny that i'm putting so much time into the appearance of this car when truthfully I don't even know if it's going to run well enough to drive yet. ha!
I'm going on faith.
I have a Harmonic Balancer on order. I'm going to remove the AC compressor when I swap the balancer, the AC doesn't work anyway, besides, who needs AC? it's only New Orleans...
02-12-2016, 07:21 PM
#10
Registered User
Thread Starter
Join Date: Jan 2016
Location: Military
Posts: 40
Interior
I know what you're thinking.
"WTF Josh? why aren't you working on the Datsun?"
well, it was Mardi Gras, cut me some slack.
Actually I got to a point on my Z where I couldn't work any further.
I lost my Ratchet.
well, I thought I did. I was pretty pissed. I take tool control pretty seriously, and I've had that ratchet for like 5 years. built like 4 cars with it. so after about a week of pouting I finally got myself to go to the store to buy a new one. and if you're gonna but a new ratchet, I figured i'd upgrade my tool box a little while I was at it. why not? and if i'm gonna upgrade my tool box then I'm gonna need to cut out new tool foam to organize everything right? but if i'm gonna cut new foam I should just go ahead and get some extra tools i've been meaning to buy... You see where this is going?
rabbit holes.
so i've spent the last four days in wonderland and now it's time to come back to Kansas.
I'll post some pictures of my tool box later.
Back to the Z. I've finished gutting the interior. I also ended up pulling the back windows, taking the hatch off and removing the taillight assembly trying to get all the dirt/rust/small pieces of candy out of this car. I'm a little concerned about the previous owner...


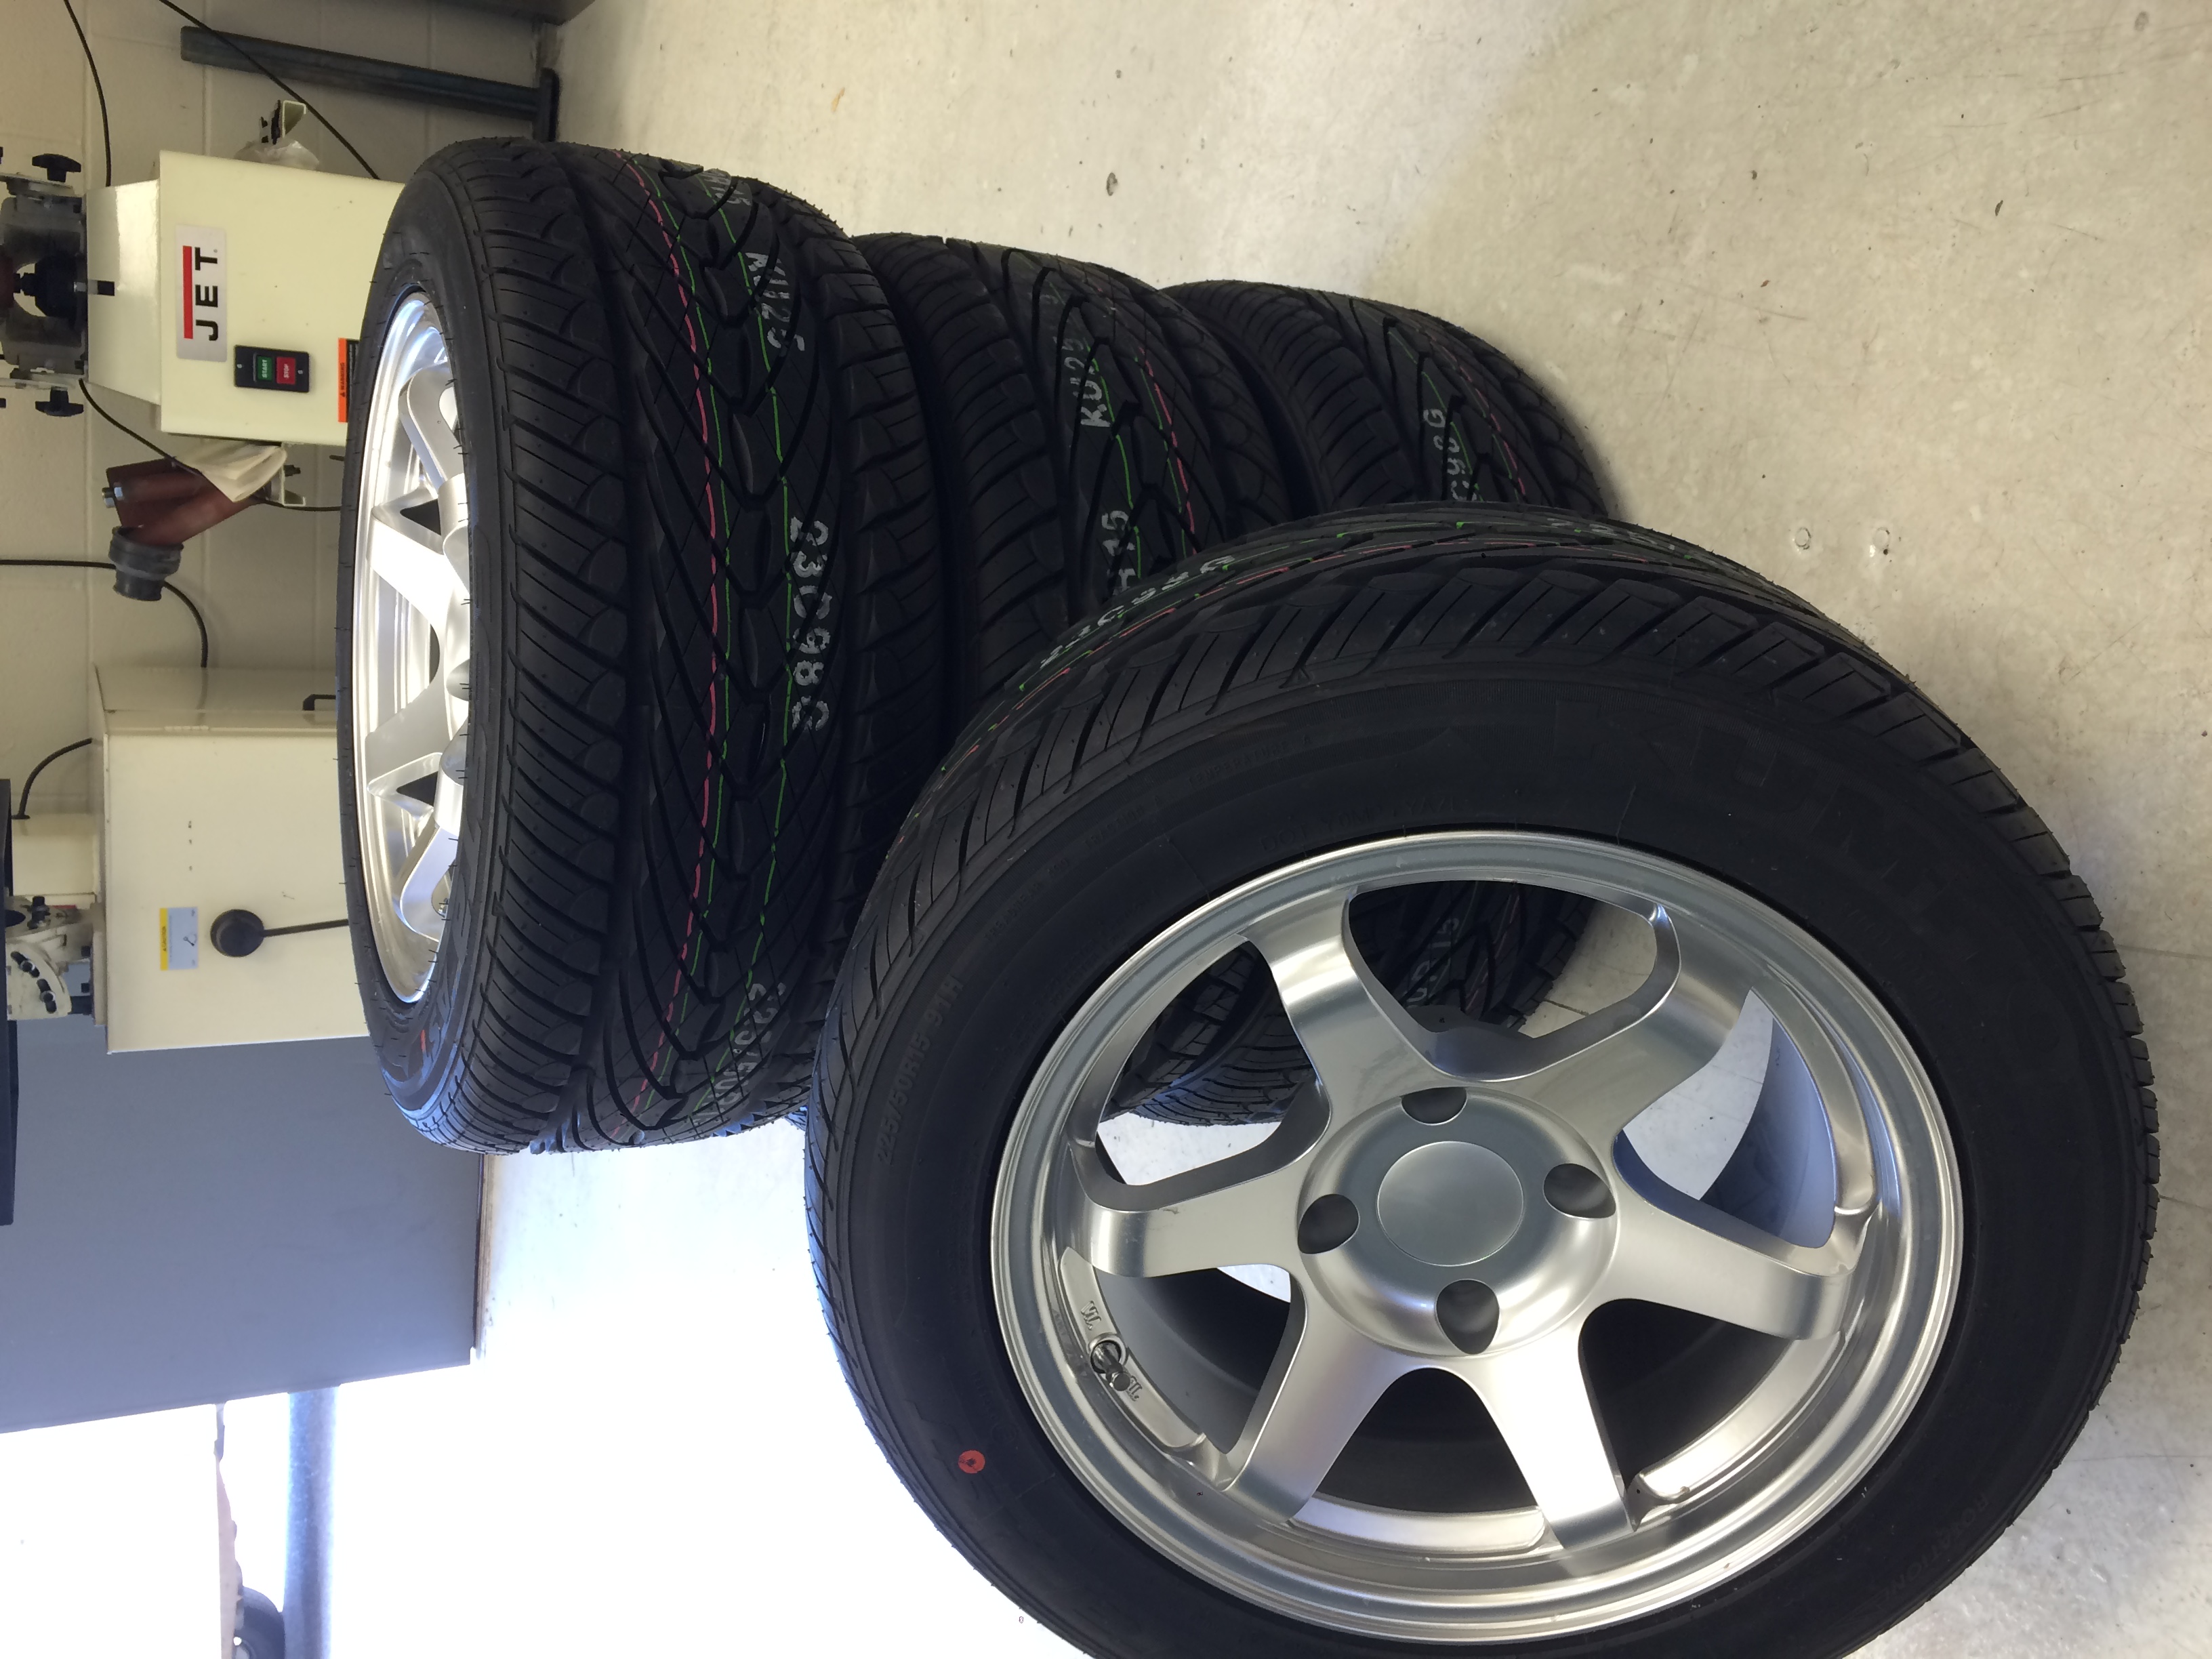
Oh! got my rims in as well. took them in to work and mounted the tires and balanced them.


on my way home I stopped at the parts store to grab some new lug nuts. I walked by the paint isle and ended up grabbing a couple cans of plasti-dip.
I've never used it before but my brother swears by it so I figured wth, can't hurt right??
lol
disclaimer, Plasti-dip is super cool. like pretty stinking cool.
IF you know how to use it. hahaha. I did not. it turned in to a disaster.
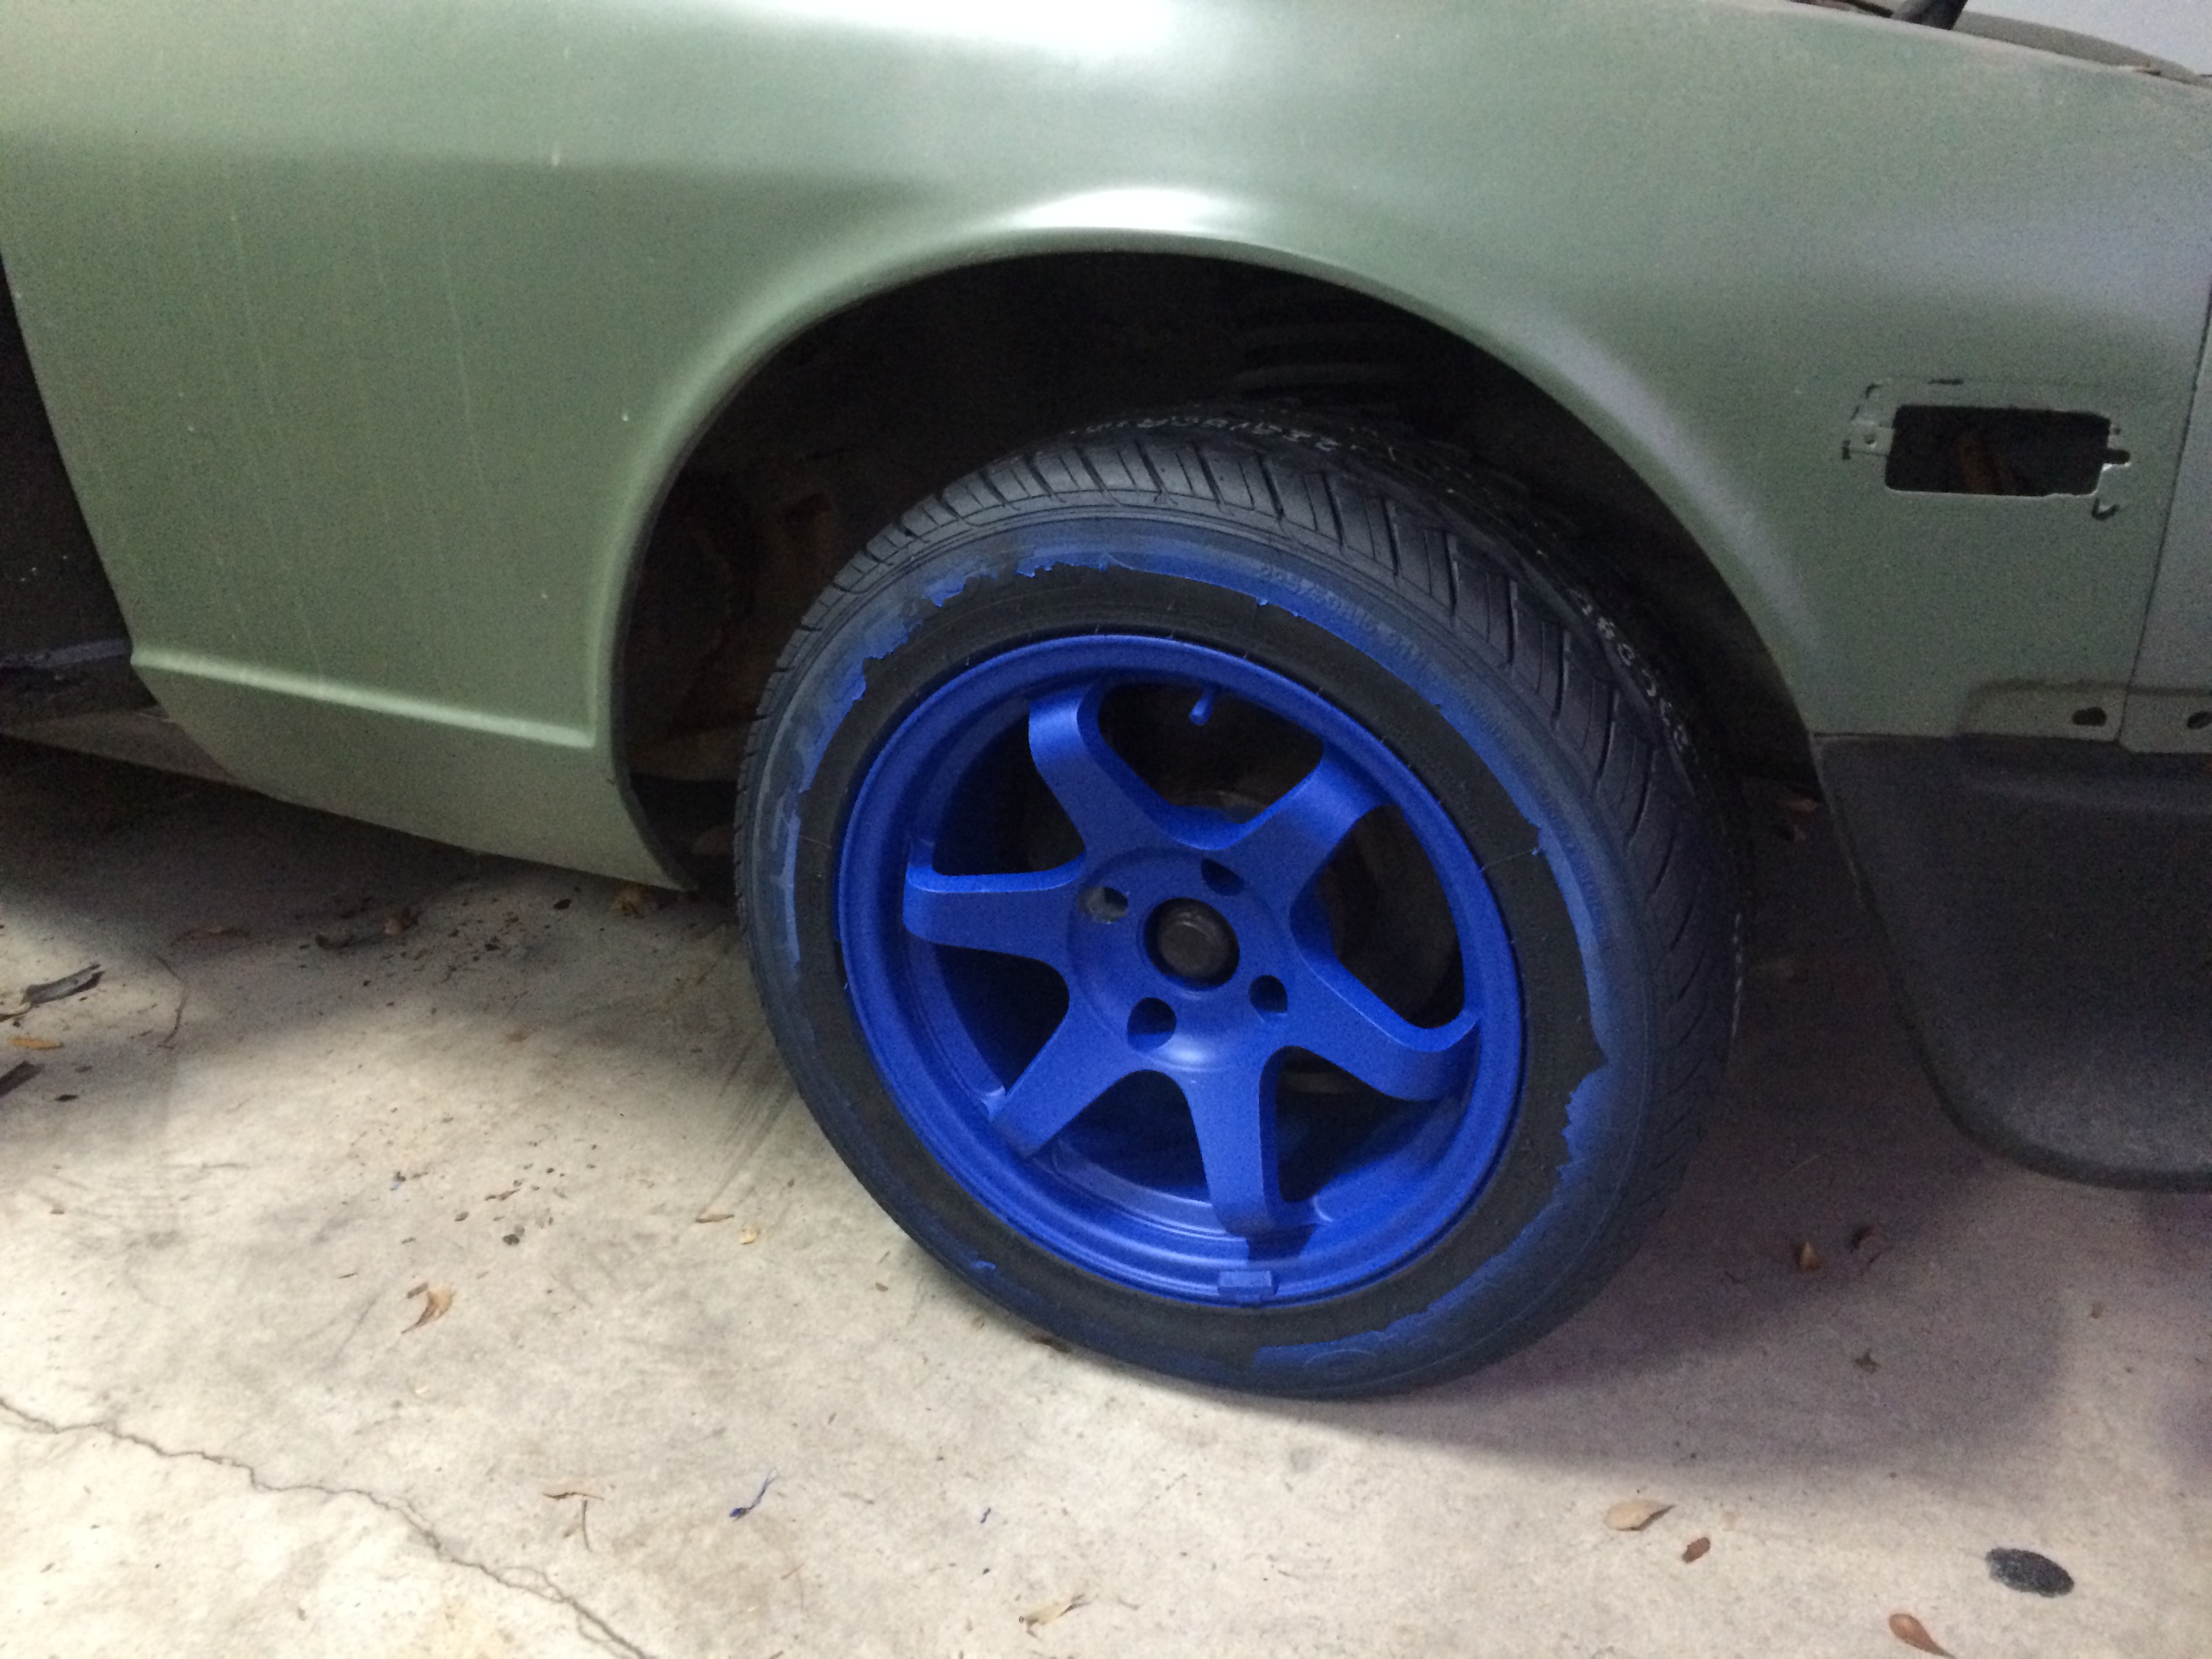
got this sweet blue color because... well why not?

the can says tape off the tires. my brother said you don't need to do that...
you should tape off the tires. lol. not because you don't want to get it on the tires, but for those of you like me, who had or have never used plastic-dip. the thicker you spray it on, the stronger it gets, and the easier it becomes to peel off. as it gets closer to the edge. and it turns into pretty much just overspray as it fades away, it becomes almost impossible to get it off the tires. so now I have these sweet blue spotted sidewalls... if you tape off the tire like an inch out side of the rim, and then spray the **** on thick right up to the tape line, all the extra will just peel right off and you won't have any overspray.
oh well. it will come off eventually. I think.
the second thing I learned is that plasti-dip tears really easily with lateral force. not like chaffing, but with twisting. the lug nut holes are pretty narrow on these rims, and as soon as I put my 21mm in to spin the lugs on I tore the coating off.
so I went to eBay and ordered a set of lug nuts with a thin walled socket for aftermarket rims to prevent the rest from tearing.

Oh also, my Lug studs are two short for these rims.
turns out my Z has two different part numbers for the lugs? fronts are short AF. and i'm assuming the longer ones the lady at the part store gave me are for the rear axle. either way. I'm going on a limb and saying they'll fit into both hubs, so I ordered 16 of the longer rear axle ones. go from there. too bad you have to take the hub completely off to change the studs on this car. what a pain.
overall i'm pretty pleased with the fitment of these rims though. completely change the look of the car.
go me.
I took the rim back off and peeled off all the ruined plastic-dip. I have an extra can of it left. probably not gonna spray it again though. too lazy. so i'll just have three blue rims and one silver rim. Ken Block style. oh and four blue spotted tires...
I originally only pulled the Hatch to make it easier to lean in to the car, but i'm glad i did because i ended up pulling the hatch gasket and treating quite a bit of surface rust in the hatch track. pictures to come.
started priming today. here's the interior taped off in true ghetto walmart style.

and here's what two cans of primer got me. I not sure why I only grabbed two cans of primer, because I know two cans won't do the whole interior, but oh well. I'll need like three more cans.

sorry the pictures are pretty bad it's dark out now. I'll have better ones when i finish painting it tomorrow.
If anyone is interested in any of my interior paneling it's all actually not in that bad of shape, the only broken piece is the right rear. i'm probably not going to put it back in and i'd part with them for the cost of shipping and a case of beer.


Edit: Here's one of my tool box.

"WTF Josh? why aren't you working on the Datsun?"
well, it was Mardi Gras, cut me some slack.
Actually I got to a point on my Z where I couldn't work any further.
I lost my Ratchet.
well, I thought I did. I was pretty pissed. I take tool control pretty seriously, and I've had that ratchet for like 5 years. built like 4 cars with it. so after about a week of pouting I finally got myself to go to the store to buy a new one. and if you're gonna but a new ratchet, I figured i'd upgrade my tool box a little while I was at it. why not? and if i'm gonna upgrade my tool box then I'm gonna need to cut out new tool foam to organize everything right? but if i'm gonna cut new foam I should just go ahead and get some extra tools i've been meaning to buy... You see where this is going?
rabbit holes.
so i've spent the last four days in wonderland and now it's time to come back to Kansas.
I'll post some pictures of my tool box later.
Back to the Z. I've finished gutting the interior. I also ended up pulling the back windows, taking the hatch off and removing the taillight assembly trying to get all the dirt/rust/small pieces of candy out of this car. I'm a little concerned about the previous owner...
Oh! got my rims in as well. took them in to work and mounted the tires and balanced them.
on my way home I stopped at the parts store to grab some new lug nuts. I walked by the paint isle and ended up grabbing a couple cans of plasti-dip.
I've never used it before but my brother swears by it so I figured wth, can't hurt right??
lol
disclaimer, Plasti-dip is super cool. like pretty stinking cool.
IF you know how to use it. hahaha. I did not. it turned in to a disaster.
got this sweet blue color because... well why not?
the can says tape off the tires. my brother said you don't need to do that...
you should tape off the tires. lol. not because you don't want to get it on the tires, but for those of you like me, who had or have never used plastic-dip. the thicker you spray it on, the stronger it gets, and the easier it becomes to peel off. as it gets closer to the edge. and it turns into pretty much just overspray as it fades away, it becomes almost impossible to get it off the tires. so now I have these sweet blue spotted sidewalls... if you tape off the tire like an inch out side of the rim, and then spray the **** on thick right up to the tape line, all the extra will just peel right off and you won't have any overspray.
oh well. it will come off eventually. I think.
the second thing I learned is that plasti-dip tears really easily with lateral force. not like chaffing, but with twisting. the lug nut holes are pretty narrow on these rims, and as soon as I put my 21mm in to spin the lugs on I tore the coating off.
so I went to eBay and ordered a set of lug nuts with a thin walled socket for aftermarket rims to prevent the rest from tearing.
Oh also, my Lug studs are two short for these rims.
turns out my Z has two different part numbers for the lugs? fronts are short AF. and i'm assuming the longer ones the lady at the part store gave me are for the rear axle. either way. I'm going on a limb and saying they'll fit into both hubs, so I ordered 16 of the longer rear axle ones. go from there. too bad you have to take the hub completely off to change the studs on this car. what a pain.
overall i'm pretty pleased with the fitment of these rims though. completely change the look of the car.
go me.
I took the rim back off and peeled off all the ruined plastic-dip. I have an extra can of it left. probably not gonna spray it again though. too lazy. so i'll just have three blue rims and one silver rim. Ken Block style. oh and four blue spotted tires...
I originally only pulled the Hatch to make it easier to lean in to the car, but i'm glad i did because i ended up pulling the hatch gasket and treating quite a bit of surface rust in the hatch track. pictures to come.
started priming today. here's the interior taped off in true ghetto walmart style.
and here's what two cans of primer got me. I not sure why I only grabbed two cans of primer, because I know two cans won't do the whole interior, but oh well. I'll need like three more cans.
sorry the pictures are pretty bad it's dark out now. I'll have better ones when i finish painting it tomorrow.
If anyone is interested in any of my interior paneling it's all actually not in that bad of shape, the only broken piece is the right rear. i'm probably not going to put it back in and i'd part with them for the cost of shipping and a case of beer.
Edit: Here's one of my tool box.
Last edited by Joshua Paul; 02-12-2016 at 10:08 PM.
02-13-2016, 07:39 PM
#11
Registered User
Thread Starter
Join Date: Jan 2016
Location: Military
Posts: 40
Primer.
Finished priming the interior today.
Here's a shot of my paint booth. it's pretty state of the art, i got it at Target, it was on sale...

once i had everything primed i rolled it out in the sun to bake a bit. i also took this opportunity to cut this atrocious muffler off. it was a rattling around hanging on a wire. not like on a "wire hanger", or like "hanging on a wire", i mean it was literally held on with a piece of wire... lol.

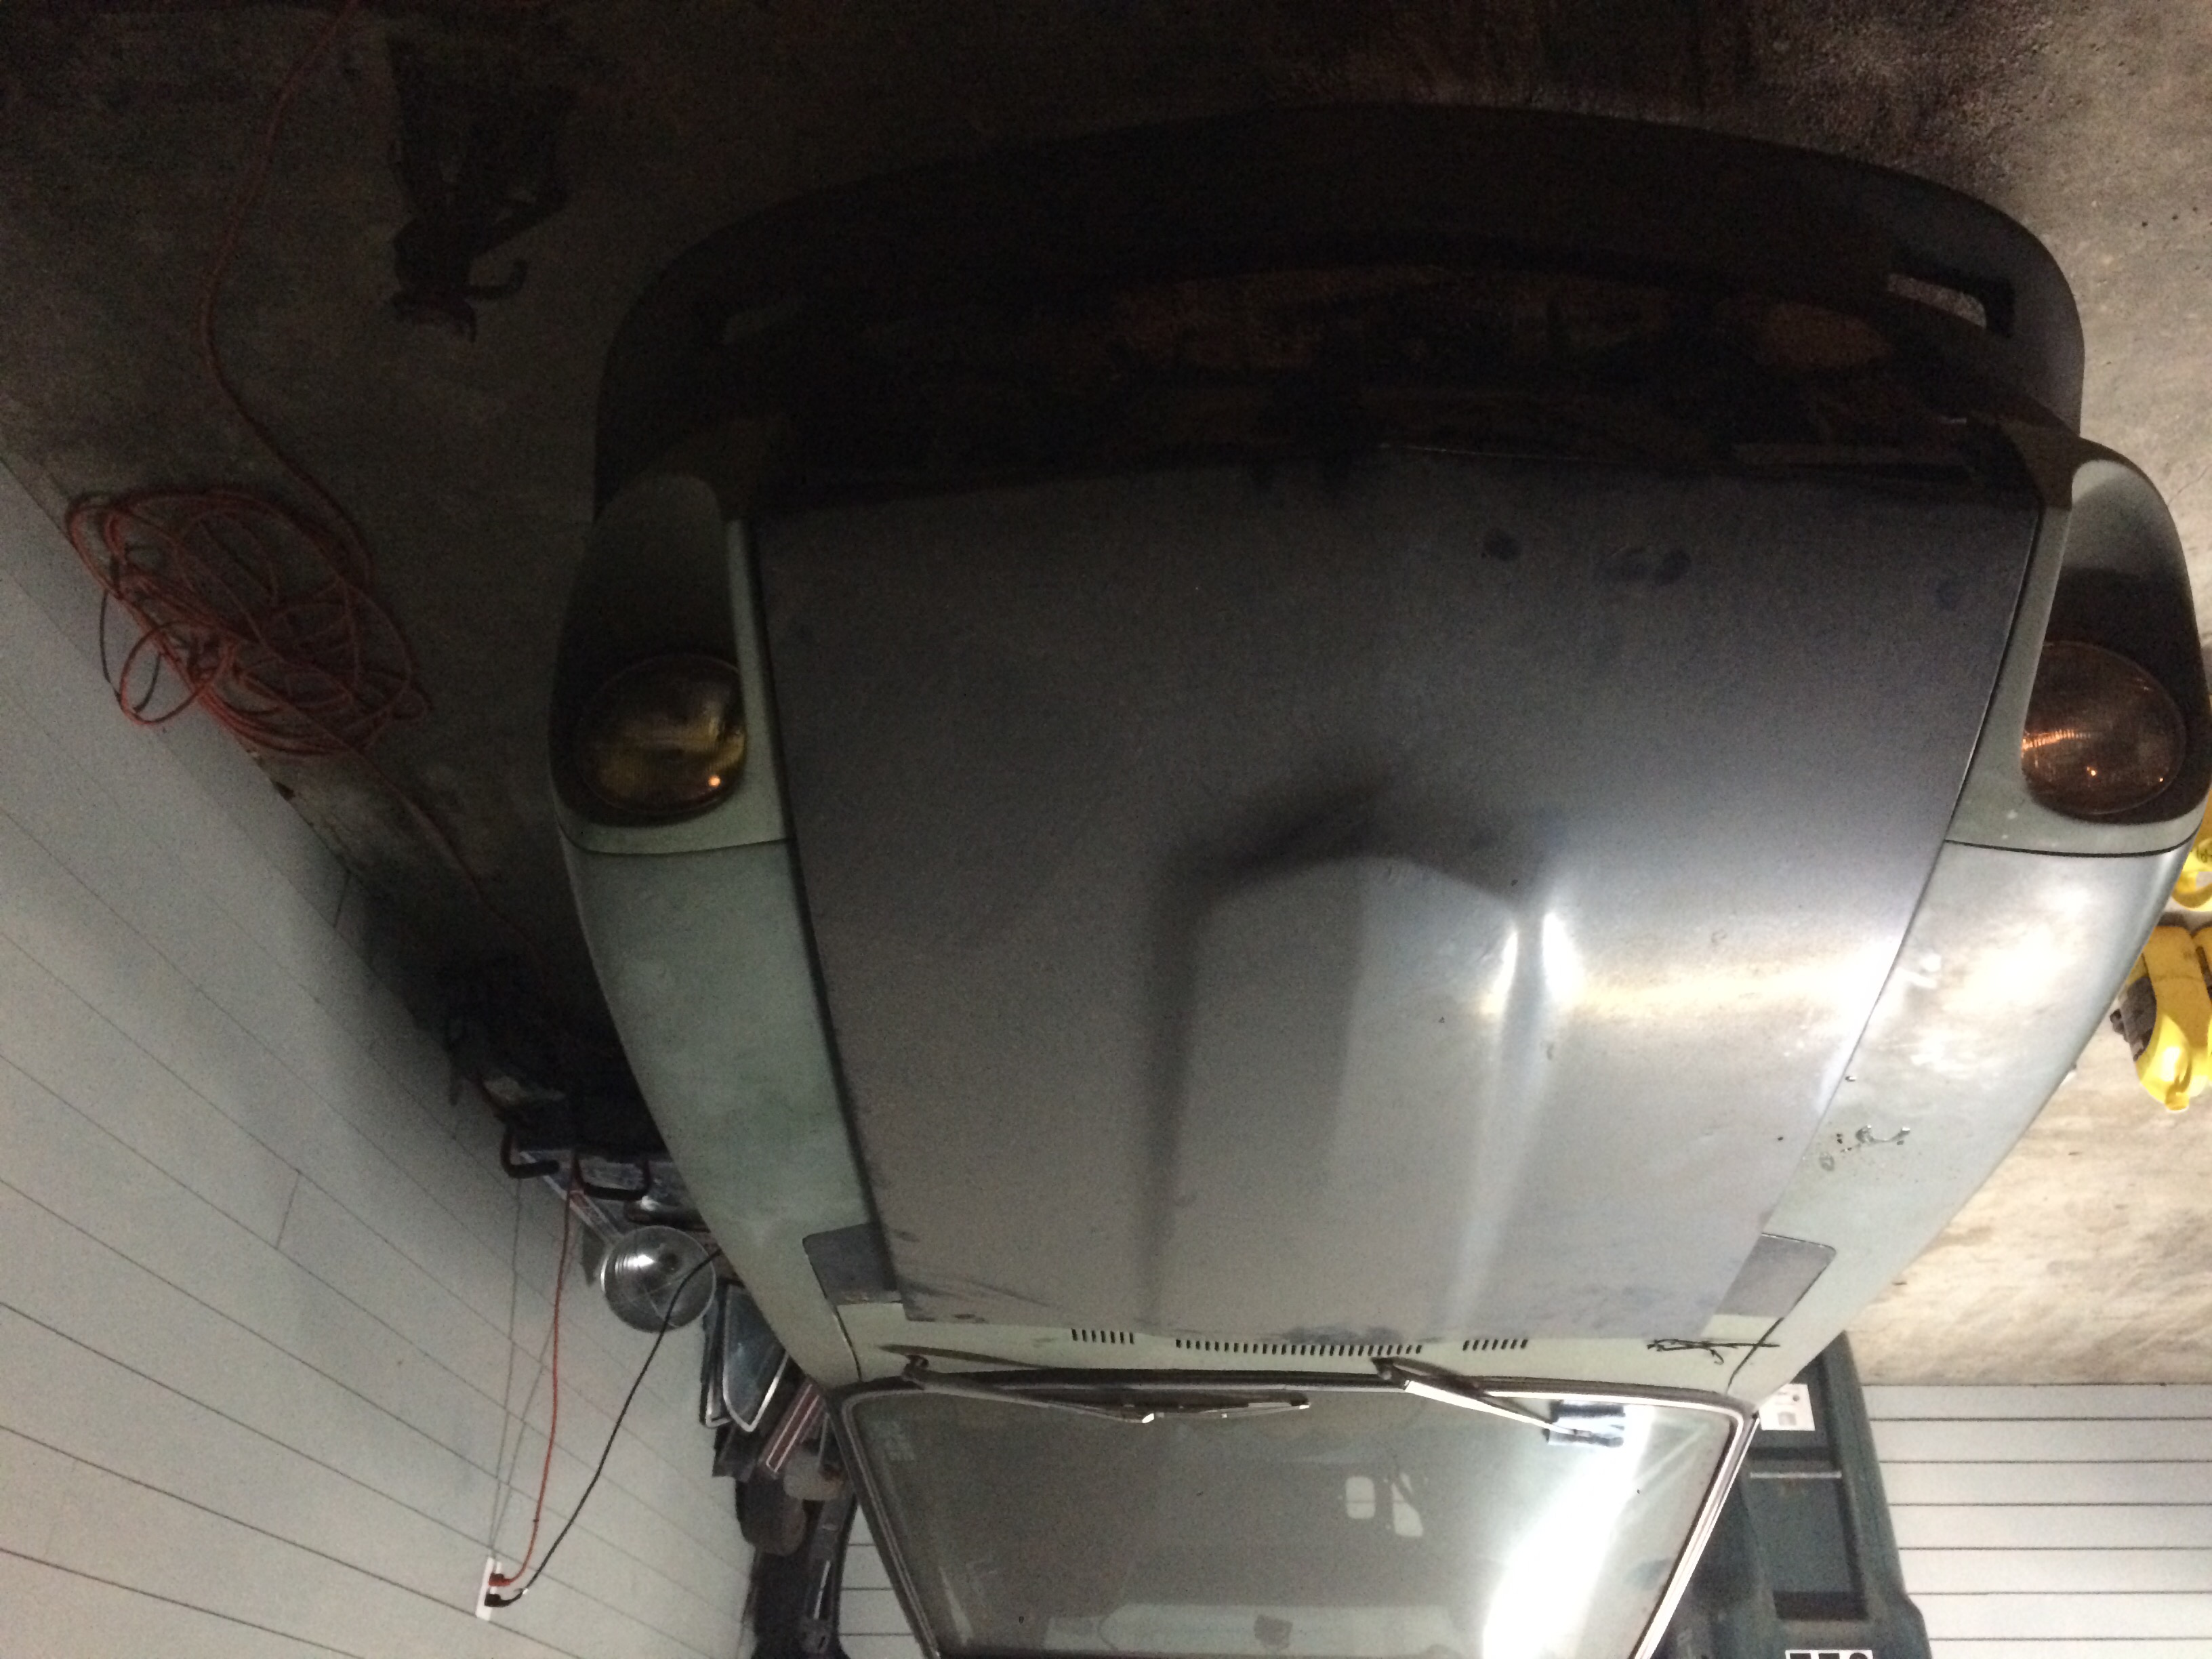
here's a couple shots of it out in the sun.


and here's what i'm thinking it's final "stance" will be when i'm done with it?

... jk.
once the paint was dry I threw the seat back in cause it looked cool and put her to bed for the day. tomorrow I'm going to take the rear bumper mounts off. I was looking at them today and I'm a little confused. need to check the FSM. I'll probably put the hatch and hatch gasket on tomorrow as well. no reason why i shouldn't that i can think of.


New harmonic balancer is here. hopefully we'll see the engine running before tomorrow's over!
still waiting on lugs and studs. damn. I want to put those rims on.
-Josh
Here's a shot of my paint booth. it's pretty state of the art, i got it at Target, it was on sale...
once i had everything primed i rolled it out in the sun to bake a bit. i also took this opportunity to cut this atrocious muffler off. it was a rattling around hanging on a wire. not like on a "wire hanger", or like "hanging on a wire", i mean it was literally held on with a piece of wire... lol.
here's a couple shots of it out in the sun.
and here's what i'm thinking it's final "stance" will be when i'm done with it?
... jk.
once the paint was dry I threw the seat back in cause it looked cool and put her to bed for the day. tomorrow I'm going to take the rear bumper mounts off. I was looking at them today and I'm a little confused. need to check the FSM. I'll probably put the hatch and hatch gasket on tomorrow as well. no reason why i shouldn't that i can think of.
New harmonic balancer is here. hopefully we'll see the engine running before tomorrow's over!
still waiting on lugs and studs. damn. I want to put those rims on.
-Josh
02-14-2016, 09:50 PM
#12
Registered User
Thread Starter
Join Date: Jan 2016
Location: Military
Posts: 40
She Runs!!!
I started today with great ambitions.
and quickly my zeal was stolen. I ended up driving back and forth to the parts store probably 6 times today. lol. there's always those days.
I hate working on cars.
but I love working on cars,
anybody feel me?
first things first, I got a new hatch gasket in the mail from Zcar depot. great product. installs real easy.

Once I had the hatch back on, I went to the store and grabbed a battery.
I wanted this thing running by the end of today.
everyone says group 24. but nobody in town had an Optima in a group 24 here. so I looked at Optima's online. I'm not really even sure if Optima makes a group 24. they make a group 24/34 and then they make a group 34 and they make a group 34/78. so if A=B and B=C then A = C right? went back to the parts store and bought a 34/78. if anybody knows more about electronics than I do and they can tell me why i shouldn't do this than please help, but i suspect it doesn't matter much in the long run. I will relocate the batter to the rear when I rewire the car. size doesn't matter to me. only amps and reliability. I've had a Yellow Top in every car i've ever owned. I won't purchase another batter.
once the battery was in I went to start her just to see if she still had it. no dice. turned over. no ignition. okay what do we need for ignition? fuel, air, and spark. okay, first is first, what are possible reasons why I wouldn't be getting fuel? is the fuel pump wor.... oh ****, forgot to plug the aft wiring harness back together after painting the interior. plunged it in and the FP kicked on.
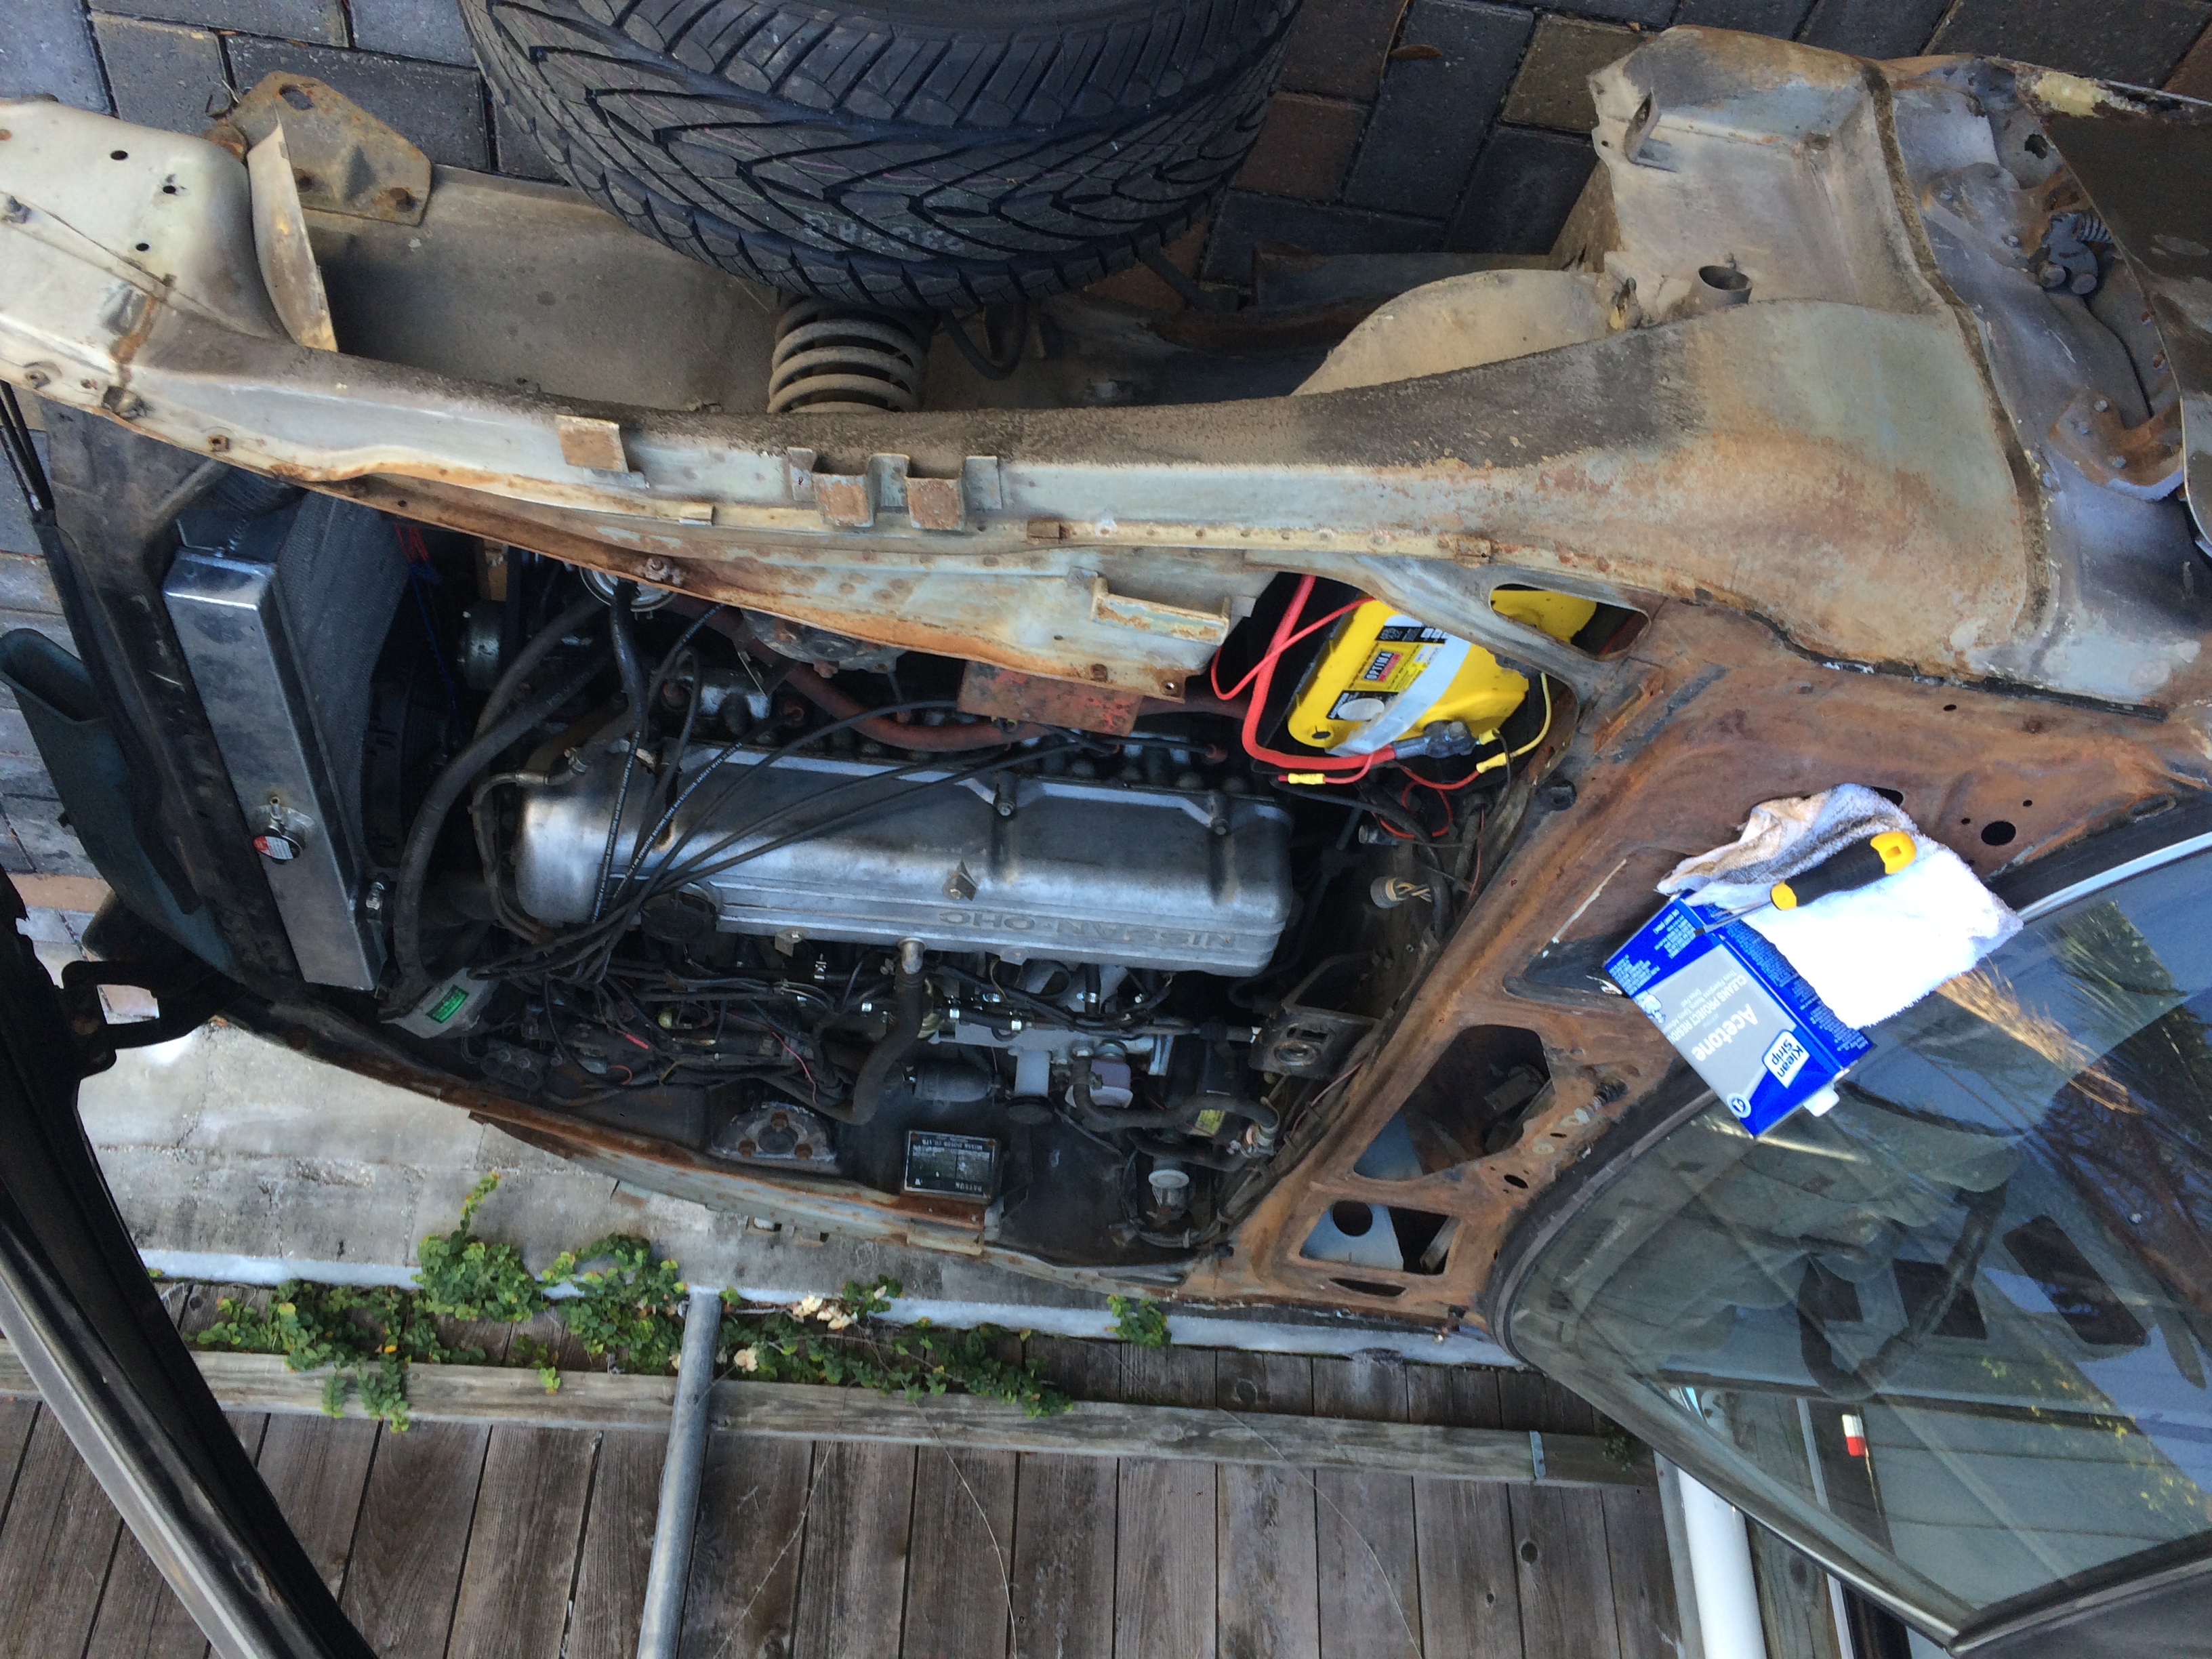
immediately I could smell fuel. turns out, I could smell it because the fuel injectors lines had corroded and fuel was straight streaming out all over my engine compartment. lol.
you can see the fuel spraying out here.

back to the parts store.
couldn't remember what size fuel line it was. so I bought all three. turns out it was 5/16ths. fuel lines replaced.
turned the car over and it fired off like a bat out of hell.
remember I cut the exhaust off yesterday.
well I cut the exhaust off right under the floorboards to get rid of that ridiculous muffler.
also turns out my floor boards have giant holes in them.
1+1=2 my interior fills with exhaust like pretty quickly. hahaha. oops.
one: accelerator pedal return spring is no good. I have to pull the pedal off the floor with my foot.
two: Harmonic balancer is definitely screwed. as is made apparent by a terrible squeak and a wobble in the serpentine belt crankshaft pulley.
cool. this was prior knowledge.
earlier at the parts store the parts guy said his computer told him the balancer needed a special type of puller that he didn't have, so i didn't get one.
use the FSM to figure out what tool is required to pull the balancer.
it's the same kind of balancer puller i've used on every engine i've had.
back to the parts store. i brought my new balancer with me. glad i did.
got a puller, but the kit didn't have bolts that threaded into this balancer,
home depot to the rescue.
the threads in the stock balancer are M6 for everyone out there waiting with baited breath...

tried my hardest to just pull the radiator, but ended up having to pull the intercooler as well. I think it MIGHT be possible if you had a 12" 1/2 drive impact extension, but i do not, and thus the amalgamation of random extensions and adapters i was using to get to the crankshaft bolt off just weren't cutting it.
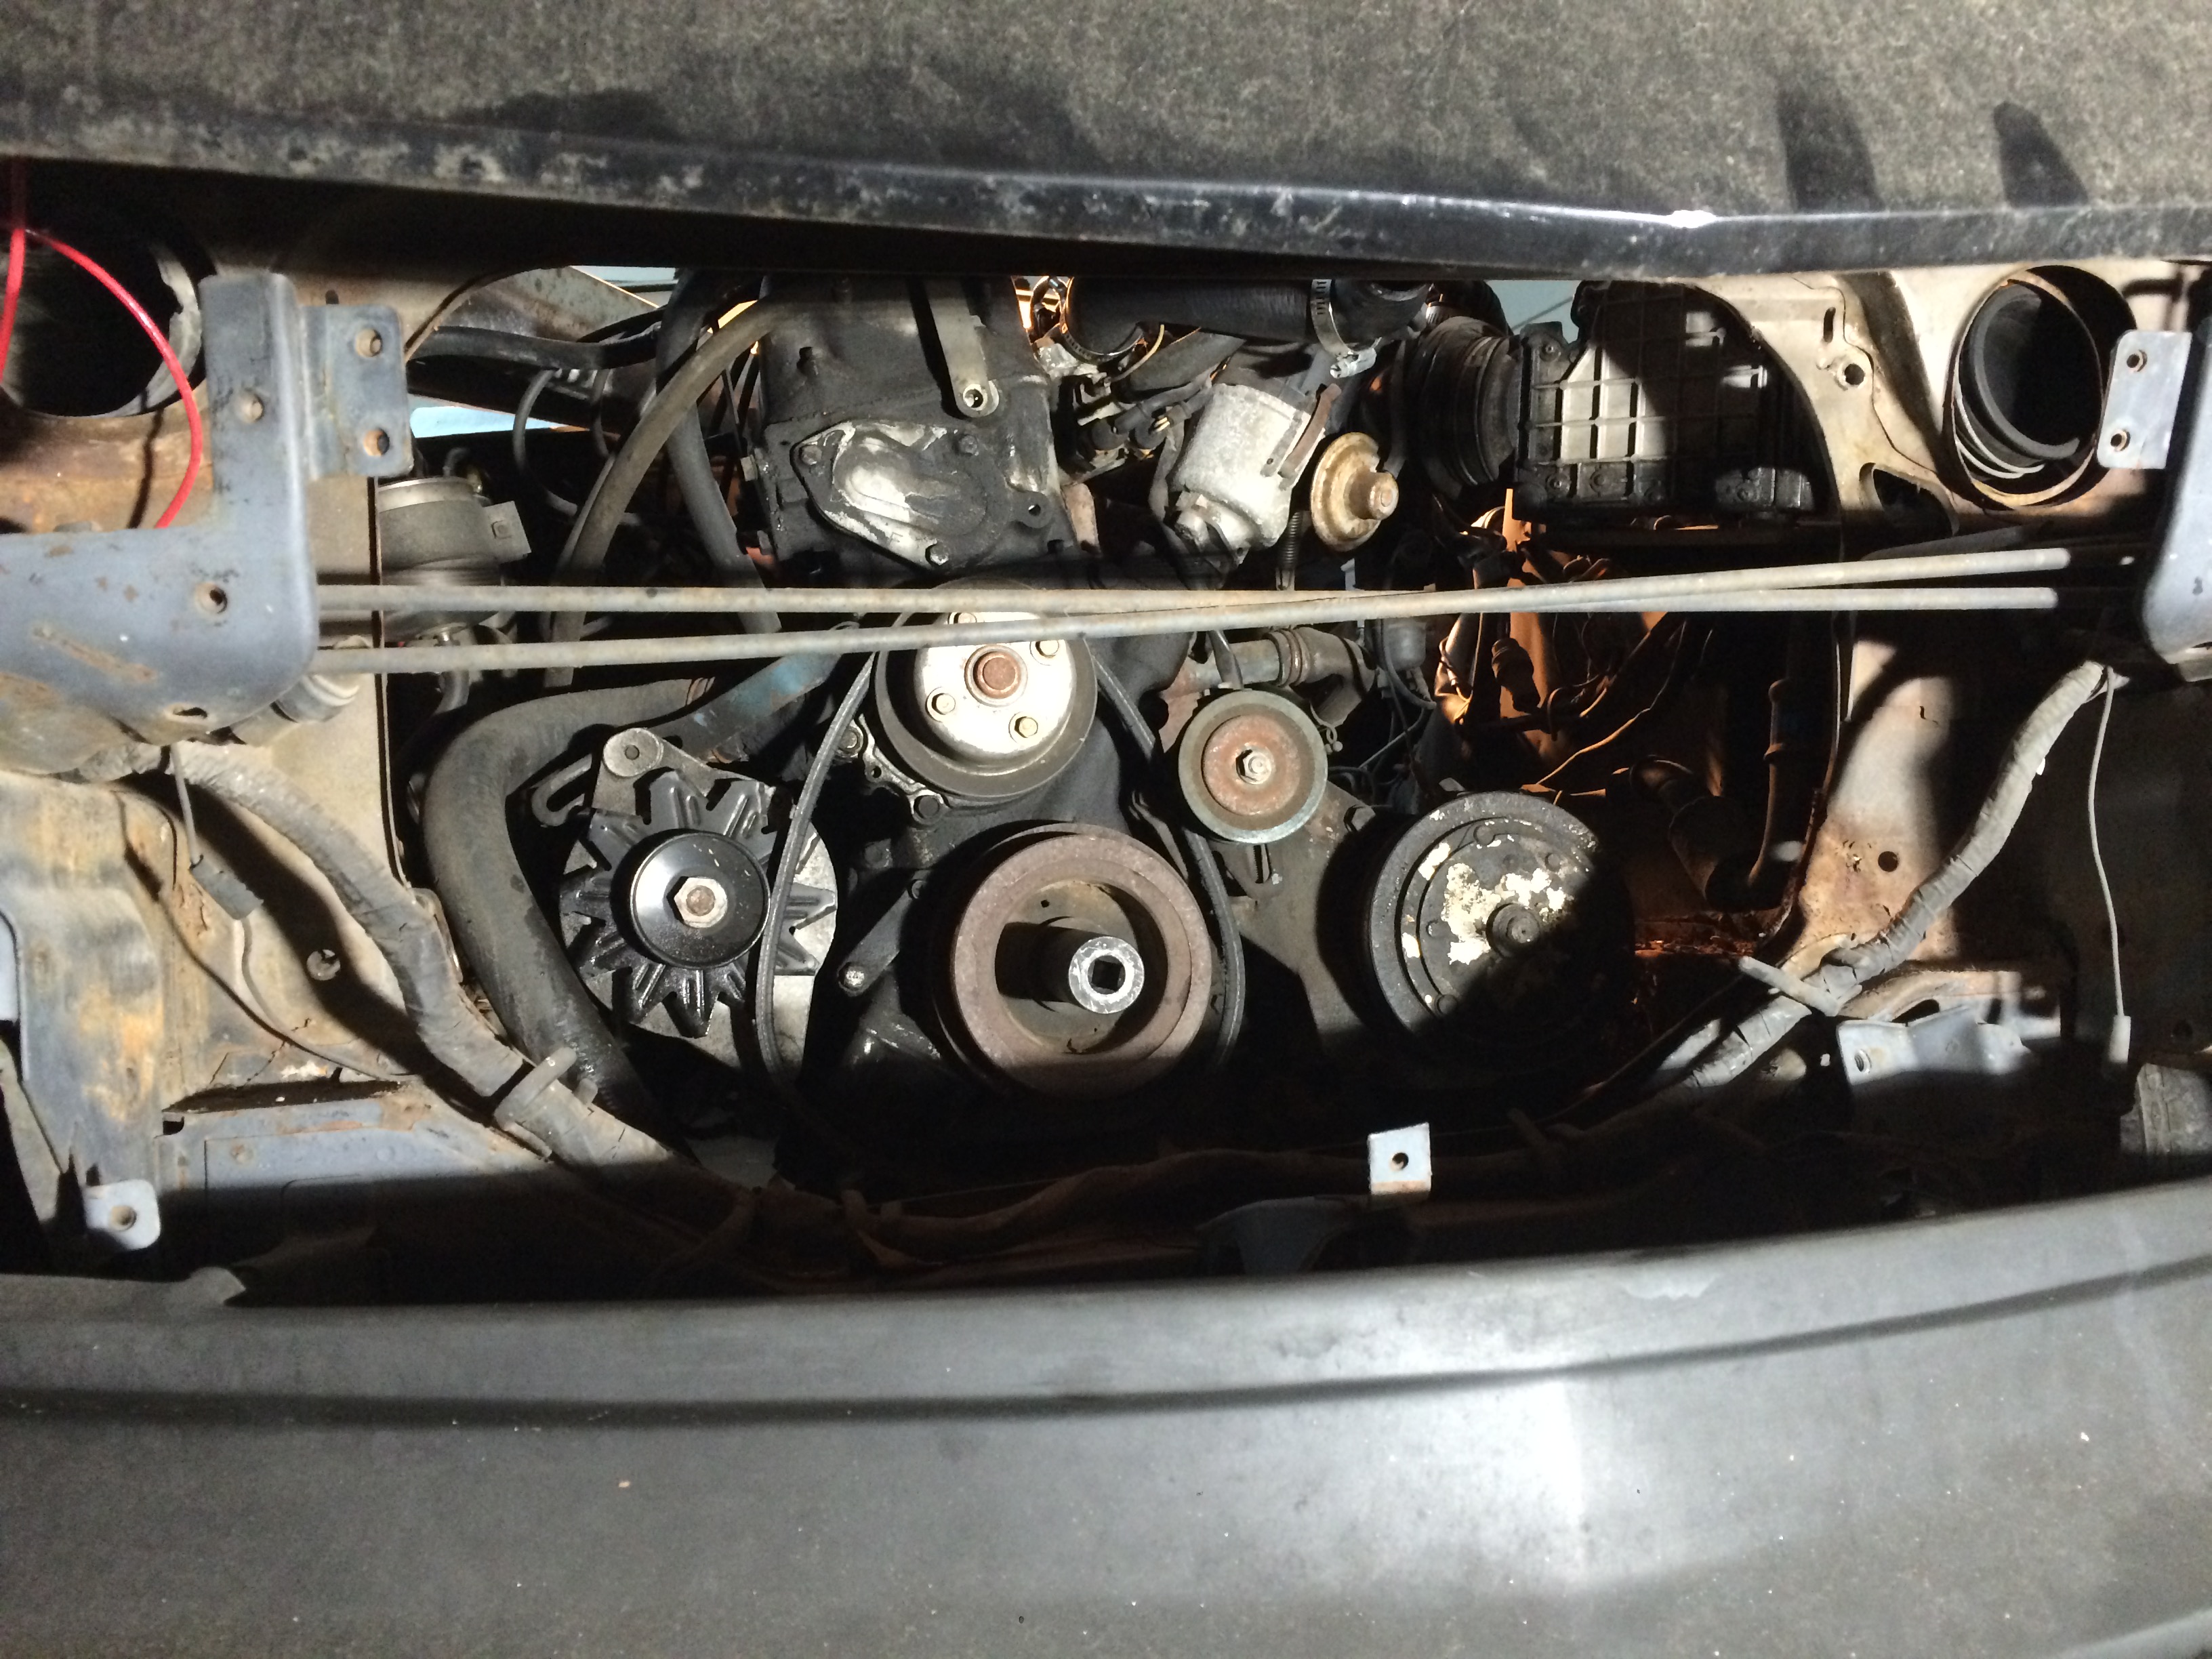
the pulley came off with zero complications after that.

put some engine oil on the internal edge of the the new pulley and installed it with my trusty and extremely precise pulley installation tool...

but seriously, just giver her some very gentle taps in a star pattern around the pulley and take your time. went right on. once I had it pretty well on there I used the crankshaft bolt and the impact driver to pull the pulley on the rest of the way. removed the crankshaft bolt then retorqued to factory specs. 87-1something ftlbs.
old balancer= completely broke.

a two part pulley???
seriously Datsun.
wtf?
oh well.
buttoned everything back up in reverse order.
too bad i had to break my AC system.
have I mentioned the AC still works on this beast???
well, worked.
the PO said it did and when i removed the evaporator it had a full charge in it.
who woulda thought?
my buddy dropped this puppy off for me to use.

he said he got it at Costco for $28.
i'm gonna go buy twelve of them.
here's some to see the light it puts out.
it came in pretty handy tonight, it's also super thin and lightweight so it's easy to set it on the car or down in the engine bay wherever you need it.

tomorrow I'm going to... Idk. I'm waiting on parts now.
I'll find something to do.
-josh
and quickly my zeal was stolen. I ended up driving back and forth to the parts store probably 6 times today. lol. there's always those days.
I hate working on cars.
but I love working on cars,
anybody feel me?
first things first, I got a new hatch gasket in the mail from Zcar depot. great product. installs real easy.
Once I had the hatch back on, I went to the store and grabbed a battery.
I wanted this thing running by the end of today.
everyone says group 24. but nobody in town had an Optima in a group 24 here. so I looked at Optima's online. I'm not really even sure if Optima makes a group 24. they make a group 24/34 and then they make a group 34 and they make a group 34/78. so if A=B and B=C then A = C right? went back to the parts store and bought a 34/78. if anybody knows more about electronics than I do and they can tell me why i shouldn't do this than please help, but i suspect it doesn't matter much in the long run. I will relocate the batter to the rear when I rewire the car. size doesn't matter to me. only amps and reliability. I've had a Yellow Top in every car i've ever owned. I won't purchase another batter.
once the battery was in I went to start her just to see if she still had it. no dice. turned over. no ignition. okay what do we need for ignition? fuel, air, and spark. okay, first is first, what are possible reasons why I wouldn't be getting fuel? is the fuel pump wor.... oh ****, forgot to plug the aft wiring harness back together after painting the interior. plunged it in and the FP kicked on.
immediately I could smell fuel. turns out, I could smell it because the fuel injectors lines had corroded and fuel was straight streaming out all over my engine compartment. lol.
you can see the fuel spraying out here.
back to the parts store.
couldn't remember what size fuel line it was. so I bought all three. turns out it was 5/16ths. fuel lines replaced.
turned the car over and it fired off like a bat out of hell.
remember I cut the exhaust off yesterday.
well I cut the exhaust off right under the floorboards to get rid of that ridiculous muffler.
also turns out my floor boards have giant holes in them.
1+1=2 my interior fills with exhaust like pretty quickly. hahaha. oops.
one: accelerator pedal return spring is no good. I have to pull the pedal off the floor with my foot.
two: Harmonic balancer is definitely screwed. as is made apparent by a terrible squeak and a wobble in the serpentine belt crankshaft pulley.
cool. this was prior knowledge.
earlier at the parts store the parts guy said his computer told him the balancer needed a special type of puller that he didn't have, so i didn't get one.
use the FSM to figure out what tool is required to pull the balancer.
it's the same kind of balancer puller i've used on every engine i've had.
back to the parts store. i brought my new balancer with me. glad i did.
got a puller, but the kit didn't have bolts that threaded into this balancer,
home depot to the rescue.
the threads in the stock balancer are M6 for everyone out there waiting with baited breath...
tried my hardest to just pull the radiator, but ended up having to pull the intercooler as well. I think it MIGHT be possible if you had a 12" 1/2 drive impact extension, but i do not, and thus the amalgamation of random extensions and adapters i was using to get to the crankshaft bolt off just weren't cutting it.
the pulley came off with zero complications after that.
put some engine oil on the internal edge of the the new pulley and installed it with my trusty and extremely precise pulley installation tool...
but seriously, just giver her some very gentle taps in a star pattern around the pulley and take your time. went right on. once I had it pretty well on there I used the crankshaft bolt and the impact driver to pull the pulley on the rest of the way. removed the crankshaft bolt then retorqued to factory specs. 87-1something ftlbs.
old balancer= completely broke.
a two part pulley???
seriously Datsun.
wtf?
oh well.
buttoned everything back up in reverse order.
too bad i had to break my AC system.
have I mentioned the AC still works on this beast???
well, worked.
the PO said it did and when i removed the evaporator it had a full charge in it.
who woulda thought?
my buddy dropped this puppy off for me to use.
he said he got it at Costco for $28.
i'm gonna go buy twelve of them.
here's some to see the light it puts out.
it came in pretty handy tonight, it's also super thin and lightweight so it's easy to set it on the car or down in the engine bay wherever you need it.
tomorrow I'm going to... Idk. I'm waiting on parts now.
I'll find something to do.
-josh
02-16-2016, 05:26 PM
#14
Registered User
Thread Starter
Join Date: Jan 2016
Location: Military
Posts: 40
Taillights
I removed the bumper mounts finally,
the right one is a pain, as I'm sure everyone here knows. removing the wheel was a big help,

the easiest way i could get the tank to come down was by lowering the right side first. if the left side comes down the tank twists into the spare tire carrier and it gets bound up.

once you get the tank down removing it was pretty easy. the corner of the mount got caught initially and i couldn't figure out on what, but it turns out there was a wire under the fender probably running to the marker light, once you take it out of the wire keepers the mount came right out.

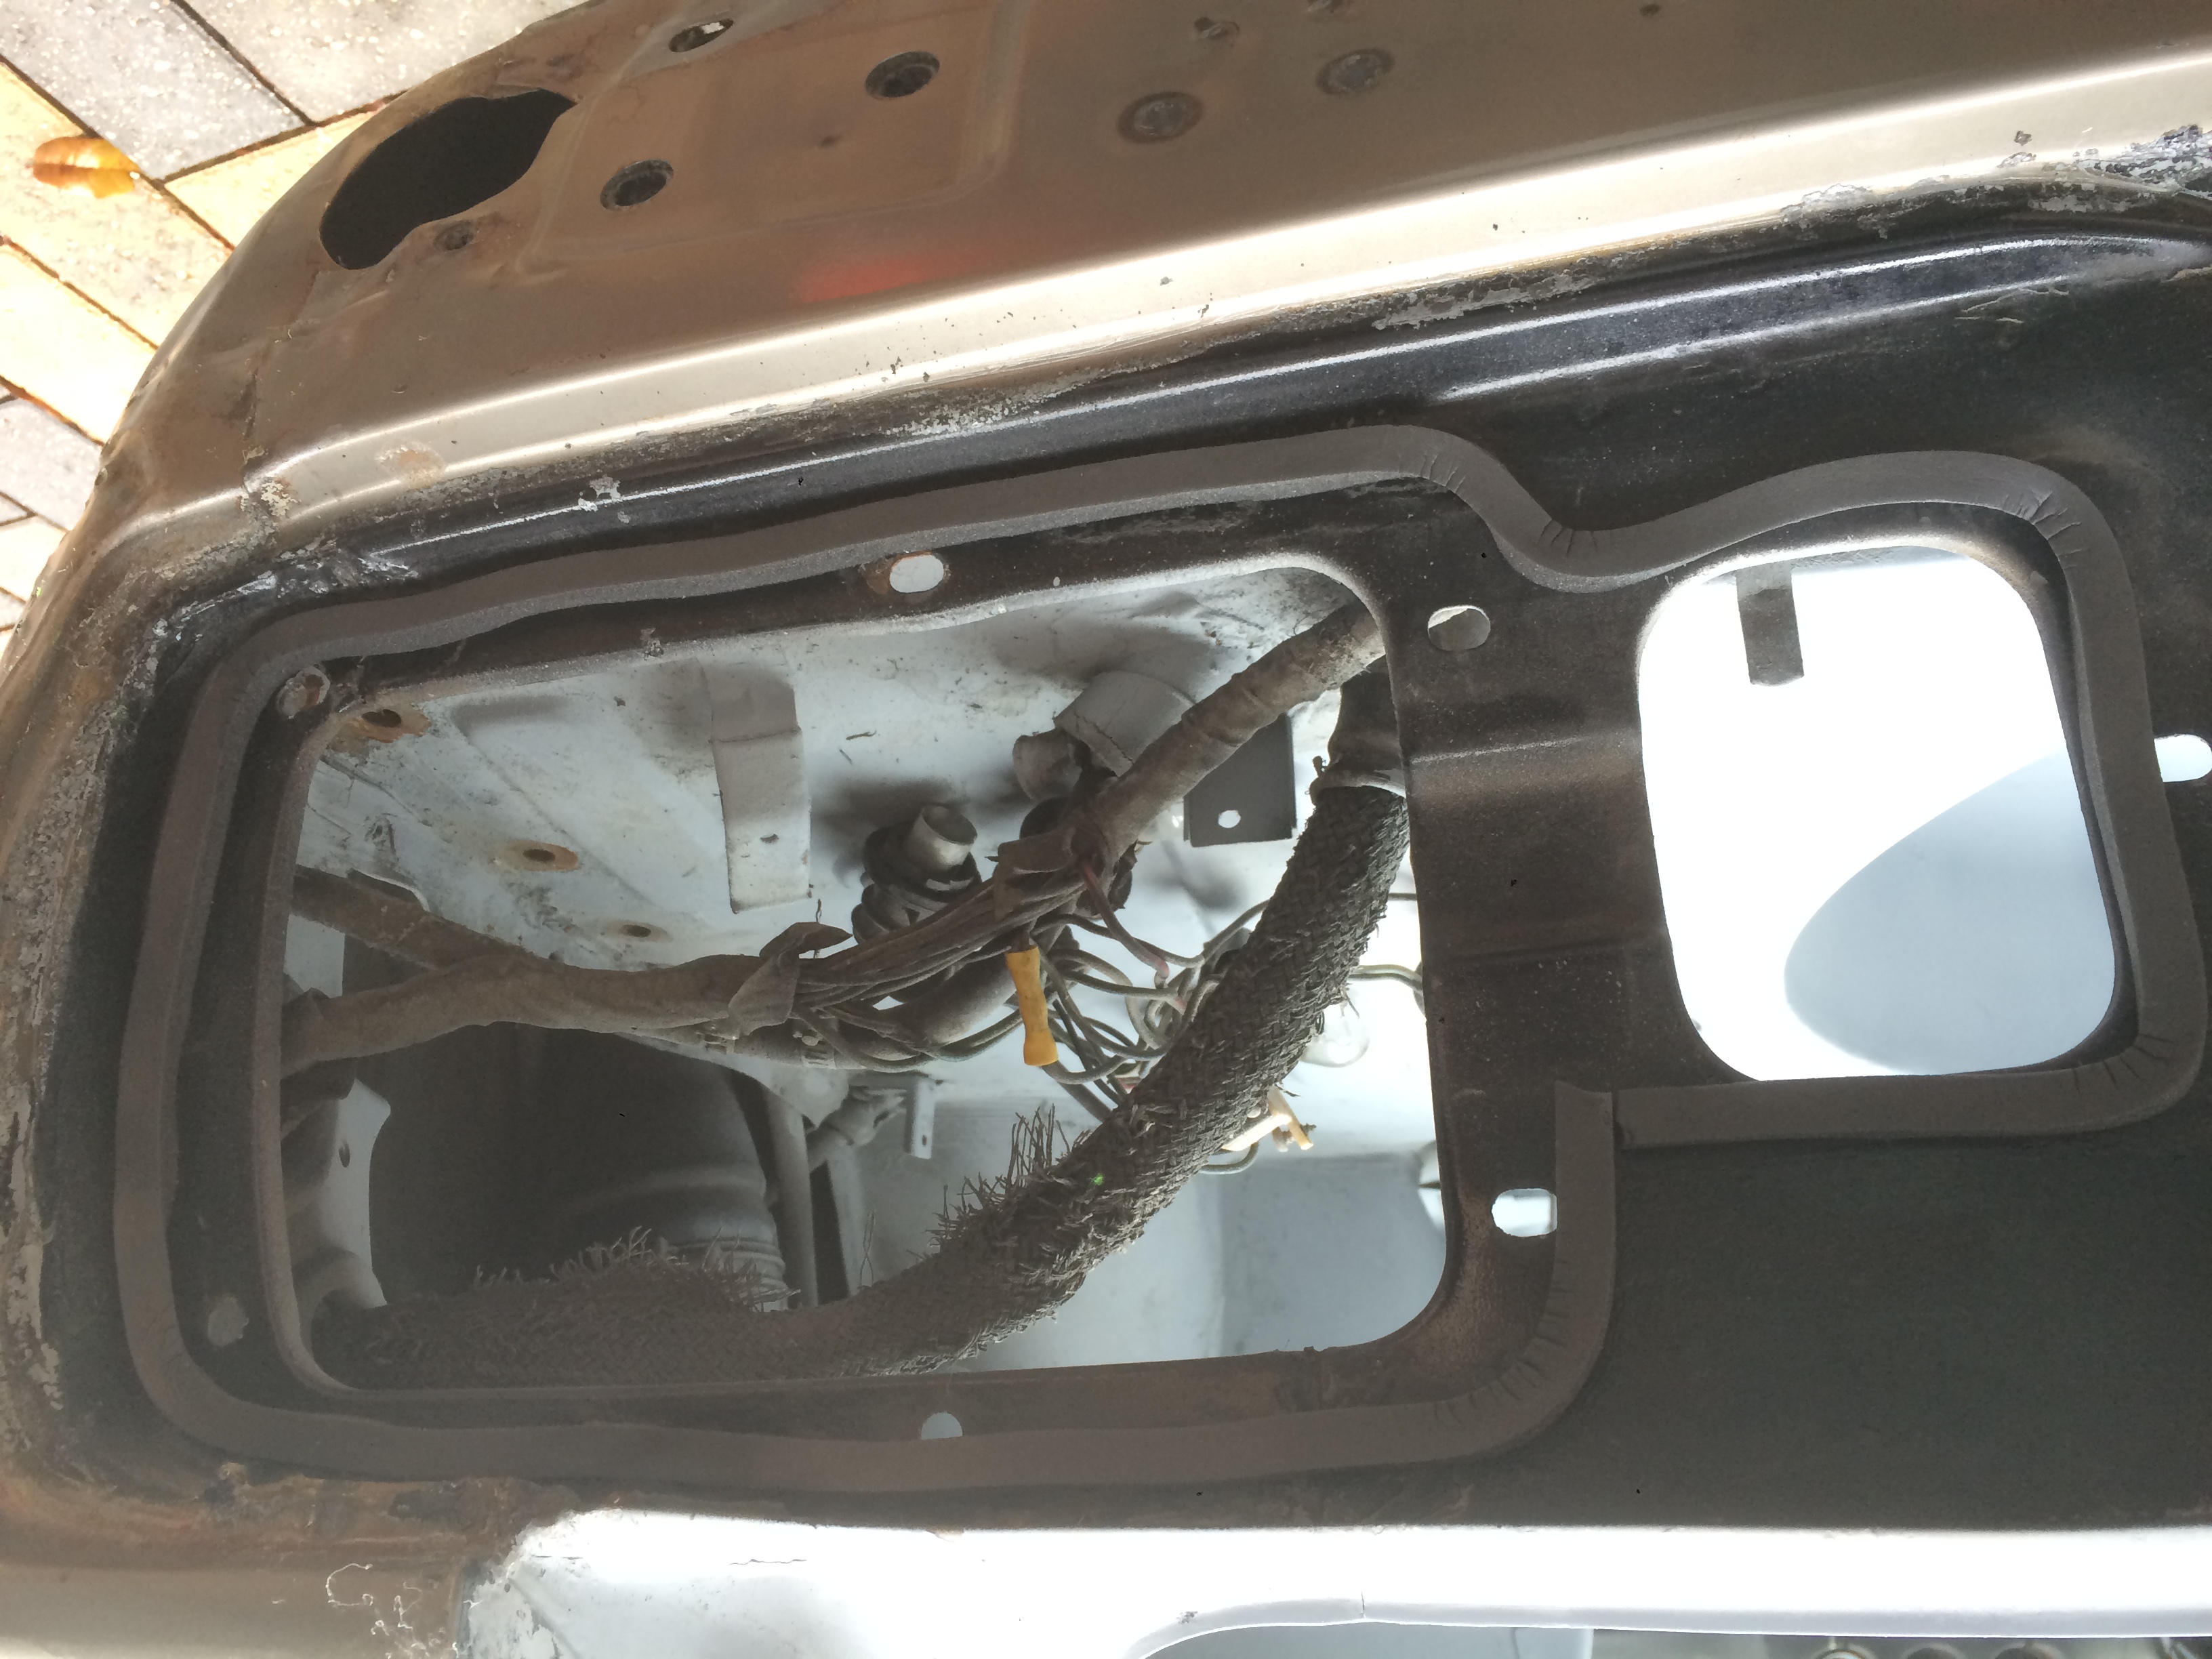
painted the taillight section flat black and reinstalled everything. most of the lights work, the signals don't. it will take more investigating to see if it's just the bulbs or the harness.

today was just a thinking day, I made a list of things to do on the car. it's way bigger than I want it to be. but alot of them are unnecessary or superfluous.

the right one is a pain, as I'm sure everyone here knows. removing the wheel was a big help,
the easiest way i could get the tank to come down was by lowering the right side first. if the left side comes down the tank twists into the spare tire carrier and it gets bound up.
once you get the tank down removing it was pretty easy. the corner of the mount got caught initially and i couldn't figure out on what, but it turns out there was a wire under the fender probably running to the marker light, once you take it out of the wire keepers the mount came right out.
painted the taillight section flat black and reinstalled everything. most of the lights work, the signals don't. it will take more investigating to see if it's just the bulbs or the harness.
today was just a thinking day, I made a list of things to do on the car. it's way bigger than I want it to be. but alot of them are unnecessary or superfluous.
02-19-2016, 07:58 PM
#15
Registered User
Thread Starter
Join Date: Jan 2016
Location: Military
Posts: 40
Chastity.
Today I got my lug nuts in.

remember that weird lug nut earlier, well ironically enough after I destroyed my first rim trying to put regular lugs in it I stumbled upon these. the dude said they are slender lug nuts that come with there own thin walled socket so you can put them in aftermarket rims with small lug nut housings.
the PO crammed some shitty incorrect lug nuts on the studs and ruined the threads, and after threatening to ruin some of my new lug nuts I put the day on pause and ran to Fastenal to get a new die the chase the threads out.
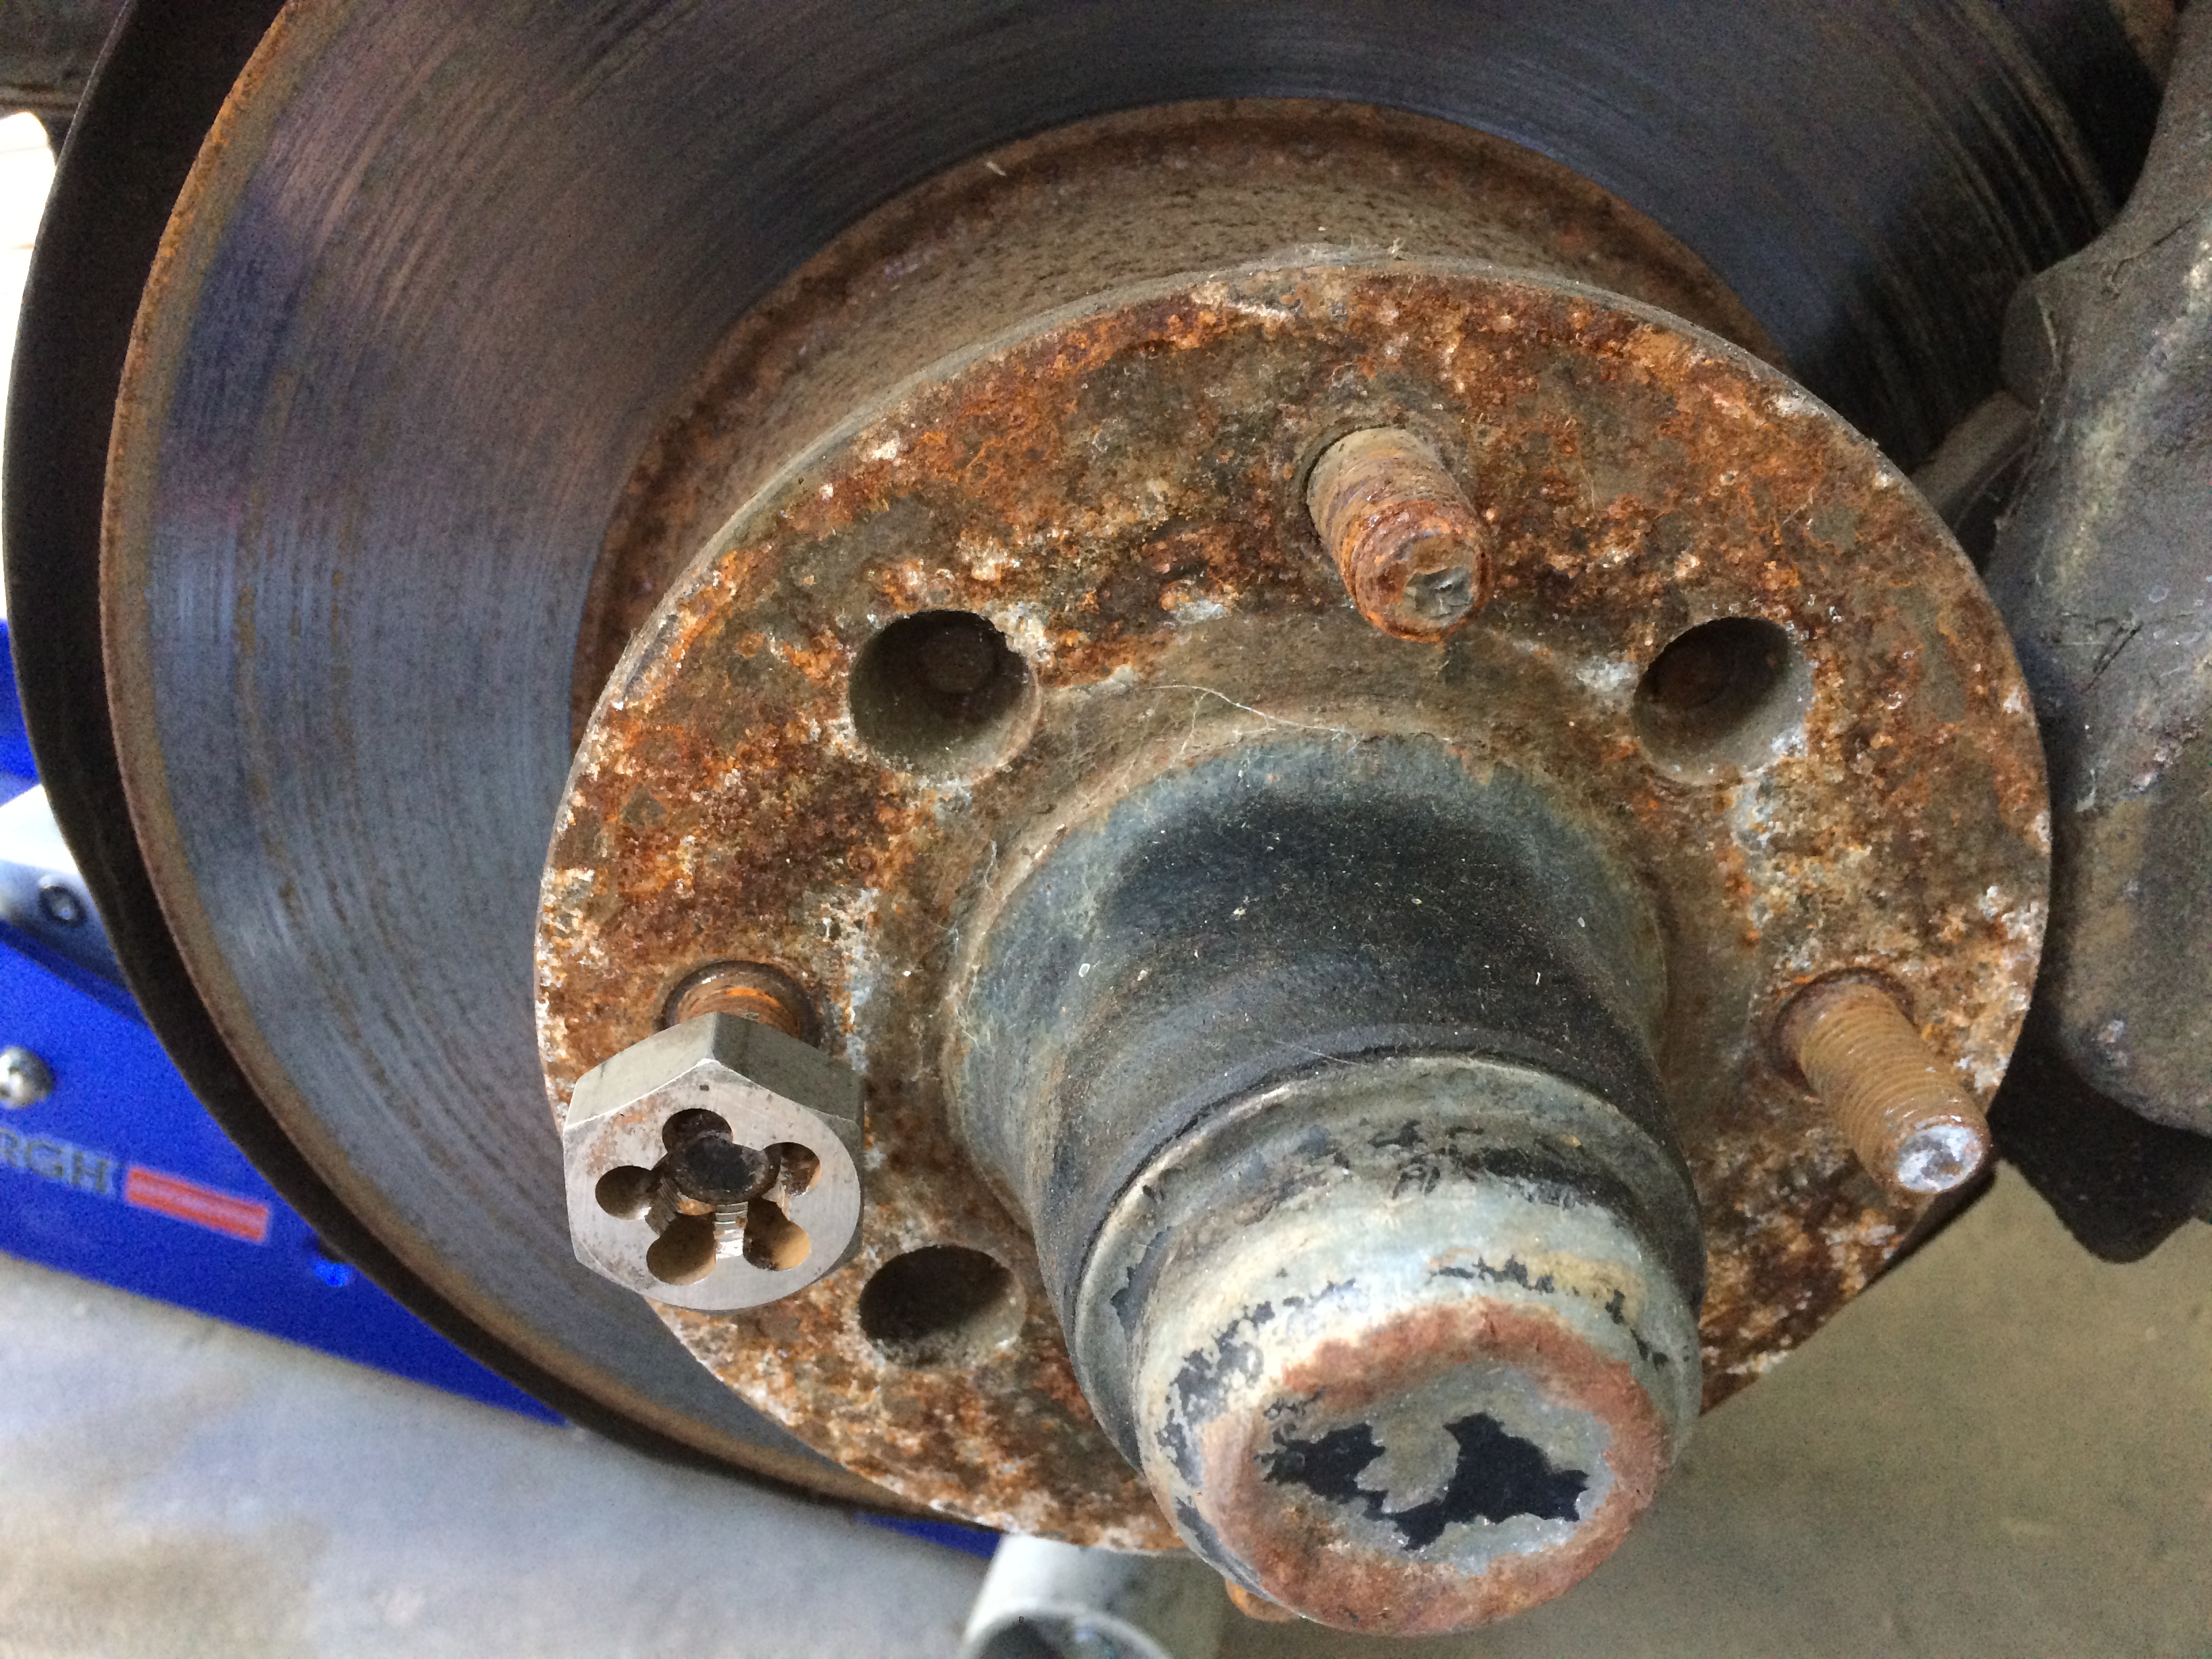
I have two different tap and die sets and neither had this thread pitch. 12 x 1.25 is extremely fine thread. but once i had the threads cleaned up I slapped some anti-seize on there and the rims went on with no problems!
once I had the wheels and tires on a took this opportunity to roll it out and and hose all that dirt off. it was starting to build up!


over the last couple days I also replaced the J bolts on the fuel tank straps, and re installed the quarter windows. probably going to take them right back out tomorrow though. ha!
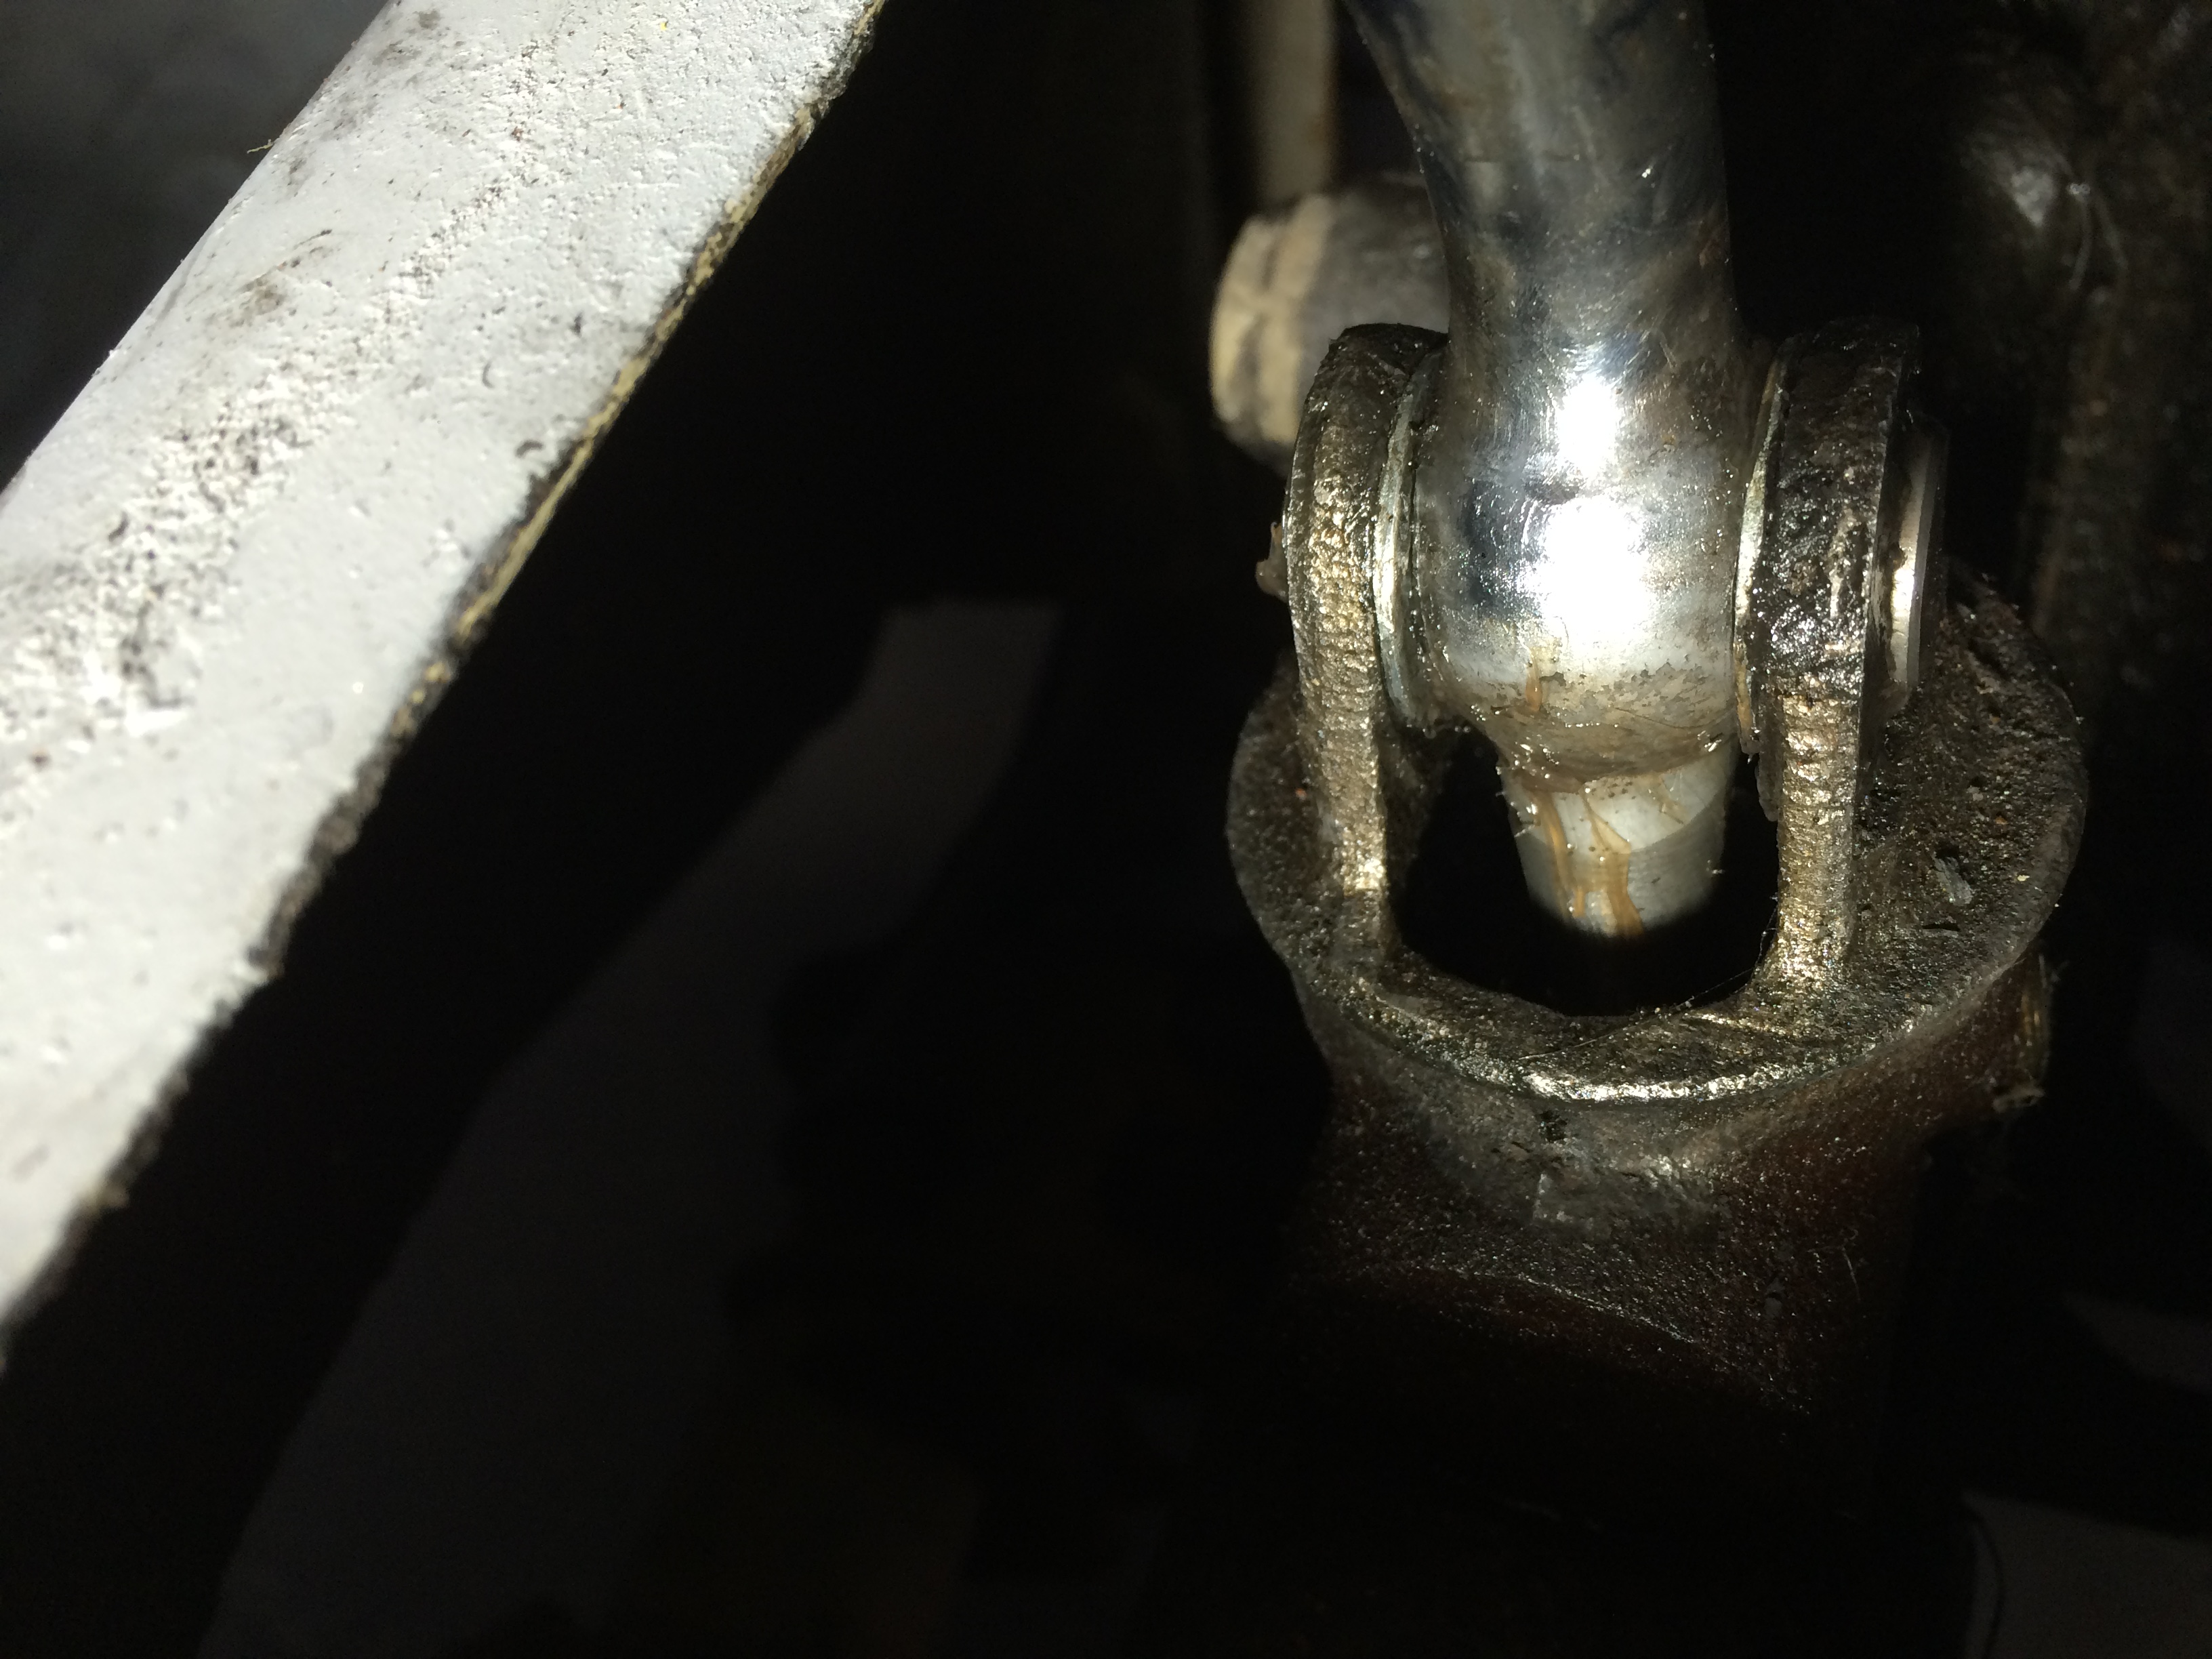
I forgot to snap a before picture, but my gear selector was pretty wobbled out, and didn't have any shims in it, so it shook on the retaining pin pretty bad and it made it hard to shift. I ran to the hardware store and grabbed some washers and a teflon bushing.
I started by drilling the teflon bushing out large enough for the pin. it was 3/8". i didn't have a drill bit handy so i made due with a spade bit. lol.


once it was large enough for the pin I took some off the outside until it fit inside the shift lever.

it's hard to see because it's already covered in grease, but it's the black bushing in there.
the washers were just too thick to fit outside of the shift lever out so I got out my poor man's lathe and took some metal off.

greased it all up and reinstalled in the car, works like a champ, shifts like silk.
Now I want to introduce you to Chastity.

Chastity has ALOT of work ahead of her, She's trying to pay for college...
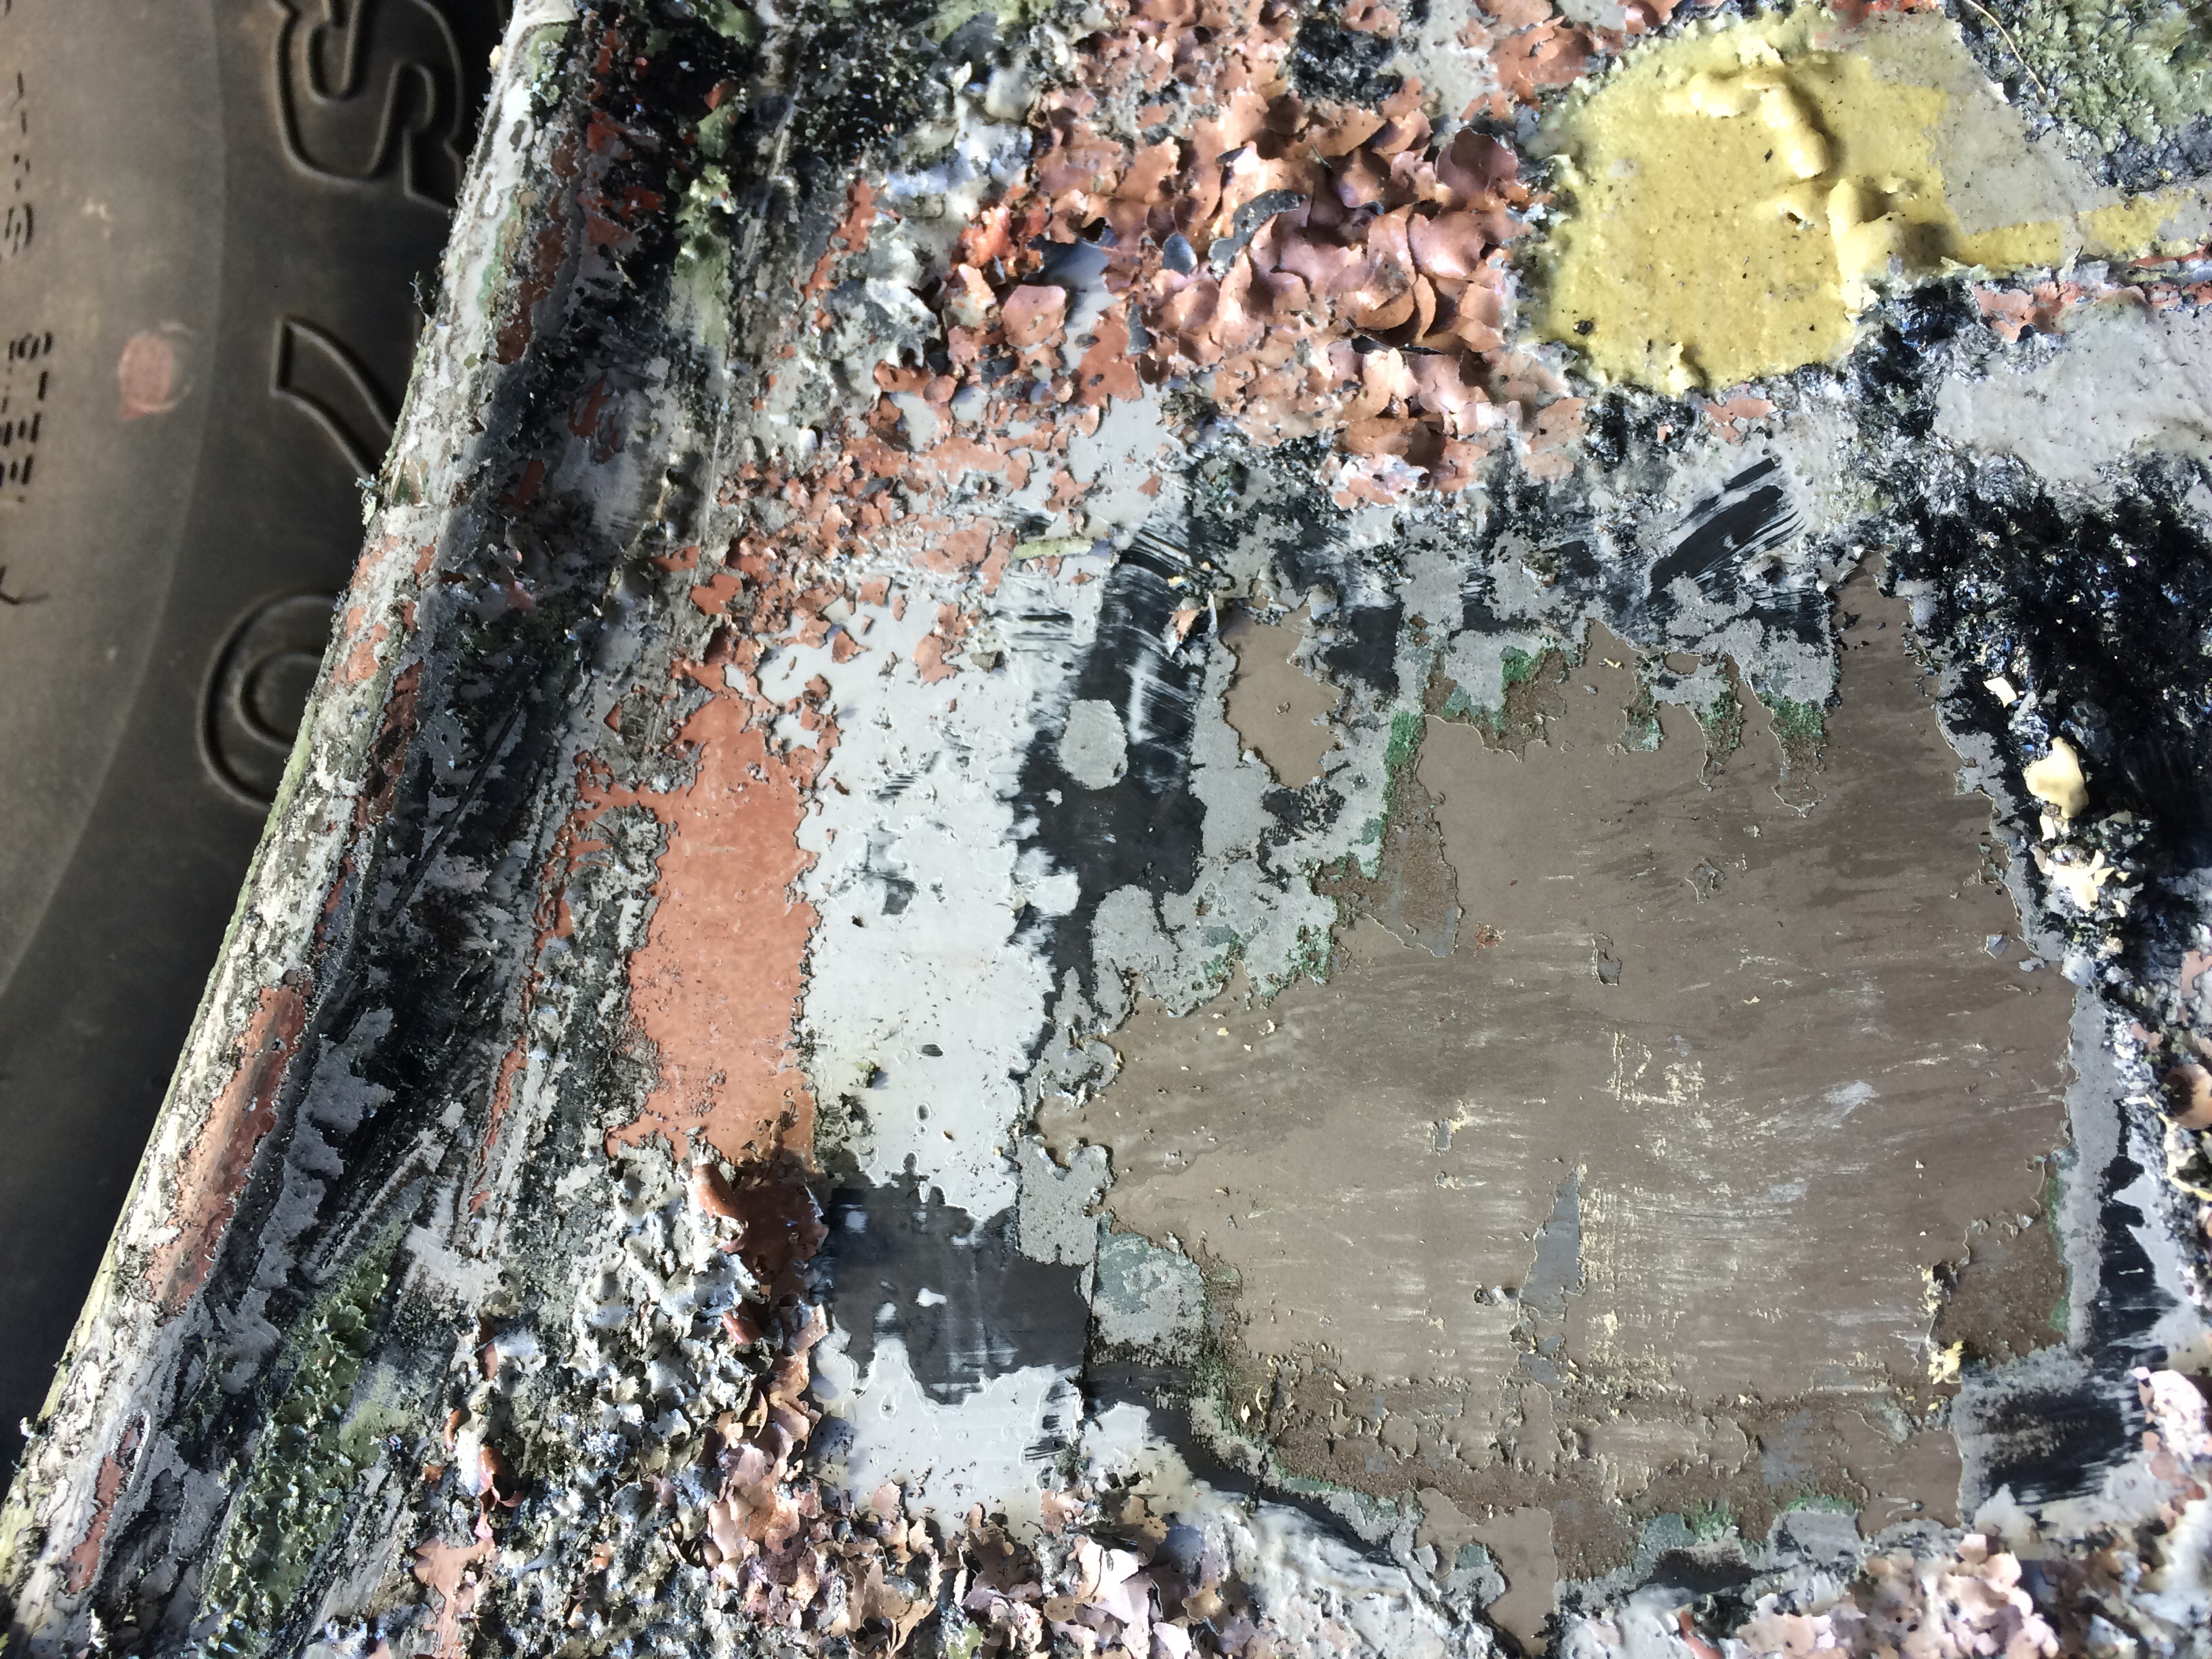
turns out there's 9 layers of paint of this old piece of ****. and it took me most of the can just to get this front fender done. She also doesn't go through bondo very well. I'm probably going to try something else tomorrow just to see a difference.
if anyone else knows a good stripper could you send me her number? this one's just not doing it for me.
but I did get some work done.


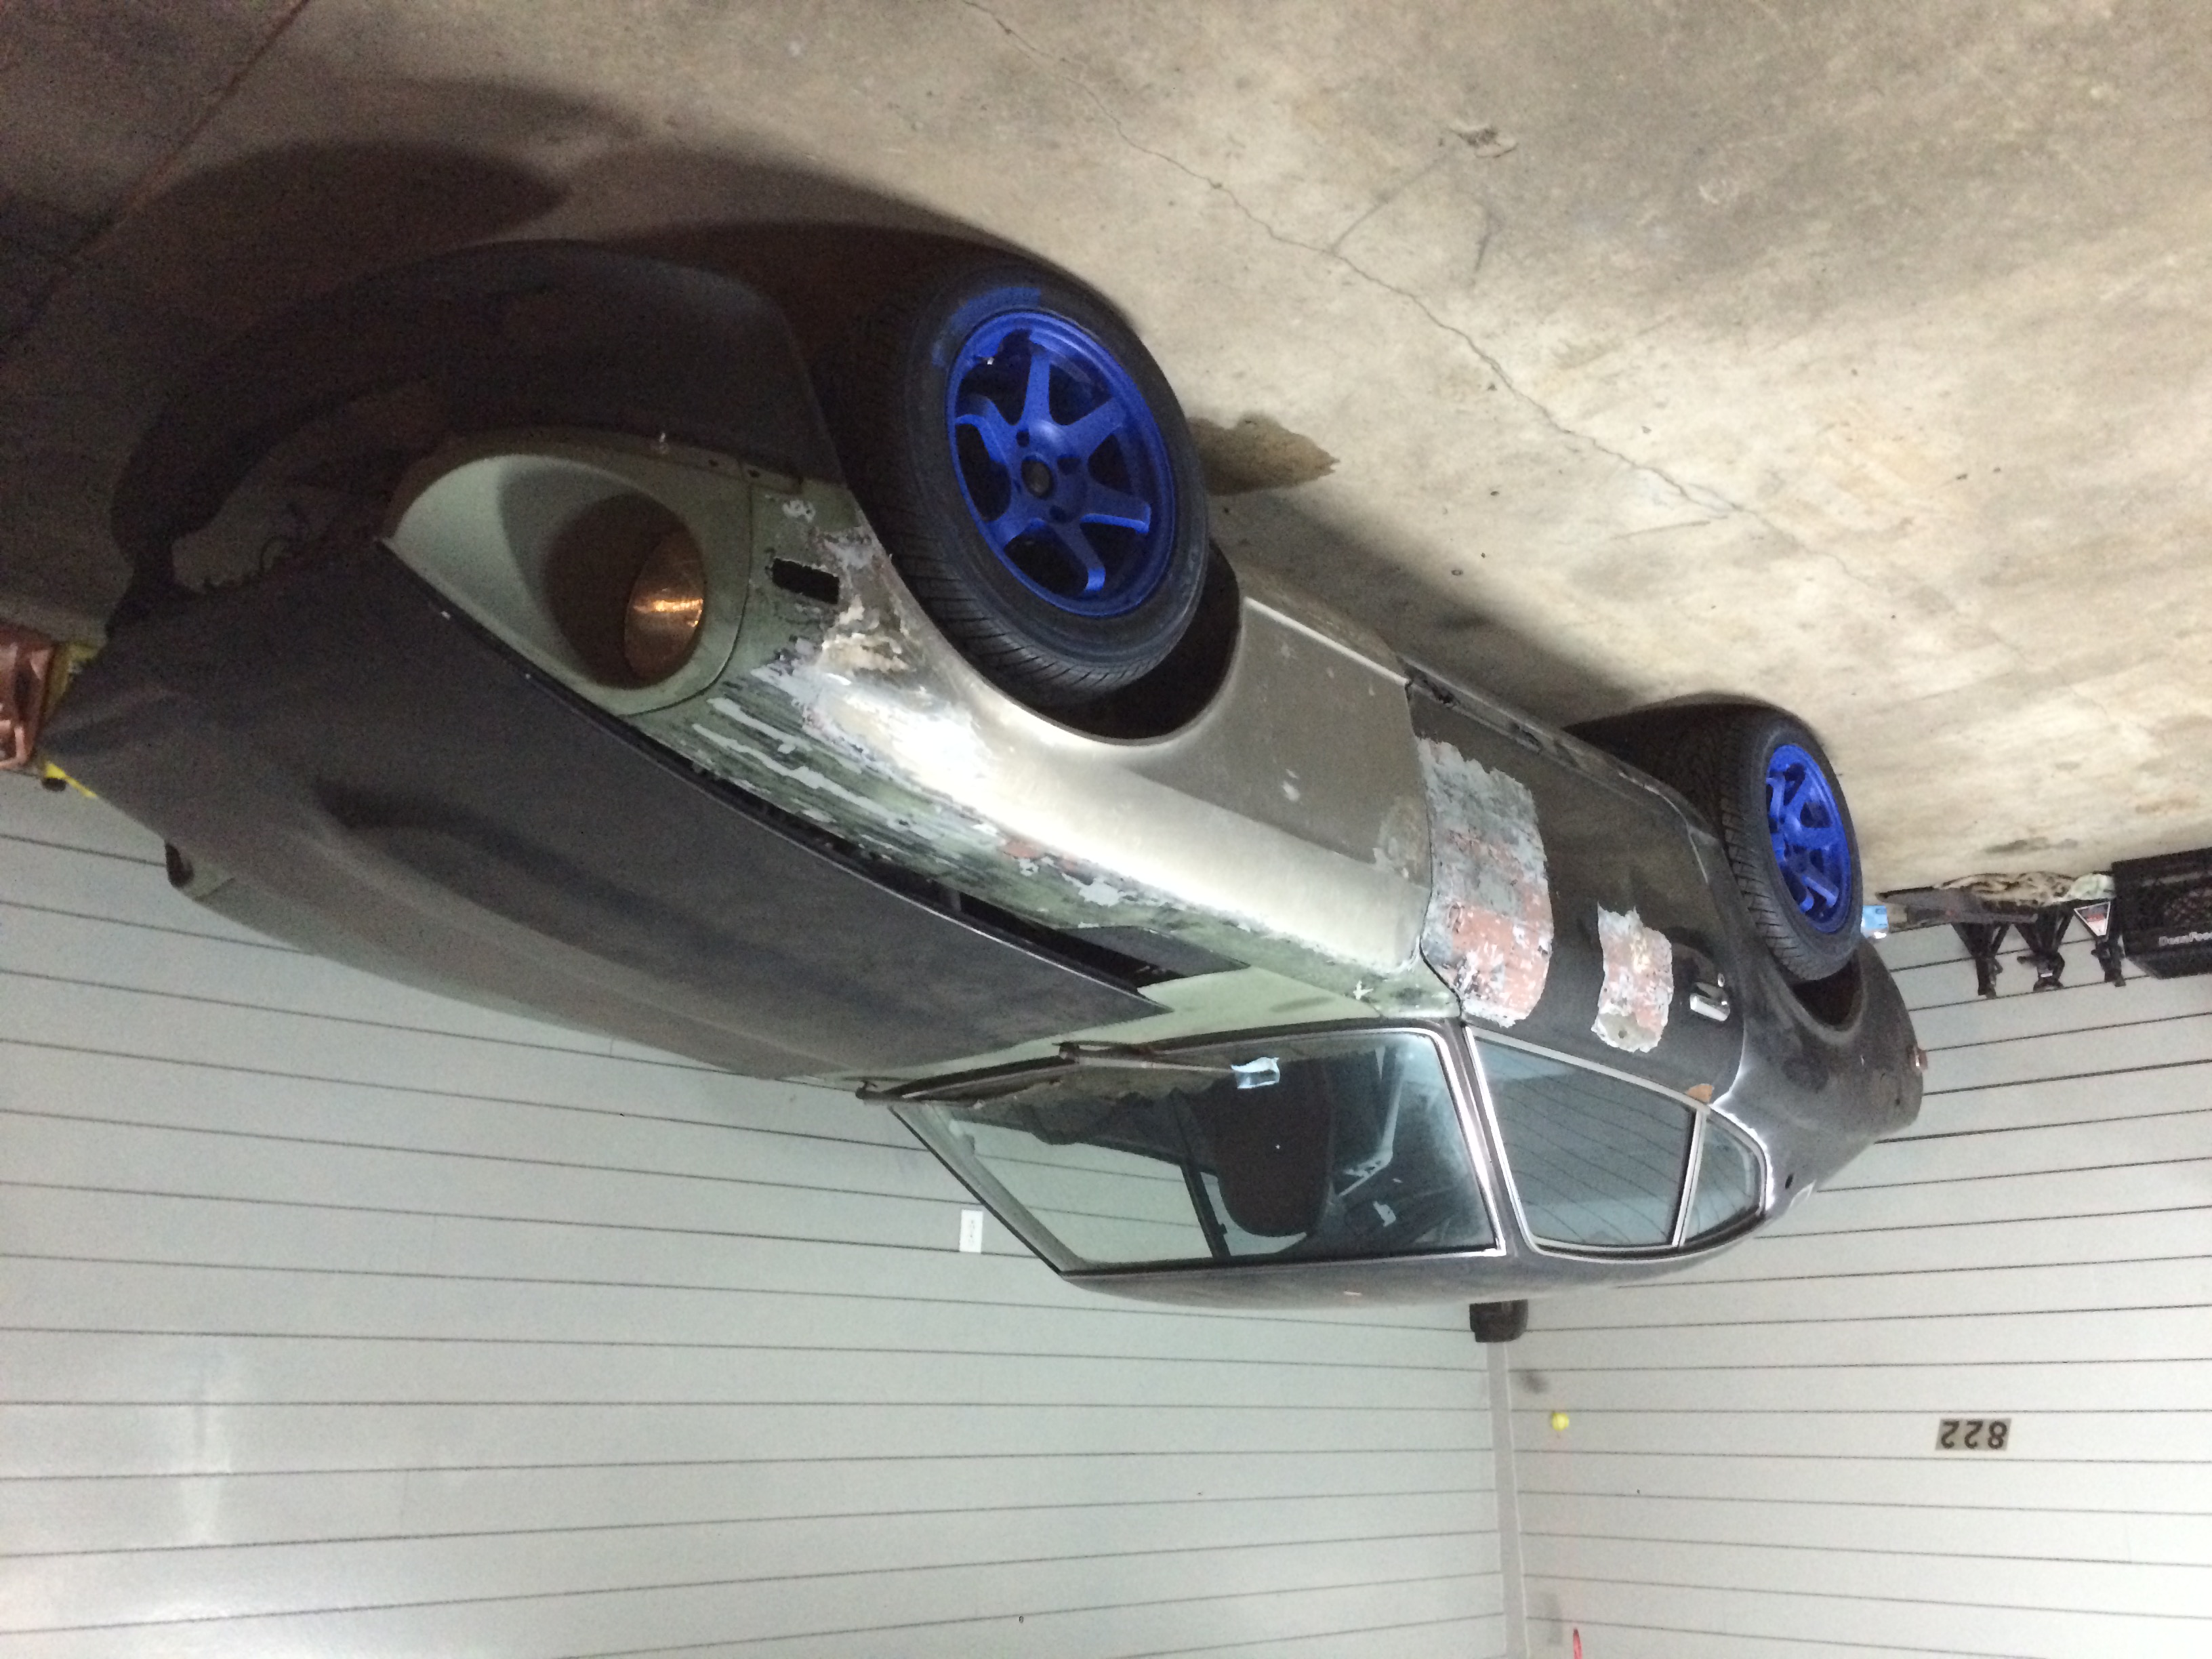
all signs point to leaving it bare metal, Mad Max the S$%& out of this thing and let the [hoon]ing commence. lol.
remember that weird lug nut earlier, well ironically enough after I destroyed my first rim trying to put regular lugs in it I stumbled upon these. the dude said they are slender lug nuts that come with there own thin walled socket so you can put them in aftermarket rims with small lug nut housings.
the PO crammed some shitty incorrect lug nuts on the studs and ruined the threads, and after threatening to ruin some of my new lug nuts I put the day on pause and ran to Fastenal to get a new die the chase the threads out.
I have two different tap and die sets and neither had this thread pitch. 12 x 1.25 is extremely fine thread. but once i had the threads cleaned up I slapped some anti-seize on there and the rims went on with no problems!
once I had the wheels and tires on a took this opportunity to roll it out and and hose all that dirt off. it was starting to build up!
over the last couple days I also replaced the J bolts on the fuel tank straps, and re installed the quarter windows. probably going to take them right back out tomorrow though. ha!
I forgot to snap a before picture, but my gear selector was pretty wobbled out, and didn't have any shims in it, so it shook on the retaining pin pretty bad and it made it hard to shift. I ran to the hardware store and grabbed some washers and a teflon bushing.
I started by drilling the teflon bushing out large enough for the pin. it was 3/8". i didn't have a drill bit handy so i made due with a spade bit. lol.
once it was large enough for the pin I took some off the outside until it fit inside the shift lever.
it's hard to see because it's already covered in grease, but it's the black bushing in there.
the washers were just too thick to fit outside of the shift lever out so I got out my poor man's lathe and took some metal off.
greased it all up and reinstalled in the car, works like a champ, shifts like silk.
Now I want to introduce you to Chastity.
Chastity has ALOT of work ahead of her, She's trying to pay for college...
turns out there's 9 layers of paint of this old piece of ****. and it took me most of the can just to get this front fender done. She also doesn't go through bondo very well. I'm probably going to try something else tomorrow just to see a difference.
if anyone else knows a good stripper could you send me her number? this one's just not doing it for me.
but I did get some work done.
all signs point to leaving it bare metal, Mad Max the S$%& out of this thing and let the [hoon]ing commence. lol.
02-20-2016, 09:18 PM
#16
Registered User
Thread Starter
Join Date: Jan 2016
Location: Military
Posts: 40
Mercedes.
My buddy said I should give Mercedes a try. wasn't a whole lot better. I don't think it's the product as much as there's just a crap ton of old paint on this car.

won't bore you with more of the same.
strip, scrap, bondo, strip, bondo, bondo, strip, scrap.
I am now here.

Door is pretty shot, but we knew that going into it.

won't bore you with more of the same.
strip, scrap, bondo, strip, bondo, bondo, strip, scrap.
I am now here.
Door is pretty shot, but we knew that going into it.
 02-27-2016, 05:00 PM
#18
Registered User
Thread Starter
Join Date: Jan 2016
Location: Military
Posts: 40
Rust.
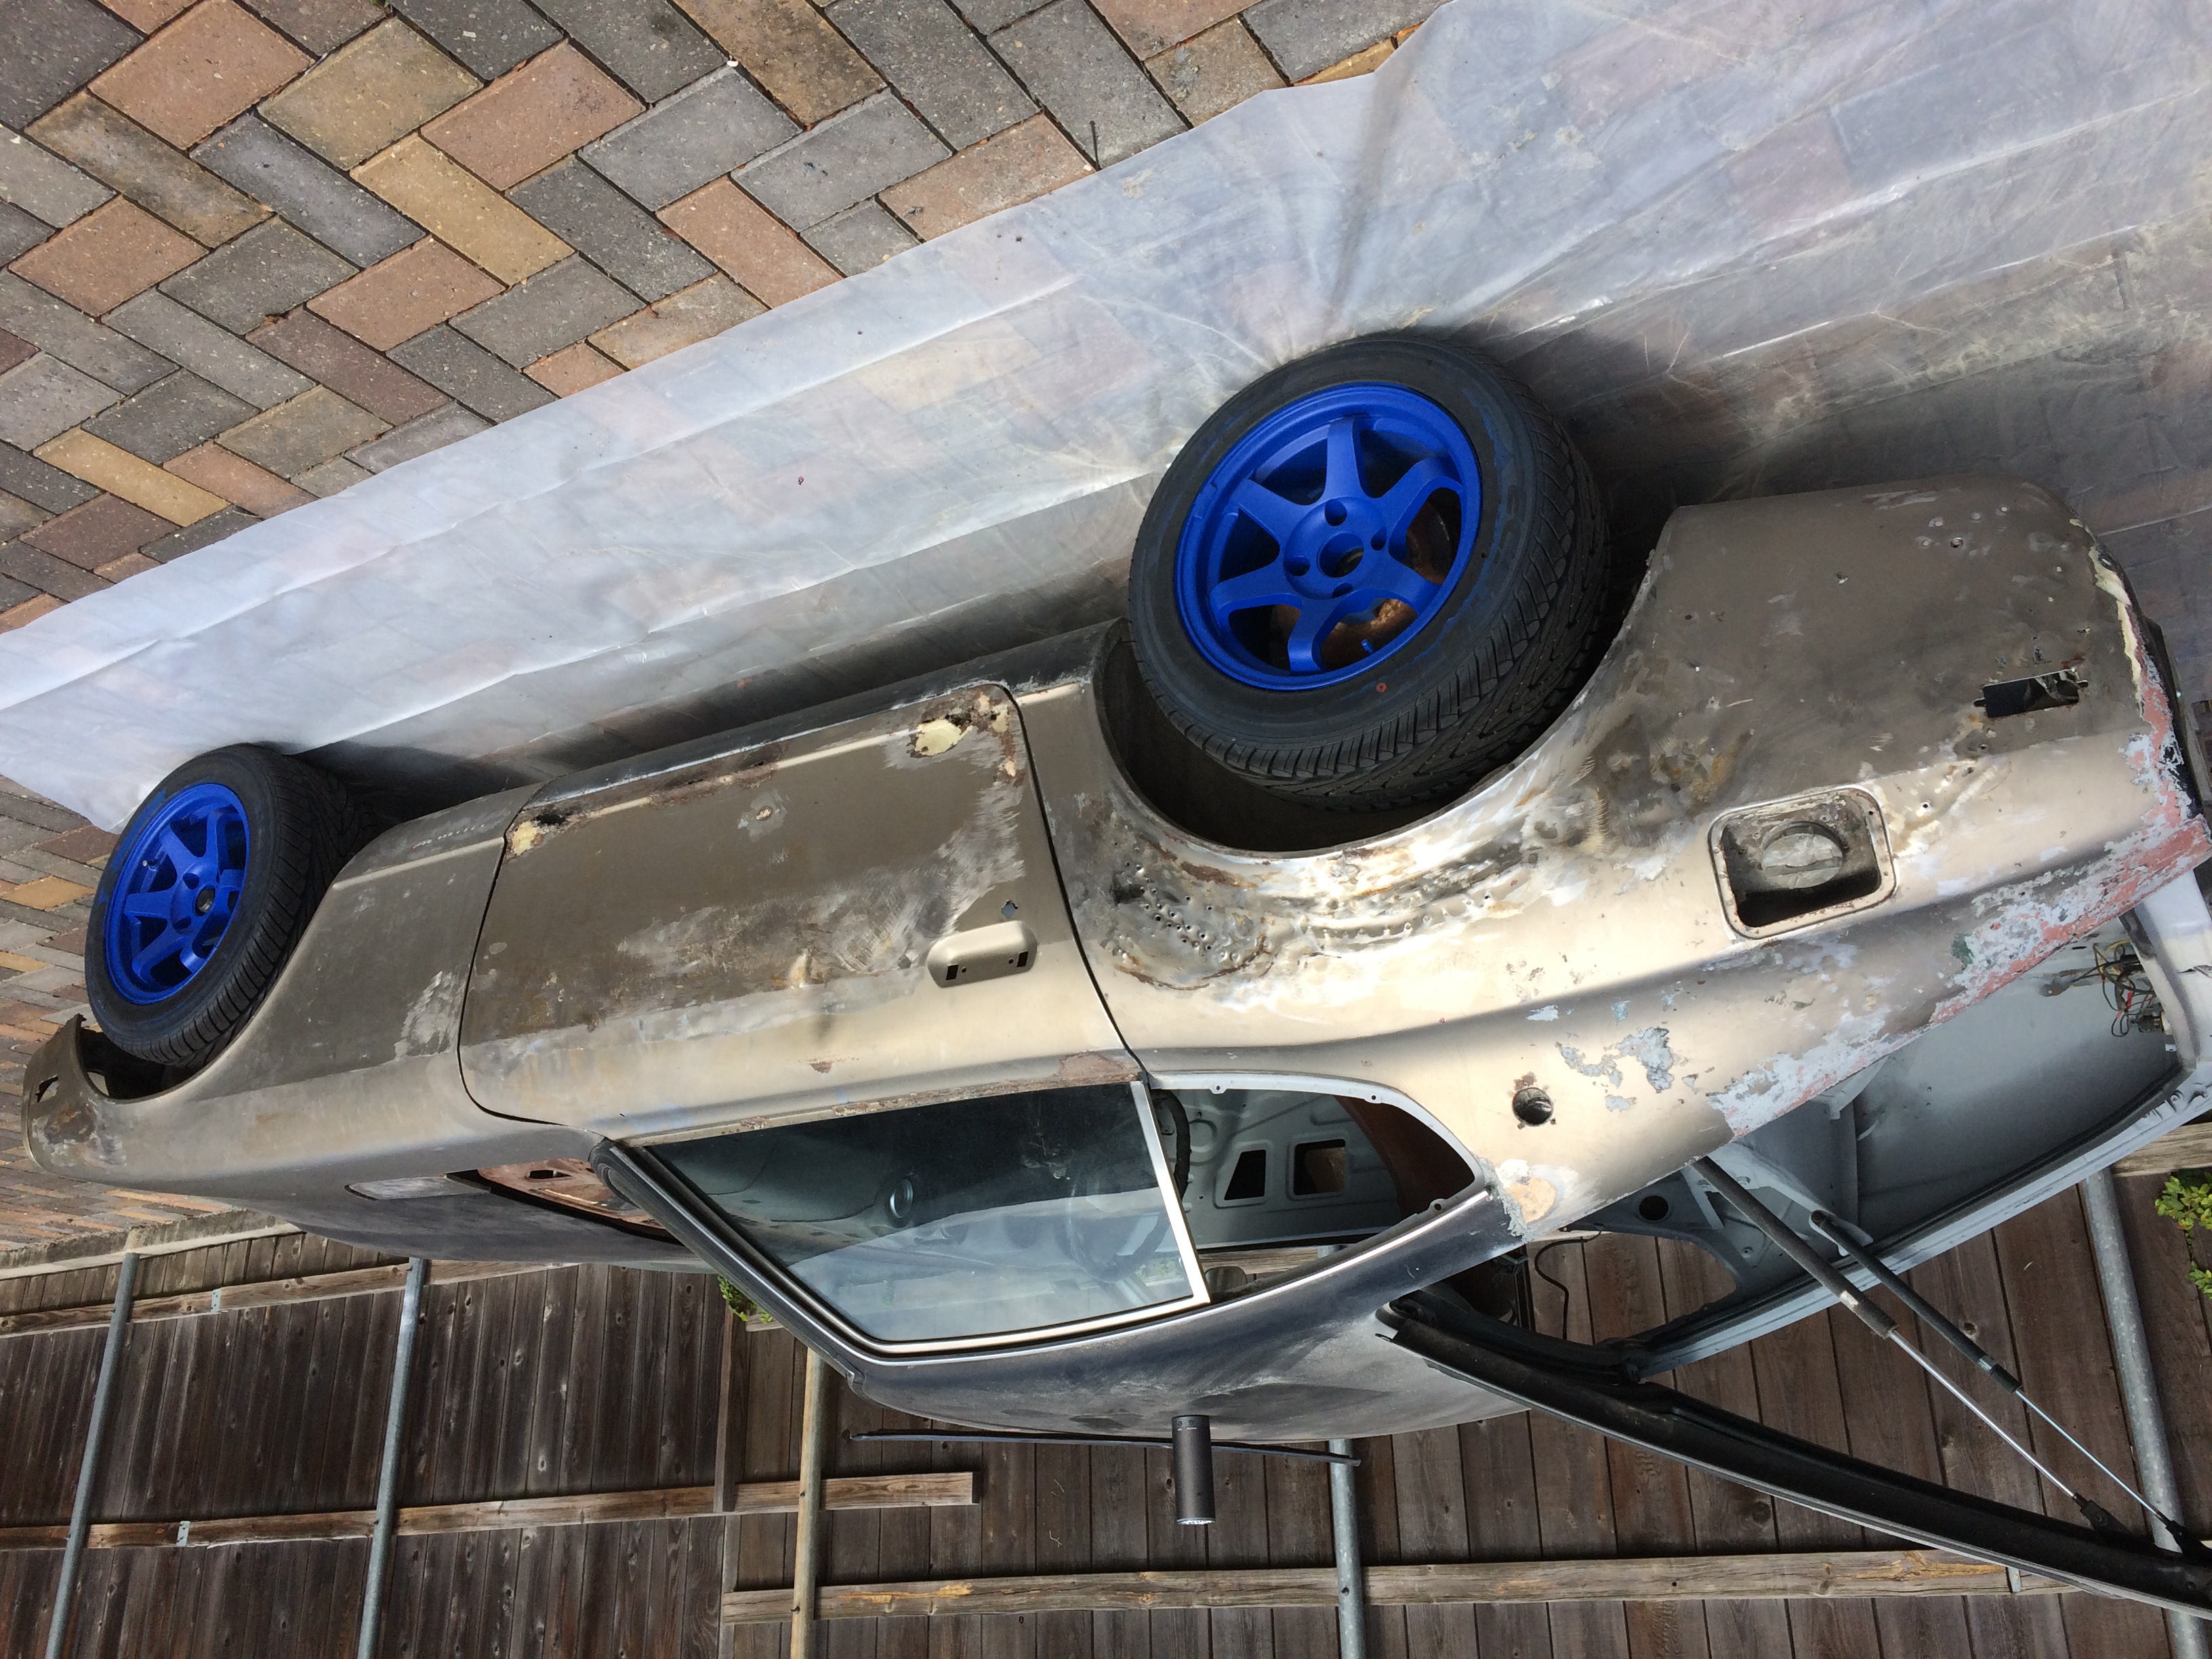
haven't been able to accomplish much this past week because of work. but this weekend looks promising. I continued stripping paint.

Most of the right side done, just have to do the rocker panel now, I also was able to treat the rust on the cowl area. it was mostly superficial, but it was everywhere.
I also had broken off bolts in most of the fender mounting points, there were only a few left holding my fenders on, I was able to remove most of them by going extremely slowly with a pair of channel locks.

once I had took a decent amount of rust off with sand paper and cleaned everything I sprayed it with rust reformer. turned out well I think,


tomorrow I should be done with removing the paint from the tail section.
Most of the right side done, just have to do the rocker panel now, I also was able to treat the rust on the cowl area. it was mostly superficial, but it was everywhere.
I also had broken off bolts in most of the fender mounting points, there were only a few left holding my fenders on, I was able to remove most of them by going extremely slowly with a pair of channel locks.
once I had took a decent amount of rust off with sand paper and cleaned everything I sprayed it with rust reformer. turned out well I think,
tomorrow I should be done with removing the paint from the tail section.
02-28-2016, 09:14 PM
#19
Registered User
Thread Starter
Join Date: Jan 2016
Location: Military
Posts: 40
I Hate Paint Stripping.
I hate paint stripping. I hate paint stripping. I hate paint stripping.
but I got the tail section done today.

I also finished the right side rocker panel.


which i'm actually pretty pleased with it's condition. I was expecting a lot worse considering the rest of the car so far, and rockers usually get it the worst, but this one is looking good.
I also stripped the cowling, starting to see more of a picture of what this car is gonna look like for the next couple months while I sort out some other issues.

to give you an idea of what i'm actually doing, each panel that I take off get's stripped, and the worst of the rust gets a wire wheel, then I paint the inside of it with rust reformer.

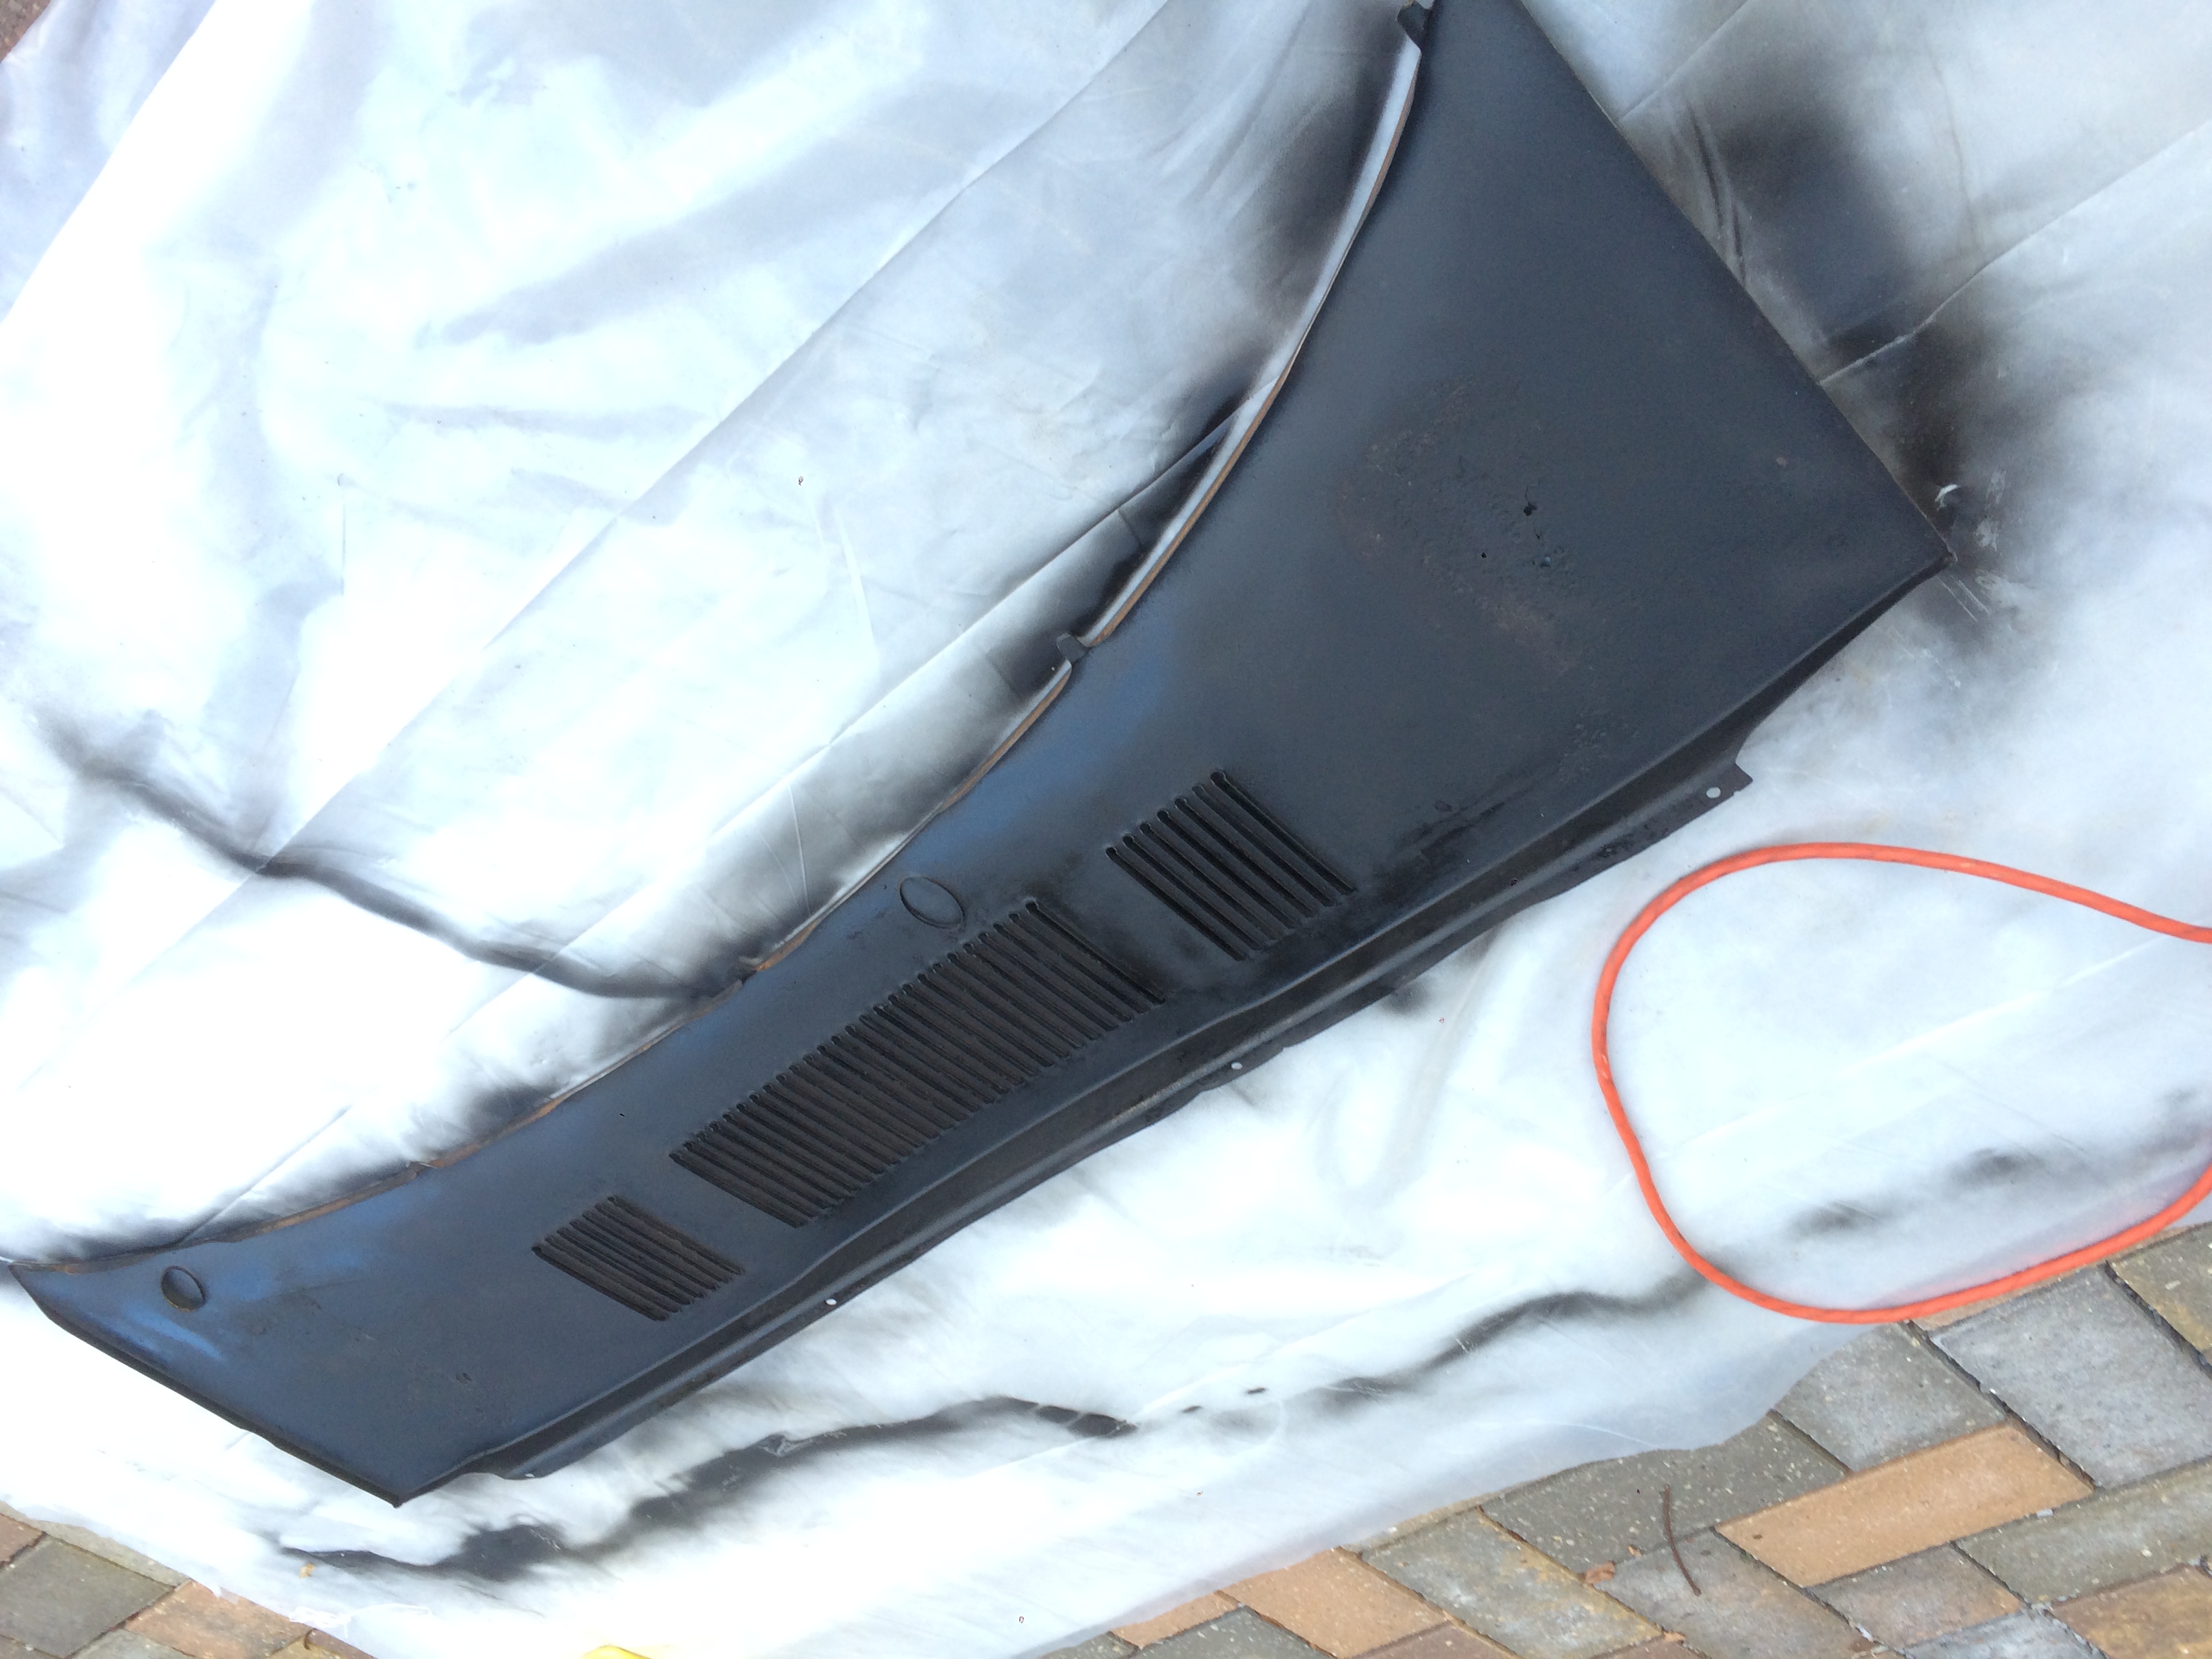
then I give the exterior a few quick coats of clear coat to keep it looking spiffy.


and re install on the car.
I also grabbed a roll of foam weather stripping from walmart for $3 and cut some to replace the original fender mounting tape. it's not exact, but it should help keep things from rattling metal-on-metal.

leaving the car bare metal for a bit is going to allow me to really look at it and process the best way to go about doing the body work. The POs on this car all really did some pretty band-aid type body work, hopefully it will pay off to have this thing done correctly and take my time doing it.... JK, it just looks dope AF.
but I got the tail section done today.
I also finished the right side rocker panel.
which i'm actually pretty pleased with it's condition. I was expecting a lot worse considering the rest of the car so far, and rockers usually get it the worst, but this one is looking good.
I also stripped the cowling, starting to see more of a picture of what this car is gonna look like for the next couple months while I sort out some other issues.
to give you an idea of what i'm actually doing, each panel that I take off get's stripped, and the worst of the rust gets a wire wheel, then I paint the inside of it with rust reformer.
then I give the exterior a few quick coats of clear coat to keep it looking spiffy.
and re install on the car.
I also grabbed a roll of foam weather stripping from walmart for $3 and cut some to replace the original fender mounting tape. it's not exact, but it should help keep things from rattling metal-on-metal.
leaving the car bare metal for a bit is going to allow me to really look at it and process the best way to go about doing the body work. The POs on this car all really did some pretty band-aid type body work, hopefully it will pay off to have this thing done correctly and take my time doing it.... JK, it just looks dope AF.
03-17-2016, 06:54 PM
#20
Registered User
Thread Starter
Join Date: Jan 2016
Location: Military
Posts: 40
no more paint.
After looking back on here, it has almost officially been an entire month since i started stripping paint, and I have come to two revelations: one, I hate stripping paint, and two, I'm some what of a perfectionist and I had to take a serious step backwards and realize that I'm building this car in an outdoor carport with consumer level tools. not everything is going to turn out perfectly. oh well.
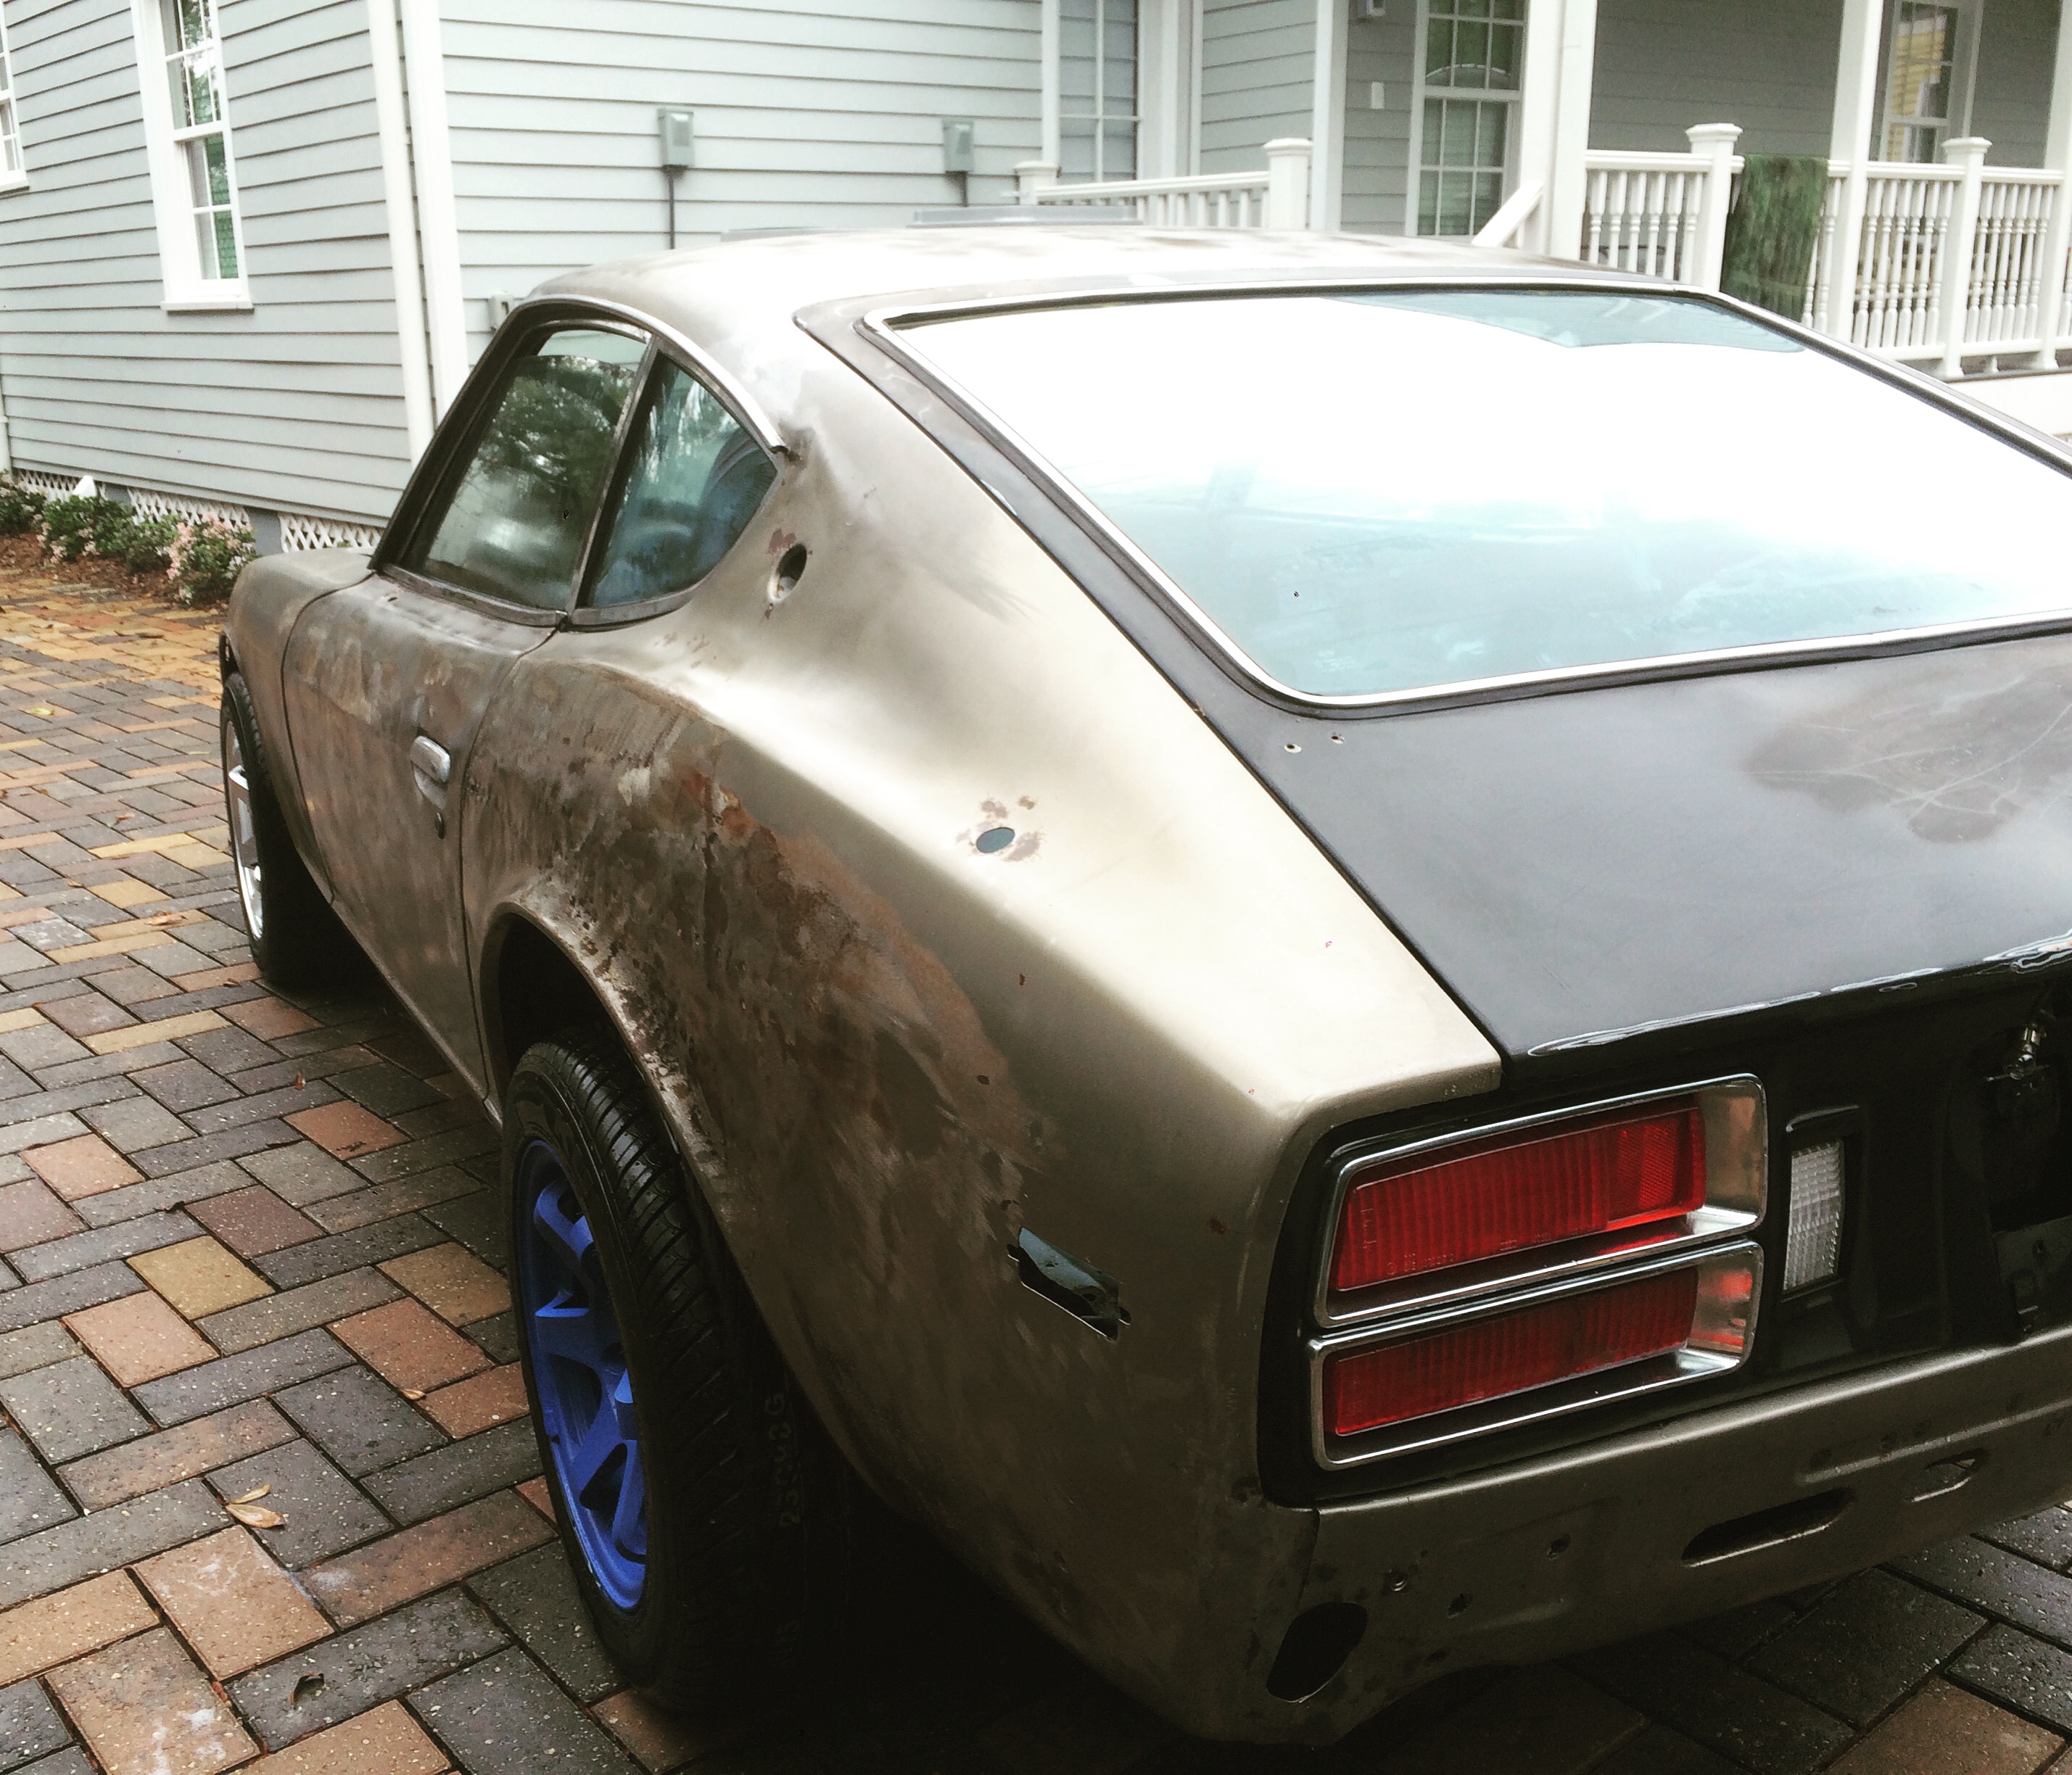
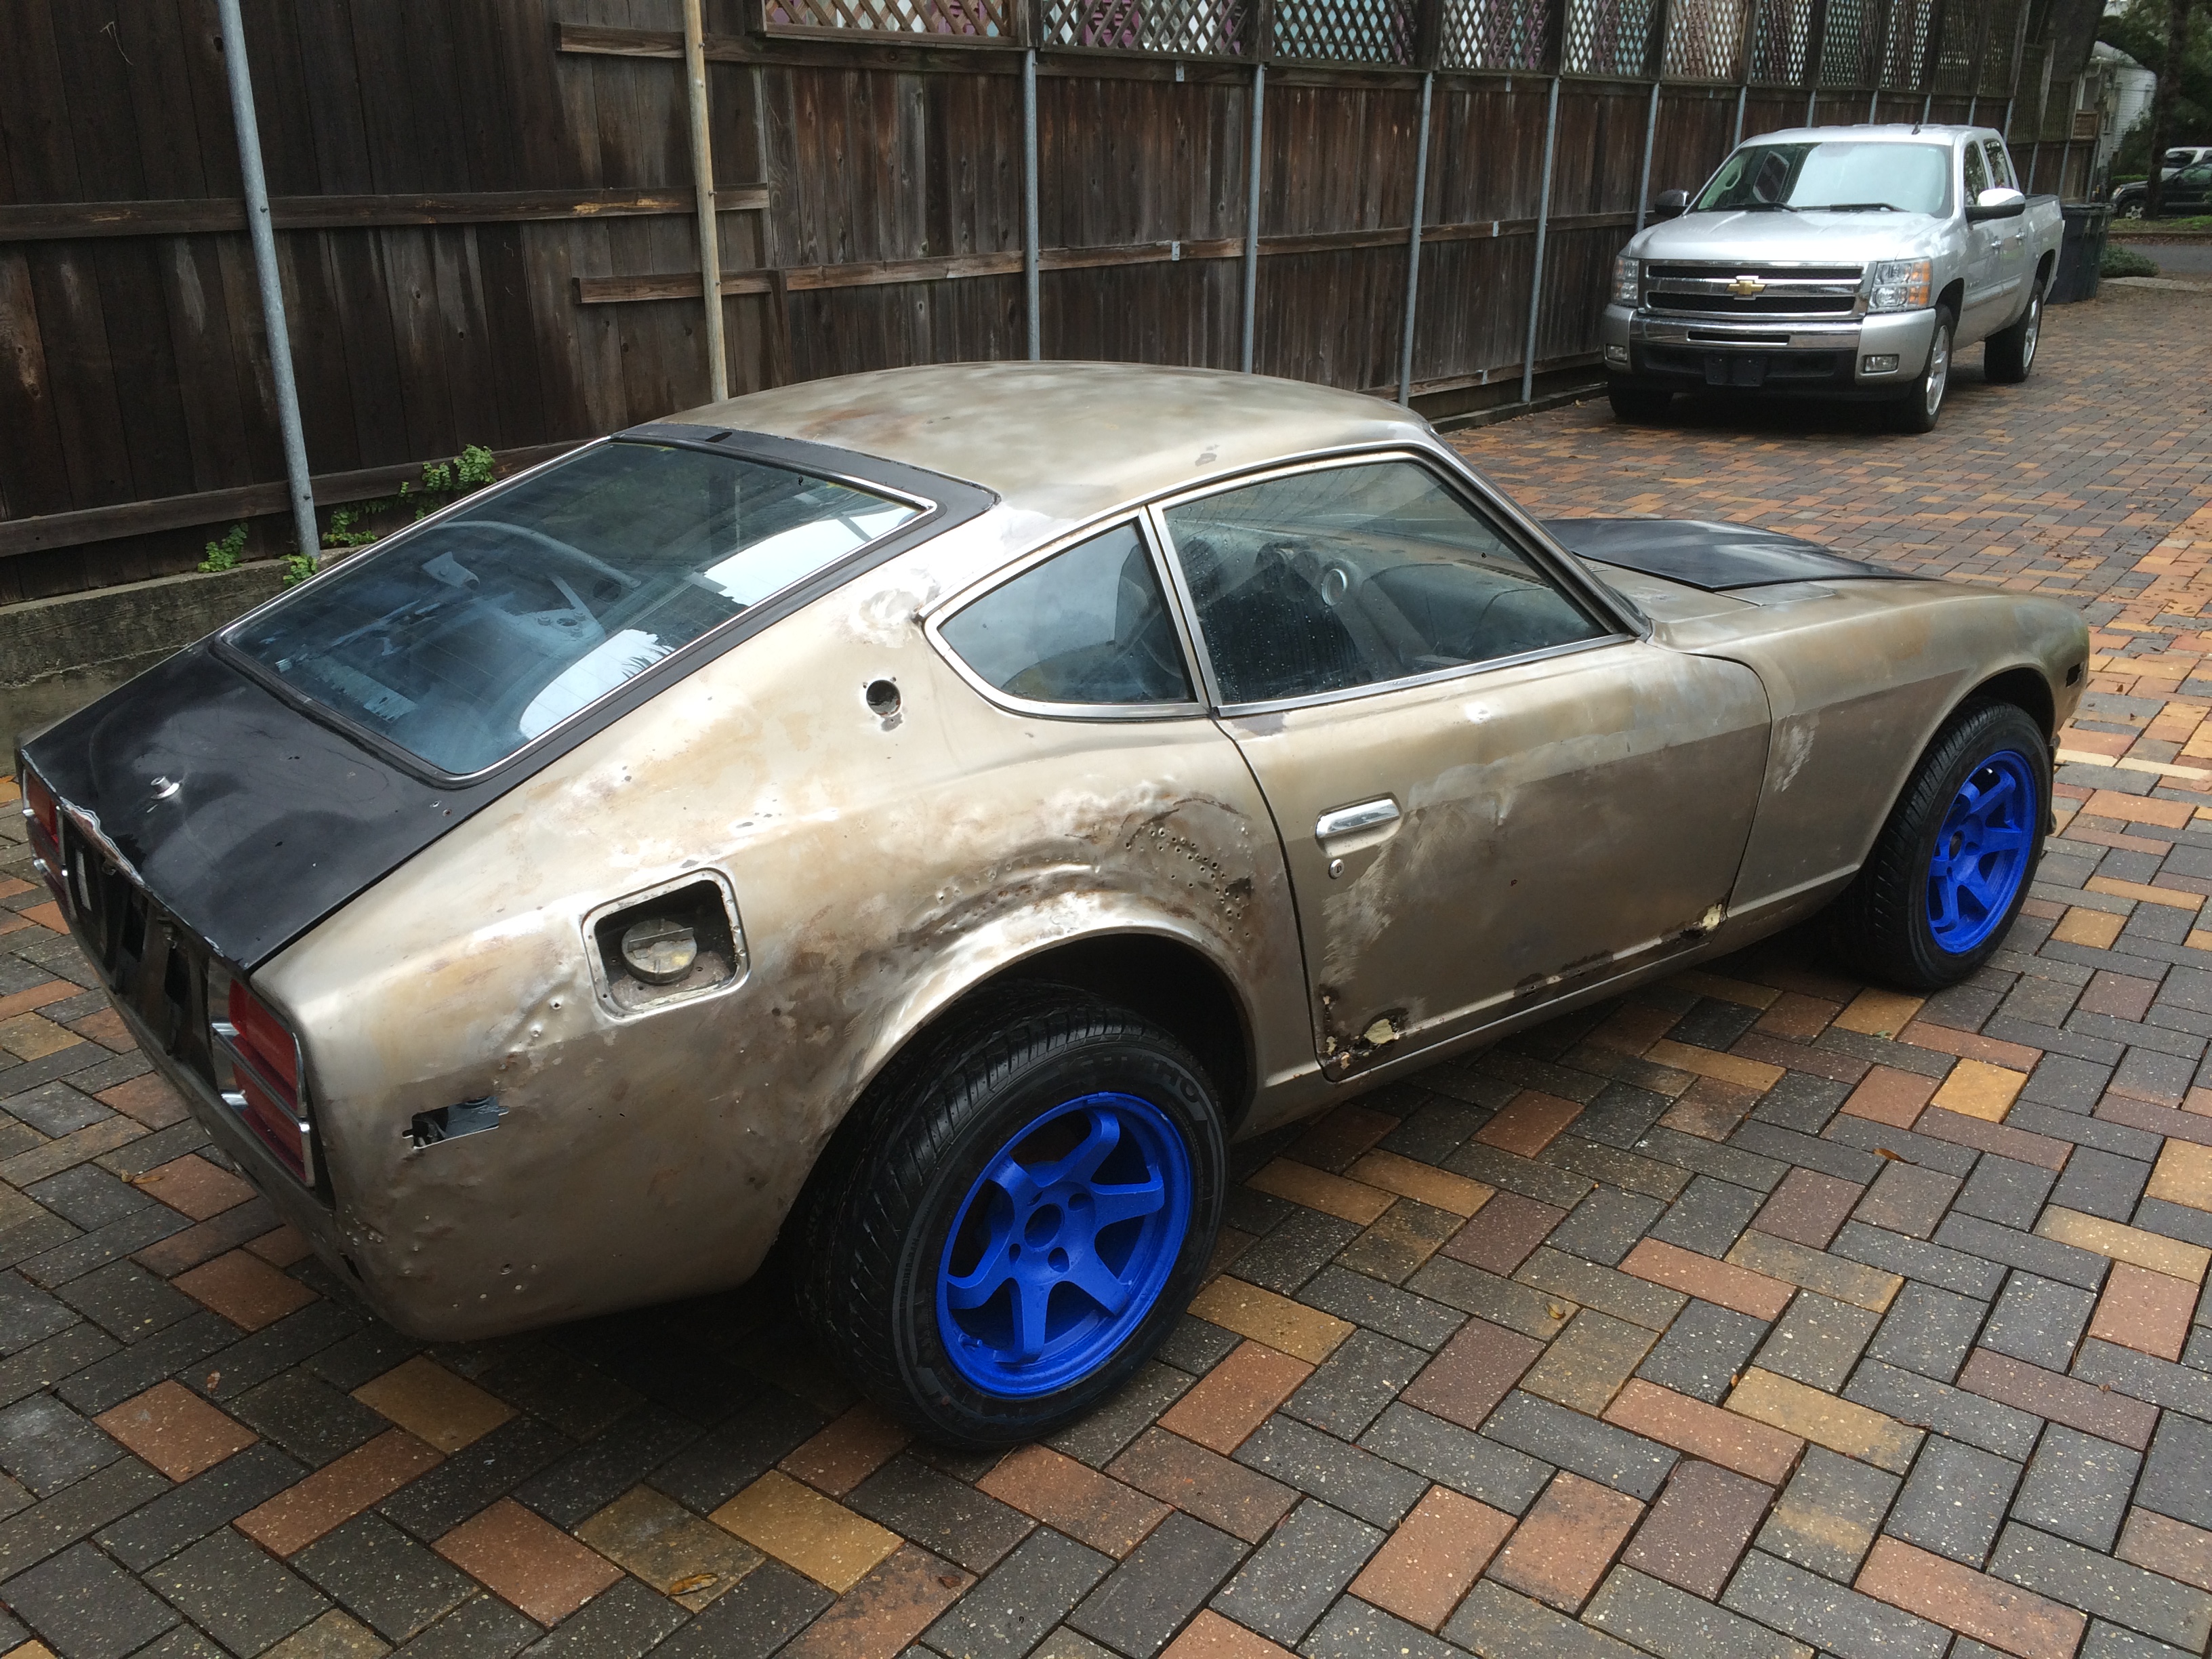
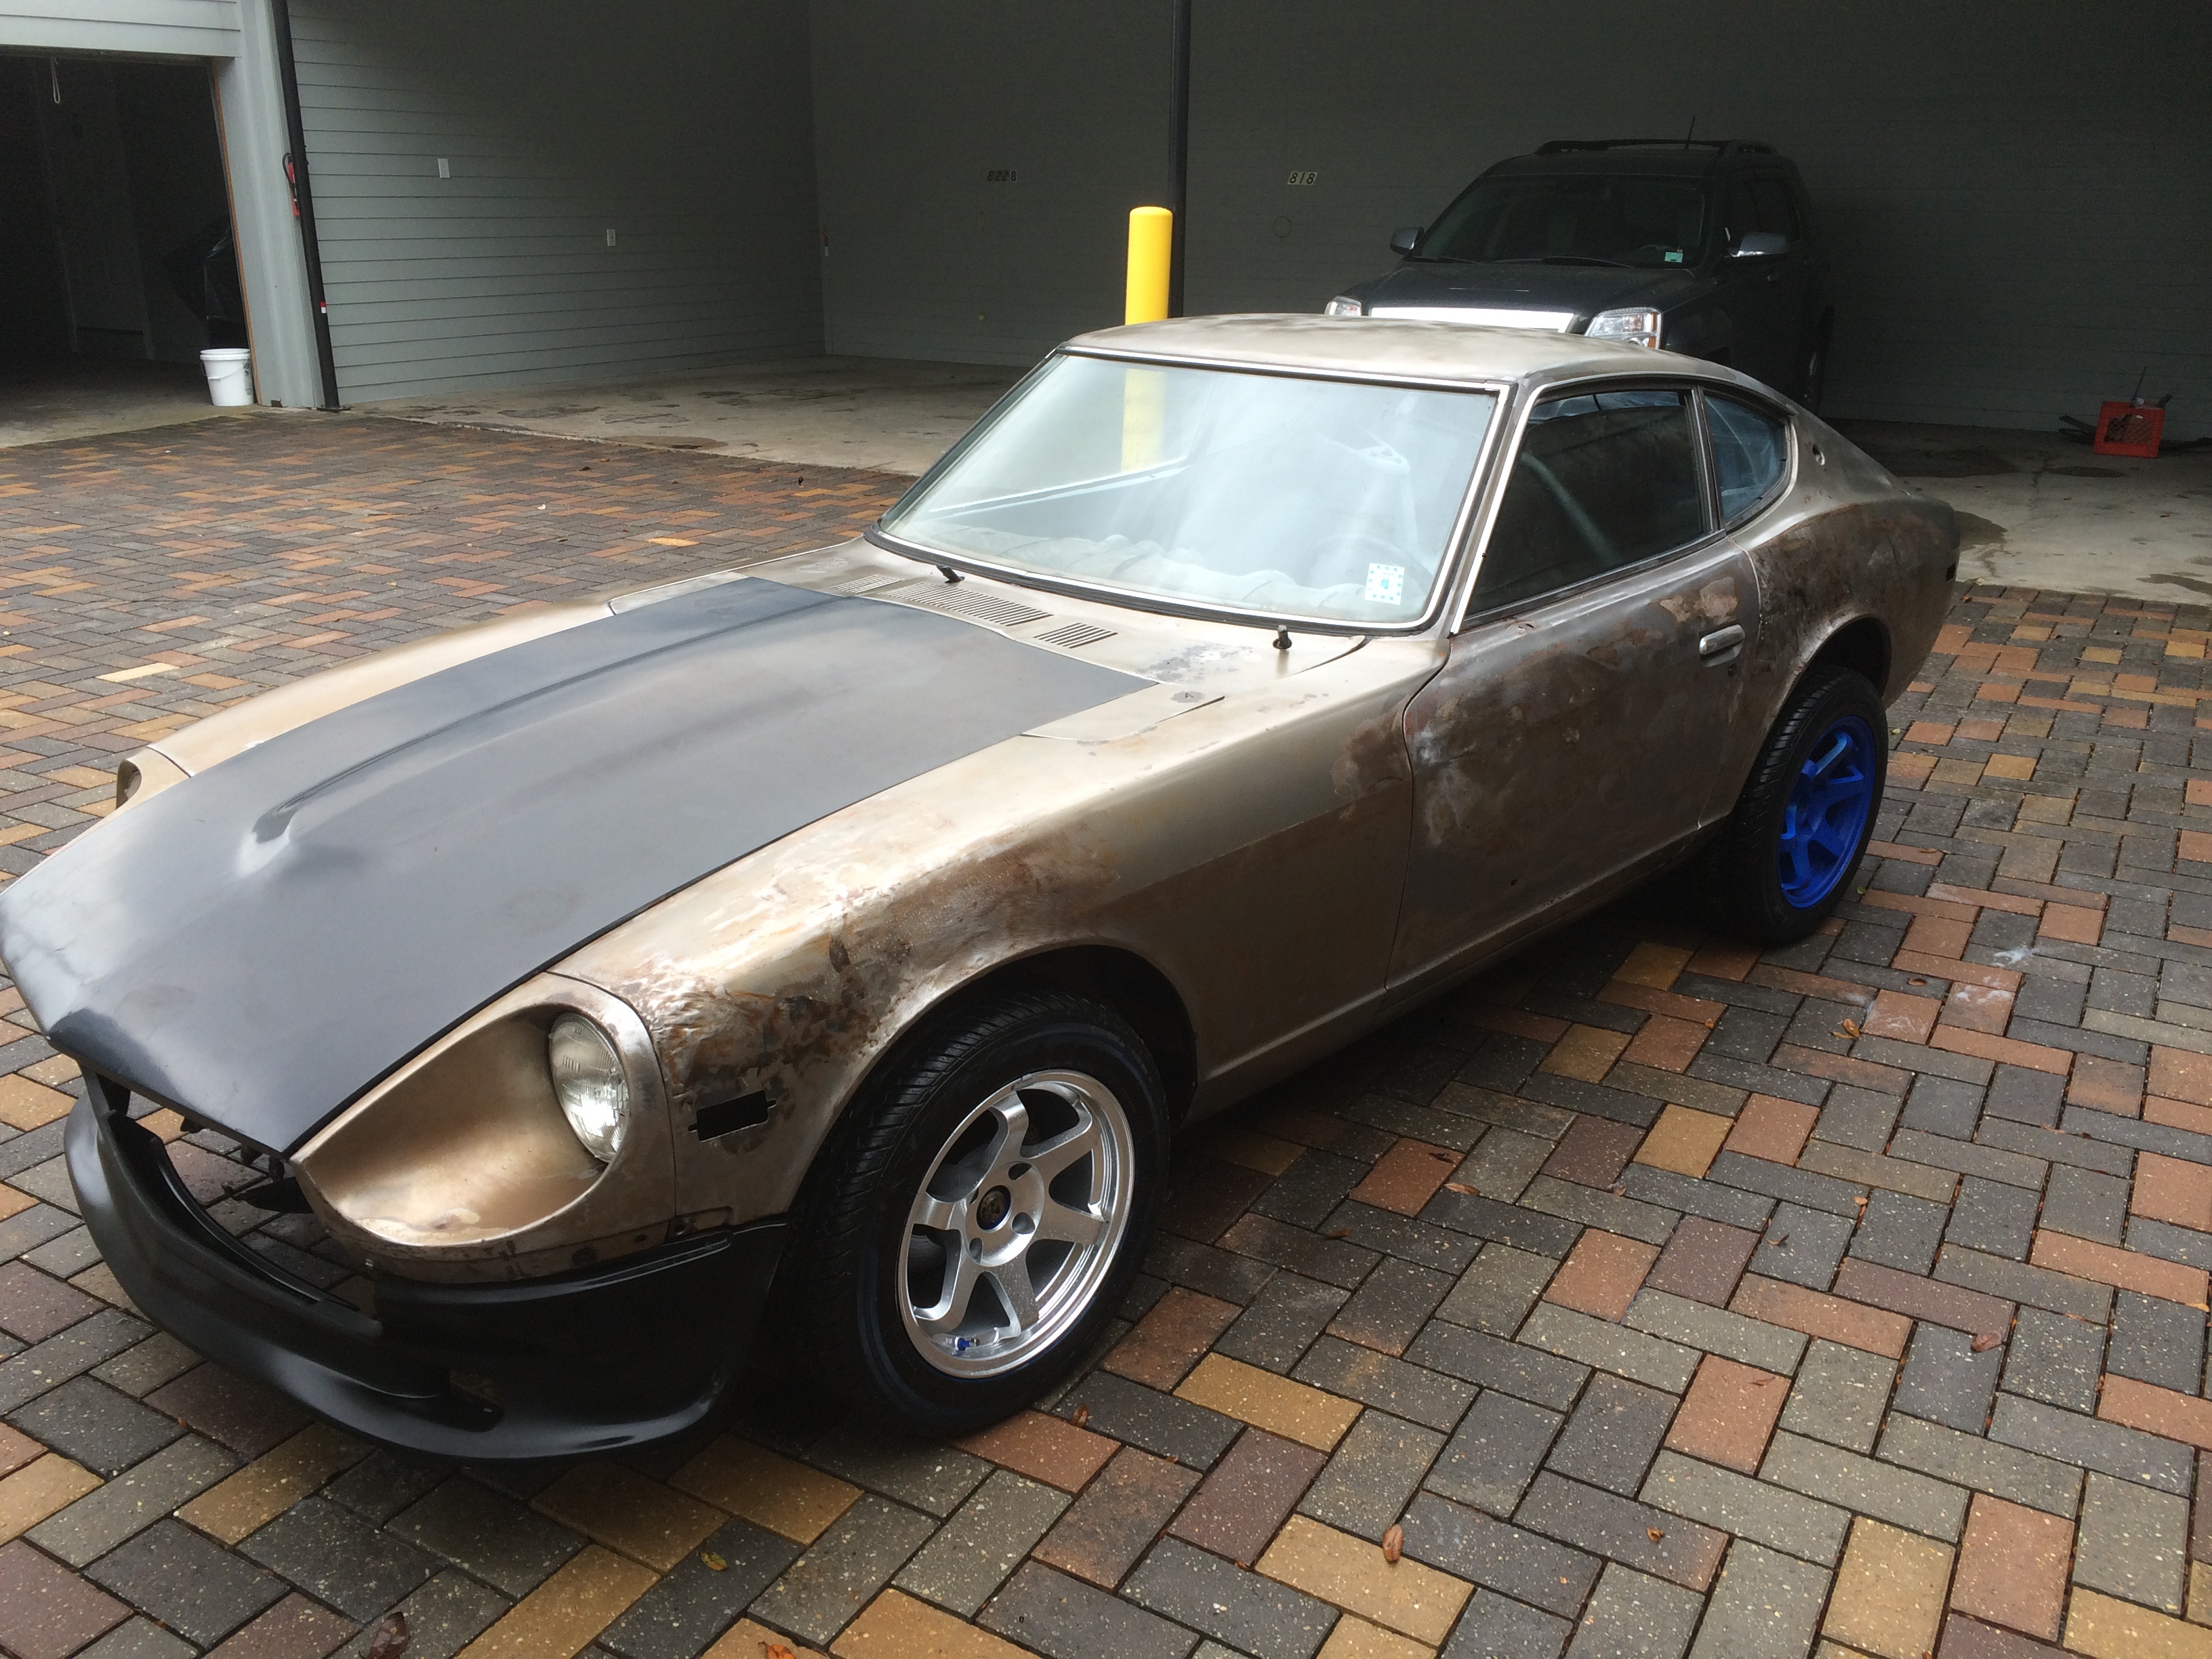
the paint that I will be taking off for the time being has been removed and the car is clear coated.


Stripping all the paint has used up a lot of my enthusiasm for this car, there is very low satisfaction per ALOT of work. it's probably just because of how much paint was on the car. i'm excited to get to work on some other things again.
time to get some stickers for this B*&^$ and get to driving it.
the paint that I will be taking off for the time being has been removed and the car is clear coated.
Stripping all the paint has used up a lot of my enthusiasm for this car, there is very low satisfaction per ALOT of work. it's probably just because of how much paint was on the car. i'm excited to get to work on some other things again.
time to get some stickers for this B*&^$ and get to driving it.
03-18-2016, 08:05 PM
#21
Registered User
Thread Starter
Join Date: Jan 2016
Location: Military
Posts: 40
body back together.
I was able to get all the body panels bolted on today. i finished up in the dark though so I don't have any good photos. more to come tomorrow.

tomorrow I should be able to replace the brake lines before I go to work. we'll see.
tomorrow I should be able to replace the brake lines before I go to work. we'll see.
 03-20-2016, 09:23 AM
#23
Registered User

Join Date: Apr 2013
Location: Tucson, Arizona USA
Posts: 576
I'm enjoying your thread quite a bit, thanks for keeping us up to date.
Just a word of caution regarding the tail light gaskets, besides keeping water out, their function is to keep exhaust fumes from being drawn back into the car. You'll have to decide if your solution is OK for you but I thought you should know.
And ... thank you for your service!
Just a word of caution regarding the tail light gaskets, besides keeping water out, their function is to keep exhaust fumes from being drawn back into the car. You'll have to decide if your solution is OK for you but I thought you should know.
And ... thank you for your service!
03-20-2016, 09:01 PM
#24
Registered User
Thread Starter
Join Date: Jan 2016
Location: Military
Posts: 40
I'm enjoying your thread quite a bit, thanks for keeping us up to date.
Just a word of caution regarding the tail light gaskets, besides keeping water out, their function is to keep exhaust fumes from being drawn back into the car. You'll have to decide if your solution is OK for you but I thought you should know.
And ... thank you for your service!
Just a word of caution regarding the tail light gaskets, besides keeping water out, their function is to keep exhaust fumes from being drawn back into the car. You'll have to decide if your solution is OK for you but I thought you should know.
And ... thank you for your service!
That's an interesting tid bit, does it have something to do with the vacuum created behind a car as it's moving? the weatherstripping is actually a pretty satisfying seal, it's about 3/8" wide, and very puffy, about 3/8". so it has a real nice squish when you tighten the housings into the car. also, considering currently i have open headers and a hole the size of Montana in my floor boards, I don't think the tail lights are where the exhaust gases are coming in from! ha!
Glad you're enjoying it!
my dad's in town this week so we should be able to drink plenty of beer and get some work done on her!
03-21-2016, 10:15 AM
#25
Registered User
Join Date: Apr 2013
Location: Tucson, Arizona USA
Posts: 576
Right on, thank you!
That's an interesting tid bit, does it have something to do with the vacuum created behind a car as it's moving? the weatherstripping is actually a pretty satisfying seal, it's about 3/8" wide, and very puffy, about 3/8". so it has a real nice squish when you tighten the housings into the car. also, considering currently i have open headers and a hole the size of Montana in my floor boards, I don't think the tail lights are where the exhaust gases are coming in from! ha!
Glad you're enjoying it!
my dad's in town this week so we should be able to drink plenty of beer and get some work done on her!
I just restored a 260Z and found that if I didn't keep a list of things needing attention, I soon forget the less obvious ones. That is until something bad happened to make me remember ...


