DriftRehab's 280z Build
 07-11-2015, 09:01 PM
#1
Registered User
Thread Starter

Join Date: Jul 2015
Posts: 15
DriftRehab's 280z Build
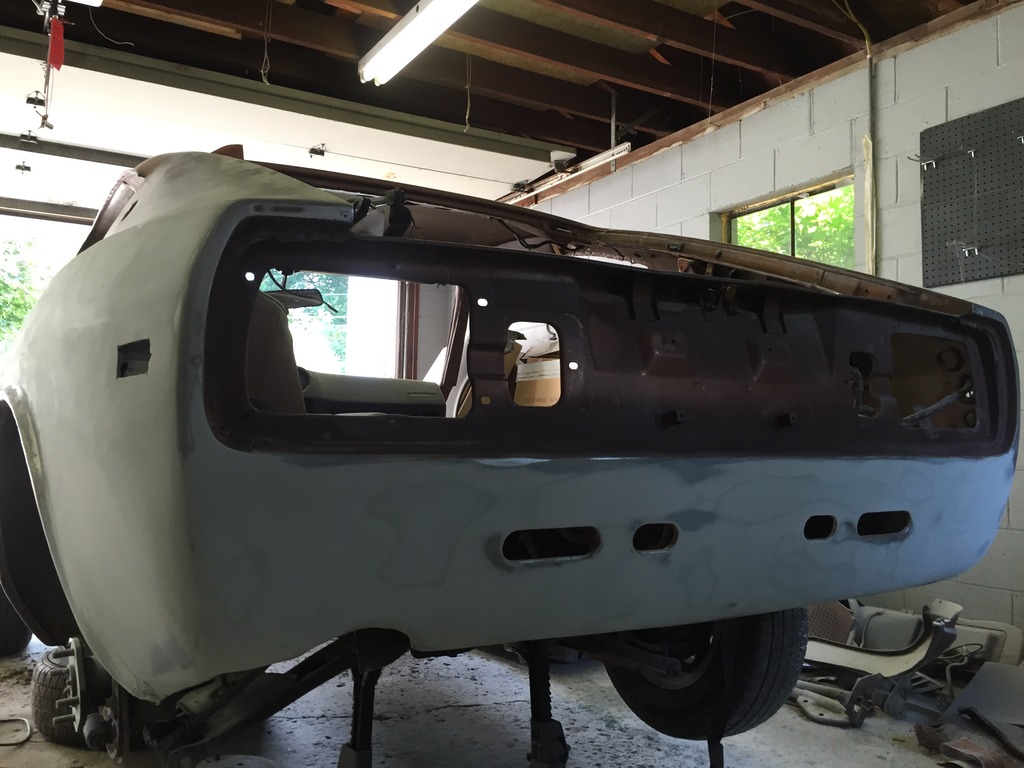
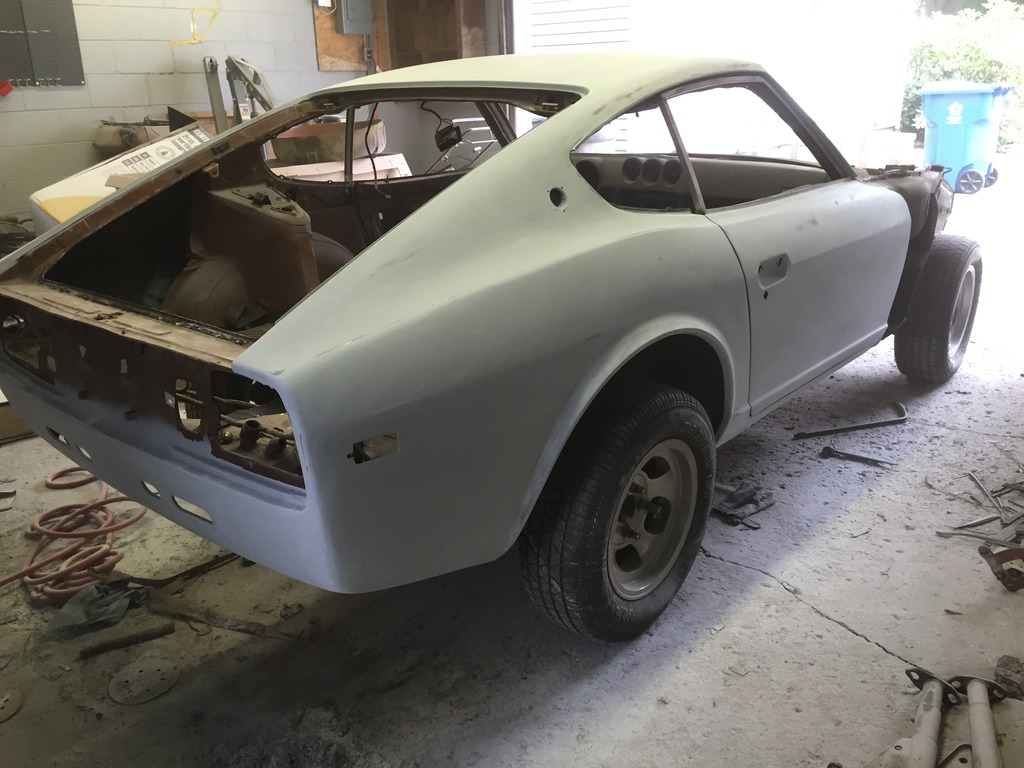
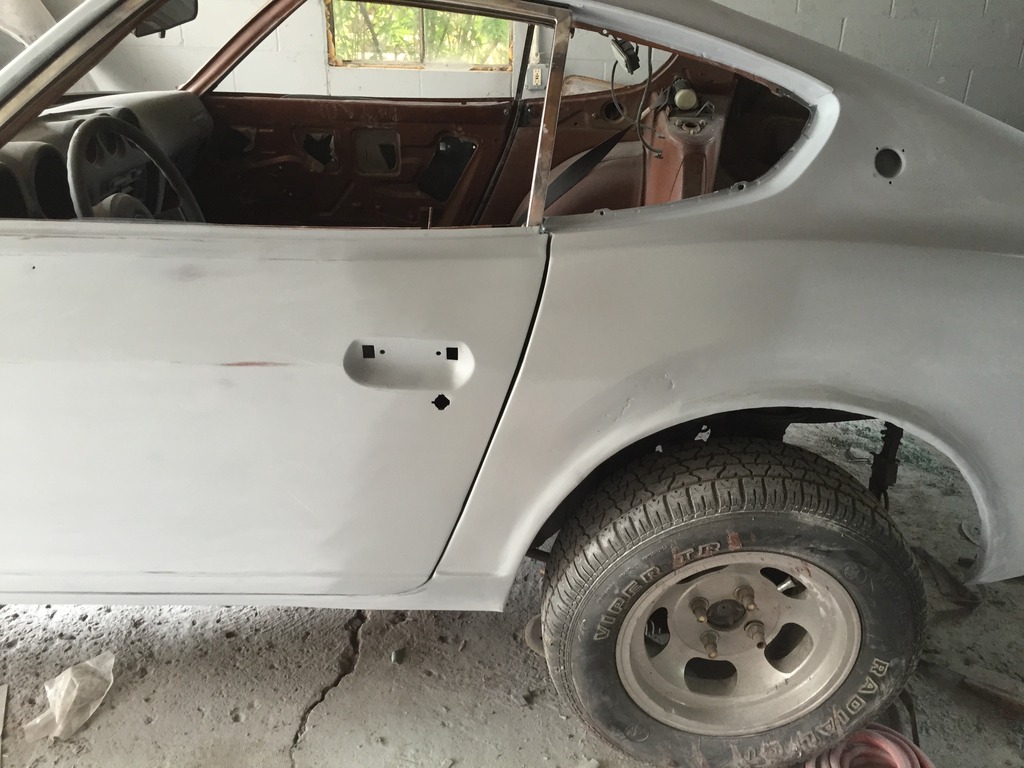
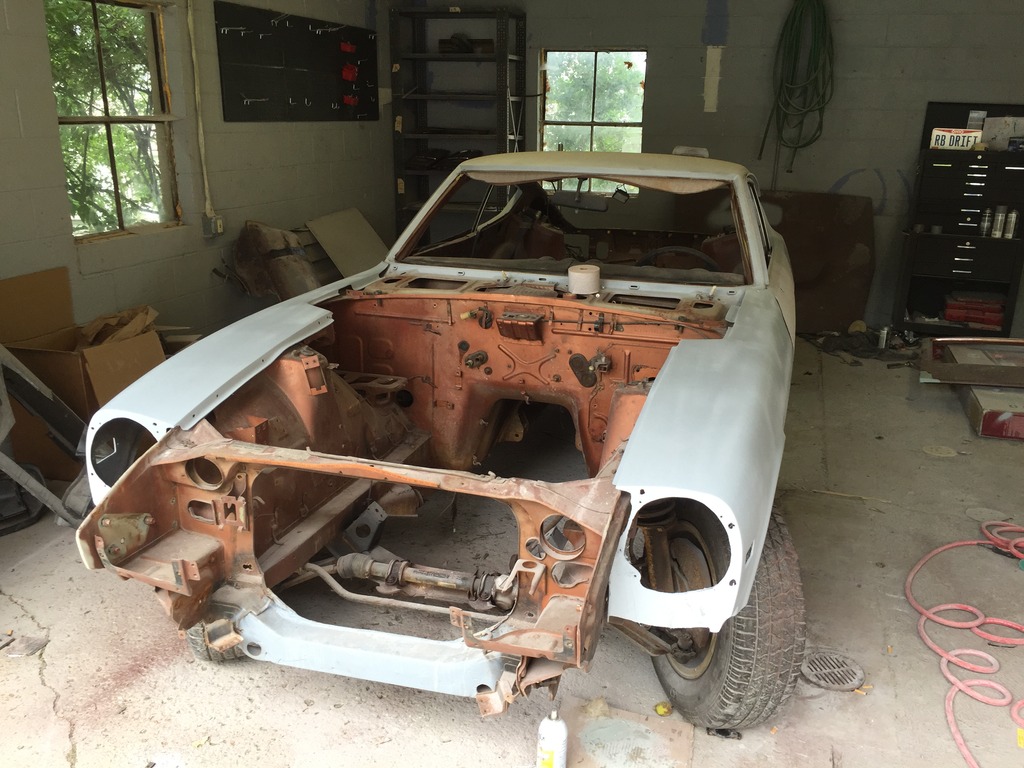
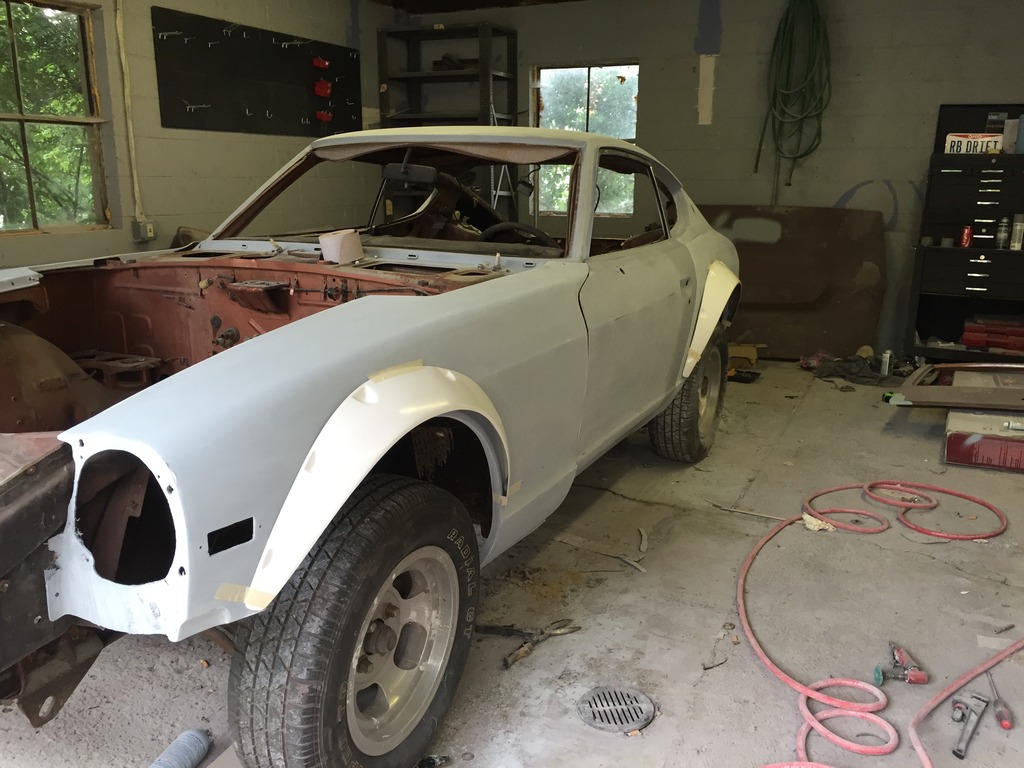
Hello everyone, I'm new here. A couple months ago I picked up a 76 280z. This is my first z build, I'm usually building s13 and s14 platforms. I found the car 3 hours south in southern Ohio. It was sitting in the previous owner's garage for 10 years and he had acquired from his friend who past away that was in the process of restoring the car and it also sat in his garage for 10 years.
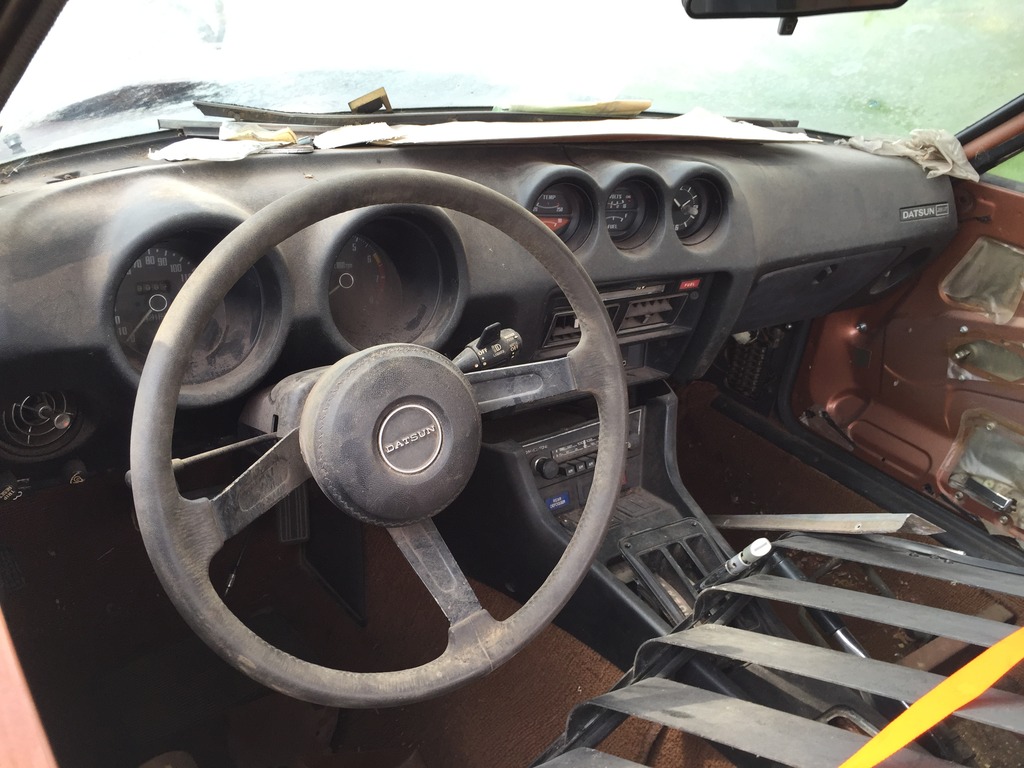
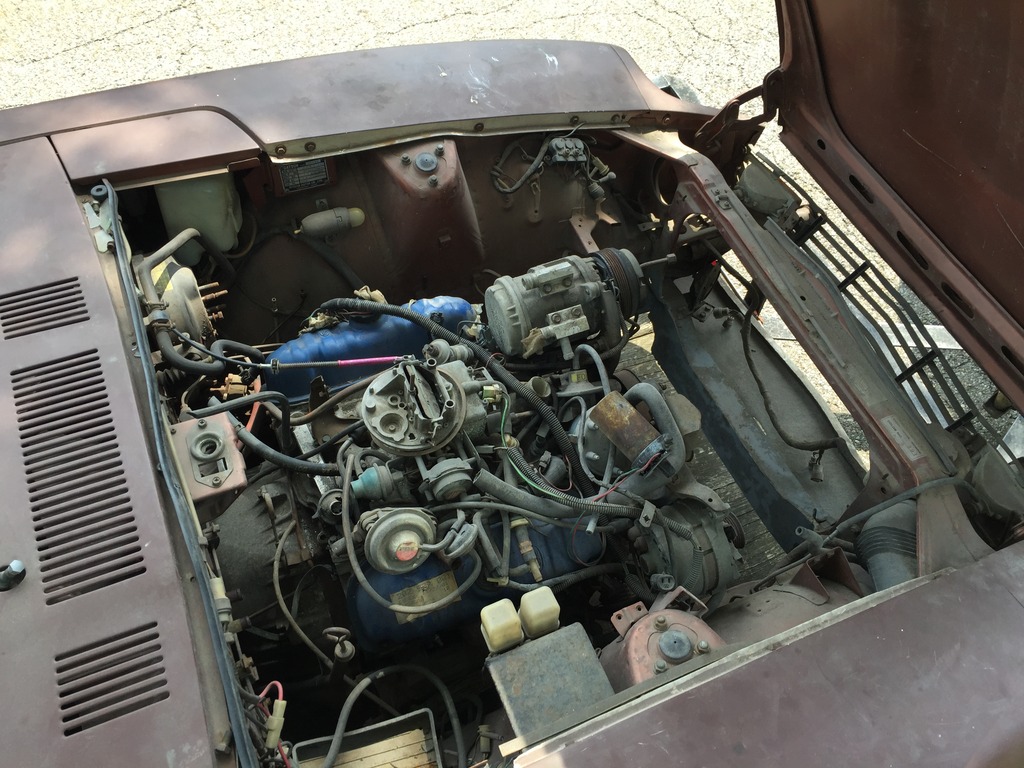
When I got the car it had some Ford v6 bolted in it but no wiring hooked up, leading me to believe the swap never ran. My plan is to swap an rb25det into it after I've completed the body work.
And now the pictures and story of where it started and where I'm at now.
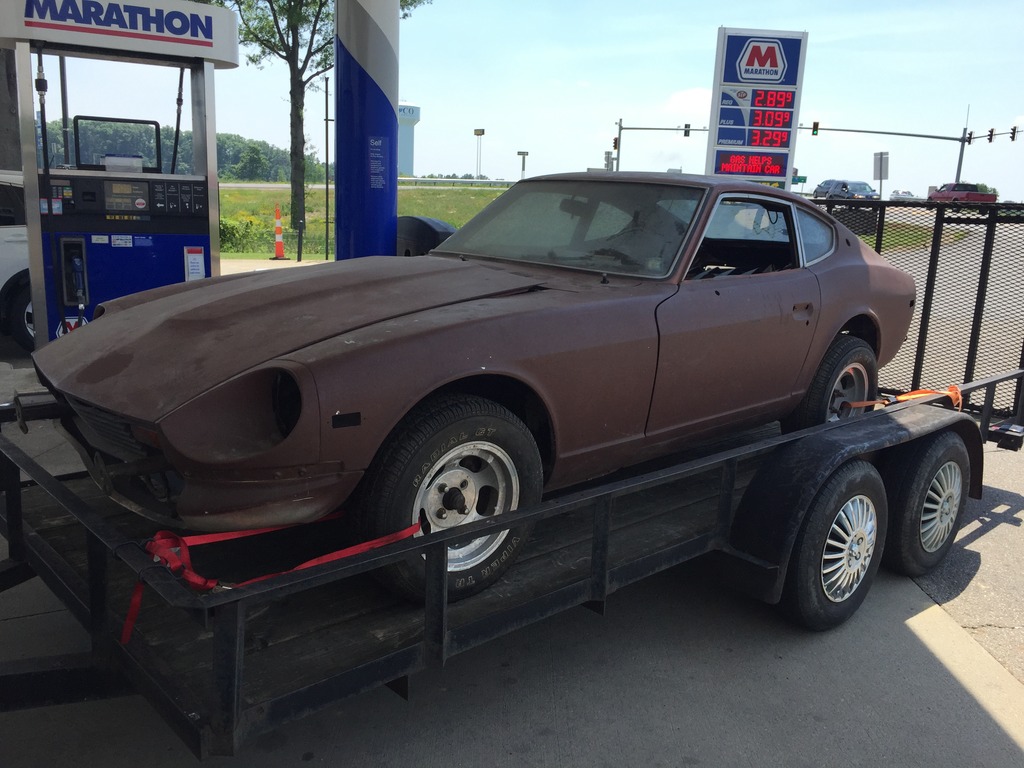
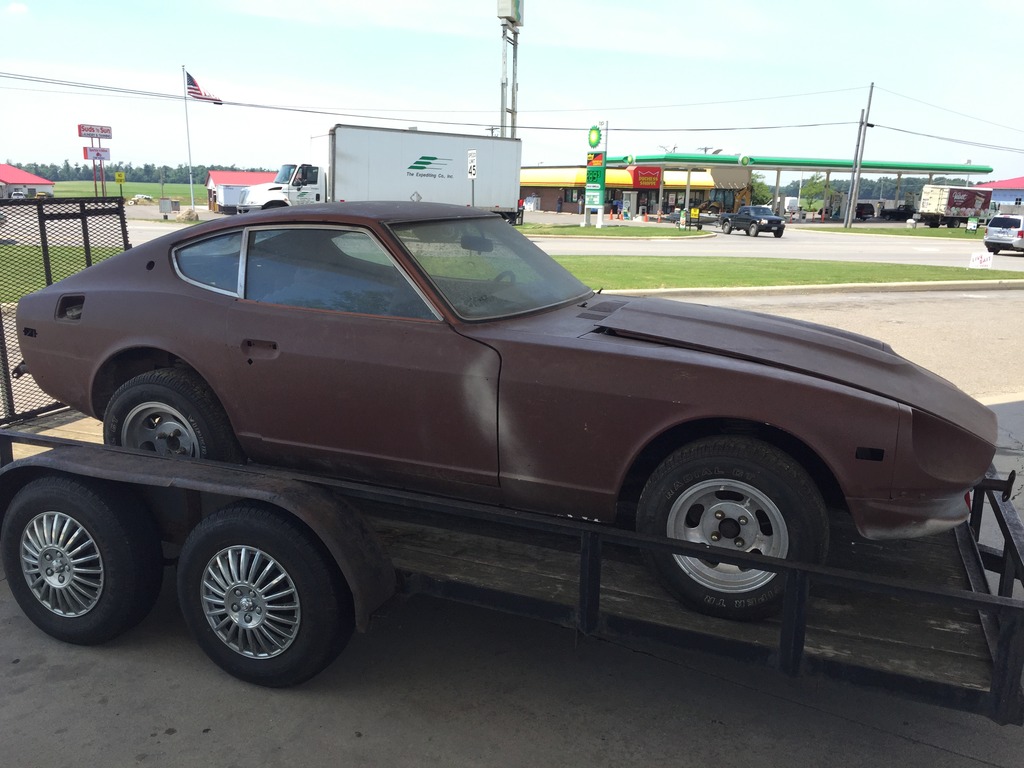

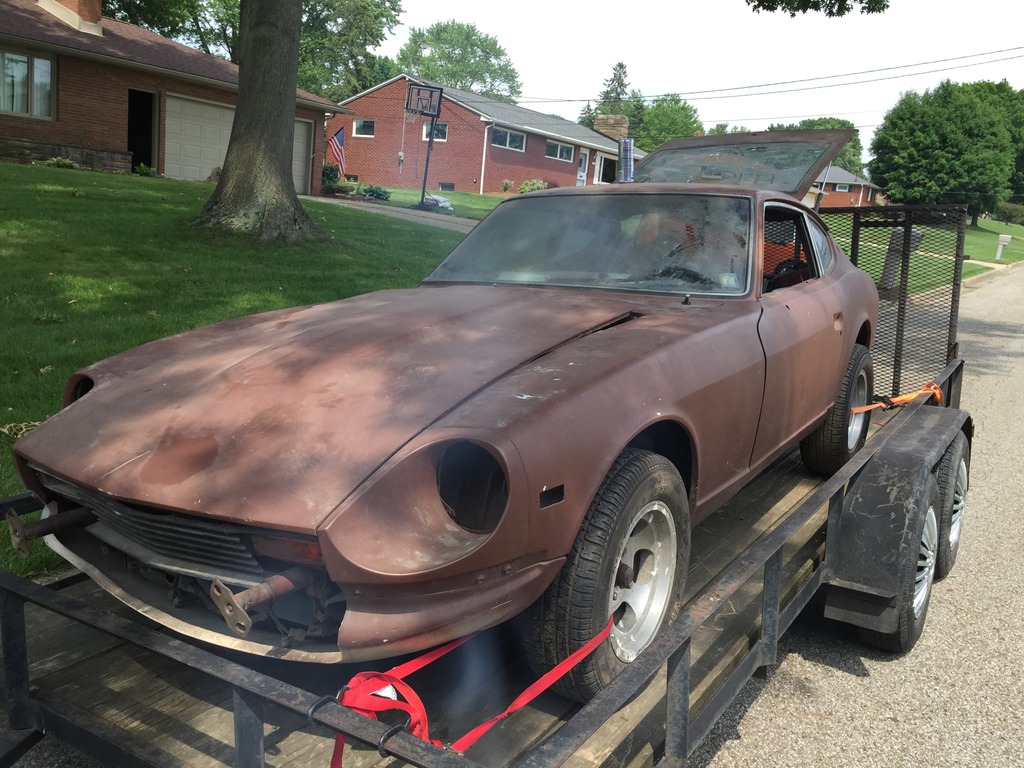
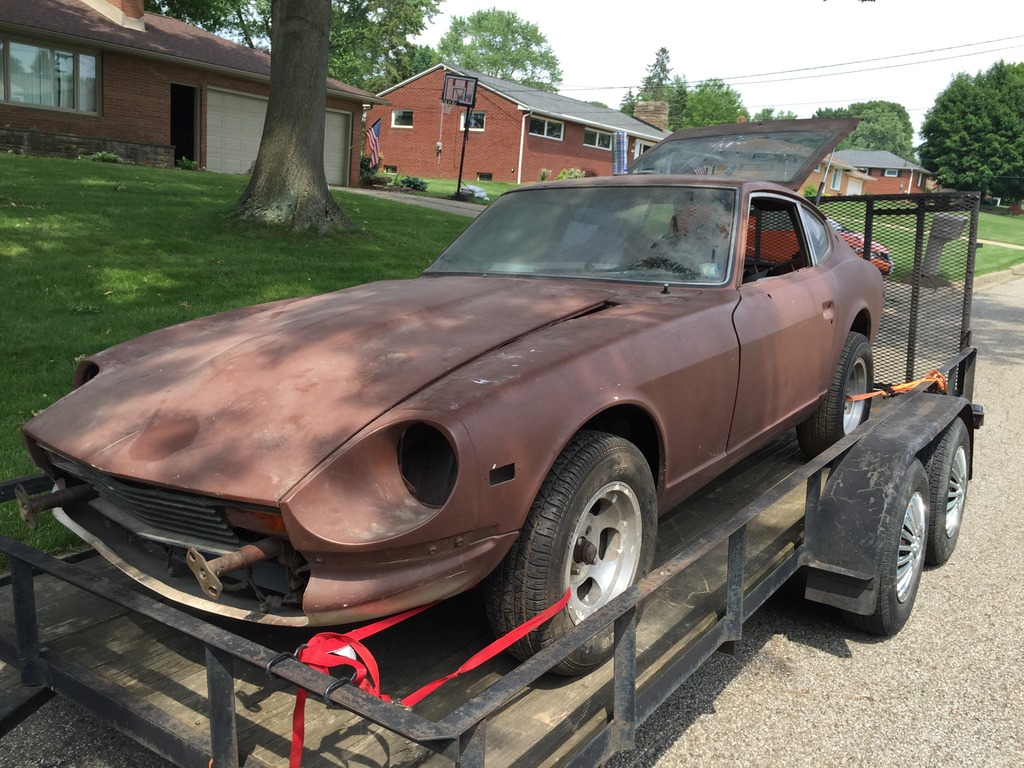
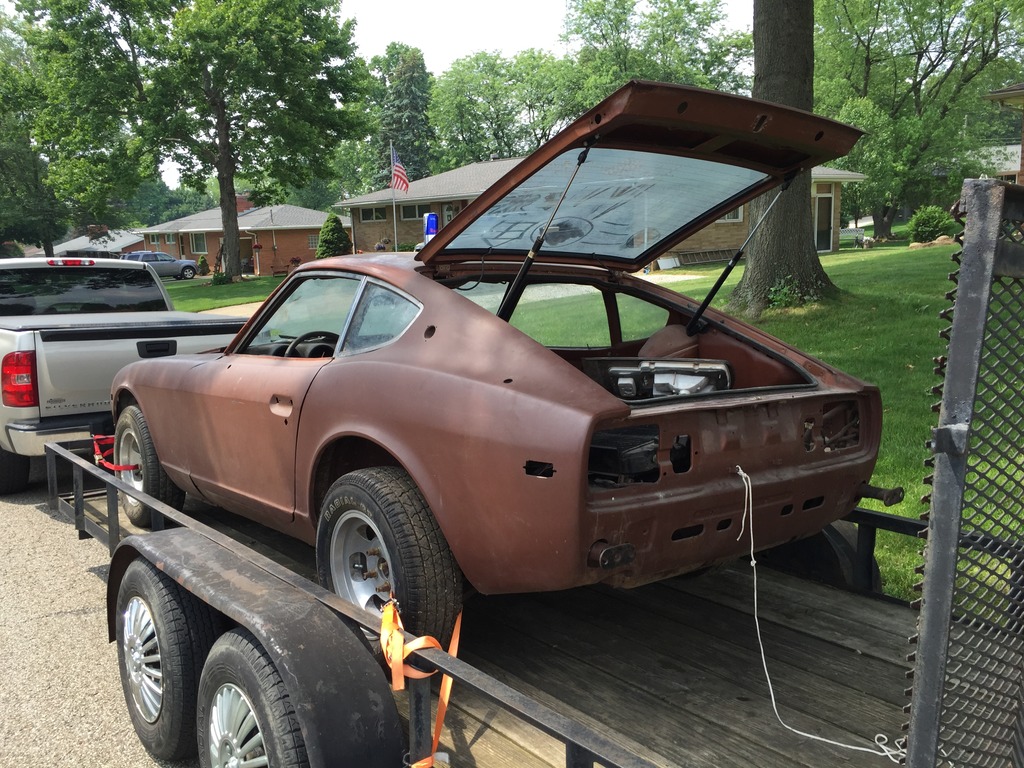
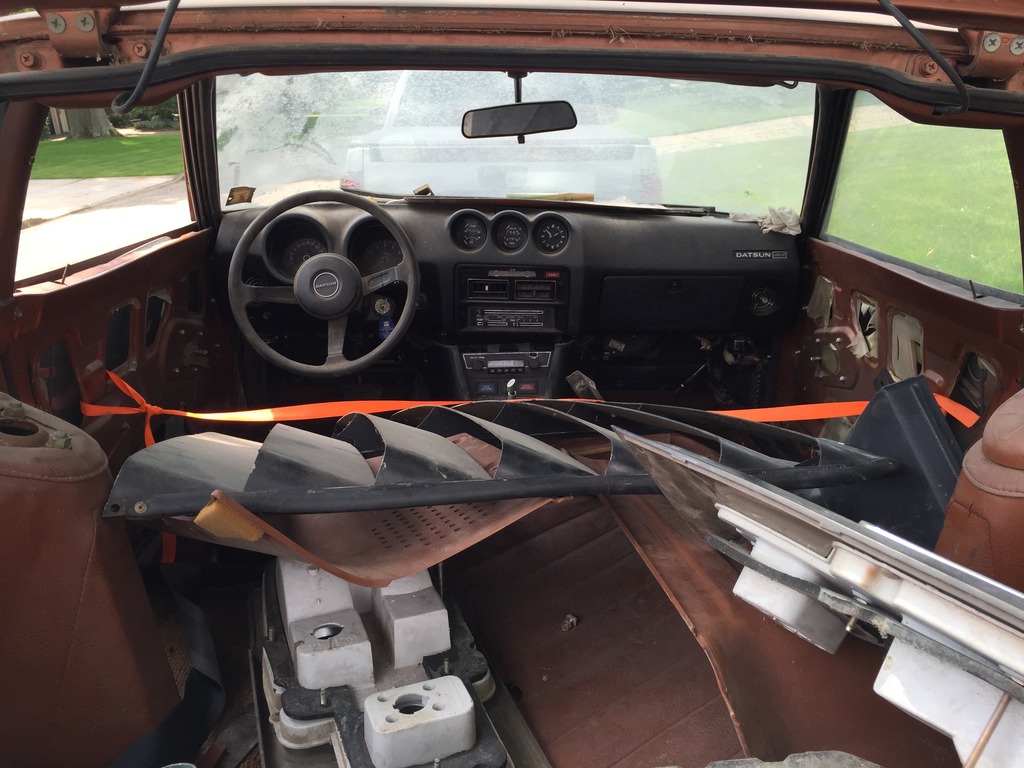
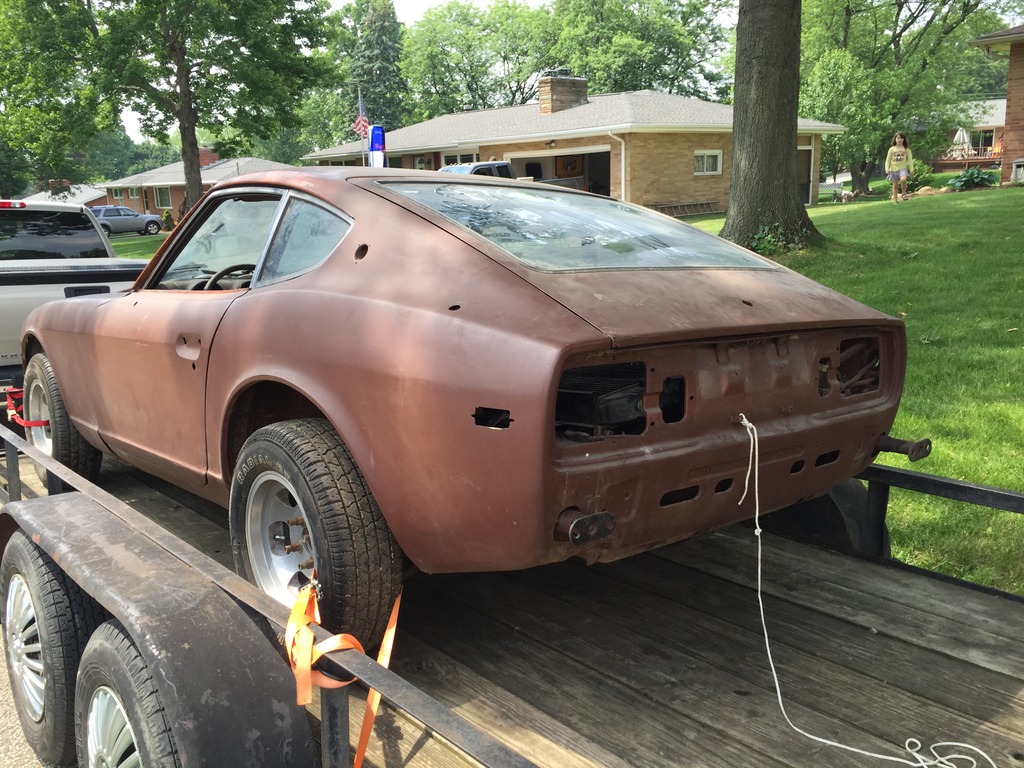
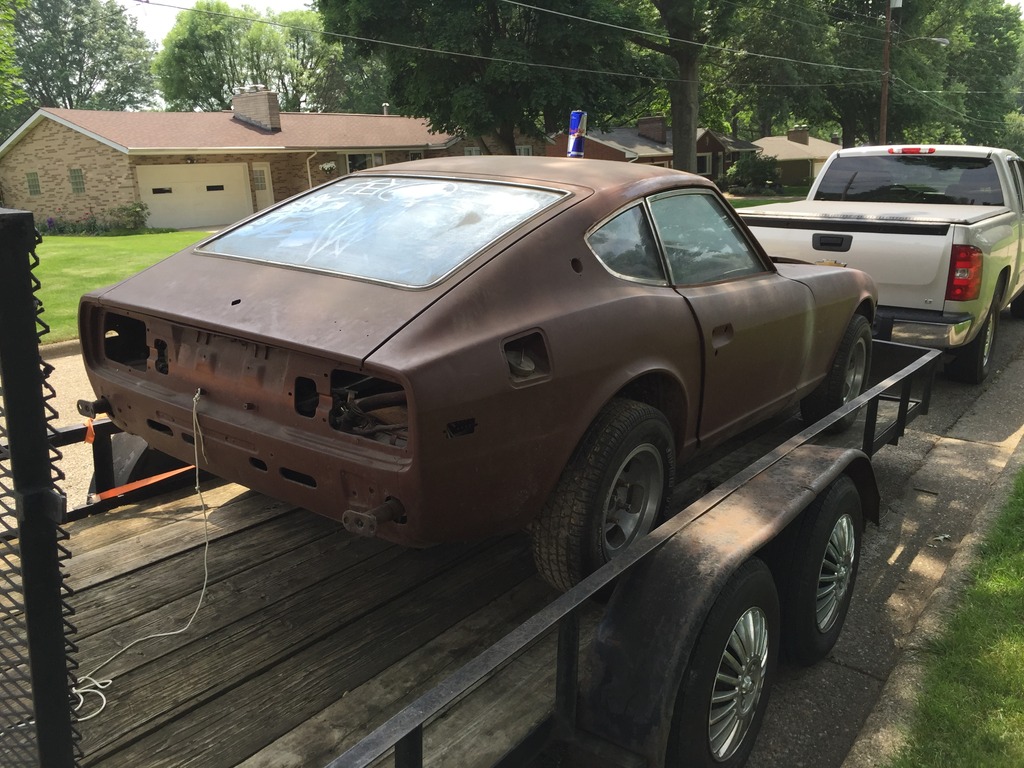

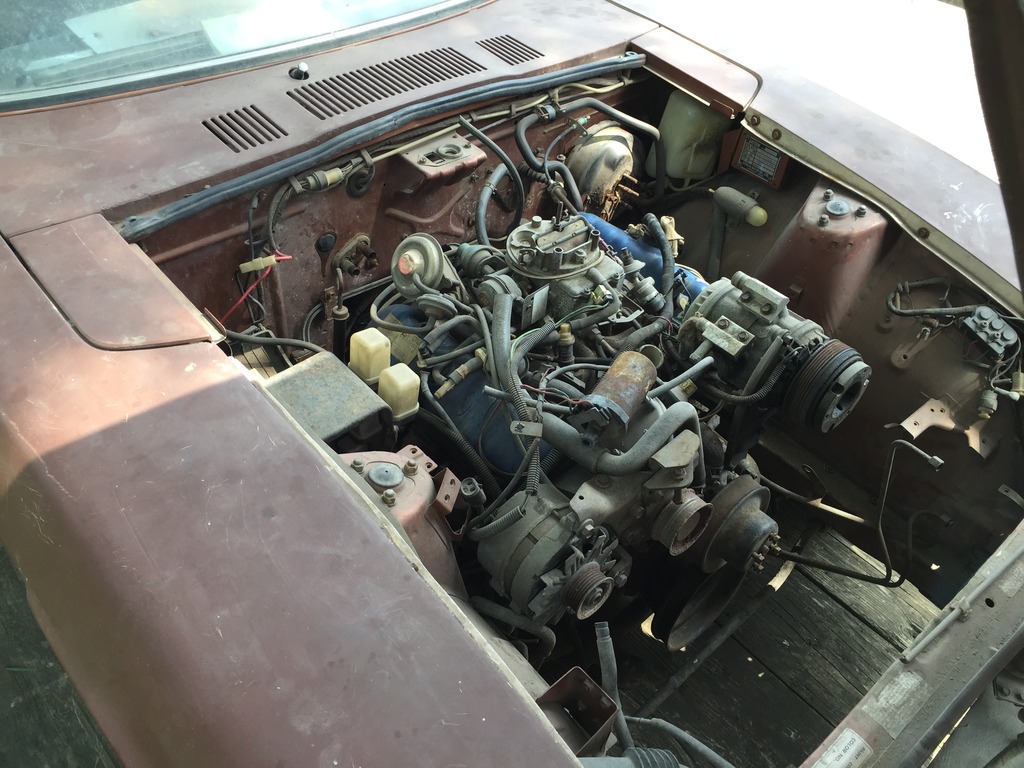
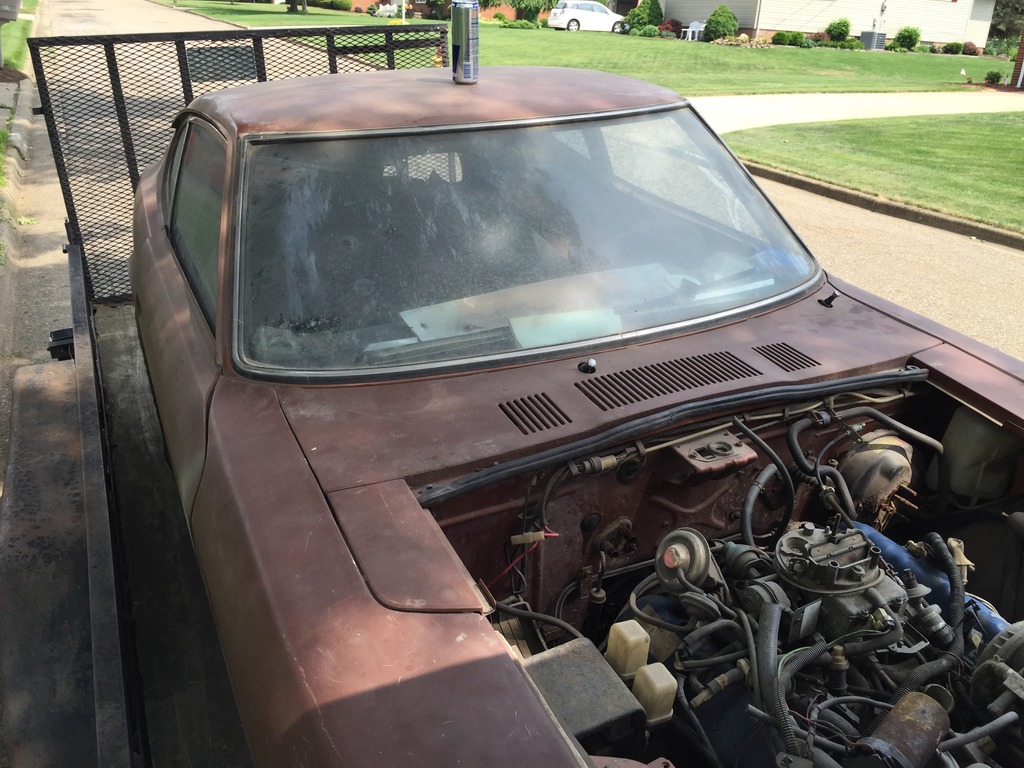
What the car looked like when I got it home, along with a truck load full of parts from every area of the car. At first glance it looked really clean.
When I got the car it had some Ford v6 bolted in it but no wiring hooked up, leading me to believe the swap never ran. My plan is to swap an rb25det into it after I've completed the body work.
And now the pictures and story of where it started and where I'm at now.


What the car looked like when I got it home, along with a truck load full of parts from every area of the car. At first glance it looked really clean.


 07-11-2015, 09:04 PM
#3
Registered User
Thread Starter
Join Date: Jul 2015
Posts: 15


 07-11-2015, 09:12 PM
#5
Registered User
Thread Starter
Join Date: Jul 2015
Posts: 15

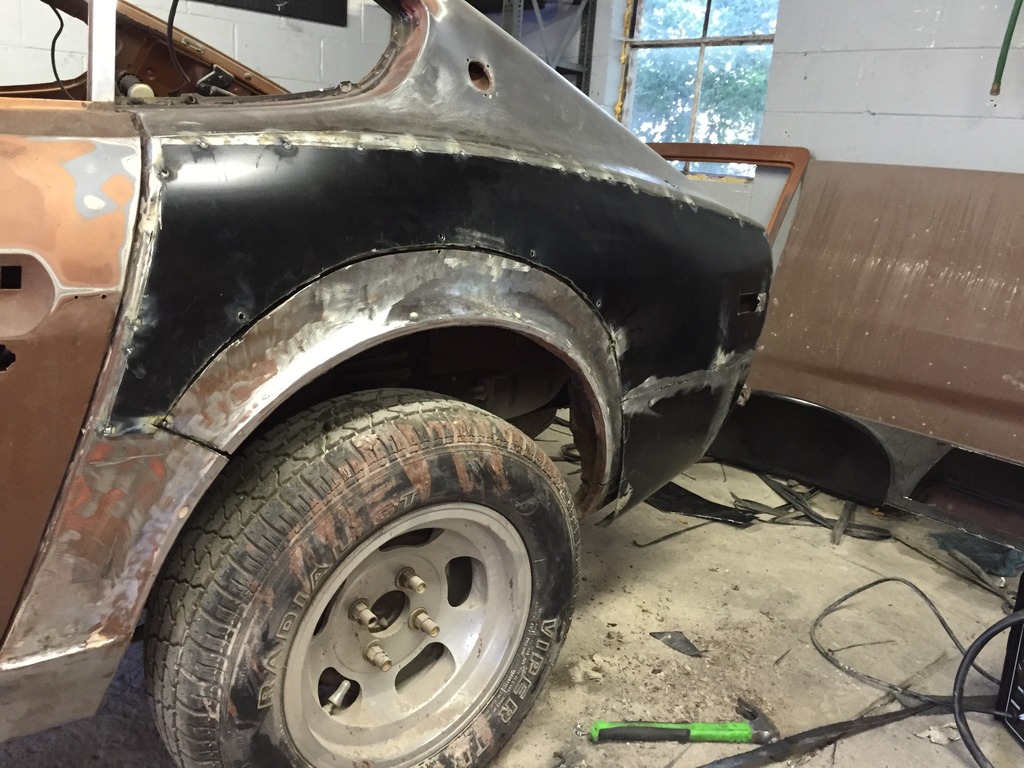
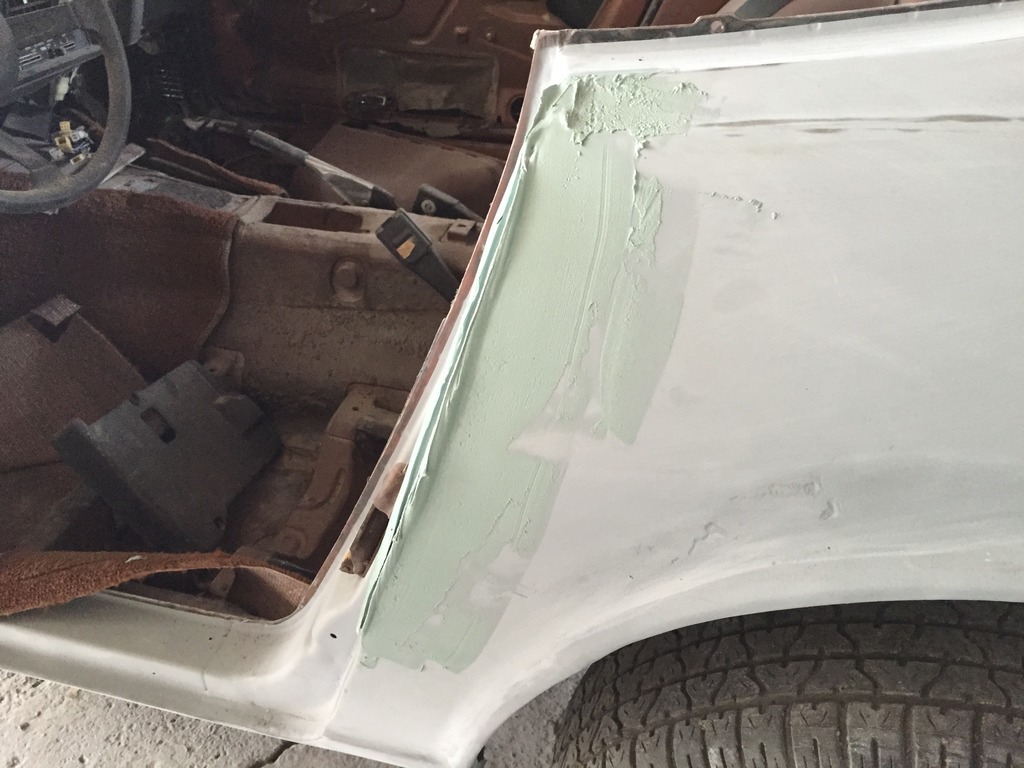
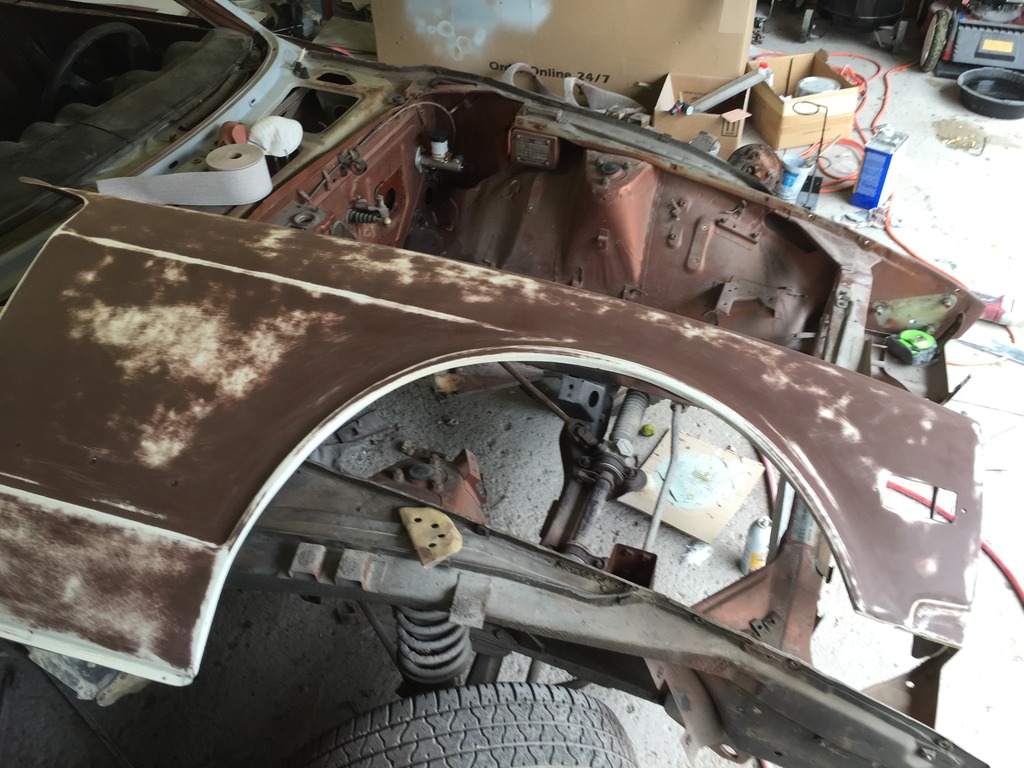
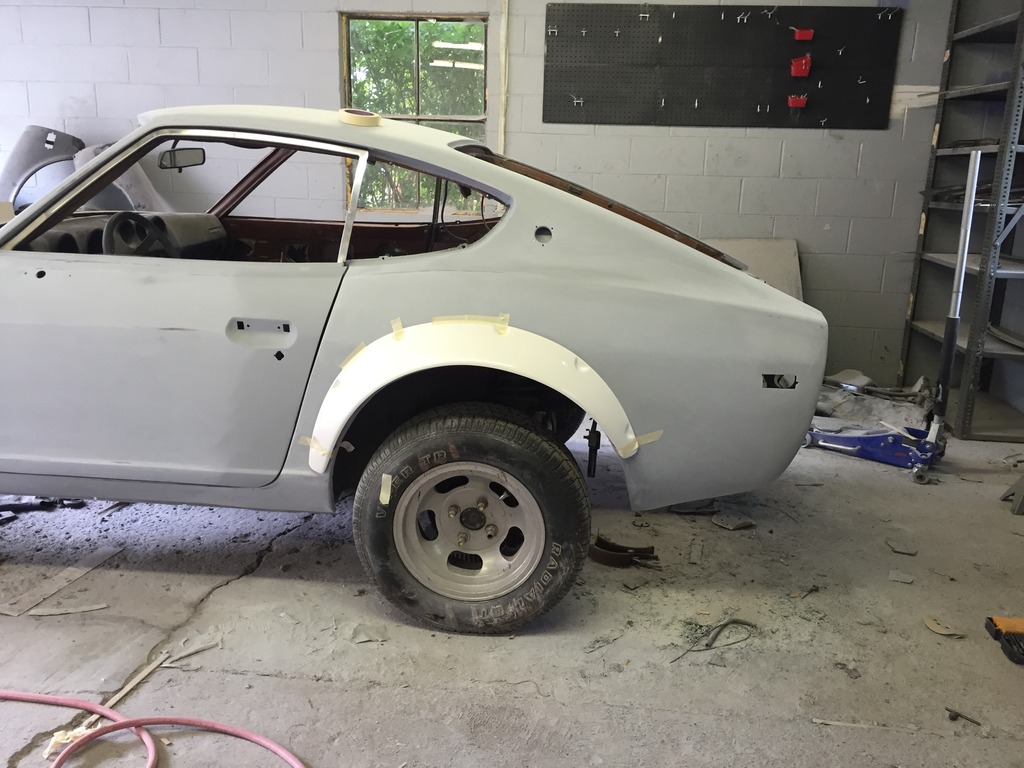
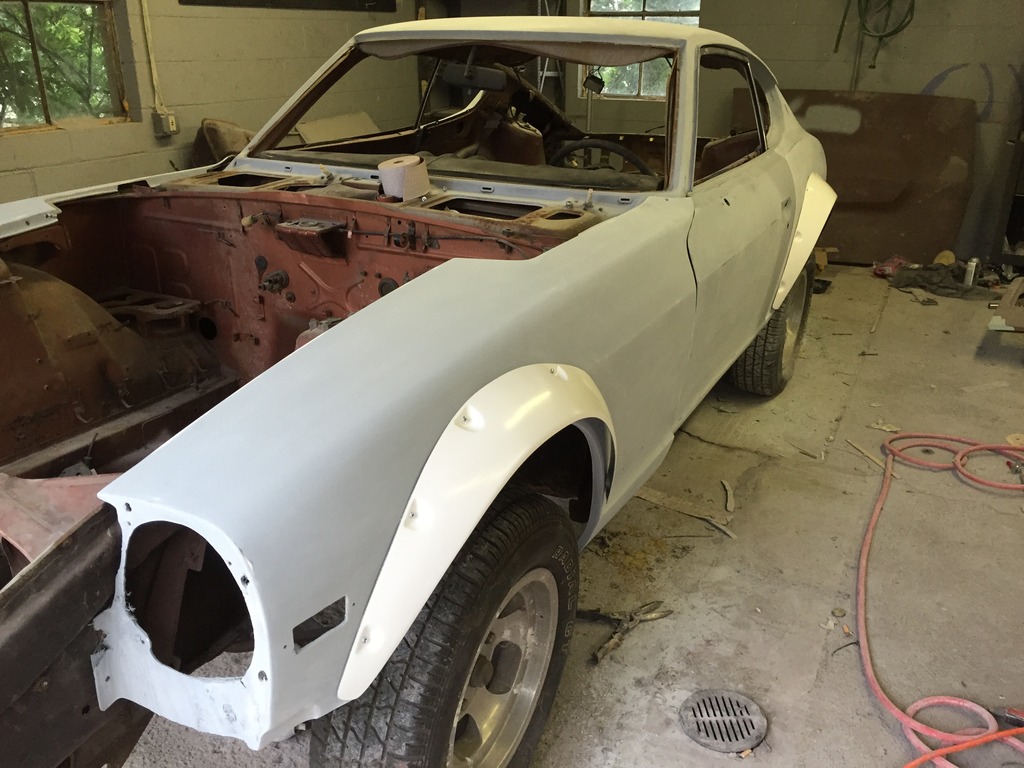
I noticed the quarter panels had some bubbles and cracks and I could see a patch from inside the rear hatch area. I threw some paint stripper on to see what was underneath.


Not good


Passenger side was perfect except a few dents. The driver's side on the other hand is a mess. An old school patch was brazed in and the entire quarter was pounded in and then shaped with way to much filler. Time to replace the quarter!
07-11-2015, 09:15 PM
#6
Registered User
Thread Starter
Join Date: Jul 2015
Posts: 15
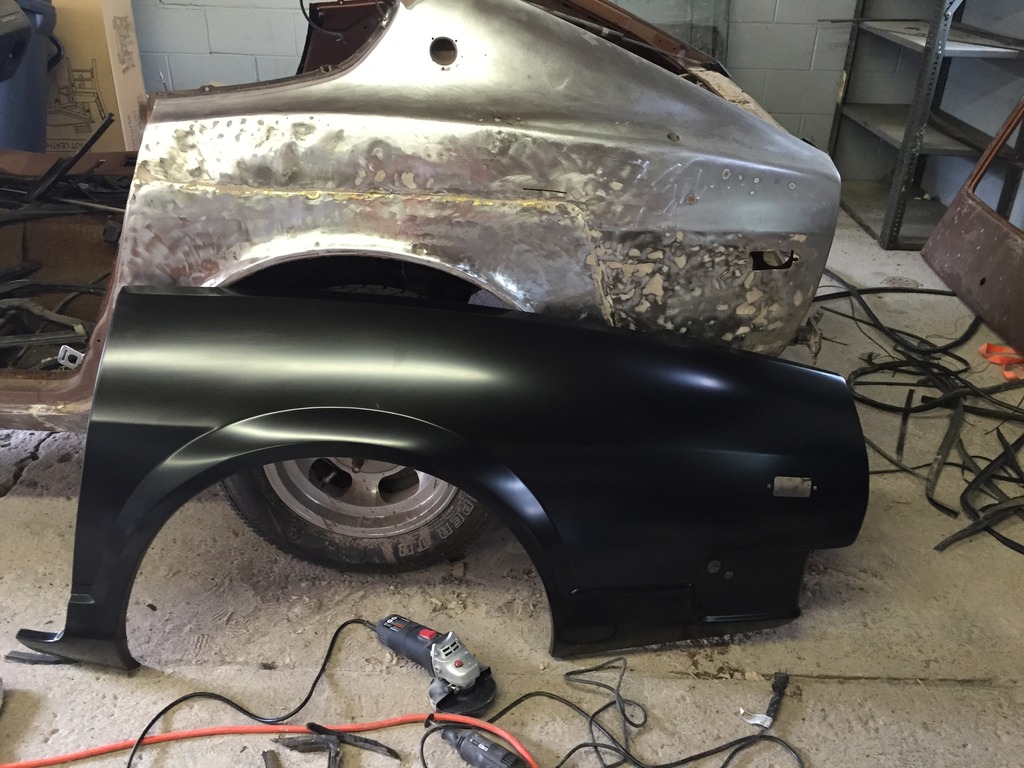
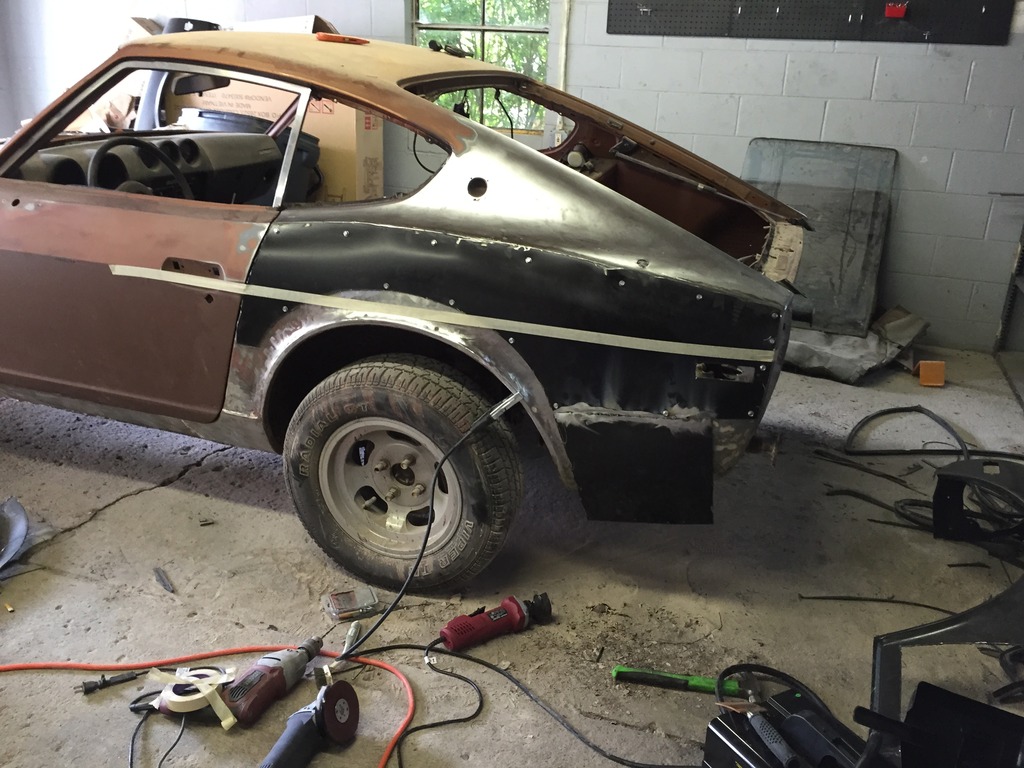
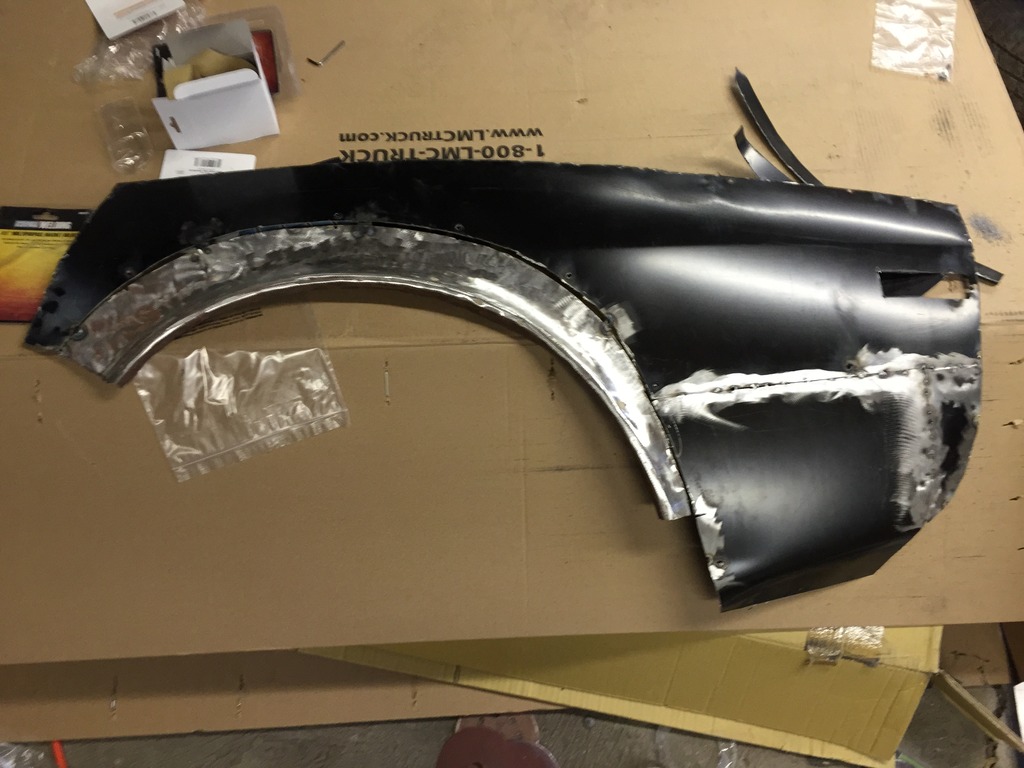
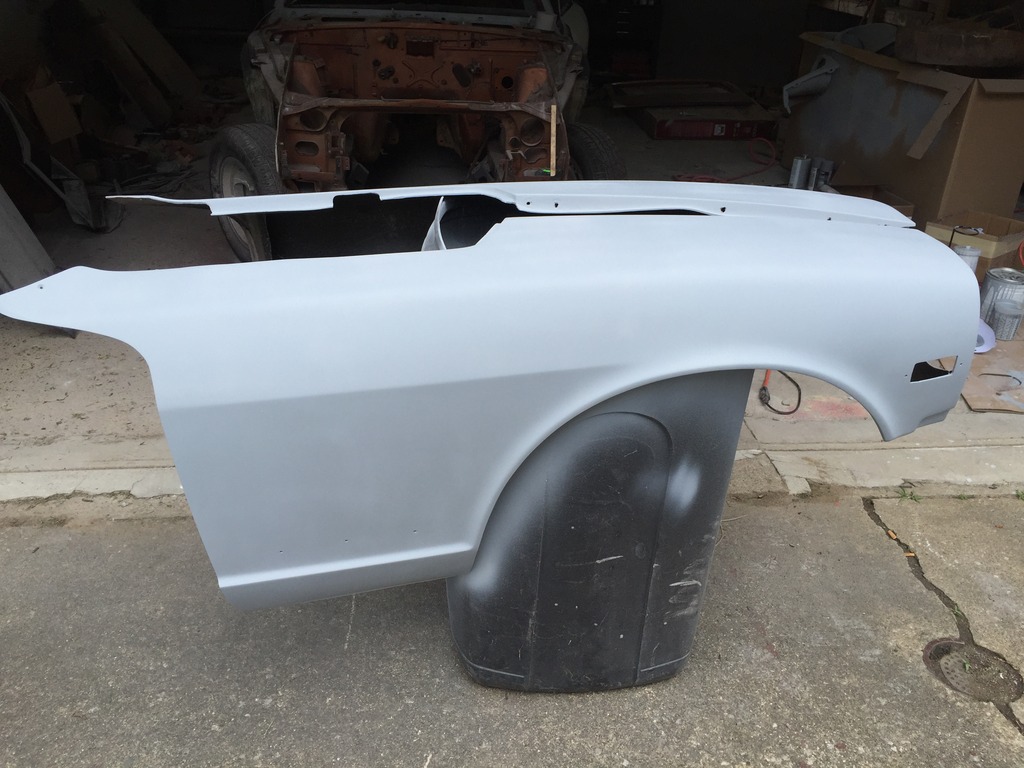
I ordered a later model 280zx quarter hoping it would be a close fit, but it wasn't anywhere close. Since I couldn't find a new 280z quarter I figured I'd make this one work. Some trimming, pounding and welding later and it was beginning to look like a quarter panel again. It even had a body line!


 07-11-2015, 09:18 PM
#7
Registered User
Thread Starter
Join Date: Jul 2015
Posts: 15
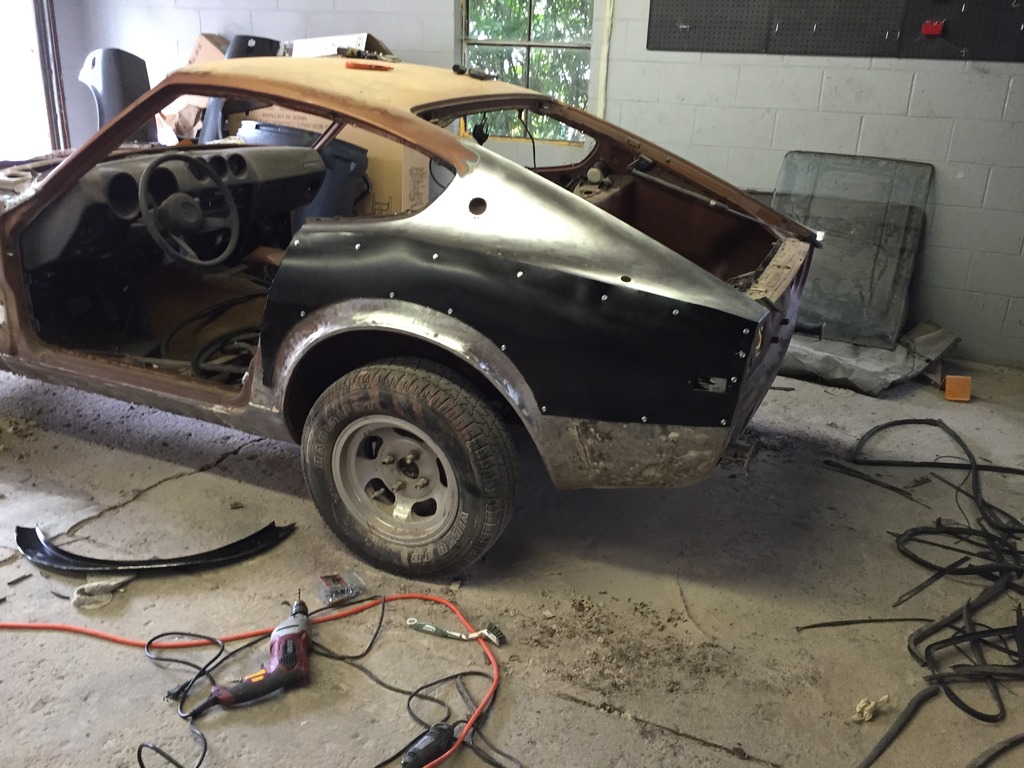
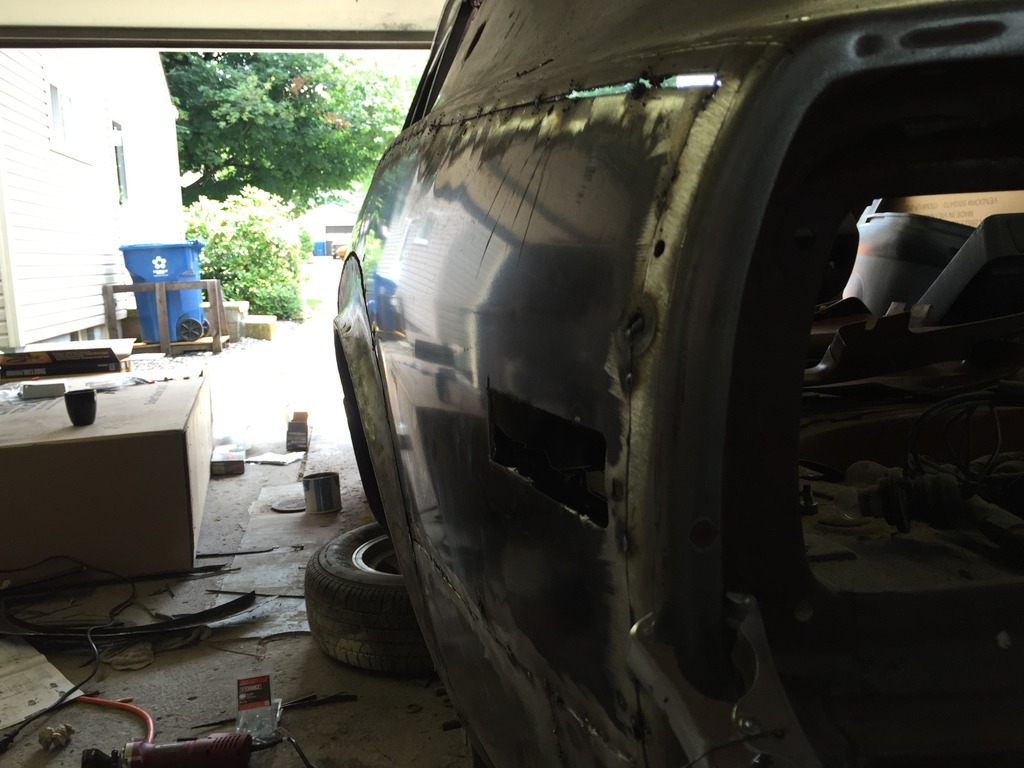
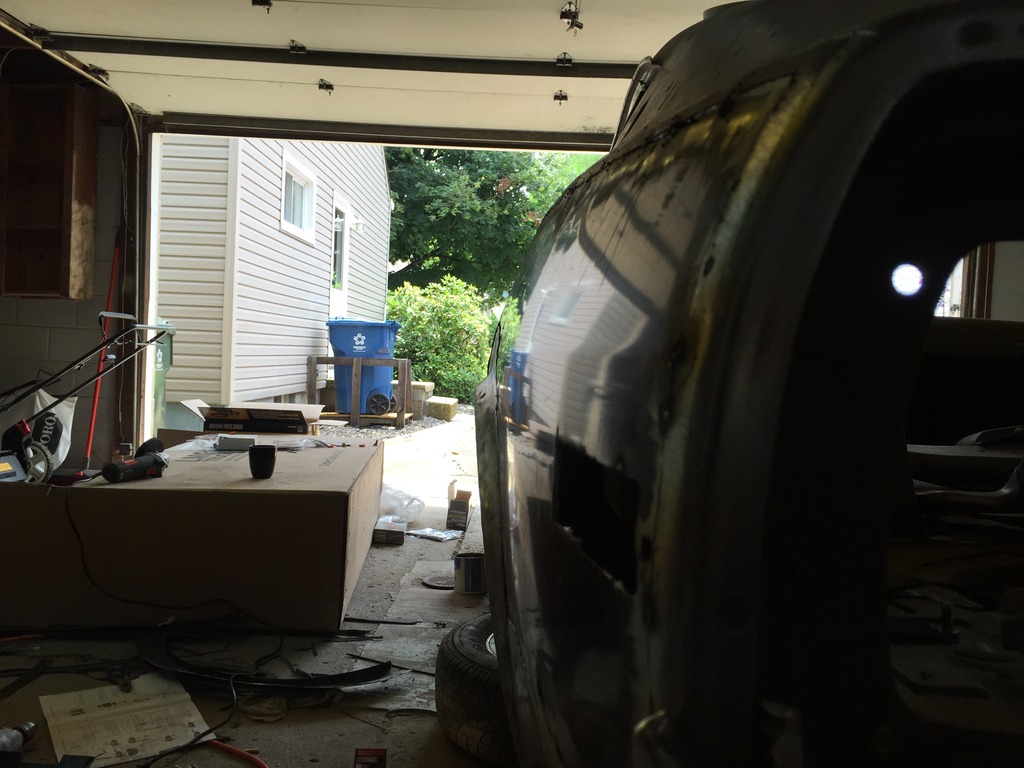
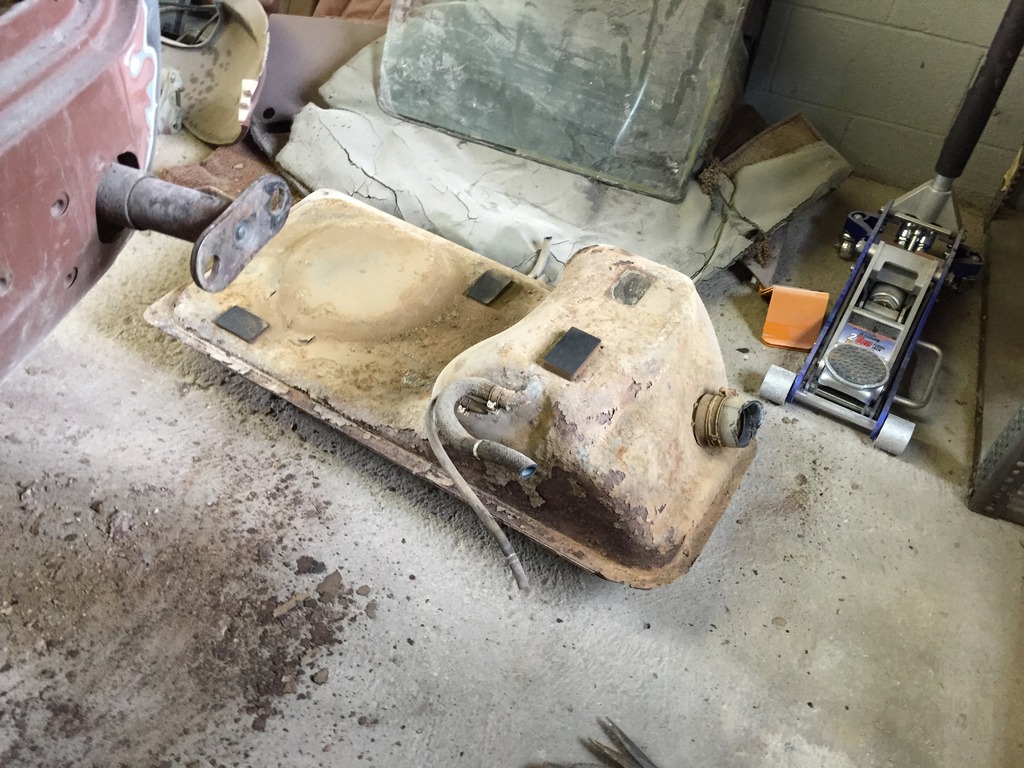
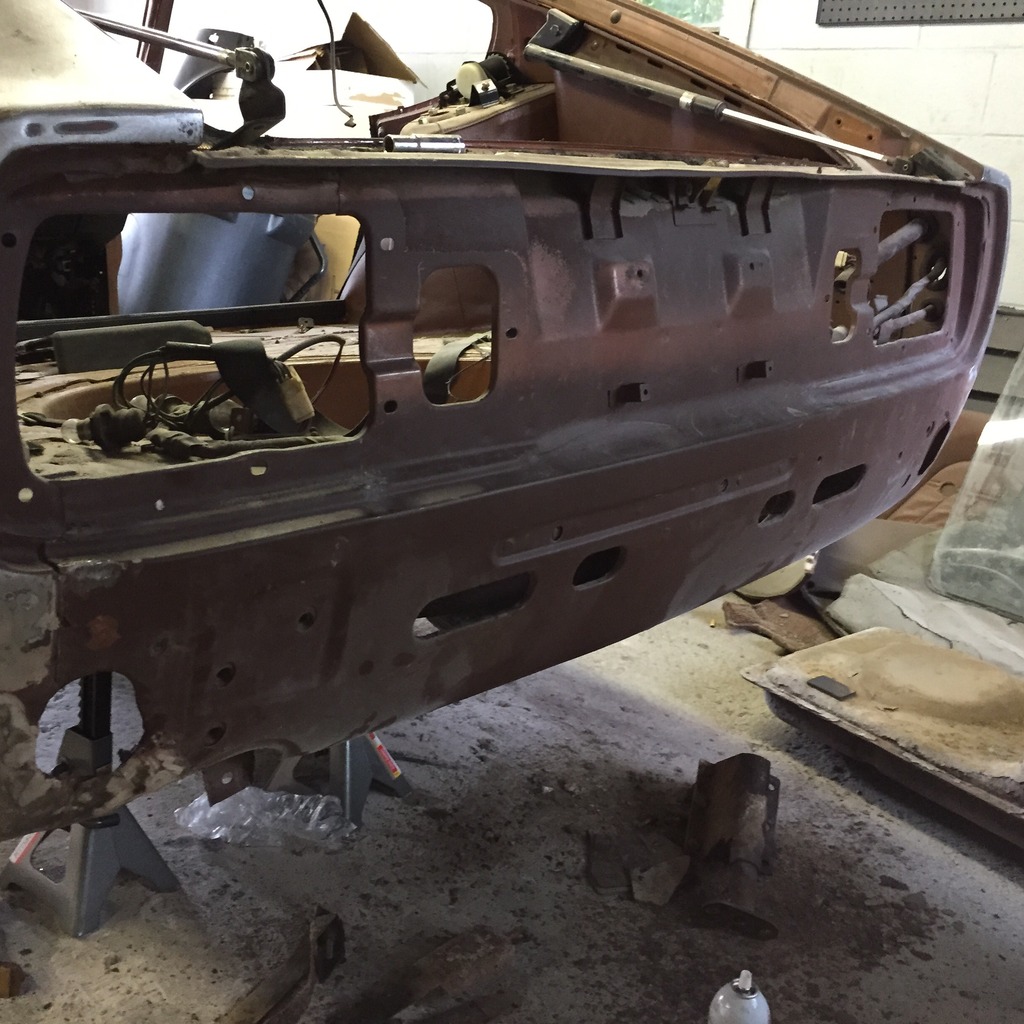
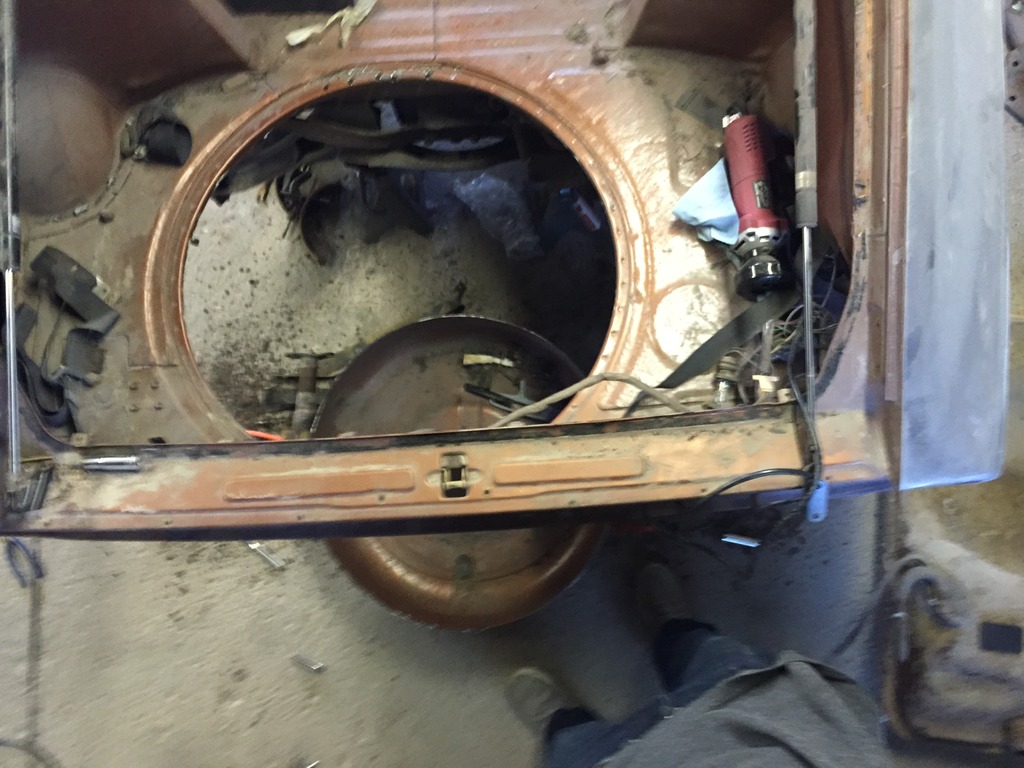
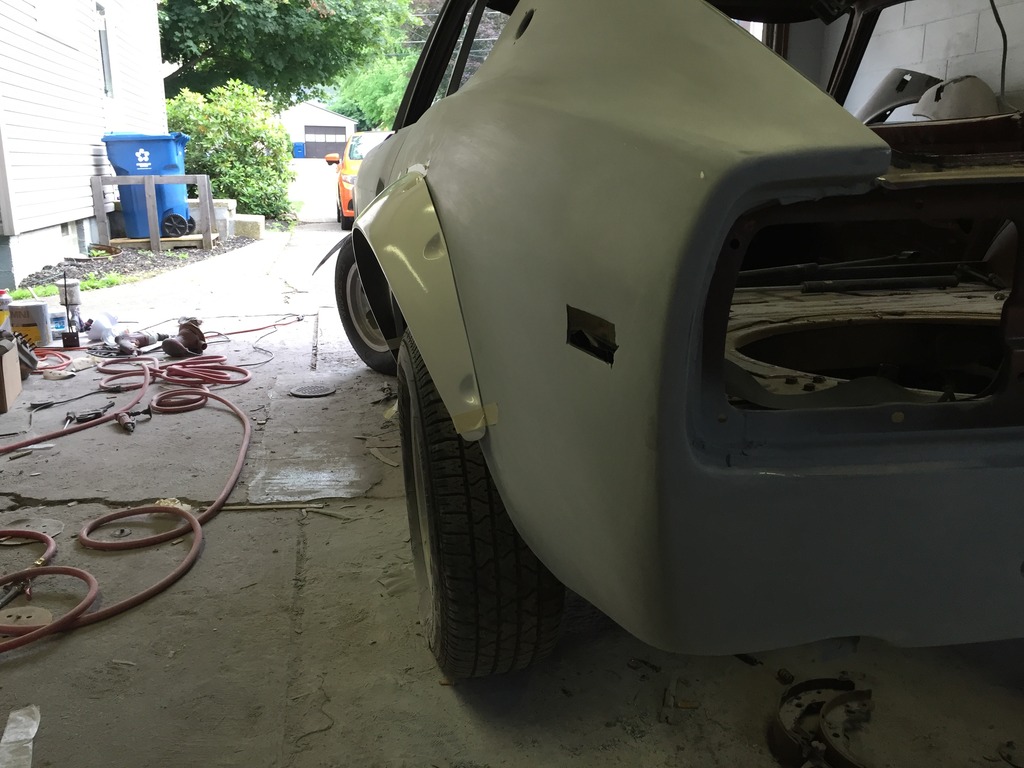
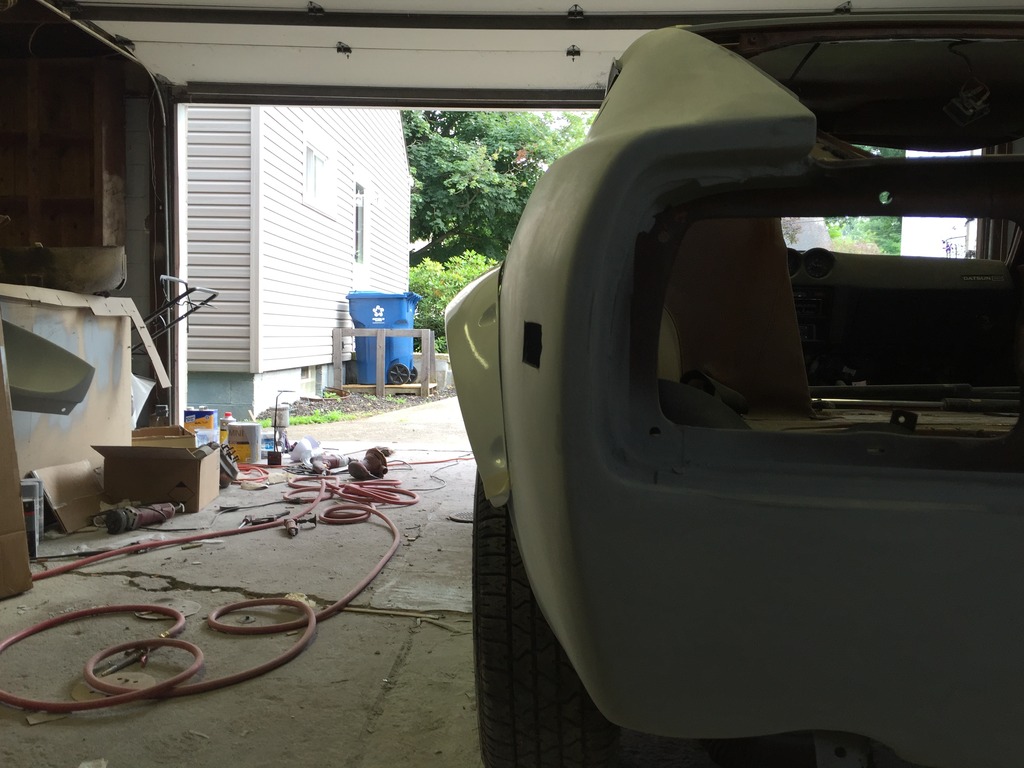
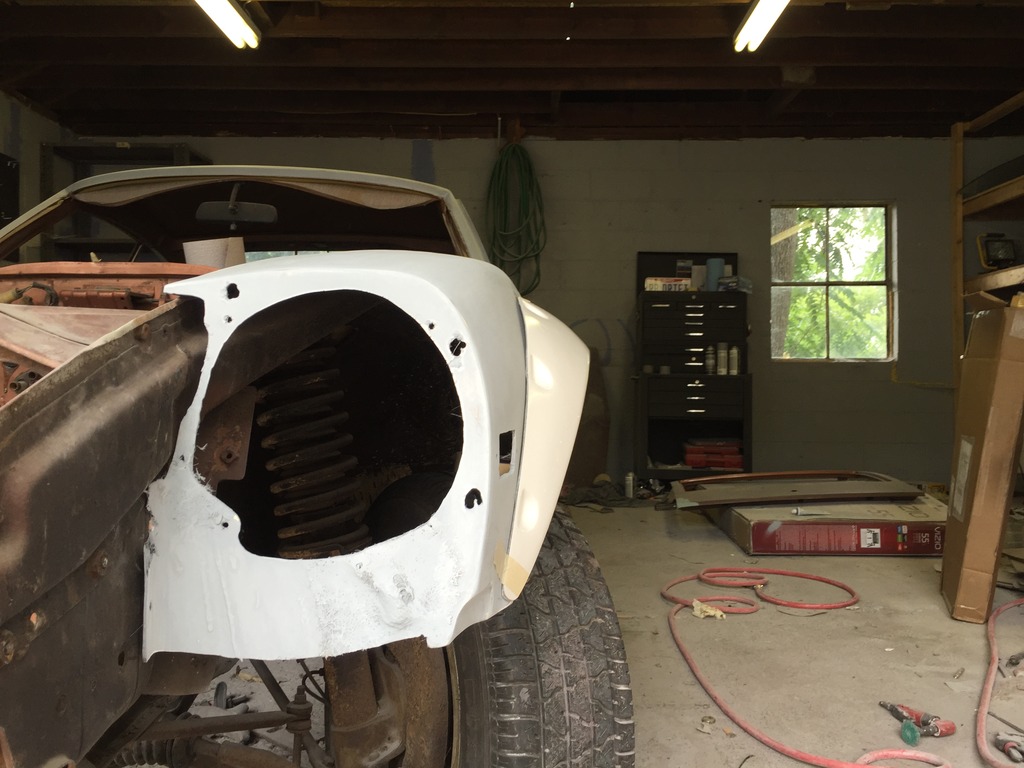
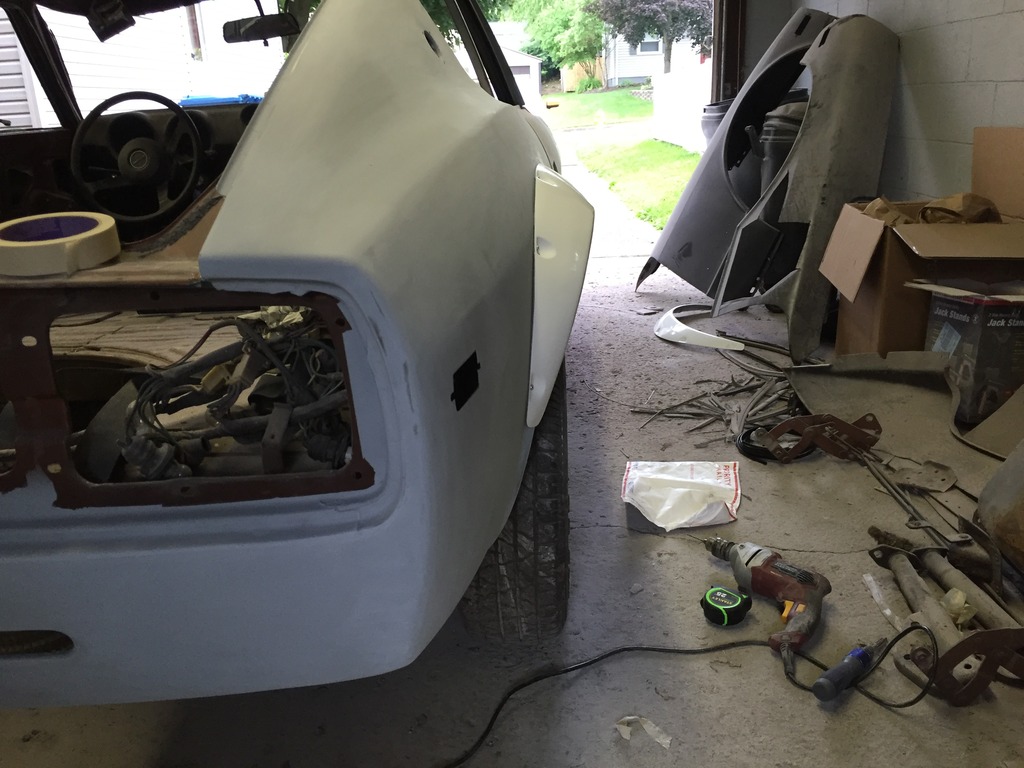
Dropped the fuel tank and pulled the rear bumper shocks. Also cut out the spare tire well in prep for a fuel cell.
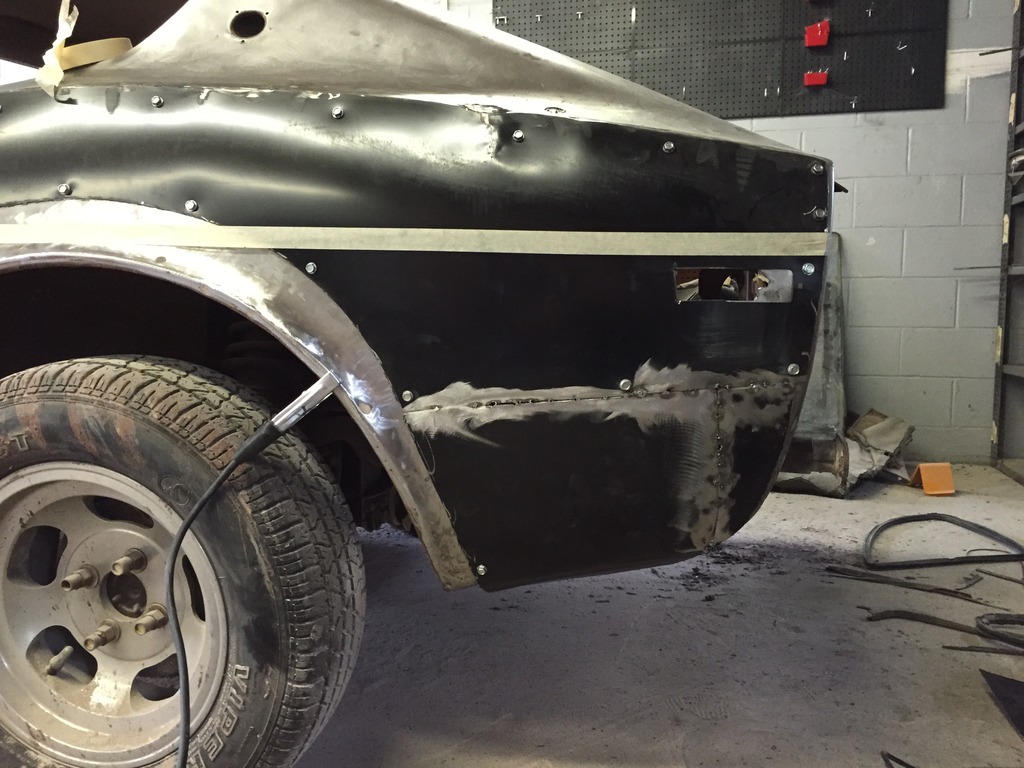
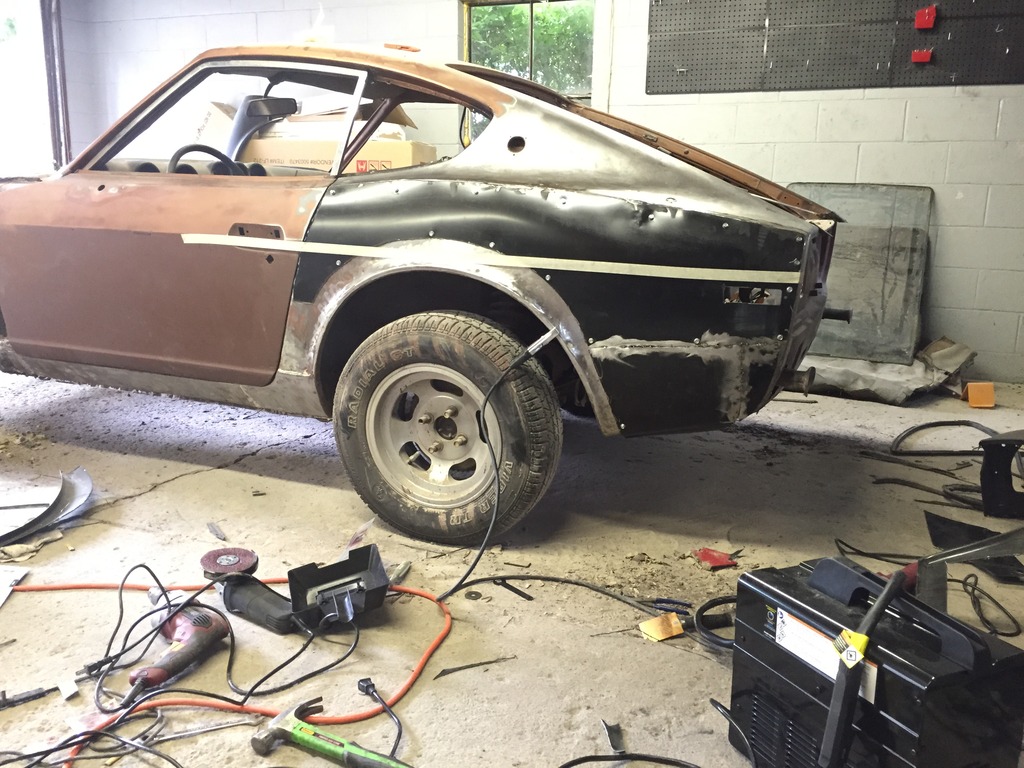
Now that all the welding was done getting the quarter in it was time to start roughing it in and getting the rest of the body prepped.
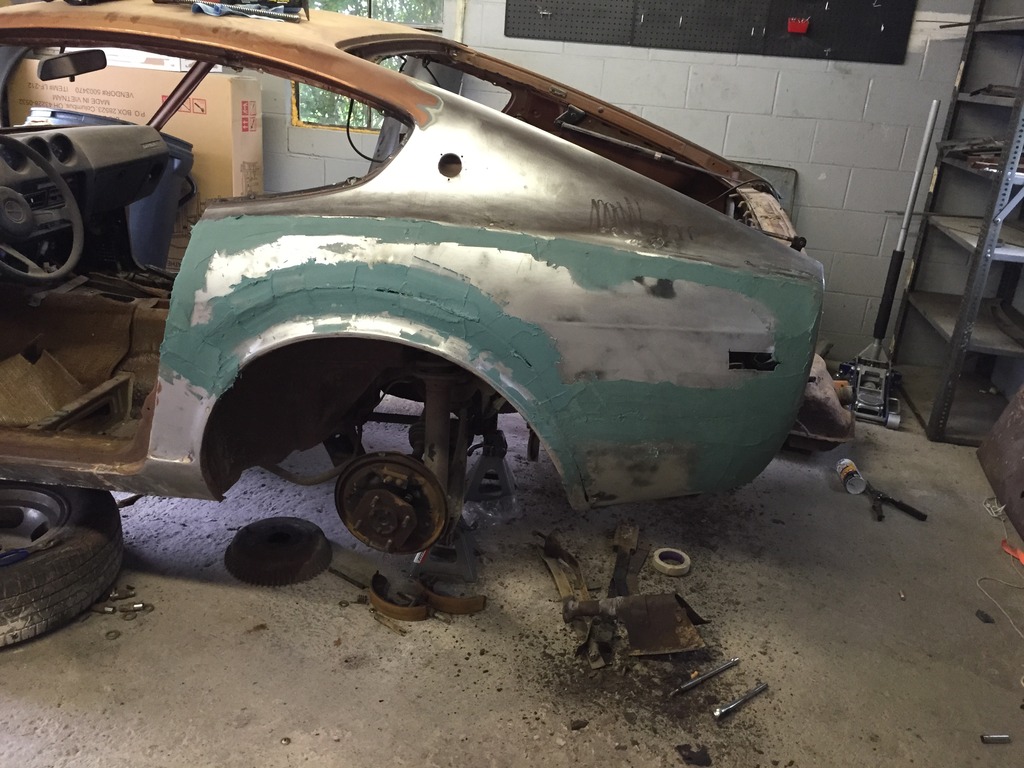
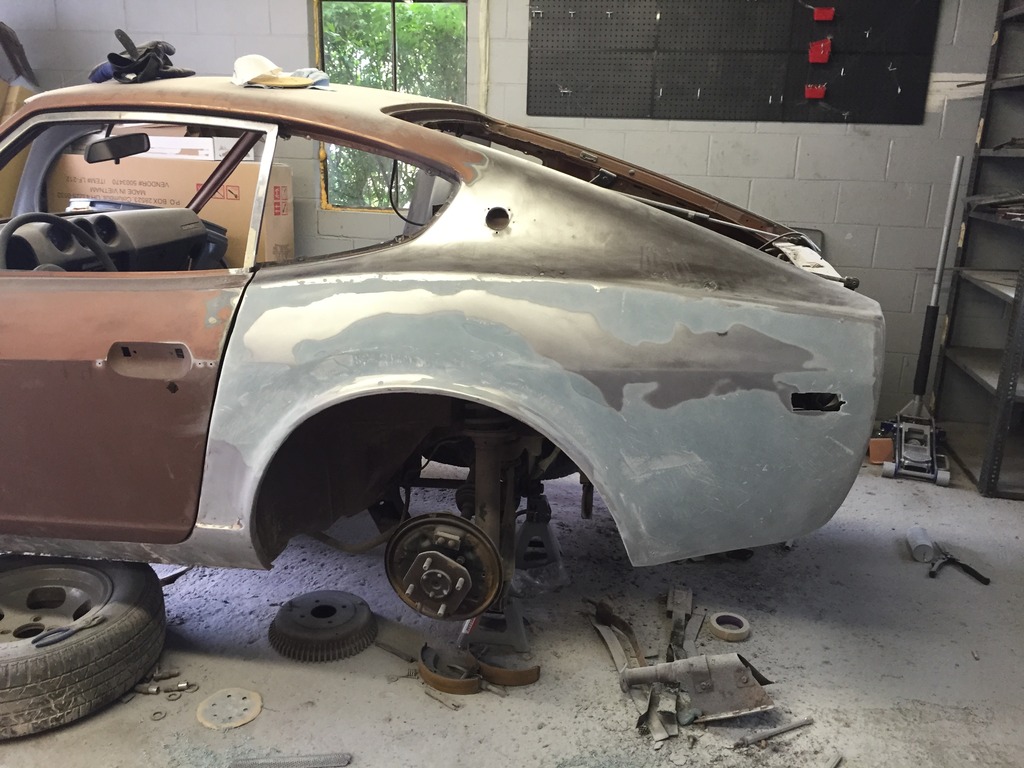

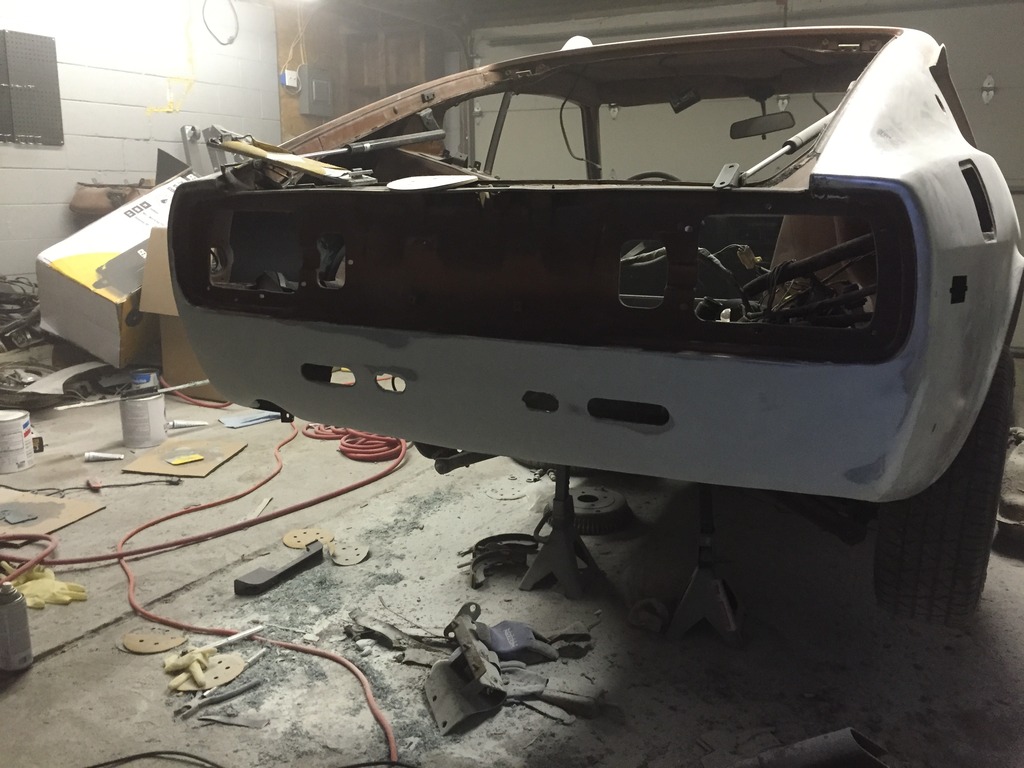
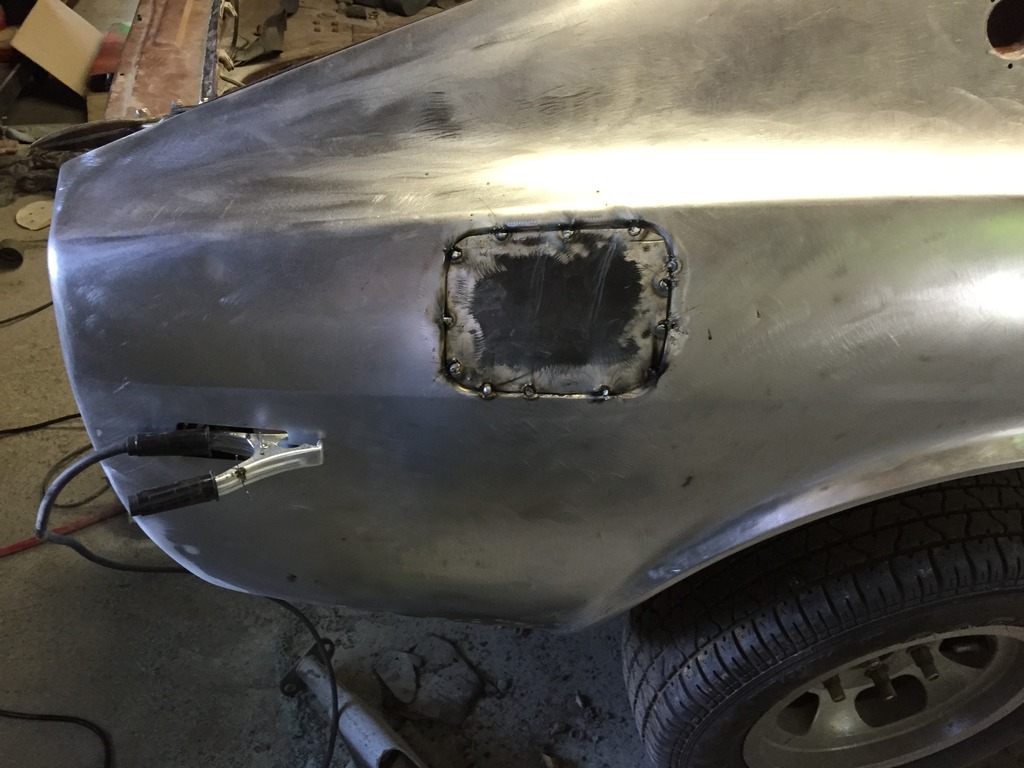
Now that all the welding was done getting the quarter in it was time to start roughing it in and getting the rest of the body prepped.


 07-11-2015, 09:20 PM
#9
Registered User
Thread Starter
Join Date: Jul 2015
Posts: 15
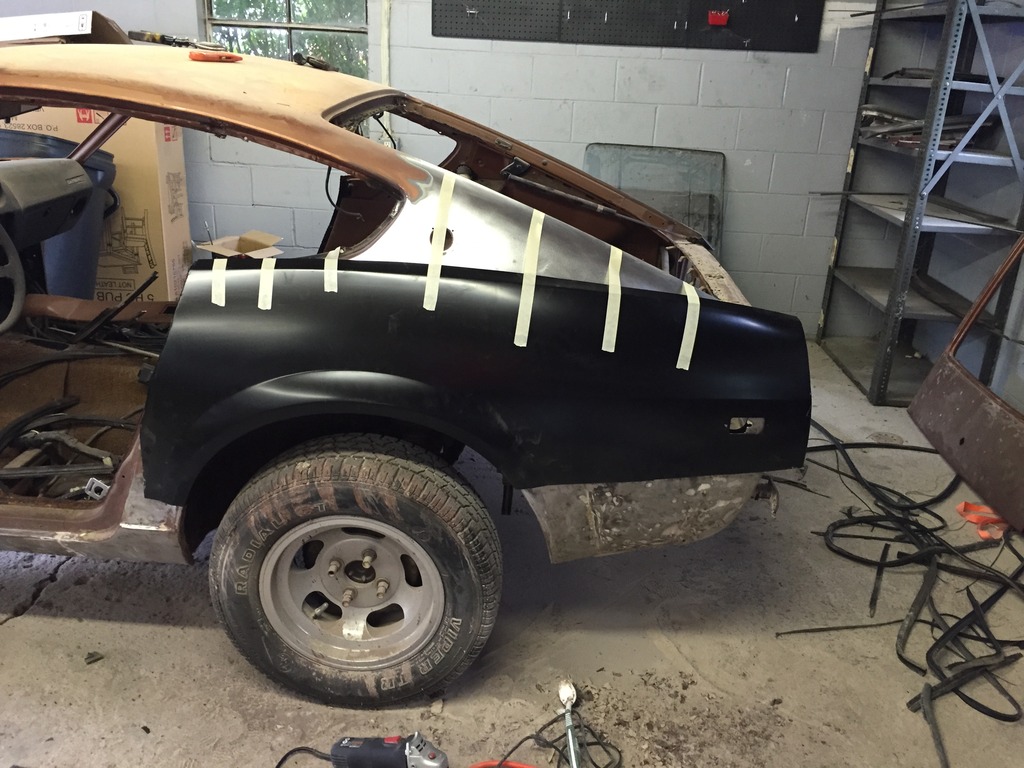
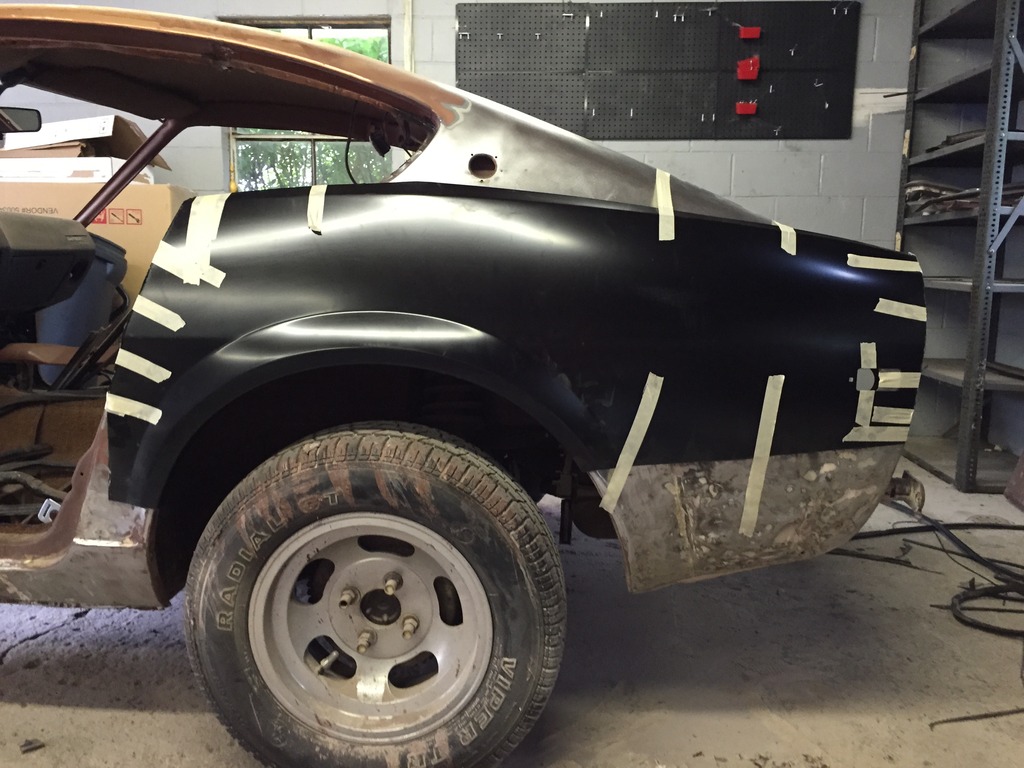
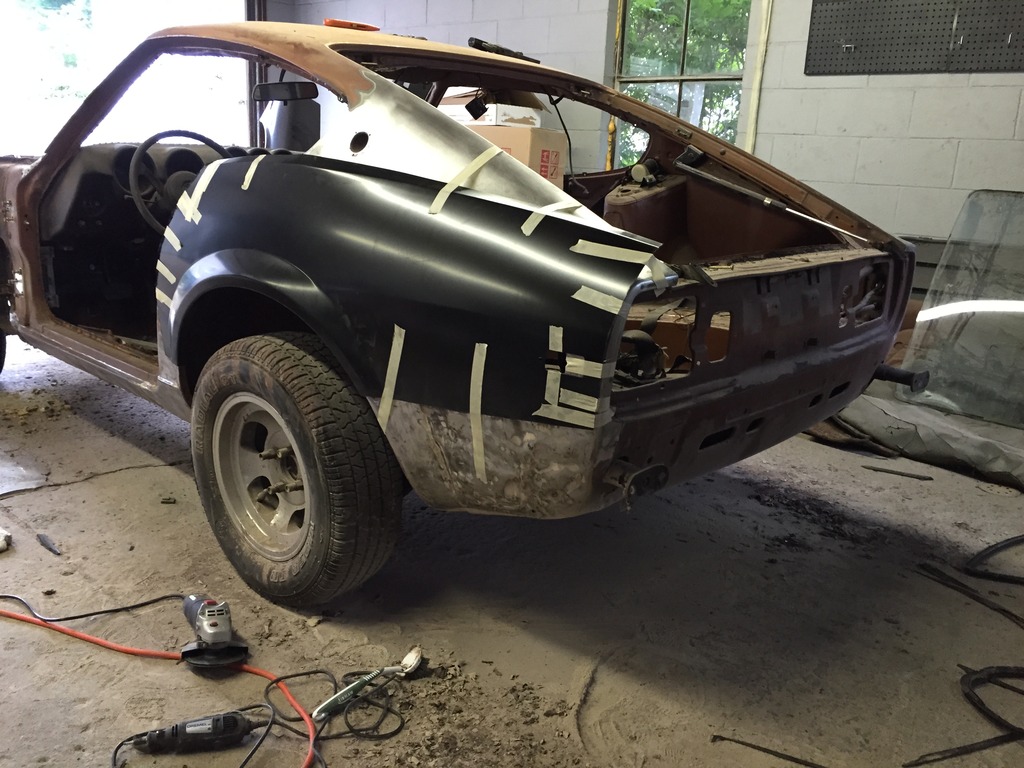
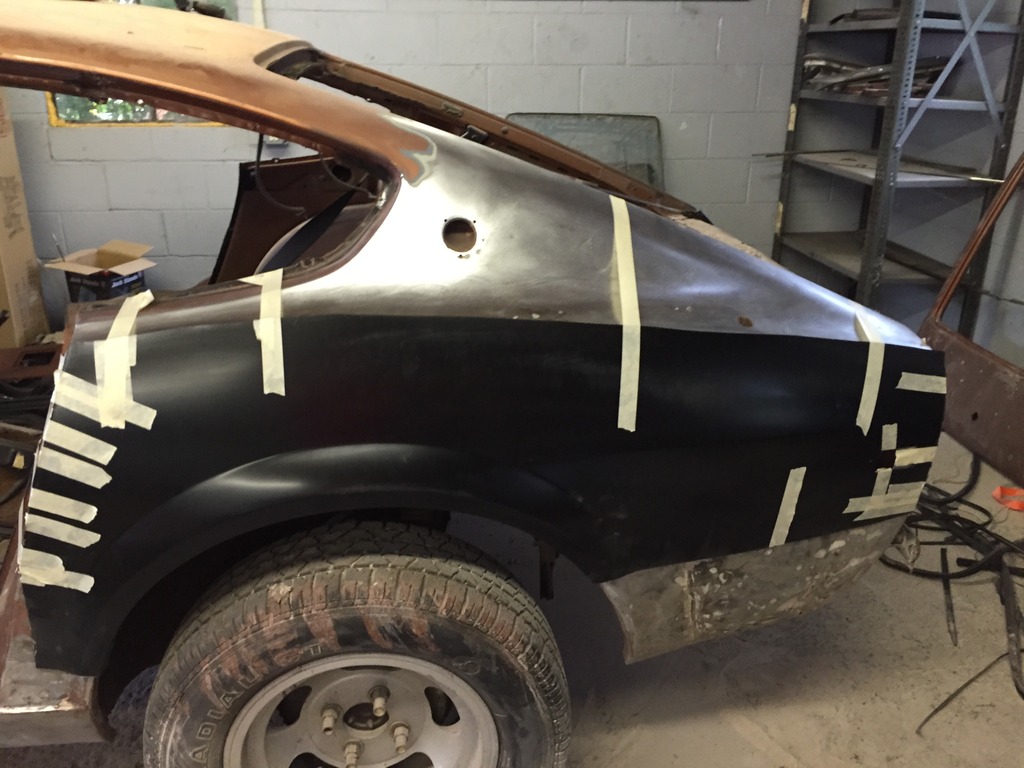
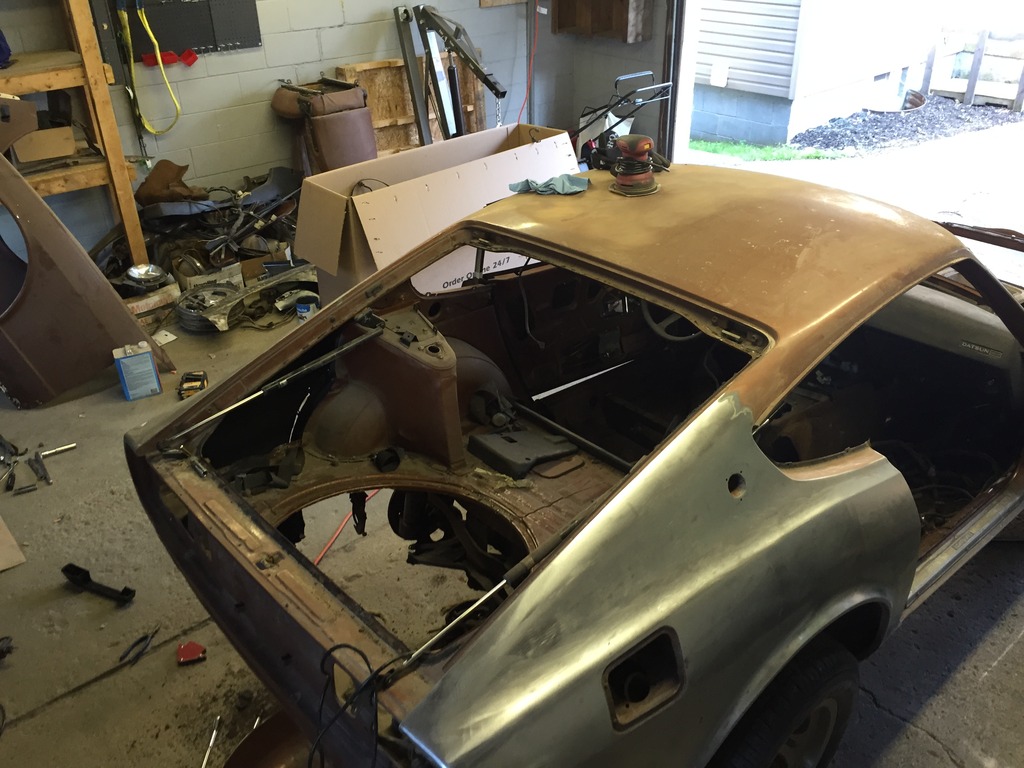
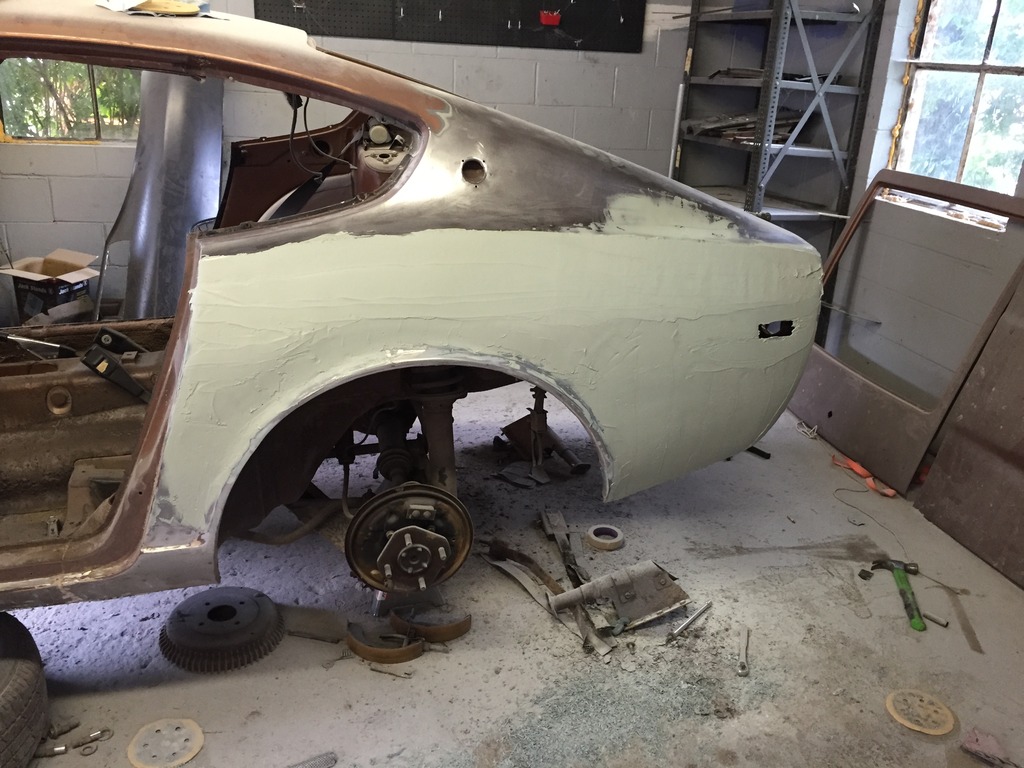
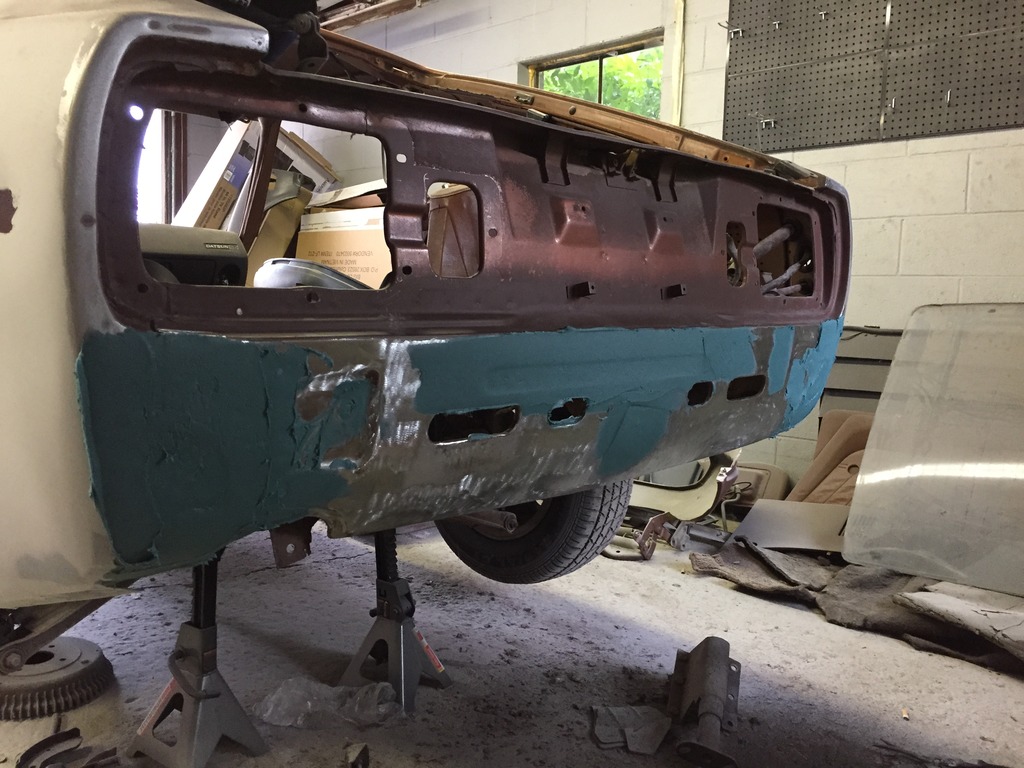
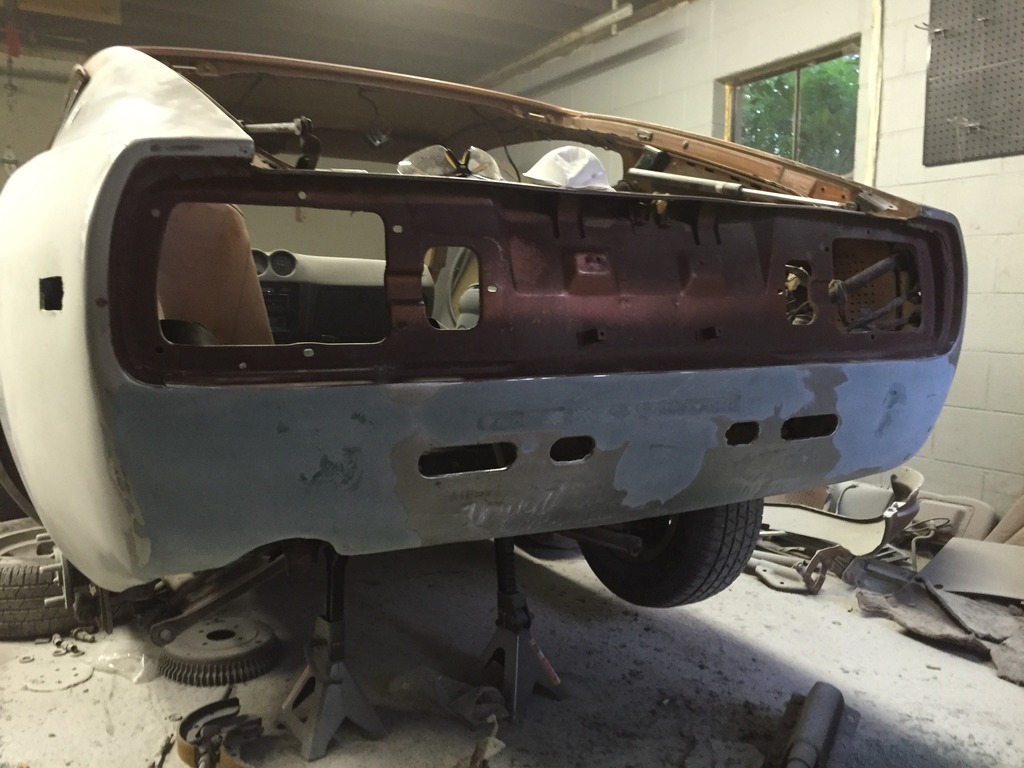
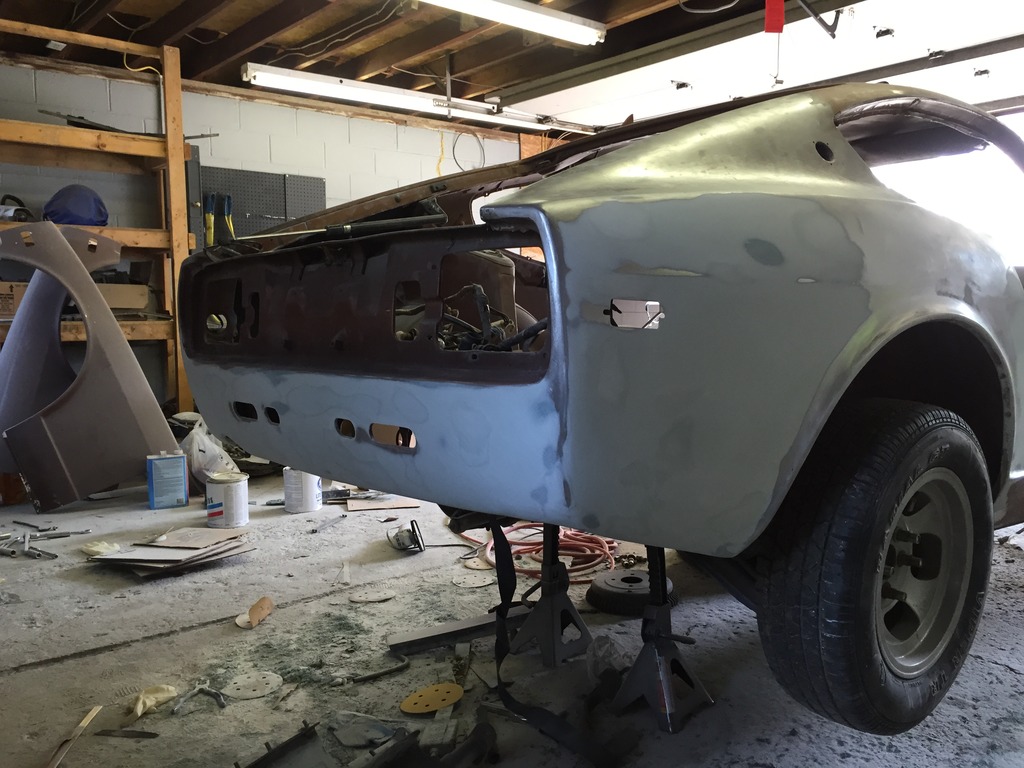
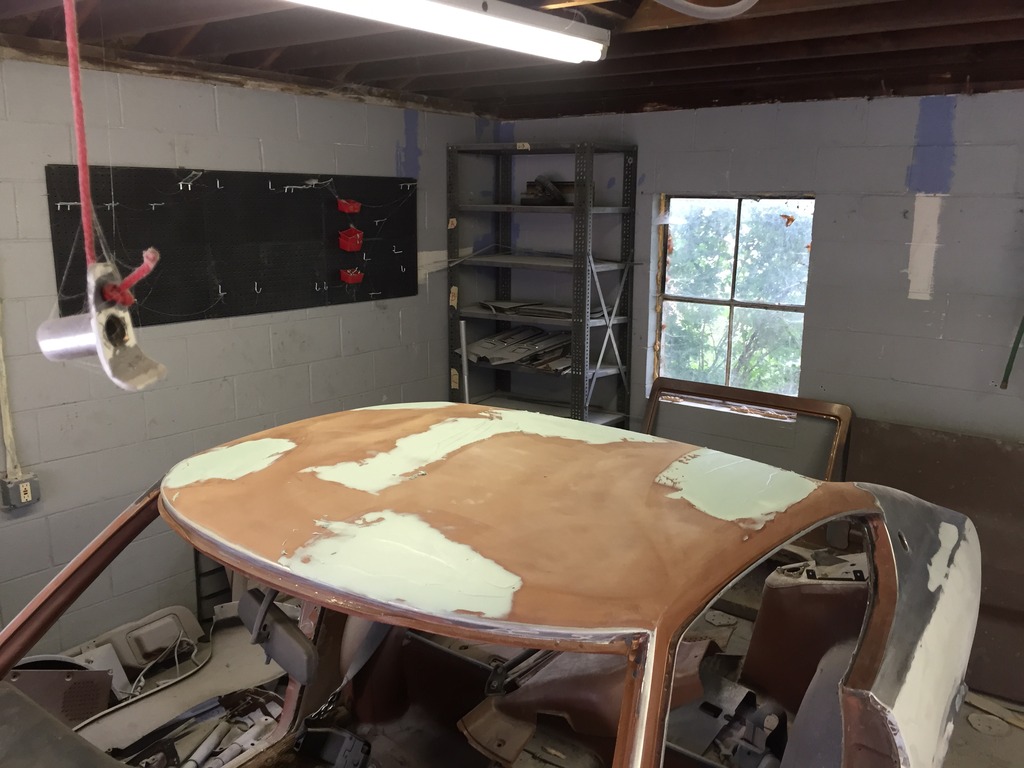
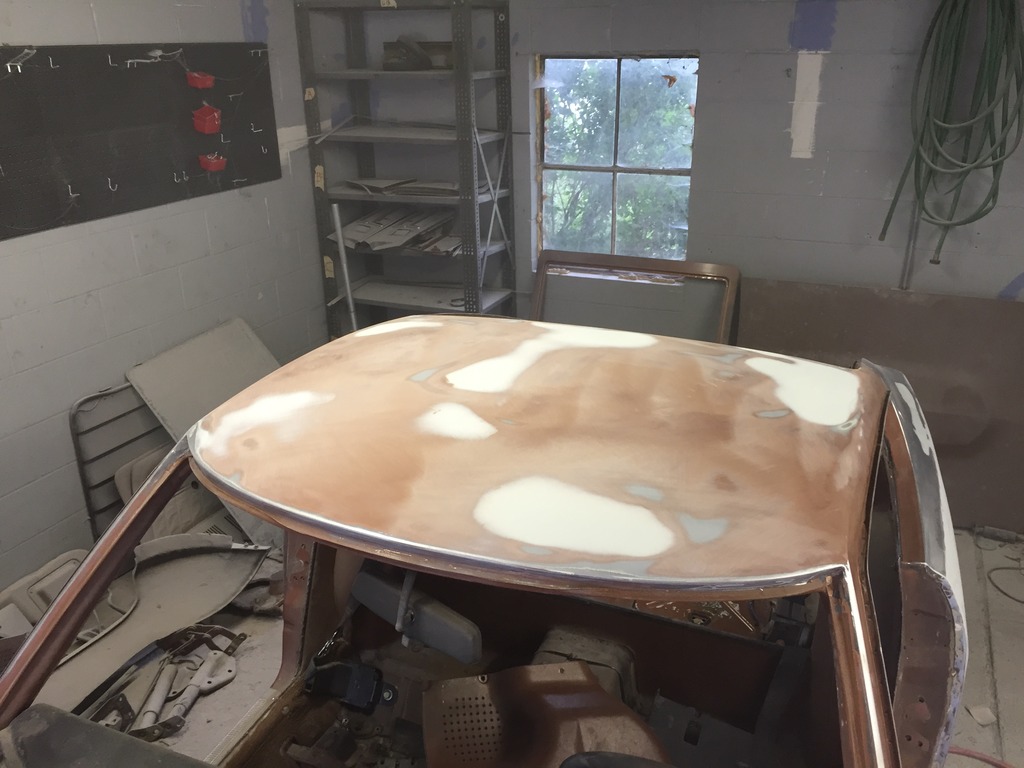
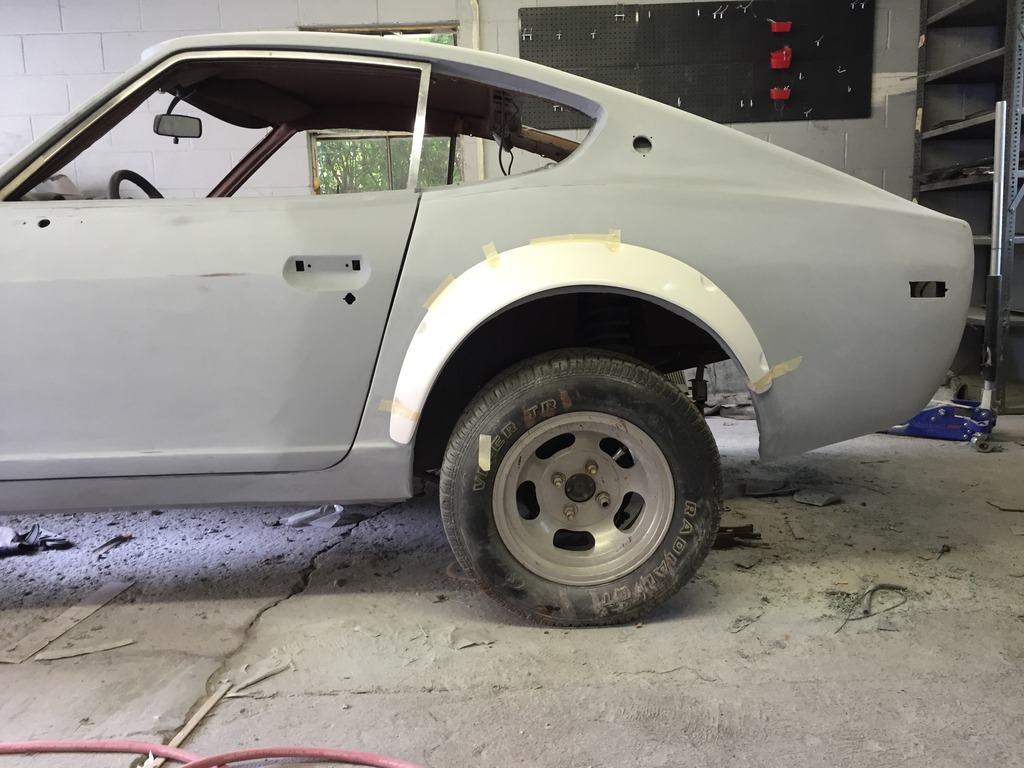
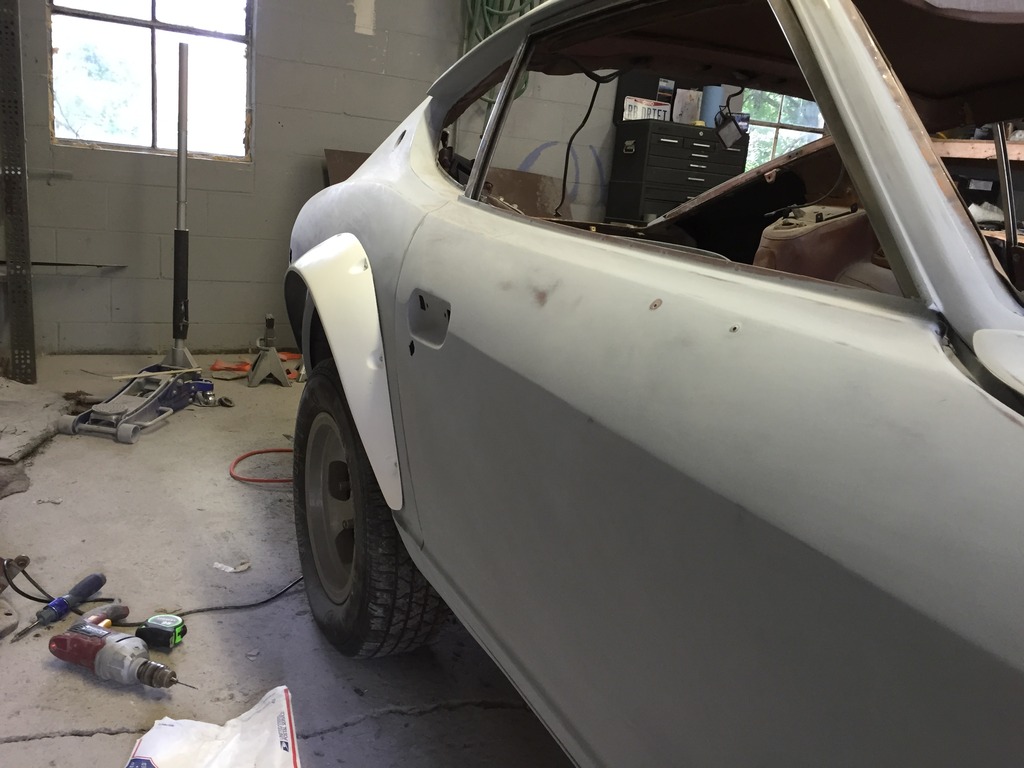
Guide coat and blocking!
I didn't like how this door gap was looking so I had to go back and fix it.
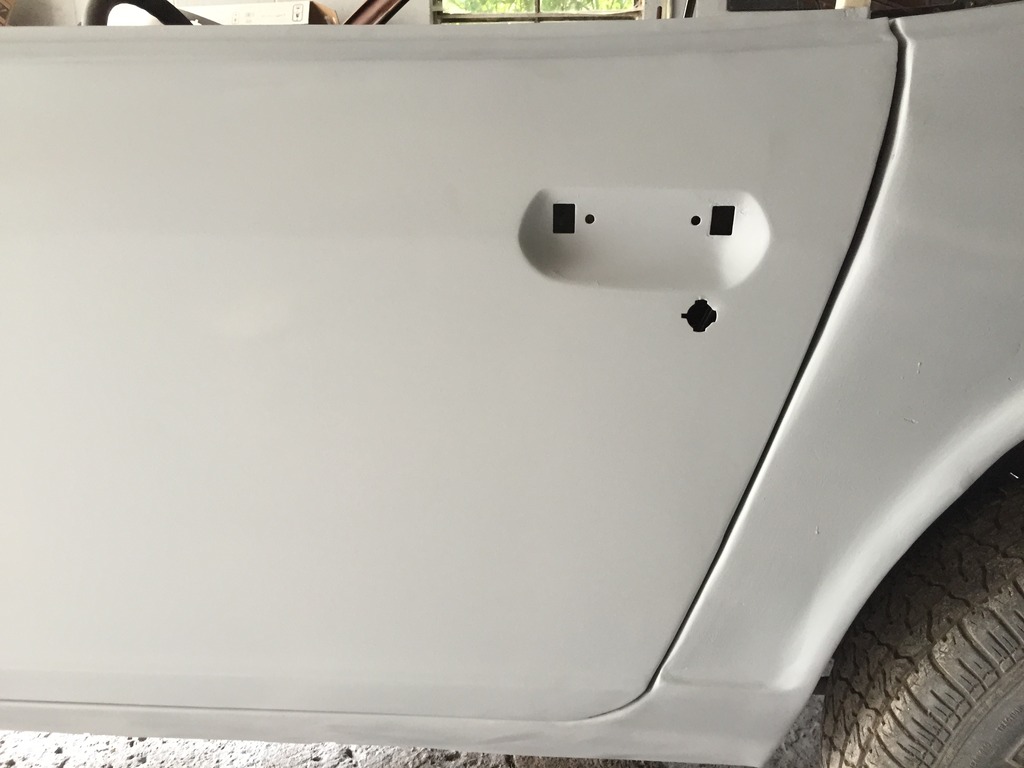
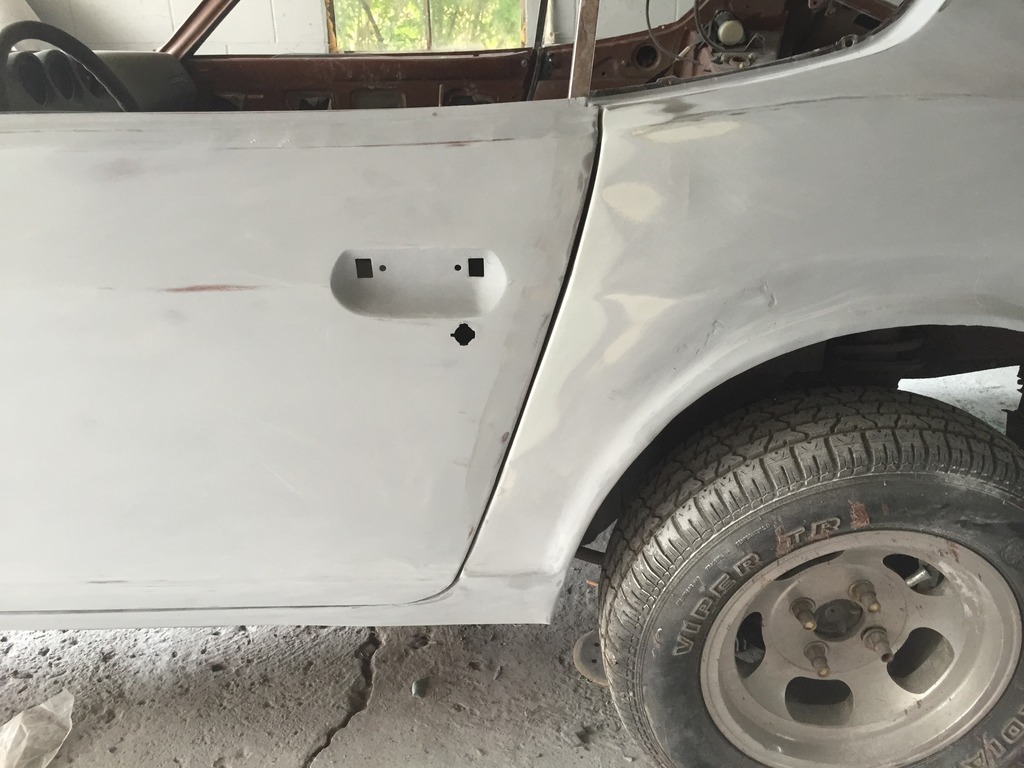
Much better
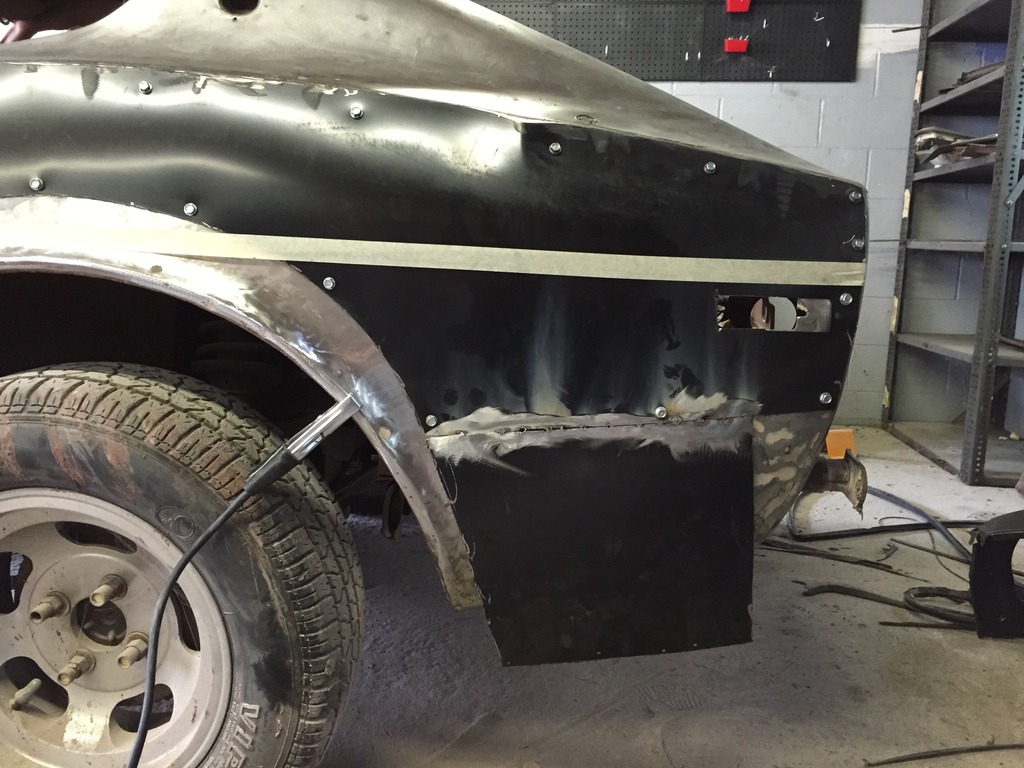
P.S. Ignore the funky stuff on the quarter, I didn't finish that area because I knew it would be getting cut out for flares.


I didn't like how this door gap was looking so I had to go back and fix it.


Much better
P.S. Ignore the funky stuff on the quarter, I didn't finish that area because I knew it would be getting cut out for flares.
Last edited by driftrehab; 07-11-2015 at 09:26 PM.


 07-11-2015, 09:29 PM
#11
Registered User
Thread Starter
Join Date: Jul 2015
Posts: 15
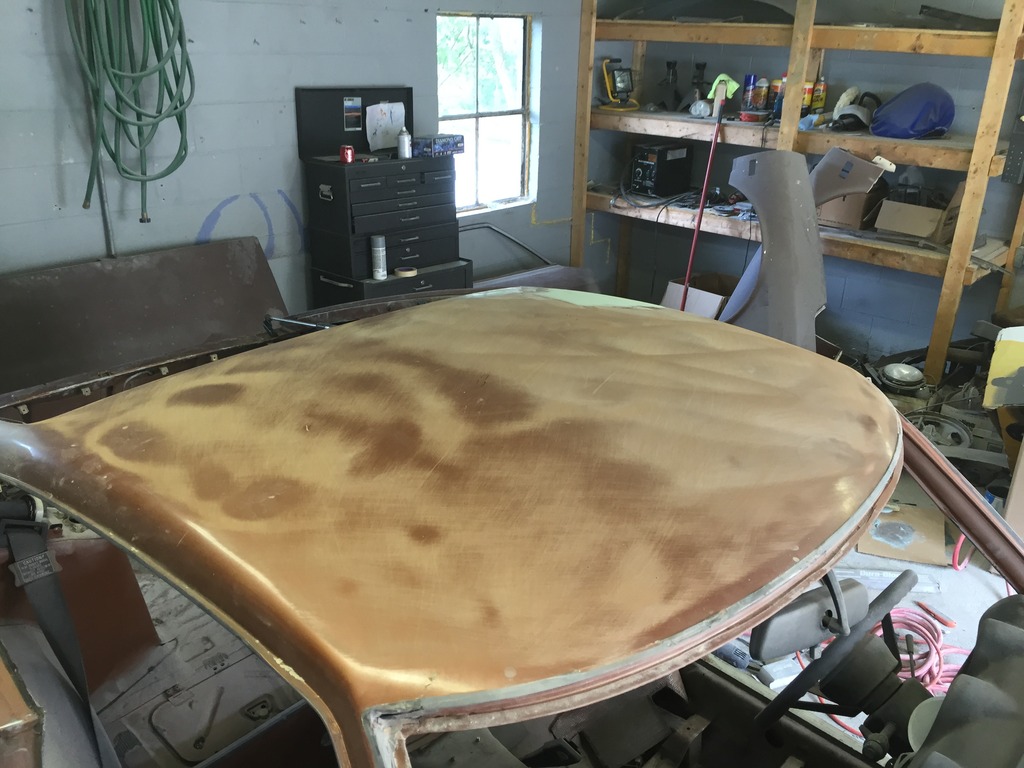
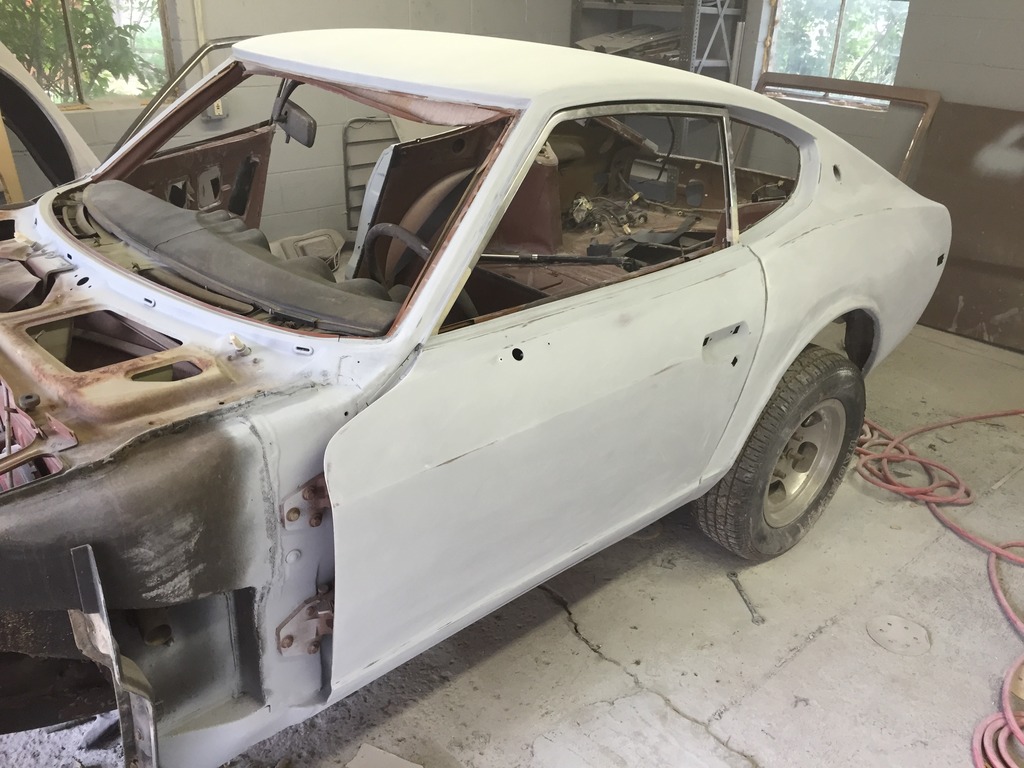
Back to body work...

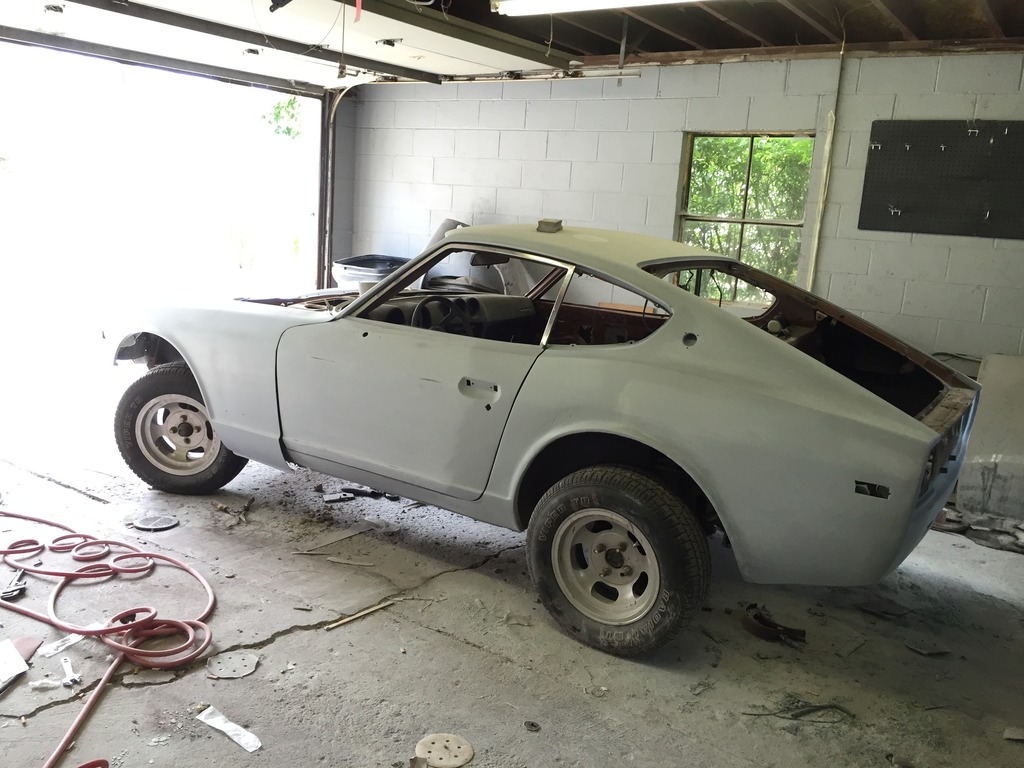
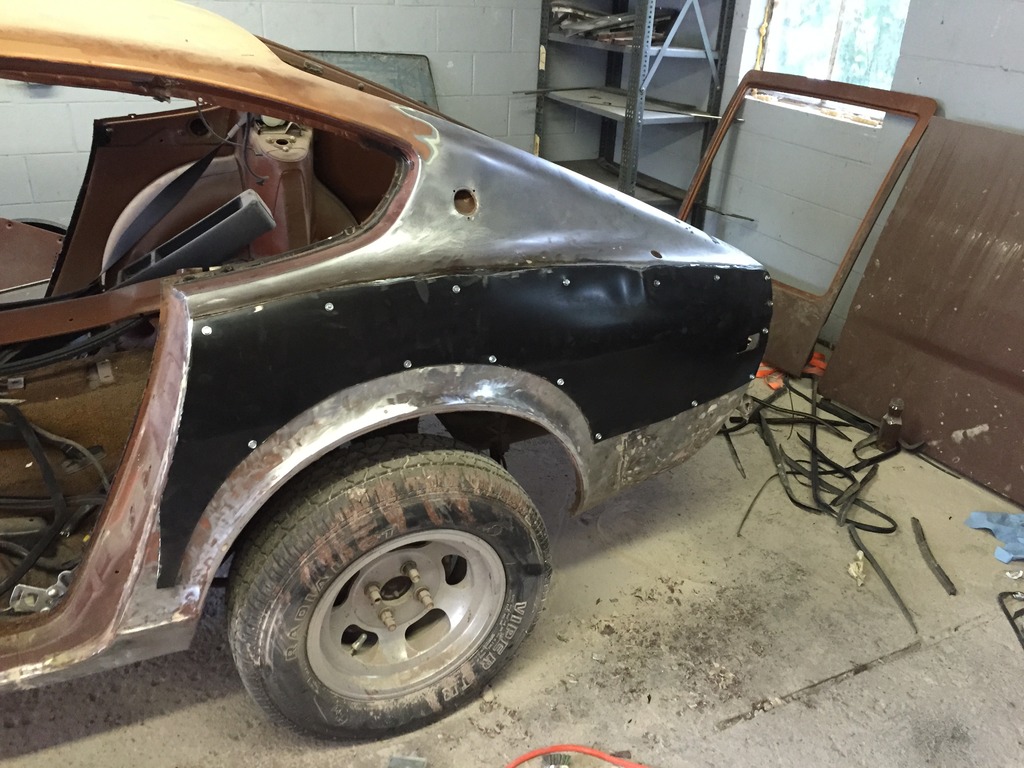
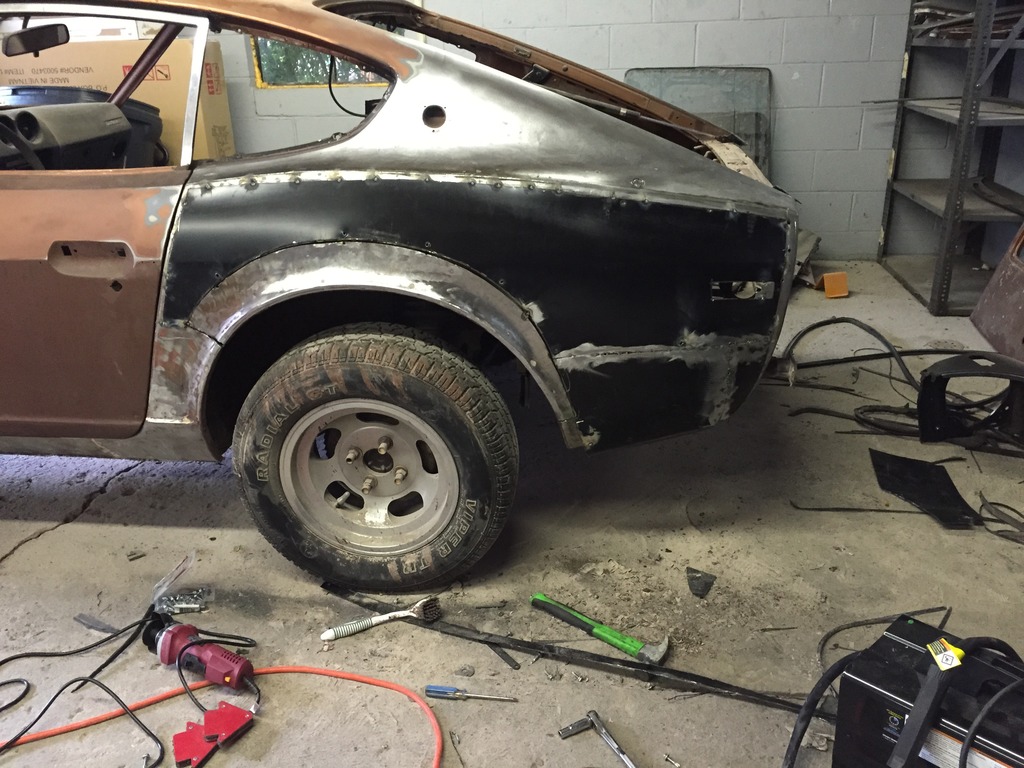
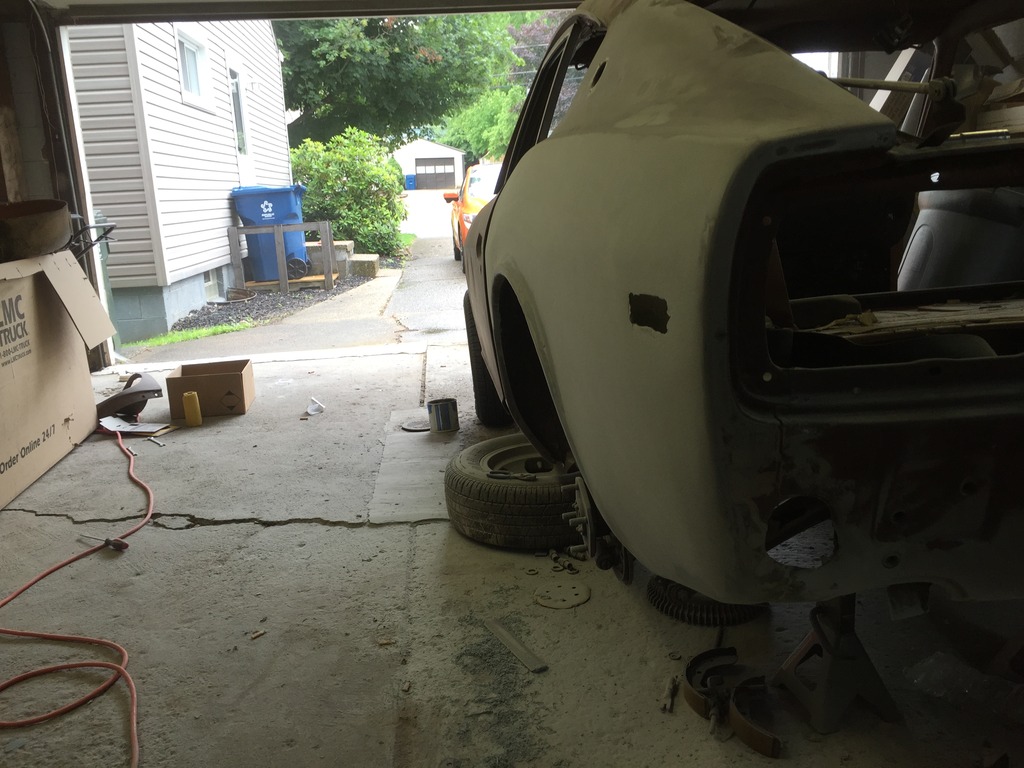
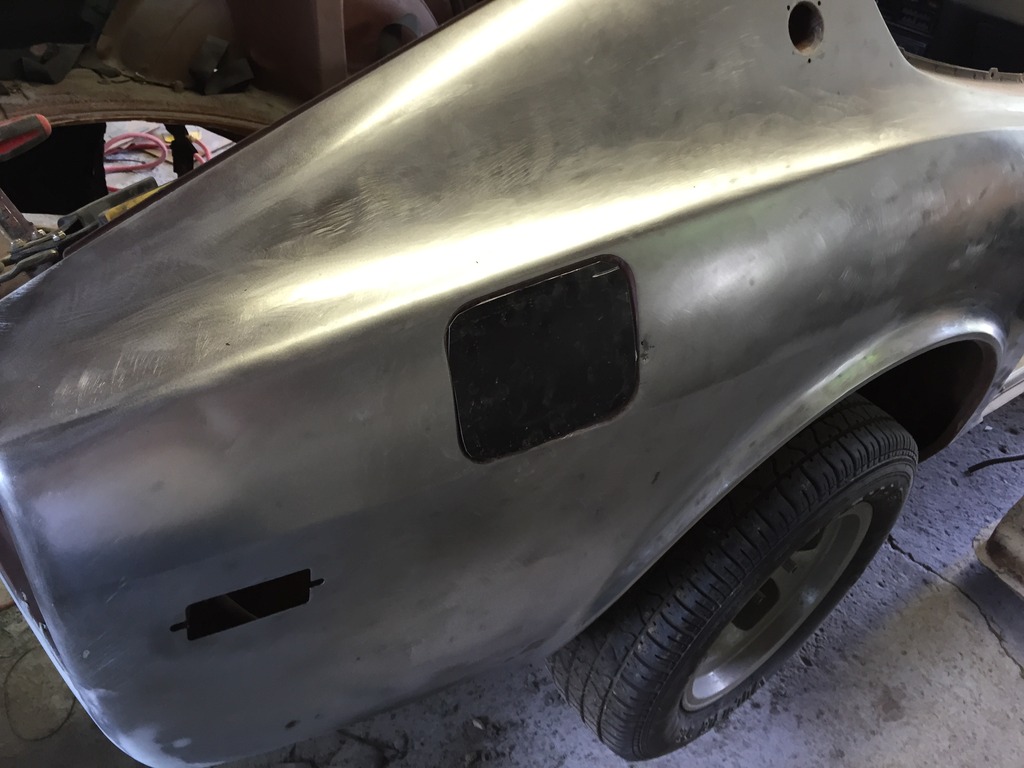
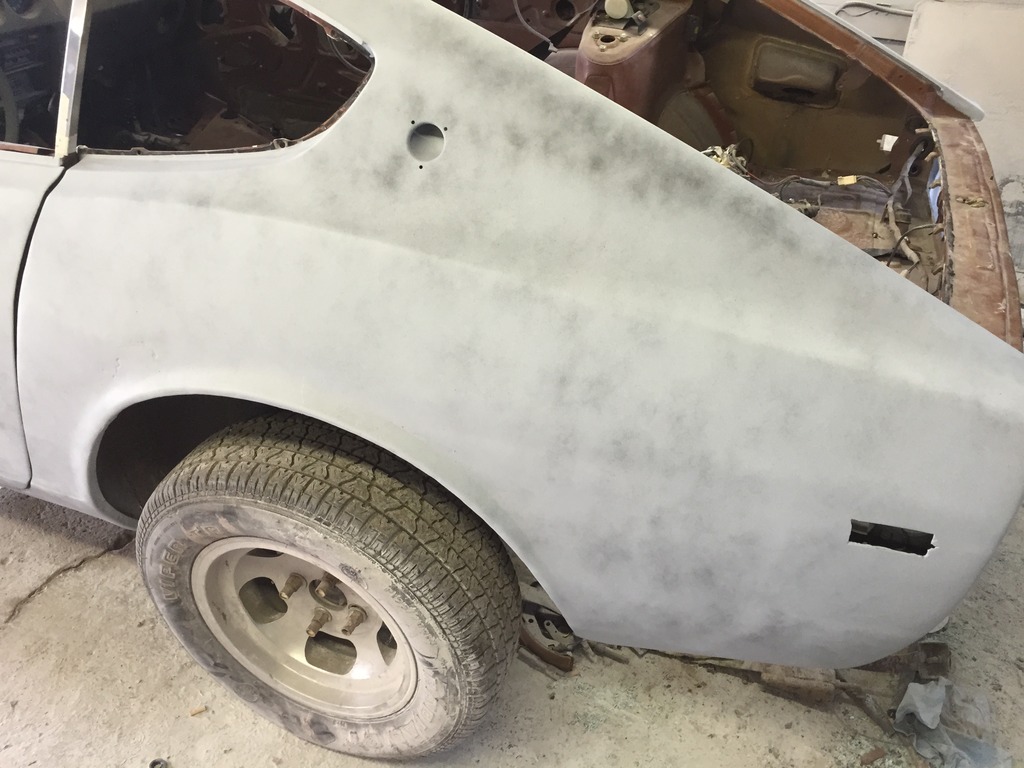
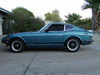
Got my flares in. The are ZG wide flares.
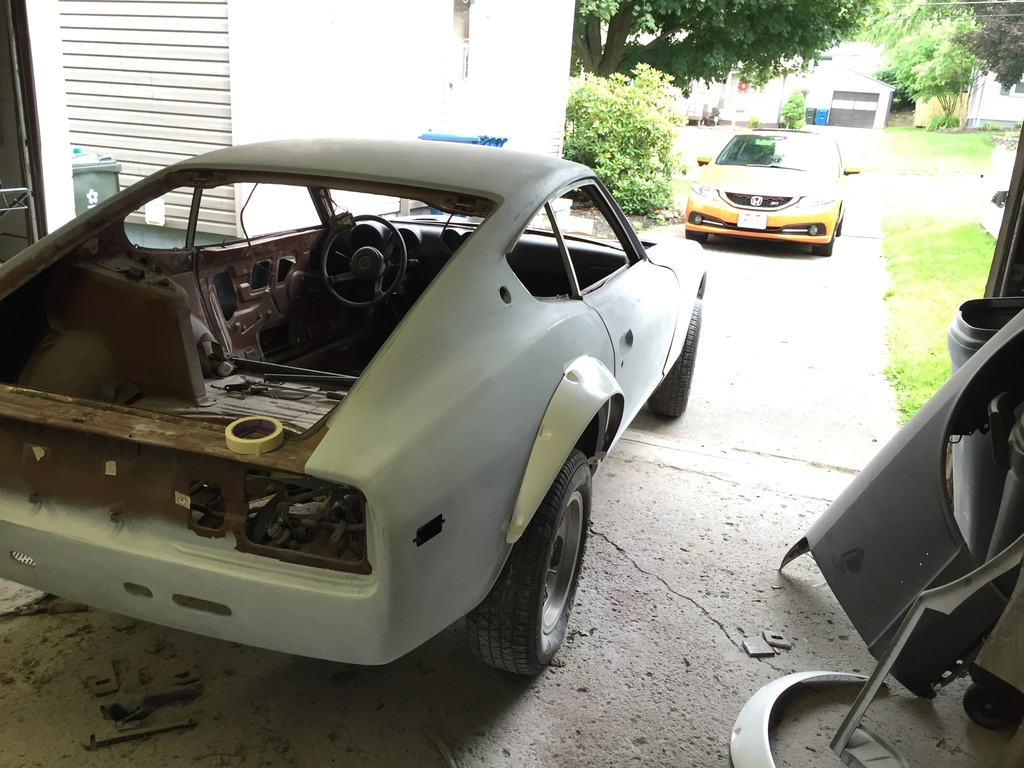
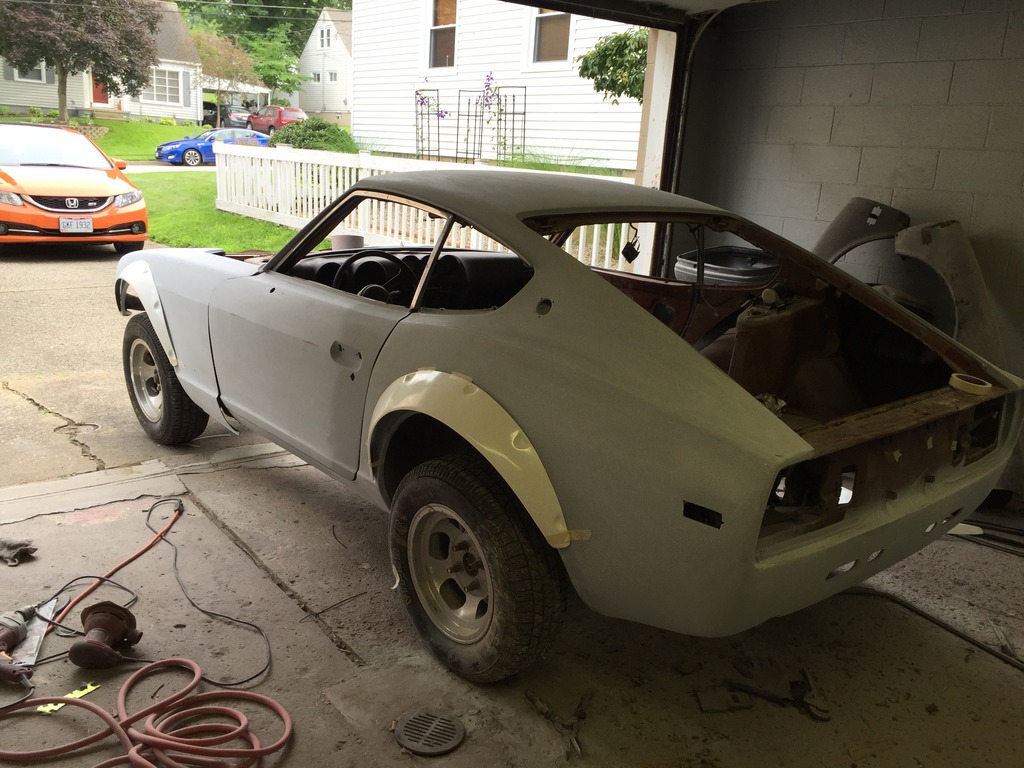
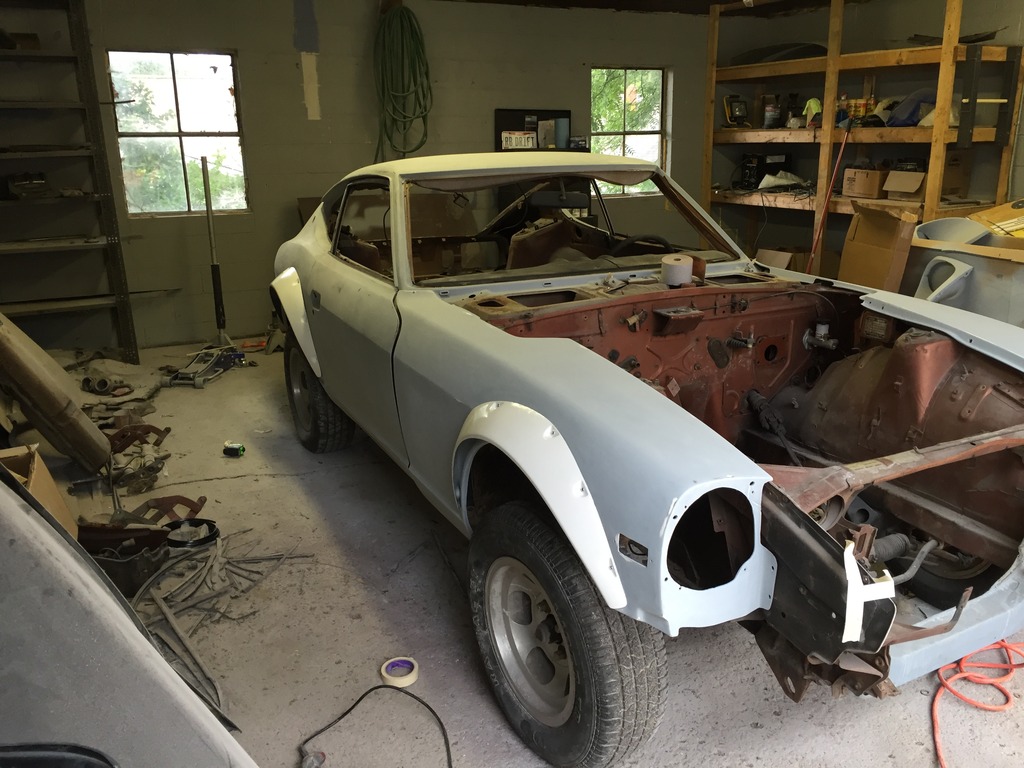
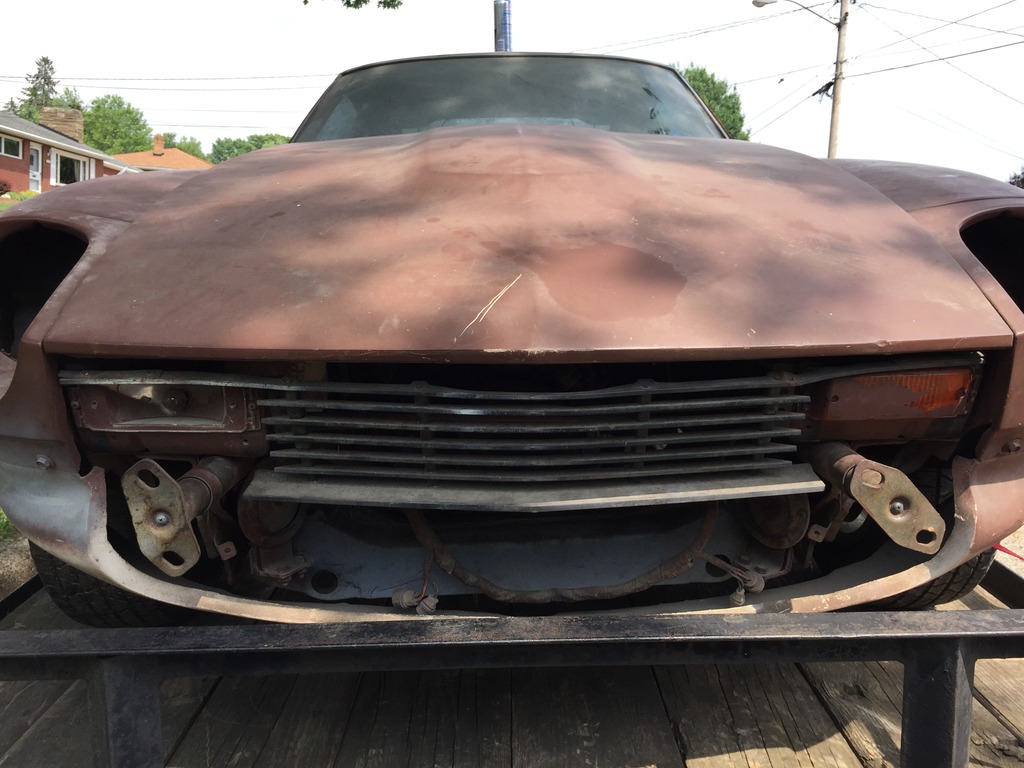
Side note before I show the pictures of the cut wheel wells. Is it normal for a 280z to sit so high? The wheel gap before I cut the wells is insane. It has 14 inch rims atm.


Got my flares in. The are ZG wide flares.


Side note before I show the pictures of the cut wheel wells. Is it normal for a 280z to sit so high? The wheel gap before I cut the wells is insane. It has 14 inch rims atm.


 07-12-2015, 03:00 AM
#14
Registered User

Join Date: Apr 2013
Location: Tucson, Arizona USA
Posts: 576
Holey moley, that's a lot of work. A fascinating photo-story as well. Some of that stuff looks real familiar to my own efforts although I don't have all the body work skill you obviously do.  I had to send lots of that work out.
My late-model 260Z has very similar stance issues. My wheel well gap is only a little less than yours but I've got more weight in the car. You know, things like a motor, transmission, fuel tank, etc. I haven't decided how I'm going to get it closer to the ground yet so I'll be watching your progress closely.
Curious, from bringing it home to where you are now, how long have you been working on this project?
07-12-2015, 08:41 AM
#16
Registered User
Join Date: Apr 2013
Location: Tucson, Arizona USA
Posts: 576
That's incredible. Yeah, I know Chip Foose and his "A Team" could get it completely done in a week or two but one guy in his garage, wow.
My project is going on three years now I'm not working it full time, but still ...
Congrats. Looking forward to see more results ...
My project is going on three years now
I'm not working it full time, but still ...Congrats. Looking forward to see more results ...
07-12-2015, 09:24 AM
#17
I have a present for you...

Join Date: Mar 2003
Location: dayton, nevada usa
Posts: 1,691
Great work! Welcome to Zdriver. It could have the wrong springs in it but yeah, it's way to high. I have lowering spring on mine and fyi they measure 10 1/2 front and 11 rear extended.
 02-02-2016, 08:26 PM
#19
Registered User

Join Date: Jan 2016
Location: Military
Posts: 40
Drift,
Dude, so glad I found this build thread, what are the chances, I follow you on iG. Much more pictures on here. Again, kick *** work. I had dreams and aspirations of this level of restore for my also 76' 280, but I don't think I currently have the right car to put this much work into, your Z was in much better condition when you started than mine is. oh well, looks like i'll just swap the gears and slam some trash cans... hehe. ; )
I'm officially starting work on My Z this month, so I'll start a thread here and send you a link. where did you learn your body work? also, did you draw the door gap open when you welded it? or was it like that before you swapped the quarter? it turned into a weird line didn't it? looks great after you patched it up though.
keep up the good work, happy wrenching.
Josh.
02-02-2016, 08:42 PM
#20
Registered User
Thread Starter
Join Date: Jul 2015
Posts: 15
Drift,
Dude, so glad I found this build thread, what are the chances, I follow you on iG. Much more pictures on here. Again, kick *** work. I had dreams and aspirations of this level of restore for my also 76' 280, but I don't think I currently have the right car to put this much work into, your Z was in much better condition when you started than mine is. oh well, looks like i'll just swap the gears and slam some trash cans... hehe. ; )
I'm officially starting work on My Z this month, so I'll start a thread here and send you a link. where did you learn your body work? also, did you draw the door gap open when you welded it? or was it like that before you swapped the quarter? it turned into a weird line didn't it? looks great after you patched it up though.
keep up the good work, happy wrenching.
Josh.
Dude, so glad I found this build thread, what are the chances, I follow you on iG. Much more pictures on here. Again, kick *** work. I had dreams and aspirations of this level of restore for my also 76' 280, but I don't think I currently have the right car to put this much work into, your Z was in much better condition when you started than mine is. oh well, looks like i'll just swap the gears and slam some trash cans... hehe. ; )
I'm officially starting work on My Z this month, so I'll start a thread here and send you a link. where did you learn your body work? also, did you draw the door gap open when you welded it? or was it like that before you swapped the quarter? it turned into a weird line didn't it? looks great after you patched it up though.
keep up the good work, happy wrenching.
Josh.
The door gap was a little messed up to begin with, but welding right along that seam may have contributed to the messed up gap.
Sad news though guys, the car has been sold. Over the past 3 years I've dumped 10's of thousands of dollars into project cars (mostly 240sx drift cars). As I get closer to 30 I'm starting to worry about buying a house, my kid's college funds, retirement funds, etc, so I couldn't justify my selfish addiction anymore
 I sold the shell to someone very amped about finishing it and doing it justice. Still sad to see it go.
I'm sure in due time I'll have another project
02-02-2016, 09:14 PM
#21
Registered User
Join Date: Jan 2016
Location: Military
Posts: 40
I learned body work when I was a teenager. I got a job as a shop hand for a local body shop and slowly learned everything until I started doing it full time. I did that for a few years on and off before I got a white collar job as a Software Engineer. Anyone can learn body work. The trick is, spend as much time doing the body work as you can. Nitpick everything. The more time you spend on the body the better the paint job will be. If you rush it you'll regret it when you look at your shinny paint job and have that wavy spot laughing at you because you didn't want to prime and block it for the 4th time haha
The door gap was a little messed up to begin with, but welding right along that seam may have contributed to the messed up gap.
Sad news though guys, the car has been sold. Over the past 3 years I've dumped 10's of thousands of dollars into project cars (mostly 240sx drift cars). As I get closer to 30 I'm starting to worry about buying a house, my kid's college funds, retirement funds, etc, so I couldn't justify my selfish addiction anymore I sold the shell to someone very amped about finishing it and doing it justice. Still sad to see it go.
I'm sure in due time I'll have another project
The door gap was a little messed up to begin with, but welding right along that seam may have contributed to the messed up gap.
Sad news though guys, the car has been sold. Over the past 3 years I've dumped 10's of thousands of dollars into project cars (mostly 240sx drift cars). As I get closer to 30 I'm starting to worry about buying a house, my kid's college funds, retirement funds, etc, so I couldn't justify my selfish addiction anymore
I sold the shell to someone very amped about finishing it and doing it justice. Still sad to see it go.I'm sure in due time I'll have another project
Dang,
I'll be sure to keep that in mind.
Well I'm sorry to hear that, I was looking forward to seeing this thing! but I respect your decision. Good luck with your future endeavors!
Josh,

Thread
Thread Starter
Forum
Replies
Last Post
em1.hernandez
280ZX (S130) Forums
12
07-11-2012 02:08 PM
snwbrderphat540
240Z, 260Z, 280Z Motor Swaps (non-V8)
197
01-19-2012 09:32 PM
Bookmarks


