260Z Restoration as a Retirement Project
 08-13-2014, 05:49 PM
#26
Registered User
Thread Starter

Join Date: Apr 2013
Location: Tucson, Arizona USA
Posts: 576
Feeling Smug Today
Since my last post I've mostly enjoying the annual summer visit of the out-of-town grandchildren. However, there has been some puttering around, mostly refinishing small bits and pieces. Digging through my parts I found more brake/fuel/clutch line clamps and rubber bits, all of which needed refinishing. Done.
Also found the hard lines for the rear drum brakes hadn't been refinished, done today.
Now for the smug part. I pulled out all my electrical harnesses today. The engine bay harness from the original rustZ had been partially eaten by a Pack Rat while sitting on my property waiting for the project to begin. The rest of the rustZ harness had suffered some unknown modifications as well (one put both headlamps on the same circuit). Because of that, five years ago I purchased a complete 260Z harness via eBay for about $76, including shipping. Turns out the harness in the Z from Flagstaff was hacked up by who knows why and it's pretty much useless.
The smug part is that with what I've learned over the last five years, the inspection of the eBay purchased harness shows it is in perfect shape and has not even been modified. It included the dash wiring as well. Wahoo! $76 well spent.
 09-01-2014, 06:07 PM
#27
Registered User
Thread Starter
Join Date: Apr 2013
Location: Tucson, Arizona USA
Posts: 576
Early versus Late 74 260Z
OMG, on the surface, not too bad. Bumpers and front combo lamps are the most obvious. Struts aren't the same either. Engine bay harnessing, connectors and component locations - a NIGHTMARE!
More to come next post.
More to come next post.
Last edited by beg3yrs; 12-19-2014 at 08:14 PM.
09-03-2014, 01:49 PM
#28
Registered User
Thread Starter
Join Date: Apr 2013
Location: Tucson, Arizona USA
Posts: 576
So, since my last big report, there has been progress, quite a bit although it's a lot of little things rather than a few big things.
Anticipating (incorrectly) the completion of the body and paint work and the imminent return of the car from the shop, I've been concentrating on refinishing, repairing and/or replacing all the items I feel must be installed before the engine and transmission go back in the vehicle.
Brake lines, fuel lines that go through the tunnel are all cleaned out and painted. All the clamps and rubber bits associated with these lines are ready to go as well. The differential has been serviced, cleaned up, painted and polished (Note: do not turn the diff over without removing the air vent first, unless you want to replace the now cracked vent ).
).
A new emergency brake cable assembly is on its way from Thailand. The hand brake lever has been refinished as well.
I'm collecting a Big Box O Parts which will go to the metal plater soon. Anything that gets abused through impact or exposure to nasty road and weather elements is going in the box - it's getting heavy. Turns out the only chrome I've identified for redo is the door handles. As I've eliminated the bumpers with my mods, all the other shiny stuff seems to be stainless steel and is in good condition for polish.
Speaking of polish, I tried out a nice Ryobi polish kit from Home Depot. It really did a good job on my marker lights, surrounds and the front and back combination lamps. They look new (from two feet) but closer inspection shows you just can't polish out the deeper gouges. Thankfully, there aren't too many of those.
Working my way around the engine bay, the vacuum assist module was cleaned up as well as the brake proportioning valves. Clutch cylinder was cleaned up and the the master brake cylinder was beyond hope so it was replaced. Hmm...the clutch slave cylinder is beyond hope too - NOTE: order a new one. Also cleaned up the refinished the coil assembly.
Now, for the "horrors of the two 260Zs" of which I previously posted. Let's talk harnessing and things associated with harnesses.
I've got a total of three 260Z harnesses. Yes, I was smug a few posts back and while there is still some degree of smugness, not as much as before.
What I've really got is two "early" harnesses and one "late" harness. One early harness is pristine. No modifications, broken wires or anything. It's not new but still very nice. Even has the fusible link assembly.
The other early harness was chewed up by a pack rat right at the firewall and its fusible link assembly was replaced by a couple of wire nuts. It also had lots of hacks to it in the wiring; the headlights were now powered by one, not two fused circuits and other hacks probably had to do with botched stereo and A/C installations.
Finally the late harness was also hacked to death with quick fix mods by a PO who was just trying to get something running with the least amount of effort paying no attention to possible future problems.
So, I decided to use the pristine early harness. Now I'm discovering these things:
1) One noticeable difference between the early and late 260Zs is the placement of the front combination lamps. What is not noticeable is Nissan decided to change the connector styles behind those lamps at the same time! This is also true for the front marker lamps and headlights. Not too bad of a problem as I changed the connectors on the combination and marker lamps from the new style to the old style with parts I had available. I couldn't do this with the headlights as I only had one old style headlight connector, not two. Instead, I changed the early style headlight connectors on the harness for the late style connectors. Ah yes, a frankenharness.
2) Then I discovered the biggest headache. Although all the electrical boxes in the engine bay are still the same, they aren't in the same location. In the early 260Z some are in front of the right wheel, some are behind the wheel well and others are on the firewall. In the later model Nissan decided to clean them up and created a relay bracket which mounts behind the right wheel well. All the parts are pretty much mounted there.
Remember I'm using a late model body and an early model harness? I decided I'd go with the bracket, since it goes with the car, and modify the harness to relocate the necessary connectors to the proper locations on the relay bracket. Opening up the pristine harness was emotionally painful but it eventually worked out. Some wires could just be re-routed and were already long enough but many others had to be lengthened with splices. I've renewed my expertise with a soldering gun and wire cutters and come to just LOVE heat shrink tubing. After three days of steady work, I've got to say the redone harness looks good (the photo is work in progress). There are no kludge wires hanging out and probably looks as close to factory as you can get. I was even able to scrounge the correct color and gauge wires from the to be scrapped harnesses.
What really gets me is after mocking up everything I found several connectors with nothing attached. Uh oh. Many hours later, after digging through the FSM (which makes no mention of these connectors, not even on the schematics) I noticed on the other early 260Z harness, they're capped off. I traced some of the wires through the early harness and found they go NOWHERE, just terminated inside the harness connected to nothing. Well, I guess it's OK to have these connectors unused - I stole the caps off the other harness and stuck them on this harness so I won't forget!
OK, nuff typing for now. Got to get back in the carport and clean up my mess so I can start another...
Well, since I can edit still, I cleaned up from the surgery and started a close inspection of the engine bay harness from the end to the firewall. Checking all connectors for "goodness" and correctness. Discovered quickly that this harness is for the automatic transmission version of the car. Mine is a manual. The first clue was the distributor connector was three pins - a manual car has only two. Lots of unused connections on this harness too ...
Anticipating (incorrectly) the completion of the body and paint work and the imminent return of the car from the shop, I've been concentrating on refinishing, repairing and/or replacing all the items I feel must be installed before the engine and transmission go back in the vehicle.
Brake lines, fuel lines that go through the tunnel are all cleaned out and painted. All the clamps and rubber bits associated with these lines are ready to go as well. The differential has been serviced, cleaned up, painted and polished (Note: do not turn the diff over without removing the air vent first, unless you want to replace the now cracked vent
).A new emergency brake cable assembly is on its way from Thailand. The hand brake lever has been refinished as well.
I'm collecting a Big Box O Parts which will go to the metal plater soon. Anything that gets abused through impact or exposure to nasty road and weather elements is going in the box - it's getting heavy. Turns out the only chrome I've identified for redo is the door handles. As I've eliminated the bumpers with my mods, all the other shiny stuff seems to be stainless steel and is in good condition for polish.
Speaking of polish, I tried out a nice Ryobi polish kit from Home Depot. It really did a good job on my marker lights, surrounds and the front and back combination lamps. They look new (from two feet) but closer inspection shows you just can't polish out the deeper gouges. Thankfully, there aren't too many of those.
Working my way around the engine bay, the vacuum assist module was cleaned up as well as the brake proportioning valves. Clutch cylinder was cleaned up and the the master brake cylinder was beyond hope so it was replaced. Hmm...the clutch slave cylinder is beyond hope too - NOTE: order a new one. Also cleaned up the refinished the coil assembly.
Now, for the "horrors of the two 260Zs" of which I previously posted. Let's talk harnessing and things associated with harnesses.
I've got a total of three 260Z harnesses. Yes, I was smug a few posts back and while there is still some degree of smugness, not as much as before.
What I've really got is two "early" harnesses and one "late" harness. One early harness is pristine. No modifications, broken wires or anything. It's not new but still very nice. Even has the fusible link assembly.
The other early harness was chewed up by a pack rat right at the firewall and its fusible link assembly was replaced by a couple of wire nuts. It also had lots of hacks to it in the wiring; the headlights were now powered by one, not two fused circuits and other hacks probably had to do with botched stereo and A/C installations.
Finally the late harness was also hacked to death with quick fix mods by a PO who was just trying to get something running with the least amount of effort paying no attention to possible future problems.
So, I decided to use the pristine early harness. Now I'm discovering these things:
1) One noticeable difference between the early and late 260Zs is the placement of the front combination lamps. What is not noticeable is Nissan decided to change the connector styles behind those lamps at the same time! This is also true for the front marker lamps and headlights. Not too bad of a problem as I changed the connectors on the combination and marker lamps from the new style to the old style with parts I had available. I couldn't do this with the headlights as I only had one old style headlight connector, not two. Instead, I changed the early style headlight connectors on the harness for the late style connectors. Ah yes, a frankenharness.
2) Then I discovered the biggest headache. Although all the electrical boxes in the engine bay are still the same, they aren't in the same location. In the early 260Z some are in front of the right wheel, some are behind the wheel well and others are on the firewall. In the later model Nissan decided to clean them up and created a relay bracket which mounts behind the right wheel well. All the parts are pretty much mounted there.
Remember I'm using a late model body and an early model harness? I decided I'd go with the bracket, since it goes with the car, and modify the harness to relocate the necessary connectors to the proper locations on the relay bracket. Opening up the pristine harness was emotionally painful but it eventually worked out. Some wires could just be re-routed and were already long enough but many others had to be lengthened with splices. I've renewed my expertise with a soldering gun and wire cutters and come to just LOVE heat shrink tubing. After three days of steady work, I've got to say the redone harness looks good (the photo is work in progress). There are no kludge wires hanging out and probably looks as close to factory as you can get. I was even able to scrounge the correct color and gauge wires from the to be scrapped harnesses.
What really gets me is after mocking up everything I found several connectors with nothing attached. Uh oh. Many hours later, after digging through the FSM (which makes no mention of these connectors, not even on the schematics) I noticed on the other early 260Z harness, they're capped off. I traced some of the wires through the early harness and found they go NOWHERE, just terminated inside the harness connected to nothing. Well, I guess it's OK to have these connectors unused - I stole the caps off the other harness and stuck them on this harness so I won't forget!
OK, nuff typing for now. Got to get back in the carport and clean up my mess so I can start another...
Well, since I can edit still, I cleaned up from the surgery and started a close inspection of the engine bay harness from the end to the firewall. Checking all connectors for "goodness" and correctness. Discovered quickly that this harness is for the automatic transmission version of the car. Mine is a manual. The first clue was the distributor connector was three pins - a manual car has only two. Lots of unused connections on this harness too ...
Last edited by beg3yrs; 09-03-2014 at 06:32 PM.
09-16-2014, 11:10 AM
#29
Registered User
Thread Starter
Join Date: Apr 2013
Location: Tucson, Arizona USA
Posts: 576
Mid-September Update
Well, I've been working at this car pretty much every day since the last update. Some days there is a lot of progress, others it seems not so much. Since the car itself is over at the body and paint shop, all my work continues to be on the stuff I've got here.
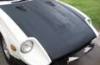
Progress at the B&P shop seems excruciatingly slow but I have to understand a couple of things. First, I got a pretty much fixed price quote on the work because they work on my car when they don't have any deadline work. Second, that should be OK with me cuz I've got plenty to do at my place and getting the body back would only horribly cramp my work space. So I move on but I do miss the baby. I visit every couple of weeks, making up an excuse like I want to fit-check a part, need a specific photo (through holes in the firewall) or something else. Sometimes I even bring a box of donuts if it's an early morning visit. I'm posting one shop photo from a month or so ago just to keep y'all reminded that this car's rear-end is going to be like a baby's bottom... BTW, for those of you who are very observant, you've probably noticed the antenna hole is gone. There's gonna be a California Wing there. Although the wing does have a hole for the antenna, I didn't like the look. So, the body hole has been filled and the hole on the wing is gone too. We'll route an antenna inside the front fiberglass air dam. It may not work as well but I mostly don't listen to broadcast radio, rather I use an MP3/iPod/iPhone player for most stuff.
So, back at the ranch. Working through my engine bay items, I had to choose between two ignition coils and their assemblies. Not too much of a problem, they both tested good but I went with bling.
Finished off the wiring harness. Relocated the connectors to accommodate the relay bracket which exists on the late 260Z but not the early one. The bracket shown in the photo is only in primer. It will be painted at the shop to match the car. I believe (not 100% sure) I've made the correct mods to work with a manual transmission instead of an automatic. That starter interlock system is the biggest difference, a real Rube Goldberg piece of work. Turns out I got to lose a whole connector and had to attach a yellow black wire to the yellow starter wire (documented in my harness records) to make things work. Some wiring had to be changed where the harness goes to the transmission as well. Fortunately Nissan engineers tried to keep things as common as possible so instead of four wires requiring a change, only two.
That folks, has pretty much emptied my engine bay totes. I've moved into the cabin. Hurray!
Since I was still fresh with wiring, I just continued into the cabin by virtually following the harness through the firewall. Got to the junction block it was in good shape. Cleaned up the fuse box connections, replaced incorrect fuses with the right ones and verified connectivity. Even found a decent used cover on eBay!
Next stop was another relay bracket. Here's another difference between the two versions of the 260Z. Not so bad this time. The horn relay was different and there's an extra metal plate to which the cover attaches on the later version. I went with the later version as it was in better shape and I already had a cover. Only a little refinishing was required to get rid of some minor rust. BTW, just how do you get rust on an interior part mounted well above the floor on the kick panel????? No answer required here, just complaining!
Next up, the ventilation system. OMG, what a dirty mess. Leaves, dirt, grime and rat turds everywhere.
Remember I've got two cars to work with here. Both had aftermarket A/C but they were fundamentally different in the installation, even though the parts came from the same manufacturer. The late Z's setup had a monstrous evaporator box that sits under the blower box in the passenger footwell. It attached to the blower box at the recirculation opening and would provide cooled air only when the system was closed to the outside. The system on the earlier Z was more like Nissan's dealer-installed system where the evaporator box sits behind the dash vents, replacing the plenum that normally sits there. I liked that setup much better, the hoses route through the existing firewall openings, it doesn't take up passenger leg space and it operates in any mode where air is sent through the upper vents, not just in recirculation mode.
Dug through the ventilation control boxes and selected the best (cleanest). Pulled the heater cores, one was obviously bad and the other tested with a small leak that was repaired at a local radiator shop - BTW, I also had both radiators from the two cars checked out - the late Z radiator was a total loss but the early Z radiator turned out to be pretty much new - good news. Yes, the two radiators are a little bit different but they both fit the later Z car. I'll have to use a lower hose from the early 260Z.
The ventilation control box has been disassembled, cleaned and reassembled and IMHO looks pretty good! The fascia panel has been restored and cleaned up as well. All lights were checked and replaced as required. One panel had a crack with one good vent, the other panel had no cracks and only one good vent. Moved the good vent from the bad panel and discovered a subtle thing. The two vents are physically the same but one is mounted upside down. It's not a mistake. The grab handles on the vents are asymmetrical to fit either the driver's or passenger's thumb and forefinger which requires one to be the reverse of the other!
I could only find one diverter vent to use. This is the plastic part which sits in front of the A/C evaporator and behind the front fascia vents. Its function is to send some of the center air to the side vents. It was missing one tab, the other tab was cracked and there was some cracking down one side. Had to fab up a metal tab and screw it on. JB Weld to the rescue for the other cracks.
Looking at the rest of the A/C system I've got, it pretty much looks like a throw-away. I've spoken with a few A/C shops here in town to get an education. I will keep the evaporator in the cabin (if it checks out as good - supposedly most do even at 40 years old) but the rest gets replaced with efficient environmentally friendly modern stuff. Now I understand why there's a firm on eBay selling "Under Hood Upgrade Kits". For $800 including shipping I get a modern rotary compressor, a new parallel flow condenser (which fits better than my old one), a new receiver/dryer, a mounting bracket pre-customized for my specific motor and hoses with connectors. Folks, this is Arizona. A/C is required.
As of today I've got the blower assembly disassembled, cleaned up and covered with a rust remediator (just can't get inside some of those areas). In a couple of days there will be a fresh coat of paint applied. I'm considering the possibility of somehow incorporating a cabin air filter into the blower assembly.
OK, nuff for now. We've got a break in the rain from Tropical Depression Odile now so back to the garage/carport I go.
Last edited by beg3yrs; 09-16-2014 at 11:18 AM.
09-22-2014, 06:36 PM
#30
Registered User
Thread Starter
Join Date: Apr 2013
Location: Tucson, Arizona USA
Posts: 576
Cabin Ventilation and A/C
Funny thing about car folk. We seem to be a good bunch.
Got my evaporator back from the radiator shop. They fixed a leak and cleaned it up for about $40. That's awesome as new evaporators seem to cost over $300.
The shop manager was curious and asked what kind of a car this was for. Said it was an S30 Z. Turns out he has a Z track car and it needs some parts. We might make some deals...
Stopped by the local auto A/C supply warehouse and got a new expansion valve plus the "black sticky tape" used to insulate the valve where it interfaces with the condenser.
Reassembled the cabin box with all these new parts (minus the sticky tape until the hoses are connected) and have stuffed it away, waiting for the actual car to arrive. PHOTO!
Spent some time working up a cabin air filter for the Z. There's another thread on this forum discussing this: https://www.zdriver.com/forums/240z-...ter-s30-40198/
Plenty of photos there if you're interested.
 09-27-2014, 10:16 AM
#32
Registered User
Thread Starter
Join Date: Apr 2013
Location: Tucson, Arizona USA
Posts: 576
Update and Request for Help (at end of update)
Here's another update and a request for help.
First, I got into the front wheel well splash guards. It is a three piece assembly in each well. This is another difference between the early and late 260Zs. The late model has them, the early one doesn't. Well, it could be the top and front ones were missing from my early model (but - there are no screw holes in my early model car) however the rear guards in the front wells are plastic bolt-ons on the later model and in the early model they are there, just welded in metal. Hmm...
Anyway, I have them all and they're in decent shape but were covered in forty years worth of road grime. You know, the PO of the later model Z had it up in the mountains of Flagstaff, AZ and I also found a service tag on the original radiator which indicated this car spent some of its life in Sonoma, California. Sonoma is also in the foothills of the Sierra Nevada Mountains. Somehow I think this car spent a lot of time cruising muddy roads with lots of clay. All my cleaning to date over all the parts of the car has involved soaking hardened sticky clay off most of the parts. This includes some interior parts too. Anyway, after two days of soaking these parts in a heavy concentrate solution of Purple Power cleaner/degreaser, I attacked them with steel wool pads for the wide open spaces and screwdrivers to get into crevices. After wearing out my elbows and several steel wool pads, lots of rinsing, more soaking and more elbow grease, they are clean. Kind of rough on the side exposed to the road of course, but they're clean.
I don't know if I mentioned that it has been determined this car was hit on the left front some time in its past. Previous signs were some wrinkling in the left wheel visible from the engine bay. Now looking at the splash guards, there are significantly more stress cracks around the mounting holes on the left versus the right side. Move evidence. Anyway, these cracks have now been repaired with my favorite epoxy, JB Weld.
A couple of coats of Adhesion Promoter followed by a couple of coats of Gloss Black Krylon Fusion for plastic and we're good to go. That's the first photo. My horses have been very happy as I'm using their jumping fence as my paint hangar. No jumping for them. This arrangement where I hang parts for paint has also been called "Redneck Wind Chimes".
Next I pulled out the tension cables, one used for the hood release and the other, a dual set used to control the chokes on the carbs. Again, I had two sets of each from the two cars. This time there are no differences between the models.
For the hood release I selected one which had the least wear. I tested it and cleaned it up. Done! Nothing major there.
The choke cables were a different story. The PO of the later model car had cut the cables apart. Don't ask me why, but there's no splicing something like that so the only uses for that set were 1) I could examine the inner workings of the cable; 2) It did have a good handle which the other set did not; 3) It also had a second switch - more on that later.
So as you can gather, I had to use the set from the early model car. This set's cables had some cracks in the protective outer shell and some of the shell was missing. You could see surface rust forming on the metal ribbon wrap underneath. My first thought was to use some electrical tape to cover the cracks and missing pieces. I didn't like that approach as the tape tends to sag and loosen with age as well as not seal all that well. Then I remembered I had lots of bigger shrink wrap tubing left from my work doing splices on the electrical harness. Voila! That stuff fit right over the tubing and shrank down tight on the cables. I'm happy with the result. I've included a photo showing both the kind of cracks and missing covering as well as a repair using the heat shrink tubing.
I scavenged the handle for the lever from the other assembly and realized there was no set screw. That's a real tiny screw and it's metric of course. I was surprised the local hardware store had one that fit ( 33 cents BTW) but they only had ones with Allen heads, not slotted. I still don't have an Allen Wrench of the right size (some too small, some too big) but we'll get that sorted.
Testing the switch revealed it wasn't working. I went through all the diagnostics to make sure it wasn't a wire connection and so on. I then tested the switch on the other unit and it wasn't working either. This second switch had clearly been futzed with in the past. The solder connection was poor and parts of the latching tabs were broken. This was clearly the one I'd examine internally to see what could be done. Well, even trying to be careful, I busted it wide open. A spring went flying into the next county (I think, could be two counties over) and it was clear I wasn't going to open the remaining switch. What I could determine though was it was just a simple mechanical mechanism with two plates, a plunger and a spring. The plunger (which I did find) seemed to be part of the electrical circuit as it was mostly plastic but had a brass surround at its base. The top of the plunger is pushed by the choke lever to activate the switch. At this point I hoped this was a dirt issue (remember the sticky clay and mud?) or at the least just corrosion. I covered the switch with circuit cleaner and worked hard to get it into any opening I could see. Then while it was still wet I took a pair of needle nose pliers, grabbed the plunger and twisted it around. I could hear something scraping slightly inside which eventually stopped. After all this, good news, the switch works great! Interesting to note here, most switches close when pushed. This one is the opposite, it is open when pushed. This makes sense the way the choke warning light is used.
I hung the cable vertically with the lever end up and sprayed WD-40 into the cables. I was happy to see it easily drain into the openings and it eventually dripped out the other end. Yes, it was now brownish from rust but at least everything is moving smoothly and the innards have a bit of protection now.
REQUEST FOR HELP:
The rubber boots that go on the end of the choke cables have perished. See photo.
I have not been able to locate replacements and I suspect the are NLA.
I'm looking for suggestions as to possible sources or alternative methods of protecting the business ends of these cables. Anyone?
 10-01-2014, 12:25 PM
#34
10-01-2014, 12:28 PM
#35
10-01-2014, 12:29 PM
#36
10-01-2014, 12:32 PM
#37
a few choices here, appear to be used datsun parts, a bit down the page https://zcardepot.com/collection/engine
10-01-2014, 12:34 PM
#38
or you could brag you have Porsche parts on your car 911 / 356 Porsche Parts | Porsche, Wurth and Fuchs Wheels | Sierra Madre Collection
10-01-2014, 12:36 PM
#39
I am done here, this has a variety of parts to pick from, you should be able to find something in all these that will work for you ! Rubber Parts
10-01-2014, 05:26 PM
#40
Registered User
Thread Starter
Join Date: Apr 2013
Location: Tucson, Arizona USA
Posts: 576
or you could brag you have Porsche parts on your car 911 / 356 Porsche Parts | Porsche, Wurth and Fuchs Wheels | Sierra Madre Collection
I am done here, this has a variety of parts to pick from, you should be able to find something in all these that will work for you ! Rubber Parts
Looks like that Suzuki part might just fit the bill. I went and measured my cables to check. I need one end with a 1/4" I.D, the other end with approximately a 1/8" I.D. and a length that can vary from 1 1/4" to around 2".
Even if that one doesn't work out, when one searches, using the right keywords really helps. I was calling them "boots" and it looks like "cable protectors" will help even more.
Thanks so much!
P.S. Googling the Suzuki part number shows it is a discontinued item and most places don't have it. However, I did get a hit at Tacoma Motor Sports and have ordered a pair. Pretty cheap at under $2 each but shipping was $13! We'll see if it really happens or if I get my money refunded.
Last edited by beg3yrs; 10-01-2014 at 06:04 PM. Reason: added P.S.
10-01-2014, 07:59 PM
#42
nomenclature
It's always key getting the right nomenclature when searching for parts, then the chance of finding something goes way up, if I get stumped on a Nissan part, I try and find an exploded view diagram that names the parts, sometimes a part will have a strange name you would have never guessed, I find that time and again with these cars, you never know when a name gets translated from Japanese to English
10-14-2014, 01:25 PM
#43
Registered User
Thread Starter
Join Date: Apr 2013
Location: Tucson, Arizona USA
Posts: 576
Mid-October Update
It's been a couple of weeks of work since my last update. Here we go...
The issue with my choke cable dust protectors is not fully resolved. I've ordered a set of Suzuki motorcycle parts which should be the right size. It's a discontinued item and my first attempt at finding some NOS was a bust. I've currently got an order in at a place in the Netherlands which is known for having lots of NOS for motorcycles or at least places to find it. Their web-site claims to have them but hope is fading as it has been ten days with the order placed and the status is still "pending". If that fails, there's another Suzuki part which is close, the cable opening is OK but the wire end is a bit too big. I figure I may be able to build up around the wire using layered heat shrink tubing to get things to work if I have to.
Got into actual dash. Pulled all the gauges, cleaned and tested them. Some lights are burned out and I replaced those with good ones from the parts car. Polished the clear plastic covers as they were scratched from over-zealous cleaning with something too rough. I am pleased to report they came out nice and clear, like new!
Mixed and matched glove box door parts to make one nice door.
Thinking more about those lights, I decided these are probably all 40 year old bulbs. While things are apart, why not replace them with new ones? Turns out MSA has a full set of bulbs that will burn a little brighter as well so they're on order.
While doing the bulb research at MSA, I discovered they have a plug in harness kit for the parking and illumination lights that relieves the current going through the combination switch and allows more current to flow through the lights themselves. I decided to go with that as it is safer and will just make things nicer overall.
MSA also has a similar headlight harness kit but it's for the 240's only. The 260/280 harness setup is evidently different enough that it doesn't make enough economic sense for MSA to provide it for the later cars. I'm thinking I want to do something like this anyway. Cogitation up to now and studying the electrical diagrams shows all the headlight current flows through the combination switch TWICE. +12V and its current is enabled through the switch to the headlights and then the current to ground comes back through the hi/low beam selector. This leads me to believe I need to install three relays because of this odd wiring and they'll all be installed up by the headlights, probably near the horns. Two of the relays will enable power to each headlight and the third will provide ground to the low beam and when enabled, switch the ground to the high beam. The reason for two relays to source the +12V is safety, if one relay goes out, only one headlight is affected. The third relay will always provide a ground to at least the low beams. This kind of mimics the odd setup of the existing circuit but keeps the high current draws out of the combination switch. I'll post later with progress on this modification.
Back inside the dash, I replaced the wiring harness with a pristine one as there was PO hacking as well as some from pack rats and age.
The dash had a cap which was well beyond its expiration date as it was almost as cracked apart as the dash underneath. Got a new one via eBay. It fits perfectly and looks great. I only did a fit check as I'll wait to install it AFTER the dash goes back in the car. It was intended to be installed in this manner and I'll be keeping it protected in its shipping box until then.
I refinished the headlight assemblies and installed new bowls and trim rings.
Today I visited the actual body at the shop as I needed to check something about steering assembly and the turn signals (see this thread: https://www.zdriver.com/forums/240z-...-cancel-40319/). That's all resolved but ... wait for it ...
There's progress! It's going into the paint booth for the engine bay spray. Hooray! Too bad I've got to be at the house for a delivery this afternoon, otherwise I'd be there taking photos. One of the guys there has promised me some. We'll see.
That's it for now. For the next month I'll be off this project doing something else fun and hopefully stay in my spouse's good graces. There might be a post in the next few days but nothing major.
Cheers,
Scott
Last edited by beg3yrs; 12-19-2014 at 08:21 PM.
10-14-2014, 02:03 PM
#44
Registered User

Join Date: Feb 2011
Posts: 302
MSA does not have a ready-made set for the 260Z/280Z because the person who builds them has not been able to source the connectors. You can contact Dave Irwin, aka Zs-ondabrain, at Classic Zcar Club - The Front Page and enquire as to what it takes to have a set made for the 260Z.
10-14-2014, 06:02 PM
#45
Registered User
Thread Starter
Join Date: Apr 2013
Location: Tucson, Arizona USA
Posts: 576
MSA does not have a ready-made set for the 260Z/280Z because the person who builds them has not been able to source the connectors. You can contact Dave Irwin, aka Zs-ondabrain, at Classic Zcar Club - The Front Page and enquire as to what it takes to have a set made for the 260Z.
Update: e-mail sent to Dave.
Last edited by beg3yrs; 10-14-2014 at 07:07 PM.
10-14-2014, 11:42 PM
#46

Sent, Received and replied.....
I'm guessing this is a late 260Z? I just noticed the white round headlight connectors. Those can only be sourced from a local "Pull a Part of another 280Z that is no longer in need of them. I would need at least 3" of wire still attached the the small, rubber ringed headlight connectors found on the engine harness.
10-15-2014, 04:55 AM
#48
Registered User
Thread Starter
Join Date: Apr 2013
Location: Tucson, Arizona USA
Posts: 576
Sent, Received and replied.....
I'm guessing this is a late 260Z? I just noticed the white round headlight connectors. Those can only be sourced from a local "Pull a Part of another 280Z that is no longer in need of them. I would need at least 3" of wire still attached the the small, rubber ringed headlight connectors found on the engine harness.
I'm guessing this is a late 260Z? I just noticed the white round headlight connectors. Those can only be sourced from a local "Pull a Part of another 280Z that is no longer in need of them. I would need at least 3" of wire still attached the the small, rubber ringed headlight connectors found on the engine harness.
Yes, car is late 260Z, harness is early 260Z from an automatic (details in earlier posts). Had to put the late style connectors from my original harness on my frankenharness to match up with the best headlight assemblies I had. Might have done it differently if I'd known about this kit at the time. Regardless of that, my e-mail accepts one of your proposals for a way forward.

Last edited by beg3yrs; 10-15-2014 at 05:01 AM.
10-15-2014, 05:12 AM
#49
Registered User
Thread Starter
Join Date: Apr 2013
Location: Tucson, Arizona USA
Posts: 576
The Delivery Came Early
My package showed up at the house just after noon so I rushed back to the body shop and got to watch the engine bay as well as the underside of the hood get sprayed. Ooooh baby, she's wet ... 
10-15-2014, 05:48 AM
#50
I have a present for you...

Join Date: Mar 2003
Location: dayton, nevada usa
Posts: 1,691
Wow! That's coming along great.
Is this what you're looking for?
http://www.ebay.com/itm/Datsun-240Z-260Z-280Z-Choke-Cable-Grommet-Rubber-Seal-NEW-OE-Nissan-/321533049834?pt=Motors_Car_Truck_Parts_Accessories&hash=item4adcdcfbea&vxp=mtr
Is this what you're looking for?
http://www.ebay.com/itm/Datsun-240Z-260Z-280Z-Choke-Cable-Grommet-Rubber-Seal-NEW-OE-Nissan-/321533049834?pt=Motors_Car_Truck_Parts_Accessories&hash=item4adcdcfbea&vxp=mtr
Last edited by theramz; 10-15-2014 at 05:53 AM.


