The Build Begins... '71 240Z
 07-08-2014, 10:09 PM
#26
Registered User
Thread Starter

Join Date: Nov 2013
Location: South Bay Area, CA
Posts: 75
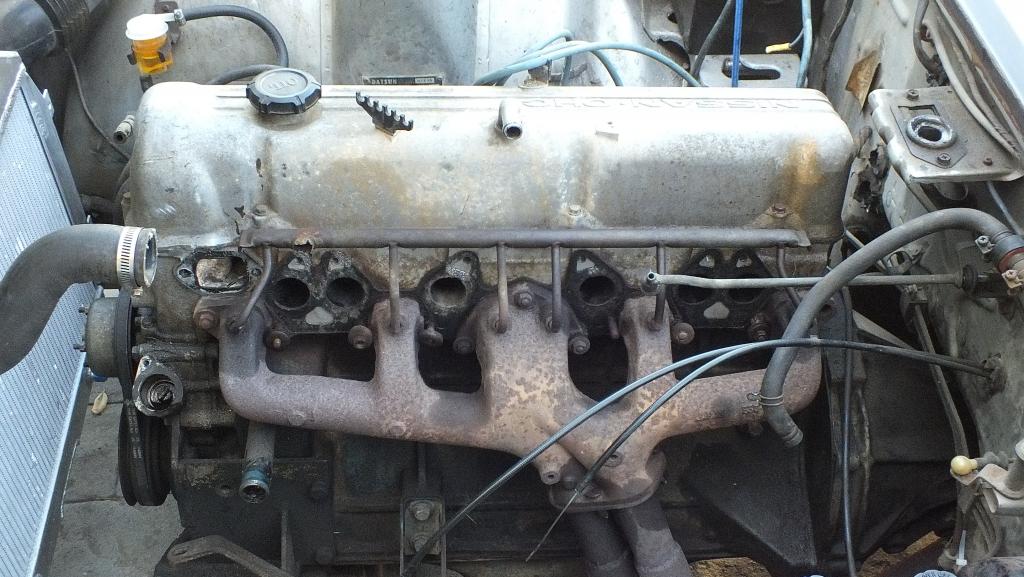
Worked on taking all of the valuables off of the old engine to transfer on the new one.

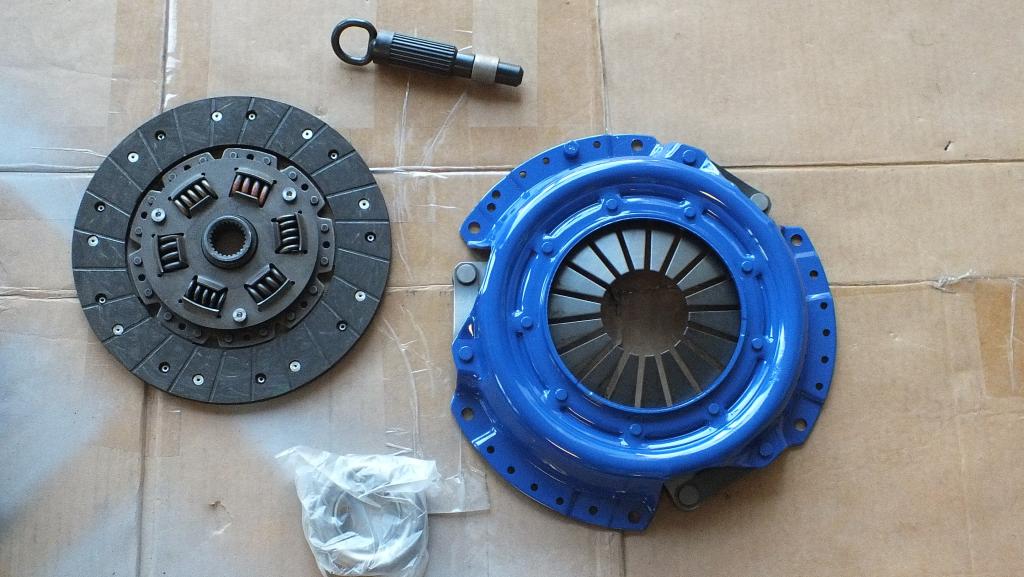
Got an Autocom stage 1 clutch kit for the new engine as well. Going to be pulling the engine only with the trans still in the car.


Got an Autocom stage 1 clutch kit for the new engine as well. Going to be pulling the engine only with the trans still in the car.

 07-09-2014, 07:31 AM
#27
Registered User

Join Date: Mar 2014
Location: North Central
Posts: 23
As long as the replacement motor is out, I would pull the pan and clean it out. My experience has been most have not ever had the pan off because
the bottom end is built strong. What I have found is thick black sludge
you could scrape out with a putty knife. That just contaminates the fresh
oil change.
the bottom end is built strong. What I have found is thick black sludge
you could scrape out with a putty knife. That just contaminates the fresh
oil change.
07-09-2014, 10:45 AM
#28
Registered User
Thread Starter
Join Date: Nov 2013
Location: South Bay Area, CA
Posts: 75
As long as the replacement motor is out, I would pull the pan and clean it out. My experience has been most have not ever had the pan off because
the bottom end is built strong. What I have found is thick black sludge
you could scrape out with a putty knife. That just contaminates the fresh
oil change.
the bottom end is built strong. What I have found is thick black sludge
you could scrape out with a putty knife. That just contaminates the fresh
oil change.
07-10-2014, 09:17 PM
#29
Registered User
Thread Starter
Join Date: Nov 2013
Location: South Bay Area, CA
Posts: 75
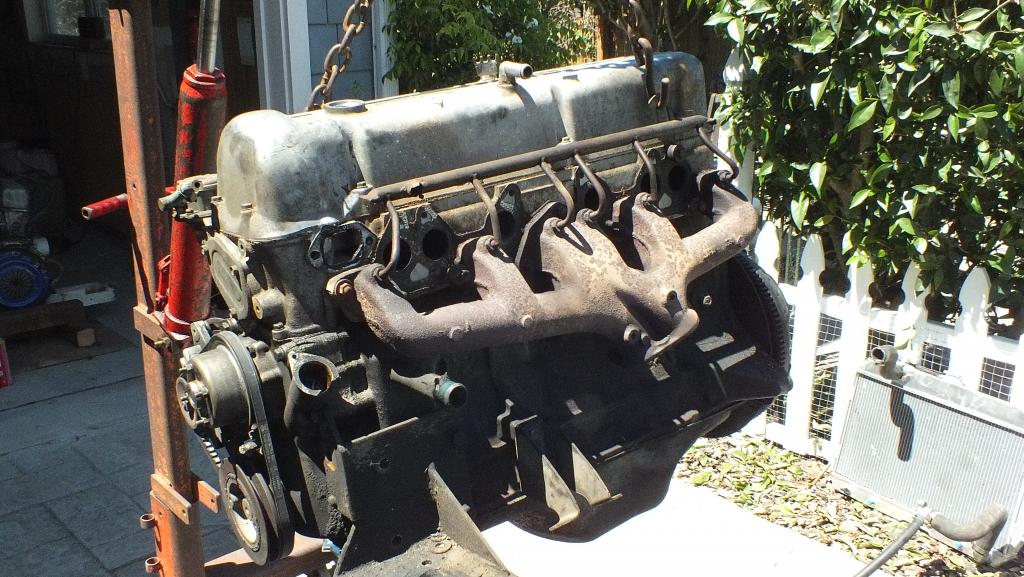
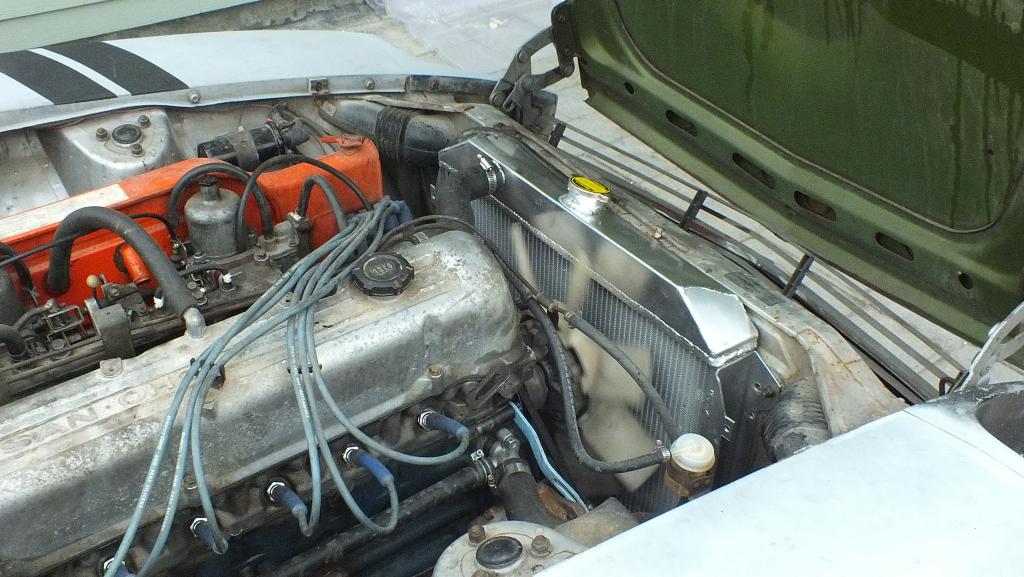
Out with the old.
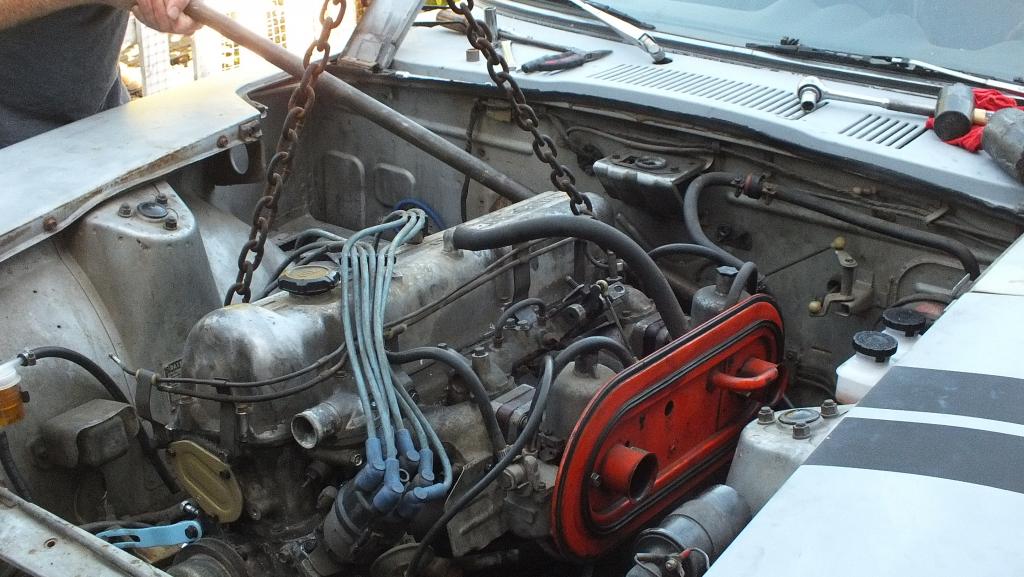
In with the new.
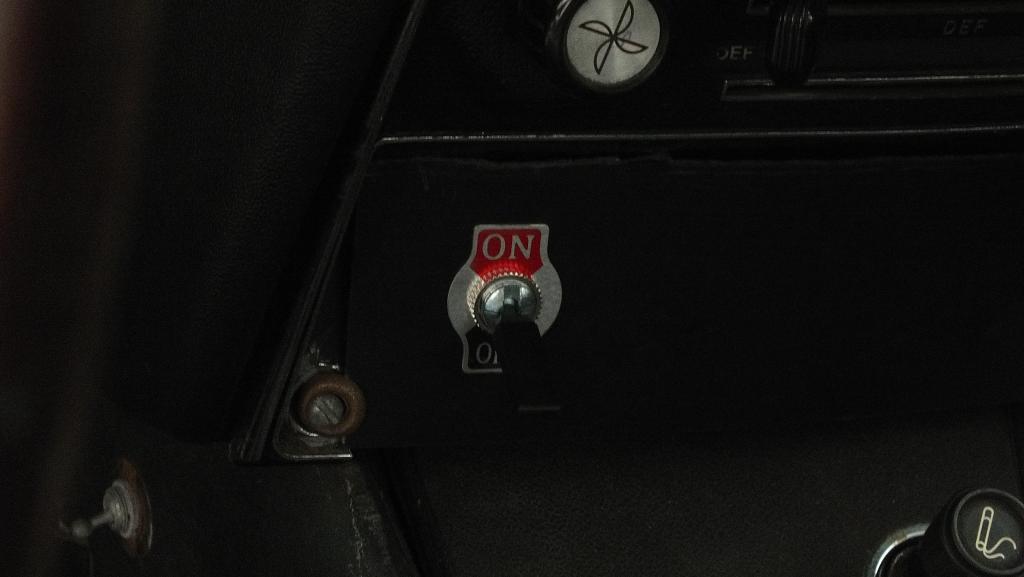
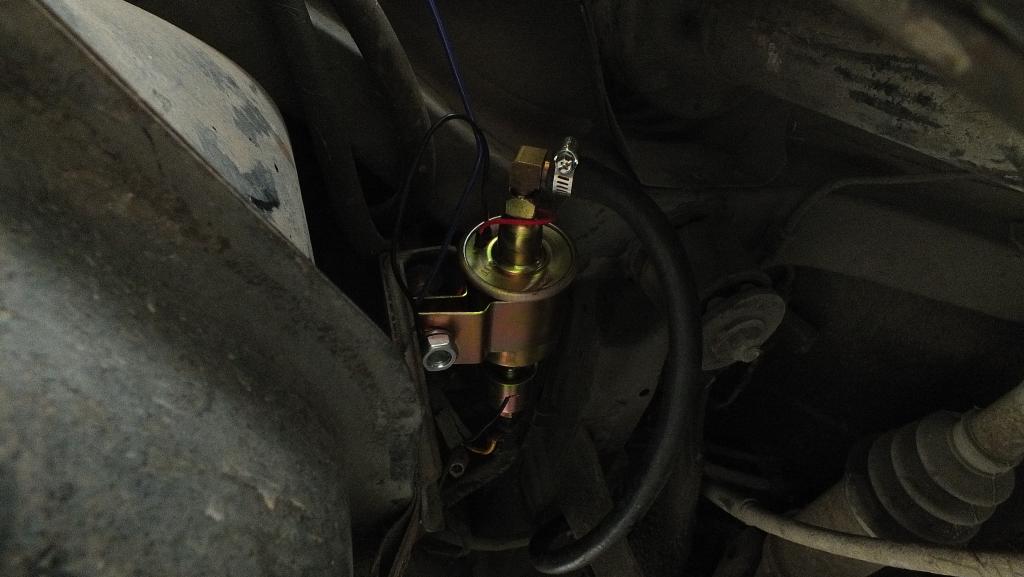
Also installed that fuel pump. Mounted it to one of the fuel tank brackets. Since the wiring in the radio compartment was all hacked up for an aftermarket A/C system, so i couldn't get power to those AUX wires in the rear. I ran a wire from the battery, to a switch, to a fuse, to the pump instead.

In with the new.

Also installed that fuel pump. Mounted it to one of the fuel tank brackets. Since the wiring in the radio compartment was all hacked up for an aftermarket A/C system, so i couldn't get power to those AUX wires in the rear. I ran a wire from the battery, to a switch, to a fuse, to the pump instead.

 07-11-2014, 02:29 PM
#31
Pan
Always a good idea to drop the pan, just to replace the gasket if nothing else, no reason to have a drippy nasty engine when you have easy access to everything when its out. rear oil seals etc.
07-11-2014, 05:47 PM
#32
Registered User

Join Date: Apr 2013
Location: Tucson, Arizona USA
Posts: 576
Fuel Pump Safety
For safety's sake, you may want to consider adding an intertial impact switch in the circuit. Nothing like an active fuel pump pumping gas all over the place after a collision.
http://en.wikipedia.org/wiki/Inertial_switch
http://en.wikipedia.org/wiki/Inertial_switch
07-12-2014, 10:22 PM
#33
Registered User
Thread Starter
Join Date: Nov 2013
Location: South Bay Area, CA
Posts: 75
For safety's sake, you may want to consider adding an intertial impact switch in the circuit. Nothing like an active fuel pump pumping gas all over the place after a collision.
Inertial switch - Wikipedia, the free encyclopedia
Inertial switch - Wikipedia, the free encyclopedia
07-13-2014, 07:31 PM
#34
Registered User
Thread Starter
Join Date: Nov 2013
Location: South Bay Area, CA
Posts: 75
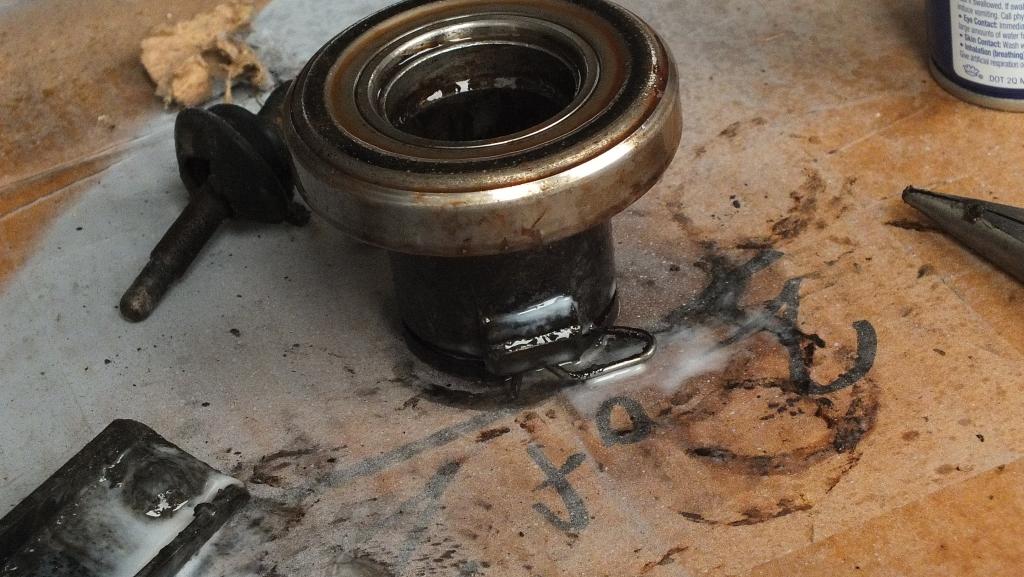
So... after all of that, the clutch wont engage. The shift fork flops around like there's nothing attached. Upon futher reasearch, the P.O transfered the old fork and collar from the original 4 spd into the 5 spd that was swapped in so they could use the original clutch. Luckily my L28 came with a Post '74 4 spd with the correct lenth of collar so the throw out bearing can each the pressure plate. Had to pull the tranny do to this which was a PITA since my driveway is brick (Jacks dont roll good on uneven surfaces).
And then murphys law continued. Don't have a picture yet, but i was driving the car around today to get some gas. Pulled into the station, gave the cahsier money for the pump and returned to the car sitting in a massive puddle of coolant...
I freaked out for a sec, because i thought the headgasket blew or something but come to find a HUGE scorch in the radiator INFRONT OF THE FAN of all places. I have no idea how this happened. Some of the fins of the fan were damaged, so i think something got caught between the fan and the radiator... F&*#!!! Had to tow it home... Well, the build is on hold for a while untill i get a new radiator. Guess i'll do cosmetic stuff here and there in the meantime.

And then murphys law continued. Don't have a picture yet, but i was driving the car around today to get some gas. Pulled into the station, gave the cahsier money for the pump and returned to the car sitting in a massive puddle of coolant...
I freaked out for a sec, because i thought the headgasket blew or something but come to find a HUGE scorch in the radiator INFRONT OF THE FAN of all places. I have no idea how this happened. Some of the fins of the fan were damaged, so i think something got caught between the fan and the radiator... F&*#!!!
Had to tow it home... Well, the build is on hold for a while untill i get a new radiator. Guess i'll do cosmetic stuff here and there in the meantime.
07-18-2014, 06:43 PM
#36
Registered User
Thread Starter
Join Date: Nov 2013
Location: South Bay Area, CA
Posts: 75
Replaced radiator today, here's the carnage.
At a normal glance, nothing seems like it has taken much damage.
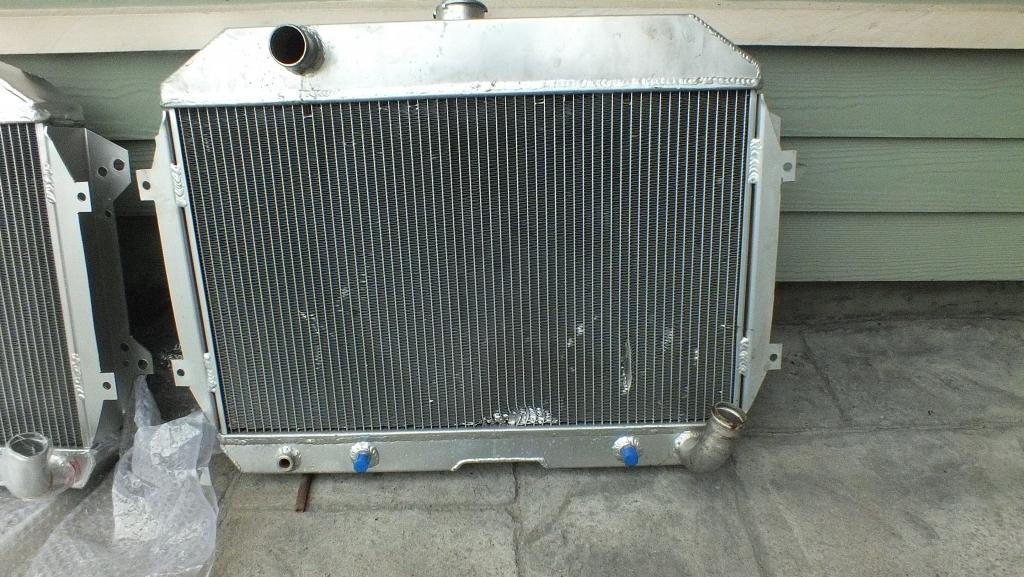
But look closely.
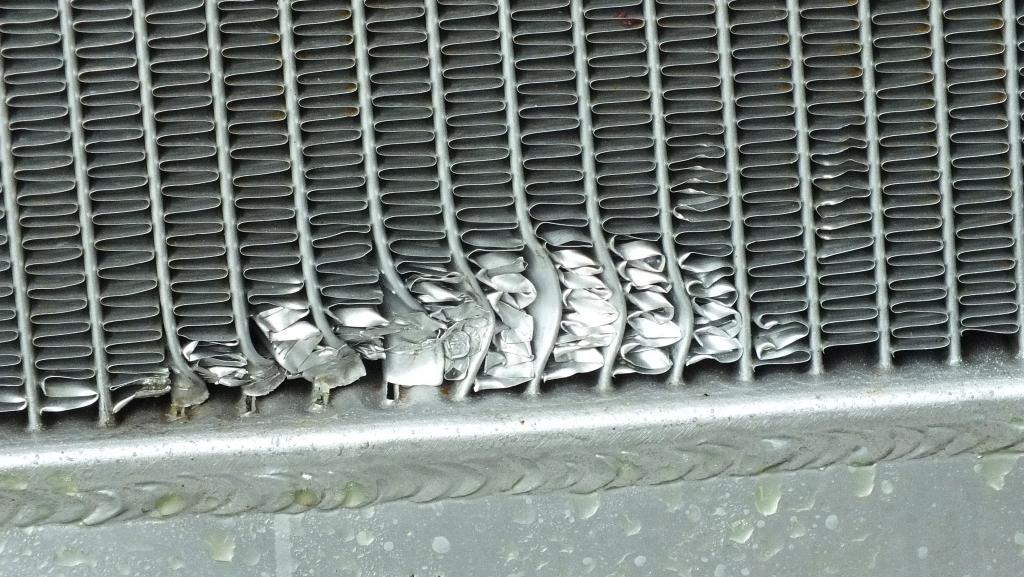
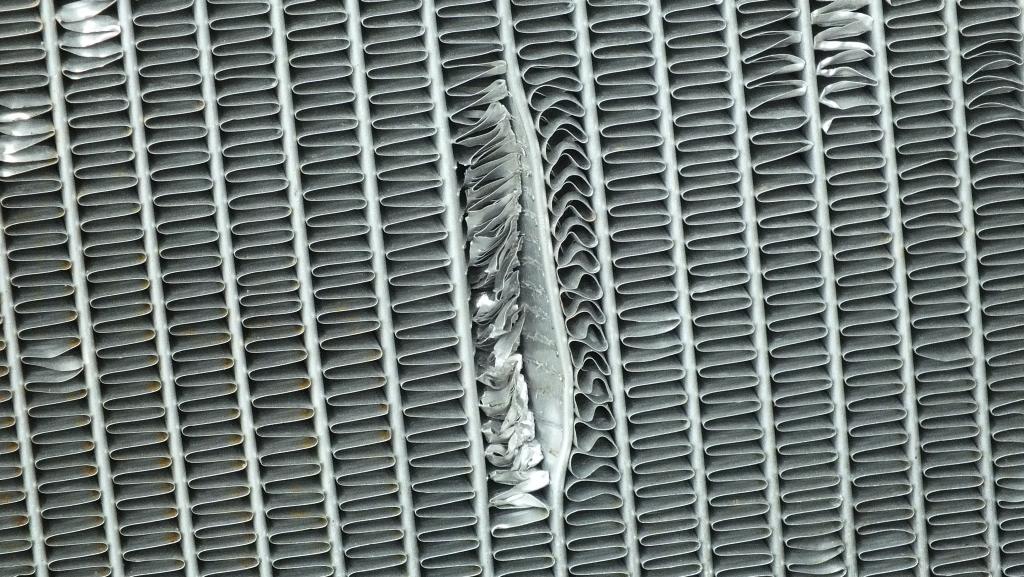
Yeah, its pretty messed up. The tips of three fan blades are now chipped/cracked.
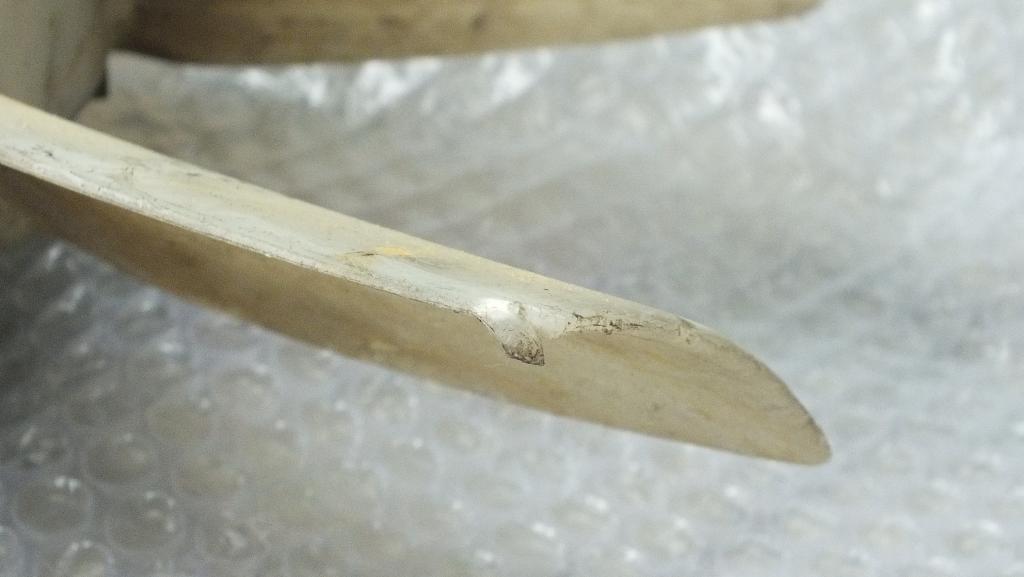
My verdict: Something got caught in the bottom of the fan, and as the blades turned, scraped that hole in the bottom of the rad. Between blades, the object got displaced further up which the blades caught again and dragged the object upwards creating that crescent shaped scorch near the middle of the rad. Why? Murphy's law i guess, damn.
Anyways, shes back on the road with the new radiator (Same Speed Daddy aluminum two row).
One question i have though is the fuel mixture. At idle, the fumes are very strong and smell rich to me. Might be just because i'm running an open pipe at the moment, but i'm not sure. Also, if i give it a quick rev, on deceleration some black smoke comes out the pipe and my God it nearly smells like raw fuel though it doesnt backfire... My NGK spark plugs are brand new, gapped at .040, and my timing is somewhere around 5-8 Deg BTDC, but i don't know for sure because i can't find that little timing mark on the pulley that the light shines on... Any ideas on this?
At a normal glance, nothing seems like it has taken much damage.

But look closely.


Yeah, its pretty messed up. The tips of three fan blades are now chipped/cracked.

My verdict: Something got caught in the bottom of the fan, and as the blades turned, scraped that hole in the bottom of the rad. Between blades, the object got displaced further up which the blades caught again and dragged the object upwards creating that crescent shaped scorch near the middle of the rad. Why? Murphy's law i guess, damn.

Anyways, shes back on the road with the new radiator (Same Speed Daddy aluminum two row).
One question i have though is the fuel mixture. At idle, the fumes are very strong and smell rich to me. Might be just because i'm running an open pipe at the moment, but i'm not sure. Also, if i give it a quick rev, on deceleration some black smoke comes out the pipe and my God it nearly smells like raw fuel though it doesnt backfire... My NGK spark plugs are brand new, gapped at .040, and my timing is somewhere around 5-8 Deg BTDC, but i don't know for sure because i can't find that little timing mark on the pulley that the light shines on... Any ideas on this?
07-19-2014, 01:19 AM
#38
Registered User
Thread Starter
Join Date: Nov 2013
Location: South Bay Area, CA
Posts: 75
Nope. I kind of wish it did now though, haha. Maybe it did at one point and someone removed it. Probably would have prevented this problem.
07-19-2014, 09:26 AM
#39
I went through the fsm quickly and could not see one in the body section, they are called splash pans, most likely. Looks like few early Z's still have them, easy to take off, hard to remember to replace. Found this thread. Difference with underbody splash guard - Nissan : Datsun ZCar forum :Nissan Z Forum: 240Z to 370Z
07-19-2014, 09:59 PM
#41
Registered User
Thread Starter
Join Date: Nov 2013
Location: South Bay Area, CA
Posts: 75
I went through the fsm quickly and could not see one in the body section, they are called splash pans, most likely. Looks like few early Z's still have them, easy to take off, hard to remember to replace. Found this thread. Difference with underbody splash guard - Nissan : Datsun ZCar forum :Nissan Z Forum: 240Z to 370Z
07-20-2014, 04:24 PM
#42
Registered User
Join Date: Apr 2013
Location: Tucson, Arizona USA
Posts: 576
One question i have though is the fuel mixture. At idle, the fumes are very strong and smell rich to me. Might be just because i'm running an open pipe at the moment, but i'm not sure. Also, if i give it a quick rev, on deceleration some black smoke comes out the pipe and my God it nearly smells like raw fuel though it doesnt backfire... My NGK spark plugs are brand new, gapped at .040, and my timing is somewhere around 5-8 Deg BTDC, but i don't know for sure because i can't find that little timing mark on the pulley that the light shines on... Any ideas on this?
Make sure your floats aren't stuck. If they are, you'll be dumping gas from the overflow tubes. If you've routed them into your air cleaner, that could explain the gas smell at idle. At higher revs you may be pulling enough fuel through the carburetors to eliminate the overflow.
I don't see in the photo if you've got what I call the "backfire damper" installed. It's basically a vacuum controlled dash-pot which slows down the rate at which the throttle closes. I'm assuming a "quick rev" also means a "quick de-rev". You might be close to getting a backfire, can't be sure. All that said, I do know of others who have removed that bit and have no problems.
Those round-top SUs I see in the photos are good but cantankerous. Check out "ztherapy.com". While they are a specialty house for rebuilding SUs, they have some good advice and may be able to help you. I turned in my old SUs for a set of re-manufactured ones from them. I can't tell you how well the work as I'm not ready in my own project (yet). However, I do have high confidence in their work - the end result was a beautiful set of carbs.
BTW, regarding the shredded radiator and chipped fan blades; Are you missing any wrenches or other tools? After your mishap I'll be very careful to tidy up when starting my motor after doing work on it. I'll also make sure my splash pan is installed when it goes on the road.
Last edited by beg3yrs; 07-20-2014 at 04:31 PM. Reason: Added BTW
07-21-2014, 12:10 AM
#43
Registered User
Thread Starter
Join Date: Nov 2013
Location: South Bay Area, CA
Posts: 75
You can adjust the idle mixture using the screw on the bottom of each carb. Turning the screw so it goes up leans out the mixture. Factory setting is 2.5 turns down from full up.
Make sure your floats aren't stuck. If they are, you'll be dumping gas from the overflow tubes. If you've routed them into your air cleaner, that could explain the gas smell at idle. At higher revs you may be pulling enough fuel through the carburetors to eliminate the overflow.
I don't see in the photo if you've got what I call the "backfire damper" installed. It's basically a vacuum controlled dash-pot which slows down the rate at which the throttle closes. I'm assuming a "quick rev" also means a "quick de-rev". You might be close to getting a backfire, can't be sure. All that said, I do know of others who have removed that bit and have no problems.
Those round-top SUs I see in the photos are good but cantankerous. Check out "ztherapy.com". While they are a specialty house for rebuilding SUs, they have some good advice and may be able to help you. I turned in my old SUs for a set of re-manufactured ones from them. I can't tell you how well the work as I'm not ready in my own project (yet). However, I do have high confidence in their work - the end result was a beautiful set of carbs.
BTW, regarding the shredded radiator and chipped fan blades; Are you missing any wrenches or other tools? After your mishap I'll be very careful to tidy up when starting my motor after doing work on it. I'll also make sure my splash pan is installed when it goes on the road.
Once, after i turned off the engine i saw gas dripping from the front carb (air filter housing was removed at the time). Wasn't much, maybe 3-4 drips. still seemed strange though. That "backfire damper" didn't seem to be working so i removed it. Didn't seem to make a difference at all. I still have it though. Oddly, the car even with the open pipe has never backfired, niether "pop off" when i coast the car in gear... Yes, i've looked into Those Ztherapy carbs and am contemplating on turning mine in some time down the line to be rebuild, or replaced. I don't remember correctly, but i think at one point during the engine swap i placed a few bolts on the shock tower... Not sure if i ever picked those up, or if one of them became the killer of my radiator.
Yesterday i took the car on a 30 mile round trip and am happy to report that the engine performed great. Besides running rich, everything else seemed fine. Temp stayed way down, no leaking, no misfiring or stumbling, no problem. I did loose a bit of tranny oil when it was removed for the collar swap... Don't want to drive it too much without topping it off.
07-21-2014, 09:06 AM
#44
Registered User
Join Date: Apr 2013
Location: Tucson, Arizona USA
Posts: 576
I should have used the word "nut" rather than screw. It's actually more like a **** and is located under the carbs. Follow the short gas line that comes from the float bowls and goes under each carb. That's the line which supplies gas to the jet needle. Just above the termination of those lines is the mixture adjusting nut. It's meant to be turned by hand. Take a look at the photo. Try turning the mixture nuts equally until you have peaked the idle RPM. You might first want to crank them both up to the stop (count the turns for each one just in case) and then back them both down the 2.5 "factory" turns. From there you can adjust for peak idle. If this doesn't work, having the original turn count will let you go back to your original settings.
Checking the float bowls and the floats shouldn't be a big job either. I think it is four screws and the top lifts off. You can easily inspect to see if it needs a cleaning and if the floats are sticking. With cars this old and the heritage of our parts mostly being unknown, it wouldn't hurt to check.
PM me with your e-mail and I'll send you some detailed information.
07-26-2014, 09:07 PM
#45
Registered User
Thread Starter
Join Date: Nov 2013
Location: South Bay Area, CA
Posts: 75
Little update: Sold the original L24, got $100 bucks just for the core. I was able to keep a few things like the fuel pump, timing gear/vacuum lobe, and the alternator.
A few days later, the buyer called me after he tore the engine down and found over a quart of sand and small rocks in the engine... Holy $#!t. I guess that was why the engine was overheating no matter what. Someone must have had serious beef with the previous owner. More updates and pics coming soon.
A few days later, the buyer called me after he tore the engine down and found over a quart of sand and small rocks in the engine... Holy $#!t. I guess that was why the engine was overheating no matter what. Someone must have had serious beef with the previous owner. More updates and pics coming soon.
07-29-2014, 08:14 PM
#46
Registered User
Thread Starter
Join Date: Nov 2013
Location: South Bay Area, CA
Posts: 75
Gettin' real tired of your **** Murphy's Law... 
Look whats in my radiator... Coolant had 60 miles on it.
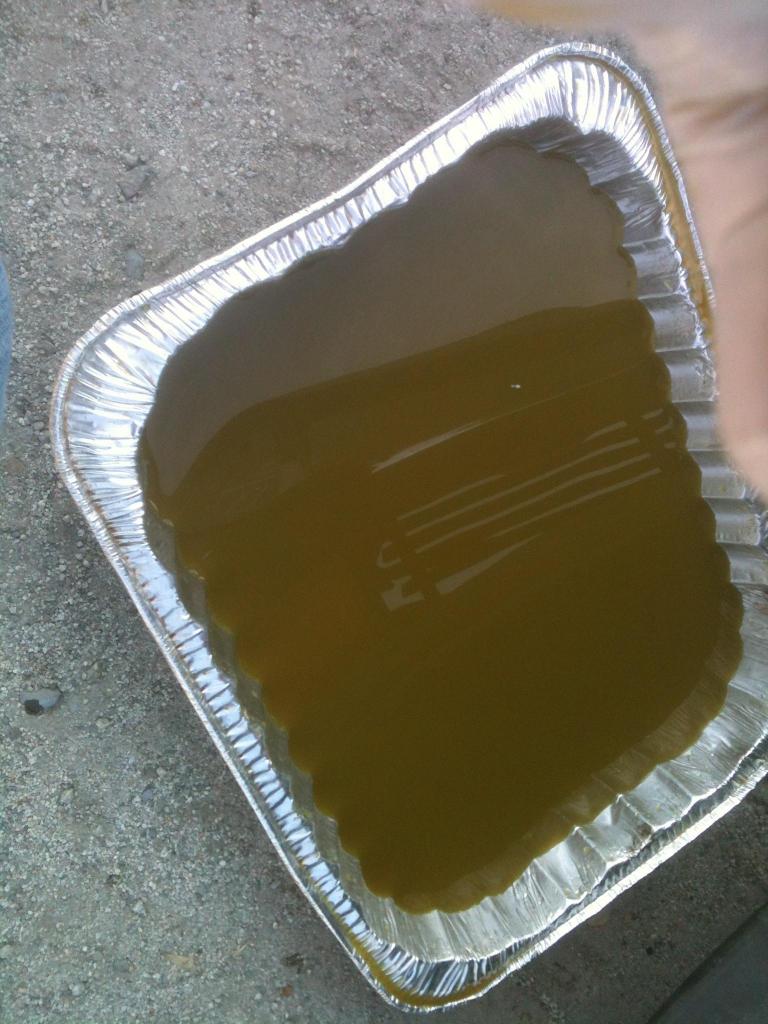

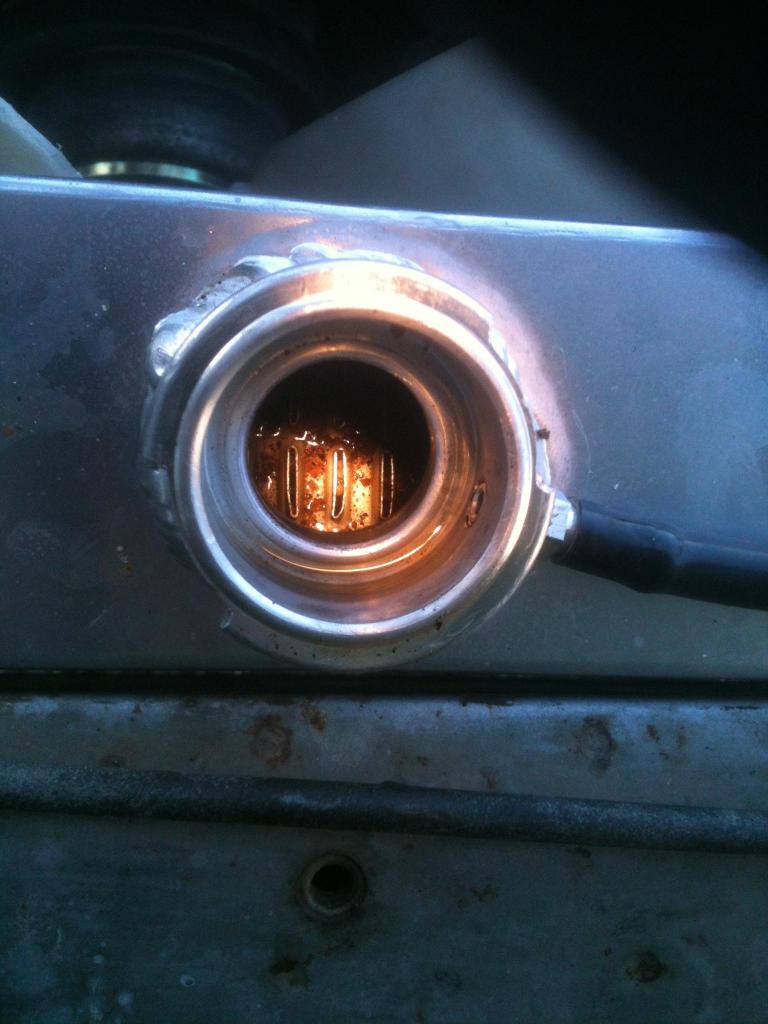
 Son of a b!tch... So i guess that's why my "brand new" engine started overheating like the old one. Sand... Lots of sand in the radiator.
Tried flushing the high holy hell out of the system, got a bit of brown crap out of the block, but couldn't get anything out of the radiator, tried using a bunch of radiator super flush crap, but no good. I guess i should have flushed the cooling system before i started running the engine. God dammit, i'm getting sick of these stupid setbacks!
The way i see it i have two and a half options: 1. Buy a third f&%$ing radiator and go further in debt then pray that there's no more sand left in the block to clog that one up. 2. remove the current one and try to flush it upside down with the garden hose. 2.5: Sell this Ed Murphy mobile and get something dependable like another 280ZX or something.
Please come forward with any suggestions you guys may have to fix this.
Look whats in my radiator... Coolant had 60 miles on it.


 Son of a b!tch... So i guess that's why my "brand new" engine started overheating like the old one. Sand... Lots of sand in the radiator.
Tried flushing the high holy hell out of the system, got a bit of brown crap out of the block, but couldn't get anything out of the radiator, tried using a bunch of radiator super flush crap, but no good. I guess i should have flushed the cooling system before i started running the engine. God dammit, i'm getting sick of these stupid setbacks!
The way i see it i have two and a half options: 1. Buy a third f&%$ing radiator and go further in debt then pray that there's no more sand left in the block to clog that one up. 2. remove the current one and try to flush it upside down with the garden hose. 2.5: Sell this Ed Murphy mobile and get something dependable like another 280ZX or something.
Please come forward with any suggestions you guys may have to fix this.
07-29-2014, 08:37 PM
#47
Registered User
Join Date: Apr 2013
Location: Tucson, Arizona USA
Posts: 576
Wow, you really are having a lot of bad cooling system juju.
If I were doing it (and I should be soon so I'm taking lots of notes here), I'd run that radiator over to a local radiator shop and have them professionally flush it out. It should be much less than the cost of a new radiator and you know it will be ok after that.
Then I'd figure a way to flush the hell out of that block. The same radiator shop can probably give you some cleaning techniques as they've probably seen this kind of issue before.
This might be a common Z L-series motor thing as I've got an L24 "parts" motor with some of its freeze plugs missing. You should see the brown crap that's pouring out of those holes.
08-03-2014, 09:15 PM
#48
Registered User
Thread Starter
Join Date: Nov 2013
Location: South Bay Area, CA
Posts: 75
Well, looks like i'm getting another radiator. Was able to sell some old parts i had sitting in my garage and now i have enough to invest. Radator shop was going to charge $100 to fix it... Screw it. Hopefully this will put an end to the demented cooling system issues that this car seems to have.
08-04-2014, 08:12 AM
#49
Registered User
Join Date: Apr 2013
Location: Tucson, Arizona USA
Posts: 576
Well, looks like i'm getting another radiator. Was able to sell some old parts i had sitting in my garage and now i have enough to invest. Radator shop was going to charge $100 to fix it... Screw it. Hopefully this will put an end to the demented cooling system issues that this car seems to have.

I'm looking for ways to save space as my 260Z shell, which will take up quite a bit of room, should be back from the body shop in a couple of weeks. It's funny how when it left for the body shop I had all this extra room in which to work. After six months it has somehow disappeared.
I suppose I should learn from your example and start selling stuff I won't need, and then toss all the stuff that's truly worthless.
Anybody want some flat-top 260Z carbs?
08-06-2014, 01:25 PM
#50
Registered User
Thread Starter
Join Date: Nov 2013
Location: South Bay Area, CA
Posts: 75
True that. I have a whole bunch of crap that came with my Z, and the engine from craigslist.
-Got a set of 3Screw carbs /w linkage and intake manifold from an E88 head
-Fuel injection manifold w/ injectors and TB,
-Electronic dizzy,
-Various body panels, windows, tail lights etc
-45 Amp alternator
-Non-reduction starter
And other various stuff.
Let me know if any of you guys need some parts, i need to get rid of this stuff so i won't charge much.


